Chapter 18
Flip-flop Air Gun
Make compressed air shoot stuff safely.
In this age of mass shootings, the last thing I think we need is more weaponry. That said, you can learn a heck of a lot from making this little beauty, and nobody will get hurt either. It’s powered by compressed air and comes from a long tradition of artillery generally termed “spud guns.” That’s because they usually shoot sections of potato. Instead, we’ll shoot sections of old flip-flops and paper rockets.
I have seen three types of spud gun: explosive, plunger, and air pump. The explosive one requires spraying highly flammable liquid into a chamber, closing it, and lighting it with some kind of spark. This is good fun, but it can also hurt you badly if you screw up.
The plunger model is the simplest, with a stick plunger pushing one spud section up the tube toward another section stuck near the other end. If the spud sections each seal off the tube, you can see how the pressure would increase as you decrease the volume between them. It’s the science of Boyle’s law: in an ideal gas, the volume and pressure are inversely proportional. (See Chapter 19 with Newton’s slingshot activity for more info on proportionality.)
What we’ll tinker with here is the final method, midway between the other two in complexity and in danger as well. If you tried really hard, you could probably put out your eye, so please try really hard not to.
Gather stuff
- PVC tube, ½ inch, around 2 meters, along with the following connectors, also ½ inch:
- T
- Ball valve
- Cap
- PVC cement
- Epoxy glue, “5-minute,” suitable for hard plastic
- Valve stem from bicycle or car tire
- Candle
- Matches or lighter
- Old flip-flop or piece of dense foam rubber, such as camping pads or packing materials
- Paper
- Tape, clear
- Stick or rod that fits into the ½-inch PVC
- Short stick to extend ball valve handle
- Hose clamps that fit around the valve handle, 2
- Soda bottle, 1 to 2 liters. Use only carbonated drink bottle here, because it was designed for a bit of pressure. Water and juice bottles are not, and they may burst if you put compressed air into them.
Gather tools
- Hacksaw or PVC cutter
- Drill
- Drill bit the same size as the valve stem
- Circular file smaller than the valve stem
- Flat file
- Pliers
- Sandpaper, around 80 grit
- Safety glasses
- Bicycle pump, hand or foot powered
- Hot glue gun and hot glue
Tinker
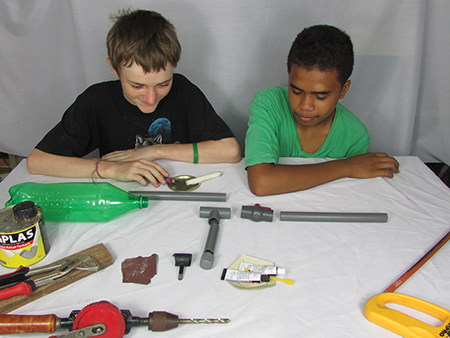
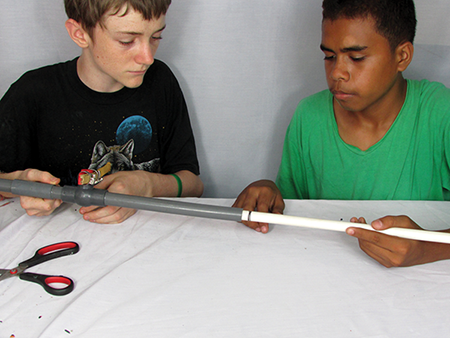
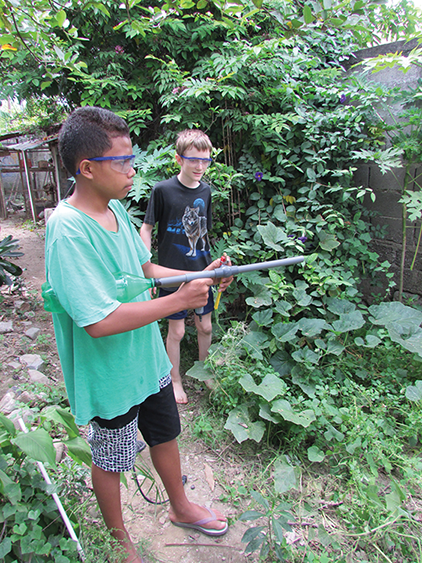
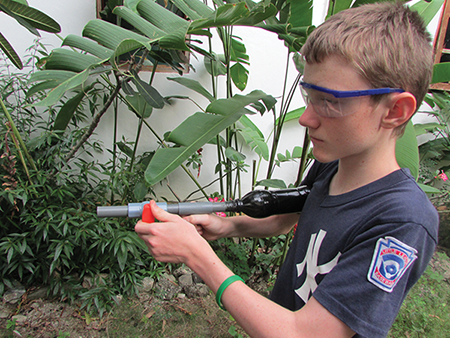
Lay out the parts and cut PVC lengths more or less as shown in this photo. Naturally, you can change any part of it you want. It’s more convenient to have a nice short one, but short barrels are less accurate, and the bullet doesn’t have time to get going very fast either, so you don’t want it too short.
We’ll go first to the trickiest part. This is a common strategy when tinkering: if you leave the most challenging part to the end, and then you find out that it’s not just challenging but actually impossible given your current stuff and skills, then you just wasted a lot of time doing the other parts.
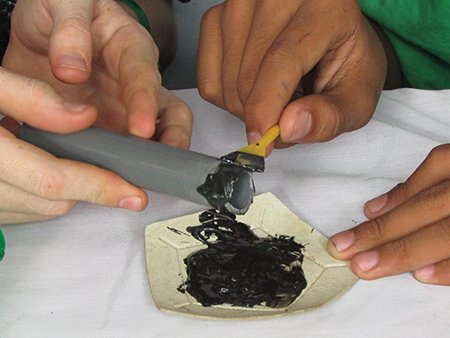
The trick in question here is to attach the soda pop bottle to the system as the reservoir of compressed air. This is not easy because its plastic is not the same as the plastic of the PVC.1 Thus, you can’t use the PVC cement. We’ll use the 5-minute epoxy, but first we’ll have to make the PVC fit nice and tightly in the mouth of the bottle. Usually the ½-inch PVC in the United States is slightly smaller in diameter than the mouth of a bottle, so what you need to do is create a bulge in the PVC so that it jams in tight.
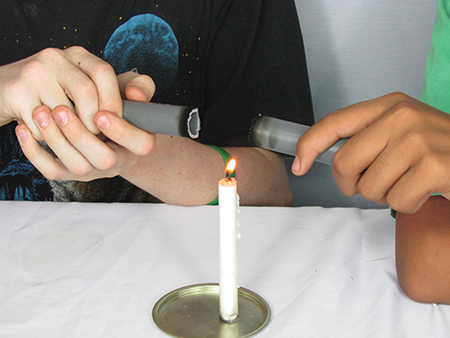
You can make this bulge with a candle. You could also do it with a stove, but you’ll want to heat up a small area around the circumference, so a pointy little candle flame is just the thing.
This part looks a lot more complicated than it is. You just hold the PVC above the flame—not in the flame—and turn it slowly. When the PVC is a little bit hot it gets soft, and then you gently push it together until it bulges a bit. It only takes a few seconds. Count to 12 and see if it’s ready. If not, try another 10 seconds.
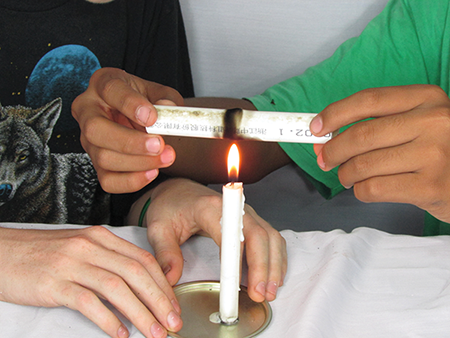

You don’t have to push very hard; if you push too hard, it will buckle and fold. Try to keep it straighter than Wiltor did in that photo, and maybe hold it a bit higher over the candle than he did so that it doesn’t get as black.
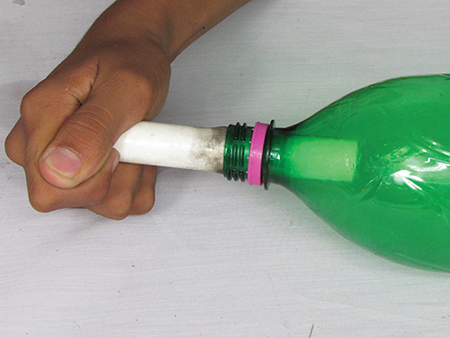
When you’ve got a nice little bulge, hold it until it cools and hardens again. You can blow on it if you want. Then wipe the soot off a bit and jam it into the bottle mouth to be sure it fits tightly.
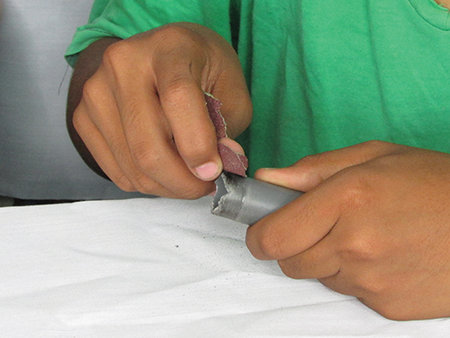
The next step is to take it back out and rough it up a bit with sandpaper. This will help the epoxy glue bond to the PVC. Hard plastics are some of the most difficult materials to get glue to bond to, and roughing them up often helps.
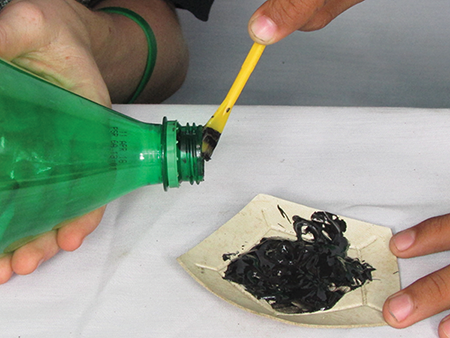
In Timor, for whatever cosmic reason, the main type of PVC available is gray in color and the size they call “½ inch” is slightly larger than the mouth of the average soda bottle. (I got ahold of a piece of the smaller white stuff just to show you how to do the bulge.) We make our compressed air guns from this larger, gray PVC, so I’ll now show you what to do if you happen to end up with PVC that’s too big.
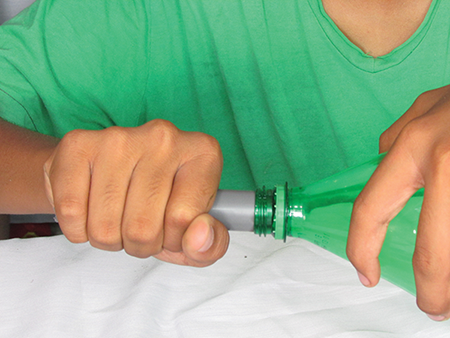
Light your candle and heat up the center of a small piece, rotating just as if you were going to make a bulge.

After 12 seconds or so, when you think it’s soft, start pulling on both sides, until it comes apart right at the hot spot.
Again, this is not difficult at all and takes only a few seconds. But you have to move quickly while it’s still hot and soft. Take one of the pieces and jam the soft, hot end, which is now slightly smaller than the normal diameter of the PVC tube, into the bottle mouth. It should jam in nice and tight.
After a few seconds of cooling, take it out and rough it up. Rough up the inside of the bottle mouth as well.

Mix up your 5-minute epoxy glue and slather some onto both surfaces, and then press them together tightly.

Pack more of the epoxy glue around the joint and lay it aside to dry without bumping it. It says 5 minutes, but give it at least 10.

The other tricky part of this project is getting the valve stem into the PVC pipe cap. First cut off a valve stem and trim away the base until it’s small but not gone. Rough it up with the sandpaper too, right around the base where the glue will contact it.
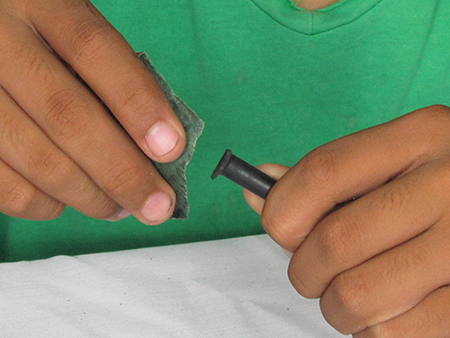
Now get a drill bit that’s about the same size as the valve stem or slightly smaller and drill a hole into the pipe cap, right in the center.
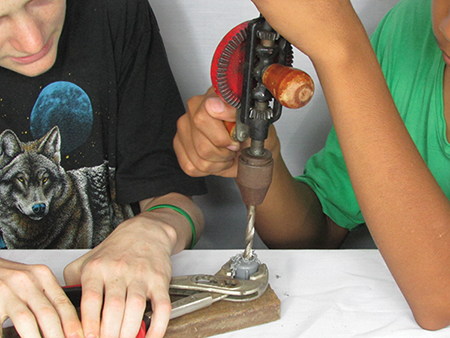
It’s best if this is a super tight fit, so if you can’t get the valve stem in, use a circular file to enlarge it bit by bit until the valve stem just barely squeezes its way into the hole.

Now do the epoxy routine again, putting it on both parts and jamming them together, then leaving them to dry without disturbing them. Avoid getting any of the glue in the hole the air will go into.

Put the pieces of the gun together as they’re going to be. Don’t shove them together too tightly, because you’re next going to take them apart for the PVC cement. But you do want to check the whole arrangement before you do the cementing—it’s a permanent bond.

If you’re happy with it, go get the PVC cement!2 This is another source of nasty fumes, so go outside.
Here again you’ll want to put liberal amounts on both the inside and outside, then jam them together. Be sure you get the angles right on the T and the ball valve. Hold it up before cementing each joint so that you get it how you want it to be.


When it’s done, check each joint to be sure you didn’t forget any. Then put it aside for at least an hour—better yet, several hours. You don’t want those joints coming apart when you pressurize it.
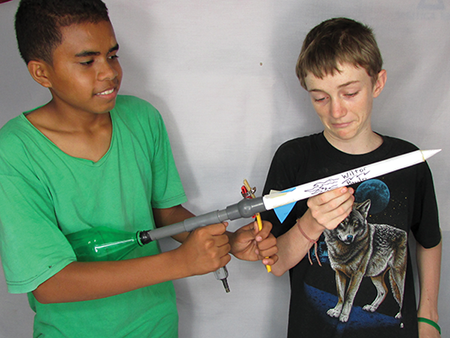
The last step on the gun is to extend the handle of the valve. This is not really necessary but helps to get a nice clean shot off. We use bamboo, as usual here in the tropics, but you could use a little stick of any kind. Put it up parallel to the handle and figure out which side you want long and how to strap it down with the hose clamps.
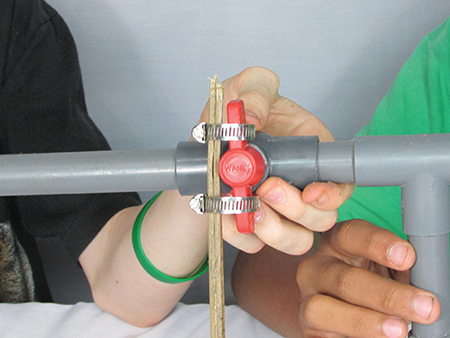
Later we’ll put some tape on it to make it look and feel good.
Now you’re going to need some projectiles. As mentioned, these guns traditionally shoot potato bits, but that’s a no-go idea when you’re living in a land where hunger visits all too frequently. Fortunately, in this land there is no shortage at all of old flip-flops.
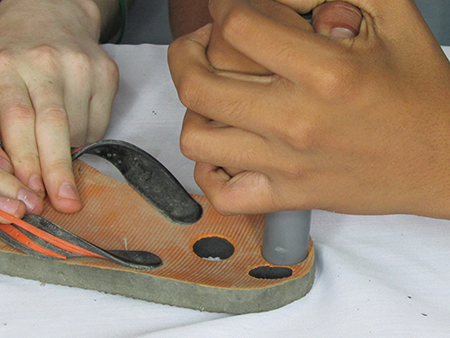
To make bullets out of flip-flops, you need a short piece of PVC the same size as the gun barrel. It helps to sharpen the end of the piece so it can cut into the flip-flop better. You can sharpen it with the file, going around and around the outside of the tip.

Then twist it into an old flip-flop, or any other piece of thick, soft rubbery stuff, and pop a piece out. Once it’s out, you may want to trim it up a bit more with scissors. It should fit tight but not too tight into the end of the barrel of your gun.

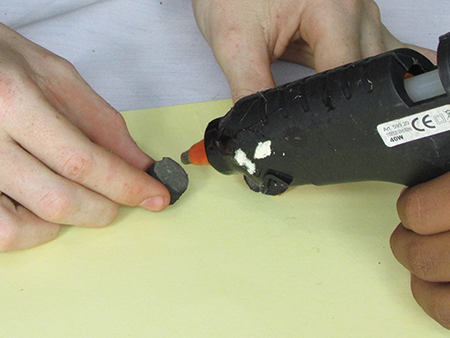
You can make a bigger projectile by hot-gluing two of these flip-flop bullets together. Again, trim the resulting double bullet with scissors so it is just the right tightness.

When the PVC cement has all hardened and you’ve made some bullets, you’re ready for some artillery action. Find a stick to use as a ramrod, and mark it so that you can push the bullet down near the valve without actually entering the valve.
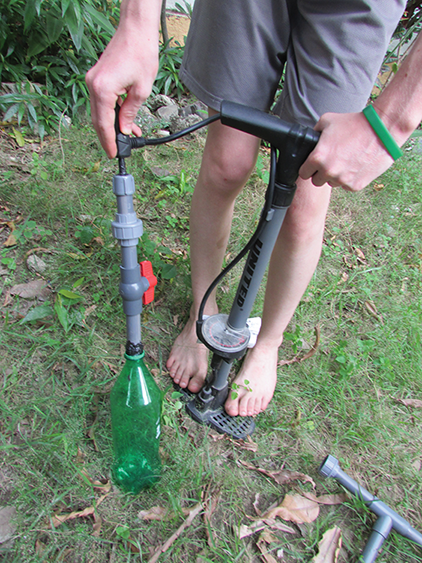
Grab the bicycle pump and your safety glasses and go somewhere far away from any other human or animal life. Hook up the pump to the valve stem and pump it up to 20 psi, that is, pounds per square inch.

Wait, there’s more! If you grow tired of the random inaccuracy of fat cylindrical bullets, you can make rockets to launch with this as well!
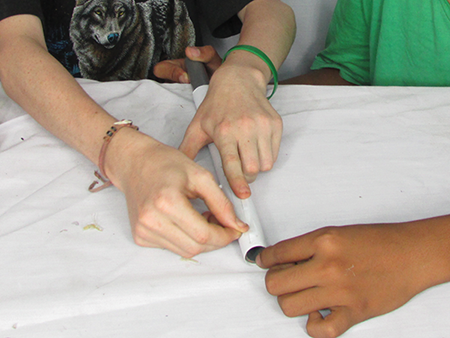
Wrap paper around a piece of PVC to make the body of the rocket. Tape it off so that it’s snug but not too tight on the tube.
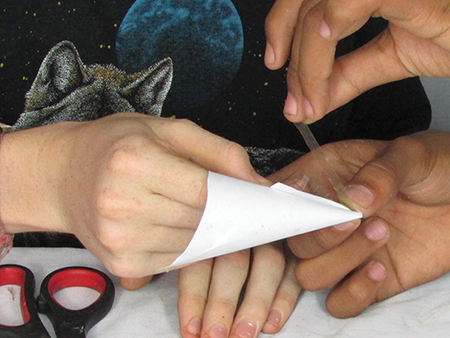
Form a cone and fins for the rocket and tape or glue them on.


Now, this one is slightly more dangerous because it’s pointy. It’s best to shoot it straight up, and let it come down away from everyone. Keep the bottle away from your face.

So, we’ve gone a bit nuts with this idea. Paulo and his buddies made this three-shot unit:

You can see how all three bottles have valves, so you open them and pump the whole thing up, then close them all. When you’re ready to shoot, open them one by one, and you get three shots with the top valve. Or open them all and get a shot with three times the air pushing on it.
We also made this one with exchangeable cartridges, separate charger unit and no valve stem on the main gun body.


Here’s one cartridge being pumped up. You then shut its valve and hook it up to the barrel. Step aside, James Bond.
Finally a pistol with a single-serve drink bottle. It doesn’t pack much punch but handles quite nicely.
What’s Going On?
Pressure is one those words people throw around without knowing the exact meaning in physics. Here it is: force per unit area. That means when you put 20 psi of pressure into your launcher, at every place on the inside of the bottle, as well as the inside of the tube and hose to the pump, and even the valve itself, you can mark a little square of one inch on a side and that square will be supporting 20 pounds of force.
To understand this better, let’s think of something else that gives 20 pounds of force. Well, a 20-pound weight gives 20 pounds of force. Weight is the force that gravity gives. Let’s think of water: 1 liter is 1 kilogram of mass, which weighs about 2 pounds here on Earth, so 10 liters would be 20 pounds of weight. So five 2-liter soda bottles would be around 20 pounds of force. Or if you want to think in terms of gallons (like gallon jugs of milk), there are around 4 liters in a gallon, so 20 pounds of force is about 2 and a half milk jugs of weight.
That’s the force then. Pressure defines the area that receives that force. In our example, it’s a square inch. So imagine 2 and a half milk jugs standing on a 1-inch square area, like maybe a postage stamp. That would be 20 psi. That’s the force felt everywhere inside your air gun system.
That’s significant. The thin plastic of the bottle can handle this, as can the PVC of the launcher tube, but you can see how you wouldn’t want to increase it. At some pressure the system won’t be able handle it and something will give way, and you’ll then have an explosion with flying shards of plastic.3
Back to our shooter: Let’s work out how much force the bullet gets. A ½-inch PVC tube has an inside diameter of about half an inch, by golly. The area of a circle is equal to pi times the square of the radius, which is half the diameter, here ¼ or 0.25 inches, so you’ve got
A = πr2
A = 3.14 x (0.25)2
A = 3.14 x 0.063 = 0.196 ≈ 0.2
That wiggly equals sign means “approximately equal to,” which is what we assume when we tinker. So the answer is 0.2 square inches, and that’s the fraction of the 20 pounds of force that the bullet gets. We can take 0.2 times 20 psi and get 4—that is, 4 pounds of force pushing that bullet forward when you open the valve.
And how fast does it get going? Ah, that depends on how long the 4 pounds is pushing on it! As long as the force keeps pushing on the bullet, it will go faster and faster. (See Newton’s second law in Chapter 19.) Now you can see how rifles get bullets moving faster than pistols do: the longer barrel gives the bullet a longer time to accelerate. The key point here is that when the bullet just emerges from the barrel and is ready to go flying through the air toward the target, it is going as fast as it will ever go. After that, it begins hitting air and eventually the target, or the ground, or something else that gets in the way, and all that stuff gives it forces that eventually bring it to a stop. (See Newton’s first law.)
I did the calculations and got around 35 miles per hour maximum if it’s accelerating for 1 foot of the barrel, and around 50 miles per hour if you had a 2-foot barrel. So it would just about keep up with the family car. But this is just a rough calculation, and the actual speed is almost certainly less, due to friction inside the barrel, leaks around the bullet, a drop in pressure as the bullet moves forward, and so forth.
There’s a whole bunch more physics happening in your flip-flop air gun, but I’m running out of space here, so I’ll just mention a few more things you could look into if you want. You can watch the shape of the projectile’s trajectory and compare it to other things you’ve seen thrown or shot. You can shoot the flip-flop bullet straight up and measure the time it takes to return to Earth, and then calculate its maximum height with simple motion equations.
Or you could just go shoot cans off a bucket in your backyard all afternoon. That’s tinkering too!