
Chapter 22
Tube Music
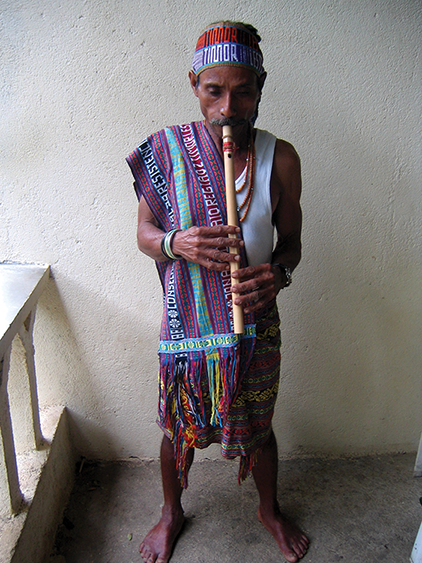
Make complex and curious sounds come from bamboo or PVC. CREDIT: Ros Dunlop
It’s said you can hear the sea if you listen to a conch shell, even if you’re not near the sea. It’s not true—you have to be near the sea. You see, the conch shell receives the sounds around it and then amplifies some of them as they resonate inside its gorgeous, spiraling cavity. If you’re near an interstate, you’ll hear the interstate noise selectively amplified in there; it will sound a lot like the sea. If you’re in a silent room, you’ll hear nothing. Please don’t take my word for it—try it yourself. You don’t need a conch shell.1 You can use a bottle, cup, or mug if you close off the mouth a bit, or you can even use your cupped hands.

It’s the middle of the night as I’m writing this (as it tends to be for most of my scribbling), and I just checked this simple little experiment again. I was not expecting much because we’re in a sleepy little cul-de-sac on an untraveled back alley and all the dogs have thankfully gone to sleep for the night.
To my surprise, I heard a pretty significant rush of sound, a lot like the sea, but steady! I looked around and it hit me: the fan! The fan produces steady white noise and the coffee cup I was listening to amplified some selected frequencies of that noise. A smaller cup selected different frequencies. Very nice.
All the instruments you’ll tinker with in this chapter run on that same principle, with the addition that they actually make sound they select from when you drive wind past them with your breath. It’s a pretty incredible process, being invisible and all, and can be quite pleasing to the ear. Have a go at it.
Gather stuff
- PVC, ½ inch, 2 meters
- Bamboo, if possible
- Assorted bottles, plastic and glass
- Pennies
- Aluminum can
- Straw
- Tongue depressors or similar flat stick, 2
- Tape—electrical and packing tape or duct tape
- Water
- Dowel, ¼-inch diameter, or similar stick
- Plastic bag, small and thin
Gather tools
- PVC cutter or hacksaw
- Hot-glue gun and glue sticks
- Knife
- Optional: drill and ¼-inch bit
Tinker
Bamboo is easy to find here, but PVC may be easier to find for you. Bamboo is also harder to work with; you can easily crush the sidewalls of the thinner stuff. But it does have inner walls separating the sections, so if you cut it just right, you don’t have to plug the bottom of a section.
Tube Music Basics
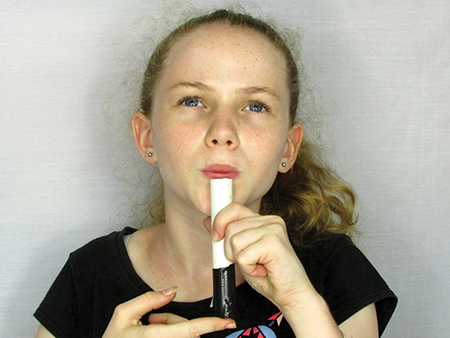
Right off the bat, see if you can make a clear tone by blowing on a piece of PVC or bamboo.
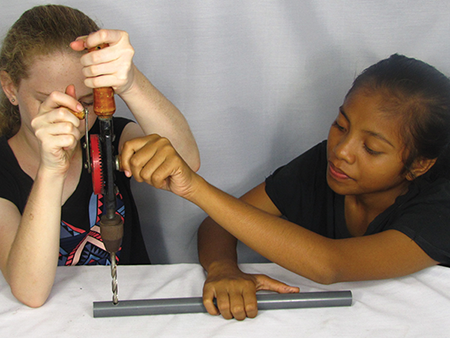
Cut a tube around 20 cm and clean off the edges so there are no burrs to mess with the airflow.


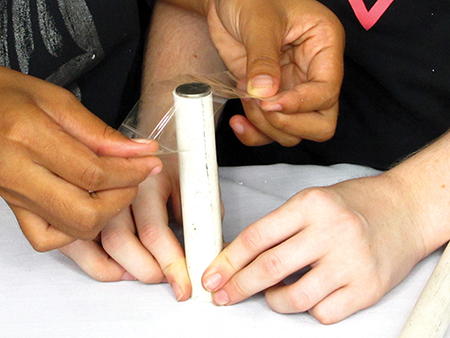
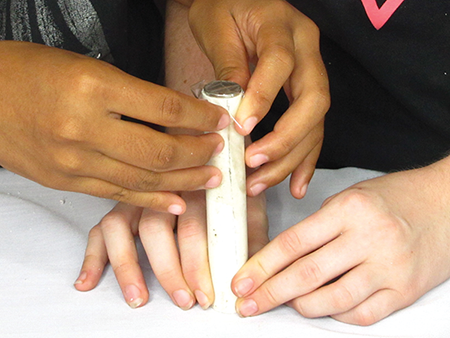
Make sure one end is plugged. You can just use your thumb, or you can tape a penny onto the bottom. (Shown here are Timorese 5 cent pieces and U.S. pennies, since it’s an international sort of book.) Make sure the coin is taped tightly, with no wiggle room and no cracks for the air to leak out. We use packing tape because it’s easier to find here than duct tape.
Now blow across the top opening. Rest your lower lip on the front of the rim, and blow smooth and steady and medium strong across the top in the direction of the far side of the rim. Change your angle up and down, and the shape of your mouth, until you get a nice, pure tone. If you are getting a breathy, vague sound, keep adjusting the wind you’re sending out until you get the crisp tone.

If you can’t get that nice tone, first make sure the tube is covered tightly at the bottom, and then try the following:
- Get a longer or shorter tube, or a 3/4-inch piece of PVC.
- Try it with a bottle first; sometimes it’s easier to get a good tone.
- Find some friends who can do it and mimic them.
Once you’ve got it, try the same thing with a tube that’s not covered on the bottom.

You should hear a vague, breathy tone, but nothing crisp. Hmmmm.
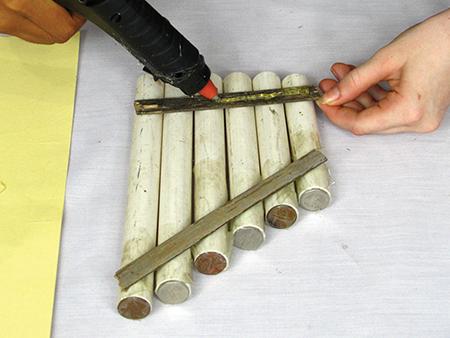
While you’re thinking about what’s going on here, make a few more instruments. Pipes of Pan are just a set of closed-end tubes of varying length. Your Aunt Wikipedia has fascinating info to share with you on the pan flute. The Greeks really did use this instrument, whether or not the god Pan played it. The Andean cultures of South America call it the zampoña and have taken it to a high level of sophistication in their music.
Chop five or more sections of PVC or bamboo and cover the bottoms well.
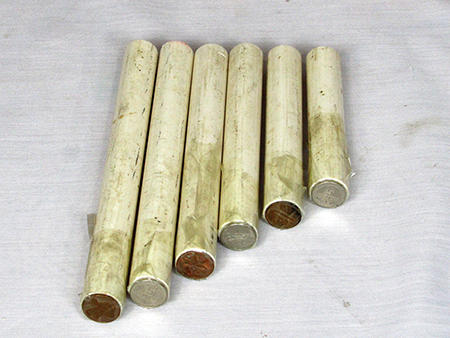
Hook them together however you want. We use hot glue, which doesn’t bond to hard plastic that well, so we back it up with tape.

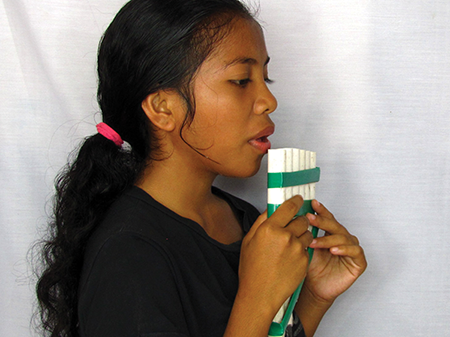
When you try playing them, you may notice that you don’t have a nice scale but rather a random set of notes from low pitch to high. If you spent some time, you could tune your Pipes of Pan to produce a scale. Just choose the low tone you like, and then one by one, cut each consecutive tube a bit shorter, maybe 5 millimeters at a time, until you get the next tone of the scale. You could even use a guitar tuner and put it on a perfect pitch. You can download apps for this as well.
Before you move on, try a few things. Get a fatter PVC piece, like 3/4 inch or 1 inch, cover one end, and blow on it. What do you notice?
Try covering the bottom of a tube with just tape—no coin. As you blow, put your finger on the bottom and feel what’s happening. Press your finger tightly over the tape and then let it loose again. Pretty cool, eh?
One more thing to try is stopping up the bottom of the tube with water. Fill a wide-mouth bottle or jar with water and sink a PVC tube in it. Blow on it as you move it up and down.


Also try blowing a hard blast and listening carefully to the tone as you do so. All the while, you’re trying to work out what the science is here—specifically, what determines the note coming out of the PVC.
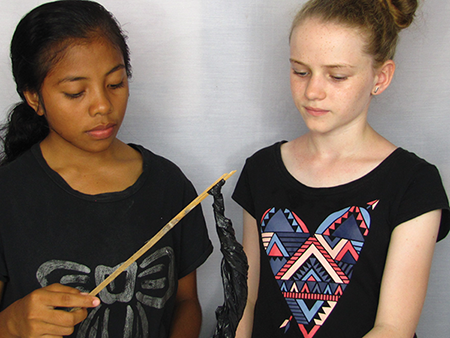
The Slide Flute and Music from Other Vessels
Next we’ll make a slide flute, which can give various tones. Chop and clean up a tube of about 40 cm. Get a stick that’s half again as long as the tube and fasten the end of the plastic bag to the tip of the stick. You can use tape or tie it on, or slit the stick and slide the bag in a bit.
Wrap the plastic bag medium-tightly around the stick right near the end until you make a bulge that will just fit into the tube.

Trim off the rest of the bag. Then tape both ends down tightly, with some of the tape sticking to the stick. This is so the plastic doesn’t slide up and down the stick as you push and pull on it.


If the top is very pointy, you can clip off a bit of the stick. You can tape over the bottom part of the stick too, for a nice handle. Now slide it into the PVC and try blowing on it.

Often it won’t work, or it won’t sound clear. Solution: add water! Using just a few drops usually does the trick.

Now you should get a clear tone that changes as you move the stick up and down.
Aside from the PVC tubes, you can also make this kind of instrument with bottles and cans.
Add water and the tone will change!

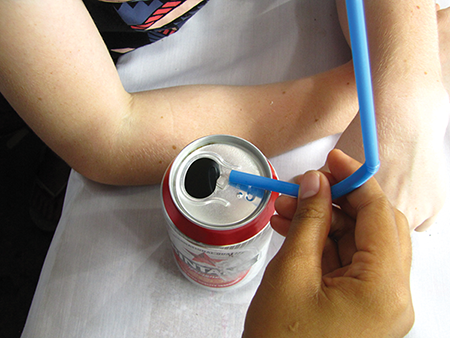
A can will make a sound if you use a straw to blow over its hole. You can take off the opener.
A glass bottle also makes at nice tone if you hit it with something, like a spoon. This tone also changes as you add water. Try it, and compare it to the changing tone you get when you blow. It’s easier to dump water than to add it, so we start with the bottle three-fourths full, then tap and blow…
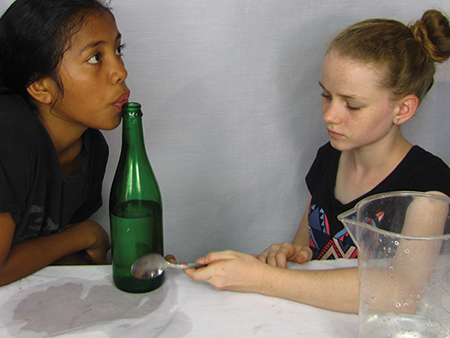
…dump some water…

…tap and blow again…

…dump some water, tap and blow again, dump some water, and on and on.
You hear the patterns? Are they conflicting in your ear, or your mind, or your mind’s ear? More on this in the “What’s Going On” section. Of course if you had eight bottles you could tap and/or blow a full scale and impress the socks off any audience.
A Real Live Flute
The final grand project is to make a PVC instrument like a concert flute, where one end is closed and you blow over a hole in the side wall near the end. Start with a piece of PVC around 30 cm long and drill one hole near one end, maybe 2 cm away, and several more farther down where your fingers can cover them up. Make the holes nice and clean.
Now cap the tube off. If you have a pipe cap, this is the time to use it, to attain the elegance necessary for future orchestral performances. If not, the coin and tape also work.
Now cover all the holes—damp fingers work well—and try to get a tone. Again, you have to move your mouth around, adjusting the angle and the shape of your mouth and the flow rate.
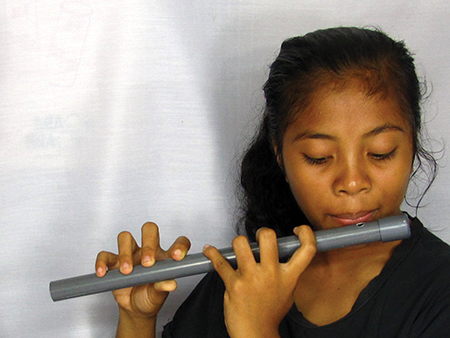
Don’t be put off by how tricky this is; the flute is known to be one of the hardest instruments for beginners in a band. If you start getting dizzy, that’s science too; your hard blowing and breathing is giving you more oxygen than you need, and your brain is going all giddy on you! When you get a tone, begin uncovering the holes and listen to the changes.
What’s Going On?
Sound is created when something vibrates. The easiest example is your throat; say “Ahhhhhh” as you hold your throat and you’ll feel the vibration in there. Guitar strings vibrate when you pluck them and piano strings vibrate when the hammer hits them. Clarinets and oboes have reeds that vibrate, and the whole brass section employs the musicians’ vibrating lips. So what in tarnation is vibrating on a flute?
You’re not going to be happy with my answer, because it’s difficult to prove and almost impossible to see. It’s the air itself.
One way to imagine this vibration is that when your breath hits that far rim of the tube,
- some of it goes into the tube,
- which increases the pressure in the tube,
- and the increase in pressure tends to push air back up out of the tube,
- and when the air comes flowing out of the tube it gets blown along with the part of your breath that’s overshooting the rim,
- but then when air comes out of the tube it decreases the pressure in the tube,
- and the decrease in pressure tends to pull air into the tube,
- and your breath is still there blowing so some of it goes into the tube,
and the cycle starts all over again.
I’m out of breath just having said all that. If your tube is resonating at around middle C, that’s 261 cycles per second—that is, the pressure increases and decreases more than 200 times each second. Lickety-split.
If you get that, you can understand two more things. If the bottom of the tube is not covered, the pressure is never going to get very high because the air just goes out the bottom. You’ll still hear a breathy note as the sound echoes around in there, like the conch shell/coffee cup note, but it won’t build into a crisp note like the closed tube.
Also, you can see that if the tube/bottle/can is larger, it will take more air to build up the pressure inside, which will take more time, and so you can’t get the cycles to happen as fast. This results in fewer cycles per second, otherwise known as a lower frequency, which gives a lower or deeper tone.
It’s not at all easy to see this vibration, but feeling it is no problem at all: on the walls of a bottle when you’re blowing a clear tone, and on the tape on the tube without the coin. You can see that the hard coins are useful at resisting the pressure change; the thin tape tends to move back and forth as the pressure rises and falls, which impacts the clarity of the tone produced.
Now think of all the ways you used to change the tone in this tinkering: different tube lengths, different tube diameters, a sliding stopper in the tube, holes in the side of the tube, water in the base of the tube, different-sized bottles, water filling up some of the space in the bottle, and so forth. In each case, you are tampering with the amount of air inside and thus the time it takes to turn around a cycle of vibration. I don’t want to trivialize the entire brass and wind instrument sections of the orchestra, but that’s more or less what the intricate structure of each complex instrument does as well. And what a glorious set of sounds results!
Did you get the point of the holes? When the air comes to a hole, it’s just like it’s gone out the top of the tube. So by covering and uncovering holes, you change the effective length of the tube and thus the vibration cycle.
How about the water in the slide whistle? That just helped seal the plastic plug. Any little hole will screw up the vibration because the pressure will not build up right. Try putting a tiny pin hole in the bottom of a plastic bottle. You’ll lose the nice sound.
All right, then what about the bottle that taps a different tone than it blows? Careful—when you whack a bottle, the glass of the bottle is what’s vibrating, not the air inside. If it is full of water, the water acts as a brake on the vibration of the glass, so the vibrations are slower and the tone is deeper. When it’s empty, the glass walls can vibrate faster, so the tone will be higher.
Meanwhile, the tone you get from blowing air goes exactly the opposite: the less water, the more air, so the slower the vibration and the deeper the tone. Vice versa is also true: more water means less air, which means faster vibration, which means a higher tone.
Finally, I bet you already figured out the funny dwooping tone when you put the tube into the water. Now the bottom of the column of air is the top surface of the water inside the tube. When the pressure increased in the tube, it pushed the water down a bit, letting more air in and so dropping the tone. But the water didn’t stay down—it surged back up, pushing out some air and so raising the tone again. Dwoop, dwoop, dwooooop.