Chapter 8
Kohe

Make a useful little basket with the square weave.
This is a super-basic basket called the kohe. Timorese weave it using strips of leaves from the Sago palm. Mana Joana used a kohe to put the seed kernels in when she went to plant corn. She recalls the pride of first learning to weave one for herself in late primary school.
Gather stuff
- 8 strips or more at least 50 cm long
Gather tools
- Stapler
- Paperclips, small
- Marker, pen, or pencil
Tinker
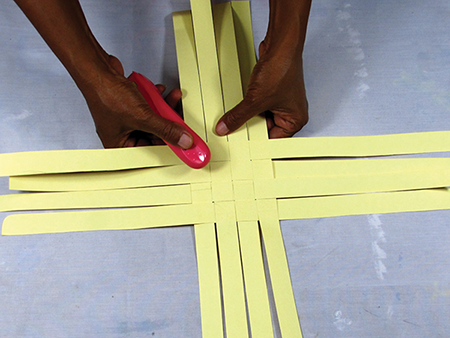
Start with the under-over weave of the placemat you may have made in kindergarten, four horizontal and four vertical.

Timorese grandmas would never start like this. They’d be clutching the strips in their hands on their laps, introducing them one by one, weaving them in and tying them off so that they’re secure. But we’ve decided this is the easiest way to show the steps on paper.
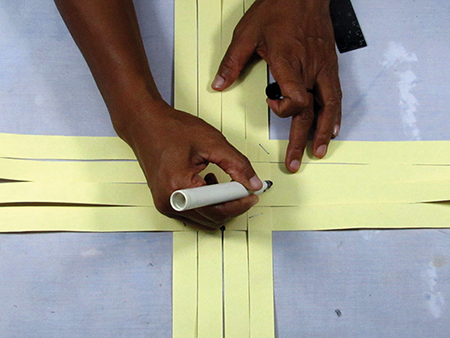
Now we’ll use another trick the local grandmas would never dream of: the stapler. That four-by-four grid needs to stay in place as we make the corners and form the walls, so put staples in four corners and make the grid solid.
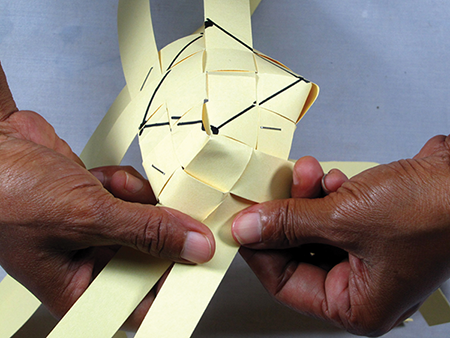
Now here’s the tricky part. The base of the basket will be a square, but not that four-by-four square you just stapled. It will be centered in that square, with corners at the four center points of the sides. So put dots at those points, and then draw lines between them, just to make it clear where you’re heading.
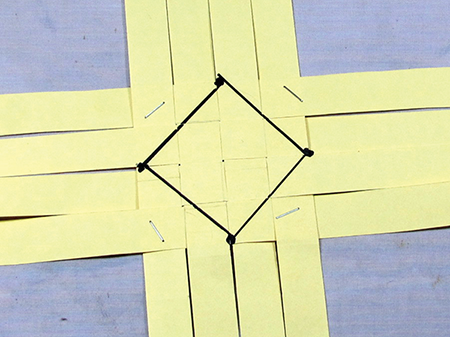
Notice that the staples are all outside that square; they’ll be on the sides of the basket.
Now grab two strips coming out of one of the sides, one on each side of one of the points you just drew. Make a corner by twisting them a bit and weaving them together. The ones to their sides will also get woven in.

There’s your first corner! When you’ve got to this point, grab a paperclip and stick it on so that it doesn’t unravel when you go to the next one.
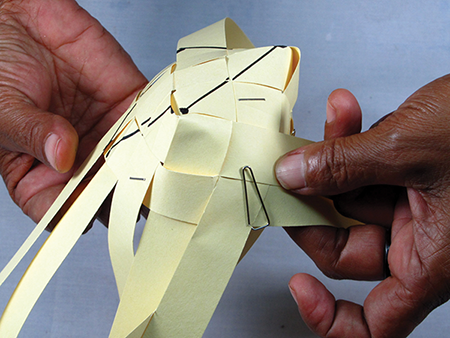
Now go do that same thing to the intersections at the other three points, until they’ve all formed corners. Your square base should be clear now.
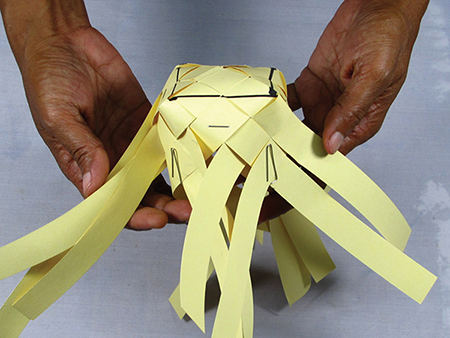

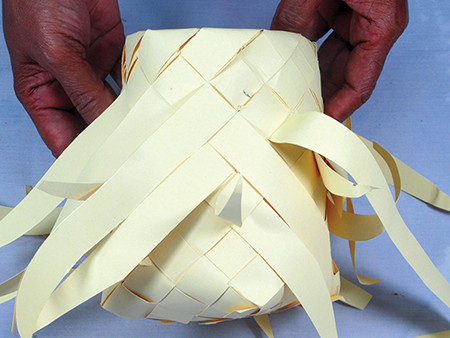
It’s hard to show the next few steps, but basically, all the strips need to meet in that familiar over-under-over fashion, all spiraling around the walls of the basket up toward the top. As you bypass the paperclips, slip them out.

You can keep going as long as you want, stapling on extensions to the strips when they run out. We stopped before our strips ran out, and it made a nice size for marbles or mints.
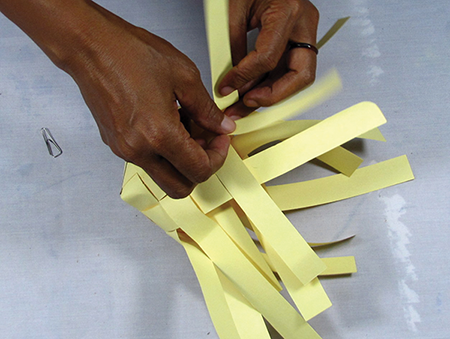
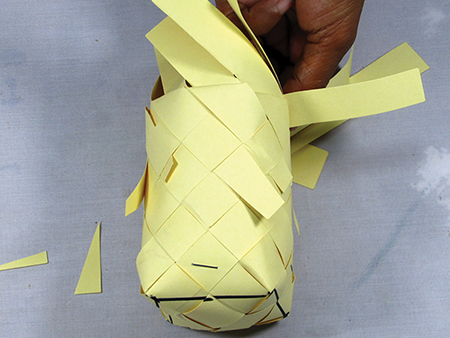
As you move up, you can tug the strips tight and fold them back to keep everything tight. When you reach the level where you’ll make the rim, fold them back all around the basket.


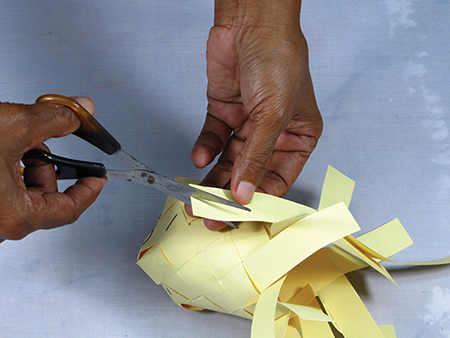
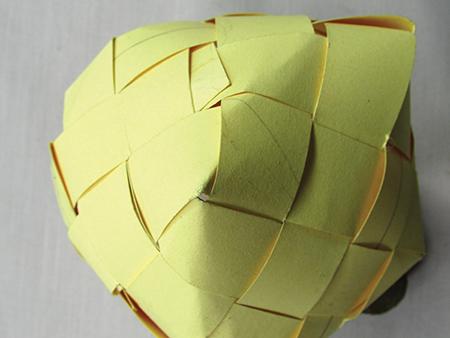
There you can see all the strips in one diagonal direction folded back over their counterparts. Now you’ll start doing 45-degree-angle folds and weaving the tips back down into the walls of the basket. To make this easy, you want to trim the tips of the strips so that they are easy to insert—make them a little pointy.
Work out that fold, outward and down, and go all around the basket doing that fold on those tips, ignoring the others for now.

Now do the same thing with the other strips but going the other diagonal direction also from inside to outside.
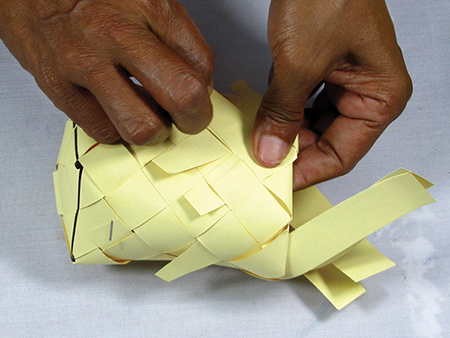
This should form a nice, smooth rim.

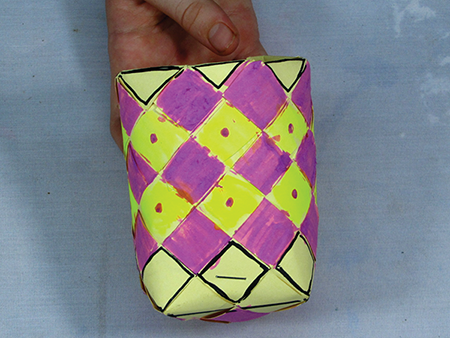
Now trim it up. Some tips you can stuff under the next strip so they are out of sight; others you have to cut off. When you’re done, it’s beautiful!
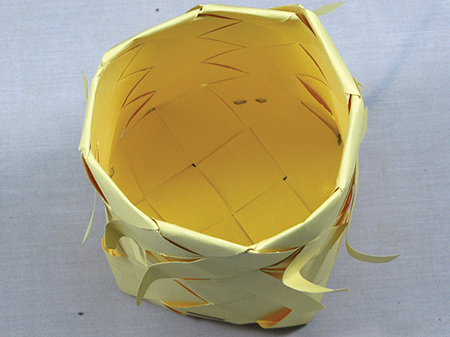

You can decorate it, or you can make another one with different-colored strips for a nice, colorful effect.
Here’s a bigger one, starting with a 6×6 base.

Many times you see kohe that are not quite finished like this, bristling with the raw ends of the strips. They get the job done, and life’s too short to make everything beautiful, eh?
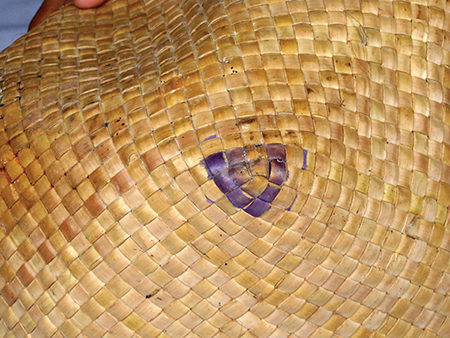
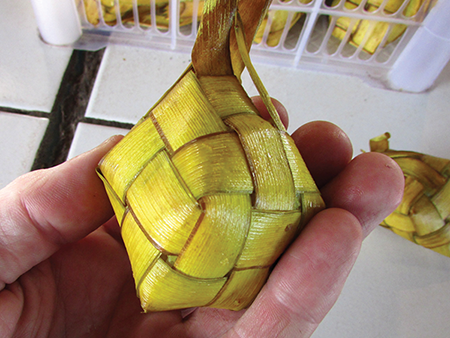
But then there are these oh-so-beautiful pieces, complete with lids, sold for a couple of bucks.


You can’t fully appreciate it without cupping it in your hands, smelling the palm fragrance, and feeling the satisfying grip of the well-fitting lid. It was definitely a professional job.
What’s Going On?
Congratulations! You’ve succeeded in using a two-dimensional strip to form a three-dimensional basket. When your far distant relatives pulled this off, maybe 2 million years ago, give or take a few weeks, they were stoked! Up to then they’d had to use animal skins, animal organs, gourd shells, or hollowed wood to carry stuff. Now a whole new world of packing possibilities was available to them.
Check out those corners you formed: three squares coming together to make a point.
It’s the same as the one on the kohe itself.
That’s the transition from the flat base to the standing sides. Each square has 90-degree corners, and three coming together gives you 270 degrees. But that’s not enough to make a flat surface—you need 360 degrees for that. Thus, the basket corner curves and the basket stands up. You’ll find corners like that in most baskets, even the little katupa woven for rice dumplings.
Some corners are pointier than others. If only two squares come together at a point with two sides in common, ordinarily you’ll get two squares smashed together. But if you puff up the space between them a bit, you get the tip of the octahedron katupa.


Read more on that and the angles formed when polygons come together in Chapter 9.
The point (ha!) once again is that the mathematics in this weaving is deep and wide. It’s also extremely useful. Before plastic or metal, this is what our human race used to carry stuff. And still today, baskets remain a highly sustainable, nonpolluting, fashionable, aesthetically pleasing, do-it-yourself answer for storing your junk and schlepping it around. See how many you can incorporate into your life.