Chapter Goal: Look at tools used specifically for altering symbols.
In this chapter, we will take some time to look at how to use symbols and review their purpose and what they are for. Then, we will look at a collection of eight symbolism tools and how they can be used to alter and distort the look or orientation of the symbol, and finally, if we can use these tools to distort the symbol further.
Note
You can find the projects for this chapter in the Chapter 12 folder.
Symbol Creation (Symbol Review)
In Chapter 6, we looked at symbols and how they can be used with the Blend tool. We also saw, in Chapter 11, that symbols can be used with graphic styles to add additional effects. Refer to Figure 12-1.
Figure 12-1
Symbols panel with static and dynamic symbols
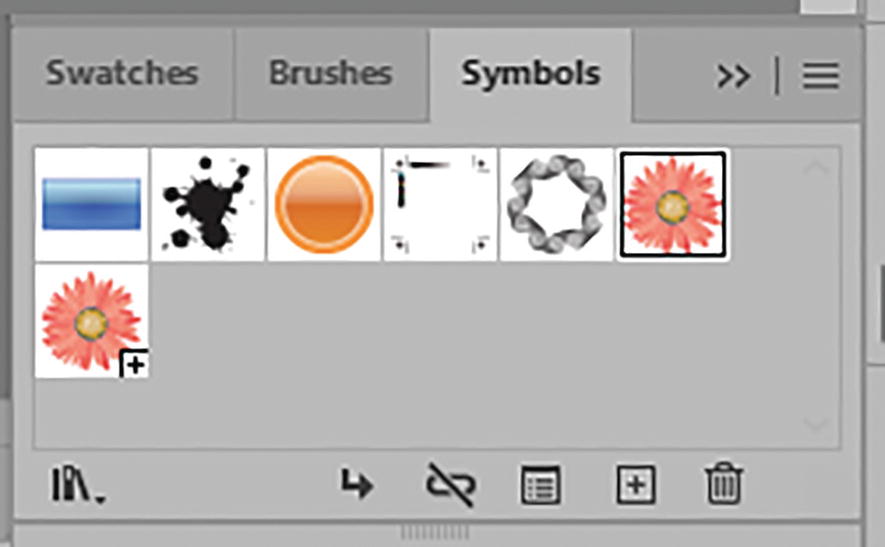
As noted in Chapter 6, symbols come in two kinds: dynamic and static. They are similar in that they can be moved, scaled, rotated, and sheared. However, dynamic symbols can have individual color changes made to specific paths with the Direct Selection tool, while static symbols cannot have this custom color change using this method. Refer to Figure 12-2.
Figure 12-2
Symbol Options dialog box, and dynamic symbol with colored petals, done with the Direct Selection tool
Both kinds of symbols can have additional graphic styles applied from the Graphic Styles panel. However, only dynamic symbols can have graphic styles applied to individual paths, which is done with the Direct Selection tool. Refer to Figure 12-3.
Figure 12-3
Static and dynamic symbols, with dynamic symbol’s petals colored with the Direct Selection tool and the Graphic Styles panel
Note
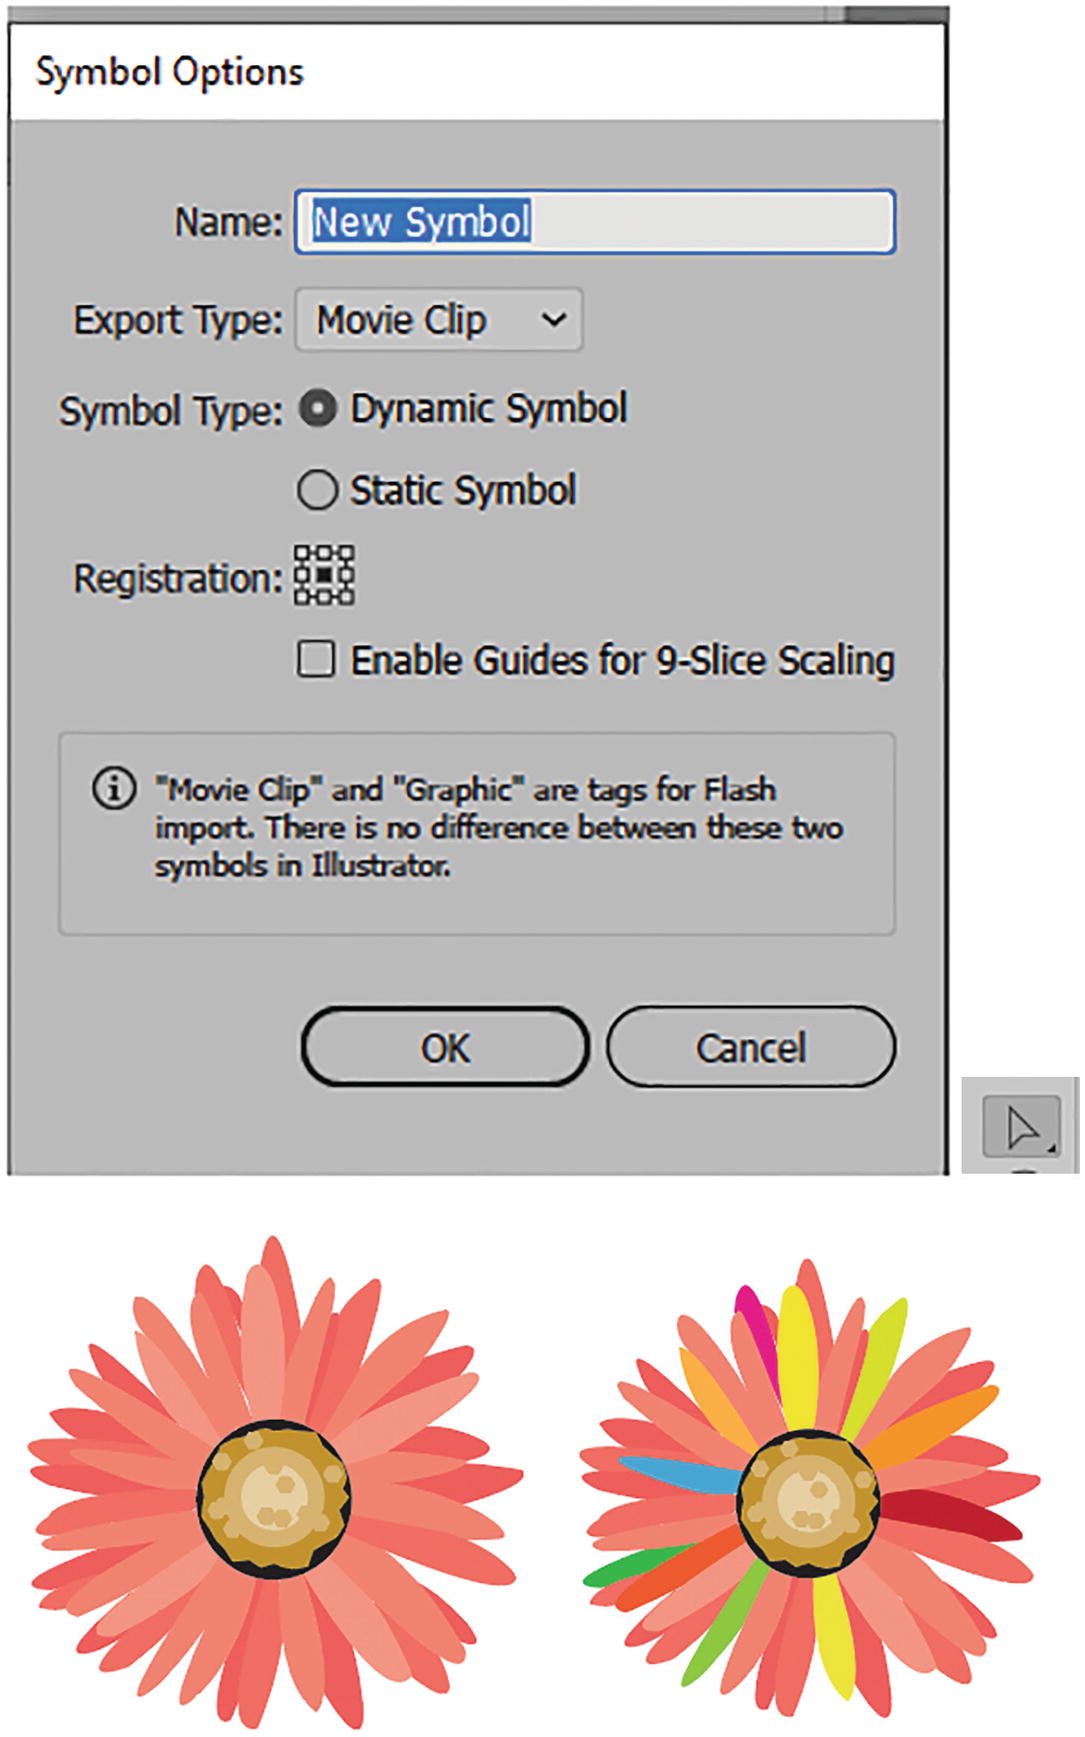
However, if you want to use tools like the Puppet Warp tool (Chapter 4) and Liquify tools (Chapter 5) on symbols, they require a break to the symbol instance link. Then, they are no longer symbols, but rather grouped objects that can be distorted and edited. Refer to Figure 12-4.
Figure 12-4
To use certain Puppet Warp and Liquify tools on symbols, you need to use the Break Link icon in the Symbols panel first
For Puppet Warp, the break is automatic. But for the Liquify tools, a warning message alerts you that you must break the symbol from the panel before you can use the tools. Refer to Figure 12-5.
Figure 12-5
The symbol is now a grouped object, and you can use the Puppet Warp tool or Liquify tool and will not see the alert message
However, there are specific tools that you can use just for symbols, and we will look at them next.
Symbolism Tools
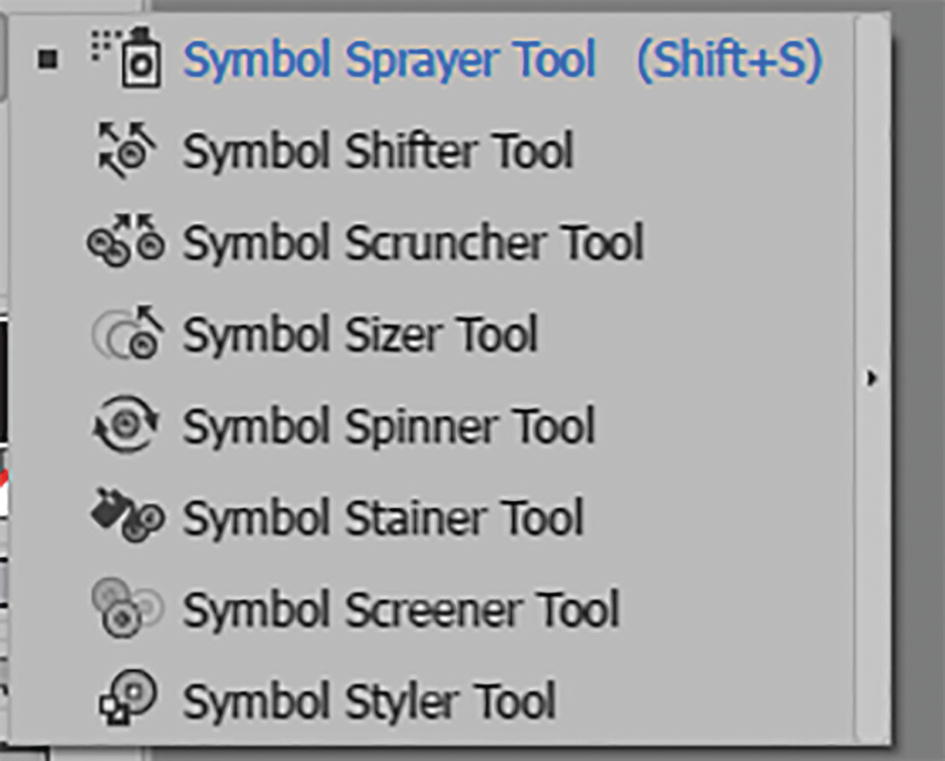
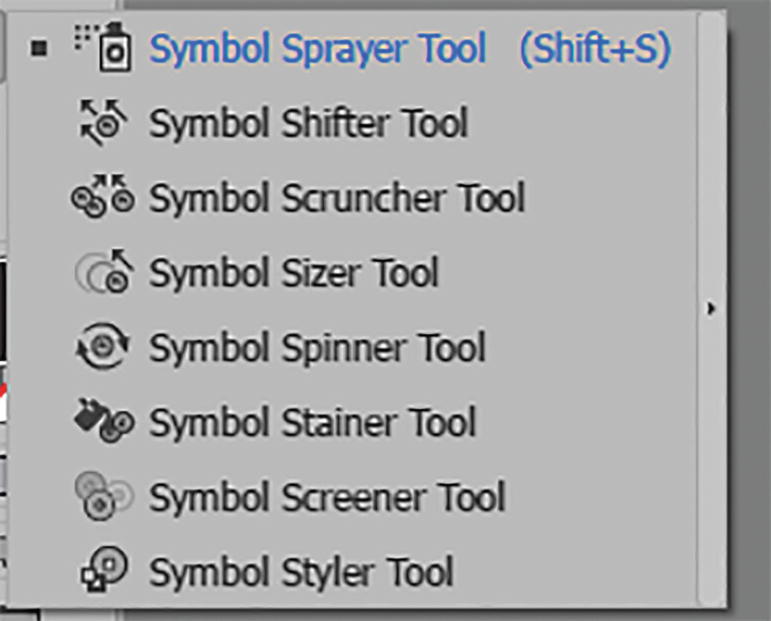
In the Toolbars panel, you will find eight symbol-related tools. Refer to Figure 12-6.
Figure 12-6
Symbolism tools
They are as follows:
Symbol Sprayer tool (Shift+ S)
Symbol Shifter tool
Symbol Scruncher tool
Symbol Sizer tool
Symbol Spinner tool
Symbol Stainer tool
Symbol Screener tool
Symbol Styler tool
Project: Bubble Wand Example
To test them, let’s create a copy of a file for practice. Open bubble_wand_start.ai. Then save a copy. Refer to Figure 12-7.
Figure 12-7
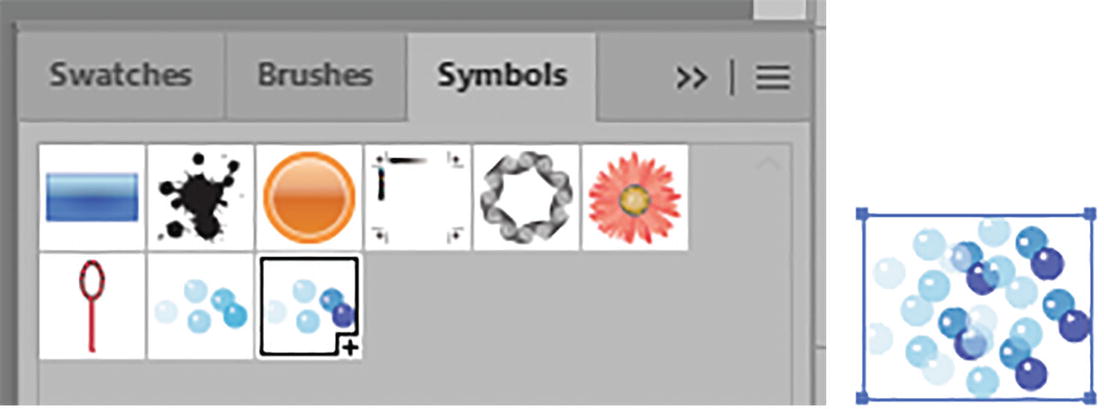
Illustration of bubble wand and bubbles
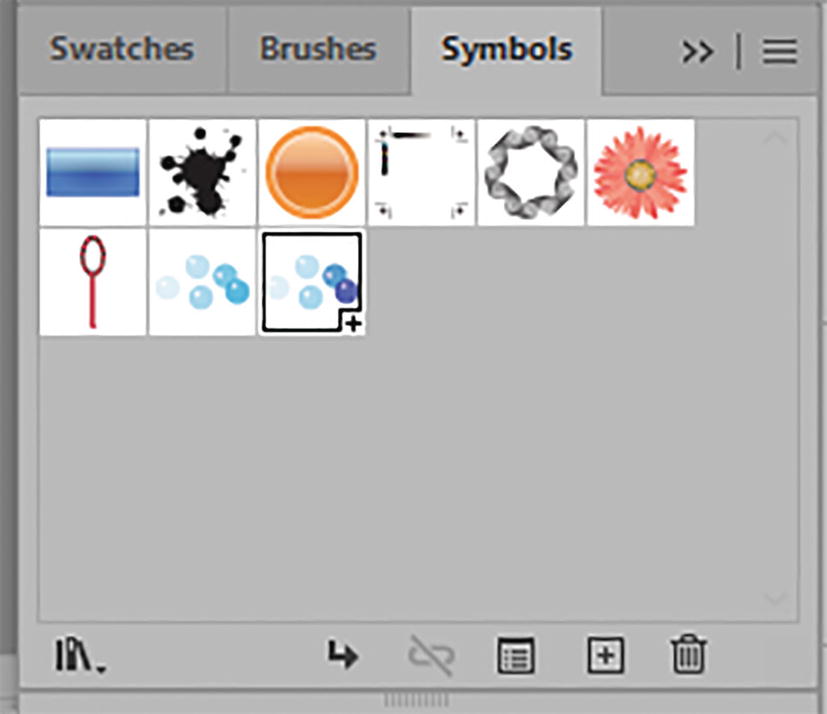
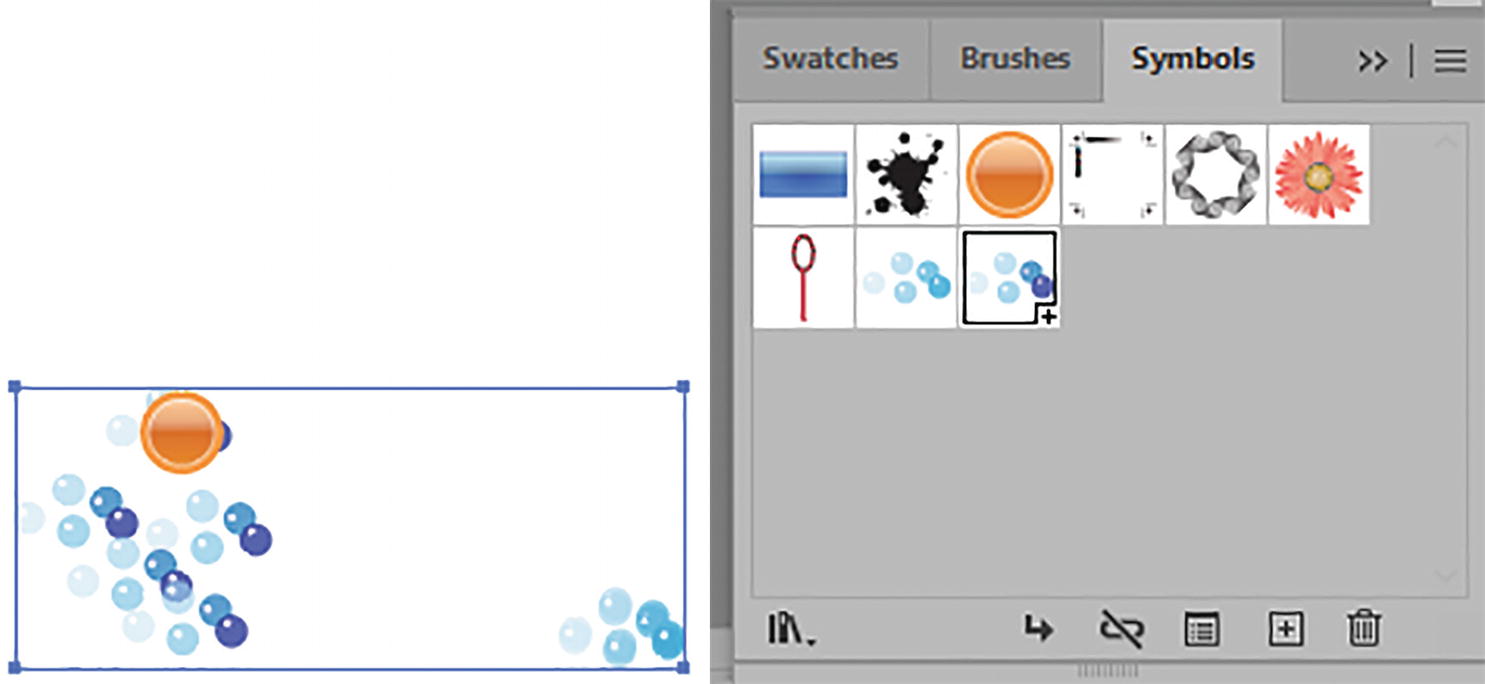
In this example, I have a wand and some bubbles as symbols in the Symbols panel. I made two bubble symbols—one is static, and the other is dynamic (plus sign)—with slightly different colors to see if there is a difference when I use the symbolism tools. Refer to Figure 12-8.
Figure 12-8
Symbols panel with wand and bubble symbols that are static and dynamic
Symbol Sprayer Tool (Shift +S)
The first tool in the symbolism set is the Symbol Sprayer tool. This is the first tool that you must use to access the other tools for the next steps. Refer to Figure 12-9.
Figure 12-9
Toolbars panel Symbol Sprayer tool
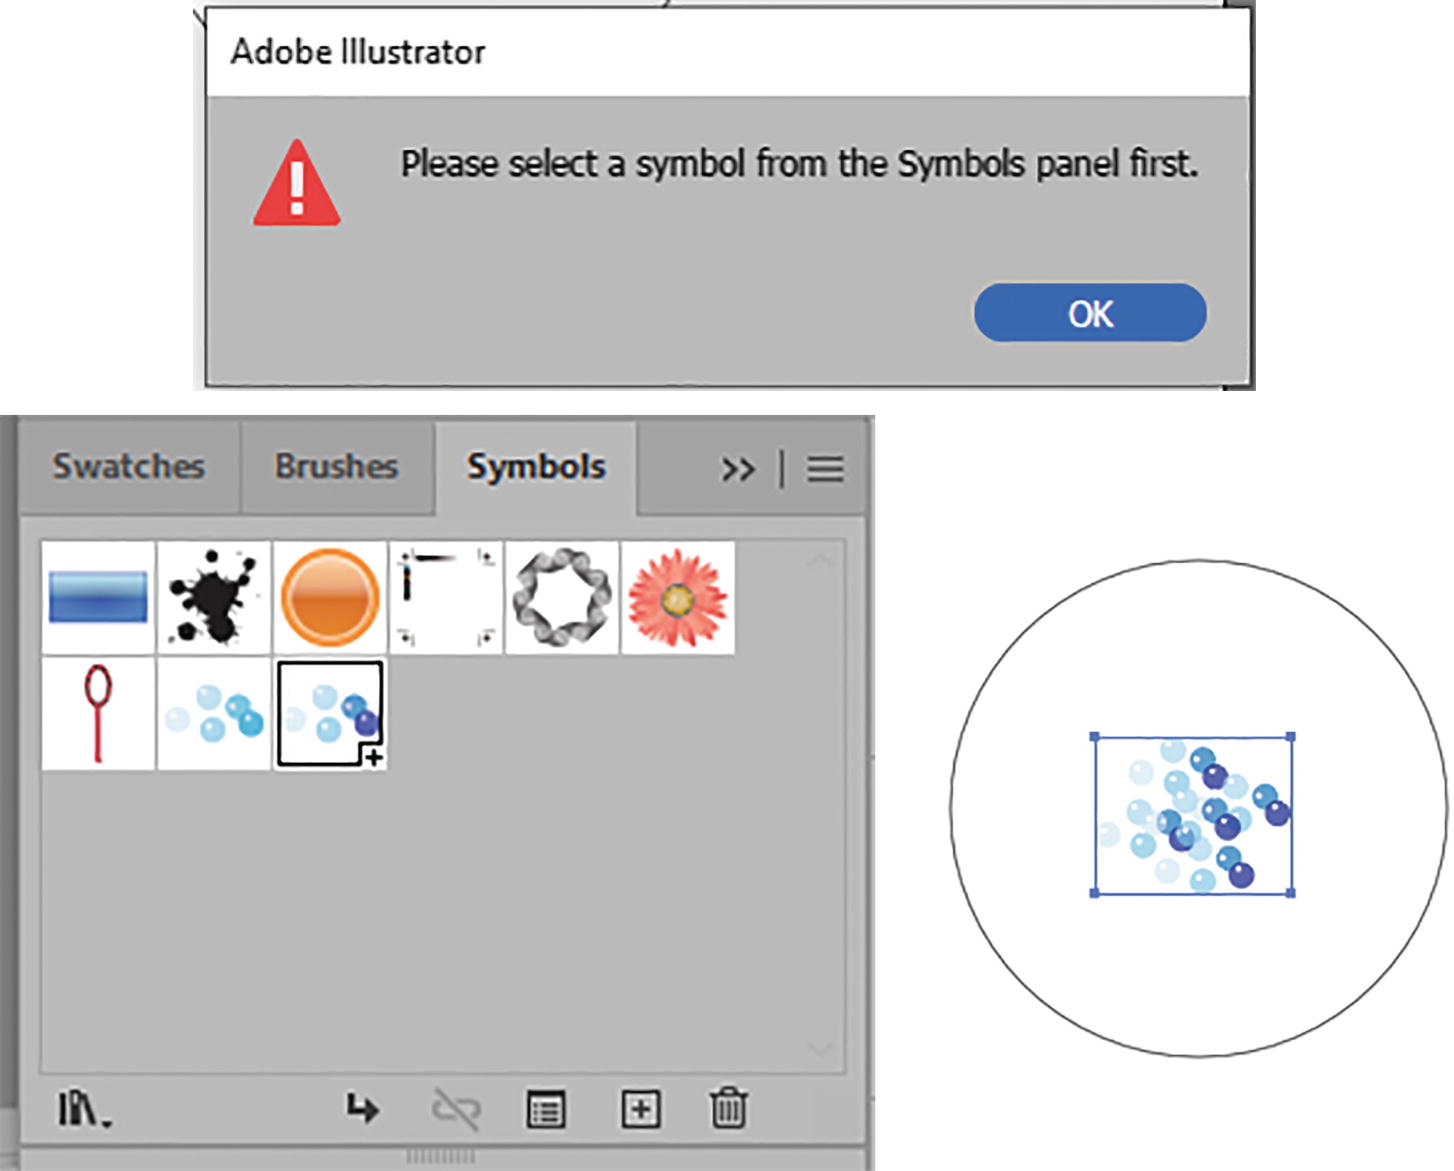
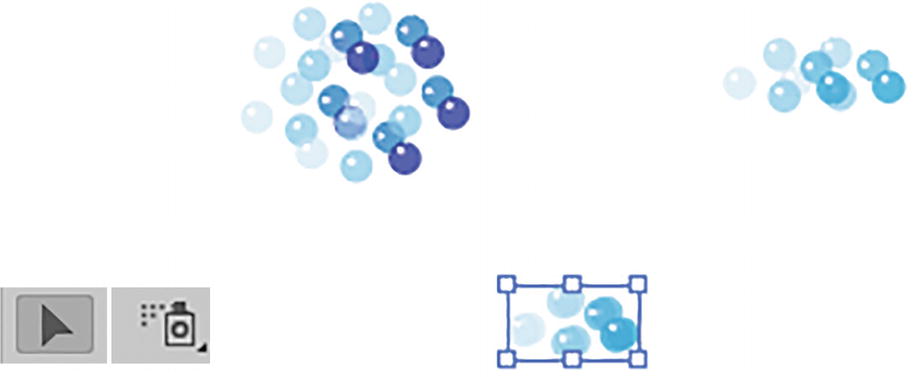
Select one of the bubble symbols in the Symbols panel. I chose the dynamic symbol. With the Symbol Sprayer tool, click and hold down the mouse, and, like mist from a spray-paint can, the small symbols will begin to appear. Refer to Figure 12-10.
Figure 12-10
Alert that you must select a symbol from the Symbols panel before using the tool, symbol selected, and the tool in use
To modify the settings for this tool and the next one, double-click on the tool to access the Symbolism Tool Options dialog box. Refer to Figure 12-11.
Figure 12-11
Symbolism Tool Options dialog box with Symbol Sprayer settings
The current settings for the Symbolism Tool Options for the Symbol Sprayer tool are as follows:
Diameter: This is the diameter of the brush area for the symbolism tool that the symbols will appear within. If you want a larger area, you must increase the size or drag around a larger area while you hold down the mouse. Outside of the dialog box, you can use your left [ and right ] bracket keys to decrease and increase the diameter.
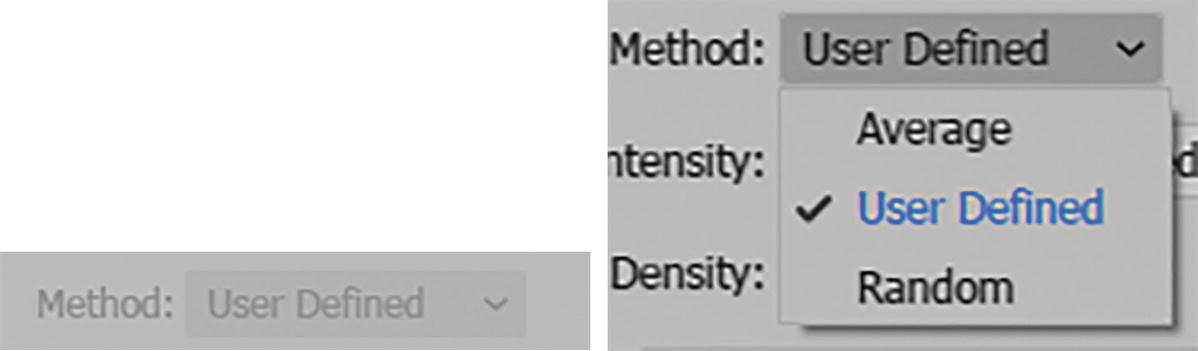
Method: This area is grayed out for the Symbol Sprayer, and by default is set to User Defined, which is based on the way the mouse is dragged or clicked by you. For the symbolism tools that we will look at next, there are additional options of Average and Random. Refer to Figure 12-12.
In Average mode, your new symbol instances can inherit the attributes of size, rotation, transparency, and style from nearby symbols in the same instance set. If a nearby symbol is 30 percent transparent, symbols added to the set will also be 30 percent transparent. With Random, the mentioned attributes would vary in size, rotation, transparency, and style. Refer to Figure 12-13.
Figure 12-13
Method mode set to Average and Random
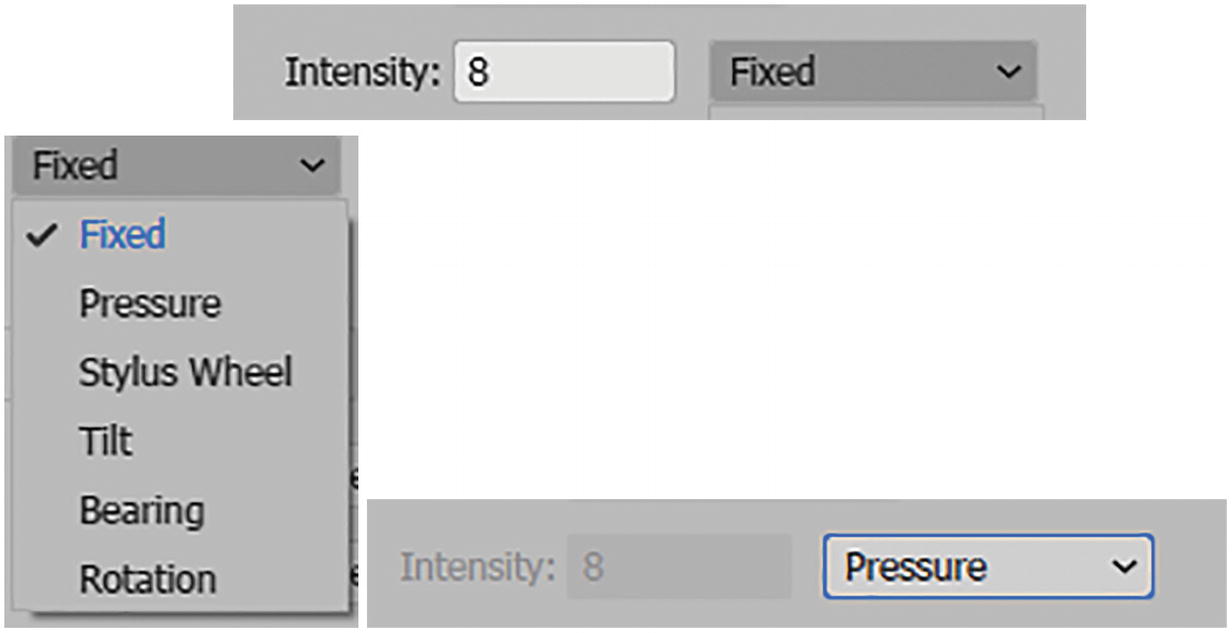
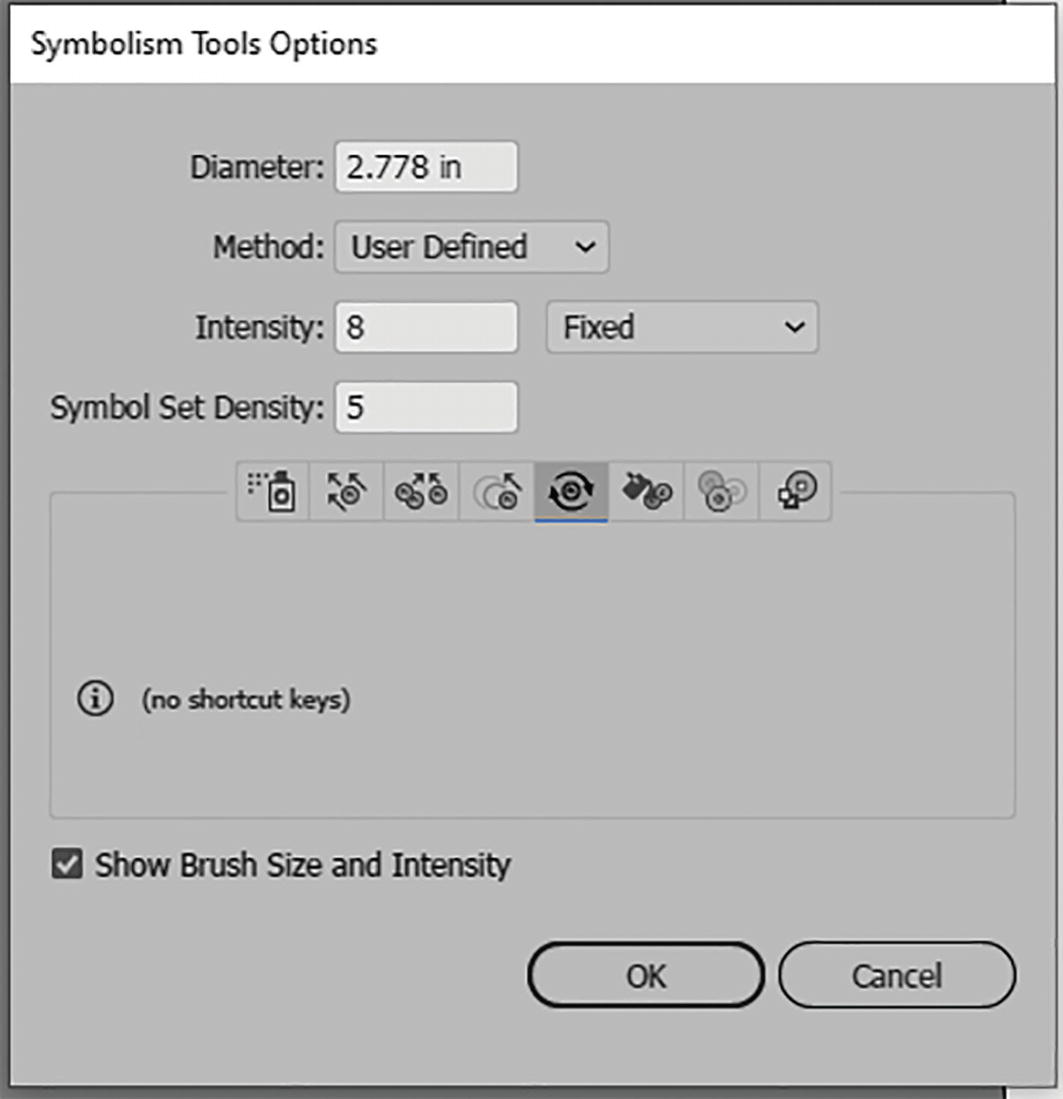
Intensity: This has a range of 1–10 and is currently set to 8; it has the option of Fixed by default. However, if you have a stylus pen you can use the other options of Pressure, Stylus Wheel, Tilt, Bearing, and Rotation. Refer to Figure 12-14.
Figure 12-14
Intensity mode to set to Fixed, or if using a stylus you can use another setting from the list, but then you cannot access the Intensity field
These options, however, will rely on the stylus, so the Intensity field will be grayed out. For this practice, leave it at the default of Fixed.
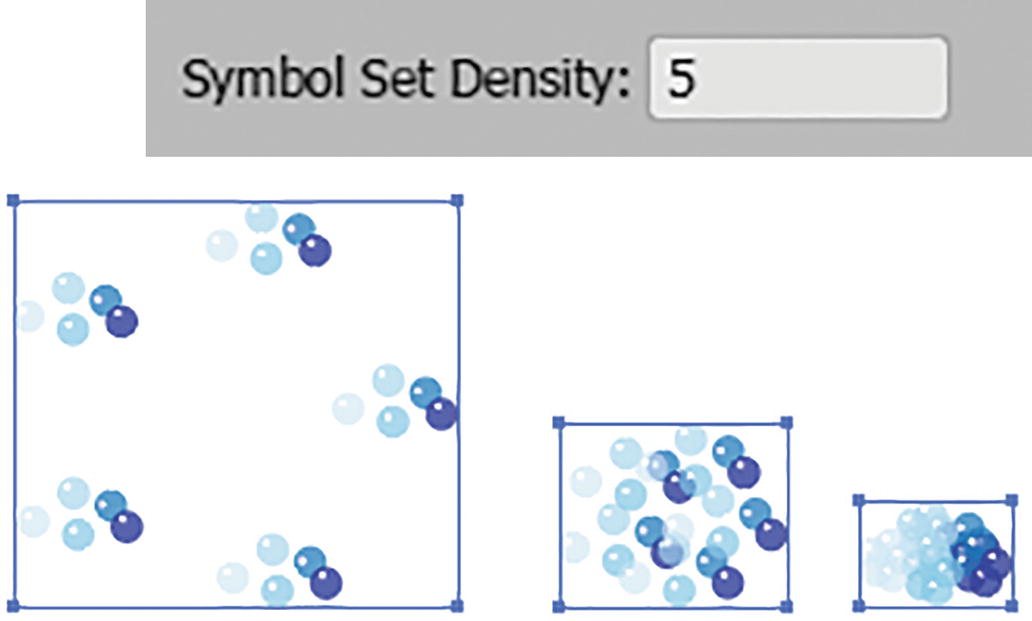
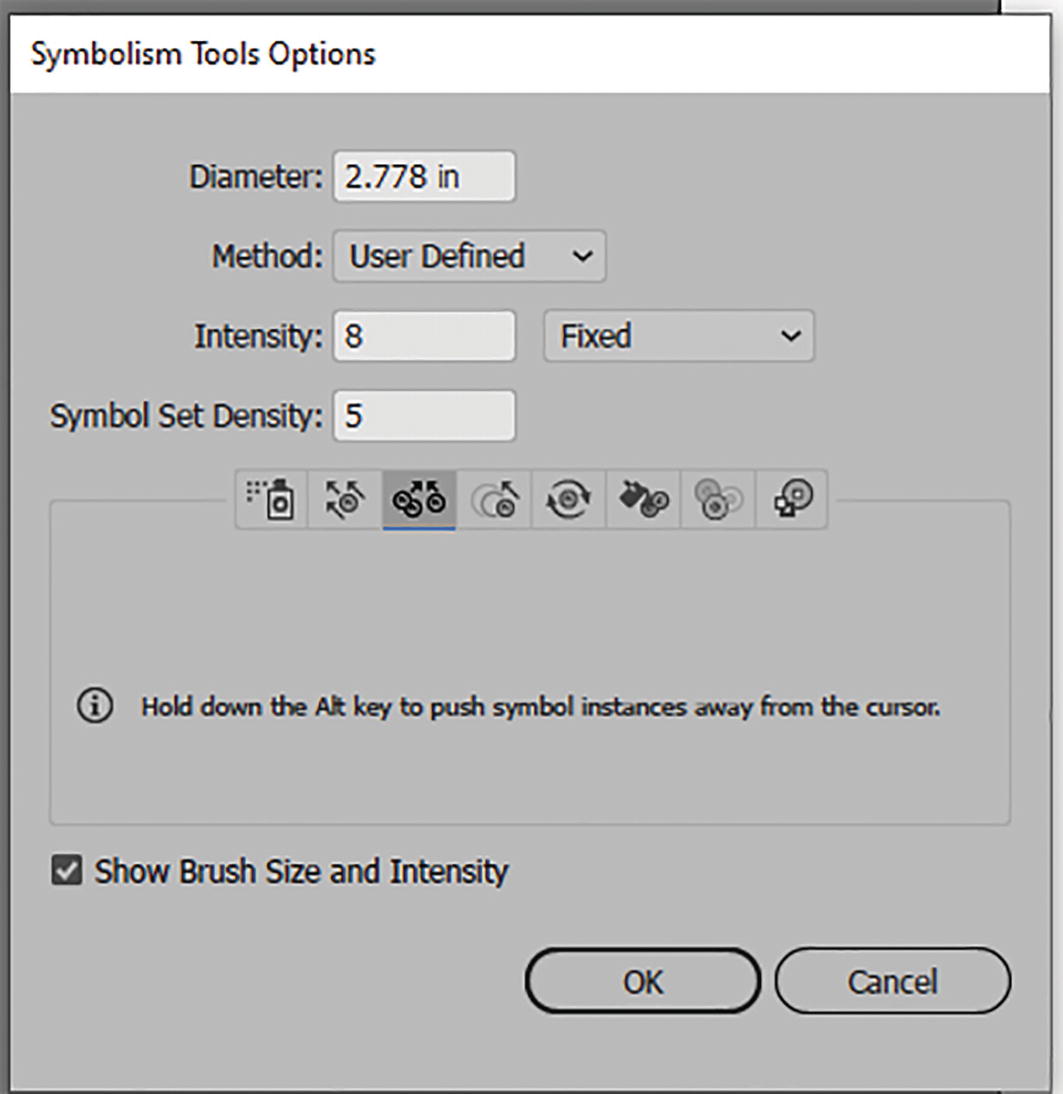
Symbol Set Density: The range is 1–10 with a default of 5. This is used to set the number of symbols that will appear and how close together they will be when sprayed. A lower number spreads the symbols apart, while a higher number clumps the symbols closer together. The settings update when you click OK to exit the dialog box. I left my settings at 5. Refer to Figure 12-15.
Figure 12-15
Symbol Set Density and effect of various settings on the symbols
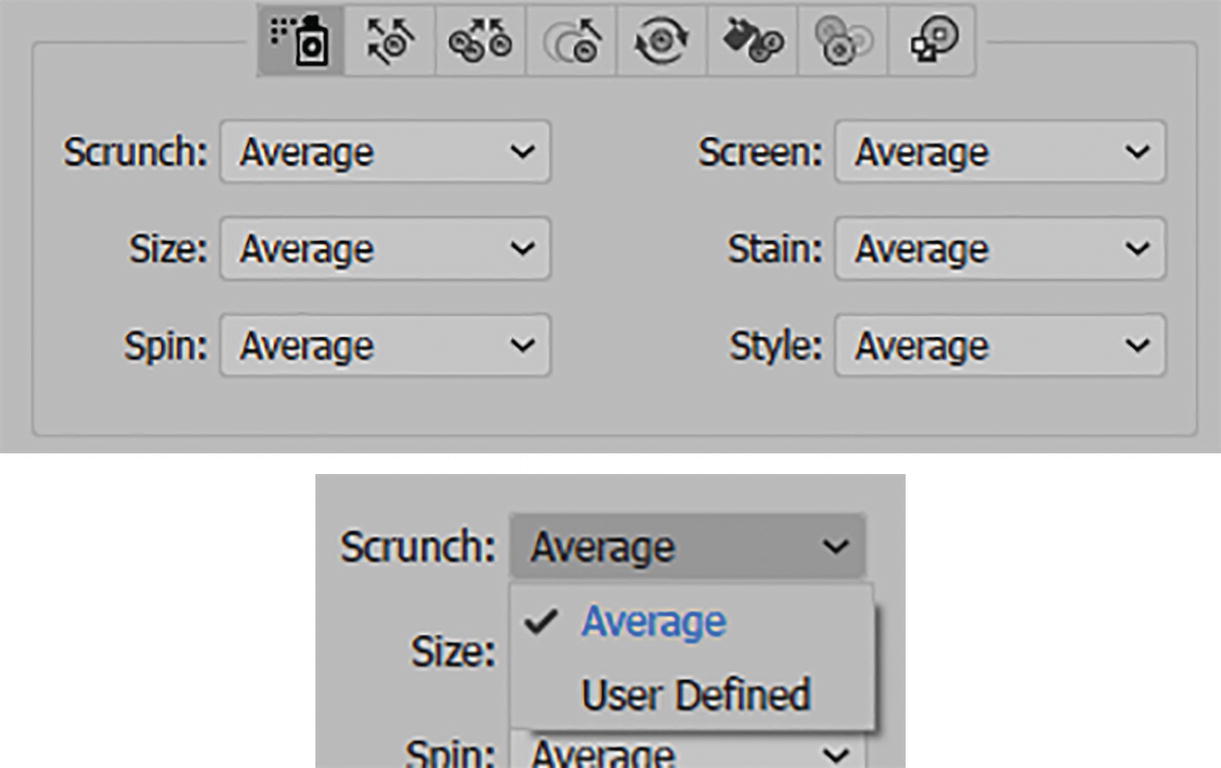
The next section is for the Symbol Sprayer, but this area controls the other symbolism tools as well.
Currently, you are on the Symbol Sprayer tab. But you can set here the Scrunch, Screen, Size, Stain, Spin, and Style tools. Currently, they are all set to Average. Alternatively, you can set them all to User Defined. Leave on the setting of Average for now. Refer to Figure 12-16.
Figure 12-16
Symbol Sprayer options and settings of Average and User Defined
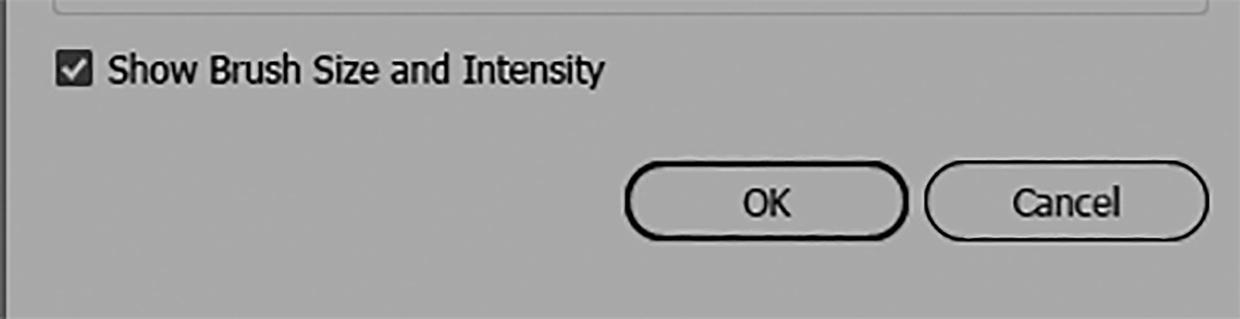
The last setting in the dialog box is Show Brush Size and Intensity. Keep the checkbox enabled and click OK to exit the dialog box for now. Refer to Figure 12-17.
Figure 12-17
Symbolism Tool Options dialog box setting for Show Brush Size and Intensity, and OK and Cancel buttons
To delete symbol instances, hold down Alt/Option as you click or drag where you want to reduce and remove instances. Refer to Figure 12-18.
Figure 12-18
Using the Symbol Sprayer tool to remove some symbols
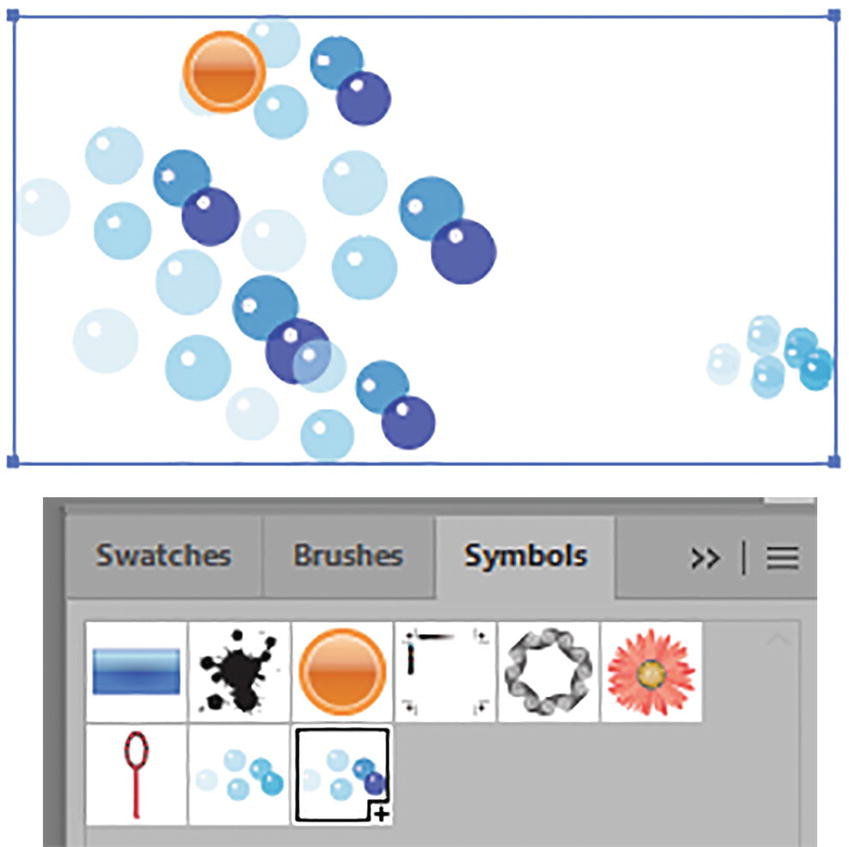
Whether you use the static or dynamic symbol, it does not appear that you can use the Direct Selection tool to recolor individual symbols, as they are now part of a set. Refer to Figure 12-19.
Figure 12-19
You cannot recolor parts of dynamic symbols that are part of a symbol set
However, you can switch to the other static bubble symbol and use the Symbol Sprayer, and that becomes part of the symbol set as well. Refer to Figure 12-20.
Figure 12-20
Adding additional symbols to the symbol set
To make it part of a new set, you need to click with the Selection tool in another location to deselect the old set and then use the Symbol Sprayer tool in a new location. Refer to Figure 12-21.
Figure 12-21
Starting a new symbol set by deselecting with the Selection tool and spraying with Symbol Sprayer
With the Selection tool, just like with symbols, sets can be scaled, rotated, and sheared using the Transform panel, as mentioned in Chapter 3. Refer to Figure 12-22.
Figure 12-22
The symbol set can be scaled and rotated
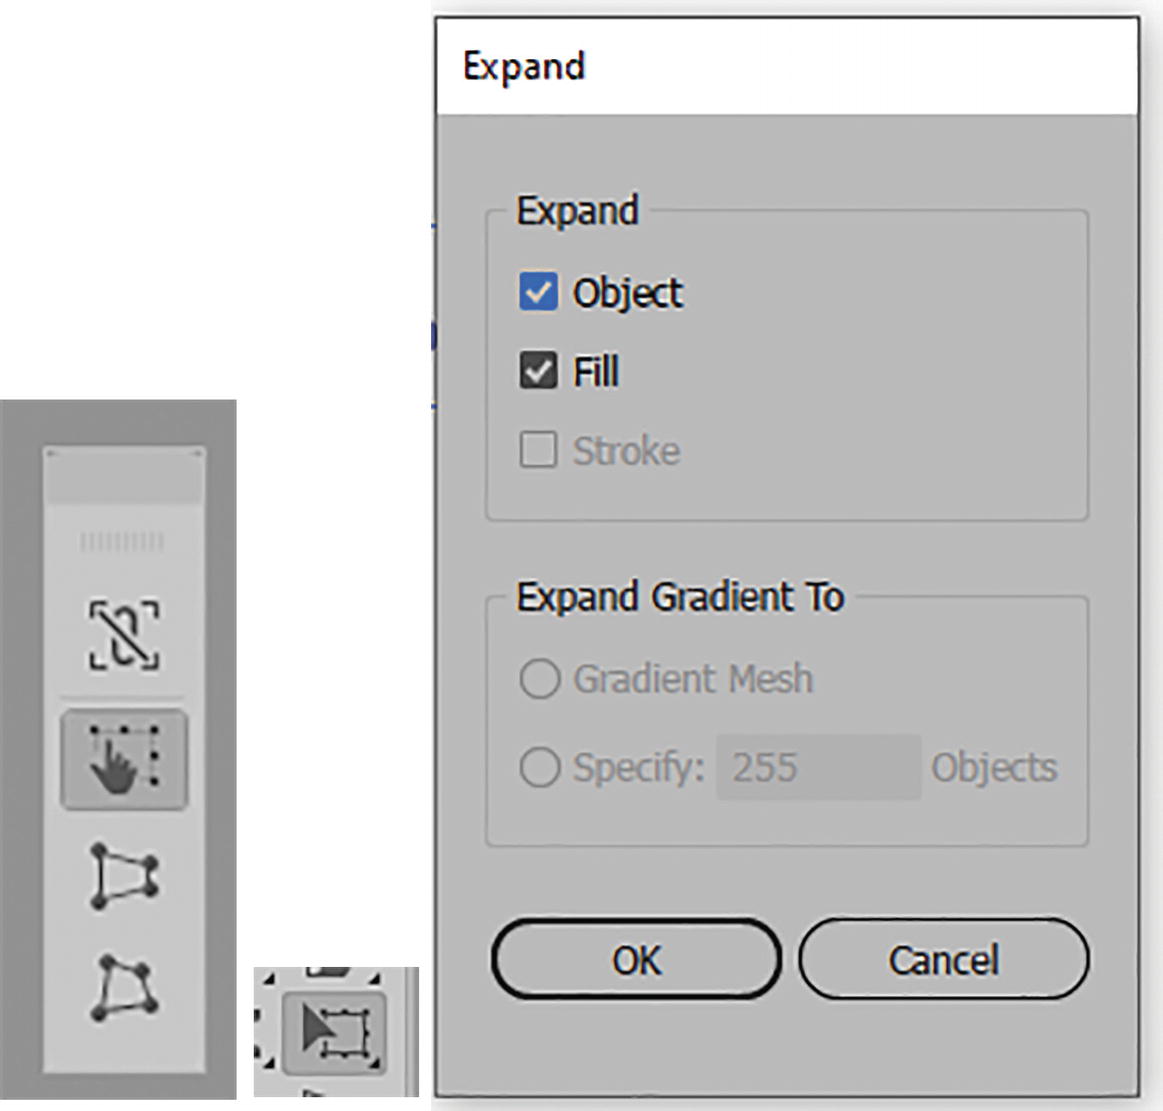
However, to use some of the other sub-tools in the Free Transform tool of Perspective Distort and Free Distort, you will need to turn the symbol set into a group object. To do that, break the link using Object ➤ Expand twice: first, to break the symbol set into individual symbols, and then to turn it into a group. Refer to Figure 12-23.
Figure 12-23
Symbol sets need to be expanded before you can use some Free Transform sub-tools
Use your Selection tool and Alt/Option key to drag a copy. Or, when a symbol set is selected, you can press the Backspace/Delete key to delete the set. Refer to Figure 12-24.
Figure 12-24
Create copies of your symbol sets
Use Edit ➤ Undo, Ctrl/CMD+Z, or the History panel if you need to undo any steps or states.
Symbol Shifter Tool
Once you have a symbol set created with the Symbol Sprayer tool and selected with the Selection tool, you can then use the Symbol Shifter tool. Refer to Figure 12-25.
Figure 12-25
Toolbars panel Symbol Shifter tool
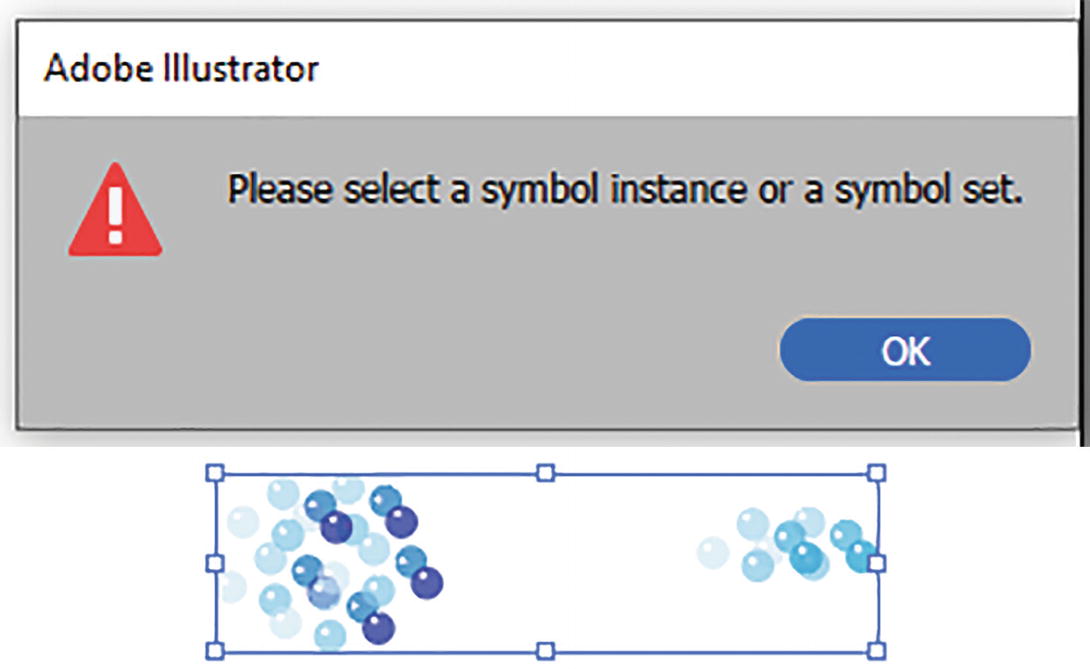
If the symbol or symbol set is not selected first, you will get the following alert message. Click OK and select a symbol or symbol set on the Artboard. Refer to Figure 12-26.
Figure 12-26
A symbol set must be selected, or you will get an alert message
With this tool, when you drag, you can move or shift the symbols in the direction that you want. In this case, I dragged upward. Refer to Figure 12-27.
Figure 12-27
Shift the symbols in another direction
Even though not all of my symbols were within the brush, because they were part of a set, they moved along with the other symbols within the diameter of the Symbol Shifter. Refer to Figure 12-28.
Figure 12-28
Shifting symbols inside and outside of the brush area of the Symbol Shifter tool
As with the Symbol Sprayer tool, to look at the options I double-clicked on the tool in the Toolbars panel.
Most of the settings—Diameter, Method, Intensity, and Symbol Density—are the same for this tool as for the Symbol Sprayer. So, you can refer to that tool for more details. I will just point out that the dialog box has a few info suggestions for using the tool. Click OK to exit. Refer to Figure 12-29.
Figure 12-29
Symbolism Tool Options dialog box with Symbol Shifter settings
Outside the dialog box, while dragging the tool, hold down the Shift key to bring symbol instances forward, or hold down the Shift+ Alt/Option keys to send symbol instances backward. Refer to Figure 12-30.
Figure 12-30
Moving instances forward and backward in the symbol set
If the symbols are of a similar color, this may not be overly apparent.
However, if different symbols are of the same set, then while that symbol is selected in the Symbols panel, you can shift that symbol up or down in the set as you hold down the Shift key. In this case, I added my symbol Illuminated Orange to the symbol set with the Symbol Sprayer tool, and then used the Symbol Shifter tool with the various mentioned key commands to move it up and down while shifting. Refer to Figure 12-31.
Figure 12-31
You can see symbols that move forward or backward with the Symbol Shifter tool in the set when they are of a different shape and are selected in the Symbols panel
Symbol Scruncher Tool
The next tool you can use, while the symbol set is selected, is the Symbol Scruncher tool. Refer to Figure 12-32.
Figure 12-32
Toolbars panel Symbol Scruncher tool
This tool allows you to drag or move closer the other symbol instances of the symbol that you selected in the Symbols panel on the Artboard. Refer to Figure 12-33.
Figure 12-33
Selected symbols move closer together with the Symbol Scruncher tool
As with the Symbol Sprayer tool, to look at the options, double-click on the tool in the Toolbars panel.
Most of the settings—Diameter, Intensity, and Symbol Set Density—are the same for this tool as for the Symbol Sprayer. So, you can refer to that tool for more details. However, in this case you do have access to Method. It currently is set to User Defined, but you can set it to Average or Random. I will just point out that the dialog box has an info suggestion for using the tool. Click OK to exit. Refer to Figure 12-34.
Figure 12-34
Symbolism Tool Options dialog box with Symbol Scruncher settings
Outside the dialog box, while dragging, hold down the Alt/Option key to push the symbol instances away from the cursor. This spreads the selected symbols farther apart. Refer to Figure 12-35.
Figure 12-35
Selected symbols move farther away from each other with the Symbol Scruncher tool and key commands
Symbol Sizer Tool
The next tool you can use, while the symbol set is selected, is the Symbol Sizer tool. Refer to Figure 12-36.
Figure 12-36
Toolbars panel Symbol Sizer tool
This tool, as you hold down the mouse will size the symbol instances selected in the Symbols panel. In this case, they became larger and will vary in size if closer to the center of the brush. Refer to Figure 12-37.
Figure 12-37
Making the selected symbol bubbles bigger with the Symbol Sizer tool
As with the Symbol Sprayer tool, to look at the options, double-click on the tool in the Toolbars panel.
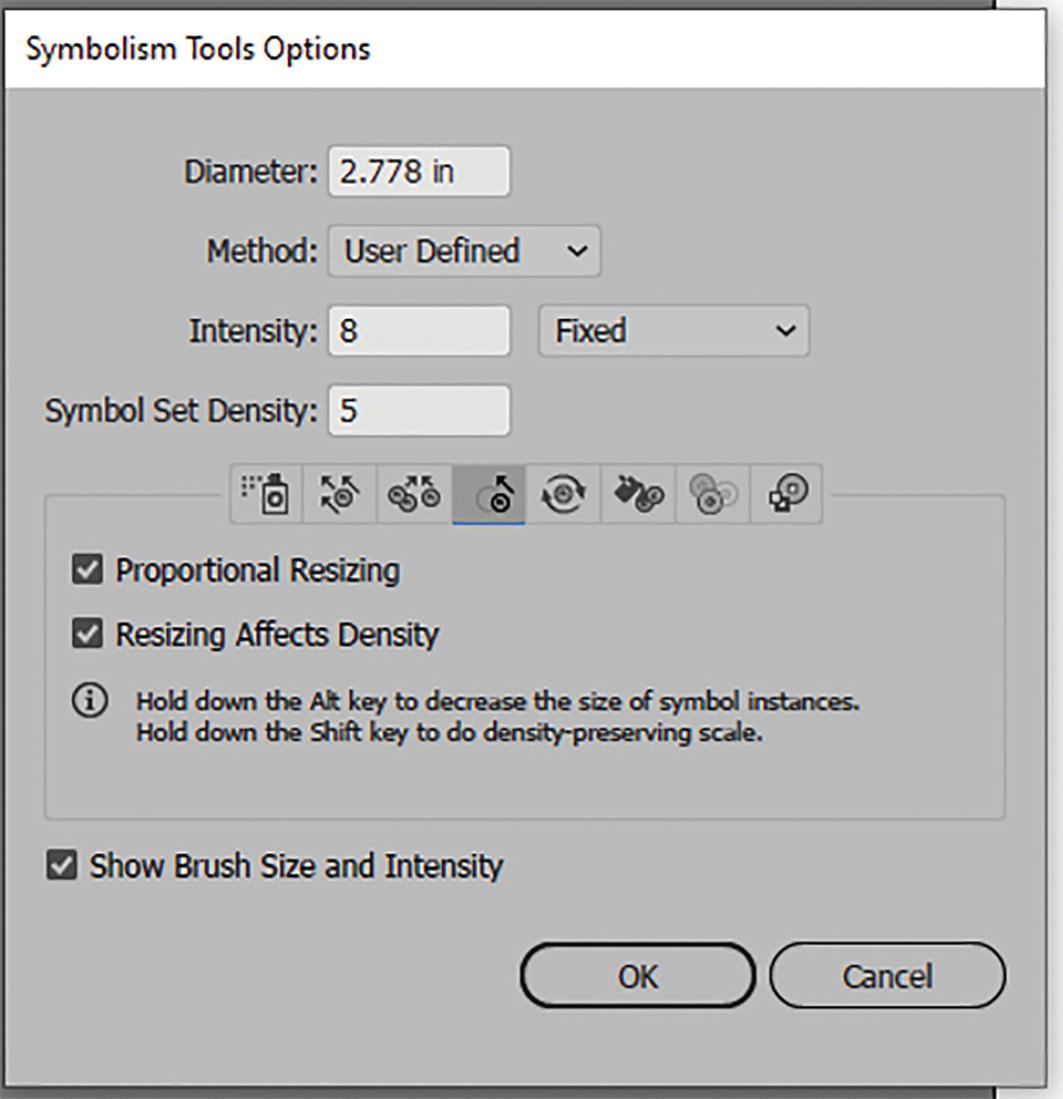
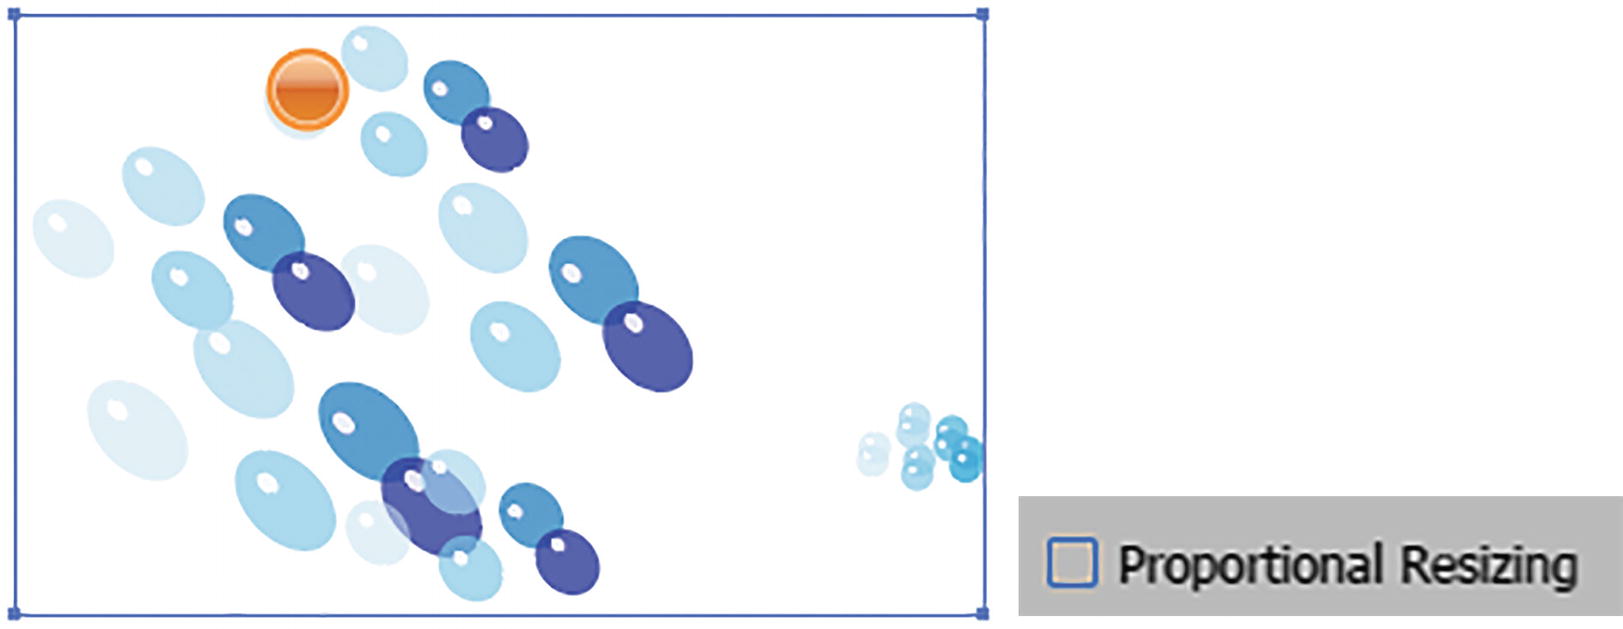
Most of the settings—Diameter, Intensity, and Symbol Set Density—are the same for this tool as for the Symbol Sprayer. So, you can refer to that tool for more details. However, in this case you do have access to Method, which currently is set to User Defined, but you can set it to Average or Random. I will just point out that the dialog box has additional settings for Proportional Resizing and Resizing Affects Density. Both these settings are enabled. Also, there are info suggestions for using the tool. Click OK to exit. Refer to Figure 12-38.
Figure 12-38
Symbolism Tool Options dialog box with Symbol Sizer settings
If you disabled Proportional Resizing, then you can stretch the shapes as you size. Refer to Figure 12-39.
Figure 12-39
Bubbles are stretched when Proportional Resizing is deselected before using the Symbol Sizer tool
Disabling the Resizing Affects Density option will cause the bubbles to randomly resize as you hold down the mouse key, and also affects the density, or closeness. Refer to Figure 12-40.
Figure 12-40
Bubbles’ density is affected when Resizing Affects Density is deselected before using the Symbol Sizer tool
By default, these settings are enabled. However, if some of these settings have been previously altered it may affect new symbols that are added that are near ones that have been already resized.
On the Artboard, while dragging, hold down the Alt/Option key to decrease the size of the selected symbol instances. Or, hold down the Shift key to perform density-preserving scaling. This affects the currently selected symbol instances. Holding down the Shift + Alt/Option keys makes the bubbles spread out or in other cases clump and become very tiny. Refer to Figure 12-41.
Figure 12-41
Using different key commands while using the Symbol Sizer tool can affect what happens to the selected symbol, making it smaller or reducing the density
Remember to use Edit ➤ Undo (Ctrl/CMD+Z) or the History panel as you work if you do not like certain sizing that the Symbol Sizer created.
Symbol Spinner Tool
The next tool you can use while the symbol set is selected is the Symbol Spinner tool. Refer to Figure 12-42.
Figure 12-42
Toolbars panel Symbol Spinner tool
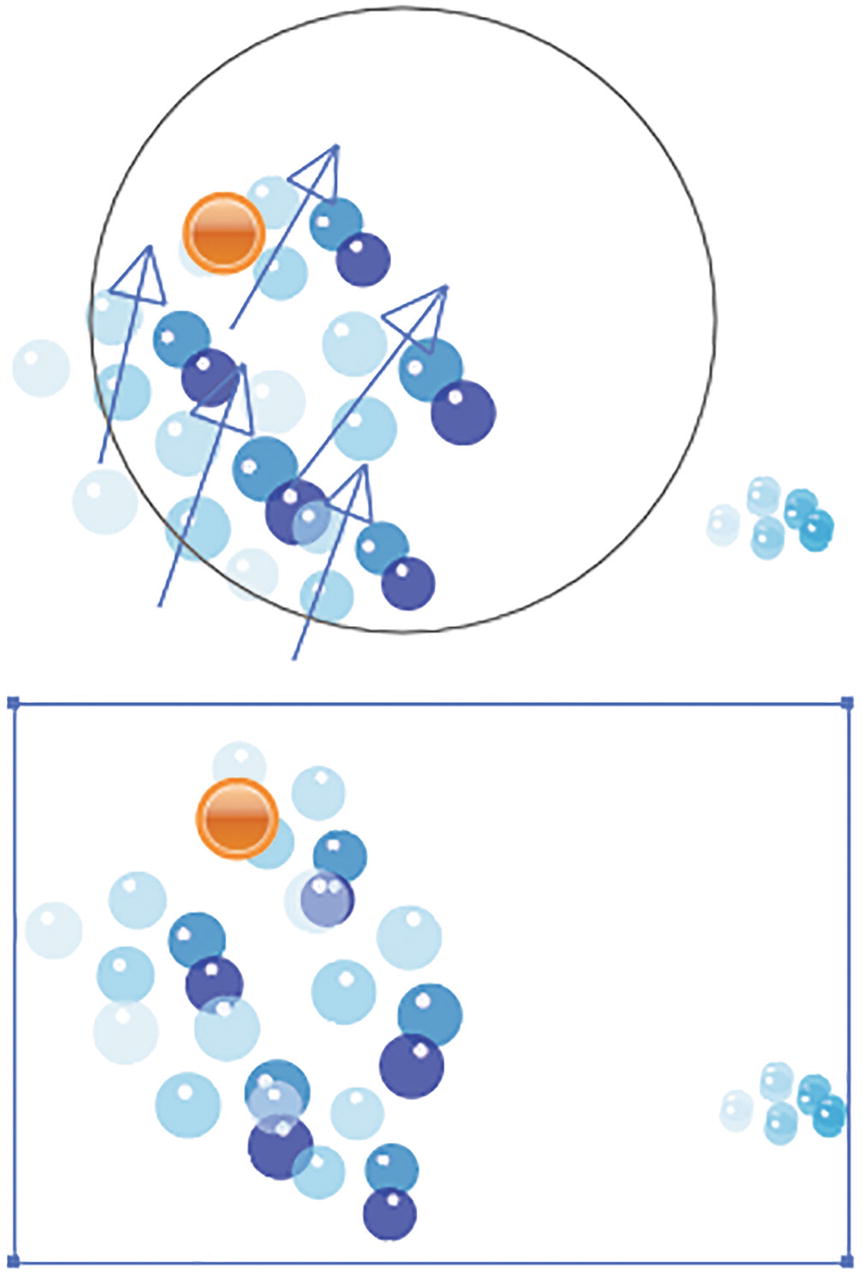
This tool allows the selected symbol instances, from the Symbols panel, to spin in the direction you drag when you hold down the mouse key. This is made clear by the way the preview arrows are pointing. As you drag the brush away from some of the symbols, and they end up outside of the brush area, they do not spin. When you release the mouse, the spin is complete. Refer to Figure 12-43.
Figure 12-43
You can spin the symbols that are inside the area of the Symbol Spinner brush
As with the Symbol Sprayer tool, to look at the options, double-click on the tool in the Toolbars panel.
Most of the settings—Diameter, Intensity, and Symbol Set Density—are the same for this tool as for the Symbol Sprayer. So, you can refer to that tool for more details. However, in this case you do have access to Method. Currently, it is set to User Defined, but you can set it to Average or Random. I will just point out that in the dialog there are no additional info settings for keyboard shortcuts. Click OK to exit. Refer to Figure 12-44.
Figure 12-44
Symbolism Tool Options dialog box with Symbol Spinner settings
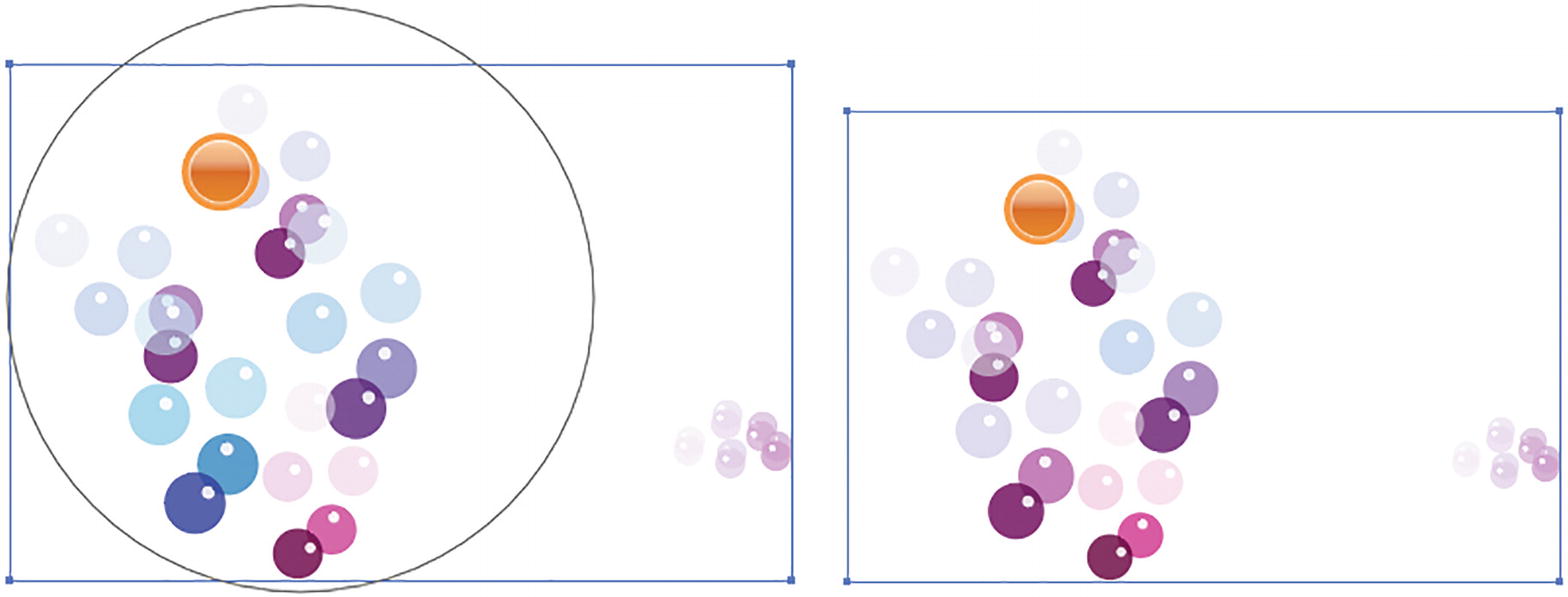
Symbol Stainer Tool
The next tool you can use while the symbol set is selected is the Symbol Stainer tool. Refer to Figure 12-45.
Figure 12-45
Toolbars panel Symbol Stainer tool
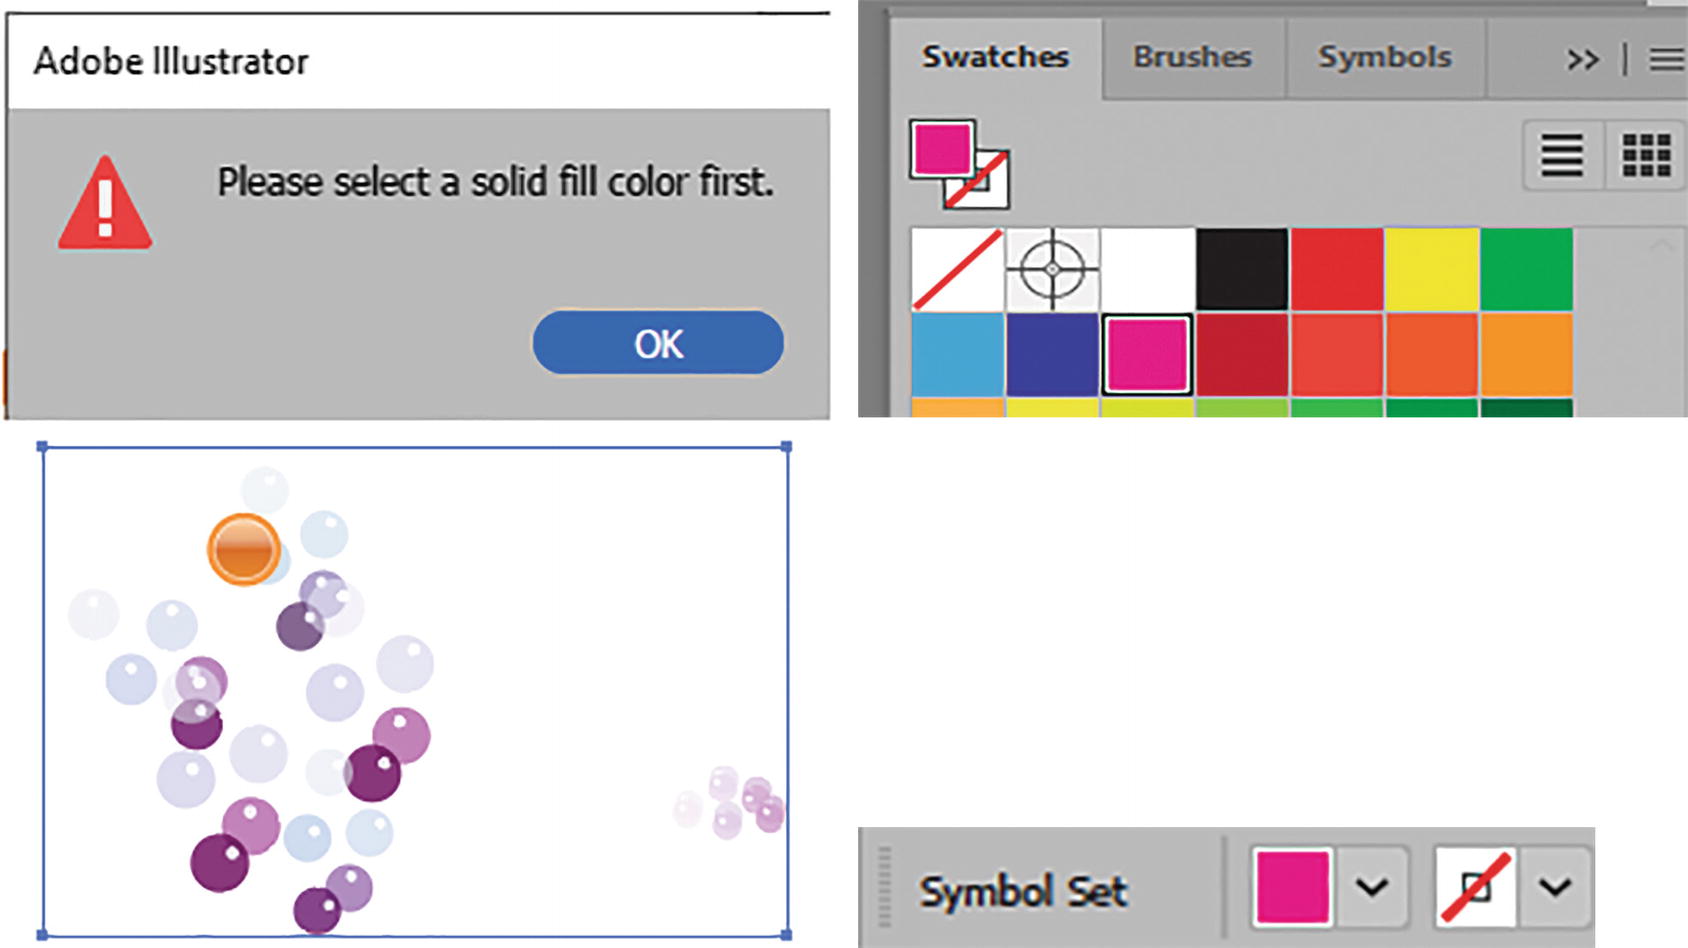
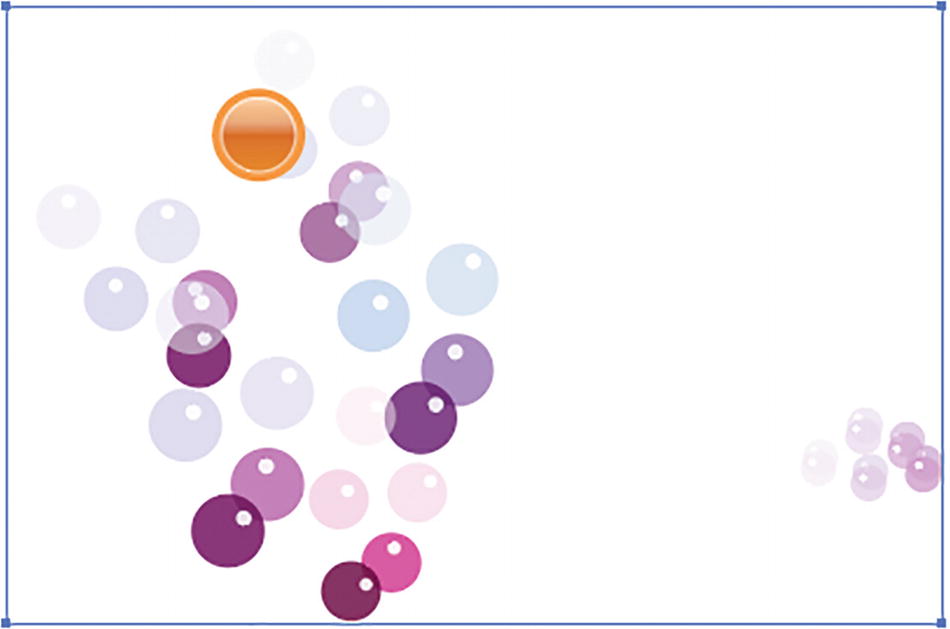
This tool can stain both dynamic and static symbols selected within the symbol set. When you click on them and hold down the mouse key, the stain tints or changes the overall hue, or color, while still preserving the overall luminosity. Refer to Figure 12-46.
Figure 12-46
Selected symbols are stained using the Symbol Stainer tool
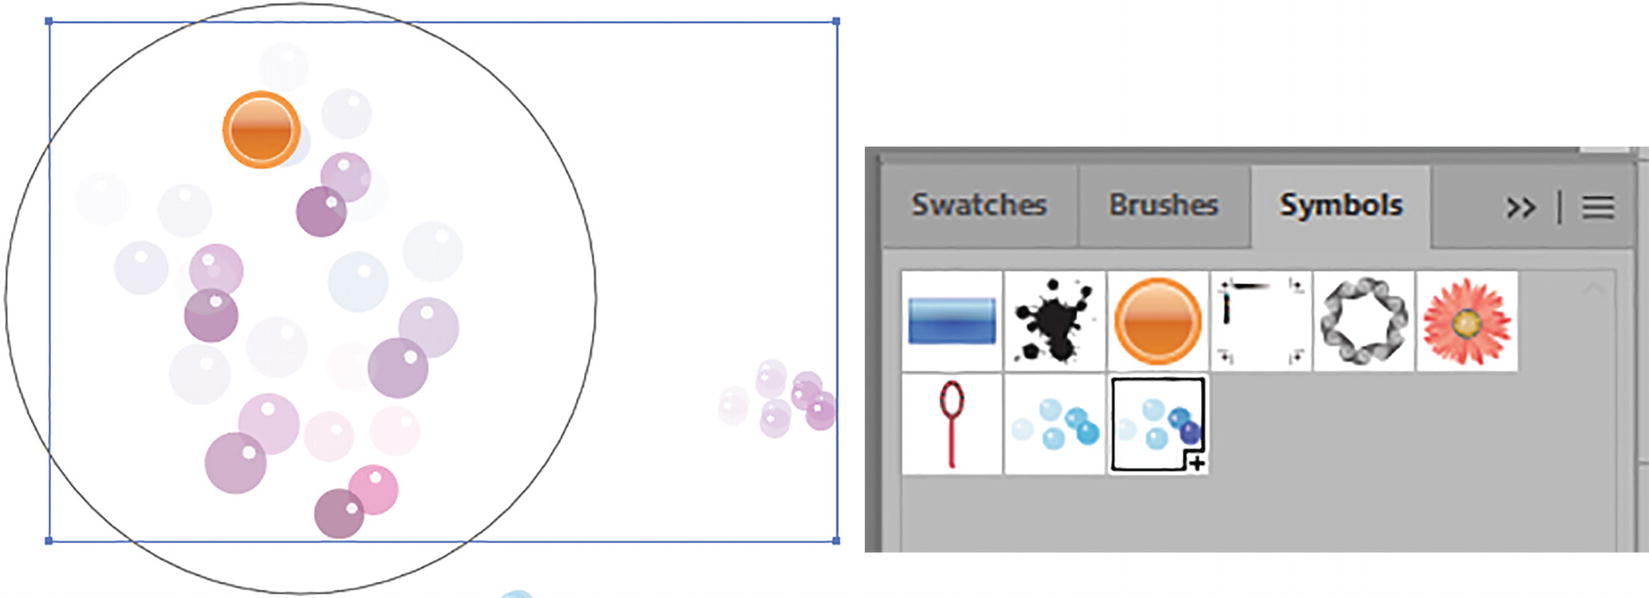
The stain is determined by a solid color that you choose first from the Swatches panel while using the tool. It does not appear, however, that you can stain the stroke separately, only the solid fill or, in this case, the symbol overall. You cannot use a gradient or a pattern to stain. Refer to Figure 12-47.
Figure 12-47
Set the stain using the Swatches panel and select a solid color; then, it appears in the Control panel
As with the Symbol Sprayer tool, to look at the options, double-click on the tool in the Toolbars panel.
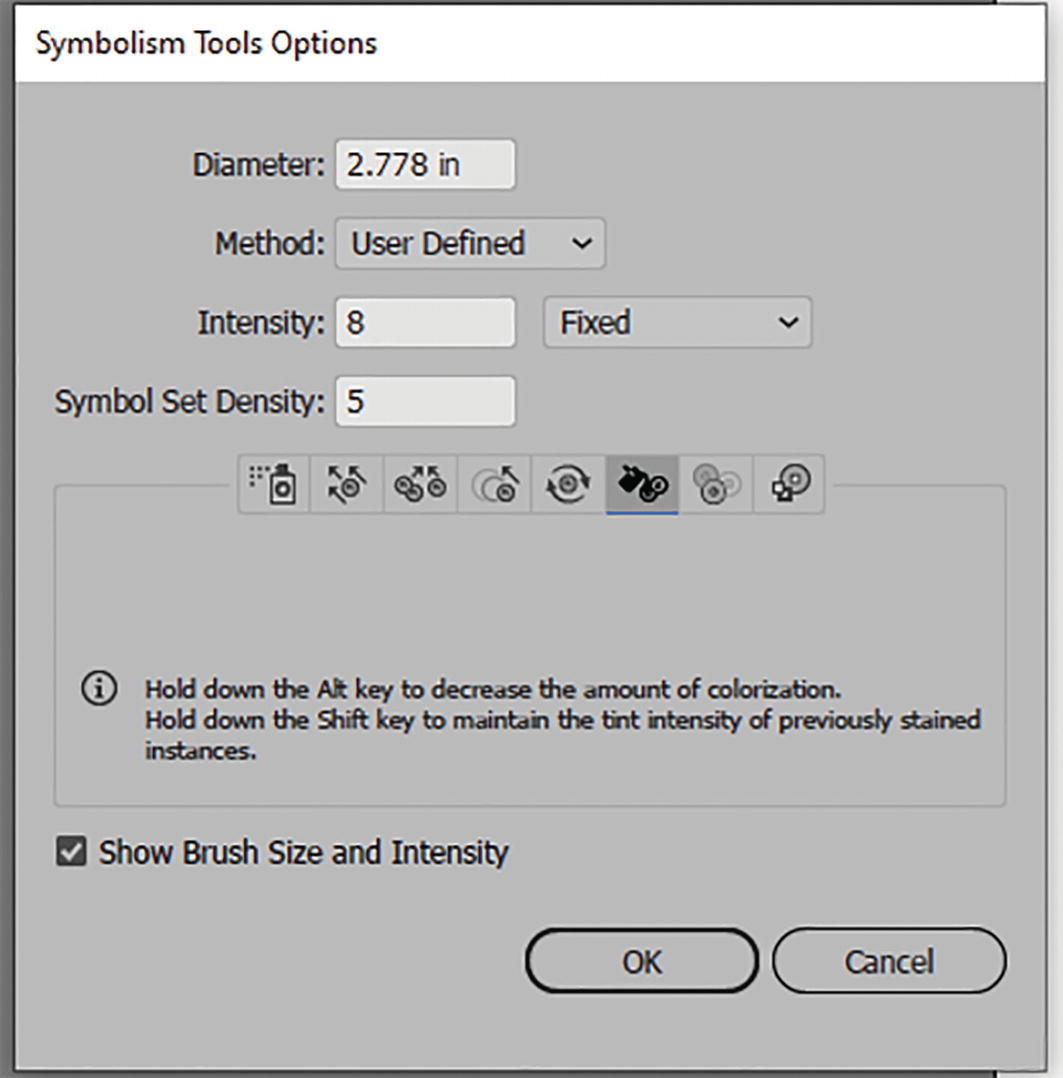
Most of the settings—Diameter, Intensity, and Symbol Set Density—are the same for this tool as for the Symbol Sprayer. So, you can refer to that tool for more details. However, in this case you do have access to Method. Currently, it is set to User Defined, but you can set it to Average or Random. I will just point out that in the dialog box there are a few additional info settings for keyboard shortcuts. Click OK to exit. Refer to Figure 12-48.
Figure 12-48
Symbolism Tool Options dialog box with Symbol Stainer settings
On the Artboard, while dragging, hold down the Alt/Option key to decrease the amount of colorization. Or, hold down the Shift key to maintain the tint intensity of the previously stained instances, while not staining other instances that have not been stained yet. This affects the currently selected symbol instances in the Symbols panel. Refer to Figure 12-49.
Figure 12-49
Using key combinations with the Symbol Stainer, you can reduce and increase the stain
Symbol Screener Tool
The next tool you can use while the symbol set is selected is the Symbol Screener tool. Refer to Figure 12-50.
Figure 12-50
Toolbars panel Symbol Screener tool
This tool fades the opacity of the symbol instances selected in the Symbols panel, making them more transparent. Refer to Figure 12-51.
Figure 12-51
The selected symbols fade when the Symbol Screener tool is used
As with the Symbol Sprayer tool, to look at the options, double-click on the tool in the Toolbars panel.
Most of the settings—Diameter, Intensity, and Symbol Set Density—are the same for this tool as for the Symbol Sprayer. So, you can refer to that tool for more details. However, in this case you do have access to Method. Currently, it is set to User Defined, but you can set it to Average or Random. I will just point out that in the dialog box there is additional info for a keyboard shortcut. Click OK to exit. Refer to Figure 12-52.
Figure 12-52
Symbolism Tool Options dialog box with Symbol Screener settings
On the Artboard, while dragging, hold down the Alt/Option key to decrease the transparency and return the selected bubbles back to their original state. Refer to Figure 12-53.
Figure 12-53
Using the key command to increase the opacity of the selected symbols
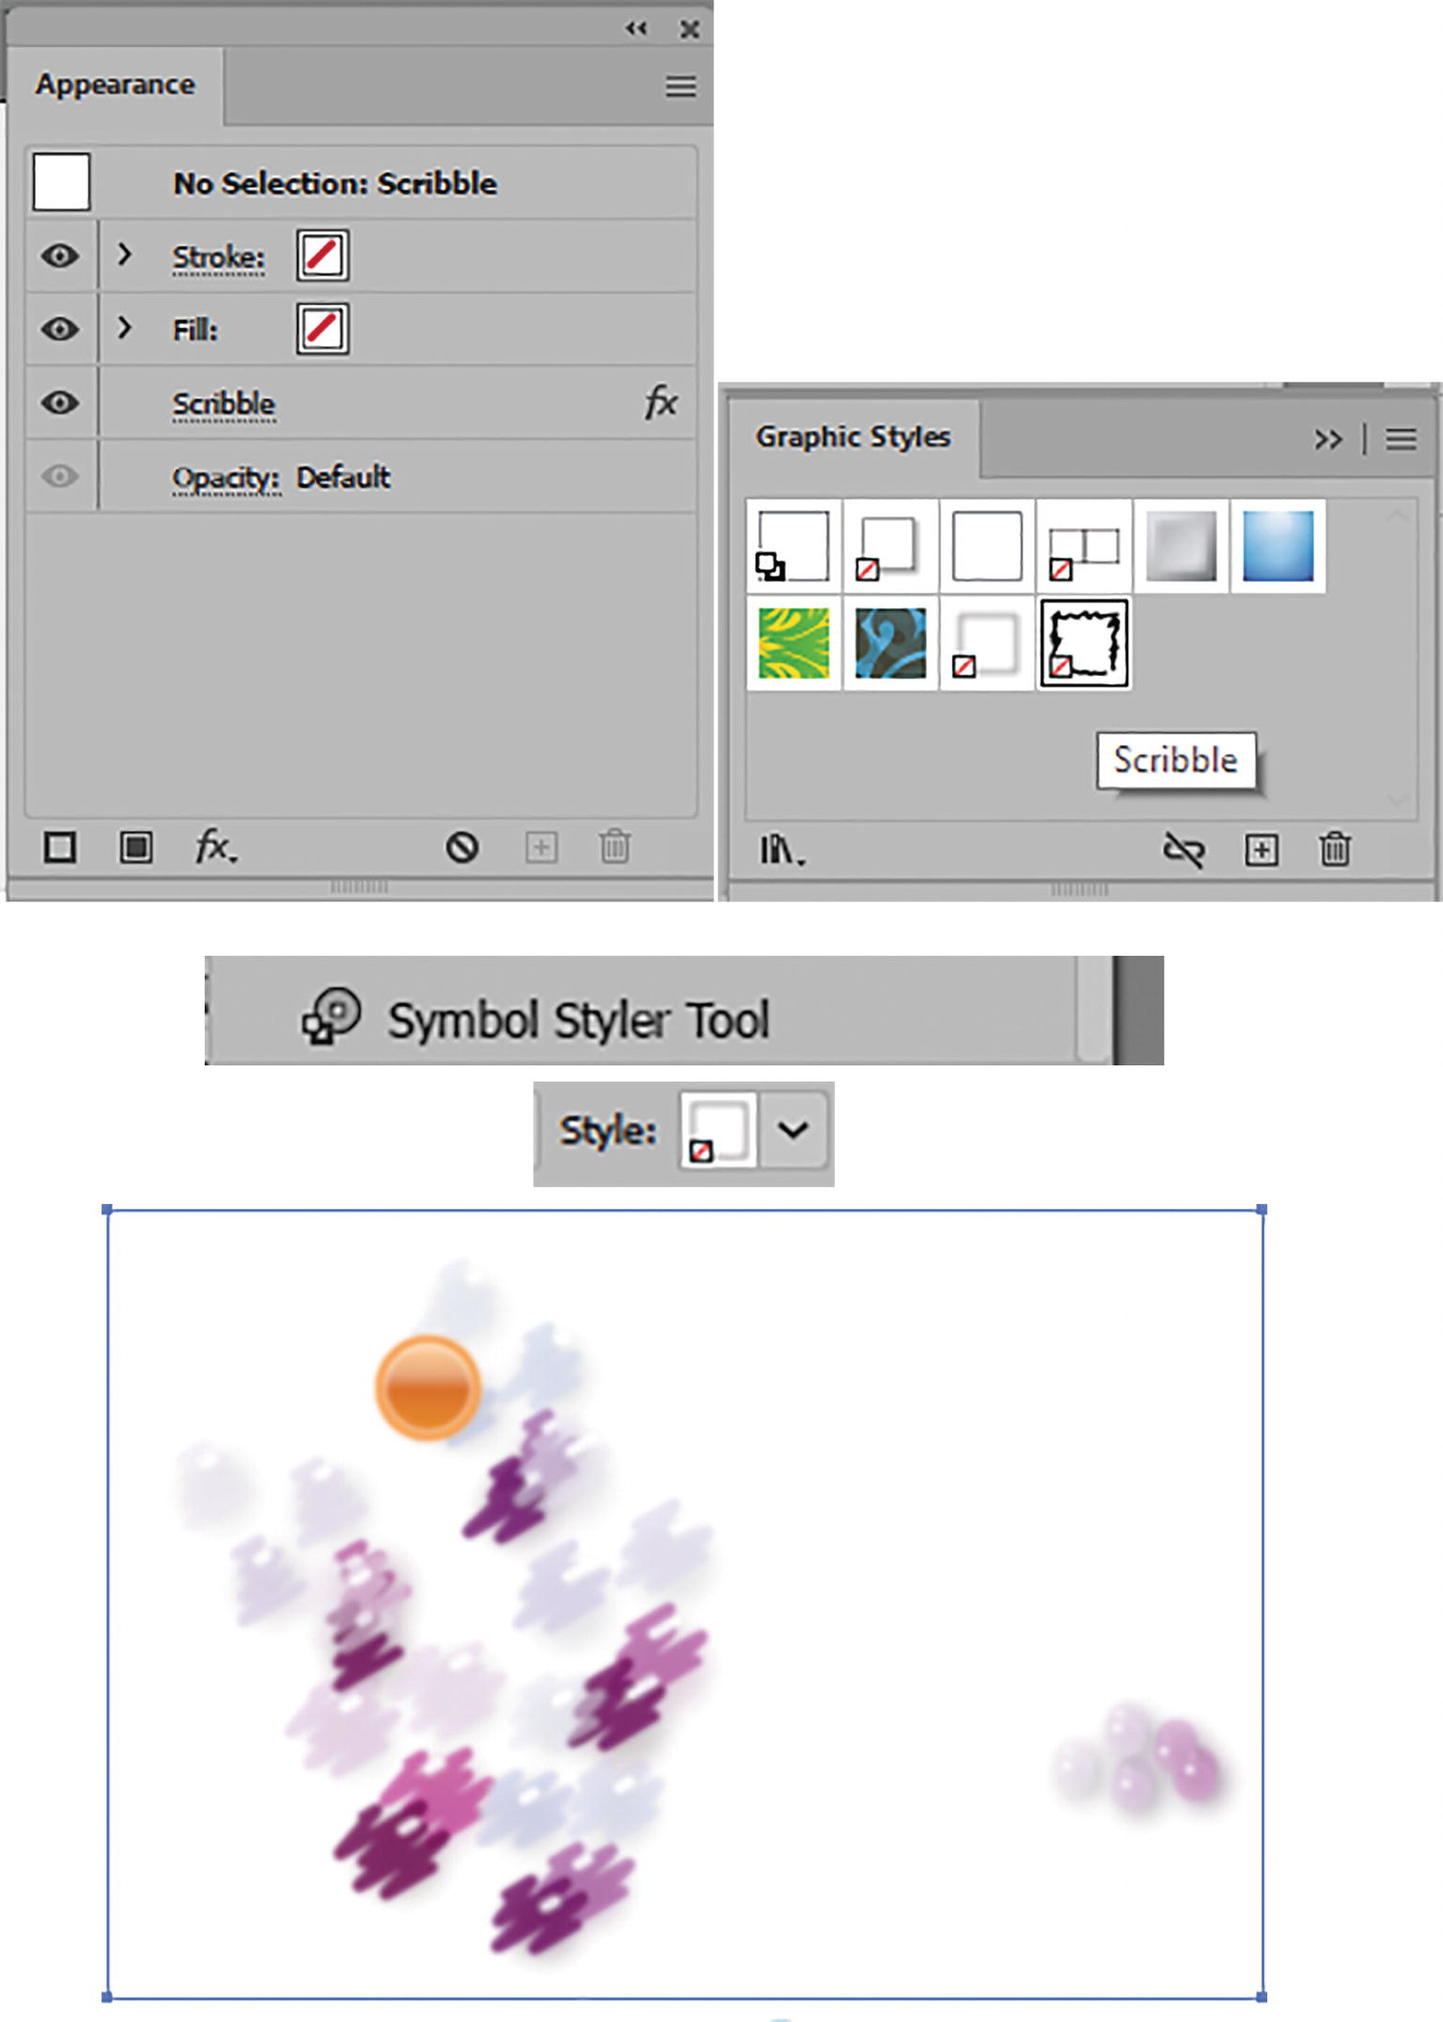
Symbol Styler Tool
The last tool you can use while the symbol set is selected is the Symbol Styler tool. Refer to Figure 12-54.
Figure 12-54
Toolbars panel Symbol Styler tool
This tool, before you can use it, requires that you select a graphic style from either the Graphic Styles panel or the Control panel, while you have a symbol instance selected in the Symbols panel. Refer to Figure 12-55.
Figure 12-55
You must select a graphic style from the Graphic Styles panel before you can use the Symbol Styler tool, or you will get an alert message. Then, select a symbol in the Symbols panel and view the graphic style from the Control panel
After you select a graphic style in the panel, you can start to use the tool. In this case, I tried drop shadow, but you can try any graphic style you like, or custom ones that you may have created in Chapter 11 when you used the Appearance panel. One graphic style can be applied, and then you can select another. Refer to Figure 12-56.
Figure 12-56
Use the Control panel to apply the style overall, or use the Symbol Styler tool for selected symbols
As with the Symbol Sprayer tool, to look at the options, double-click on the tool in the Toolbars panel.
Most of the settings—Diameter, Intensity, and Symbol Set Density—are the same for this tool as for the Symbol Sprayer. So, you can refer to that tool for more details. However, in this case you do have access to Method. Currently, it is set to User Defined, but you can set it to Average or Random. I will just point out that in the dialog box there are a few additional info settings for keyboard shortcuts. Click OK to exit. Refer to Figure 12-57.
Figure 12-57
Symbolism Tool Options dialog box with Symbol Styler settings
On the Artboard, while dragging, hold down the Alt/Option key to decrease the style intensity. Hold down the Shift key to maintain the style intensity of the previously styled instances. This does not style other instances that previously were not styled. Refer to Figure 12-58.
Figure 12-58
Use various key combinations to alter the style intensity of selected symbols in this example adding a drop shadow
Creating Graphic Styles for Symbols
Not all graphic styes are ideal to use on symbol sets. If you select one you do not like, then Edit ➤ Undo right away. Then, deselect the symbol set and, with your Selection tool, click off the symbol set and search for other options in your Graphic Style libraries. Refer to Figure 12-59.
Figure 12-59
Some graphic styles do not work well for all symbols, so before you search for more you need to deselect the symbol set and then search in the Graphic Styles library
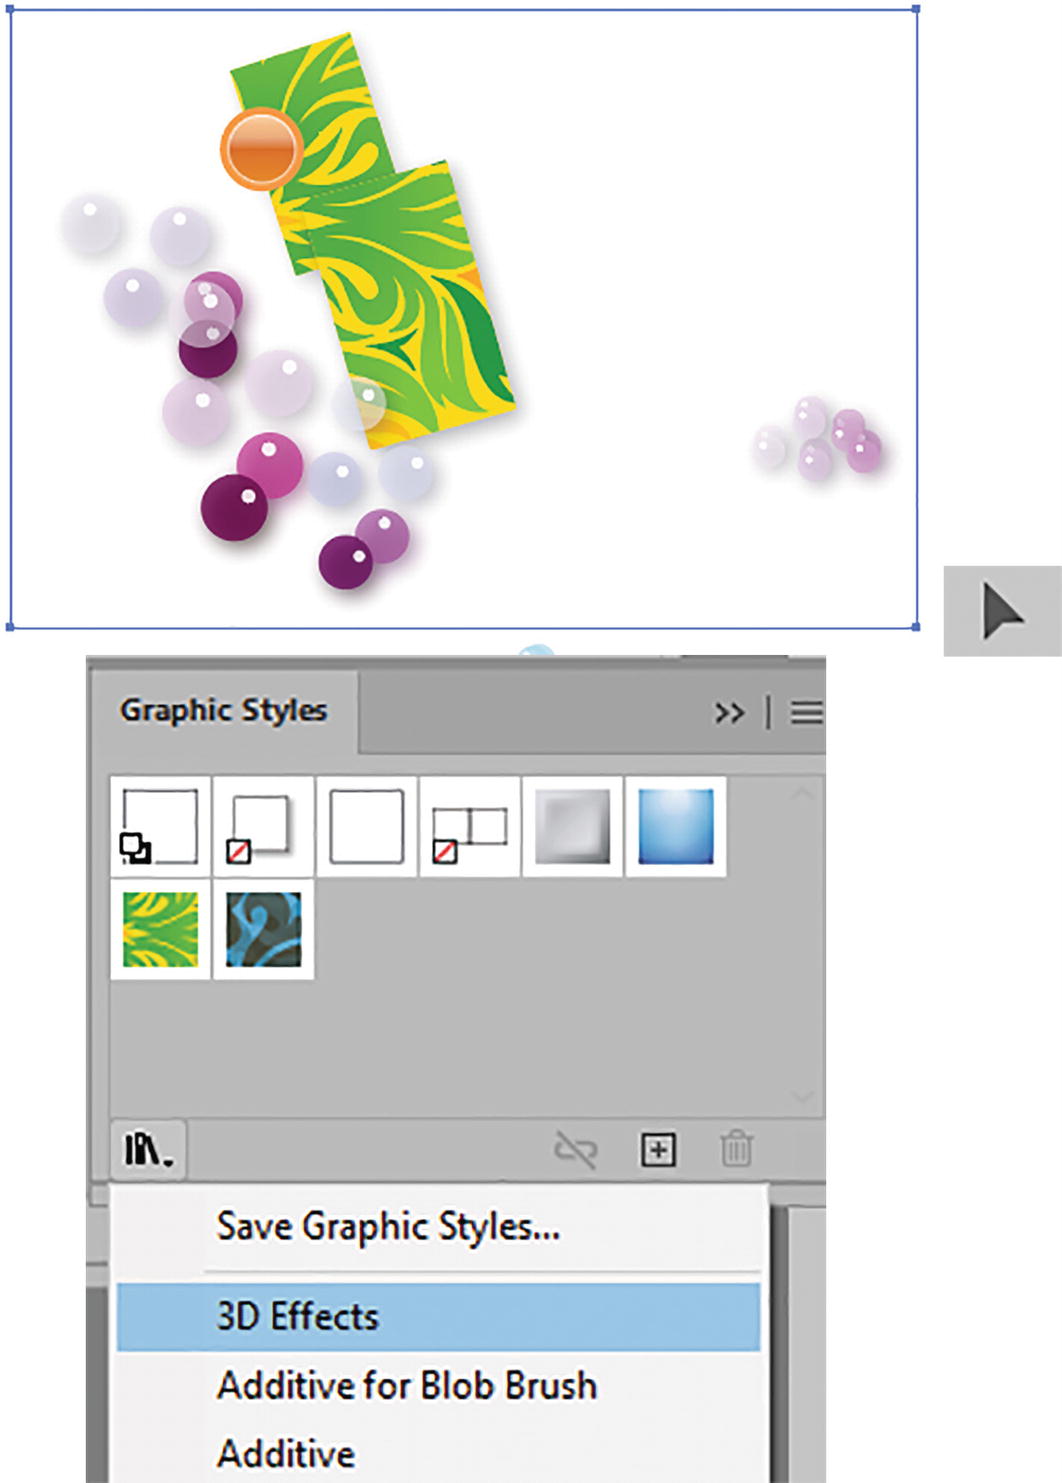
Ideally, for these kinds of symbols I find the ones with the red slash. In this case, I looked in the Additive for Blob Brush library. Click on one to add it to the panel. Refer to Figure 12-60.
Figure 12-60
A Graphic Styles library that is ideal for symbols, and then one of them added to the Graphic Styles panel
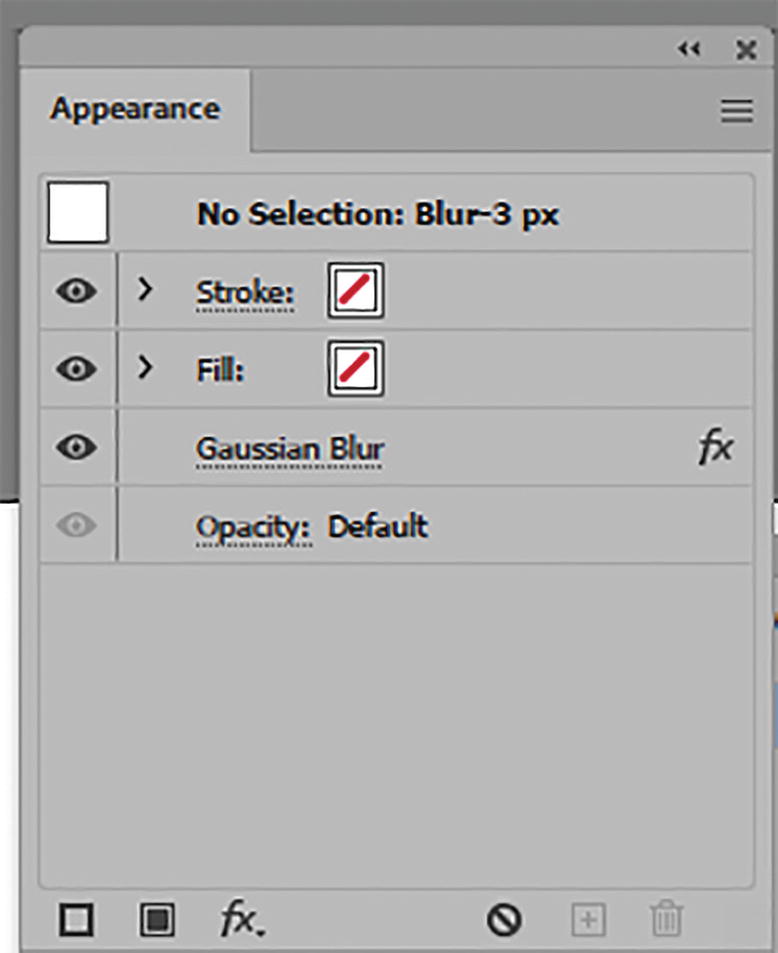
Graphic styles with a red slash generally indicate in the Appearance panel that they have no stroke or fill, only an effect, which can help you to avoid adding box-like shapes around circular items in your symbol set. Refer to Figure 12-61.
Figure 12-61
Current Graphic Style settings in the Appearance panel
The symbols in this case do have a fill, and so the drop shadow or blur effect becomes apparent. Refer to Figure 12-62.
Figure 12-62
The style in the Control panel and applied to the symbol set overall
This is a good way to build some of your graphic styles with no stroke or fill and just an effect. Then, save them in the Graphic Styles panel. Next, apply them, using the Control panel, to the selected symbol set or symbol overall, or use the Symbol Styler tool on certain symbols within the set. Refer to Figure 12-63.
Figure 12-63
Create your own effects in the Appearance panel, store them in the Graphics panel, and then use them with your Symbol Styler tool on selected symbols. View the settings in the Control panel
So, as you can see, once a symbol is part of a symbol set it does not matter if it is a static or a dynamic symbol. Instead, you can use the symbolism tools and the Graphic Styles panel to distort your symbols.
Save your work, and you then can look at my example, bubble_wand_final.ai.
For additional ideas on symbolism, you can visit this link:
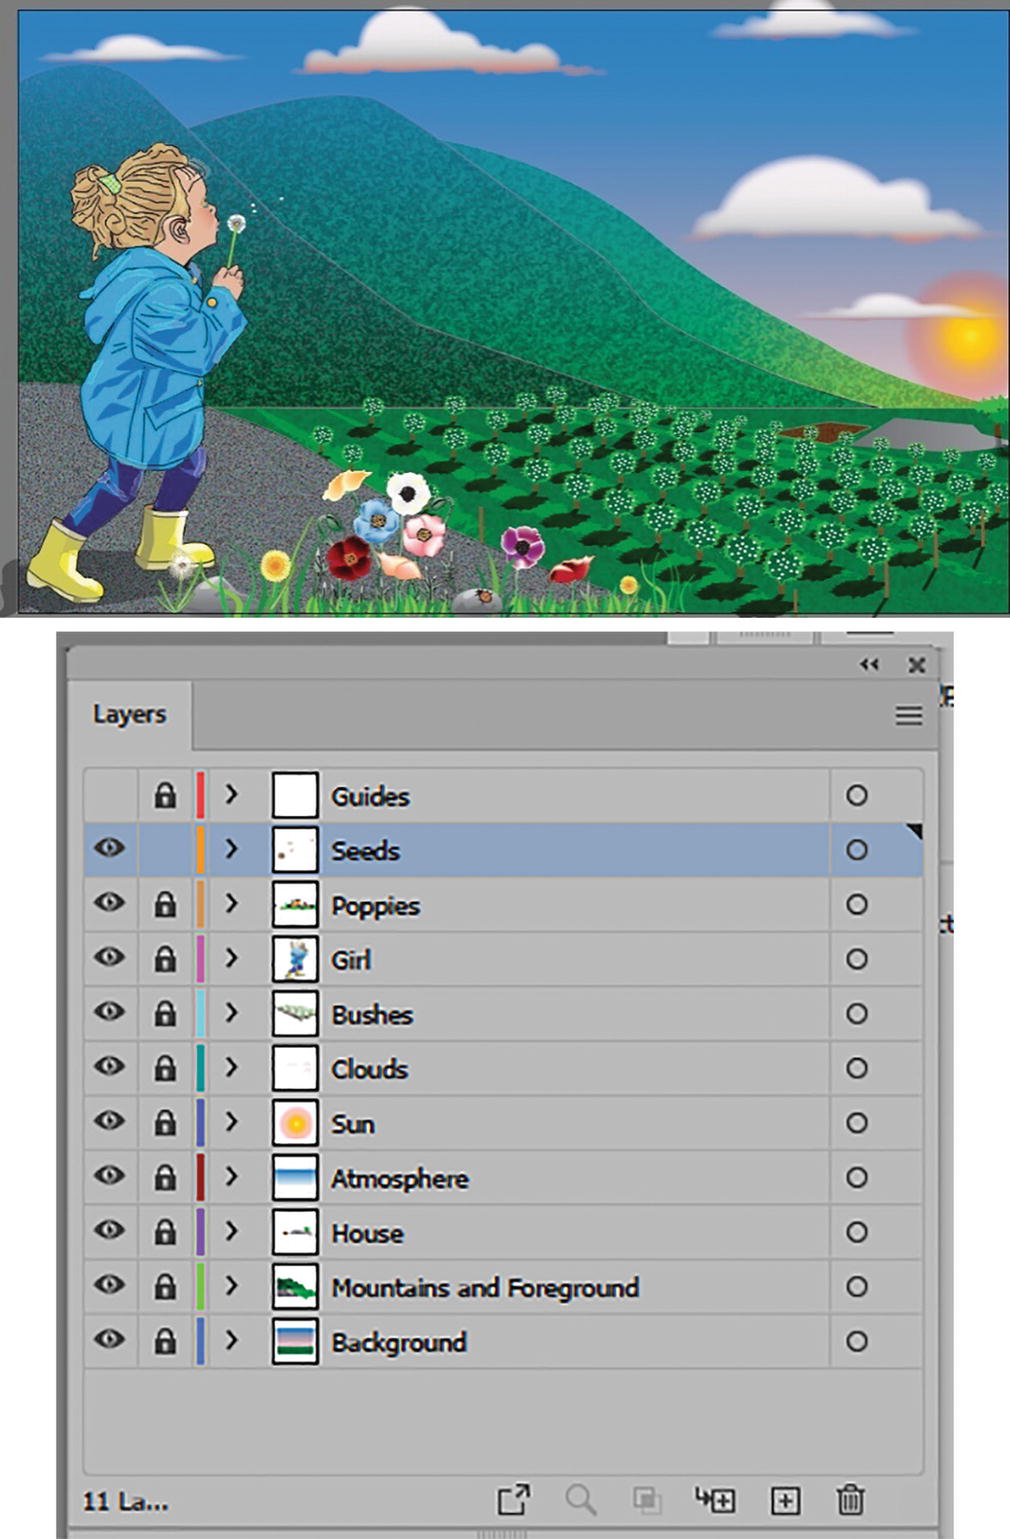
Project: Blowing in the Wind, Part 8: Dandelion Seeds
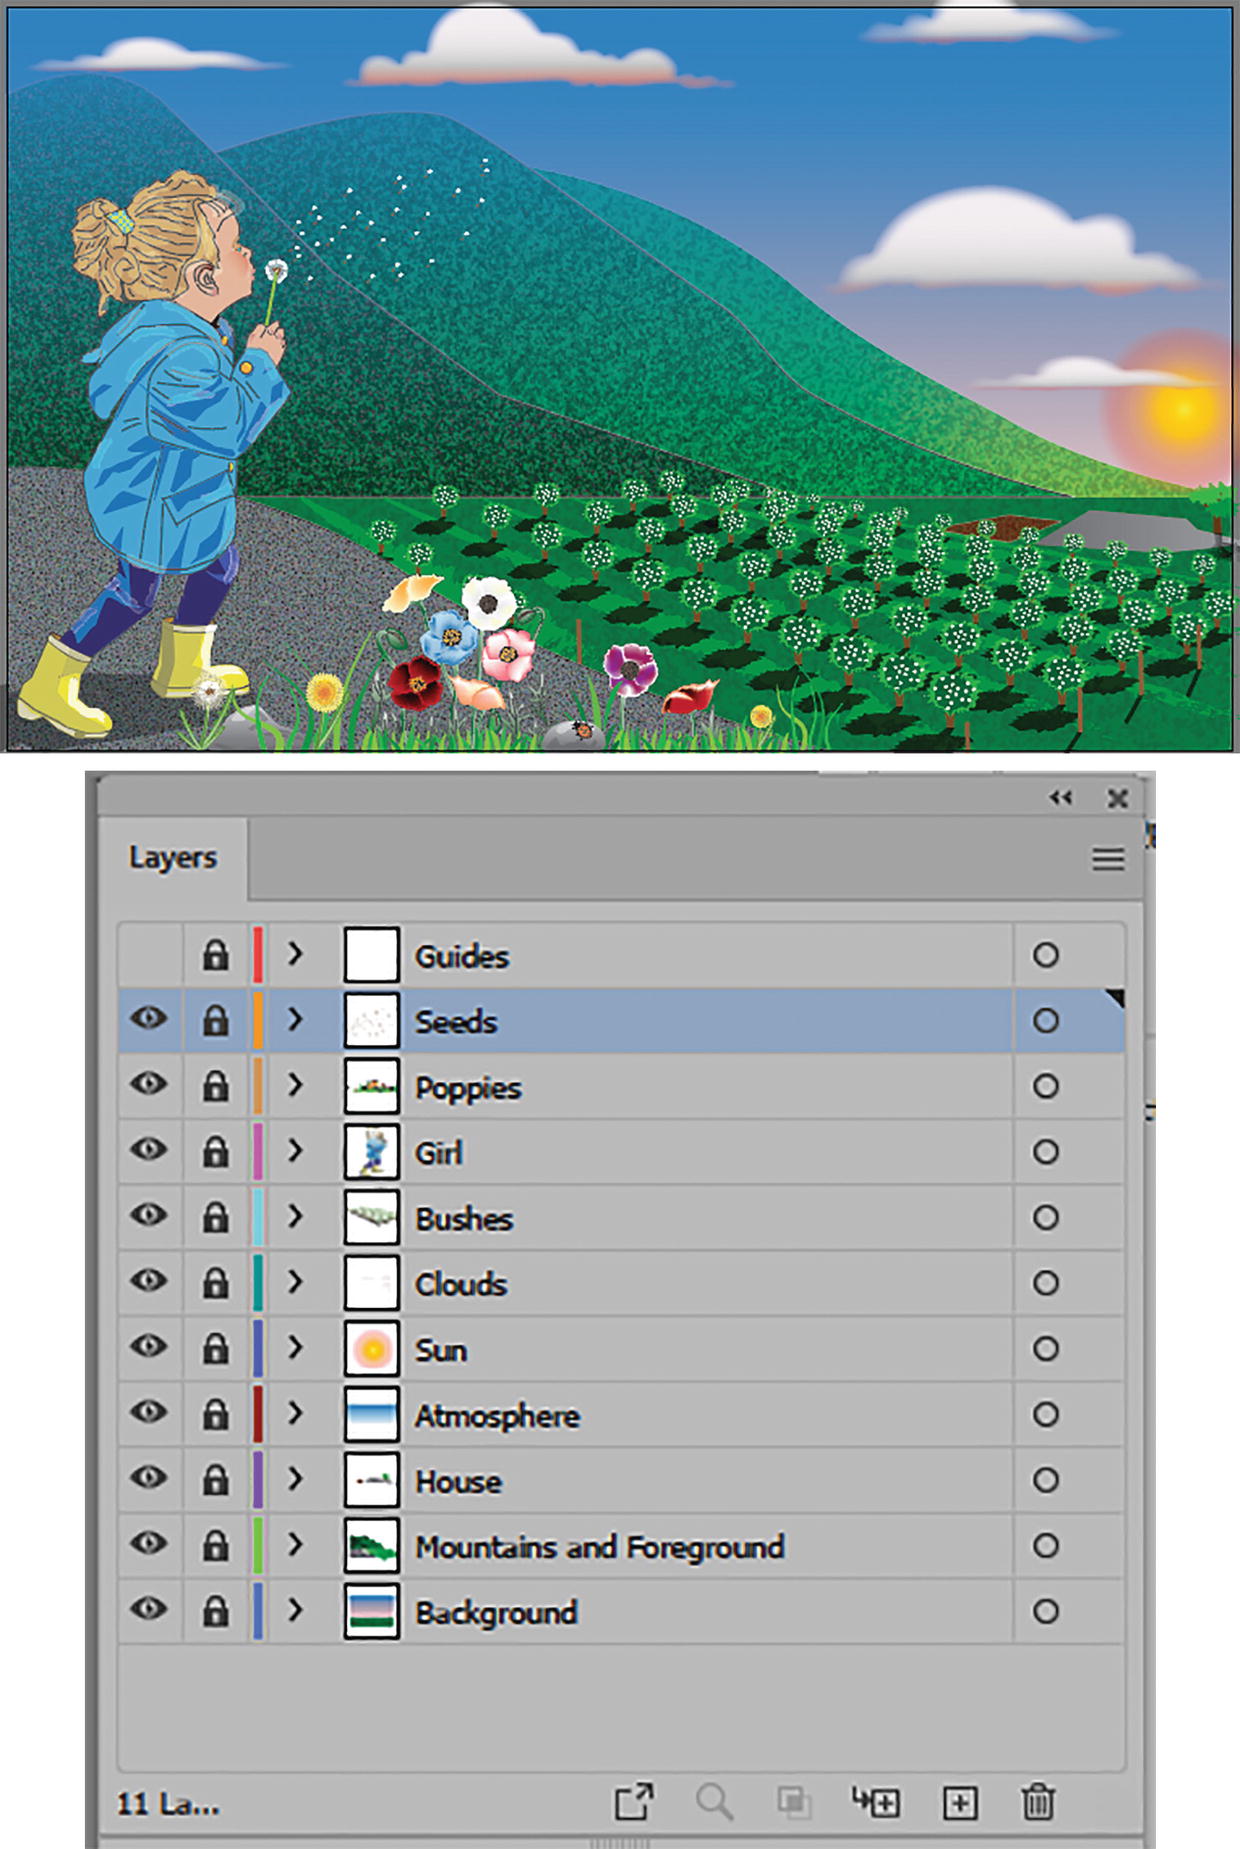
Continuing with the landscape project of the girl at the farm, you can use the symbolism tools to scatter some of the dandelion seeds to the wind.
Open the file Landscape1_8_start.ai. Save a copy of the file if you want to practice.
In this file, I have added a new unlocked layer called Seeds. Refer to Figure 12-64.
Figure 12-64
Landscape image with current layers and Seeds layer unlocked
If you zoom in with your Zoom tool or Ctrl/CMD + +, you will notice that I have started to add some seeds to the dandelion, which are actually symbols. Refer to Figure 12-65.
Figure 12-65
Use the Symbol tool to add dandelion seeds to the image
I dragged some of the symbols onto the Artboard and scaled and rotated them, but now I want to create a random scattering.
On your own, practice this with your symbolism tools. Your example does not have to be the same as mine. Refer to Figure 12-66.
Figure 12-66
Use your symbolism tools to move and scatter seeds
However, in this example, the tools that you would likely use are the Symbol Sprayer, Shifter, Scruncher, Sizer, and Spinner. Use them to adjust and scatter your seeds. Refer to Figure 12-67.
Figure 12-67
The scattered dandelion seeds of the symbol set
When you are done, you can compare it to my example, found in Landscape1_8_final.ai.
Lock your Seeds layer and then save your work so far. Refer to Figure 12-68.
Figure 12-68
View the current image so far and lock the Seeds layer in the Layers panel
We have almost completed the picture and will do so in the next chapter when we build the farmhouse.
Summary
In this chapter, we looked at the many ways you can use the symbolism tools with your symbols as well as the Appearance and Graphic Styles panels and how they can be used to enhance the symbol sets. After working with symbols, let’s move on to Illustrator’s new 3D features.