
Chapter Goal: Get used to working with various tools in the Illustrator Toolbars panel and Object menu to distort shapes and paths.
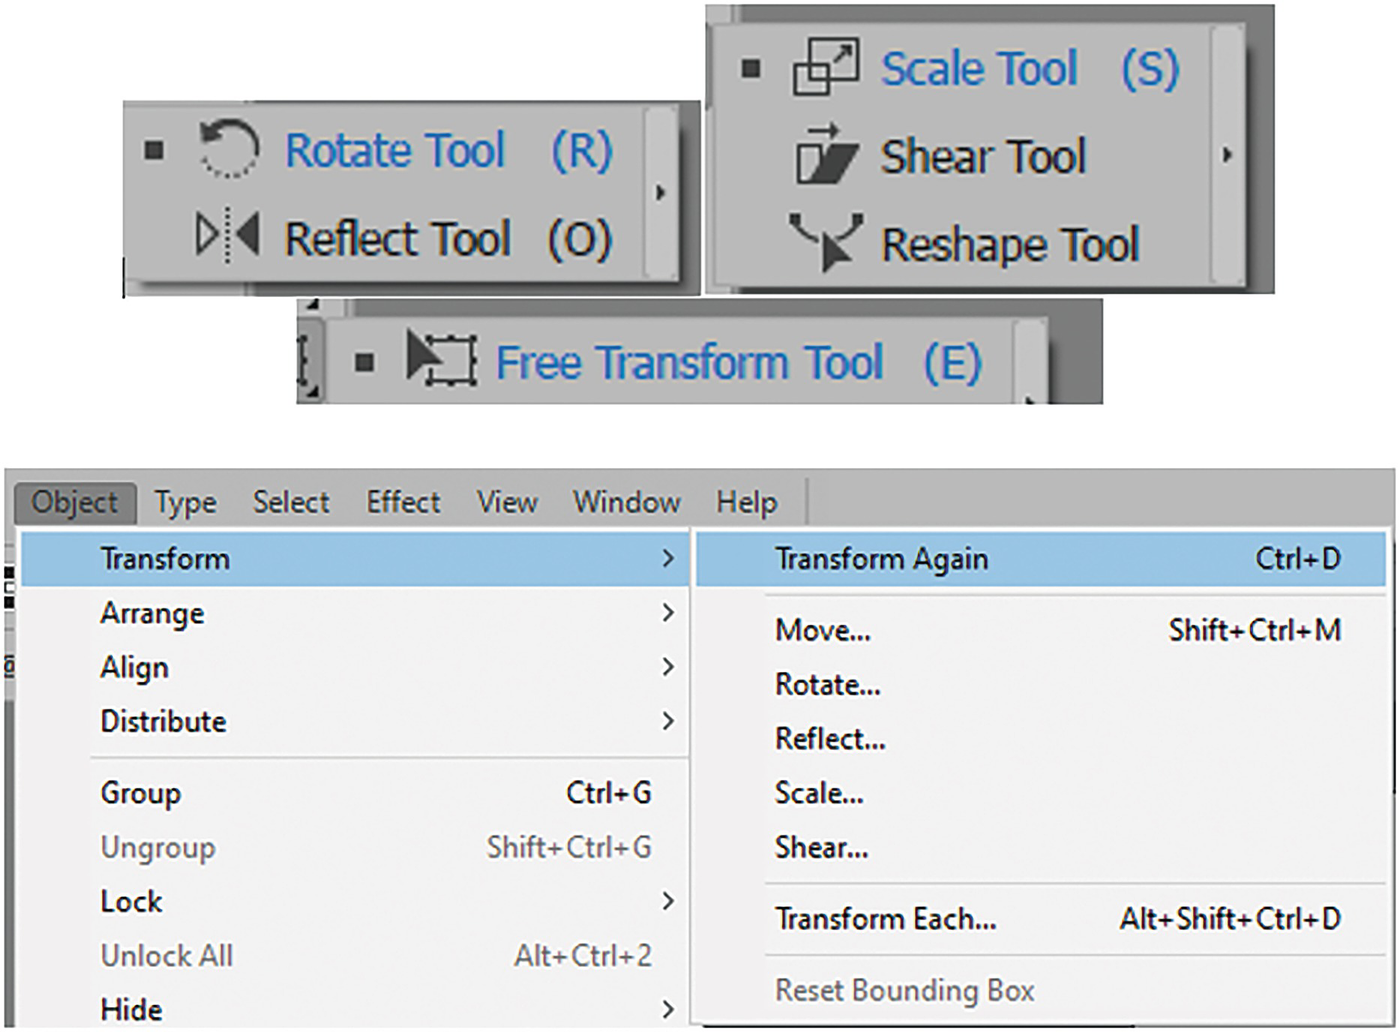
Illustrator’s Rotate, Reflect, Scale, Shear, Reshape, and Free Transform tools. Dialog boxes for many of these tools can be found in the Object ➤ Transform menu
You can find the projects for this chapter in the Chapter 3 folder.
For practice, create a new document with the settings found in Chapter 1, or use my file reshape_tools.ai to practice with various shapes and tools.
Move (Selection Tool)

The Move dialog box can be found with the Selection tool; options change if the shape has a pattern
The Move dialog box, with the preview enabled, allows you to position your object horizontally or vertically, or at a set distance or angle (0°–360°) from the point of origin. Updating one text box updates the others collectively. By default, the options are grayed out for Transform Objects and Transform Patterns. However, if your shape contains a pattern swatch then these options become available, and you can transform the object and pattern collectively or separately.

Result of using the Move dialog box to create a copy of the shape
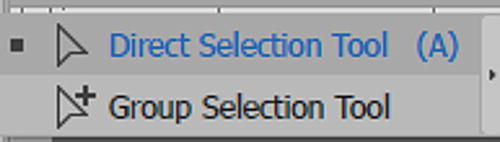
You can also access the Move dialog box when a shape is selected with the Group Selection tool, or when a point on a path is selected with the Direct Selection tool. Just double-click on the tool in the Toolbars panel while the object or path is selected. Refer to Figure 3-4.
The Move dialog box is also used with the Direct Selection and Group Selection tools
Rotate Tool (R)
The Transform panel allows you to do a basic rotation of a shape

Select an object with the Selection tool, then the Rotate tool. Click to set the reference point for rotation, and then drag to rotate
When an object is first selected with the Selection tool and then the Rotate tool, rather than just rotating from the center you can click to move or drag your reference point of rotation to a new location on or off the object, and then drag the object to rotate around that point. Refer to Figure 3-6.
Holding down the Shift key while dragging can constrain the rotation to 45° angles. Holding down the Alt/Option key while dragging the object creates a rotated copy around that reference point. To create more copies, make sure to click on the reference point again before you Alt/Option-drag another copy; otherwise, you might reset the reference point by mistake.

Use the Rotate dialog box to rotate a copy of the object
If you want to rotate the current object, click OK, or if you want a copy of the object, click the Copy button. The Cancel button exits the dialog box without the rotation occurring. Refer to Figure 3-7.
If you hold down the Alt/Option key while clicking to move the reference point of rotation to a new location, you can enter the Rotate dialog box and retain the same point position, rather than reverting to the center-point position when you double-click on the tool. Holding down the Ctrl/CMD key while dragging allows you to move the object and keep the point of rotation in the same location during the move.
Reflect Tool (O)

Use the Transform panel menu or Properties panel to do a basic horizontal or vertical flip of an object
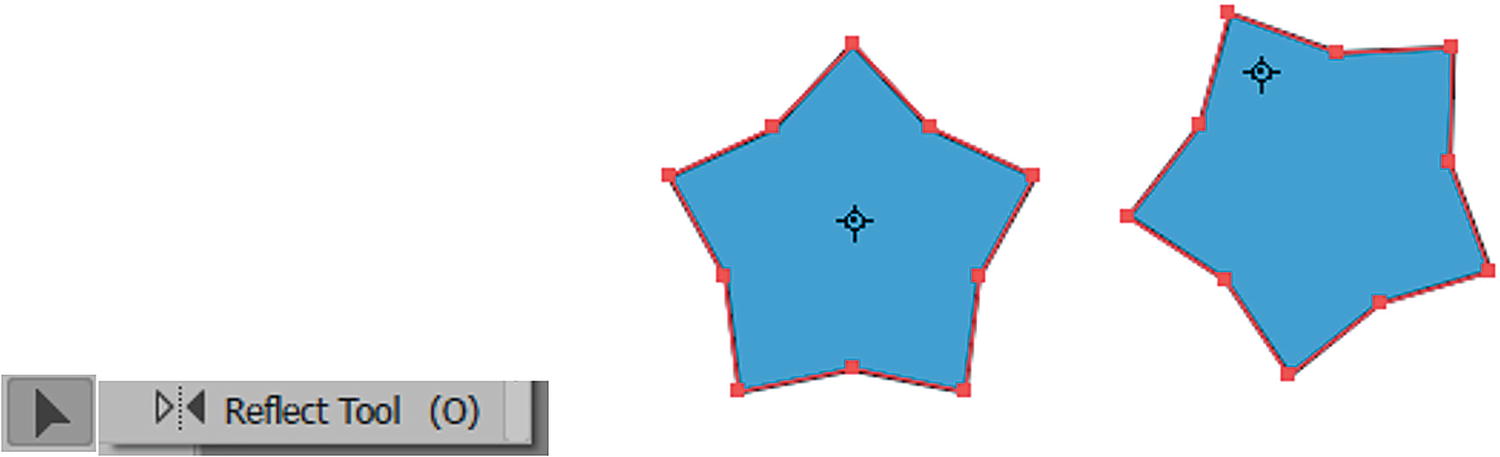
Select an object with the Selection tool, then Reflect tool, and set the reference point for reflection. Then, drag to reflect
When an object is first selected with the Selection tool and then the Reflect tool, rather than just reflecting over the center, you can click to move or drag your reference point of reflection to a new location on or off the object, and then drag the object to rotate on that axis angle of reflection. Holding down the Shift key while dragging can constrain the reflection to 45° angles. Holding down the Alt/Option key while you drag the object creates a reflection copy around that reference point. To create more copies, make sure to click on the reference point again before you Alt/Option-drag another copy; otherwise, you might reset the reference point by mistake. Refer to Figure 3-9.

Use the Reflect dialog box to reflect a copy of the object
If you want to reflect the current object, click OK, or if you want a copy of the object, then click the Copy button. The Cancel button exits the dialog box without the reflection occurring. Refer to Figure 3-10.
If you hold down the Alt/Option key while clicking to move the reference point of reflection to a new location, you can enter the Reflect dialog box and retain the same point position rather than reverting to a center point when you double-click on the tool. Holding down the Ctrl/CMD key allows you to move the object and keep the point of reflection in the same location during the move.
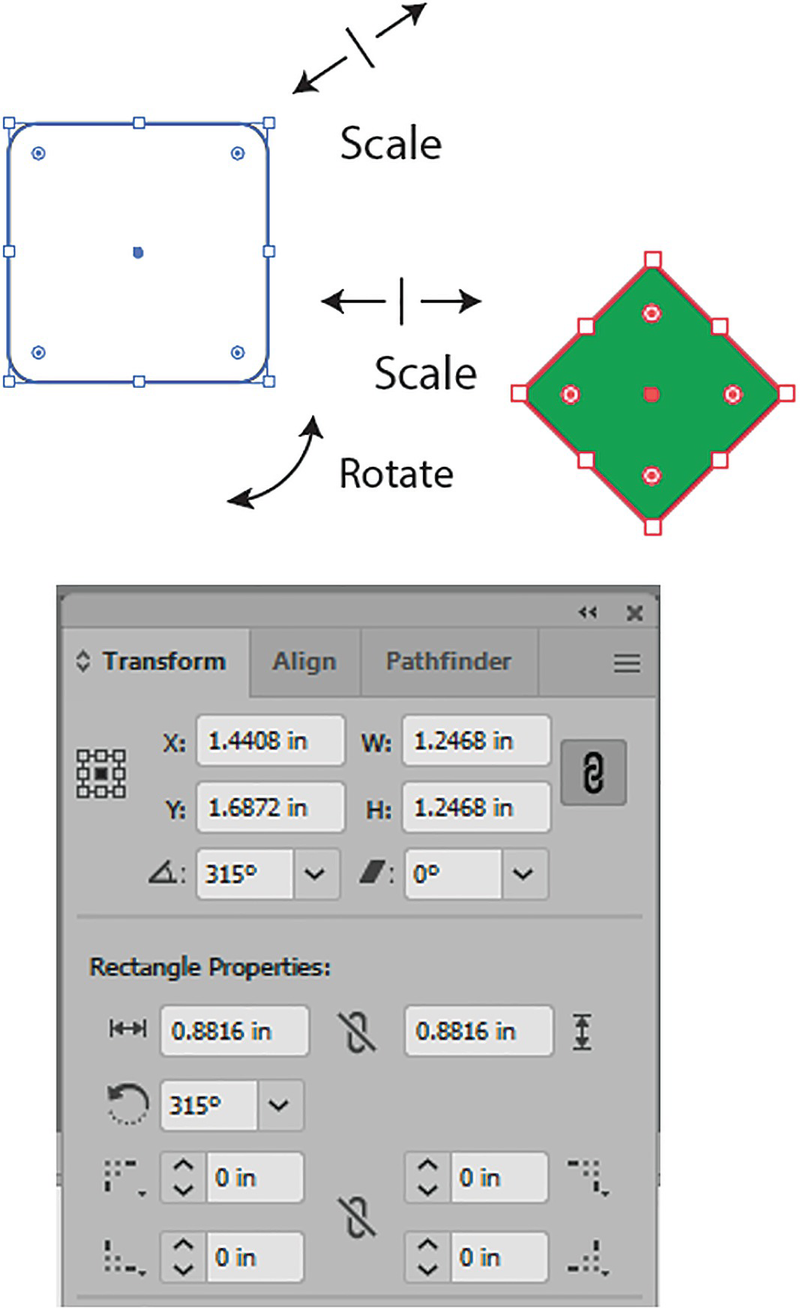
Scale Tool (S)

Use your Selection tool with bounding box handles and the Transform panel to scale your object’s width and height

Select an object with the Selection tool, then Scale tool, and set the reference point for scaling. Then, drag to scale your object
When an object is first selected with the Selection tool and then the Scale tool, rather than just scaling from the center you can click to move or drag your reference point of scale to a new location, on or off the object, and then drag to adjust the point of scale. Holding down the Shift key can constrain the object’s width and height. Holding down the Alt/Option key while you drag the object creates a scale copy around that reference point. To create more copies, make sure to click on the reference point again before you Alt/Option-drag another copy; otherwise, you might reset the reference point by mistake. Refer to Figure 3-12.

Use the Scale dialog box to scale a copy of the object
Scaling can be in positive or negative percentages between -20,000% and 20,000%.
If you want to scale the current object, click OK, or if you want a copy of the object, then click the Copy button. The Cancel button exits the dialog box without the scaling occurring. Refer to Figure 3-13.
If you hold down the Alt/Option key while clicking to move the reference point of scale to a new location, you can enter the Scale dialog box and retain the same point position rather than reverting to a center point when you double-click on the tool. Holding down the Ctrl/CMD key allows you to move the object and keep the point of scale in the same location during the move.
Shear Tool
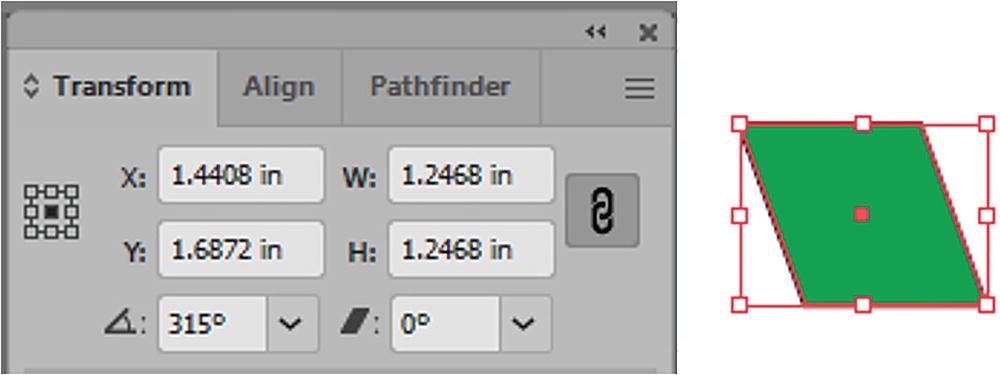
Use the Transform panel to do a basic shear of the object

Select an object with the Selection tool, then the Shear tool, and set the reference point for shearing. Then, drag to shear the object
Shearing is similar to Edit ➤ Transform ➤ Skew in Photoshop.
When an object is first selected with the Selection tool and then the Shear tool, rather than just shearing from the center you can click to move or drag your reference point of shear to a new location on or off the object, and then drag to adjust the point of shear. Drag in an up-and-down direction to shear vertically, or left and right to shear horizontally. Holding down the Shift key can constrain the object’s width and height, depending on the side on which you are dragging. Holding down the Alt/Option key while you drag the object creates a sheared copy around that reference point. To create more copies, make sure to click on the reference point again, before you Alt/Option-drag another copy; otherwise, you might reset the reference point by mistake. Refer to Figure 3-15.
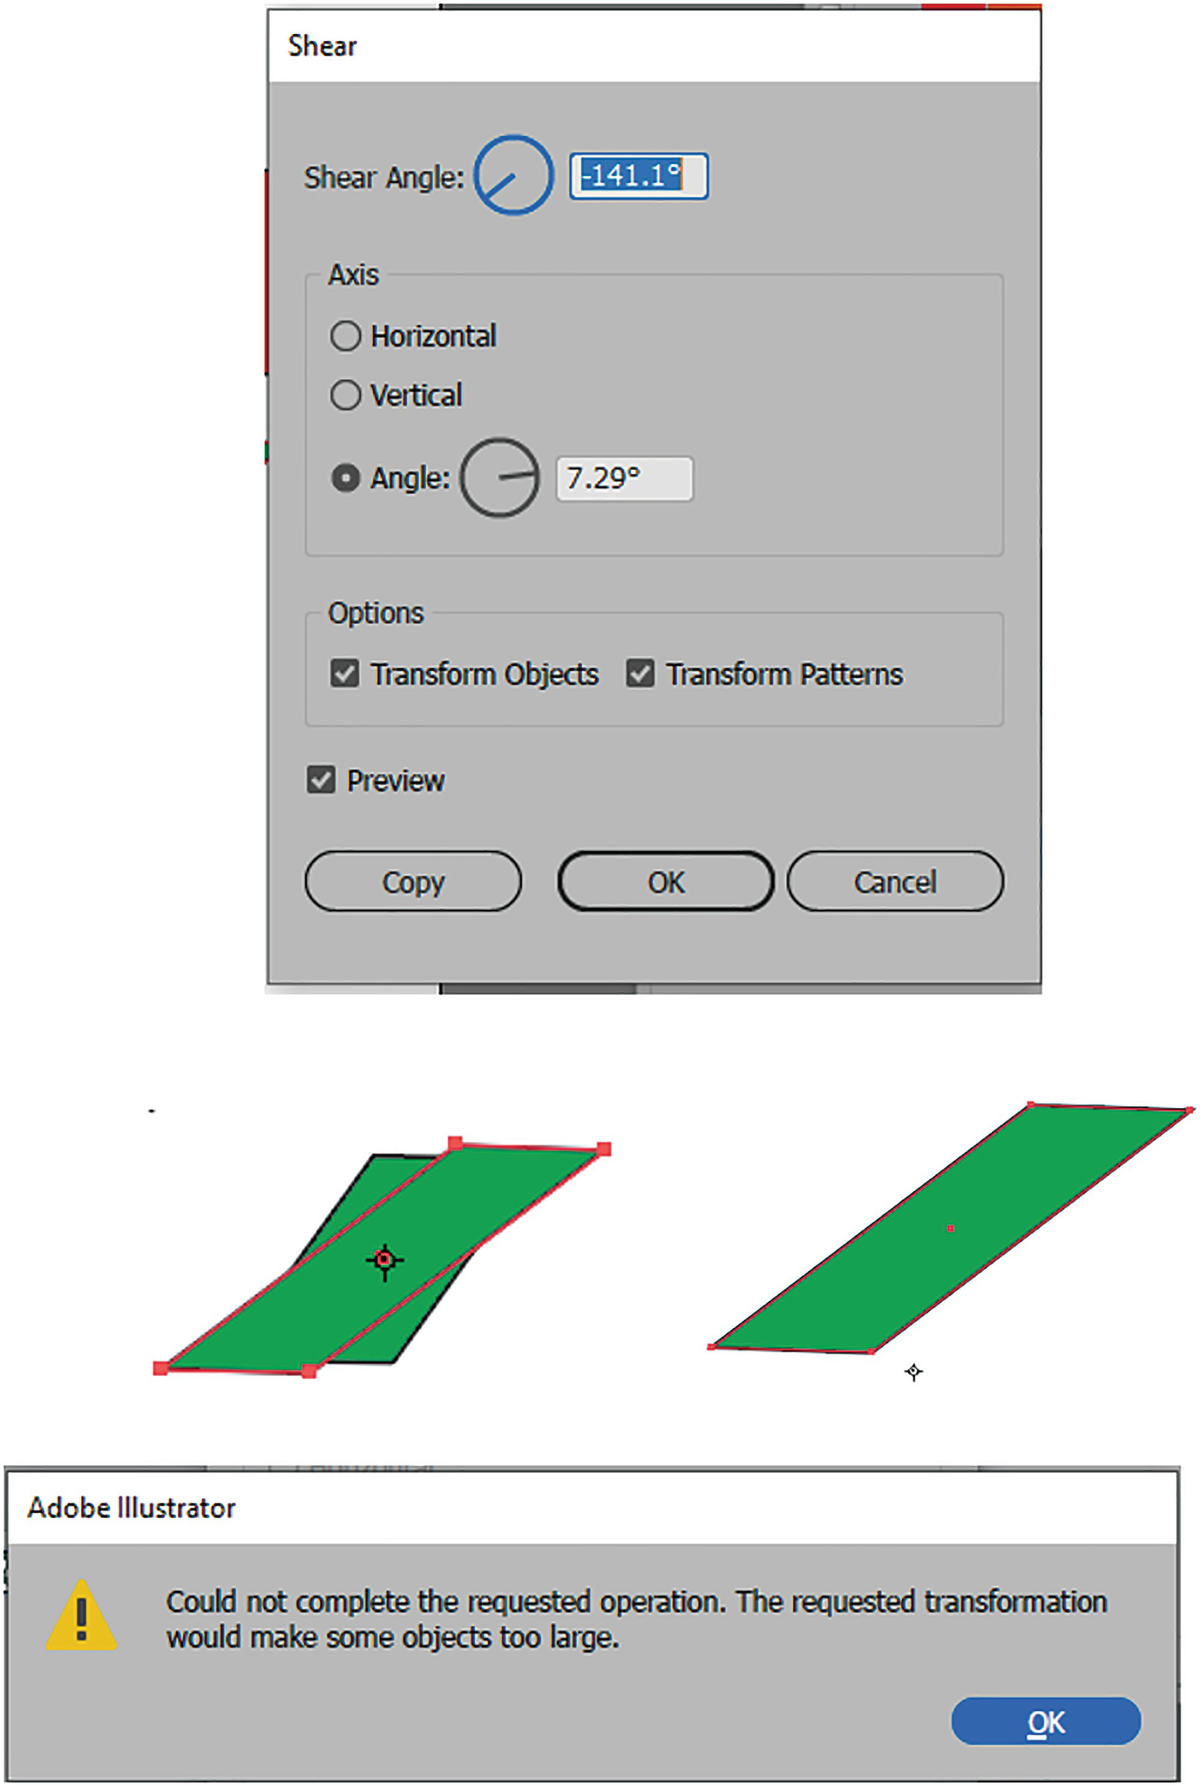
Use the Shear dialog box to shear a copy of the object
If you want to shear the current object, click OK, or if you want a copy of the object, then click the Copy button. Clicking the Cancel button exits the dialog box without the shear occurring. Refer to Figure 3-16.
If you hold down the Alt/Option key while clicking to move the reference point of shear to a new location, you can enter the Shear dialog box and retain the same point position, rather than reverting to a center point as happens when you double-click on the tool. Holding down the Ctrl/CMD key allows you to move the object and keep the point of shear in the same location during the move.
Shear can be a useful tool when you want to adjust an object according to perspective or cast a shadow on the ground.
If want to repeat steps (including Move, Rotate, Reflect, Scale, or Shear), you can use Object ➤ Transform ➤ Transform Again or the key command Ctrl/CMD+D.
Transform Each
Another way to perform many of these actions at the same time on an object is to select Object ➤ Transform ➤ Transform Each (or Alt/Option+ Shift+ Ctrl/CMD+D).

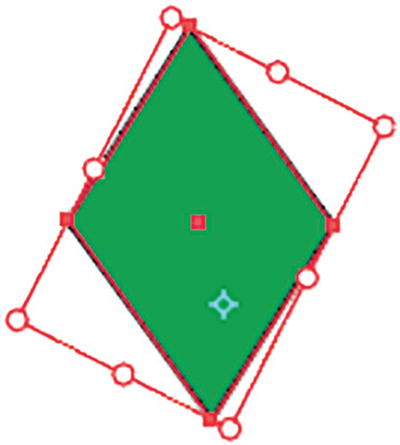
The Transform Each dialog box allows you to scale, move, and rotate, as well as other options, to transform your object
If you want to apply the Transform Each to the current object, click OK, or if you want to do so to a copy of the object, then click the Copy button. Clicking the Cancel button exits the dialog box without the transformation occurring. Refer to Figure 3-17.
When your bounding box has been tilted due to rotation, you can use the Object ➤ Transform ➤ Reset bounding box. Refer to Figure 3-18.

Transform Each was used to scale, move, and rotate a copy of the object
Likewise, if you have multiple selected objects or use Object ➤ Group to group them, you can use any of these mentioned tools and dialog boxes to adjust paths.
Reshape Tool

Toolbars panel Reshape tool

Select the object first with the Selection tool and then the Reshape tool. Add an anchor point to the object’s path to reshape it
Hold down the Alt/Option key if you want to duplicate the path after adding points.
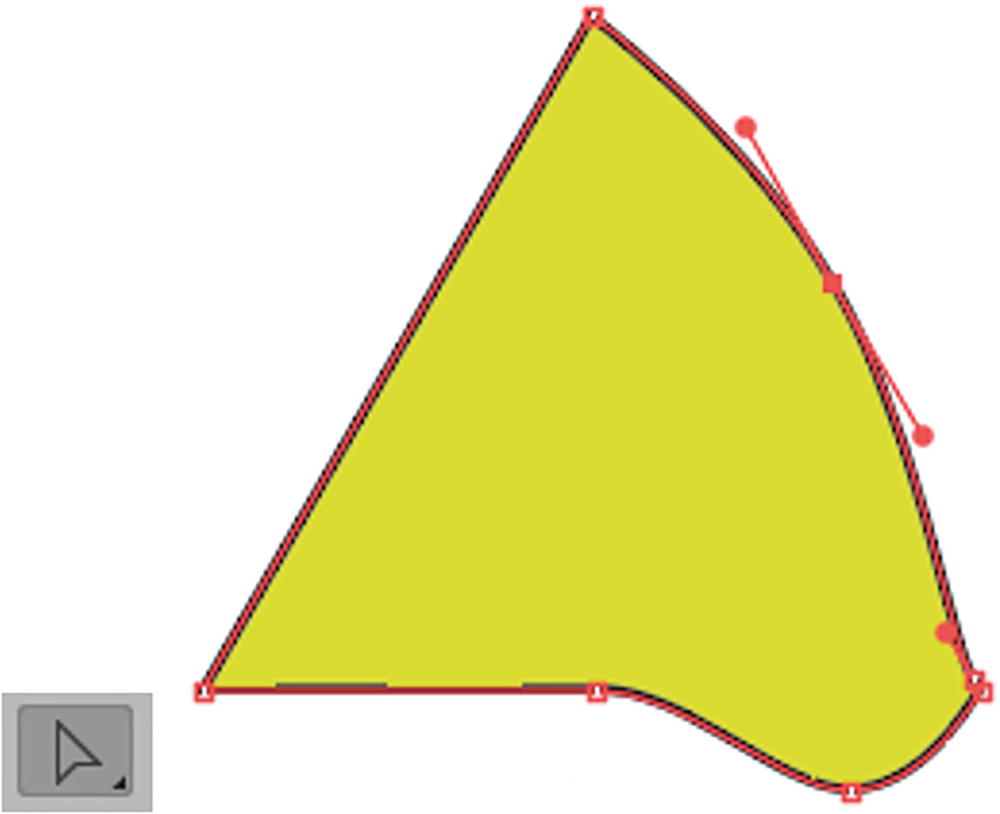
Use the Direct Selection tool to reshape the curved closed path

When a path is open with no fill and created with the Pen tool, you can use the Reshape tool to add points and edit the path
There are no additional dialog boxes for this tool. This tool would be good to use with paths created with the Pen tool, Line tool, Arc tool, or Spiral tool, all of which we reviewed in Chapter 2.
Free Transform Tool (E)
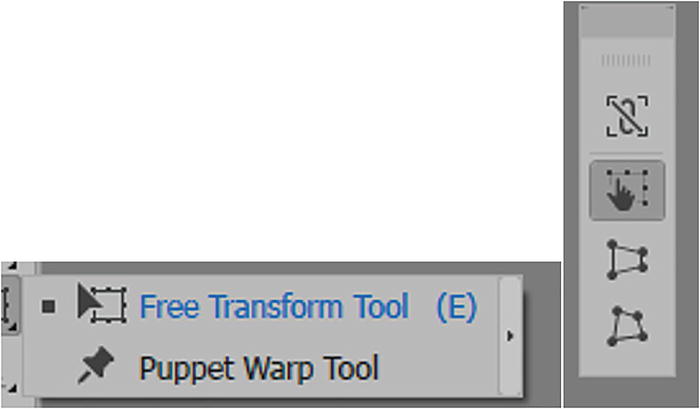
Toolbars panel Free Transform tool with its four options
Constrain
Free Transform
Perspective Distort
Free Distort
First select an object with the Selection tool, and then do so with the Free Transform tool.
Constrain and Free Transform

Use Constrain and Free Transform to scale and rotate your object by dragging on the shape’s bounding box handles
To scale relative to the object’s center point, hold down the Alt/Option key as you drag.

Use Constrain and Free Transform to rotate and shear your object by dragging on the shape’s side bounding box handles
Use Constrain and Free Transform and move the reference point, then drag on the bounding box handles to alter the shape

Disable the Constrain options and continue to use Free Transform to scale, rotate, and shear using the bounding box handles
Perspective Distort

Use the Perspective Distort option to distort your object using the handles, and then rotate the object when pointer changes to curved arrows
Free Distort

Use the Free Distort option to distort your object using the handles, and to rotate the object
You can see how this is much more versatile than just using the Transform panel to distort objects.
Project: Blowing in the Wind, Part 2
Let’s continue with the project that we started in Chapter 2. Recall that it is a landscape, with a girl on a farm.
Go to File ➤ Open Landscape1_2_start.ai and then File ➤ Save As to make a copy, if you want to follow along for practice.
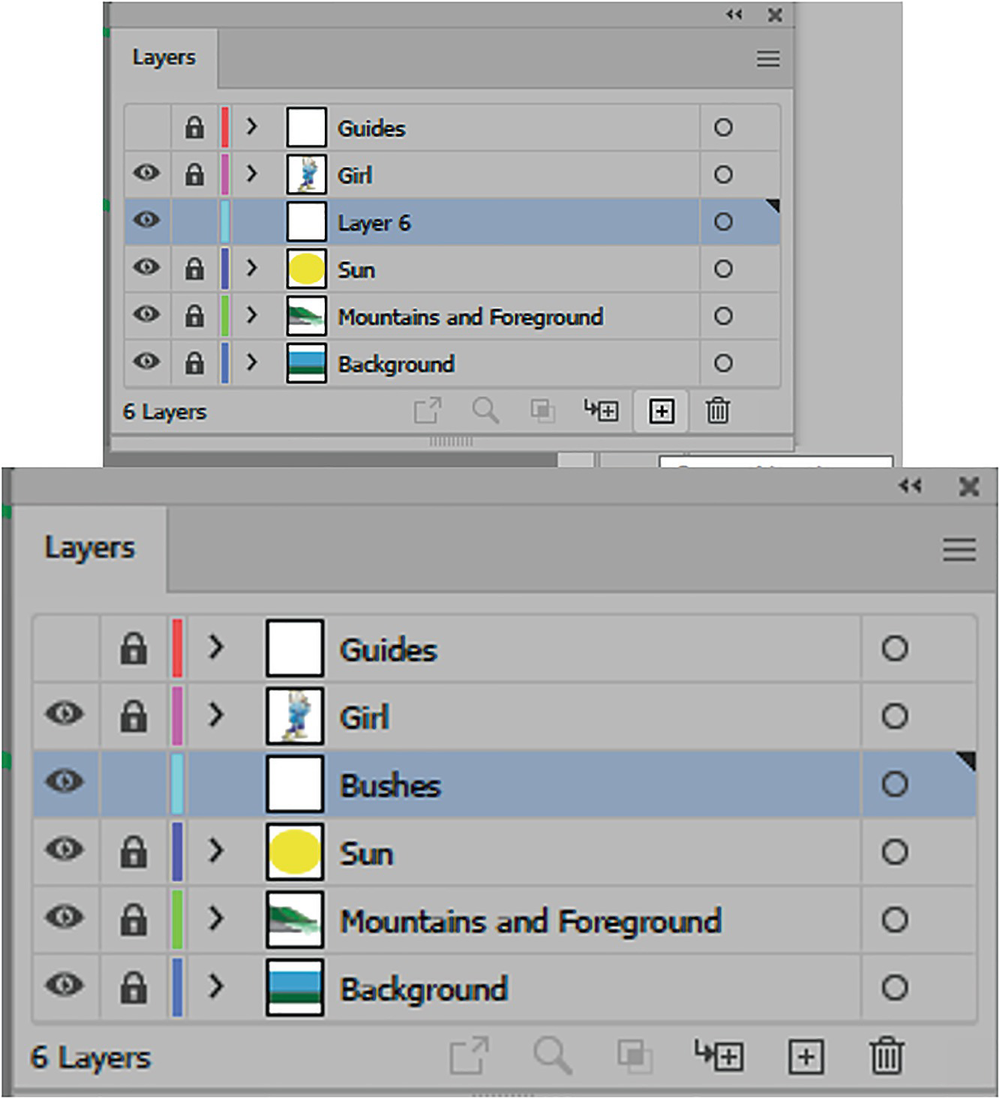
The project has a new layer called Bushes

The bush is selected, and the layer in the Layers panel has many sublayers
Parts of the bush were created using the Pen and Ellipse tools. Later, you can review its multiple parts by revealing its sub-layers in the Layers panel. Refer to Figure 3-31.
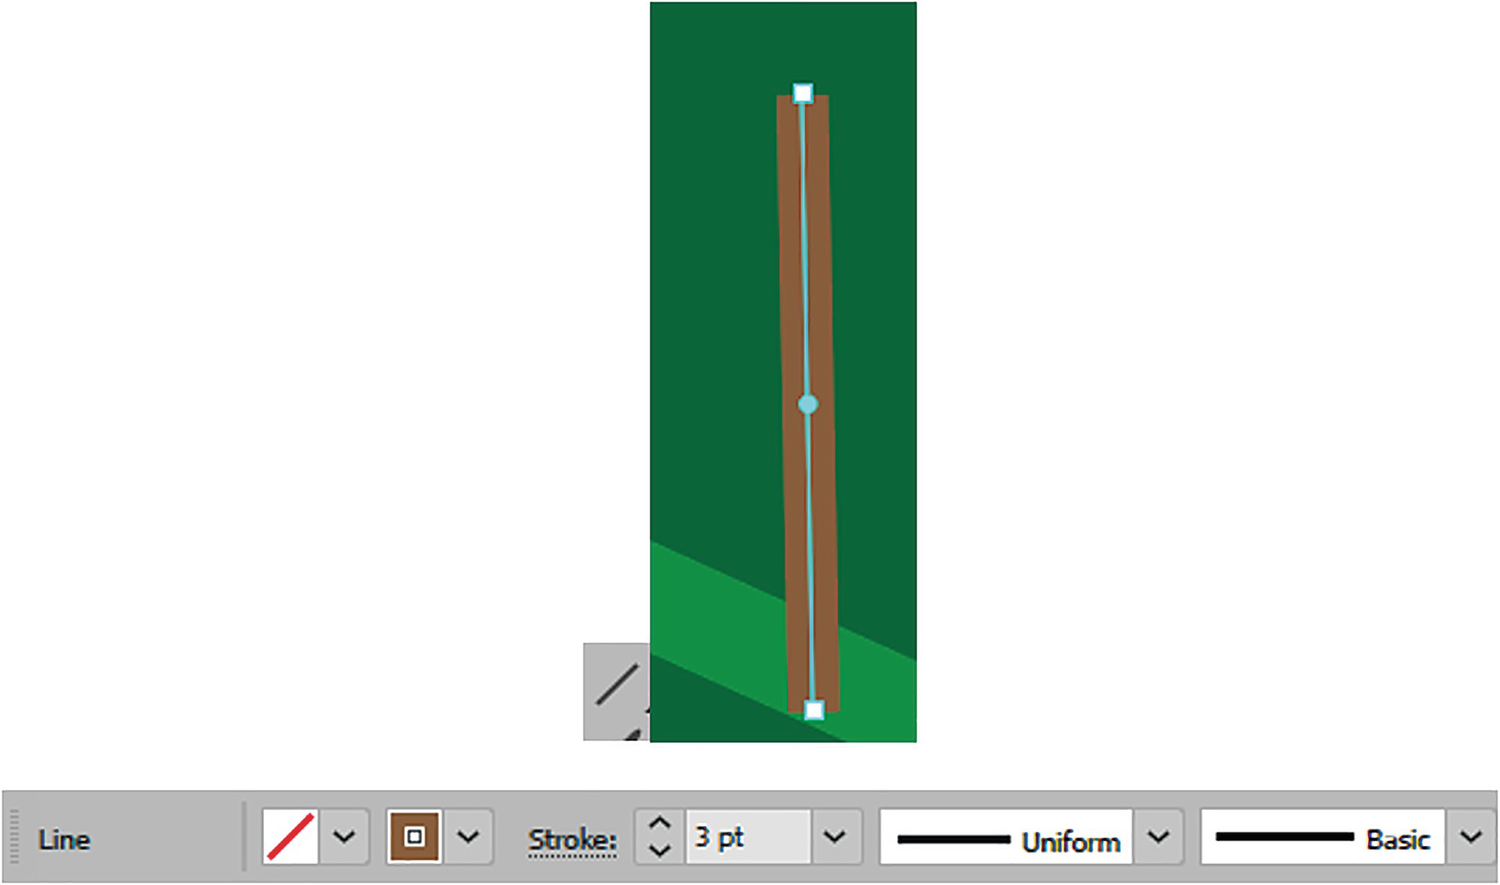
The post in the image was created using the Line tool. It has a brown-colored stroke with a stroke weight of 3pt, as seen in the Control panel
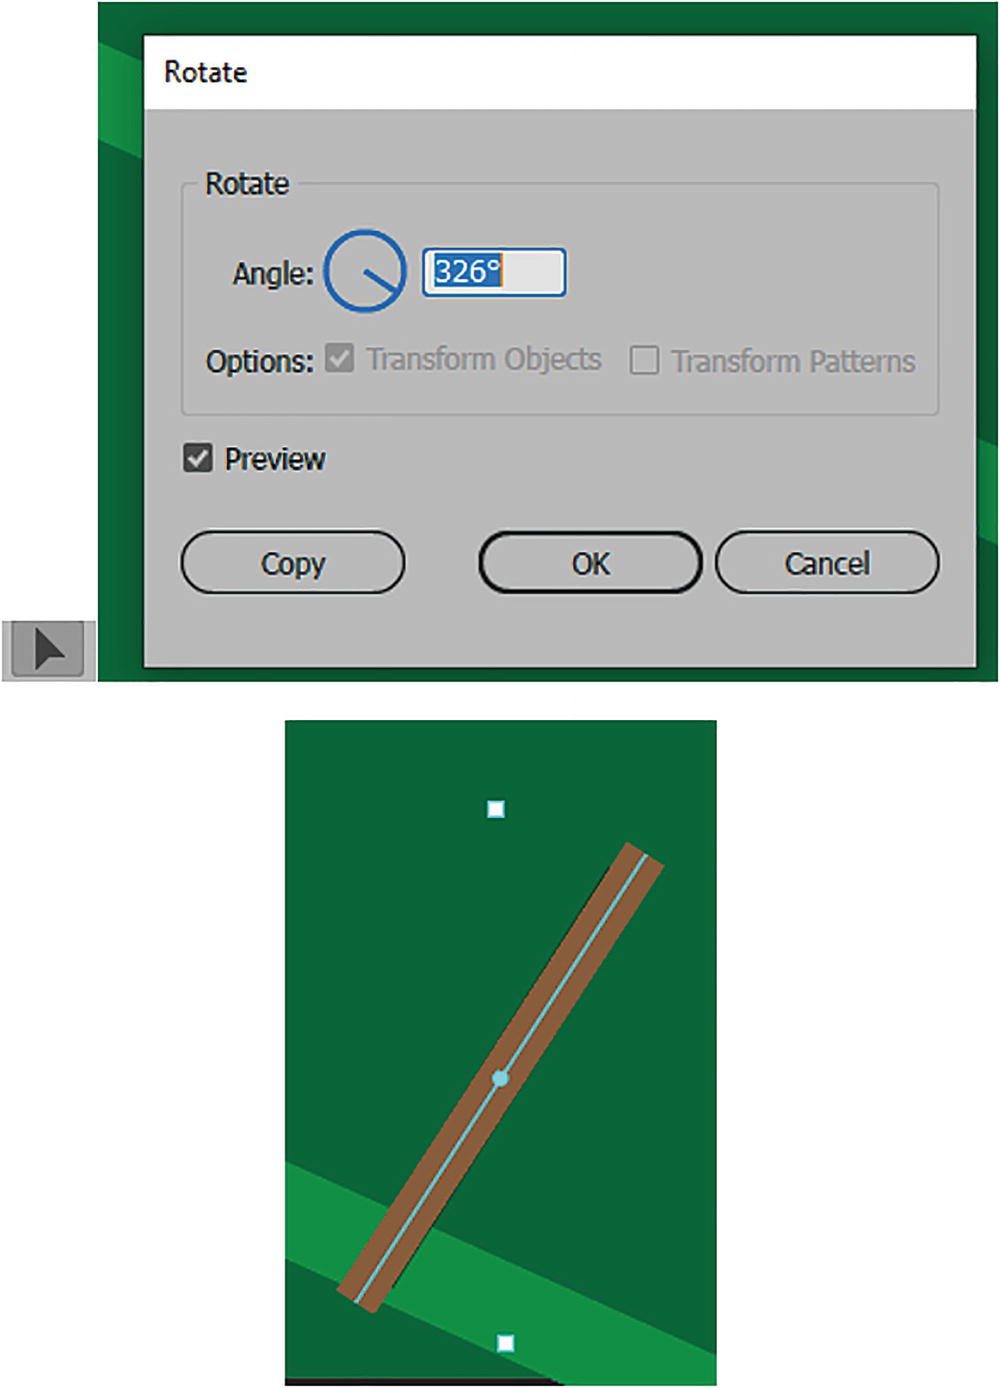
Use the Rotate tool to set and preview the rotation

Use the Rotate tool to create a rotated copy of the post
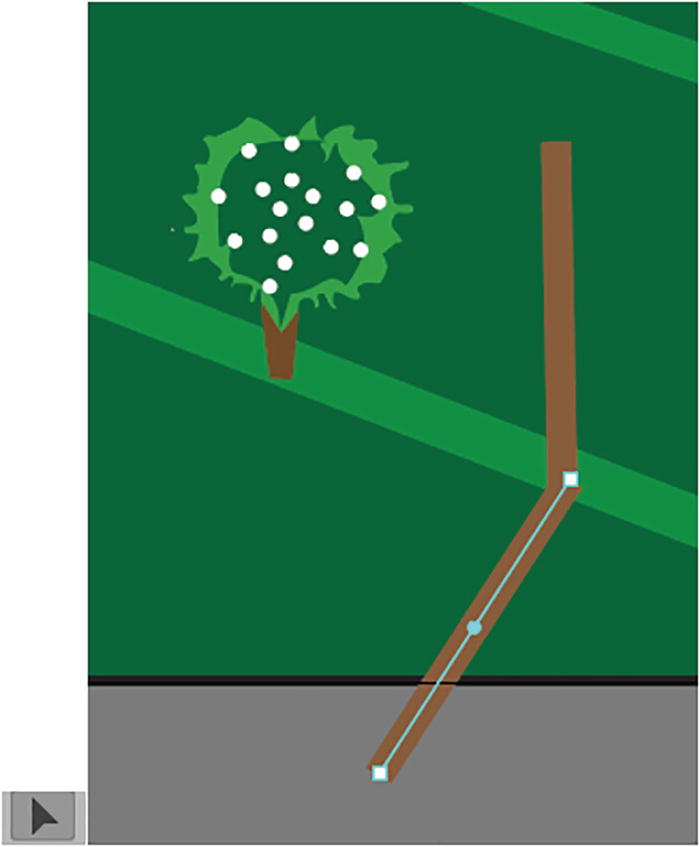
Use the Selection tool to move the copy of the post to the base of the post to start creating a shadow

Use the Control panel to set the copy of the post to black and an opacity of 78% to create a shadow with some transparency

Use the Selection tool and the Object menu to send the shadow behind the post, and then group the shadow and post together
Then, click off the artboard to deselect the group. Refer to Figure 3-37.

Use the Selection tool to select the bush
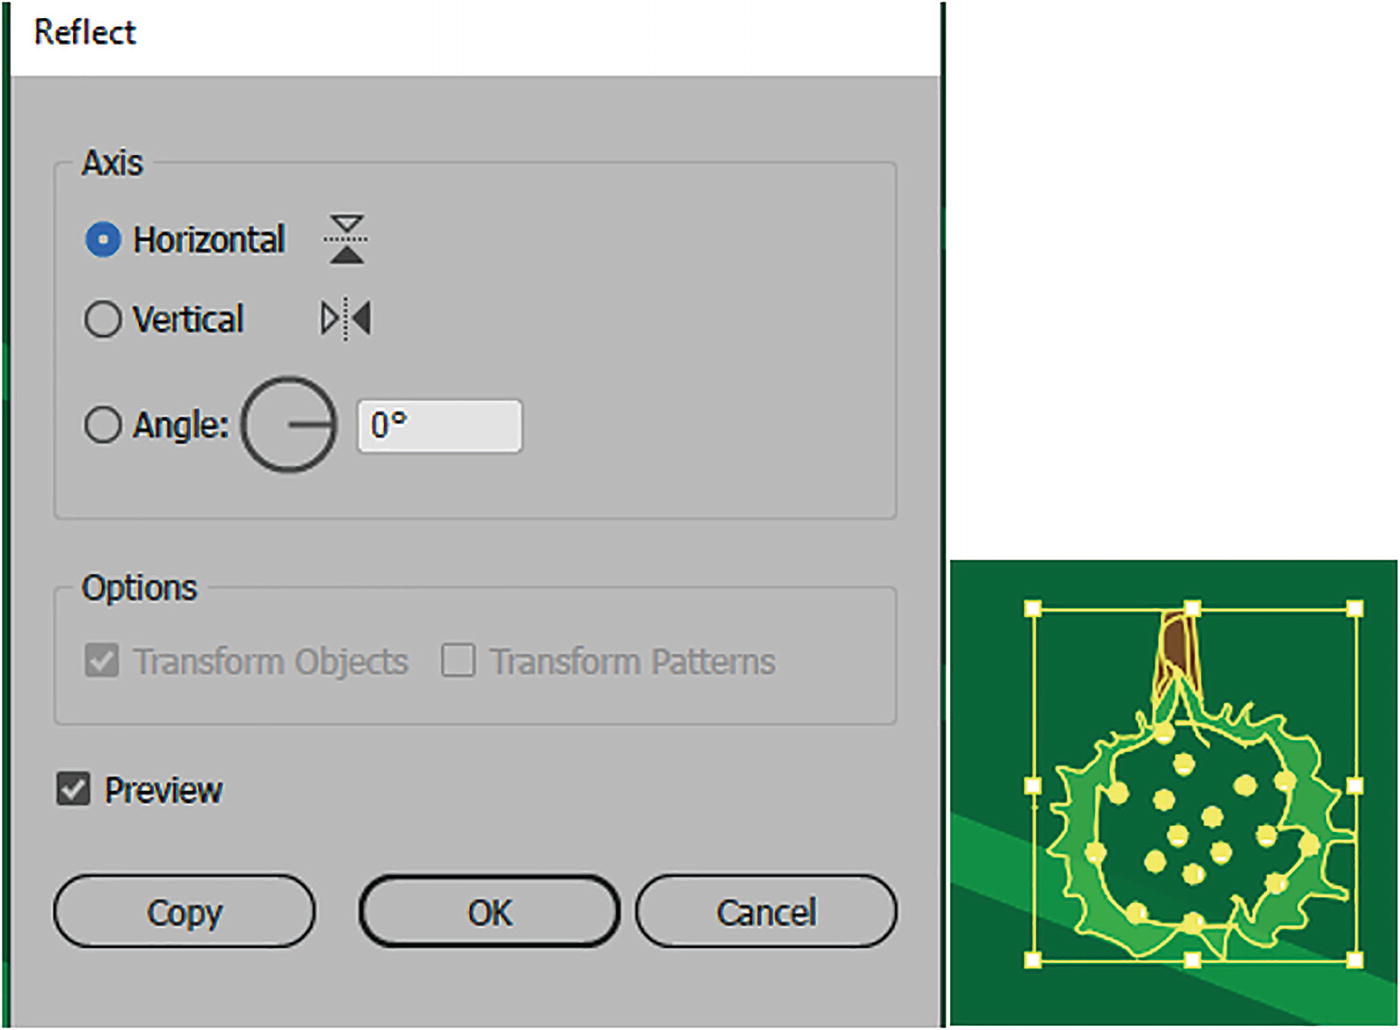
Use the Reflect dialog box to reflect the bush

Use the Reflect dialog box to create a copy of the bush and select it with the Selection tool

With the Selection tool, move the copy of the bush to the base of the original bush
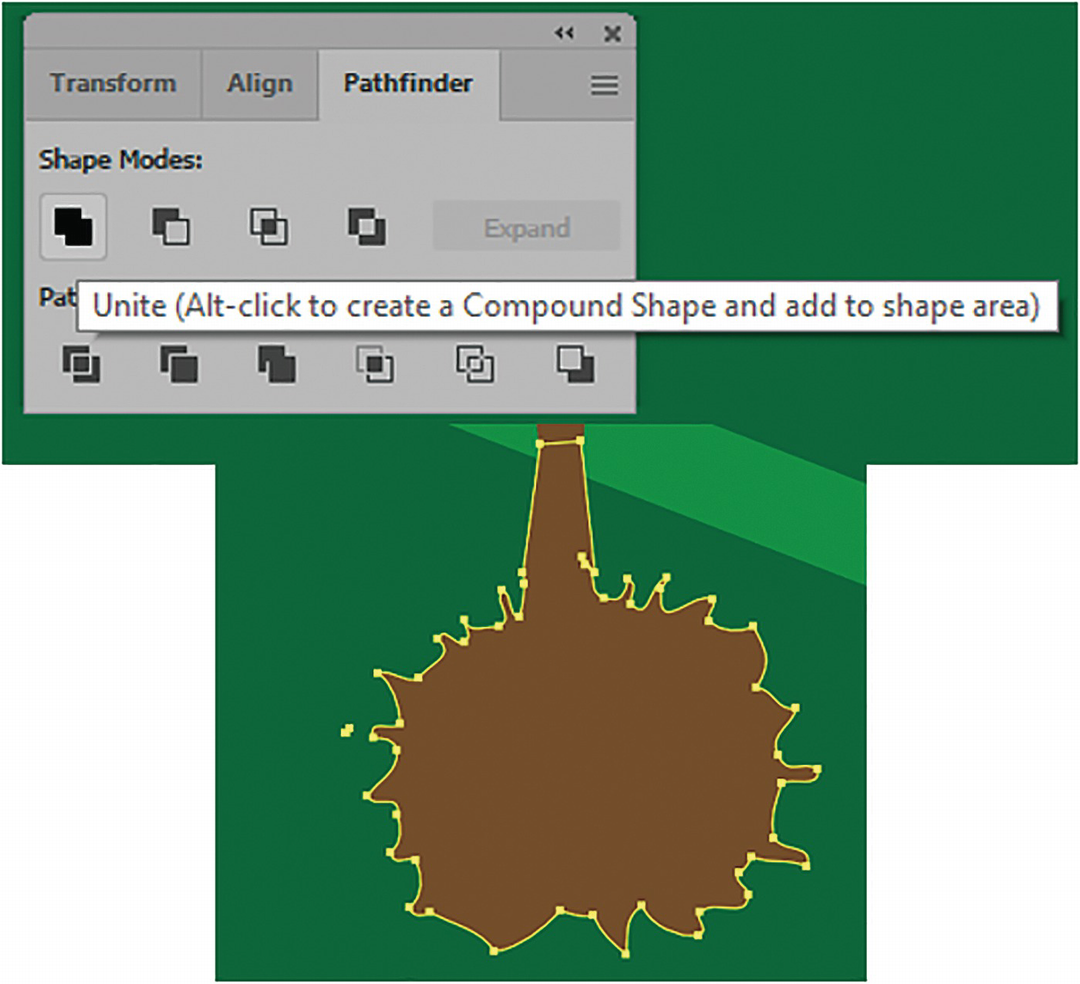
With the copy selected, use the Pathfinder panel to unite all the paths as one unit to create the start of a shadow

Use the Control panel to set your shadow’s fill color, stroke, and opacity
We will look at opacity and blending modes in more detail in Chapter 8 and see how they can improve the look of a shadow.
OK, that is good. But now we need to twist the shadow so that it looks a bit more in line with the post.
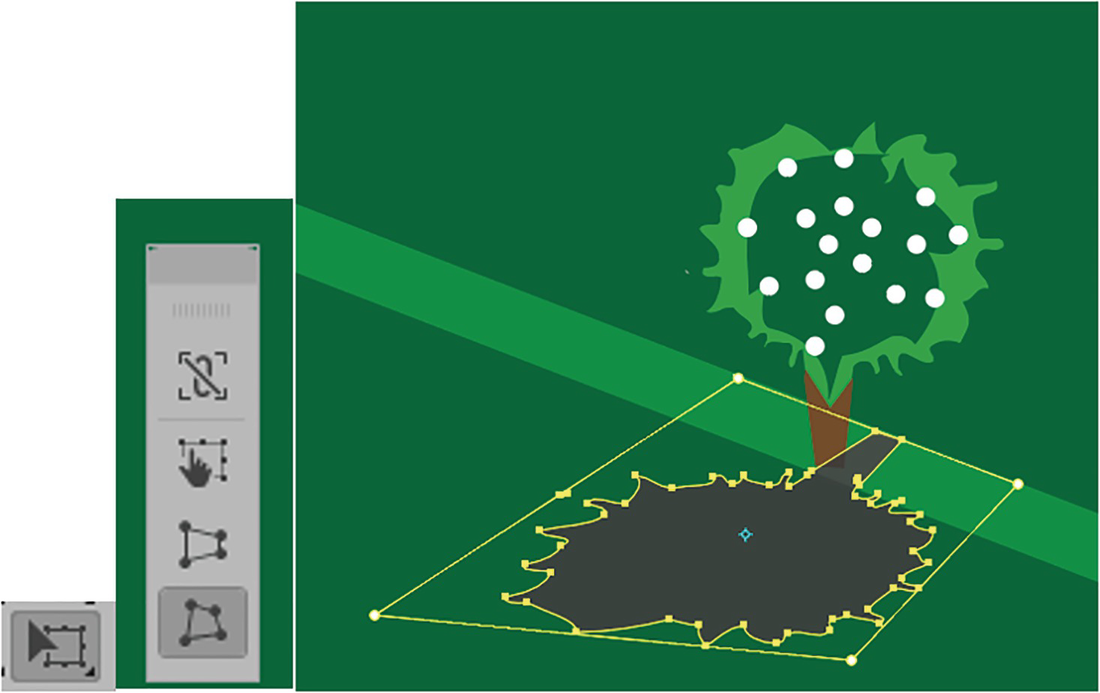
While the shadow is selected, use the Free Transform Free Distort tool to modify the basic shape of the shadow

Use your Direct Selection tool to further modify points on your bush’s shadow. Group the bush and shadow and lock the layer in the Layers panel
Because these bushes are seen at a distance it does not have to be perfect, but try getting the shadow as close to mine as you can. The ground on the farm is bumpy and hilly so the shadow will not lie exactly flat.
Now use the Selection tool to create a rectangular marquee around both the shadow and bush and choose Object ➤ Group. Refer to Figure 3-45.
At this point, lock your Bushes layer.
Save your work. You can see my final file in Landscape1_2_final.ai.
Summary
The Scale, Rotate, Reflect, and Shear tools, along with the Transform panel, allow you to modify and twist all or part of your shape. This can be further enhanced with the Object ➤ Transform dialog boxes. You can use the Reshape tool to modify part of a path and Free Transform tools for additional distortions. In the next chapter, we will look at the Puppet Warp tool, which has similar features to the same tool in Photoshop.