![]()
Prototyping Using Storyboarding and Feedback Tracking
As you saw in Chapter 2 there is more to ALM than the three pillars (Traceability, Visibility, and Automation) of high-level processes. You also saw that the following four topics are important:
- Collaboration
- Workflow
- Security
- Reporting and analysis
Of these four, the features of the new PowerPoint Storyboarding tool will help you to increase collaboration between stakeholders and the development team, as you can avoid confusion as to what the requirements really are. This chapter looks at how this feature works and how it can help to improve collaboration as well as traceability.
This chapter also covers the Microsoft Feedback Client, which is another part of TFS 11 that helps with collaboration and traceability in our organizations. The Microsoft Feedback Client allows us to launch an application, capture our interaction with it as video, and capture our verbal or type-written comments as well. The feedback is stored in Visual Studio 11 Team Foundation Server (TFS) so that we have good traceability.
Requirements gathering is tough. Often stakeholders and end-users do not know what they want until they see a prototype or some early builds of a system. It’s then that the ideas and the creativity start flowing. User stories are a great way to capture high-level requirements without locking the development team into a particular technical solution. Using storyboarding, in addition to user stories, is a good way to add clarity to requirements by attaching visual drawings of the system. In TFS 11 we can create storyboards using Microsoft Office PowerPoint and attach (link) these to our User Story work item (Product Backlog work item). Of course we can use storyboards with the other process templates as well. These might not contain Product Backlog Items, but instead have other names for their work items. Providing a visualization of what the team is going to build allows us to more easily retrieve feedback from our team and stakeholders.
![]() Note The idea of storyboarding was developed at the Walt Disney Studio during the early 1930s. Disney credited animator Webb Smith with the idea of drawing scenes on separate sheets of paper and pinning them up on a bulletin board to tell a story in sequence, thus creating the first storyboard (http://www.instructionaldesign.org/storyboarding.html).
Note The idea of storyboarding was developed at the Walt Disney Studio during the early 1930s. Disney credited animator Webb Smith with the idea of drawing scenes on separate sheets of paper and pinning them up on a bulletin board to tell a story in sequence, thus creating the first storyboard (http://www.instructionaldesign.org/storyboarding.html).
In more recent days, this technique has been applied to software development as well. A storyboard is a visual expression of everything that will be contained in a software application. It can show the flow of an application before it is developed, giving stakeholders and end-users the chance to experiment with the flow to see how it will affect the application or system.
Storyboarding minimizes the risks inherent in all software development projects: missed delivery deadlines, exceeded budgets, deliverable ambiguity, and client expectations so that we finally can end up with a product with minimum bugs. There are numerous techniques and tools for storyboarding. The aim of this book is not to teach storyboarding, but to show how TFS 2012 supports this way of working. Hence, we will not dive into storyboarding itself.
How to Do It
To start using PowerPoint Storyboarding go to the Start menu and click Microsoft Visual Studio 2012. Select PowerPoint Storyboarding and click (see Figure 10-1). Make sure you have Microsoft Office PowerPoint installed before you try this.
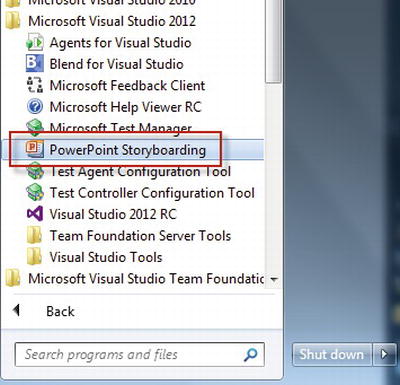
Figure 10-1. Starting PowerPoint Storyboarding
If you do not want to use Visual Studio to start storyboarding you can use web access instead. Navigate to the project web access page in your browser. Create a new Product Backlog Item and go to the Storyboards tab in the lower left and click Start Storyboarding (see Figure 10-2).

Figure 10-2. Starting PowerPoint Storyboarding from the project web access page
After PowerPoint has loaded you find a collection of predefined storyboard shapes that you can use to create your storyboard (see Figure 10-3).
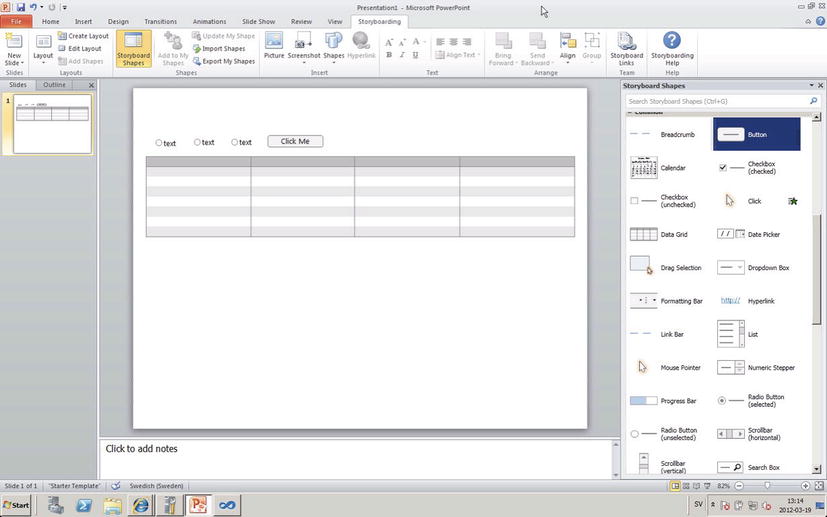
Figure 10-3. The storyboarding collection of PowerPoint shapes
To create your storyboard, you can drag and drop images from the Storyboard Shapes pane. You can also use all the features present within PowerPoint itself. These features include clipping and inserting screenshots. You can also hyperlink from one page to another, do animations, insert images and shapes, and align and group objects. These features are very powerful and will help you gather better requirements.
Here is a valuable tip. When you add placeholders for texts in the UI it’s common to use the “lorem ipsum. . .” Latin text.1 There is even a macro in PowerPoint that helps you with this. Just type =lorem() in a textbox and it expands to a fancy Latin fragment! (See Figure 10-4.)
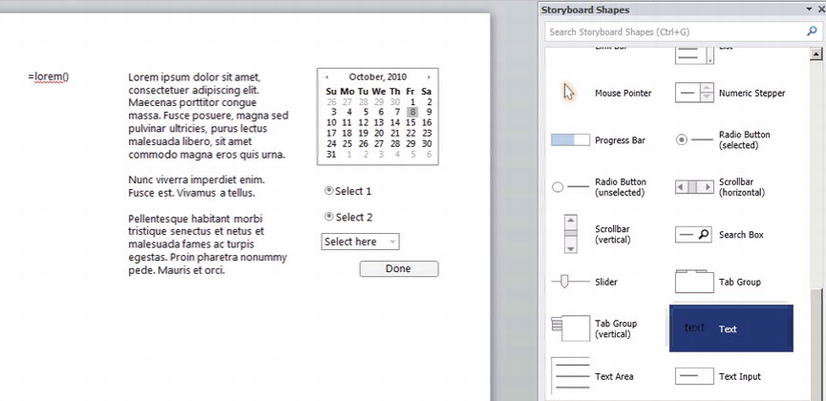
Figure 10-4. Adding placeholders for text
After you are satisfied with the storyboard, save it. Keep in mind that you must save it on a network share, otherwise TFS cannot link a work item with the storyboard.
Now go back to the new Product Backlog Item (PBI) in your team project using either Visual Studio or web access. Go to the Storyboards tab in the lower left of the PBI. Click Link To and browse your way to the storyboard on the network share. After successfully linking to the storyboard, you will see the linked file in the PBI (see Figure 10-5).
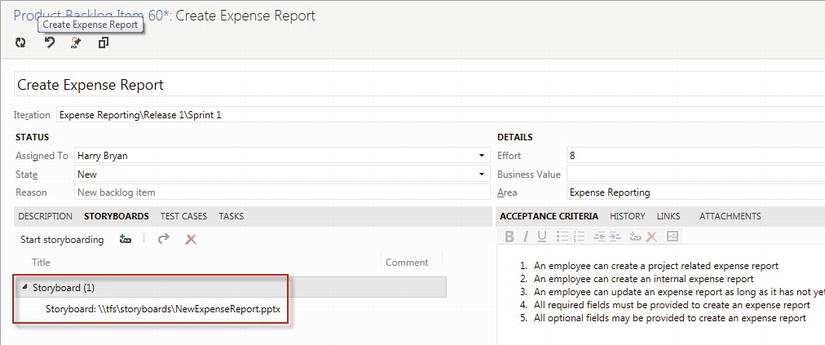
Figure 10-5. Sucessfully linked a PBI to a storyboard
When to Use Storyboarding
Okay, so now you know how to create storyboards using PowerPoint. When can you use this feature? From an agile perspective, you have several options. If you remember the requirements workshop our friends in Kangreen held in the beginning of their project in Chapter 8 they could definitely use this functionality during the workshop. They could have sat down and done the storyboards live during the meeting, coming up with new suggestions or improvements as they went along.
Another situation when this feature would be great is during the stakeholder meetings that the product owner holds. Together the PO and the stakeholders can discuss several options and agree on a design.
During sprint planning the PO could also quickly draw up a storyboard and discuss it with the team, clarifying any questions the team might have.
Storyboarding is a very useful technique that all projects can benefit from. Accessing a digital storyboard tool adds even more benefits.
Feedback Tracking Using Microsoft Feedback Client
Feedback can be hard to retrieve sometimes. You need to schedule meetings, find somewhere to meet, and preferably be located at the same location. To make feedback requests easier and more frequent, Microsoft has added a nice feedback feature to TFS 2012. This feature allows you to send feedback requests to other persons, such as stakeholders or users, via email. The person then gives feedback and returns their feedback.
Go to the web access page of your team project. Under Activities, click Request Feedback (see Figure 10-6).
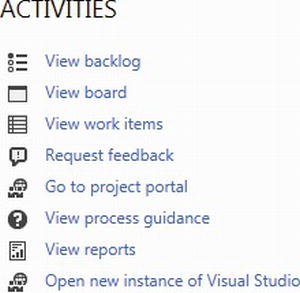
Figure 10-6. Request Feedback is available from the web access page
If you don’t see the Request Feedback link, then alerts have not been set up on your TFS server. To fix this, ask your TFS administrator to go to the TFS administration console and enable Email Alerts (see Figure 10-7).
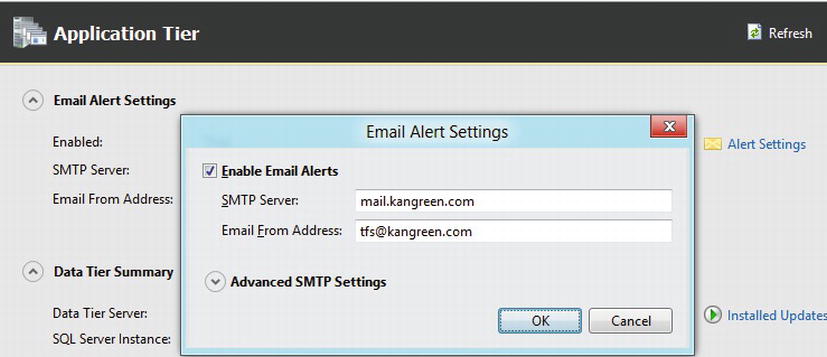
Figure 10-7. Configuring email alerts
Now fill out the form that appears (see Figure 10-8). First select which stakeholder should give the feedback. Then select how the stakeholder should access the application. There are three options:
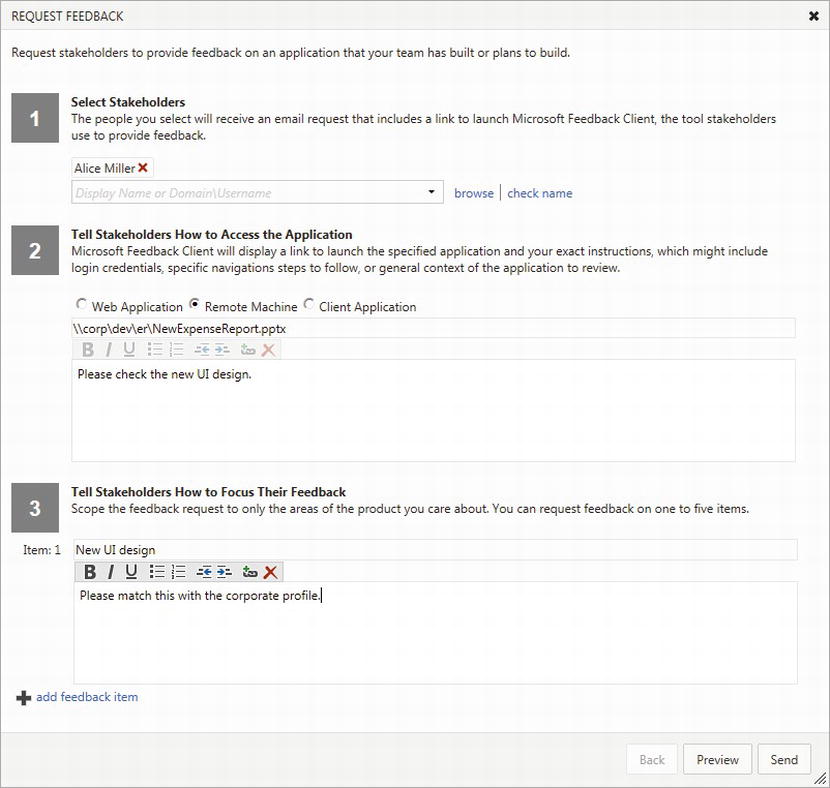
Figure 10-8. Sending feedback request
In this case we have selected a remote machine and attached the link to our storyboard. Because the feedback is on a network share, the stakeholder can access it from his or her machine. We can also add login information or any information the stakeholder needs to access the application.
Next tell the stakeholder what to focus on during the feedback session. This could basically be anything, from compliance with company profile to whatever you need feedback on.
![]() Note You can send multiple items for review at the same time. You don’t need to create one request for each, although, from a traceability perspective this might be the best.
Note You can send multiple items for review at the same time. You don’t need to create one request for each, although, from a traceability perspective this might be the best.
The stakeholder receives an email from the sender. This email includes a link to the feedback session. After the stakeholder clicks this link, the Microsoft Feedback Client starts. If the client is not installed, there is a download link for downloading and installing it (see Figure 10-10).
![]() Tip If your company policy includes firewall rules that do not allow external application downloads, you can change the link by following these steps:
Tip If your company policy includes firewall rules that do not allow external application downloads, you can change the link by following these steps:
- Use remote desktop or equivalent to access all servers in the TFS Application Tier
- Use Windows Explorer and go to C:Program FilesMicrosoft Team Foundation Server 11.0Application TierWeb Services\_static fs11\_scriptsTFS (or the location where TFS was installed)
- Download the feedback client from http://www.microsoft.com/visualstudio/11/en-us/downloads#feedback-client and save it to a network share
- Edit the original TFS.Requirements.Feedback.Models.min.js (make sure you save a copy first, in case something goes wrong)
- Search and find “INSTALL_FEEDBACK_TOOL_URL”
- Replace the default value with a link to the saved feedback client exe file. Please note that this is a file we are referencing not a web site. It could look like this: file://MyCompanyShare/vs_feedbackclient.exe.
- Save the TFS.Requirements.Feedback.Models.min.js file
- Test that the feedback client link has changed
The Feedback client includes all information that you provided in the previous feedback request. For instance, any credentials you might have supplied for starting or accessing the application. When the stakeholder is ready he or she clicks Start (see Figure 10-9) to start the feedback session.

Figure 10-9. Starting the feedback session
This starts the feedback client, which contains three steps as seen in Figure 10-10:
- Start, which starts the actual feedback session
- Provide, which gathers the feedback
- Submit, where the stakeholder submits the recorded feedback
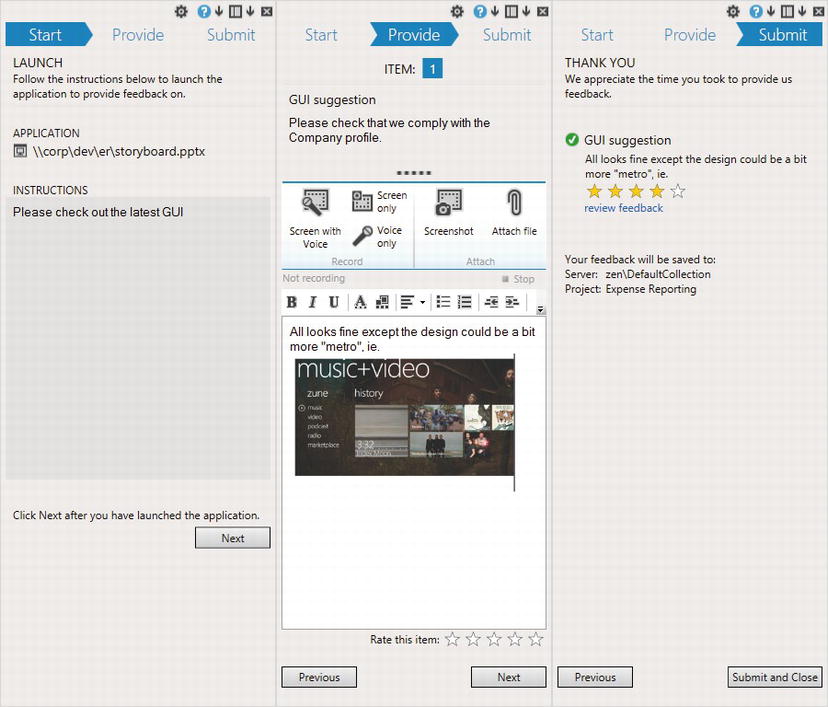
Figure 10-10. The three steps of the feedback client
By following the instructions in the feedback client the stakeholder has several options to record the feedback, including (see Figure 10-11):
- Recording screen interactions with an application
- Recording voice comments
- Using rich formatted text
- Including a screen shot or any other file
- Rating of the feature using stars (see Figure 10-10)

Figure 10-11. Recording feedback in the feedback client
Once we are finished with the feedback session we can either submit it or save it for later additions. Before submitting feedback we have the option to review the feedback. If the stakeholder is satisfied with the session he or she can submit it. Next a feedback response work item is created in TFS and the feedback request creator can go to web access and look under shared queries. There is a Feedback Requests query that returns all feedback requests and responses (see Figure 10-12).

Figure 10-12. Feedback requests query
When a feedback response work item is opened, all feedback given is attached as linked images (http://msdn.microsoft.com/en-us/library/hh301769(v=vs.110).aspx). To review the feedback:
- Choose the appropriate recording for the recording that you want to review.
- Select the link that appears after Navigate To at the bottom of the form.
- Click the Open button. The recorded feedback session is downloaded to your computer and opens in your default media player. You need the Microsoft Expression Encoder 4 installed as well.
- You can play, pause, and resume viewing the recorded session.
Summary
Gathering requirements is always hard. It is often problematic to have a stakeholder or end-user stating what they want unless they have something to relate to. Storyboarding is one way to make this process easier. By storyboarding the flow of an application or a system it is easier to get a feel of the system and thus the ideas and creativity seems to start flowing. The agile practices build on this fact, and by using agile practices in combination with techniques such as storyboarding, we can make the requirements gathering more efficient and hopefully capture the requirements more correctly.
The support for storyboarding in TFS and Office PowerPoint is a step forward in the requirements gathering process using Microsoft tools. This feature is really useful and we will definitely use it as a replacement for other storyboarding techniques in future projects.
Retrieving feedback from stakeholders is essential in any project. By using the feedback tracking features of TFS 2012 we have a solid way of both requesting and retrieving feedback.
Both these tool sets are valuable additions to TFS and Visual Studio that enable even better collaboration between stakeholders and development teams. Exactly in the spirit of ALM.
1 Please see http://www.lipsum.com/ for more information regarding this Latin text.