![]()
TFS Installation, Upgrade, and Administration
In the previous chapter we discussed the architecture of TFS. We also covered some basic implementation planning. In this chapter we will take this further and look at the different TFS installation options we have. We will also go through some common upgrade scenarios and look at what needs to be done to get a pre-TFS 2012 instance upgraded to 2012.
Installation Options
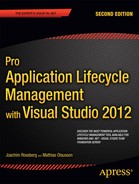
When running the setup of TFS the installation wizard wants to install the core components on your machine. You get the option of where to install these components on the first setup page (see Figure 31-1). Make sure to choose a suitable location because it is always impractical to change the location later.
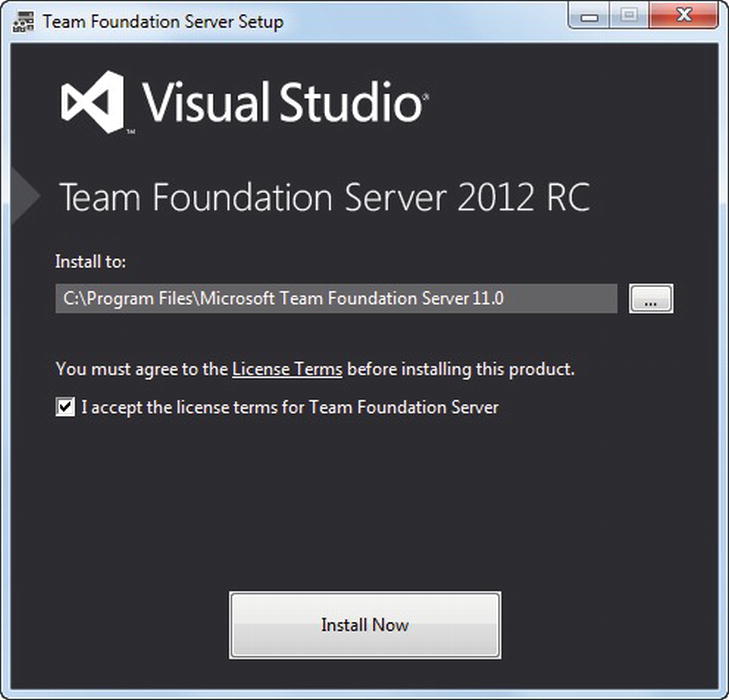
Figure 31-1. Starting the setup of TFS core components
You start the setup by clicking Install Now. After the core components installation is finished you are welcomed to the TFS configuration center as seen in Figure 31-2.

Figure 31-2. The TFS Configuration Center from where we install TFS
We can see that we have options to configure our Team Foundation Application Server and also our Build service. Let us focus on the TFS application server for now.
We can configure TFS in four different ways:
- Basic
- Advanced
- Application-Tier Only
- Upgrade
Let’s now take a look at these installations in a little more detail.
The Basic installation of TFS is the option to use if we want to have a single server TFS installation up and running quickly. The TFS basic installation even runs on a client operating system if we want to setup a minimal development environment.
If we want, we can add more than the core TFS features (such as work item tracking, version control, and builds) and get reporting in our projects as well as team portals. We need to install SQL Server before we install the TFS if we want to have reports. If we can manage without the reporting features, we can let the TFS installation install SQL Server Express for us.
Team Foundation Server can install SharePoint 2010 for us if we want, but we can use an existing installation of SharePoint Products with the basic configuration wizard as well. This is new for TFS 2012 and is great because we get the simplicity of the basic installation but can use a version of SharePoint Products other than the one that ships with Team Foundation Server. If SharePoint is not installed on the same server as the TFS application tier, then we need to install the SharePoint TFS Extensions on the SharePoint server. The SharePoint TFS extensions installs the TFS specific SharePoint features such as WebParts.
![]() Note If installing a SQL Server instance yourself, please install SQL Server 2008 R2 or SQL Server 2012. You must also install the following SQL Server features for a complete TFS setup: Database Engine, Full-Text Search, Analysis Services, and Reporting Services. After you have installed SQL Server, configure Analysis Server for automatic failover.
Note If installing a SQL Server instance yourself, please install SQL Server 2008 R2 or SQL Server 2012. You must also install the following SQL Server features for a complete TFS setup: Database Engine, Full-Text Search, Analysis Services, and Reporting Services. After you have installed SQL Server, configure Analysis Server for automatic failover.
The standard installation is very straightforward and will need very little user interaction. Here are the steps you need to follow:
- In the Team Foundation Server Configuration tool, choose Basic, Start Wizard. The Basic Configuration wizard appears.
- Read the Welcome screen, and then choose Next.
- Perform one of the following actions as seen in Figure 31-3:

Figure 31-3. Choose to install SQL Server Express or use an existing SQL Server
- Choose Install SQL Server Express to host the configuration database on an instance of SQL Server Express, and then choose Next.
- Choose Use an existing SQL Server Instance to host the configuration database on an existing instance of SQL Server, and choose Next. Then, in SQL Server Instance, type the name of the server that is running SQL Server or the named instance that will host the configuration database, and choose Next. Choose Test to test the connectivity to SQL Server.
- Review the information on the next screen, and then choose Next. The wizard validates your configuration.
- When validation is complete choose Configure (see Figure 31-4). The wizard applies the configuration settings.
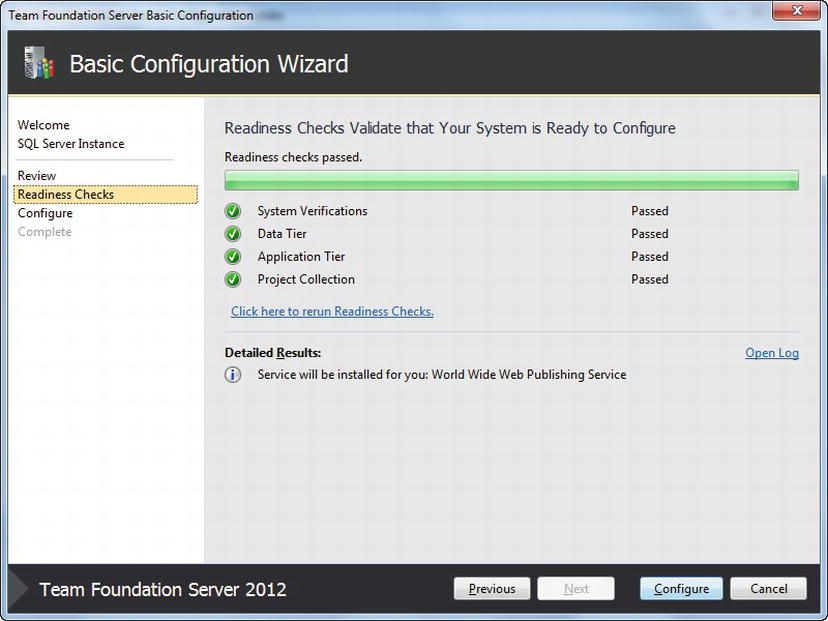
Figure 31-4. Starting TFS configuration
Advanced
If we need to configure a more complex setup of TFS, we can use the Advanced configuration. This option allows us to install and configure TFS on more than one server and it also lets us have more control over the options that are available to us.
Some of the options we have are to use an existing SQL Server or SharePoint server that we want to use to host team projects or TFS data. We can also place TFS and its configuration databases on different servers.
We can also choose to install SQL Server and SharePoint on separate new servers if we do not have any existing one we can use. These installations can be hosted on different servers as well. If you use multiple servers, you can distribute the load between Team Foundation Server and the configuration database, or you can ensure that prerequisite server software for features such as reporting or the portal site is running on capable hardware.
![]() Note Don’t mistake the multiple server installation with the scale-out features that Team Foundation Server offers. The scale-out features include the ability to create a Team Foundation Server farm and add a team project collection to an instance of SQL Server that was not part of the original deployment of Team Foundation Server. However, these scale-out features are not part of the advanced setup scenario above.
Note Don’t mistake the multiple server installation with the scale-out features that Team Foundation Server offers. The scale-out features include the ability to create a Team Foundation Server farm and add a team project collection to an instance of SQL Server that was not part of the original deployment of Team Foundation Server. However, these scale-out features are not part of the advanced setup scenario above.
If you configure TFS on multiple servers, you must consider your user accounts as well. You need an Active Directory domain in your network because you cannot use local accounts. Make sure that the account that you use to install Team Foundation Server is a member of the Administrators security group on the servers where you will install Team Foundation Server. Be sure to involve your infrastructure team in this process so that you will not run into problems later on.
If you plan to configure reporting, you must also be a member of the Administrators security group on the server that is running SQL Server Reporting Services. If you plan to configure SharePoint Products, you must be a member of the Farm Administrators group on the SharePoint Central Administration site.
Also make sure you have noted the service accounts that you will use to install Team Foundation Server, SQL Server, and SharePoint Products.
The steps you need to follow to configure your TFS installation using the advanced options can be found at http://msdn.microsoft.com/en-us/library/dd631919(v=vs.110). We do not cover all these steps here because there are too many. Please refer to this web page for these instructions.
If you already have a TFS server installation in your organization you have some options for improving performance or repair a TFS installation in the application-tier only configuration option. There can be many reasons for using this option:
- You might want to build redundancy into your TFS installation by adding a new TFS server and create a server farm. This requires Network Load Balancing installed and configured on the participating servers. This also requires that the application tier and the configuration database are installed on separate servers.
- You might want to improve speed of your TFS installation by adding TFS servers to a farm. Scaleout deployments should also use a load balancing solution to distribute the load evenly over the farm.
- You might have a TFS application tier that has failed for some reason and needs to be replaced.
- Maybe the server hardware is getting obsolete and you need to move the TFS Application Tier to another server.
![]() Note You must have installed TFS 2012 using a domain account for the service account (TFSSERVICE); otherwise you must change to a domain account.
Note You must have installed TFS 2012 using a domain account for the service account (TFSSERVICE); otherwise you must change to a domain account.
Installing an additional Application Tier to an existing TFS installation
- Install TFS 2012 as described earlier.
- From the Team Foundation Server administration console choose Application-Tier Only Configuration.
- In the SQL Server Instance dialog select the SQL Server hosting the TFS configuration database for your setup.
- Choose a database from the list to which this Application Tier will be connected.
- Choose the execution account for the TFS services.
- Choose the authentication method.
- Finally step through the final steps in the wizard and the new application tier is setup for you.
Upgrading from Earlier TFS Versions
If you are already using TFS in your organization there is a good chance that you can upgrade to TFS 2012. You can perform an upgrade from the following earlier TFS versions:
- Developer Preview or BETA release of Team Foundation Server 2012
- Team Foundation Server 2010 with or without Service Pack 1
- Team Foundation Server 2008 with Service Pack 1
There are two upgrade paths that you can choose. You an upgrade your TFS installation and keep using the existing hardware or you can upgrade and move TFS to new hardware. We recommend moving to new hardware if possible because it will let you keep the old installation to fall back to in case something goes wrong.
To upgrade and keep your existing hardware, follow these steps:
- Verify that your operating systems and your hardware are supported by TFS 2012.
- Check that SQL Server is version 2008 R2 or higher. If not, you need to upgrade SQL Server first.
- Backup your TFS data. The installation deletes your databases.
- Select which account TFS will use. The default is the Network Service account. You probably want to keep using the old account but you can choose the Network Service account if you want.
- Using control panel you need to uninstall the previous version of TFS. This might seem dangerous but uninstalling TFS will not remove the TFS database. We can always re-create an application tier by restoring and reconfiguring the TFS database.
- If you are running SharePoint on a computer that is not the TFS computer, you need to uninstall the TFS extensions for SharePoint as well. If SharePoint is running on the TFS server, the extensions will be automatically removed during uninstall of the previous TFS version.
- Run the Team Foundation Server install from the product DVD and then use the Upgrade Configuration wizard to upgrade your installation.
- Follow any instructions on the screen.
Move to New Hardware
To upgrade to TFS 2012 and move to new hardware:
- Verify that your operating systems and your hardware are supported by TFS 2012.
- Backup your TFS data to restore on the new machine.
- Select which account TFS will use. The default is the Network Service account. You probably want to keep using the old account but you can choose the Network Service account if you want.
- Install SQL Server 2008 R2 or 2012 on the server you have selected. Do not forget to check all SQL Server requirements first. Check http://msdn.microsoft.com/en-us/library/dd631907(v=vs.110) for more details. If you are going to use an existing server, you need to verify that it meets the system requirements.
- Install and configure Reporting Services and Analysis Services on the SQL Server (if not already installed). Keep in mind that the report server cannot be shared with other applications since TFS requires a dedicated report server. If your report server is not on the same server as Team Foundation Server, the account that you used to install Team Foundation Server needs to be added to the Administrators security group on the report server. This enables setup to configure the report server to work with Team Foundation Server.
- You can set up SQL Server for reporting during an upgrade in any of the following ways:
- You do not have to use the same report server that you used with your earlier version of Team Foundation Server.
- You do not have to use the same SQL Server instance for the report server as the one that you used for the Database Engine.
- You can use multiple servers to host the report server.
- Verify that you have configured all instances of SQL Server to meet the minimum requirements of Team Foundation Server.
- Set up your SharePoint Products if you want to continue using a portal. Do this before launching the TFS upgrade. You cannot install SharePoint Foundation 2010 during Team Foundation Server upgrade, as you can during installation. For SharePoint you have the following ways to install:
- Install SharePoint on the same new hardware you will use for TFS
- Install SharePoint on different hardware from the new TFS
- Continue to use a SharePoint installation that is installed and running on different hardware from where you will install the new TFS.
- Install Team Foundation Server and use the Team Foundation Server Configuration tool to restore the data you backed up earlier in this checklist and configure the upgrade.
- If you installed Microsoft Office SharePoint Server 2007 or SharePoint Server 2010, you must configure the enterprise application definition that you created for Team Foundation Server.
Once the steps in any of these two preceding upgrade paths are complete, please follow the steps from http://msdn.microsoft.com/en-us/library/dd631898(v=vs.110) to configure the upgrade. Notice that you have different steps depending on from which previous version you are upgrading.
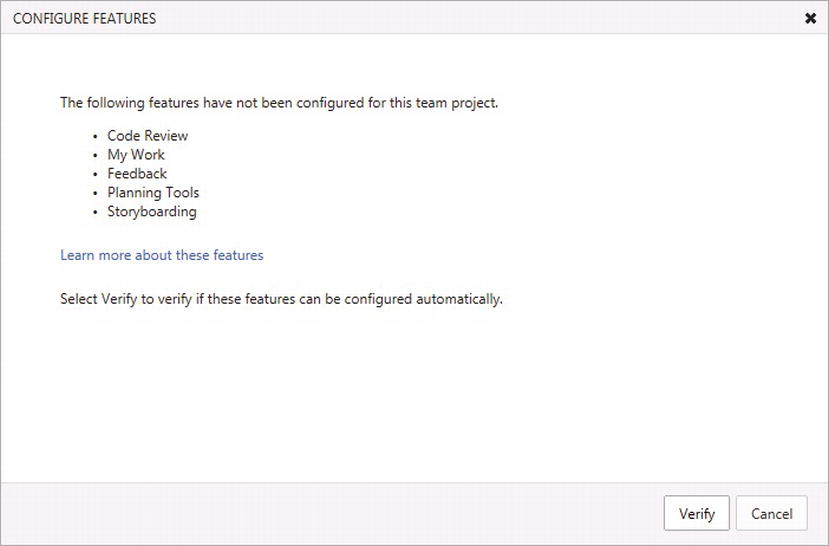
Enabling Features After Upgrade
After we have upgraded our TFS instance we can continue to work in the project but some new TFS features will not be available to us before we enable the capabilities. After enabling these new features we get access to the following TFS 2012 features:
- Code Review: Initiate code review and give responses.
- Feedback: Initiate feedback requests and track feedback responses.
- My Work: Manage work, suspend and resume tasks.
- Planning Tools: Manage the product backlog and plan sprints using the backlog page (including iteration and capacity planning), manage spring activities using the task board page.
- Storyboard Integration: Access the storyboards by linking them to work items.
- Hidden Types Category: Specify the set of work item types that the Visual Studio tools create but not something we work with manually. This includes Code Review Request and Code Review Response, Feedback Request and Feedback Response, and Shared Steps.
If a project has not yet been updated, the error in Figure 31-5 is shown where we can configure the features using a wizard.
Figure 31-5. Error message for missing configuration of upgraded team project
Click the Configure feature to initiate the wizard that enables the new features. The wizard analyzes the team project to see whether the process template used is compatible with what the wizard can upgrade to. Figure 31-6 shows the configuration wizard process.
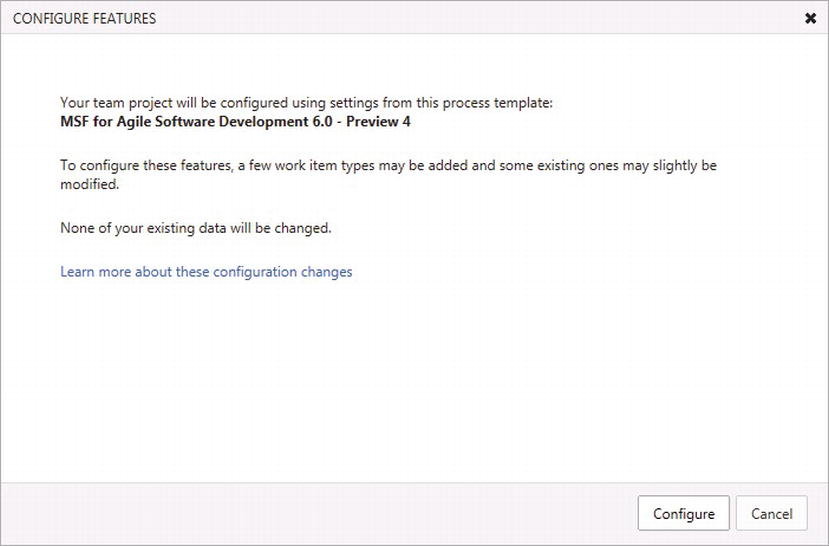
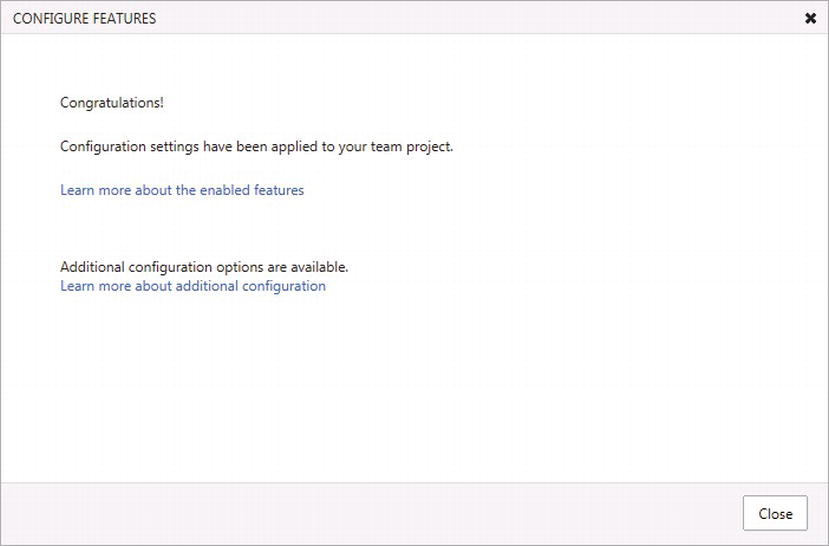
If the project cannot automatically be upgraded we can still do the upgrade by hand. For a description of the required steps see http://msdn.microsoft.com/en-us/library/ms194972(v=vs.110).
Team Foundation Server Administration
A Team Foundation Server will not run and maintain itself (nor will any other server product). You need to plan for maintenance and operations at the same time as you plan for the deployment. Be sure to involve the operations team already at the deployment planning stage (at the latest) so that they can advise on how to implement TFS into your infrastructure. As we can understand from the TFS architecture in Chapter 30 there are numerous ways to deploy TFS and many things to consider.
Some of the tasks that need to be taken care of after (and during) a TFS installation are
- Managing the service accounts and the services that were used during deployment.
- Setting up security by managing users and user groups, both server-level as well as collection-level security
- Managing permissions and security for any other roles necessary.
- Creating and maintaining team project collections so that projects and resources can be well supported
- Setting up permissions on servers that are integrated with TFS. For instance, a separate SQL Server or a SharePoint server. This requires managing groups and permissions between these participating servers.
- Adding servers and resources necessary for the deployment.
- Creating disaster recovery routines, including backing up and restoring data, both on TFS server, SQL Server databases as well as on SharePoint servers.
It is essential that the administrators understand the architecture of TFS and also the basic concepts that we have covered in this book. This includes the features of TFS, the tools TFS offers both to developers, project managers, administrators and others.
Administrators also need to understand how TFS and its components communicate so that the correct settings can be applied in the network. There are also Windows server security concepts and restrictions they need to be aware of, like access control, user account administration, and so on. This should not be a problem for a good operations team, but make sure you won’t run into problems with something you could easily avoid beforehand.
Also make sure that the competence on SQL Server and SharePoint (if you will use it) is high, especially if this is the first SQL Server/SharePoint deployment in your organization. If you are going to use Lab management and Hyper-V for testing you need to make sure that operations understand and can manage a Hyper-V server.
TFS includes an administration console (see Figure 31-7) where common administration and tasks for TFS can be performed. From this console you can manage administrative permissions, your team project collections, your build environment, and your virtual lab environment, as well as checking your TFS deployment status and reading various TFS log files.
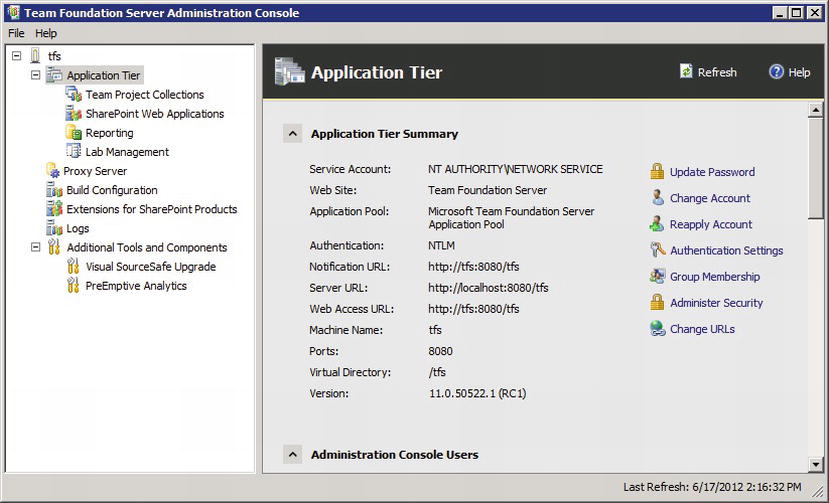
Figure 31-7. The TFS management console
Here are some of the things the management console can help you with:
- Managing the SharePoint web applications. This requires the TFS server extensions for SharePoint and that you have added the SharePoint Web applications as resources that are available for team projects and team project collections.
- Configuring reporting resources for your team project collections and the projects in those collections.
- You can monitor your TFS server logs.
- Create and manage team project collections. This includes organizing the team projects into a specific team collection so that the structure matches the development needs.
- You can start and stop TFS services for operational maintenance. You can also change the accounts or passwords that are used as service accounts in TFS.
- The console can be used to manage server level users and user groups. You can create your own custom groups if you do not want to use the default.
If the TFS operations team prefer to, they can also use the TFS command line tools to manage the TFS deployment. They can of course script the parts they need as well. The command line tools are installed during the TFS installation.
Adding TFS Collections After Installation
As we saw previously we can choose to upgrade an existing TFS instance as part of the TFS 2012 installation. But what if we have already setup our TFS 2012 and want to upgrade an existing TFS later on? Do we have to reinstall the entire TFS setup to do the upgrade?
Fortunately for us there is a command-line tool that allows us to upgrade an existing TFS to 2012—the TFSConfig.exe utility. To upgrade a TFS 2008 or 2010 database we issue the following command:
TFSConfig Import /SQLInstance:ServerName /CollectionName:NewCollectionName /confirmed
Where
If we need to move a TFS database from one TFS instance to another we can use the Team Foundation Server Administration Console to do this and go through the following steps:
- Select the collection from the administration console on the source server and select Detach.
- Back up the database on the source server.
- Copy the backup set to the target server.
- Restore the backup set on the target server.
- Go to the administration console on the target server, select Team Project Collections and Attach Collection. The wizard in Figure 31-8 opens where we point to the restored collection database and lets the wizard connect it to the TFS instance.
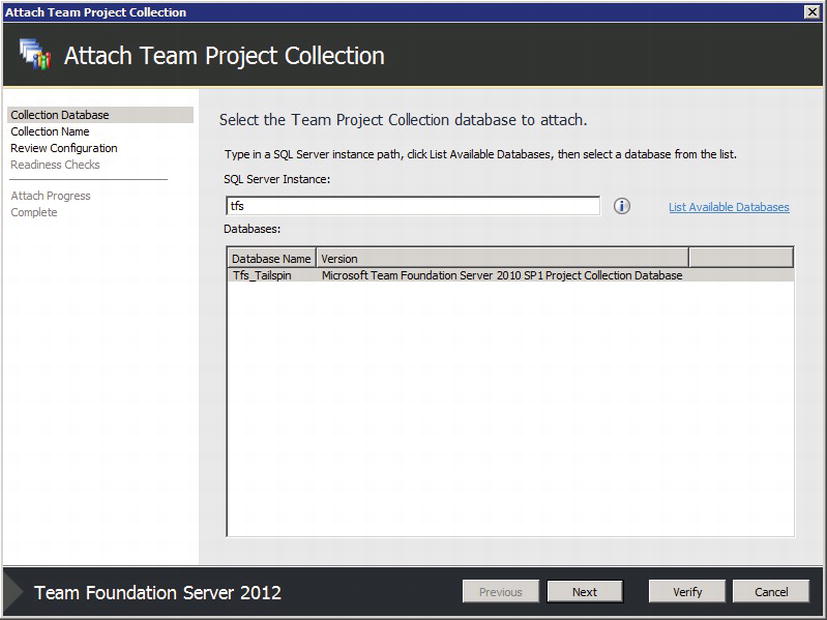
Figure 31-8. Attaching a Team Project Collection
![]() Note If the attached database is an earlier version, it will be upgraded as part of the attach process.
Note If the attached database is an earlier version, it will be upgraded as part of the attach process.
Another behavior you may notice when working with a TFS 2012 and its web client is that some features may not be available to all users. It turns out that the web client has an access model that allows us to define the functional authorization for our users. If for instance a user does not see the “View Backlog” option on the team’s home page (see Figure 31-9) this is likely due to restrictions in the access configuration for that user.

Figure 31-9. User not having access to the Backlog view in TFS web access
Figure 31-10 shows how to assign a user to the appropriate permissions in the TFS Web Access. The permissions enable the correct features for the user.
- Limited: View work items created by self.
- Standard: Limited plus standard features and the Agile Boards.
- Full: Standard plus Backlog and Sprint Planning Tools and Request and Manage Feedback.
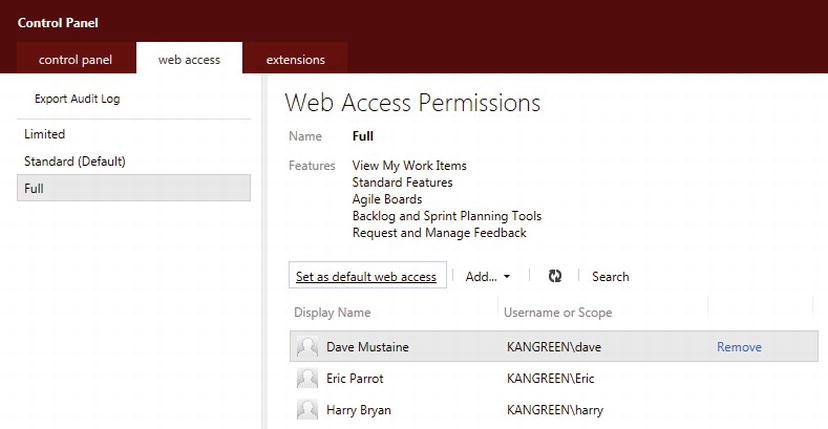
Figure 31-10. Adding users to Full access in the TFS web client
Similarly we may not have setup our iterations properly. For instance, if we have not selected iterations for our project, the TFS web client cannot render the team board (see Figure 31-11). To resolve this problem we need to click the “Select team’s iterations” link and configure the iterations for our team.
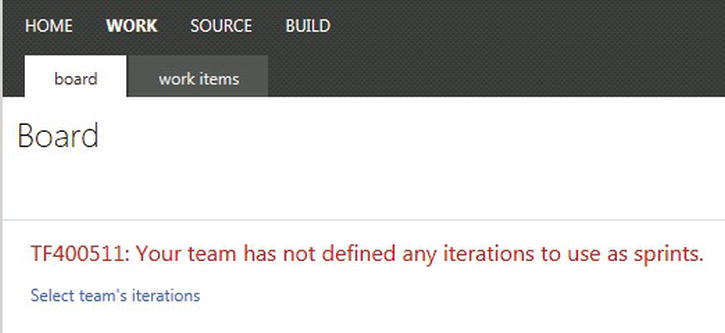
Figure 31-11. Error in configuration of Team Board
Some features in TFS 2012 require we enable email alerts, for instance, the Feedback tool and the alert subscriptions.

Figure 31-12. Error message for missing email alert configuration
To enable alerts we can use the Team Foundation Server Administration Console. Select the TFS application tier and scroll down to the Email Alerts Setting to bring up the configuration dialog. From the settings dialog we can provide the address to our SMTP server as well as the sender address used when sending out alerts (see Figure 31-13).

Figure 31-13. Email Alert Settings
The Email alert settings dialog has been extended with an Advanced SMTP settings section. This new feature allows us to configure the identity for the SMTP authorization.
Summary
In this chapter we have looked at the various ways we can configure a new TFS installation. We have seen how simple it is to set up a basic setup, as well as what needs to be done to get an advanced configuration in place.
Many existing TFS installations will need to be upgraded and we have looked at how this can be achieved. In general, we recommend moving to new hardware when upgrading TFS because that lets us fall back to the old instance in case something goes wrong.
Finally, we covered some of the administrative tasks related to maintaining a TFS 2012 server. In particular we looked at how we can enable different capabilities in TFS by running the corresponding configuration.
This concludes the architecture, installation, and administration sections of the book. Next we will look at how reporting works in TFS and how we can use the data in TFS to analyze the performance of our team.