DV Toolkit for LE
DV Toolkit
If you are working in post-production, whether for video or film, you will almost certainly benefit from adding the DV Toolkit option to your Pro Tools LE system.
DV Toolkit is a bundle of additional software that provides most of the Time Code features that are available in the TDM software along with Digidesign’s DigiTranslator option for full AAF/OMF import and export, AudioSuite DINR LE noise reduction plug-in, and Synchro Arts VocALign Project plug-in for dialogue replacement.
DV Toolkit 2
DV Toolkit 2, announced just as this book was being completed, provides an even larger collection of tools, including the TL Space Native Edition convolution reverb, the DigiBase Pro file management tool for working with the large number of files and volumes on post projects, and the Pro Tools MP3 Option for exporting mixes as MP3 files.
With DV Toolkit 2, users can expand Pro Tools sessions to up to 48 mono or 48 stereo tracks at up to 96 kHz to accommodate more complex post-production projects. In addition, DV Toolkit 2 adds a wide selection of post-specific Pro Tools functions, many of which were previously available only with Pro Tools HD software, including: Replace Region and Edit to Timeline Selection Commands, Scrub Trim Tool, Export Session Text, Continuous Scrolling, and the Universe Window.
DigiTranslator
DigiTranslator allows you to import or export audio sessions from or to other applications, such as Avid Xpress DV, Final Cut Pro or Adobe Premiere. You can then record new dialogue, sound effects and music as necessary or clean up existing audio, replace ‘dodgy’ dialogue, and so forth. Afterwards, you can transfer the session back to the original format if necessary.
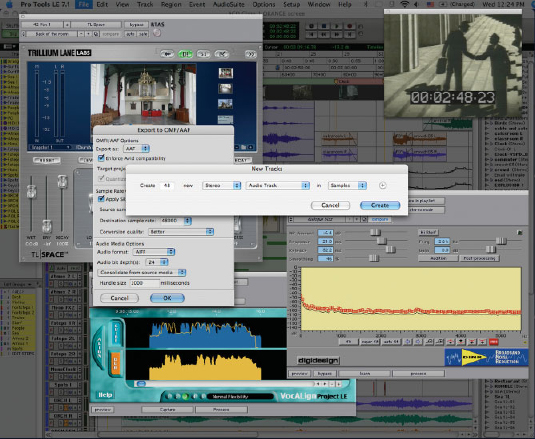
Fig. A2.1 – DV Toolkit 2.
Transfers are also possible to and from other digital audio software such as Logic Pro, Digital Performer, Sonar, Cubase SX, and Nuendo.
When DigiTranslator is installed, the Export: Selected Tracks as OMF/AAF… command in the File menu becomes active whenever a track or tracks are selected.
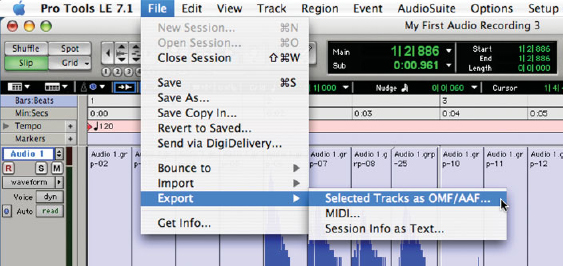
Fig. A2.2 – Export: Selected Tracks as OMF/AAF… command.
When the Export to OMF/AAF dialog appears, you can use this to change the sample rate and to select the file format and bit-depth of the exported audio if necessary.
If you intend to transfer to software running on the same system, you can use the default ‘Link to source media’ option, but if you intend to take the exported files to another system you should choose ‘Copy from source media’ so that the exported OMF/AAF file actually contains the audio rather than simply pointing to the original audio files on your system. A third option, ‘Consolidate from source media’, only copies the actual audio used in the audio regions within the session rather than the complete audio files from which these regions are taken.
tip
When the Export to OMF/AAF dialog is opened, it defaults to exporting AAF format files, so if you want to export an OMF file you must specifically select this using the ‘Export as:’ popup selector at the top of the dialog window.
Fig. A2.3 – Export to OMF/AAF Dialog.
Digidesign Intelligent Noise Reduction
Digidesign Intelligent Noise Reduction (DINR) LE version features the Broadband Noise Reduction (BNR) AudioSuite plug-in – no RTAS version, though. BNR provides broadband and narrowband noise reduction for reducing tape hiss, low frequency rumble, microphone preamp noise and similar unwanted sounds.
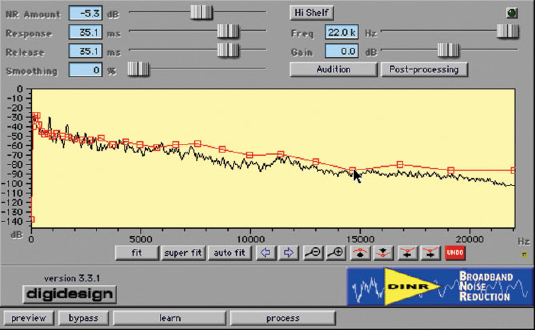
Fig. A2.4 – DINR BNR Plug-in.
Synchro Arts VocALign Project
The Synchro Arts VocALign Project plug-in automatically adjusts the timing of one audio signal to match another by applying varying amounts of time stretching or compression to the audio. Originally designed as an Automatic Dialogue Replacement (ADR) helper application for use in video and film post production, it can also be used to tighten up doubled vocal or instrumental parts in music.
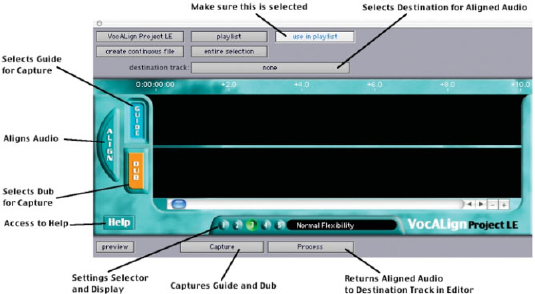
Fig. A2.5 – VocALign Project plug-in.
DV Toolkit Time Code Features
Timebase Rulers
DV Toolkit adds Timebase Rulers to Pro Tools LE so that you can use Spot mode to spot audio to Time Code or to Feet+Frames.

Fig. A2.6 – Timebase Rulers.
Scrubber Tool for scrubbing a Movie track
You can use the Scrubber tool to scrub a QuickTime Movie track with full-frame accuracy. Just select the Scrubber tool, click in the Movie track and drag the Scrubber.
note
If you scrub directly on the Movie track, only the movie will scrub (no audio will play). If you scrub on an audio track, audio and the movie will scrub simultaneously.
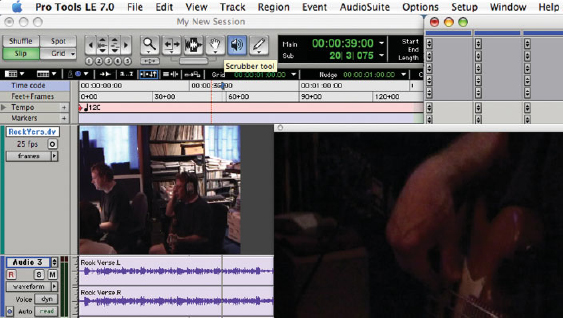
Fig. A2.7 – Scrubber Tool.
Custom Shuttle Lock Speed
If you press Control-9 (Mac) or Start-9 (Windows) on the numeric keypad in Transport or Classic modes, Pro Tools LE will enter a fast shuttle mode and will ‘lock’ into this mode. In other words, it will playback many times faster than real time until you stop playback. The default speed can be too fast, or too slow, for some users, so the Custom Shuttle Lock Speed setting in the Operation Preferences window is provided to let you adjust the fast-forward Shuttle Lock speed to whatever speed suits you.

Fig. A2.8 – Custom Shuttle Lock Speed setting in the Operation Preferences window.
Time Code Mapping Options
Various Time Code mapping options are available when Importing Tracks. When specifying where imported tracks are placed in the current session you can maintain Absolute or Relative Time Code values or map the Time Code Start to a specific time code location.
Use Subframes Option
When you are using the Spot dialog, Shift dialog or the Go To dialog, you can click the ‘Use Subframes’ option if you need greater precision. This option adds an additional time field containing subframe values at the far right in the SMPTE hours:minutes:seconds:frames box. This is separated from the whole frames time field by a period (.) instead of a colon (:).
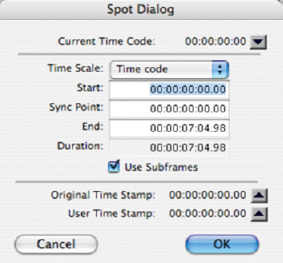
Fig. A2.9 – Spot Dialog with Use Subframes option activated.
Session Setup Window
DV Toolkit enables several features in the Session window that can be accessed from the Setup menu.
Time Code rates and Feet+Frame rates
Time Code rates and Feet+Frame rates for sessions can be set in the Session Setup window.
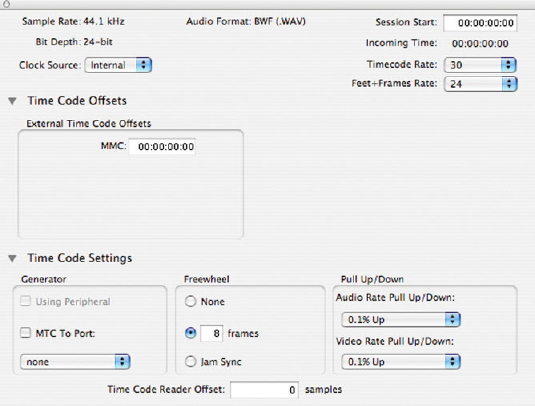
Fig. A2.10 – Session Setup Window.
All the Time Code rates that you are likely to encounter are fully supported.
Supported Feet+Frame rates are 25 fps, 24 fps and 23.976 fps – which is used during Telecine transfer from a 24 fps film projector to NTSC video, regardless of whether the session is using audio pull down or not.
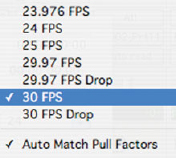
Fig. A2.11 – Time Code Rate Selector.
Pull Up and Pull Down
The Session Setup window also allows settings for Audio Rate Pull Up/Down and Video Rate Pull Up/Down. These are used when laying audio back onto film or video, or when recording audio for film or video. Audio Pull Down Factors and QuickTime Movies Audio ‘pulls’ can be used to adjust the speed of Pro Tools’ audio playback to make sure that it always matches the picture during the post-production process.
note
As the manual explains: ‘DV Toolkit for Pro Tools LE offers limited pull capabilities, primarily for TDM users who have a secondary Pro Tools LE system that they use to perform smaller tasks or “go portable”.
Although DV Toolkit for Pro Tools LE offers some pull down options, it does not have the ability to adjust the internal sample clock the same way large TDM systems do in tandem with the Digidesign SYNC I/O peripheral.
Since DV Toolkit for Pro Tools LE does not have any means to adjust the Pro Tools sample clock, it instead simulates the audio/video pull relationship by pulling up the video instead of pulling down the audio. This maintains the proper video/audio speed relationship when using the fixed Pro Tools internal clock.
The audio sample clock is not pulled down, so the digital outputs are not outputting a pulled down sample clock.
If you are using an external clocking source (such as S/PDIF or ADAT Optical), Pro Tools audio and MIDI is resolved to the Digital input’s clock speed. If you select audio pull down in Pro Tools, the audio still doesn’t pull down in Pro Tools LE; the video still pulls up to maintain the proper relationship, and the actual Pro Tools sample rate is now dependent on the digital clock source. However, if the incoming Digital Clock speed is pulled down, the Pro Tools audio and MIDI will run at a pulled down rate, and the video will be pulled up, returning picture to its normal speed.’
So, if pull down is selected in DV Toolkit for Pro Tools LE and your Pro Tools LE system is synchronized to an external clock via your interface’s Digital input, there are two possibilities:
1. If the external clock is not pulled down, the actual sample rate of the Pro Tools LE audio and playback speed of the MIDI is not pulled down; instead the video is pulled up.
2. If the external clock is pulled down, the actual sample rate of the LE audio and the playback speed of the MIDI is pulled down and the video plays at its original non-pulled speed.
Time Code Setup Commands
The Setup menu has various time code related commands.
Redefine Current Time Code Position
You can use this command to redefine the current time code position and session start time. By creating an insertion point (or selection), and then entering the desired new time code position for that location, the session start time will be recalculated based on the new, relative Time Code location.
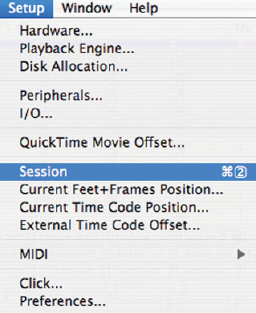
Fig. A2.12 – Setup Menu.
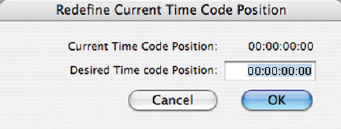
Fig. A2.13 – Redefine Current Time Code Position.
Redefine Current Feet+Frames Position
You can use this command to redefine the current Feet+Frames position. By creating an insertion point (or selection), and then entering the desired new Feet+Frames position for that location, the session start time is recalculated based on the new, relative Feet+Frames location.
Typically, this command is used for integrating test tones, pre-roll, Academy leader, and similar pre-program material into Pro Tools sessions.
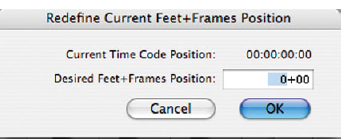
Fig. A2.14 – Redefine Current Feet+Frames Position.
Redefine External Time Code Offset
You can use this command to redefine the External Time Code Offset.
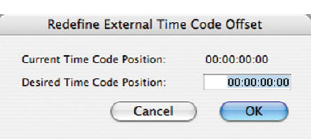
Fig. A2.15 – Redefine External Time Code Offset.