What’s in a name?
‘Pro Tools’ – the name says a lot! I reckon this is a tribute to the power of positive thinking: say what you want to become and you will! Pro Tools was ‘born’ around 1992 as an aspirational 4-channel recording and mixing system that was more or less a digital version of the popular 4-channel cassette-based Portastudio systems that songwriters used around that time to make their demos. Absolutely nobody considered Pro Tools to be a professional system at the time: it was rightly regarded as nothing more than a toy recording-gadget for computer hobbyists to check out.
But look at Pro Tools today: it has become, without question, the leading system for professional audio recording around the world! The once-mighty Studer multi-track analogue and digital recorders are no longer manufactured, as demand for these machines has plummeted, and even the mighty Neve and SSL mixing consoles are now under threat from Digidesign’s ICON mixing worksurfaces.
The truly amazing thing is that almost anyone can afford to buy an entry-level Pro Tools system today – which was never true of a Neve/Studer or any similar professional analogue system. Using Pro Tools LE – the home studio version of the Pro Tools HD software that is used every day in leading professional studios around the world – with hardware options priced to suit most people’s pockets – even a kid can get started in a bedroom. And the almost identical Pro Tools M-Powered software works with an even wider range of affordable hardware interfaces.
Who should use it?
Anyone who wants to record, edit, and mix audio and MIDI data will find Pro Tools suitable for these purposes. Recording engineers, music producers, musicians, composers, arrangers, people working on sound in theatre or in music venues – almost anyone who needs to work with recorded audio and MIDI in any situation.
There is plenty of competition around, including Apple’s Logic software, MOTU’s Digital Performer software, Yamaha/Steinberg’s Cubase SX, and Nuendo software to name just a few. One advantage Pro Tools has over these competitors is that it is unquestionably easier to learn how to use. This is due to the excellence of its design, which manages to fit most features into just two main windows – the Edit and Mix windows – while its competitors confuse their users with far too many windows to fit comfortably onto even the largest computer screen – or even onto a pair of screens.
Students and aspiring recording engineers and producers will particularly benefit from learning how to use the Pro Tools LE or M-Powered software because all the software features in these versions are included in the Pro Tools HD software used in the professional studios – and the user interface is virtually identical. As a result, everything you learn using Pro Tools LE or M-Powered is immediately transferable to the professional Pro Tools HD systems.
Affordable Pro Tools Systems
The Mbox is the most affordable Digidesign branded system, priced at under $500. Avid, Digidesign’s parent company, bought M-Audio in 2005. Almost immediately Digidesign released a version of Pro Tools LE called Pro Tools M-Powered that works with M-Audio’s expanding range of versatile and affordable audio interfaces. For example, the M-Audio Ozonic is a MIDI keyboard that also incorporates both MIDI and audio interfaces and hooks up to the computer via FireWire. Ideal for laptop users, systems such as Ozonic with Pro Tools M-Powered software are certain to encourage even wider use of Pro Tools systems.
More ambitious setups need more inputs and outputs and possibly a mixing control surface – a box with faders, knobs, and switches that hooks up to the computer to control Pro Tools LE. Digidesign offers the Digi 002 Rack – which has 8 channels of analogue I/O plus digital I/O and monitoring capabilities in a 2U 19″ rack. If you want a control surface, there are two main options: the Digidesign Command | 8 or the Digi 002 – which has the same I/O capabilities as the 002 Rack plus an 8-fader control surface. The Digi 002 looks like a compact 8-channel digital mixer and it can function as a stand-alone 8:2 mixer with two internal effects units plus two external effects sends, EQ, dynamics, other effects, and snapshot automation. The Command | 8 is similar to the Digi 002, but does not include the audio to computer interface – so you need a 002 Rack (or some other suitable interface) as well.
Speakers, Headphones, and Microphones
You also need a suitable loudspeaker monitoring system to work with and at least one set of headphones.
As far as headphones are concerned, the Beyer DT100 or DT150 models are the best choices for regular studio use for the important reason that any of the parts that wear out can be easily replaced. This is not the case with most other headphones – especially those sold for use with consumer audio systems which generally have flimsy cables and earpieces that wear out very quickly with no replacement parts available from the manufacturers.
There are lots of loudspeaker systems available to choose from. Those with built-in amplifiers are usually the most convenient to work with. M-Audio, for example, sells a range of affordable monitors to suit smaller budgets.
But if you really want to do justice to your system, you should go for something like the Mackie HR824 nearfield monitors, which have built-in power amplifiers. The high-frequency amplifier is rated at 100 watts with 150-watt peaks while the low-frequency amp puts out 150 watts with 200-watt peaks – so plenty of headroom to avoid distortion. The 1″ tweeter with its exponential waveguide provides wide dispersion of high frequencies to above 20 kHz while the 8.75″ woofer delivers flat frequency response down to 42 Hz. So these speakers provide lots of bottom end and a comfortable high end with a wide mixing sweet spot – just what you need for long sessions.
And if you want something even punchier, my top recommendation has to be the ATC SCM SCM20ASL Pro active monitors. These ‘deliver’ whether you are recording, mixing, or mastering. ATC monitors are widely used in top mastering, orchestral and music studios around the world. These models use a 6″ combination mid/bass drive unit and a 1″ tweeter to deliver performance that you would normally expect only from a large 3-way monitor. Each cabinet has a 250-watt amplifier for bass/mid and 50 watts for high frequencies – and will deliver continuous Sound Pressure Levels of up to 108 dB. Yet even at the highest-volume levels, the amp and driver system maintains ultra-low distortion, solid stereo imaging, and a high degree of linearity. So what you hear is what you got!
If you have to choose just one versatile and affordable microphone for vocals and instruments, this has to be the Shure SM58 or SM57. If you have a little more to spend, I recommend Beyer M130, M160, and M260 ribbon microphones. The M130 and M160 can be arranged in a stereo M/S configuration that sounds great for recording pianos, drum kits, and almost any acoustic or electric instruments. The M260 is ideal for recording acoustic guitars. And if your budget will stretch, a Neumann M149 or M147, or an AKG C12VR or C414 studio condenser microphone will let you capture audio at the highest quality.
Home Studio Setups
A very basic home setup will just be in one room or part of a room. A separate vocal booth is always a good idea – whether you are recording voiceovers or vocals or one or two instruments, singers, or musicians. A separate recording room or studio is better still.
Don’t forget that human beings have to breathe fresh air to function properly, so a suitable ventilation or air conditioning system should be regarded as a necessity – not a luxury. Seating and benching should be ergonomically designed so that whoever is sitting and working in the room is not having their attention constantly distracted because they can’t sit comfortably or reach the equipment properly. You should also pay attention to the lighting in the room, making sure that this can be bright enough when it needs to be and dim enough when a more intimate atmosphere is required.
If you don’t want to disturb your neighbours or have them disturb you while you are recording, you are going to have to consider soundproofing. If an airplane flies past or a truck rumbles by, or someone in the building slams a door while you are recording into microphones, these sounds will be there in your recordings and can be impossible to remove completely afterwards without adversely affecting the sounds you want. You can buy acoustic tiles, baffles, panels, and other devices to add to a room to cut down any excessive reverberation or reflections of sound, but these won’t stop sounds coming in from outside or prevent all your sounds from travelling outside. You can get some useful isolation by constructing inner floors, ceilings and walls, and filling the area between outer and inner with layers of acoustically absorbent materials such as rockwool. Nevertheless, the only way to do this truly effectively is to use very expensive sound isolation techniques such as suspending a room within a room on vibration isolation mountings to prevent sound entering or leaving structurally and/or lining the room with lead to damp any vibrations before they can be retransmitted from the walls.
Laptop Musicians
With a laptop you can record on top of a mountain or at the bottom of the Grand Canyon or at any point in between that you can reach.
Laptops are very popular with musicians, especially now that there are so many virtual instruments available, ranging from classic instruments such as the Hammond Organ, Steinway Piano, Fender Rhodes, Moog, ARP, Yamaha, and Korg synthesizers, to the simulations of most popular guitar amplifiers and effects units that can be found in Native Instruments Guitar Rig and IK Multimedia’s AmpliTube.
If you are on the move with your laptop and you want to set it up to make music in a hotel room or in a field or in someone else’s studio, you will probably want a small keyboard so that you can enter MIDI data with a built-in MIDI interface or USB connection to connect it to your computer, and maybe some knobs and sliders to control software parameters on-screen. And if you want to carry your studio on your back in style, M-Audio, for example, makes a padded nylon Studio Pack. This conveniently carries an M-Audio Ozone or Oxygen 8 keyboard along with a laptop and accessories.
Mac or PC?
Pro Tools was originally developed on the Mac and, typically, the feature set on the Mac has always been a little ahead of the feature set on Windows.
Nevertheless, Digidesign is committed to achieving parity between the software for the two platforms wherever possible, and it has to be said that there is little, if any, practical difference between the two implementations these days.
I personally favor the Mac platform because I like the Mac’s OS X operating system better than Windows and I have always found the Mac to be easier to troubleshoot than my Windows computers. I also use various software applications that are only available on the Mac platform, such as Digital Performer.
However, there are good software applications for Windows that are not available on the Mac, such as Sonar and GigaStudio, which is an argument in favor of owning two computers for music so that you get the best of both worlds.
Perhaps the ideal would be to buy a Mac that uses an Intel processor and allows you to run Windows as well as OSX. It is rumoured that the next generation of Apple computers will do just this. But they said that about the PowerPC platform, and it never happened. So we will just have to wait and see…
Pro Tools LE Software
Pro Tools LE software serves as the interface between you, your computer, and your Pro Tools LE hardware. It lets you record and play back up to 32 tracks of audio at once and allows you to import and export audio using various popular file formats. It is also a full-featured MIDI sequencer that can record, edit, and mix up to 256 MIDI tracks alongside your audio. MIDI events and sequences can be manipulated as easily as audio in Pro Tools software, in most cases sharing the same editing and mixing tools.
You can adjust every aspect of the audio and MIDI tracks using a single screen – the Edit window. Here you can fix the guitarist’s ‘bum’ notes, get rid of any pops or clicks, instantly change the tempo of your audio files and loops, rearrange your songs, stretch or squeeze your audio to fit to picture, and so forth.
And when it’s time to mix, you can use the Mix window to automate every move you make with the audio and MIDI tracks, and to automate every effect that you have applied using the plug-ins – giving you near total recall of your mixes. You can also send and return audio to and from outboard gear via the audio interface.
Pro Tools M-Powered Software
Pro Tools M-Powered software is a special version of Pro Tools LE designed to work with various affordably priced M-Audio interfaces.
Pro Tools M-Powered software is virtually identical to Pro Tools LE. The main differences are that M-Powered does not include the Ignition Pack of plug-ins and does not support the Control │ 24 control surface, the DV Toolkit option, or the DigiTranslator option that allows you to import and export files compatible with other digital audio and video software.
You can open sessions created in Pro Tools M-Powered software with any Mac OS X-based or Windows XP-based Pro Tools system, allowing you to easily collaborate with other Pro Tools users. So you can take your projects to a Pro Tools HD-equipped recording studio for additional recording or mixing – or take professional studio projects back home or on the road.
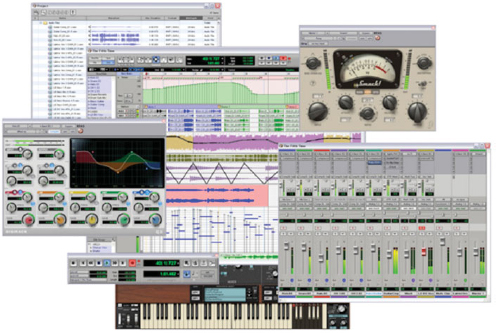
Fig. 1 – Pro Tools M-Powered software.
Transfers
Pro Tools lets you easily transfer sessions between your home setup and a professional studio or onstage rigs – encouraging collaborations with other Pro Tools users.
All Pro Tools sessions can be transferred between any types of Mac-based or Windows-based systems – whether you are using Pro Tools LE, M-Powered, or HD systems.
Included Software
Every Pro Tools system includes the standard DigiRack plug-ins along with seven Bomb Factory plug-ins: the BF76 Compressor, the Essential Clip Remover, the Essential Correlation Meter, the Essential Meter Bridge, the Essential Noise Meter, the Essential Tuner, and the Funk Logic Mastererizer.
Current Pro Tools systems also ship with the Pro Tools Ignition Pack. This includes Propellerhead Reason Adapted, Ableton Live Lite Digidesign Edition, FXpansion BFD Lite, Celemony Melodyne ‘uno essential’, and T-RackS EQ, AmpliTube LE, and SampleTank 2 SE from IK Multimedia.
Reason Adapted gives you a virtual rack of MIDI-based synthesizers, samplers, drum machines, effects to work with. Audio from Reason Adapted can be streamed directly into the Pro Tools mixer via ReWire for processing and mixing within Pro Tools.
Live Lite Digidesign Edition lets you compose, record, remix, improvise, and edit musical ideas using its intuitive sampler and sequencing features. Live’s ‘elastic audio’ sequencing modifies the tempo and pitch of loops in real time, allowing you to drop multiple loops into a song regardless of pitch or tempo. Individual outputs from Live Lite can be streamed directly into the Pro Tools mixer through ReWire.
BFD Lite provides you with three meticulously recorded drum kits along with additional individual samples – all with multiple velocity layers – to use with your Pro Tools system.
SampleTank 2 SE is an easy-to-use sample playback module that provides quick access to a wide range of sounds. This plug-in has an excellent library of samples and instruments and features powerful playback engines with high-quality built-in effects.
AmpliTube LE is a flexible guitar amp-, cabinet-, and effects-modeling plug-in with a variety of amp and cabinet models, classic stomp boxes, and other effects to choose from. Though AmpliTube LE sounds great on guitar, it can be used on almost anything – from vocals to drum tracks.
T-RackS EQ is a warm sounding tube-modeled parametric EQ that provides a useful alternative to the standard DigiRack EQs for mixing and mastering.
Melodyne ‘uno essential’ lets you correct the tuning in mono audio tracks, edit the timing of melodic lines, or completely rearrange parts through its intuitive user interface.
These basic versions give you a ‘taste’ of what you get with the full versions, so if you find these useful, you should consider upgrading to the full versions, which have a lot more to offer.
The Ignition Pack also includes the Pro Tools Method One instructional DVD, a Bunker 8 REX File CD, 1-year membership to Broadjam.com and a limited-time free trade magazine subscription.
The Pro Tools Method One instructional DVD helps you learn Pro Tools system essentials, from setting up sessions and recording audio to editing MIDI, working with loops and plug-ins, automating mixes, and more.
The Bunker 8 REX File CD is a useful collection of REX files for your Pro Tools system.
Even more software
There are also various extra bundles of software that are either included for free with particular Pro Tools systems, or that can be purchased at attractive prices.
For example, Digi 002 systems include the following software bundle at no additional charge: Bomb Factory BF-3A classic compressor; Moogerfooger Ring Modulator and Analog Delay based on Bob Moog’s classic designs; Cosmonaut Voice, which offers a telephone voice and interplanetary effects; JOEMEEK SC2 Photo Optical Compressor and VC5 Meequalizer; Tel-Ray Variable Delay, SansAmp PSA-1; Voce Spin rotary speaker simulator and Voce Chorus/Vibrato.
For just under $500, Digidesign offers the Music Production Toolkit, an impressive selection of tools that can help easily expand the creative power of a Pro Tools LE or Pro Tools M-Powered system. With the Music Production Toolkit, users can take advantage of an impressive collection of plug-ins and enhanced editing tools, increased track count, and the ability to easily export mixes as MP3 files.
The Music Production Toolkit includes a host of powerful plug-ins ideal for creating and producing music, including: Hybrid, a versatile high-definition synthesizer from Digidesign’s new Advanced Instrument Research group; TL Space Native Edition, a pristine convolution reverb; Smack! LE, a professional compressor/limiter; SoundReplacer, a time-saving sound replacement tool; and Digidesign Intelligent Noise Reduction (DINR) LE, an easy-to-use noise reduction plug-in.
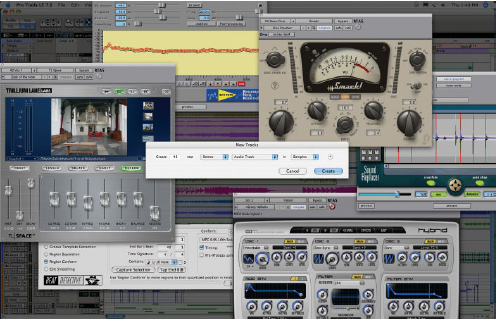
Fig. 2 – Music Production Toolkit.
With the Music Production Toolkit, users can also expand their Pro Tools sessions up to 48 mono or 48 stereo tracks at up to 96 kHz for more complex mixes. In addition, the Music Production Toolkit features a multi-track version of Beat Detective, which allows users to perform automatic groove analysis and correction across multiple audio and MIDI tracks at the same time. This multi-track capability was previously available only with Pro Tools HD software. The Toolkit also provides the Pro Tools MP3 Option for exporting mixes as MP3 files. Finally, the Music Production Toolkit includes an upgrade to the latest Pro Tools software (currently version 7.1) from any previous version of Pro Tools LE or Pro Tools M-Powered software.
What you don’t get in Pro Tools LE and M-Powered
So what do you miss out on with Pro Tools LE and M-Powered compared with Pro Tools HD software? Two of the main differences are that you are restricted to 32 tracks and there are no surround features. Beyond that, there is no Continuous Scrolling option, no Momentary Solo Latch, no Shuttle keypad mode, no Collection Mode in Beat Detective, no Universe window, and no Delay Compensation. Some of these are not too essential, but I particularly miss Pro Tools HD’s Edit menu ‘Play Timeline Selection’, ‘Change Timeline to Match Edit Selection’, and ‘Change Edit to Match Timeline Selection’ commands.
With Pro Tools HD, you can choose to have Pro Tools automatically apply real-time fade-ins and fade-outs to all region boundaries in the session, which saves you the trouble of editing to zero-crossings or creating numerous rendered fades in order to eliminate clicks or pops during playback. Pro Tools LE and M-Powered do not have this Auto Region Fade feature. The Trim tool does not have Pro Tools HD’s Scrub Trim feature that lets you scrub along a track to listen for a trim point, then automatically trim to where you release the mouse button. And the Track Punch feature that makes Pro Tools HD more useful as a digital dubber for film re-recording and mixing, for loading dailies and recording Foley, as well as for over-dubbing and tracking in music sessions, is not available.
There are also some limitations when it comes to mixing. For example, the Trim mode that is featured in Pro Tools HD that lets you modify already written automation data for track volume and send levels in real time is not supported. Also, there is no Snapshot Automation and no ‘Copy to Send’ command. ‘Copy to Send’ lets you copy the entire automation playlist for the selected control to the corresponding playlist for the send. This is very useful if you want a track’s Send automation to mirror the automation in the track itself so that the effect level follows the levels in the main mix.
Another area where features are more limited is synchronization. There is support for the Generic MTC Reader in the Peripherals dialog, so you can use the MOTU MTP AV or Digital Timepiece, for example, but there is no support for any of Digidesign’s sync peripherals such as the SYNC I/O. And although there is support for MIDI Machine Control (MMC), there is no support for 9-pin Serial or 9-pin Remote Machine Control. The good news is that you can lock to all MTC formats and use MMC. However, there is no Timecode or Feet and Frames display, no Pull up/Pull down, no Movie Sync Offset, and no Auto Spot mode, and although it supports MIDI controllers such as the HUI, there is no Pro Control support.
The bottom line? These missing features are particularly important for video post-production and film work and most can be added using the DV Toolkit option (see Appendix 2). If you are working mostly in music production you can live without these features most of the time, although you can always add the Music Production Toolkit option (described in the previous section) to get more tracks and the extra Beat Detective features.
What’s in the book
Chapter 1 presents descriptions and notes about Digidesign’s Pro Tools hardware for LE systems along with overviews describing M-Audio’s hardware for M-Powered systems.
Chapter 2 offers a more detailed description and notes about the Digi 002 control surface and interface along with an overview of the Command │ 8 control surface which has similar features.
These first two chapters will be very helpful to anyone who is planning to buy or upgrade their Pro Tools LE or M-Powered system and wants to know what the hardware options are.
In Chapter 3 you will find descriptions of the Pro Tools LE software, explaining various features of the Mix, Edit, and Transport windows, along with overviews of all the menus and of the file browsers.
This chapter is intended to inform the reader about the capabilities of the software and to provide useful tips and notes about the user interface. It will be useful for readers who want to compare Pro Tools with similar software, and as a ‘primer’ for anyone ‘on the learning curve’ who will find the highlighted notes and tips draw attention to important details that they may have missed when reading the manuals.
note
Descriptions of Pro Tools LE software apply equally to Pro Tools M-Powered software – which is virtually identical.
Chapter 4 explains how to restore the default preferences so that anyone who wishes to follow the step-by-step examples featured in this and subsequent chapters will see similar looking screens. Lots of basic information about opening new sessions, saving sessions, allocating hard disk space, setting up tracks, and importing audio and video files is presented here.
Chapter 5 is all about tempos and grooves. If you are recording musicians, it is important to make sure that they are playing in time with a click so that you can edit the performances afterwards. If you are working with audio that was not recorded to a click, you will need to adjust the tempo of the Pro Tools session to that of the recorded or imported audio (or vice versa) to allow editing. Beat Detective is also explained with examples.
One of the big steps forward from Pro Tools 6 to Pro Tools 7 is the enhanced MIDI sequencing capabilities. Tied in with this is the rise and rise of virtual instruments which seem to be getting better, more numerous, and more popular each day that passes. Chapter 6 explains how to get started using the virtual instruments supplied with Pro Tools systems and how to record these to audio tracks ready for mixing in Pro Tools.
Editing MIDI is covered in Chapter 7, which explains the editing features that are available then provides step-by-step examples to give you a ‘jump-start’.
Chapter 8 shows you how to prepare to record audio before guiding you step-by-step through your first audio recordings and first edits.
Pro Tools gives you lots of tools to edit audio with, so Chapter 9 is packed full of explanations, notes, and tips about how to use these editing features.
Chapter 10 aims to get you up to speed quickly with the technical features that you will use during your mixing sessions. Mixdown to stereo is also covered in some detail.
At the end of the book you will find a couple of useful appendices. Appendix 1 talks about backups and transfers while Appendix 2 explains the features of the DV Toolkit. To finish up, the (Further Information) More Info section has a list of recommended books, magazines, and websites that you can check out if (when!) you are hungry for more information.