
We have already discussed that the USB-to-Dynamixel adapter is a USB-to-serial converter with an FTDI chip on it. We have to install a proper FTDI driver on the PC to detect the device. The driver is required for Windows but not for Linux, because FTDI drivers are already present in the Linux kernel. If you install the RoboPlus software, the driver may already be installed along with it. If it is not, you can manually install it from the RoboPlus installation folder.
Plug the USB-to-Dynamixel into the Windows PC, and check Device Manager (right-click on My Computer and go to Properties | Device Manager). If the device is properly detected, you'll see something like this:

If you are getting a COM port for the USB-to-Dynamixel, you can start the Dynamixel manager from RoboPlus. You can connect to the serial port number from the list and click on the Search button to scan for Dynamixel, as shown in the next screenshot. Select the COM port from the list, and connect to the port marked 1. After connecting to the COM port, set the default baud rate to 1 Mbps, and click on the Start searching button:

If you are getting a list of servos in the left-hand side panel, it means that your PC has detected a Dynamixel servo. If the servo is not being detected, you can perform the following steps to debug:
- Make sure that the supply and connections are correct using a multimeter. Make sure that the servo LED on the back is blinking when the power is on; if it does not come on, it can indicate a problem with the servo or power supply.
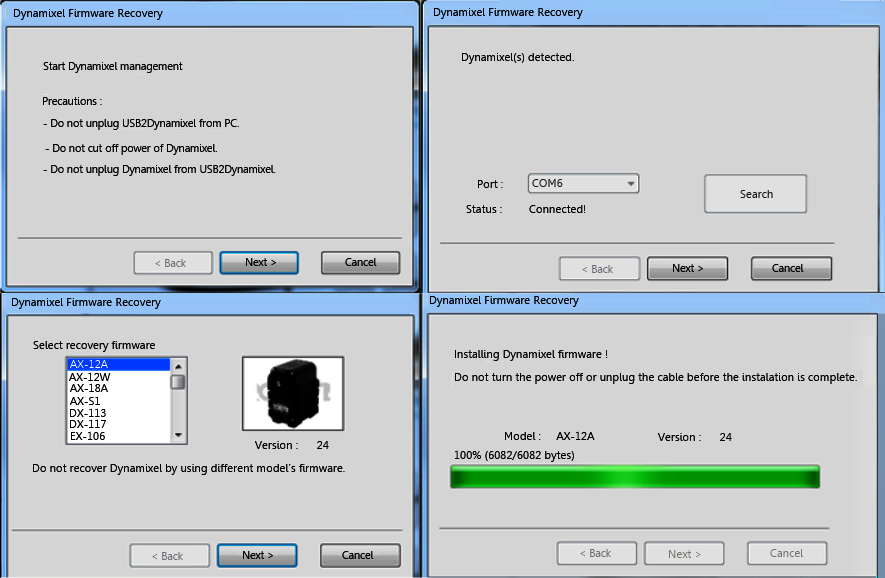
- Upgrade the firmware of the servo using the Dynamixel manager. The wizard is shown in the next set of screenshots. While using the wizard, you may need to power off the supply and turn it back on to detect the servo.
- After detecting the servo, you have to select the servo model and install the new firmware. This may help you to detect the servo in the Dynamixel manager if the existing servo firmware is outdated:
If the servos are listed in the Dynamixel Manager, click on one, and you will see its complete configuration. We have to modify some values inside the configuration for our current face-tracker project. Here are the parameters:
- ID: 1
- Baud Rate: 1
- Moving Speed: 100
- Goal Position: 512
The modified servo settings are shown in the following screenshot:

After adjusting these settings, you can check whether the servo is working well or not by changing its Goal Position.
Nice! You are done configuring Dynamixel—congratulations! What's next? We want to interface Dynamixel with ROS.