Chapter 13: Appendix
All the topics that could not be covered in this book's main chapters are instead covered here. This appendix is largely a collection of useful topics, including tips and tricks. So, let's look at a few tips and tricks relating to Raspberry Pi, Python 3, and OpenCV.
Technical requirements
The code files of this chapter can be found on GitHub at https://github.com/PacktPublishing/raspberry-pi-computer-vision-programming/tree/master/Appendix/programs.
Check out the following video to see the Code in Action at https://bit.ly/3ewQwHs.
Performance measurement and the management of OpenCV
OpenCV has a lot of optimized and unoptimized code. The optimized code uses features of modern microprocessors, such as instruction pipelining and AVX.
We can check whether the optimization of OpenCV is enabled on the computer we are currently using with the cv2.useOptimized() function. We can also use the cv2.setUseOptimized() function to toggle the optimization. The cv2.getTickCount() function returns the number of clock ticks (also known as clock cycles) from the time that the computer was turned on. This function is called before and after the execution of the code snippet that we are interested in.
Then, we compute the difference between the clock cycles and it returns the number of clock cycles needed to execute the code snippet. The cv2.getTickFrequency() function returns the frequency of the clock cycles. Then, we can divide the difference between the clock cycles by the frequency of the clock cycles to obtain the time required for the execution of the code snippet:
import cv2
cv2.setUseOptimized(True)
print(cv2.useOptimized())
img = cv2.imread('/home/pi/book/dataset/4.1.01.tiff', 0)
e1 = cv2.getTickCount()
img1 = cv2.medianBlur(img, 23)
e2 = cv2.getTickCount()
t = (e2 - e1)/cv2.getTickFrequency()
print(t)
The output of the preceding code is as follows:
True
0.004361807
We can also use the functions in the time Python 3 library to establish the amount of time required to run any code snippet. Try this out as an exercise. Next, we will see how to reuse a Raspbian OS microSD card.
Reusing a Raspbian OS microSD card
We have learned to write the Raspbian OS to a microSD card using Win32 Disk Imager. Now, we are going to see how to reuse that microSD card for any other purpose. Insert the microSD card into the microSD card reader and connect it to a Windows PC. It will show two partitions. Only one of these is readable and it will be labeled boot. It should also have the config.txt file, which has a size of around 250 MB. The other partition is unreadable. We cannot use this microSD card as it is used for another purpose. So, we need to use a few tools to format this card before we can reuse it again for any other purpose.
Formatting the SD card using the SD card formatter
There is a free tool for formatting SD cards. We can download it from https://www.sdcard.org/downloads/formatter/. Install this tool and open it, and it will show the following window. The drive letters could be different depending on the number of drives on your computer. The following is a screenshot of the application:
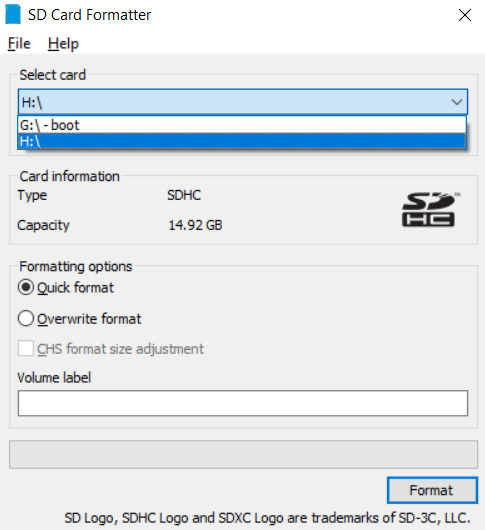
Figure 13.1 – The SD card formatter
Choose any drive (it will format the entire card anyway) and click on the Format button. This will show the following confirmation box:
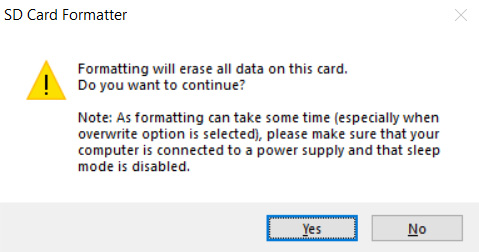
Figure 13.2 – Confirmation dialogue
Click the Yes button and it will format the card. After formatting, there will be only one drive letter corresponding to the card. The card is completely formatted now and we can use it as if it is fresh.
The Disk Management utility in Windows
We can even use the Disk Management utility in Windows to format the microSD card. In the search bar, type Disk and you will find the Create and format Disk Partitions option. You can also find this utility from the Windows Control Panel, too. Again, insert the Raspbian OS microSD card that you want to reuse into an SD card reader and connect it to a Windows computer. Open the Disk Management tool and you will see something as in the following screenshot:
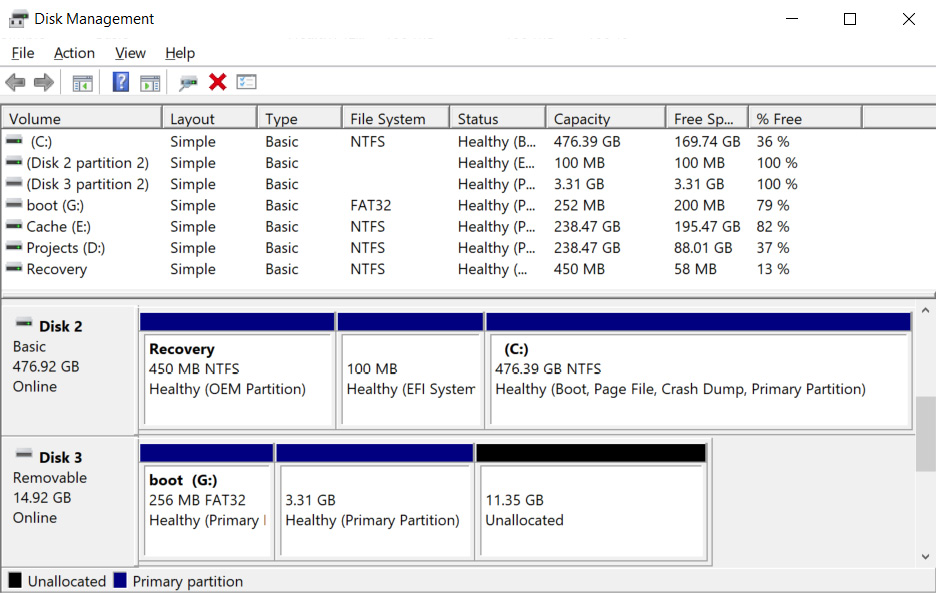
Figure 13.3 – The Disk Management utility window
This lists all the disks (removable and non-removable) attached to the system. Out of these, the one that is removable (with a boot partition of 256 MB) is the microSD card. As you can see in the preceding screenshot, I inserted the Raspbian OS microSD card without expanding the filesystem (I mean, I wrote the Raspbian OS to it, but did not use it to boot up the Raspberry Pi board). That is why it shows two allocated partitions and one unallocated partition. If you have used the card to boot up a Raspberry Pi board, it expands the filesystem and the second biggest partition occupies the unallocated part. So, used Raspbian OS microSD cards show two partitions only. Anyway, we can just right-click on an allocated partition and choose the Delete Volume… option. Do this for both of the allocated partitions:
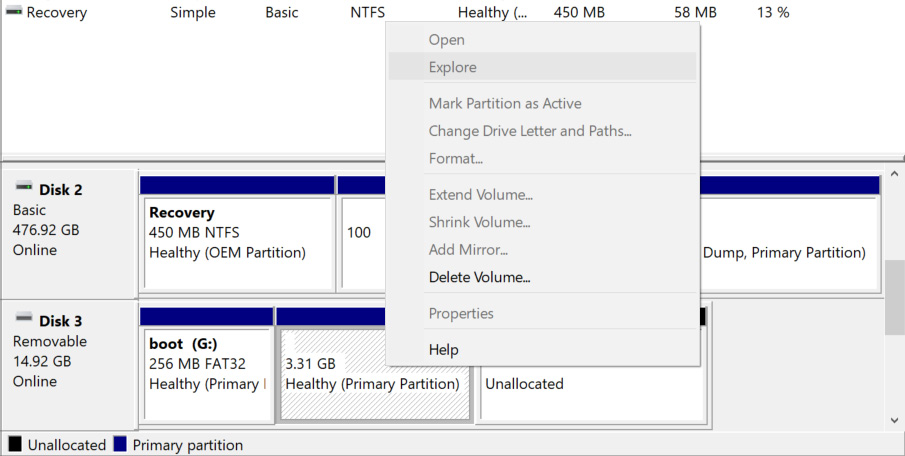
Figure 13.4 – Deleting partitions of the SD card
The disk will look as follows after deleting all the allocated parts:
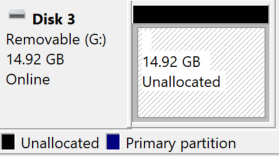
Figure 13.5 – Creating a new partition on the SD card
Just right-click on the disk corresponding to the microSD card and click on New Simple Volume. This will launch a wizard to a new volume. Complete the guided wizard with all the default options and you will get a fresh disk for reuse. You can rewrite the Raspbian OS to this or use it to store your favorite MP3 songs. This Disk Management tool gives us better control over the finer aspects of disk formatting and partitioning.
Tour of the raspi-config command-line utility
We can configure Raspberry Pi by using one of the following three methods:
- The Raspberry Pi configuration tool in the Raspbian OS menu
- By altering the content of /boot/config.txt
- With the raspi-config command-line utility
We will provide a detailed tour of the raspi-config tool in detail in this section. Open the Raspberry Pi command prompt and run the following command:
sudo raspi-config
This will open the Raspberry Pi configuration tool in Command Prompt, as in the following screenshot:
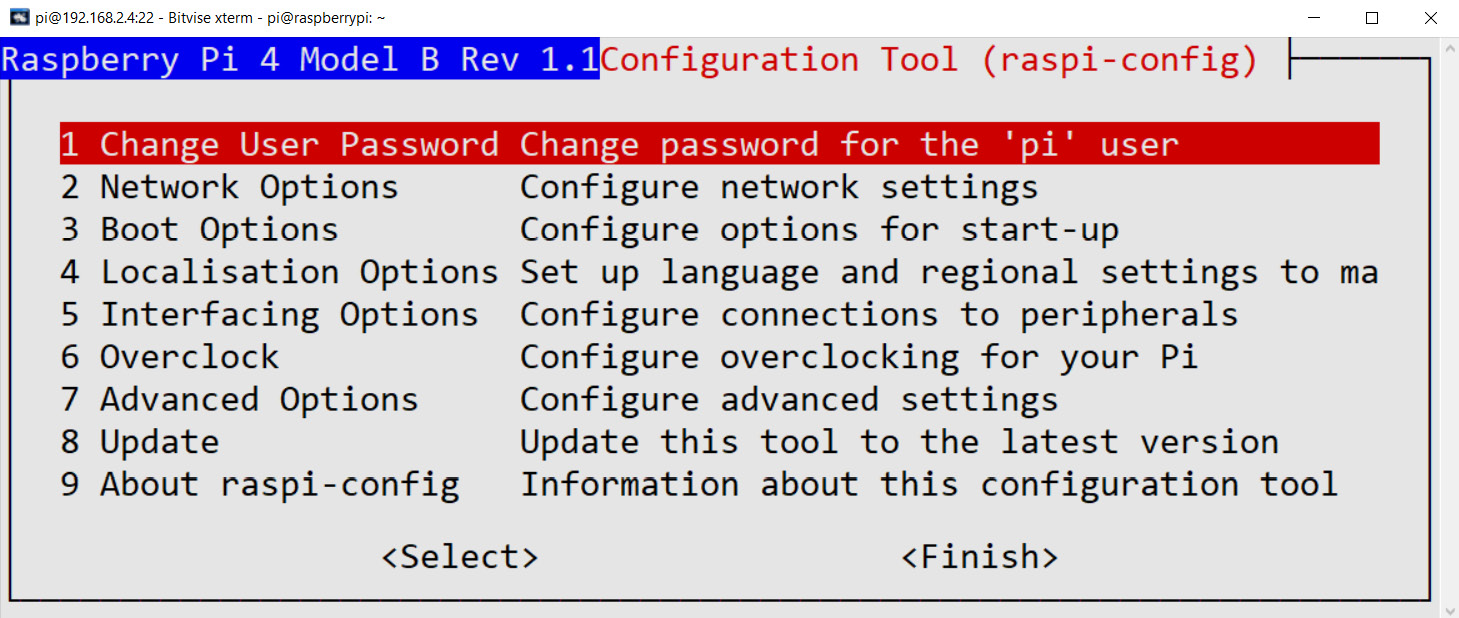
Figure 13.6 – The main menu of the raspi-config utility
The first option is used to change the password for the pi user. The second option in the main menu, Network Options, has the facility to change the way the Raspberry Pi board is connected to the network:

Figure 13.7 – Network Options
The third option in the main menu (Boot Options) details the booting options, as follows:

Figure 13.8 – Boot Options
The fourth option in the main menu (Localization Options) allows you to set the locale, time zone, keyboard layout, and Wi-Fi country, as follows:

Figure 13.9 – Localization Options
The fifth option in the main menu is Interfacing Options, which appears as follows:
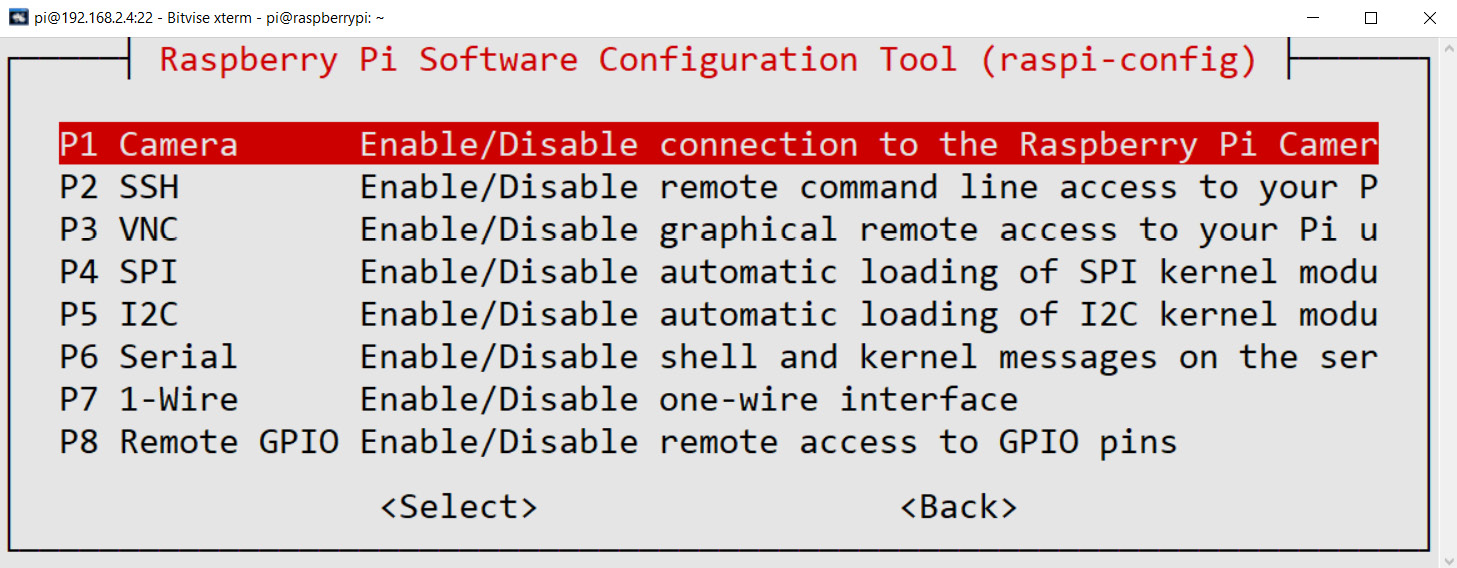
Figure 13.10 – Interfacing Options
Out of the preceding options, we have already enabled P1 Camera, P2 SSH, and P3 VNC for our demonstrations.
The sixth option in the main menu is for overclocking Raspberry Pi 1 and Raspberry Pi 2. Other models have to be overclocked manually.
The seventh option in the main menu is Advanced Options, as follows:
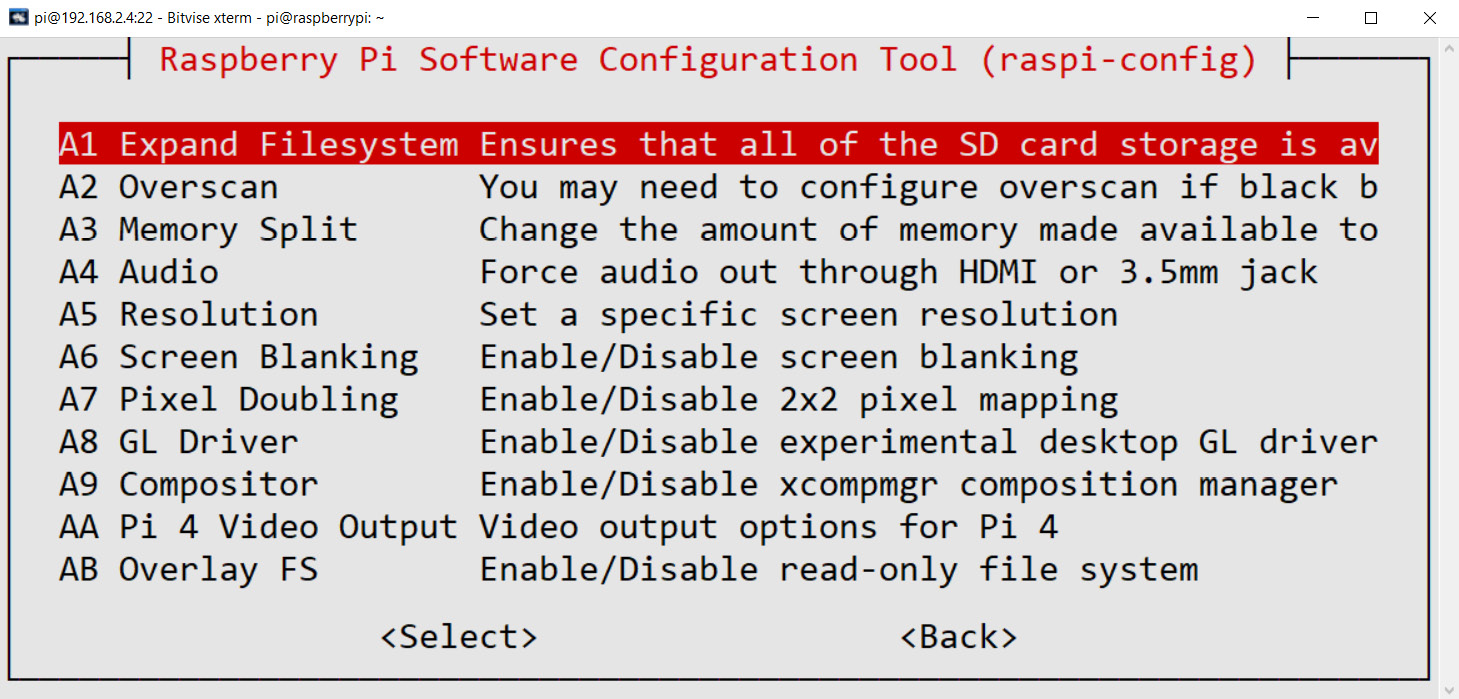
Figure 13.11 – Advanced Options
In the preceding screenshot, A1 Expand Filesystem expands the filesystem to make sure all the space in the microSD card is available for use. A3 Memory Split is used to allocate memory for the graphics.
The eighth option updates the raspi-config tool. If you are accessing the command prompt of the Raspberry Pi board, then this is the best way to configure Raspberry Pi.
Installation and the environment setup on Windows, Debian, and Ubuntu
We can demonstrate all the areas we have learned on other desktop computers with the Windows and Linux OSes. Only the part related to the Raspberry Pi camera module will not work with the other computers as desktop motherboards usually do not come with DSI ports. We can also run the code examples on other single-board computers that run Debian or Ubuntu.
The process to install the packages is the same on Ubuntu, Debian, and their derivatives. All the modern Linux distributions come with Python 3. We just need to use the apt and pip3 tools for installation.
For a Windows PC, we need to install everything from scratch. Let's get started with understanding how to install Python 3 by taking the following steps:
- Visit www.python.org and download the installation file for the latest Python 3 release:
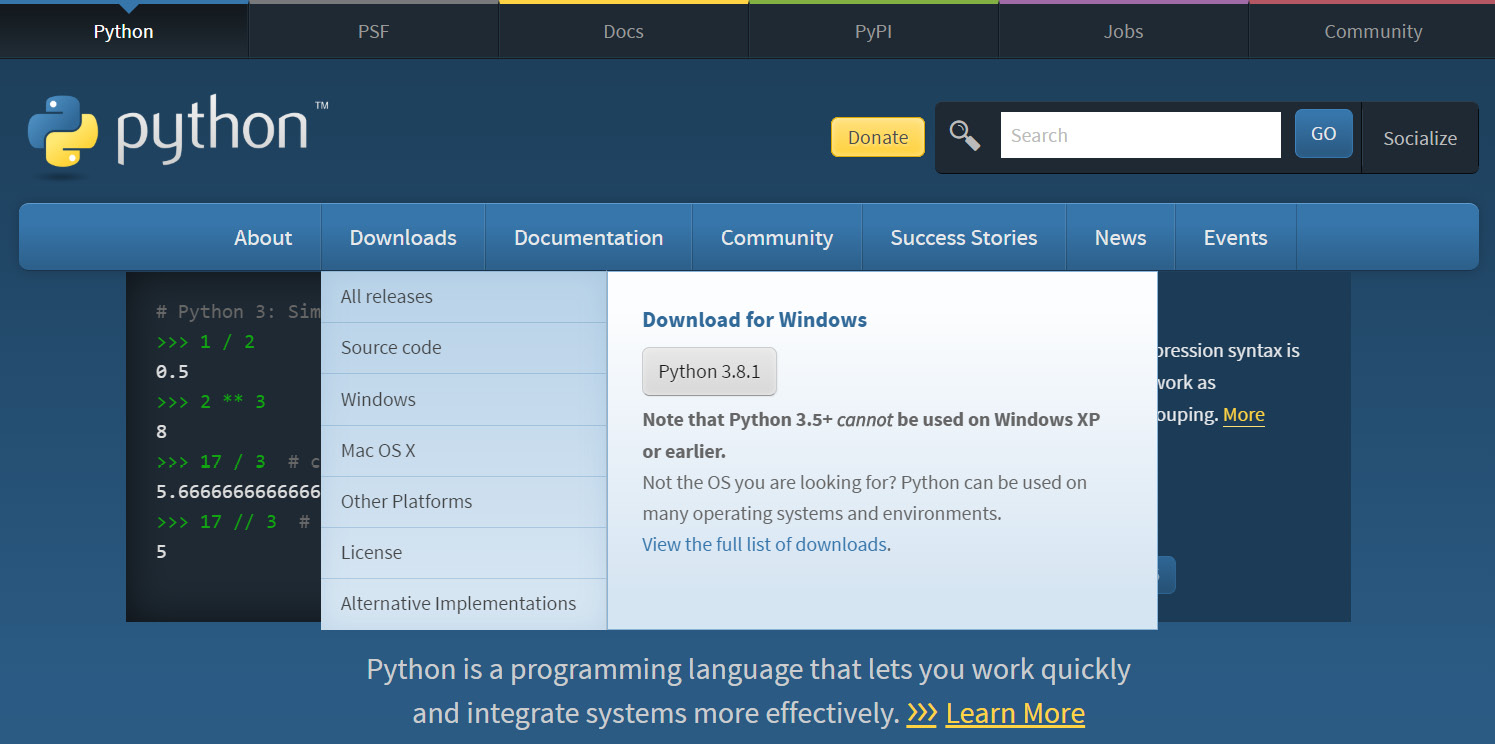
Figure 13.12 – The Python Foundation home page
Run the downloaded setup file. It will open an installation wizard, as follows:
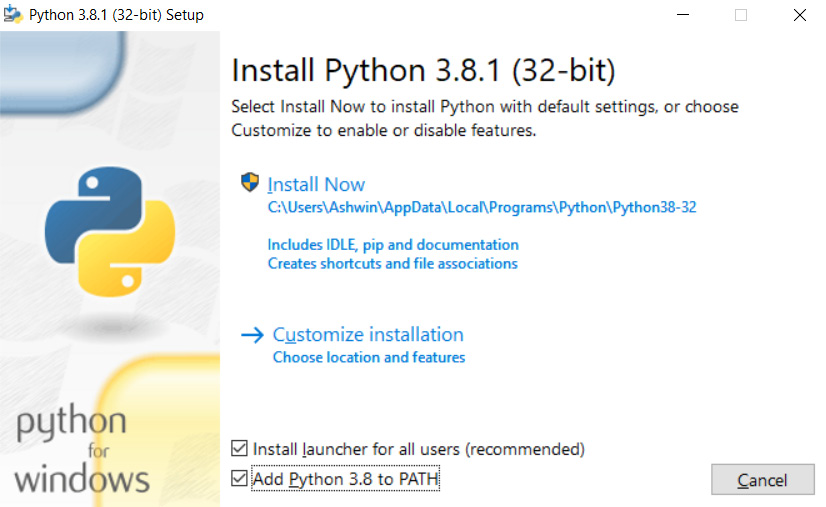
Figure 13.13 – The Python 3 installation options
- Then, click on Customize installation. The following window will appear:
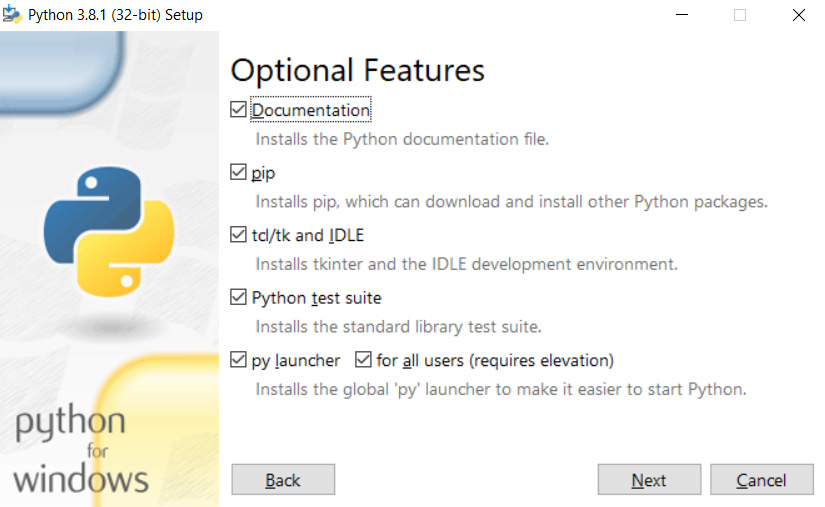
Figure 13.14 – Optional features for installation
Check all the checkboxes and then click the Next button. In the next window, keep all the options as they are and finish the installation.
- Once the installation is completed, we can verify it by searching IDLE in the Windows search bar. Also, in cmd (Command Prompt of Windows), we can verify whether the python and pip3 commands are working.
A Python 3 interpreter comes in the form of the binary executable python.exe file for Windows, and we can call it directly on Command Prompt if we have checked the appropriate option during the installation, as discussed previously. We can install all the packages used in the earlier chapters of this book with the pip3 utility on Command Prompt.
Python implementations and Python distributions
A Python implementation is a program that acts as the Python programming language interpreter. The interpreter provided by https://www.python.org/ and the one that comes with Linux is known as CPython. Other popular implementations include (but are not limited to) the following:
- MicroPython
- IronPython
- Stackless Python
- Jython
- PyPy
- CircuitPython
We can find a list of alternative implementations and their project URLs at https://www.python.org/download/alternatives/.
A Python distribution is a Python interpreter implementation and an additional set of packages bundled together. A few Python implementations are distributions themselves. Actually, there is no clear distinction between the terms implementation and distribution. We can find more information about distributions at https://wiki.python.org/moin/PythonDistributions.
