
Chapter 2: Preparing the Raspberry Pi for Computer Vision
In the previous chapter, we learned the fundamentals of single-board computers, computer vision, and OpenCV. We learned the detailed specifications of the Raspberry Pi (RPi) 4B and the RPi Zero W. We also learned how to set up Raspbian OS on all the RPi boards models in detail.
In this chapter, we will learn how to prepare our RPi board for computer vision. Continuing from where we left off in the previous chapter, we will start by installing the OpenCV library for computer vision and the other necessary software for remotely accessing the desktop, as well as Command Prompt. We will learn how to transfer files between an RPi and a Windows PC. We will also learn how to exploit the computation power of the RPi by overclocking it and installing a heatsink on it to reduce the temperature of the processor.
The topics that we'll cover in this chapter are as follows:
- Remotely logging into the RPi with SSH
- Remote desktop access
- Installing OpenCV on an RPi board
- Heatsinks and overclocking the RPi 4B
Remotely logging into the RPi with SSH
We can remotely access the Command Prompt of the RPi board using various software from Windows. We can run all the Linux commands that do not involve the GUI remotely from Windows. As you may recall, we discussed how to enable SSH with the Raspberry Pi Configuration tool in Chapter 1, Introduction to Computer Vision and Raspberry Pi. It enables remote login through SSH.
In order to get started, follow these steps:
- First, we need to install any SSH software available for free. The most popular is PuTTY (https://www.putty.org/). I prefer to use another popular SSH client that comes with SFTP known as the Bitvise SSH client. You can download the installation file for Windows from https://www.bitvise.com/ssh-client-download and install it. After doing that, open the Bitvise SSH client. The following window will appear:

Figure 2.1 – Bitwise Connection window
Enter a hostname, username, and password. The hostname is nothing but the IPv4 address of our RPi board, which we learned how to find in Chapter 1, Introduction to Computer Vision and Raspberry Pi.
- After entering all the necessary information, click the Login button. This will start the RSA key exchange and display the following message box:

Figure 2.2 – Message window for the first-time connection
- Click the Accept and Save button. This will save the exchanged RSA keys. Note that this message box won't be displayed if we try to connect to Raspberry Pi again with the same Windows computer. After that, two separate windows will appear. The first is the Command Prompt of the Raspberry Pi. Just like LXTerminal, we can run Linux commands from here too:

Figure 2.3 – Bitwise SSH window
- We can change the font and size of the text that appears here by changing the properties, which can be found by right-clicking the title bar. The following is the file transfer window:
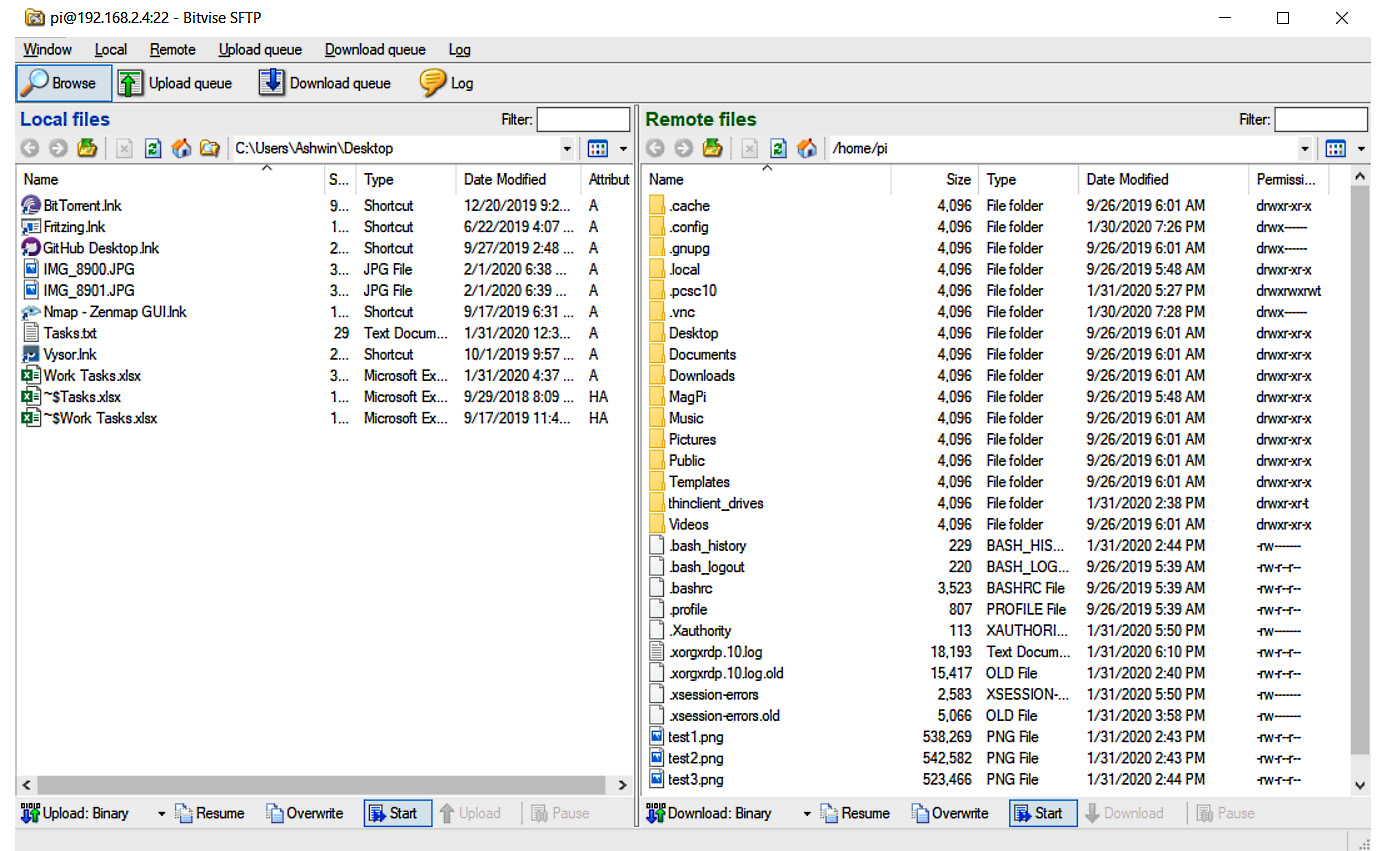
Figure 2.4 – Bitwise FTP file transfer window
On the left-hand pane, we have the Windows desktop and on the right-hand pane, we have /home/pi, the home directory of the pi user. We can transfer files between Windows and the RPi just by dragging and dropping them between these panes.
NOTE
We can access the Raspberry Pi Configuration Tool from the Command Prompt using the sudo raspi-config command. This is the command-line version of the tool.
This is how we can connect to the Command Prompt of the Raspbian OS remotely and transfer files. Next, we will learn how to remotely access the Raspbian OS desktop.
Remote desktop access
The Bitvise SSH client is great for file transfers and accessing the Command Prompt terminal of RPi. However, we need to use another piece of software to access the desktop of RPi remotely. There are two methods we can follow. The first one is VNC (we learned how to enable it in Chapter 1, Introduction to Computer Vision and Raspberry Pi, using the Raspberry Pi Configuration tool), while the other is using Windows' built-in Remote Desktop Connection utility. We can find it in the Windows search bar, as follows:
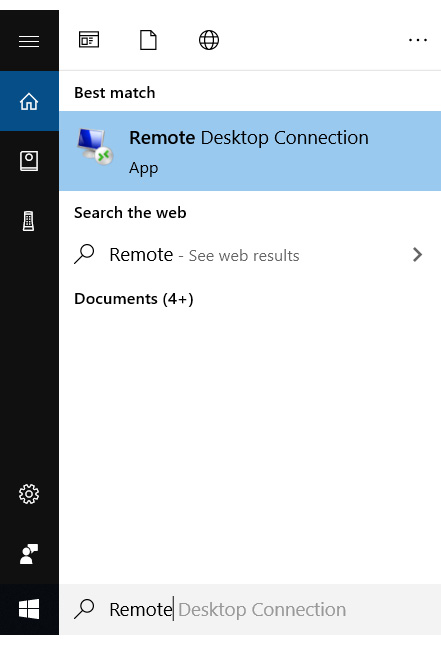
Figure 2.5 – Remote Desktop Connection option in the Windows search bar
But before we can use it, we need to install xrdp on the RPi. Installing it is very easy. We just need to run the following command at LXTerminal on the RPi:
sudo apt-get install xrdp -y
Information
You might want to read more about xrdp at http://xrdp.org/.
Once xrdp has been installed on the RPi, you need to follow these steps:
- Open the Remote Desktop Connection application on your Windows PC:
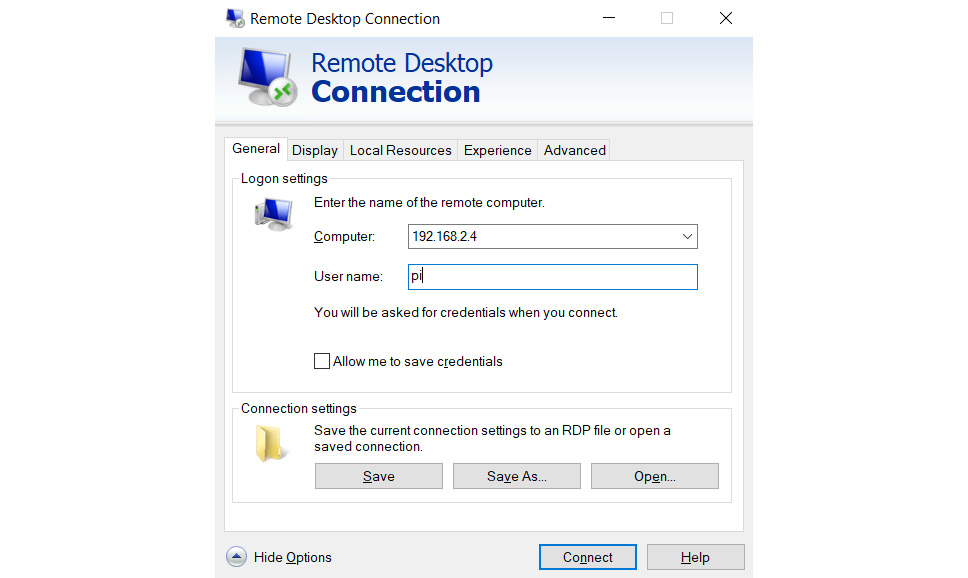
Figure 2.6 – Remote Desktop Connection
- Enter the IP address and pi in the textboxes labeled Computer and User name. You might want to check the checkbox for Allow me to save credentials and save the connection settings too. Once we click the Connect button, the following window will appear:

Figure 2.7 – Credentials for the Raspbian OS for Remote Desktop Connection
- Enter the password and check the checkbox if you want to save the password for this connection. Click the OK button; the RPi remote desktop window will appear after a few moments. If you have less traffic on your LAN, then the working of Remote Desktop will be smooth. The following is a screenshot of the Remote Desktop window:

Figure 2.8 – Raspbian OS Remote Desktop
We can perform all the tasks related to the GUI from here. This means we don't need a separate display for the RPi board if we use Remote Desktop.
Installing OpenCV on an RPi board
Follow these steps to install OpenCV on the RPi:
- First, we need to install a few dependencies. Run the following command to install all these dependencies:
sudo apt-get install -y libhdf5-dev libhdf5-serial-dev libatlas-base-dev libjasper-dev libqtgui4 libqt4-test
- Once the installation is successful, we can install OpenCV on the RPi:
pip3 install opencv-python==4.0.1.24
- Once the installation of OpenCV is successful, we can verify it by running the following command:
python3 -c "import cv2; print(cv2.__version__)"
The following should be the output:
4.0.1
This means that the installation is completed and that we can import OpenCV in our Python 3 programs.
Next, we will learn how to overclock the RPi 4B and how to install heatsink on it.
Heatsinks and overclocking RPi 4B
Overclocking means running the processors at higher speeds than those that are intended. When we overclock the processors, their temperature tends to rise and they radiate more heat. Raspberry Pi board models do not come with any built-in coolers. You can buy passive heatsinks from many online shops such as Amazon. The following is an example of a heatsink with a fan:

Figure 2.9 – Small heatsink for RPi
The heatsink fan can be powered by connecting it to a 5V or 3.3V power supply. The speed of the fan depends on the voltage, and we can connect it to the RPi power pins. We will learn more about the GPIO and the power pins of RPi in the next chapter. The best and the most effective heatsink that I found was the ICE Tower fan for the RPi 4B (https://www.seeedstudio.com/ICE-Tower-CPU-Cooling-Fan-for-Raspberry-pi-Support-Pi-4-p-4097.html).
The following is my own Pi with the ICE Tower mounted on it:
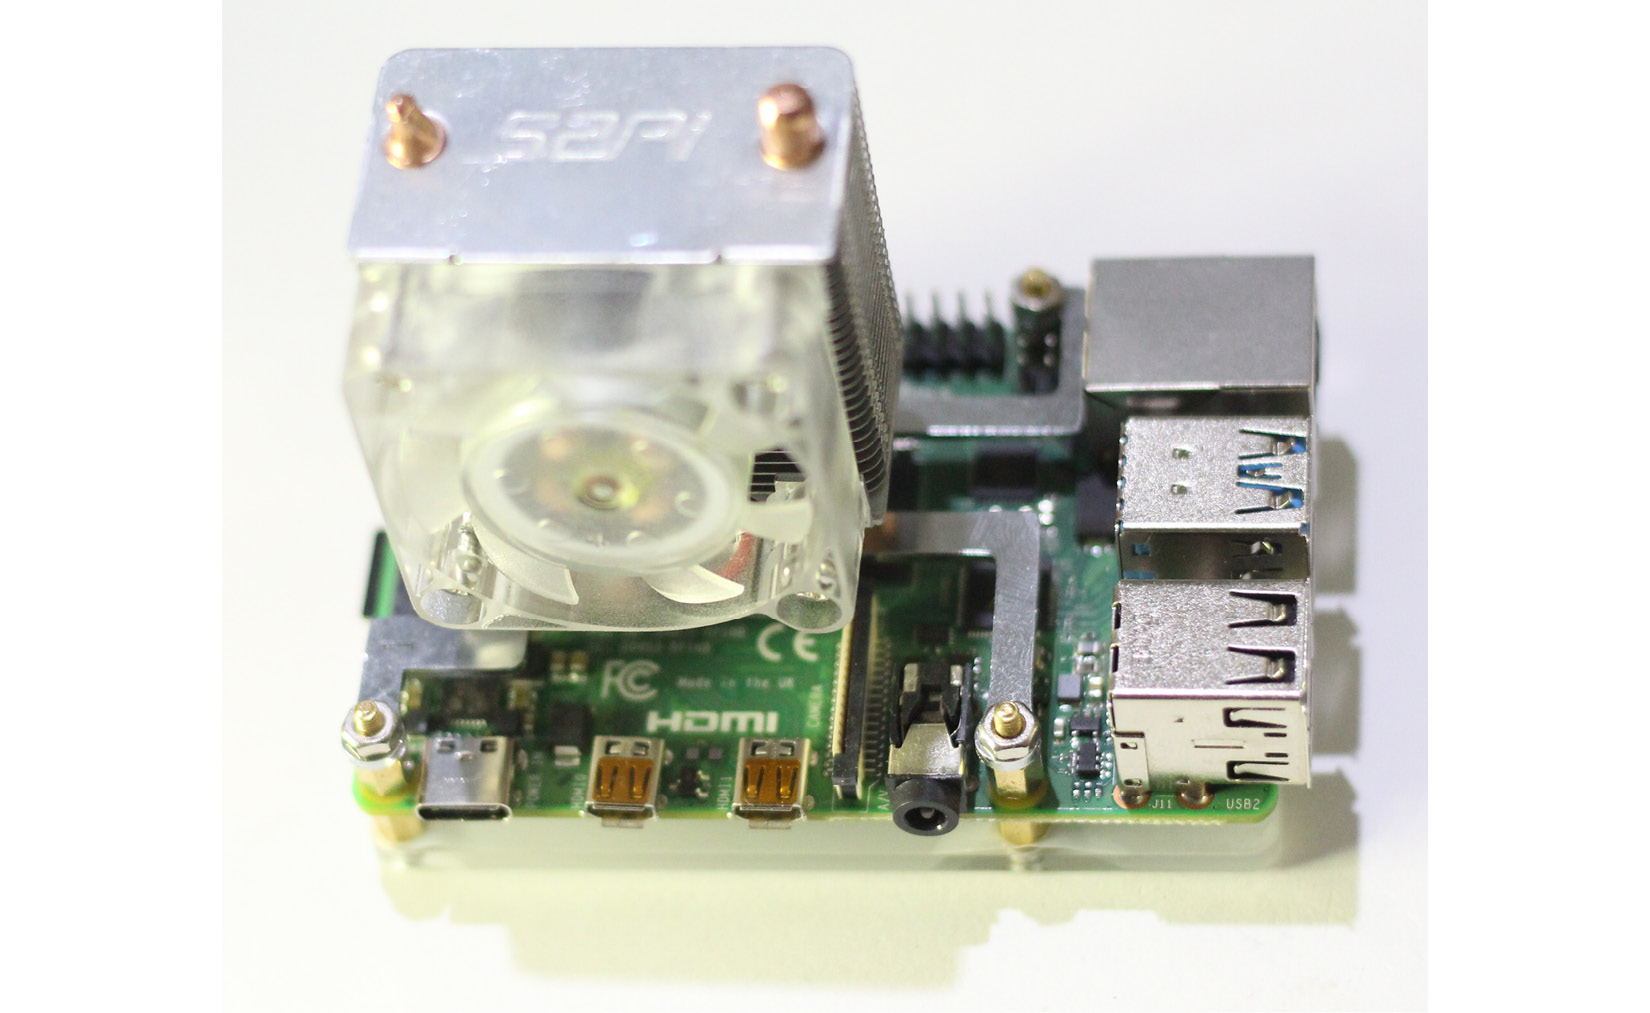
Figure 2.10 – ICE Tower installed on Raspberry Pi
It comes with a booklet with easy installation instructions.
NOTE:
It is necessary to install an actively cooled heatsink and fan on the RPi's processor to overclock it. Overclocking any processor without adequate cooling may damage it.
We can overclock the CPU, GPU, and RAM of an RPi board. In this section, we will discuss how to overclock an RPi 4B board.
Make sure that you update the firmware with the following command:
sudo rpi-update
It is necessary to update the firmware before overclocking the Pi. Once you've done that, run the following command:
sudo nano /boot/config.txt
This will open /boot/config.txt using the nano text editor. At the end of the file, add the following lines:
over_voltage=6
arm_freq=2147
In the first line, we are setting the overvoltage as overclocking requires additional power. In the next line, we are overriding the default clock frequencies of the CPU. Save the changes and reboot the RPi.
Often, the RPi may not boot back up. In that case, you might want to change the /boot/config.txt settings for overclocking (using a Windows PC) to over_voltage=2 and arm_freq=1750, respectively,
In the case that these setting too fail to boot the RPi, then comment both the lines and the RPi will boot up. Overclocking does not work stably with every processor.
When we run a computationally heavy process on the RPi board, all these additional megahertz will manifest themselves. We can monitor the clock in real time using the following command:
watch -n1 vcgencmd measure_clock arm
The output will cross the speed range of 2 billion (2 GHz) once we launch any heavy program on the RPi.
All this additional processing power we obtained by overclocking the RPi board will help us with our computer vision experiments.
Summary
In this chapter, we learned how to remotely log into the RPi and how to access the RPi desktop remotely with RDP. We also learned how to install OpenCV and how to verify it. Also, we learned how to overclock an RPi board.
We will be using all the skills we learned in this chapter throughout this book for accessing the Command Prompt and desktop of Raspbian OS remotely while writing programs for computer vision. We will also use file transfer quite a few times, as well as the OpenCV library in most programs.
In the next chapter, we will learn the basics of Python, NumPy, matplotlib, and the RPi GPIO library. We will also learn about the SciPy ecosystem.