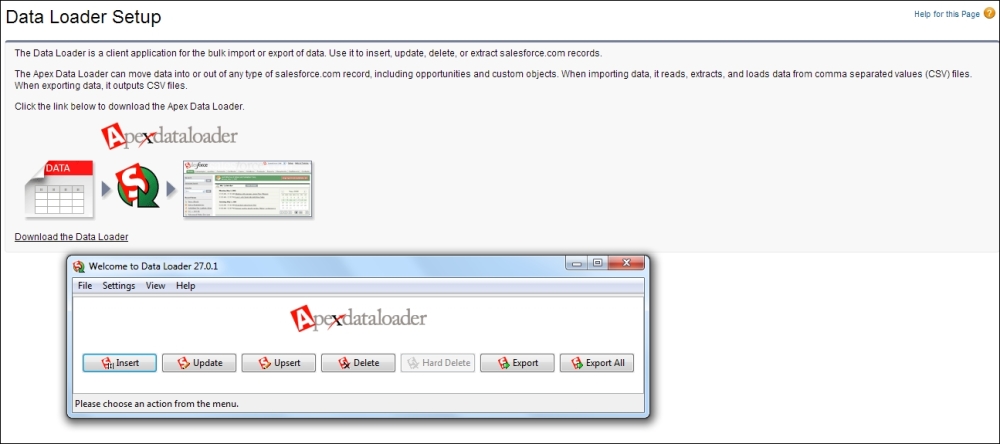
IT applications are meant to make our life simple. In order to load data from a CSV file on a computer to Salesforce, we have a native built-in tool provided by Salesforce; this is known as the data loader. To download data loader from your organization, navigate to Setup | Data Management | Data Loader; on this page, you will see the Download the Data Loader link to download the tool to your local device. Once the tool is downloaded, we can install it. The tool can work on both Windows and Mac machine systems.
The following screenshot shows the link to download the data loader once you navigate to the Data Loader Setup page; it also shows the data loader UI. One can export data from Salesforce, insert data into a Salesforce table, update data on Salesforce, or delete the data.
An important step in data migration is to first connect this data loader to your organization. Salesforce data insertion can be in your production organization or in a sandbox. Sandbox is a testing environment where all code is built and data is validated by application users, and production is the live environment where end users use the built applications.
The following are the steps that need to be followed to connect the data loader to the SFDC system:
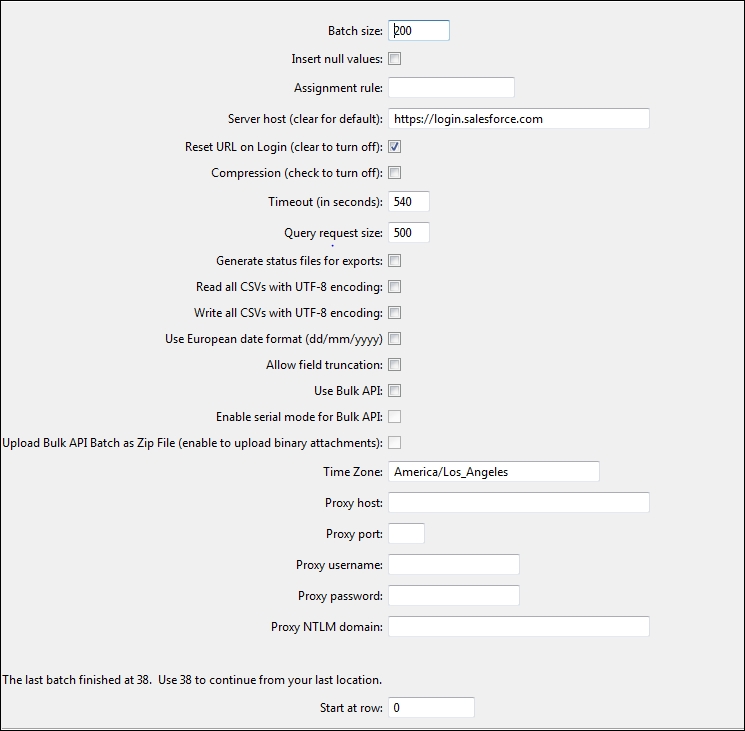
- On top of the data loader UI screen, we have the Settings option. This is where we set some key parameters such as credentials and select whether we need to connect to a sandbox or production instance.
The following screenshot shows the screen generated in the data loader for the Settings option. For sandbox, the server host will be test.salesforce.com, while for production, it is login.salesforce.com. If your organization uses proxy, then you will need to configure the proxy settings as well. The Time Zone field is important because all the date and time fields that we load from Excel will be considered by default based on the time zone we set. It's a little tricky to understand mapping of date and time fields from Excel; by default, it takes the computer time and also the time zone specified in the data loader settings. If the wrong time zone is specified, the data loader uses GMT time.
- For the Insert, Update, and Upsert options, one has to do mapping from an Excel file (the
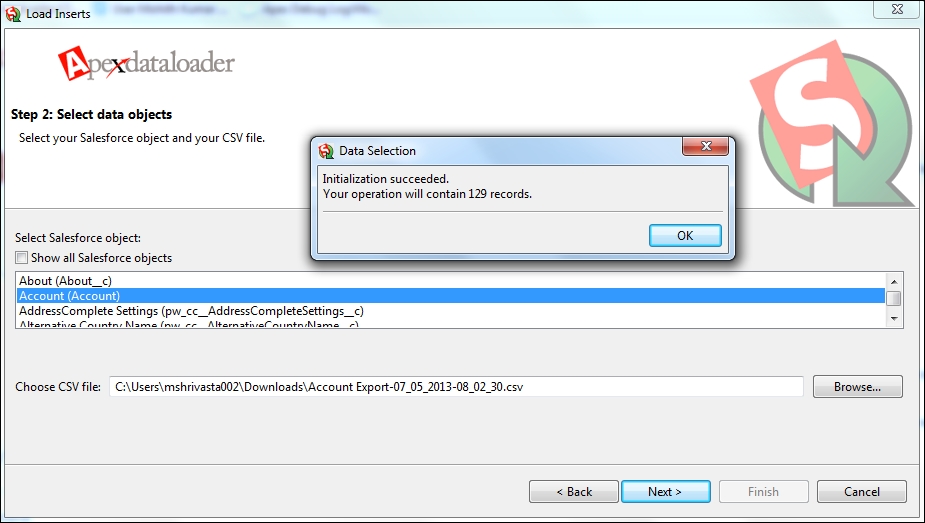
.csvfile). The Upsert option uses external IDs. The data, if not found in the SFDC database, will be updated; otherwise, a fresh entry of the record is created in Salesforce. - For data extraction, use the Export option. The Export option will retrieve data from the Salesforce database into a CSV file (use Excel or Notepad++ to view this file). The following screenshot shows how to browse to the desktop file and select the SFDC object for data loading:
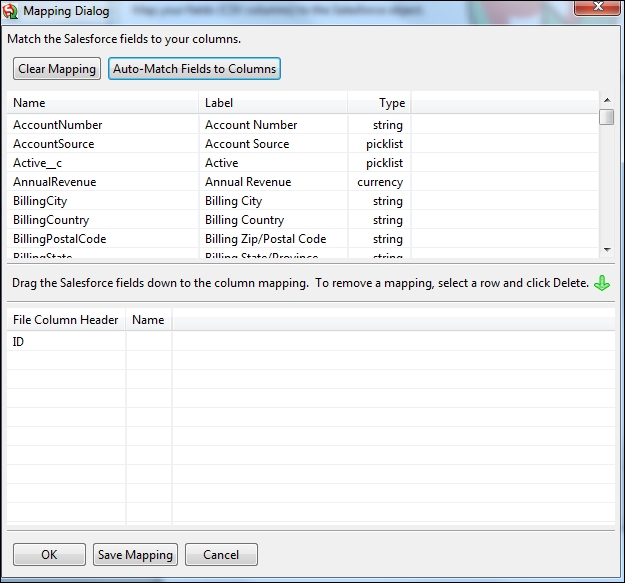
- An important stage while using the data loader is field mapping; the following screenshot shows the Mapping Dialog window. There is an auto-match option that can be handy as well, as it can automatically map fields between the CSV and SFDC object fields.