
In this lesson, you learn how to manage your To Do list. You learn how to create and respond to To Do items, convert Mail Messages to To Do items, and view To Do status.
To help keep track of all the things you have to do, create a personal To Do item. The difference between a To Do item in Notes and a Follow Up item (see Chapter 4, “Managing Mail”) is that a Follow Up item flags an email as a reminder and a To Do item allows you to fill in detailed information about the item.
Once created, you can view To Do items in your To Do view or optionally display them in your calendar. To access the To Do view, click the To Do bookmark as shown in Figure 11.1.

You can also switch to your To Do view by clicking on the word Mail in the Navigator pane of your mail database and choosing Switch to To Do from the drop-down list as shown in Figure 11.2.

Lastly, you can see the “MiniView” of your To Do view by clicking on the tab at the bottom of your Mail Views and Folders pane and selecting To Do as shown in Figure 11.3.
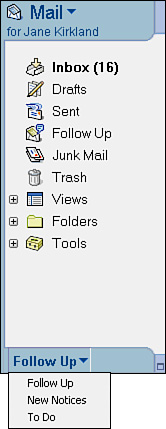
Figure 11.3. When you click on the MiniView tab you can choose to view the To Do, Follow Up, or New Notices MiniViews.
In previous versions of Lotus Notes, To Do items were called tasks, and we tend to use these two words interchangeably throughout this book. To create a personal To Do entry, do the following:
From anywhere in Notes, click the To Do bookmark on the left of your screen. The To Do view opens, as shown in Figure 11.4.
Click the New To Do item button on the Action bar. The To Do item form appears, as shown in Figure 11.5.
(Optional) Select Mark Private if you do not want to give access to this To Do item to others to whom you give access to your email.
Enter a description for this To Do item in the Subject field.
Choose to assign this task to yourself or to others. If you select others, the form changes so you can add a list of assignees, as shown in Figure 11.6.
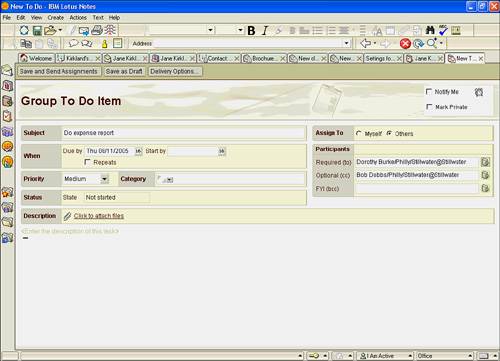
Figure 11.6. Complete the participant fields as you would complete the header of an email. The three fields here represent the to:, cc:, and bcc: fields of an email. Others will automatically be notified by email when you save this To Do item. By including others on your To Do item, it becomes a “group to do” item.
To establish a start date for the task, enter the date in the Starts by box or click the Date icon next to the box to select a date from the drop-down calendar. Enter a date in the Due by box to set a due date for the task, or click the Date icon next to the box to select a date from the drop-down calendar.
(Optional) If you have a repetitive task, select Repeats. The Repeat Options dialog box appears (see Figure 11.7). Under When the To Do repeats, select the frequency of the repeat (such as Monthly by Day, then Every other month on the, and then the day). Under how long the To Do repeats, specify when the repeating task ends by setting the number of days or an ending date. To prevent the due date of the task from falling on a weekend, select an option under If the Date Occurs on a Weekend. Choose OK to close the dialog box. If you need to go back and change the Recurrence options later, click the Settings button.
To set a priority for the task, click High, Medium, Low, or None (the default is Medium). Setting this priority affects the order that To Do items appear in your To Do list. Those with a high priority will appear with an icon labeled “1” and will appear before any 2s (medium priorities) and any 3s (low priorities). All no-priority tasks appear last on their respective dates in your To Do views.
(Optional) Choose an appropriate Category such as Holiday or Vacation from the drop-down list, or type your own category in the Categorize field.
To attach files to this To Do item, click the Attach Files field and choose a file or files to attach.
(Optional) If you are assigning this to others, click the Delivery Options button on the Action bar to set the following options:
Choose your Delivery Report, Delivery Priority, and Return Receipt options. These options are the same as the options you find when you send a Mail Memo.
Check I do not want to review replies from participants if you do not require the participants to respond to your assignment.
Check Prevent counter-proposing to prevent the recipient from sending the task back to you with a counter proposal.
Check Prevent delegating if you do not want the recipient to assign this task to someone else.
Check Sign and/or Encrypt to encrypt or attach an electronic signature to the memo.
Click the Save and Close button (available if you’re making a personal To Do) or the Save and Send Assignments button (available if you’re assigning to others). The task appears in your To Do view.


Once you’ve saved a To Do item, you can view it by opening it from your To Do view. A new button appears on the Action bar of saved or saved and sent To Do items. That button, Chat, allows you to chat with members of the To Do item (see Figure 11.8). To learn more about instant messaging, see Chapter 18, “Instant Messaging.”

Figure 11.8. Use the Chat button on the Action bar of saved To Do items to instant message anyone listed in the Assign To fields.
In addition to displaying in your To Do view, To Do items also appear in your calendar. You can change the default settings of Notes if you do not want To Do items to appear in your calendar. See Chapter 19, “Customizing Notes,” for more information.
To edit a To Do item, simply click once in the Subject field and you can edit it while in your To Do view. You can also double-click a To Do item to edit it.
You can convert mail messages to To Do items so that they appear in your To Do list. For example, you can convert a mail message from your manager that asks you to prepare your department’s budget for next year to a task, which adds that message to your To Do list so that you won’t forget to follow up. To convert a mail message to a task, do the following:
Select the document in your Inbox view pane or open the message.
Click the Copy Into New button on the Action bar. Select New To Do.
A new To Do opens. The subject of the mail message appears as the Subject. The body of the mail message becomes the Details. You can make any changes or additions you want to the information provided there.
Assign the task to yourself or others and click the Save and Close button on the Action bar or press the Esc key.
You also can create new tasks from Calendar entries. If you’re creating an entry that also happens to be the deadline for a task, choose Copy Into New, New To Do from the menu. Change any information in the new To Do document and then save and close it.
Existing tasks often generate new tasks, and you can create new tasks from an existing task document. With the existing task selected or open, choose Actions, Copy Into, New To Do from the menu. Complete the new To Do document, save it, and close it.
To keep track of the tasks you assign to yourself, tasks others assign to you, and tasks you assign to others, open the To Do view in the Mail database.
Several views are available for the To Do list: All To Do’s, Personal, Group, By Category, Incomplete, and Complete. You can change the status of an item by completing it and clicking the Mark Complete button on the Action bar. You can also cancel or reschedule a group To Do by choosing Actions, Reschedule, or Cancel from the Action bar.
When you are named as a participant on a To Do document, you receive a mail message in your Inbox. When you open the message, you find choices for responding to this To Do assignment on the Action bar. Click the appropriate button on the Action bar:
Respond—. Click here to Accept or Decline the task, Delegate the task to another person, or Propose New Time, which allows you to change the due date. If you delegate the task, you must name a person to handle the task. However, you can request updates from the owner of the task (the person who created the To Do document). You can also receive updates if you decline the task. The last choice in this menu is Completed, which marks the task as completed and notifies the sender that you have completed the task.
Respond with Comments—. Contains the same choices as found in the Respond menu, but the return form includes a field for you to add comments when accepting, declining, delegating, proposing a new time, or completing the item.
Request Information—. Click here to ask for further information before or after accepting the task. When you select this, you also have the opportunity to Include comments on the reply message.
When you select a response option, a mail message is generated and sent to the owner of the task. When the owner receives your response, he too has options, which are available under the Actions button on the Action bar in the To Do view. These actions are also available for To Do items you have saved, not just those to which you are responding. These include the following:
Reschedule
Cancel
Confirm
View Invitee Status
Send Memo to Invitees who have Responded
Send Memo to Invitees who have not Responded
In this chapter, you learned how to assign To Do items to yourself and to others, how to mark the To Do items as completed, and how to view the items. In the next chapter, you will learn how to use the Address Books.