Chapter 19
Creating a Client or Partner Portal
IN THIS CHAPTER
![]() Setting up a client or partner portal using SharePoint
Setting up a client or partner portal using SharePoint
![]() Inviting users and getting them up to speed
Inviting users and getting them up to speed
![]() Creating a public website with GoDaddy and Wix
Creating a public website with GoDaddy and Wix
Creating and using a client or partner portal based on SharePoint is now easier than ever. SharePoint takes away all of the difficulties in setting up the infrastructure, freeing you to work on the shared content with your clients and partners. In the first part of this chapter, you get such a portal set up in just a few minutes. You invite new users to the portal and figure out how to get them started. Finally, you explore how to set up a public-facing website using your special Office 365 discount with GoDaddy or Wix.
Sharing a Site with External Guests
Microsoft has dramatically streamlined the process for sharing a SharePoint site with external guest users. For example, you might want to share a SharePoint site with clients or partners. In the past this required a significant amount of SharePoint knowledge and caused a tremendous amount of frustration for people.
The simplest way to create a client or partner portal is to create a site dedicated to those particular guests and then share the site with them. A more advanced way would be to fine-tune which users can see which areas of a site (which we cover in more depth in Chapter 20).
To create a guest portal you can use with clients or partners:
- Create a SharePoint site that you will dedicate to a client or partner (see Chapter 5).
- Navigate to the site in your web browser.
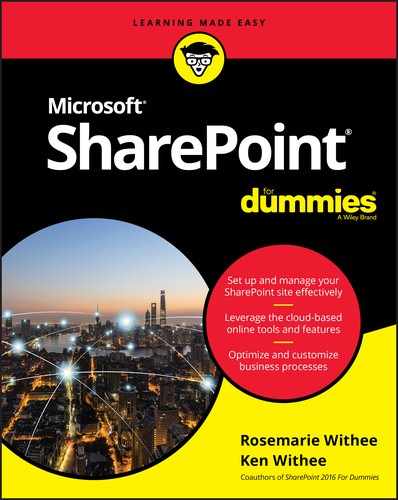
Click the Settings gear icon in the upper-right corner of the screen and choose Site Permissions, as shown in Figure 19-1.
The Site Permissions pane opens.
 SharePoint changes the gear icon drop-down menu items depending on where you are in the SharePoint site. Make sure you are on the Home page of the SharePoint site, and make sure you are an administrator in order to see Site Permissions.
- Click the Invite People button and choose Share Site Only, as shown in Figure 19-2.
Type the email address of the person you want to share the site with.
When you enter a valid email address, the email will appear as a button under the textbox, as shown in Figure 19-3.
Click the validated email address to add it to the Site Permissions dialog.
Figure 19-4 shows the result. By default, a user is added with edit permissions with the assumption you want to use the site to collaborate. If you want to only allow the user to read and not edit the site, select Edit under that person’s email address in the dialog and change the setting to Read.
Type a message to the person in the “add a message” dialog and then click Add.
The person will be sent a message with a link to the site. Figure 19-5 shows the message received in a Gmail account.
When your guest clicks the link, he or she will be presented with a screen to sign into the SharePoint site. Your guest will need to use a Microsoft account or an existing Office 365 account (which he or she might already have as part of his or her own organization). Figure 19-6 shows the sign-in screen.
Once your guest signs in with his or her existing Microsoft account or Office 365 credentials, your guest will have access to the SharePoint site you have set up in your own Office 365 tenant.

FIGURE 19-1: Selecting Site Permissions for the Settings menu.
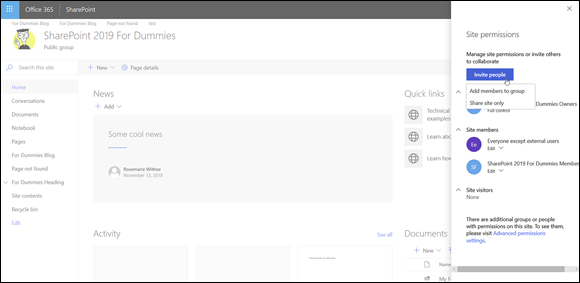
FIGURE 19-2: Choosing the option to invite people to the site.
FIGURE 19-3: Entering an email address of the person to invite to the site.

FIGURE 19-4: The email address is added to the dialog.

FIGURE 19-5: Receiving a SharePoint invite in Gmail.

FIGURE 19-6: Signing in to access a shared SharePoint site.
Inviting Guests Using Outlook Groups
In addition to inviting guests to the site directly, you can also invite people using Outlook groups. To do so you simply choose Add Members to Group in the Site Permissions dialog (refer back to Figure 19-2) and then add the person just like you would to any other Outlook group. In fact, SharePoint has already automatically created an Outlook group for you to use, and you can add people by simply going to Outlook in your web browser (select it from the Apps menu that looks like a waffle in the top-left corner of the screen) and adding them to the Outlook group, as shown in Figure 19-7.
FIGURE 19-7: Adding a user to the Outlook group for your SharePoint site.
Planning for Your Client or Guest Portal
In the previous section you invited guests to your SharePoint site in just a few minutes. This is great if you just want to get up and going and don’t have time to put into a lot of planning. This section goes through some of the items you will want to consider when making a plan for your SharePoint site for your clients or partners.
Planning for a client portal is similar to planning for a regular SharePoint site in that you have to determine what the site will be used for and the types of activities that need to be supported in that environment. Here are a few items worth noting when planning your Office 365 environment:
The number of resources and the amount of storage space you have available in Office 365 is limited. Storage is easy to understand, but resources are not on the surface. Basically, a number of physical and virtual resources on the hardware and operating system are monitored daily by SharePoint Online. The types of items measured include counts, seconds, numbers, CPU cycles, bytes, threads, and Windows handles. Each of these items has a hard upper limit based on the hardware that is handling the requests, and so you’re granted a set number of resources per Office 365 subscription. You must allocate those resources based on what you think each site collection will need on a daily basis. You can change the allocation at any time, but remember that your total resource (and storage) allocations for your SharePoint subscription remain the same.
The SharePoint Online service administrator can set the storage limits for site collections and sites created by users. SharePoint storage limits depend on a number of different factors, but, in general, the storage is 1TB (terabyte) plus 0.5GB (gigabyte) per additional user. You can find all of the specifics by entering SharePoint Online and OneDrive for Business software boundaries and limits into your favorite search engine. Look for a link that is on office.com for official guidance. Also, keep in mind you can always buy more SharePoint storage if you need it. SharePoint Online is constantly being updated, and it’s entirely possible that the limits will change. Make sure to check the Office 365 website for the latest limits and pricing information.
- You don’t have control over some of the configuration items in SharePoint Online that you have for SharePoint On-Premises. Most of the differences are at the farm administration level, but it’s something to keep in mind. If you’re dead set on particular functionality, then you want to make sure it’s available in SharePoint Online.
Keep in mind that SharePoint Online is a product in motion. Microsoft is constantly updating and tweaking the user interface and location of components. The concepts are usually the same, but if you see something a little different than we describe, you might have to hunt around because you are likely seeing a new change Microsoft has made.
In addition, you should consider a number of things when planning out your SharePoint Online environment. These include
- Your DNS name, if you need to have a distinct URL to access your public-facing website. (We cover some more information about configuring the DNS name later in the chapter.)
- Whether you will allow external users to be able to edit the site and collaborate with you and others on the site or whether you want these users to have read-only access.
Launching Your Portal
If you are launching your client or partner relationships from scratch, then you are already done! Just invite them to the SharePoint site and start working. If, on the other hand, you have been working with your clients or partners using other tools, then you will need to think about how to get the site launched and usable. For example, you might need to migrate an immense amount of pre-existing documents and information in your network drives or on your local computer into the site so that your clients and partners can access it.
Here are a few approaches you can take to get your portal providing value as quickly as possible:
- Have your users do the work. This is a fairly low-maintenance version of migrating content from one SharePoint environment to the next because you put the burden of content on the users’ shoulders. As long as your clients and partners can add content to the site, they can upload all of their content there going forward. Don’t try to put a burden on yourself by having your clients email you documents and then you uploading them; instead, train your clients to upload the documents directly to the portal. It is easier on your clients and partners, and easy on you, too.
- Help users devise a plan to migrate their content or at least identify content (and sites) that need to be migrated. This approach takes a lot more time, but may be the most effective way to get users migrated completely and according to your timeline. It may also require some coercive tactics, such as the threat of turning off existing servers or making their content read-only, but at least it shouldn’t be an outright scramble at the end. For example, if you have been using a shared folder system, such as Dropbox, then move that content to your new client or partner portal as part of your launch strategy.
Our recommendation is to start using your new portal as soon as possible. Send the invites to your clients and partners and get everyone used to making it the one stop shop for working with you on content.
Creating a Public-Facing Website
If you have Office 365 and you need a public-facing website, you are in luck. Microsoft has negotiated special deals with two select website hosting partners: GoDaddy and Wix.
To create a public-facing website, the first thing you need to do is browse to the Office 365 Administration Center (https://portal.office.com) and click Public Website in the left navigation pane. You are presented with a page outlining the partners Microsoft decided to work with for public-facing websites, as shown in Figure 19-8.
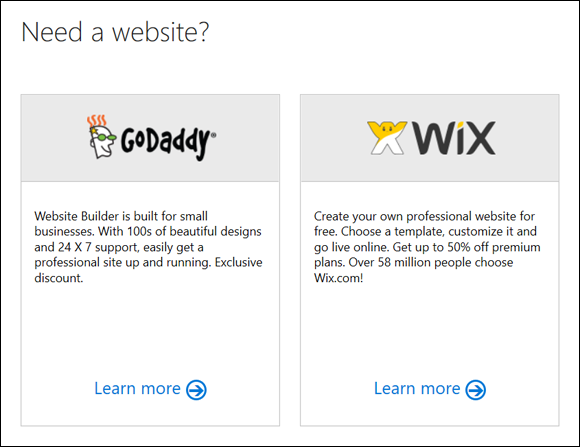
FIGURE 19-8: Microsoft’s website hosting partners.
Choose GoDaddy and you can use a tool called Website Builder. Choose Wix and you can leverage its much-loved drag-and-drop functionality to create a website.
In our opinion, GoDaddy is a much more powerful platform, but Wix is much simpler to use and can help you get your site up and looking beautiful right away. One additional benefit to Wix is that getting started with it is free.
We will always choose GoDaddy just for the additional power features it offers such as its advanced hosting, premier DNS, and customization options. That said, though, Wix is easy to use if you just need a basic website.
GoDaddy
If you decide to go with GoDaddy, click the Learn More link (see Figure 19-8) to start the process. You are redirected to a special GoDaddy site setup to give you the special Microsoft Office 365 discounted rate.
If you just want to set up a basic site using GoDaddy’s Website Builder functionality, click the Get Started link and follow through the process, as shown in Figure 19-9.
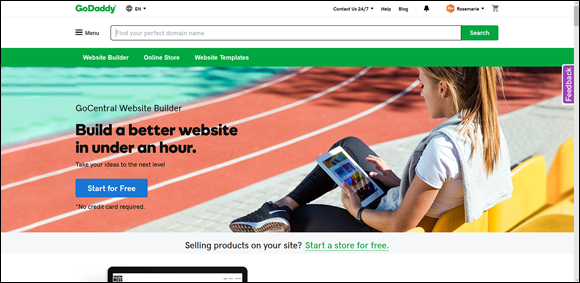
FIGURE 19-9: Getting started with a GoDaddy website from the Office 365 admin center.
You can then review the type of website plan you are interested in and walk through a GoDaddy wizard to set up your site. Figure 19-10 shows a table that GoDaddy provides to help you choose the website you need.
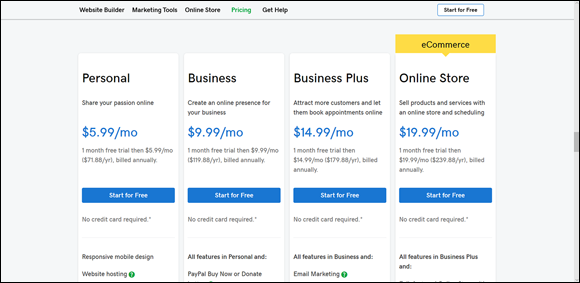
FIGURE 19-10: Choosing a website plan from GoDaddy with the Microsoft discount.
As you continue through the process, you will be guided in setting up your public-facing website. You control your public-facing website and decide how you want to integrate it with SharePoint Online and Office 365. For example, you might want to have an Extranet link that takes people to your SharePoint Online-based client or partner portal that you set up previously in the chapter.
Wix
If you decide to go with Wix, click the Learn More link (see Figure 19-8) to start the process. You are redirected to a special Wix site set up to give you the special Microsoft Office 365 discounted rate on Premium Plans, as shown in Figure 19-11.
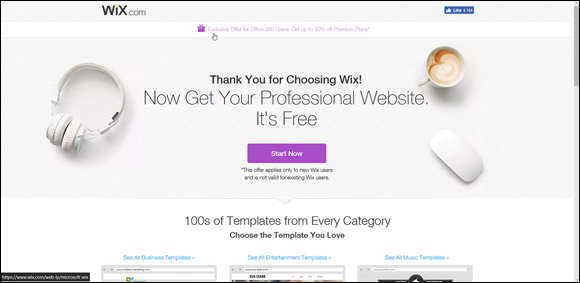
FIGURE 19-11: Getting started with a Wix-based public website.
To get started building your Wix-based site, click the Start Now button and follow the Wix wizard. After your public-facing website is set up, you have control of its content through the Wix interface.
If you decide to create a SharePoint-based portal for your clients and partners as discussed earlier in the chapter, you might want to add a link to it on your Wix-based site.
Working with an Existing SharePoint Online Public-Facing Website
A SharePoint-based public website site collection is still SharePoint behind the scenes, but it looks and behaves quite differently than your typical SharePoint site. This functionality is no longer available and we were tempted to cut this content from the book. However, if you have been a SharePoint customer for some time, you might still have a public-facing website as part of your package. For this reason, we decided to leave in this content for people who have grandfathered features. If you are new to SharePoint, then focus on your GoDaddy or Wix site for a public-facing website.
 The public-facing site was designed with the best intentions, but Microsoft realized its partners provide a better solution and stopped allowing for the new creation of SharePoint-based public websites. However, if you already have an existing SharePoint Online-based public-facing site, you can continue to work with it and manage it, and we cover this subject in the next few sections.
Reviewing what you get with your site
Wondering what you get in your SharePoint Online public website? A number of apps are contained in the default site:
- Categories
- Documents
- Form Templates
- Pages
- Photos
- Posts
- Reusable Content
- Site Assets
- Site Elements
- Style Library
Most of these apps are empty, but some are pre-populated for the default site. The Pages app is where all the web pages for your public site are located. It contains the pages that make up the default website. These are:
- About Us
- Archives
- Blog
- Contact Us
- Default
- Directions
- PageNotFoundError
- Post
- Posts
- Search Results
Most of these pages are self-explanatory. As you customize your public site, you will add pages to and remove pages from the library. The pages that are there by default are the ones used as an example and make up the default website.
Your site is not available to the world until you publish it. This gives you time to work on it and perfect it before unleashing it on the world. You will see a Make Website Online link in the upper-right corner of the page. When you click that link, your website will be published for the world to see. When you want to take your website offline, you can click the Make Website Offline link, which appears in the same location.
Adding and editing web pages
If you have some experience with updating and adding pages to a regular SharePoint site, you’ll find yourself in familiar — but not exactly the same — territory when doing the same thing in your public website. If you’ve never done this stuff in SharePoint before, relax: It’s pretty easy and straightforward.
Adding a new page
You get to the list of contents for the site by clicking the Settings gear icon and choosing Site Contents. This automatically takes you to the Site Contents page. Here, you can add new apps or click the Pages app and add new pages.
When you are in the Pages app, you can click the New Document drop-down list on the Files tab of the ribbon. You have the option to add a new page to your site. When you add a new page, you choose a template from the drop-down list.
This is convenient for quickly getting the layout and design right for the purpose of the page. You have the option of choosing from the following page templates (which use SharePoint content types):
- Page
- Error Page
- Information Page
- Multi-Area Page
- Web Page
Clicking a new page type in the New Document drop-down list brings up a page where you can specify the title of the new page, the web address, and the page layout. And in case that threw you for a loop, yes, you are using a SharePoint page to create a new SharePoint page. Experiment with a few pages and layouts to figure out how to use the different templates and what the different options mean.
The differences in the page templates are subtle. For example, you might wonder what the difference is between a Page template and a Web Page template. Microsoft makes an attempt to clarify differences by including a description next to each page template type, but it is still fairly unclear.
To understand the differences, you need to understand that these are actually SharePoint content types. A content type is a collection of fields. So the difference between a Page template and a Web Page template depends on the fields that are defined in each content type. If you click on the Library tab of the Pages app and click the Library Settings button, you see a section called Content Types. Notice that these are the same options from the New Document drop-down list. If you added a content type to this section, you would have another option on the New Document drop-down list.
You can click a content type to see the fields included in the content type. By clicking the Page content type and then clicking the Web Page content type, you can compare and contrast the differences.
Editing your pages
To edit any existing pages, browse to the Pages app and click a page. This displays your page in the browser. You can edit the page by clicking Page tab of the ribbon and clicking the Edit button. You can then edit your page and add, modify, and remove content.
You see Page, Format Text, and Insert tabs of the ribbon. Each ribbon tab contains buttons that are familiar with any document editing tool, and they work exactly the same. You can format text and choose a different font, size, or color on the Format Text tab. You can insert content on the Insert tab. And you can preview, save, and publish the page on the Page tab.
Updating page properties
After you’re done creating new pages, you may want to change some options for the site pages, such as the content type of the page or the contact for the page. These options are included on the Page Properties page, that you can access by selecting the page in the Pages app and clicking the Edit Properties button on the Files tab of the ribbon.
If you don’t have access to a page, then the Edit Properties button is disabled.
Changing the site’s look and feel
An important and unique tab on the ribbon of a public site is the Site tab. You see the Site tab when looking at any page in your public website (assuming you have permissions, of course).
The Site tab enables you to change the look of your site and edit important components such as the title, logo, menus, and Search text box. You can even edit the style sheet for the site in the Advanced section. If you’re not familiar with style sheets, this option is best left unexplored. For you intrepid web developers out there, good luck!
Using a vanity domain
If you already have a SharePoint Online public-facing site, you can use a custom domain with it by registering the domain with a registry such as GoDaddy or another Internet registrar.
As mentioned previously, Microsoft doesn’t allow you to create new public-facing SharePoint Online sites any longer. Instead, it directs you toward its select partners, GoDaddy and Wix. When you create a public-facing website using these partners, you can choose your own domain during that process (described earlier in the chapter). If you already have a SharePoint Online-based public-facing website, you can still add a custom domain to it.
You can change the domain name of your public-facing site, but you first have to register your domain name with Office 365. To do so, follow these steps:
Browse to the Office 365 Admin page by selecting Admin from the Apps menu.
The Apps menu looks like a waffle in the top-left corner of any Office 365 app.
- In the left navigation pane, click the Domains link (found under the Setup grouping).
- Click the Add Domain link.
- Follow the wizard that walks you through adding a domain.
- When you are finished with Step 4, go back to the SharePoint Online Administration Center (the SharePoint link in the Admin page), select your existing public-facing website site collection, and click the Add Domain button in the Public Website portion of the Site Collections ribbon.
In the Select Your Domain dialog box, find your new domain name, select it, and click OK.
If you do not see your new domain name yet, you may need to wait for DNS to switch your record from the previous location to Office 365. This usually happens within a day but can take up to 72 hours.