Chapter 9
Working with SharePoint from Microsoft Office
IN THIS CHAPTER
![]() Understanding how Microsoft Office integrates with SharePoint
Understanding how Microsoft Office integrates with SharePoint
![]() Creating new Office files and saving them to SharePoint
Creating new Office files and saving them to SharePoint
![]() Opening files saved in SharePoint from your SharePoint site
Opening files saved in SharePoint from your SharePoint site
![]() Taking a look at Microsoft Office on mobile devices
Taking a look at Microsoft Office on mobile devices
The Microsoft Office suite of productivity apps — Word, Excel, and PowerPoint — is still one of the most used suites of software for working with content. SharePoint is a member of the Office family as well and has embraced Microsoft Office with excellent integration. This is not to say you can’t use other suites of software to create and edit your content. You can! But if you are using Microsoft Office, you will be pleasantly surprised at how SharePoint fits in seamlessly with the Office apps you have come to know and love.
In this chapter, we take a look at how SharePoint can be used with the Office productivity apps on desktop computers and laptops as well as on mobile devices. These include Word, Excel, PowerPoint, OneNote, OneDrive for Business, and more.
Getting Familiar with Office Versioning
Just like other Microsoft products, Office is moving to the cloud. This doesn’t mean the Office clients are only available in the cloud — you can still download them and install them locally on your computer as a stand-alone client if you wish. What it does mean is that by moving the Office products to the cloud, Microsoft has enabled users to receive continual updates to the Office clients through a subscription-based program called Microsoft Office 365.
Instead of a one-time purchase of an application (such as Word or Excel) that you download directly onto your computer, with Microsoft Office 365, whenever a new feature comes out for any of the Office apps, you automatically get that feature as an update. You don’t have to wait for the next major release (traditionally every three years) for new features. (And versioning of the Office clients is constantly changing!) The downside to the subscription-based model is that you continue to pay a monthly fee to Microsoft for as long as the subscription is active.
 When you purchase the stand-alone Office clients instead of the Microsoft Office 365 subscription, the Office suite is simply called Office 2019.
Working with Office on Your Desktop or Laptop
Let’s face it: Most of us still use Word, Excel, and PowerPoint when we create new content. These productivity apps are popular and we love them. The good news is that we don’t have to give them up in order to adapt to the new cloud-based future. We can still use them and they now work better than ever in the cloud.
But what does “in the cloud” mean? It simply means that we can open and save content directly to SharePoint (in the cloud) from the Office apps running on our local computer. Let’s take a look at how to create new content and edit existing content using Office installed on a desktop or laptop computer.
Installing Microsoft Office
Before we get started working with the Office apps, we need to make sure they are installed. There are two primary ways to obtain the Microsoft Office suite of apps. You can download it as part of your Office 365 subscription or you can buy it outright.
If your Office 365 subscription includes Microsoft Office, you can install the Office apps by doing the following:
- Open your web browser and navigate to
www.office.com. - Select Sign In in the top-right corner of the screen and sign into your Office 365 account.
- Click Install Office in the upper-right corner of the screen and select Office 365 apps, as shown in Figure 9-1.
Follow the instructions to download and install the apps.
Once the download and installation are complete, you will find the familiar Word, Excel, PowerPoint, and other apps in your Start menu on your computer (or in your Apps on a Mac).
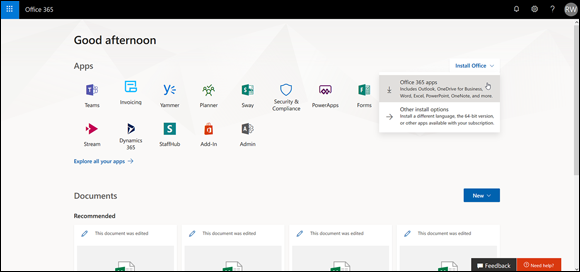
FIGURE 9-1: Using the office.com screen to install the Office apps.
 We cover purchasing an Office 365 subscription in Chapter 1. Be aware: not all Office 365 subscriptions include access to the Microsoft Office apps. Make sure you choose a subscription that does if you want to use the Office apps on your local computer.
If you want to purchase the Office apps and download them the old-fashioned way, you can do so. Just follow these steps:
- Open your web browser and navigate to
products.office.com. - Click the Products tab and select See All Office Products in the lower-right corner of the drop-down menu, as shown in Figure 9-2.
Scroll down the page and under the “Office for home” section, choose either Office Home & Student 2019, Office Home & Business 2019, Office for Mac, or Office Professional 2019.
Clicking a link will take you to a page where you can purchase Microsoft Office for a one-time charge and then download and install it on your computer. Once installed, the Office clients will show up in your Start menu on your computer (or in your Apps on a Mac).
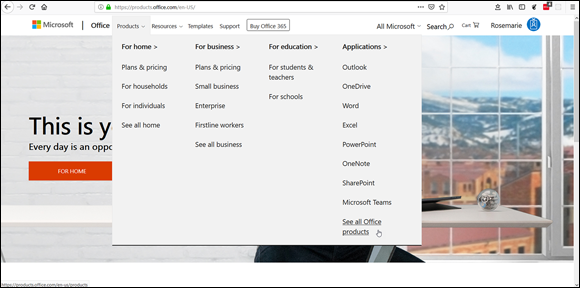
FIGURE 9-2: Viewing the Office products from the products.office.com page.
Saving a new document to SharePoint
You can create and save a new Office document using the apps on your computer and then save it to your SharePoint site without ever needing to leave the Office app. Let’s do that now with a new Excel workbook.
- Open the Excel app on your computer.
- Choose File ⇒ New ⇒ Blank Workbook to create a new blank workbook.
- Enter some data.
Choose File ⇒ Save.
Because this is the first time saving this file, the Save As menu opens.
- From the Save As menu, select Add a Place.
- Choose Office 365 SharePoint as the cloud location you want to add, as shown in Figure 9-3.
Enter your email address for Office 365 and click Next, as shown in Figure 9-4.
If you are following along with the book, we created this account in Chapter 1.
- Enter your password and click Sign In.
Decide if you want to allow Windows to use this account everywhere on your device.
We recommend this so that SharePoint is integrated wherever you need it.
Click Yes if you agree.
Windows will then go about integrating SharePoint with your computer. Now, whenever you are in Office and choose File ⇒ Save, you will see your SharePoint site available as a cloud location, as shown in Figure 9-5.
Choose your SharePoint site in order to see the possible document locations.
In this example, we will choose Shared Documents. You must choose a document location. If you just choose the general SharePoint site, you will get an error message that says you cannot save in that location. The reason for this is that a SharePoint site by itself doesn’t have any place to store the content. You need a Library, such as Shared Documents, in order to save the content into. We cover creating these Libraries in Chapter 11.Your file will be saved and you can keep working in Excel. As you work on the document your changes will be saved into SharePoint and thus into the cloud. The result is that even if your computer is lost or stolen or crashes, your Excel file will always be available in SharePoint and you can access it from any other device.
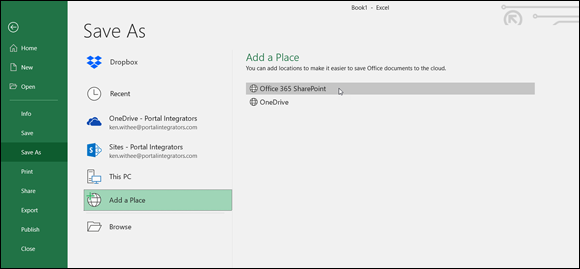
FIGURE 9-3: Choosing Office 365 SharePoint as a new cloud location in Excel.
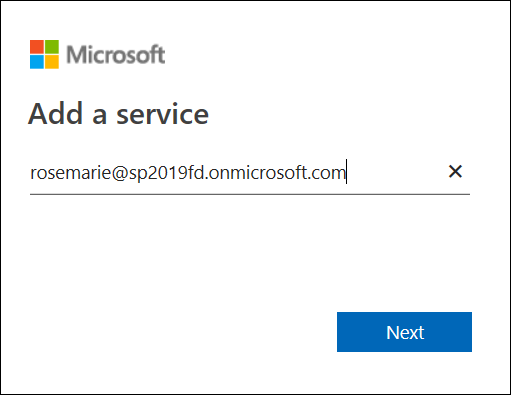
FIGURE 9-4: Signing into your Office 365 account to add it as a cloud location.
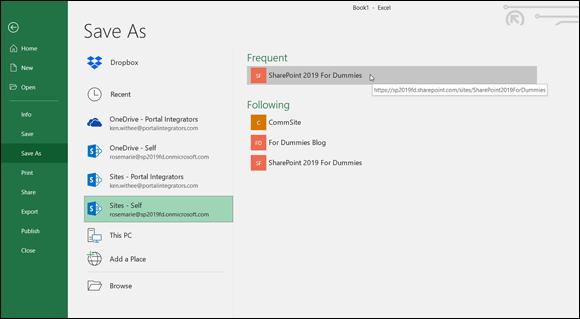
FIGURE 9-5: Viewing SharePoint as a location to save a document.
Opening a document from SharePoint
You can open an Office document that has been saved to SharePoint in one of two ways. First, if you are browsing the SharePoint site, you can click a document and view and edit it in your web browser using the Office web apps. Second, if you want to open the document in the Office app on your local computer, you can click the “Open In [app]” button that appears in the top middle of the screen, as shown in Figure 9-6. Here, when you click “Open in [app],” the app on your computer opens and you can continue to work on the document. When you save the document, it is automatically saved back to the same SharePoint location so you will never lose your work.
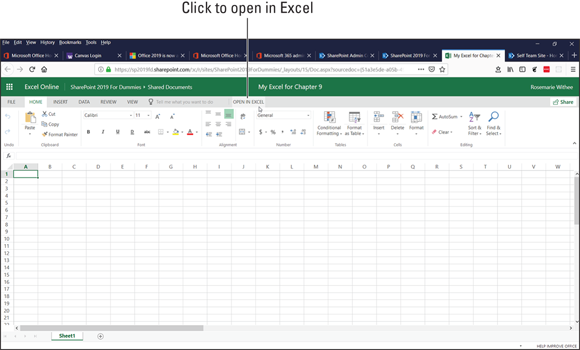
FIGURE 9-6: Opening an Excel file directly from SharePoint.
In addition to opening an Office file from within SharePoint, you can also open the Office app on your computer first and then browse to a file that is located on SharePoint. For example, with Excel, when you first open the app, click the Open tab on the left. You will see the SharePoint locations and recent files, even those that are stored in SharePoint, as shown in Figure 9-7. Microsoft has done a great job of making the cloud-based content stored in SharePoint feel just as easy as working with files that are saved locally.
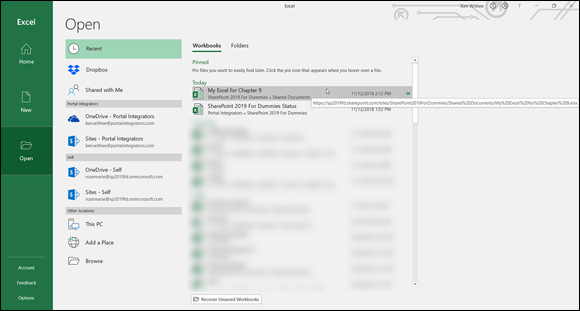
FIGURE 9-7: Opening an Excel file stored in SharePoint.
In these examples we used Excel, but you can follow the same process with any of the Office apps.
Working with Office on Your Smartphone or Tablet
In addition to working with the Office suite of apps on your desktop or laptop computer, you can also work with the popular Office apps on your iOS- or Android-based mobile device.
Saving a new document to SharePoint
When you create a new Office document on your mobile device, you can choose to save it to your SharePoint site. This happens by default since you had to sign into the app when you first opened it.
To create a new Word document on your mobile device and save it to SharePoint, follow these steps:
- Open the Word app on your mobile device.
- Choose to create a new blank document.
- Enter some text and then click the ellipsis in the upper-right corner of the screen and click the Save button, as shown in Figure 9-8.
- Give your document a name and then choose your SharePoint site, as shown in Figure 9-9.
Select the location within the SharePoint site where you want to save the document.
In this example we will choose Documents, as shown in Figure 9-10.
Tap Save in the upper-right corner of the screen.
Your file is saved to your SharePoint site. You can now access it from any other mobile device or even open it from Word installed on your desktop or laptop computer.
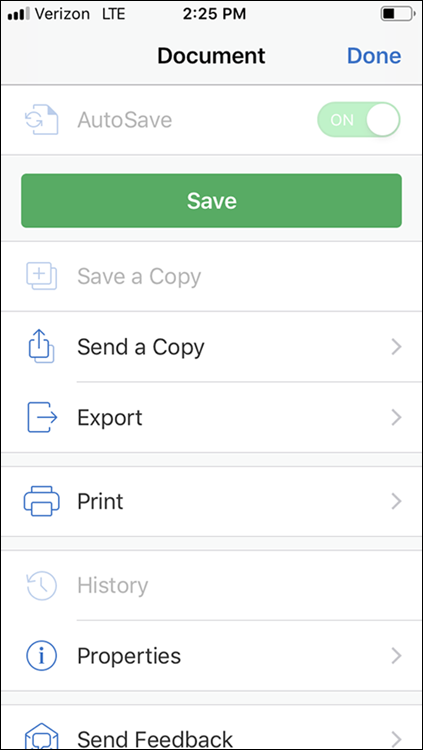
FIGURE 9-8: The Save button in the Word app on an iPhone.

FIGURE 9-9: Choosing a SharePoint site to save a Word document from an iPhone.
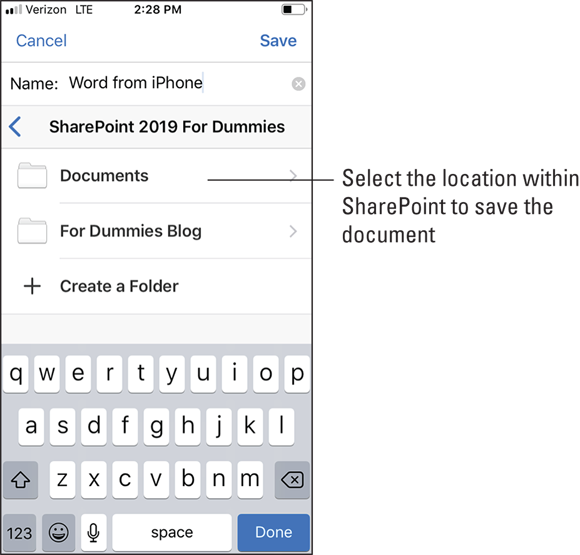
FIGURE 9-10: Selecting the Documents library within a SharePoint site.
Opening a document from SharePoint
Opening an Office document on your mobile device is no different than opening a locally saved file. When you open Word or any other Office app, you will see a Recent tab at the bottom of the screen. Tap that tab and you will see all your recent documents, including those saved to your SharePoint site, as shown in Figure 9-11.

FIGURE 9-11: All your recent Word documents are located on the Recent tab.
To open a document, just tap on it and make edits. When you save the file, it is automatically saved back to SharePoint — you don’t have to do anything extra. This is a nice feature that has saved us multiple times when we have dropped or otherwise rendered a phone unusable!