
2 The Tools of Action-Sports Filmmaking
Camera Gear: Choosing a Format
DV magazine, online forums, advice from friends … whom do you listen to when it comes time to buy a new camera? There’s a lot of good advice out there, but the first question you need to answer clearly is, What do you intend to shoot, and is it recreational or professional?
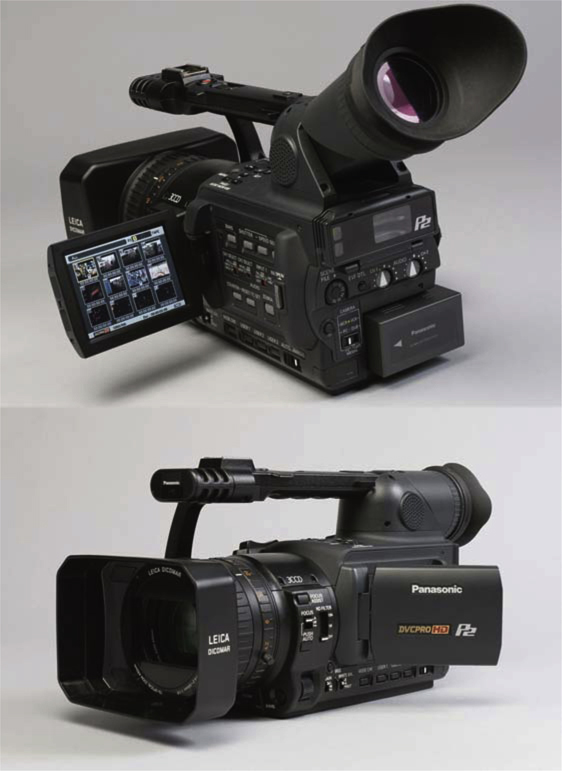
Whether you’re buying your first camera or just getting a new one, there is one significant difference in recent equipment offerings: some record to linear videotape, and some to internal hard-disk drives. Being that the latter technology is fairly new, many people still like the tangible comfort and simplicity of finishing a shoot and putting a physical tape in their pocket. Hard-disk-recording cameras are a growing phenomenon, and professionals agree they will someday replace linear-tape cameras, especially as disk storage capacity and reliability increase, and the costs of such technologies goes down. Hard-disk-capable cameras (see Figure 2-1) also offer instant access to scenes, just like a DVD would, and you can easily drag and drop clips to your computer from the camera. The downside? Disk cameras typically offer lower storage capacity, so you’ll need to stop shooting and offload the content before you continue. If you are planning on shooting an action-sports event, or anything that will run a few hours or more, you’ll likely need to shoot with a tape-fed camera. However, if you’re shooting a short film or any other “controllable” event, a hard-disk camera should be sufficient for you.
Figure 2-1 Panasonic’s AG-HVX200 with P2 media cards.
The most widely accepted and reliable tape-fed camera format is DV, or digital video. Sony, Panasonic, Canon, and JVC all offer a great array of variably priced reliable DV cameras. The DV format shoots at a native 720 × 480 lines of resolution (see Table 2-1). Cameras that shoot DV will still vary in quality, though, based on a variety of other factors — most notably the number of CCD (charge-coupled device) chips they have and the quality of the optics. Cheaper DV cameras are single-chip devices — that is to say, they have a single CCD chip that converts all color information to tape. Higher-end cameras are three-chip devices; they have three CCDs, with each one designated to record part of the RGB spectrum (one for green, one for red, one for blue). Many years ago, DV wasn’t considered a passable medium for broadcast-television work, but with the proliferation of reality TV and other forms of lower-budgeted filmmaking, three-chip DV cameras have become more widely accepted for professional use. In fact, you’d be surprised how many live-action sporting events will broadcast mixed-camera formats. I spent approximately six years shooting bike, skate, and in-line events for ASA Entertainment. Most of those events were broadcast on Fox Sports or ESPN. Very often the shoots would consist of from four to six ENG (electronic news gathering) Betacam cameras and one or two DV cameras that would focus on getting in the action and more-personal shots with the athletes. Although there can be a noticeable difference in the looks of those two formats, oftentimes we’d use that difference to our advantage. For example, when we shot ASA events, we would use a DV camera (then a Sony DCR-VX2100 or similar) as the on-course followcam while the Betacam SP cameras stayed fairly stationary. This meant that every time the show producer would cut to the followcam, it was a unique and exciting angle that also had a unique look to match.
Table 2-1
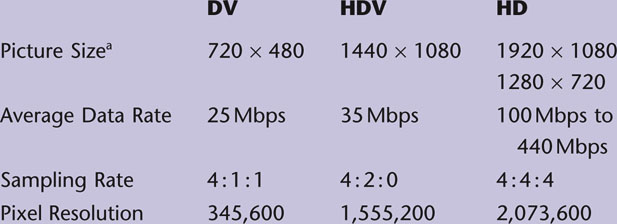
This table represents only some of the most commonly used formats.
a Resolution is based on the NTSC video standard used in the United States.
In the world of action-sports videos, three-chip DV and HDV cameras are the number one camera format used across the board. They offer a small, unobtrusive package for getting in close and personal with your subject, as well as getting the camera quickly and easily into and out of high-risk shots. Let’s say you want to shoot someone grinding down a handrail on the street or along the coping of a ramp. The compact size of a DV or HDV camera will allow you to stand relatively close, and you’ll find it much easier to step back to safety if your subject messes up and you suddenly find a bike, board, or person flying toward you. I can’t even begin to count the number of times I’ve had a camera within inches of a skateboard or the pegs of a bike as someone lost control of a trick and I had to pull my camera out extremely quickly. Most three-chip DV and HDV cameras, such as the ones listed below, even have a sturdy handle located on the top for easy operation.
One of the primary techniques used in filming action sports is to throw on a wide-angle lens, open the LCD screen, and hold the camera close to the ground, using the handle on top. My disclaimer: just remember that getting in close to your subject while they’re spinning, flipping, or grinding is always going to put you and/or your camera at risk. About eight years ago, I was shooting a skater in Puerto Rico for a video called Hoax 7: Scared Straight. I was following the skater at fairly high speed, down a sheet of wood that covered a set of stairs as part of his line through a park. Every time he would mess up and we would do it again, I felt a little more comfortable and would get a little bit closer. The problem arose on the fifth take. I got so close to him that just as I was jumping onto the wood, he was also landing on the wood — causing it to bow up at the ends. The result was that the 3-inch lip was now more like 8 inches, and my wheels caught the edge — which sent me flying forward, camera first. I managed to hold on to the camera and protect it, as I rolled out of it getting some scrapes on my elbows and back. The lesson here is twofold: first, having that handle on top saved my camera, enabling a strong enough grip to not lose it midflight; and second, no matter how many times you shoot something in what feels like a controlled environment, things change. So keep your eyes open.
DV Cameras
The DV format was created by a group of ten or so companies, including many of the big dogs (Sony, Panasonic, JVC, Philips …). DV was originally designed as a fast, cheap, and simple replacement to less-reliable formats such as 8mm and Hi8. DV, however, records only onto a ¼-inch tape. This means that the slightest scratch, ding, or pull can leave your footage with a digital hit, or even go so far as to ruin it entirely. Although DV has become so standardized, and its tapes so high quality, that this damage is rare, it is nonetheless very important to always keep your tapes stored in a cool, dry place. If you happen to shoot something irreplaceable, you may want to back it up before you begin playing and watching the tape repeatedly; DV tape will begin to break down as the camera or video deck heads repeatedly push against the tape during playback.
Another important feature to understand in DV is compression. Originally called DVC (digital videocassette), DV takes the information the CCD chips gather, and then compresses that video using a discrete cosine transform (DCT) in order to decrease the size of the digital stream of data. The compressed stream of data going to the tapes is only 25Mbps (megabits per second), as opposed to 100Mbps and up for true high definition. This amounts to a serious difference between tape formats in data rates and compression. Although DV looks good, you’ll see the difference when you compare it to HD (high definition).
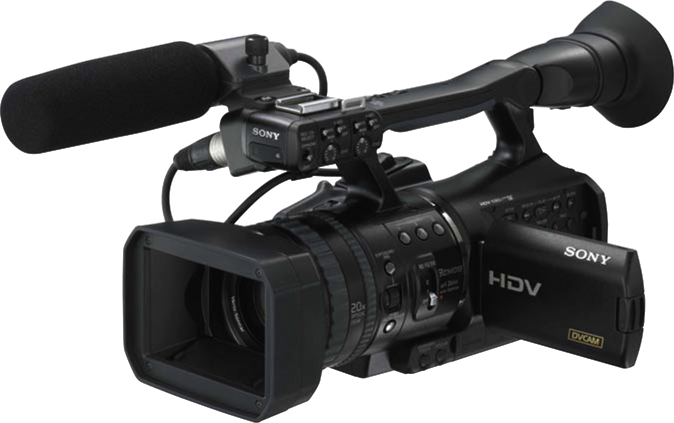
The first widely accepted DV camera came in 1995 when Sony hit the market with a prosumer camera that set the standard for everything to come, the DCR-VX1000 (see Figure 2-2). This three-chip DV camera still sells today in various incarnations, from the redesigned VX2100 series to Sony’s first true 24p HDV (high-definition-video) camera, the HVR-V1U, which released 11 years later with a striking resemblance to the VX1000 (see Figure 2-3). What made the VX1000 so popular was its versatile design and serious durability, all at a reasonable cost. Action-sports athletes and filmmakers around the world quickly embraced this camera, and it became a staple of almost all action-sports video.
Figure 2-2 Sony DCR-VX1000, released in 1995.

Figure 2-3 Sony HVR-V1U, released in 2006.
HDV Cameras
The Sony HVR-V1U (as seen in Figure 2-3) uses the ever growing in popularity HDV format. This format records to the same tapes as DV, but uses a codec based on MPEG-2 (Moving Picture Experts Group) video compression, which enables a much higher compression rate than does DV. The downside to squeezing so much more information on the same size tape, as you may have guessed, is that more problems arise with dropouts and artifacting. Many people agree, though, that it’s worth the sacrifice, based on the increase in overall quality that HDV delivers.
The HDV format is more expensive compared to DV, but it is worth it. With high-definition forms of DVD such as Blu-ray and HD DVD — as well as HD content available via cable, satellite, and the web — the outlets to watch your HD recorded material are becoming more regular every day.
One key perk to shooting HDV is that the cameras remain almost the same size as DV, and you can swap tapes quickly and easily. (Please see Chapter 9, Post Production, for the different needs of editing equipment for HDV.)
It’s also important to note that almost all HDV cameras allow you to switch back into regular DV mode if desired. Most cameras also have a down-conversion feature built in, allowing you to shoot HDV, but then output DV into your computer for editing. This is a nice feature if you plan on archiving footage for down the road, but for now need only a lower-res edit for the web. Remember, although you may not have an HD television or Blu-ray DVD burner now, you will in the near future. My advice is to honestly look at where you intend to screen your work, and decide if HDV is worth the added investment. Most good three-chip HDV cameras can be had for a few thousand dollars, and go up from there.
HD Cameras
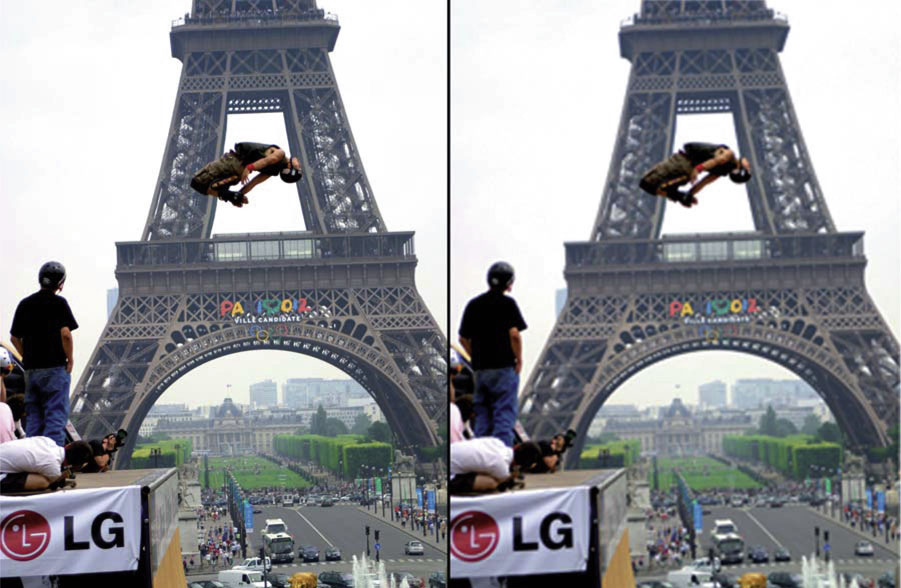
Many people assume that HDV is HD, and they’re right, partially. By definition, an HD (high-definition) camera is one that shoots at a higher resolution than an SD (standard-definition) camera, such as DV or Betacam SP. However, I’ve chosen to separate HDV and HD because of the significant differences you’ll encounter with both formats. Originally, the National Television Standards Committee, also known as NTSC, standardized the United States at 525 lines of resolution with 29.97 frames per second (fps). HD is usually shot with 1,080 lines of resolution and an aspect ratio of 16 × 9 (or 1.78 : 1), compared with conventional television’s 4 × 3 (or 1.33 : 1) (see Figures 2-4 and 2-5). The 4 × 3 ratio of most television shows today is slowly being replaced by the widescreen format of movies and HD. Most plasma and LCD TVs come widescreen, as do more and more laptops these days because widescreen more closely represents what you actually see, and thus is more appealing to the eye. Even your DV and HDV camera will give you the option to shoot widescreen by either letterboxing the image or stretching it out to utilize all the pixels (called anamorphic), and then allowing you to resqueeze in postproduction, thus retaining a higher-quality image. One of the upsides of shooting 16 × 9 is the cinematic look and feel it creates.
Figure 2-4 4 × 3 aspect ratio.
Figure 2-5 16 × 9 aspect ratio.
Although true HD is nearly four times the resolution of standard def (see Table 2-1), it’s also typically more than four times as expensive, so most action-sports videos are rarely shot on full-resolution HD. Some of the more popular HD cameras — such as the Sony HDW-F750 and HDW-F900, as well as the Panasonic VariCam and AJ-HDX900 — deliver amazing image quality and camera versatility. At the time of this writing, however, they still retailed for between $26,000 and $90,000, depending on the model. These cameras do feature interchangeable lenses and larger tape formats with options for better (or even no) compression compared with HDV cameras.
The key to the decision on the part of most action-sports filmmakers to shoot HD is usually budget. If you’re not expecting to project your finished product on a movie theater screen, then even the dramatic increase in quality may not be necessary for your project. Again, Robert Rodriguez shot Once Upon a Time in Mexico on the Sony HDW-F900, and that was a big-budget Hollywood film.
60i or 24p
When NTSC became the official standard in the United States in 1953, television had committed to the 29.97 interlaced format. This is the standard still used today in almost all of North America. Although the rest of the world uses PAL or SECAM, U.S. TV and video cameras have stuck with NTSC. The format builds each frame of video in two parts as it interlaces odd and even scan lines from each of two consecutive frames of pictures. This is why, when you pause interlaced video, you often get a stuttering effect. In contrast, 29.97, also referred to as 60i (the total number of interlaced frames in one second, rounded up), gives you a very sharp, in-focus, “video look.” This look is usually associated with news, home videos, and anything of that nature. Film, on the other hand, typically shoots at 24 frames per second without interlacing. This accounts for part of the smooth, more surreal look of film. So, like the progressive nature of action sports themselves, video cameras have now begun shipping with a 24fps mode that does not interlace the frames. This mode, often called 24p, scans and displays each frame of video in its entirety before progressing on to the next frame. The result is a much more filmlike image, but shot on video. A few of the first and most popular prosumer video cameras — such as the Panasonic AG-DVX100 and AG-HVX200, and the Sony HVR-V1U — allow you to switch between 60i and 24p modes. These cameras typically offer a 30p mode as well, which is ideal for action. Because 24fps can cause a little blurring in the action if your subject is moving too quickly, action-sports filmmakers often shoot 30p as a means to compensate while still maintaining that progressive-frame-mode look.
The creative choice between 24p and 60i can be a very subjective one. Whereas most high-end HD filmmakers will shoot 24p for the purpose of getting that film look, a lot of documentary and action-sports cameramen prefer 60i for the exact reason that others dislike it: the sharpness, clarity, and deep-focus ability are great for capturing the action.
In 2004, I made a documentary called Harnessing Speed. The subject was Stealth, a summer action sci-fi film by Rob Cohen (director of such movies as Dragon: The Bruce Lee Story and The Fast and the Furious). We had looked at numerous camera setups for the shoot, but in the end decided to shoot 60i for all of the behind-the-scenes-style footage, and 24p for all of the interviews and wrap-ups. The reason was that the 60i would help give the footage that feeling of reality, like the news, and thus create a sense of urgency and risk in what we were shooting. Meanwhile, the 24p interviews would look softer and smoother, a way to add a little polish to the piece without affecting the 60i footage.
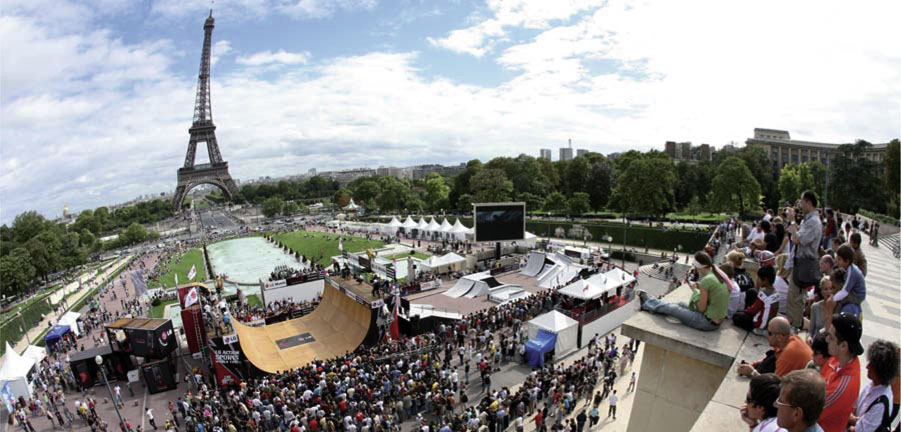
Brooks Ferrell, an action-sports DP (director of photography) and cameraman, has shot many of the Vans skate events for Windowseat Pictures. These events are not just about the amazing skateboarding and snowboarding tricks that are pulled off, but also the lifestyle and characters that are shown. Brooks likes to capture all of the lifestyle in 24p mode, and all of the action in 30p. In the summer of 2006, we shot the Downtown Showdown for Vans on the back lot of Paramount Pictures. This shoot consisted of six Panasonic AG-DVX100B cameras, all in 30p or 24p mode. Because the back lot of the studio resembles New York City’s Lower Manhattan, the surreal film look was ideal for the cool laid-back lifestyle skate event it turned out to be.
Almost all cameras should eventually offer a 24p or 30p mode, so if you’re looking for a new one with which to shoot action-sports events, documentaries, or short films, it would be a wise investment to get a camera that offers this feature.
Film vs. Video
No camera breakdown is complete without examining the option to shoot film. Whether it’s Super8, 16mm, Super 16mm, 35mm, Super 35mm, or even the enormous IMAX-sized 70mm format, there is no denying the beauty of film — and the insane cost of it.
First, the limitations: it’s expensive; you can’t instantly review what you just shot; it’s bulky, fairly time-consuming to reload; and of course, you usually need to transfer it all to a video format in order to screen it, edit it, or distribute it.
Now the upside: it looks absolutely amazing.
Figure 2-6 Vans Downtown Showdown, Paramount Studios back lot.
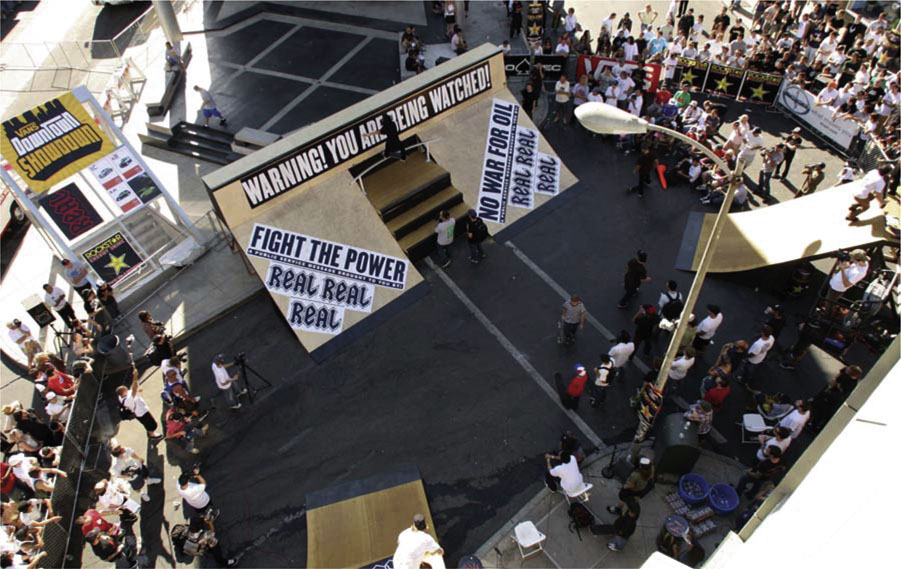
Courtesy Windowseat Pictures.
Up until 1999, the University of Southern California’s film school (the USC School of Cinematic Arts) had all students in their entry-level 190 course shoot Super8 film. Doing so not only gave you an appreciation of film, but it made you really think about what you were filming, how you were going to edit it, and whether or not you really needed that extra shot. I remember using a fold-up clothes-drying rack as a means to hang all of my shot and developed Super8 film clips. By the end of a day of splicing and taping film together, when you finally sling up your finished cut, you pay very close attention to what shots you missed, angles you wish you had got, and things you’ll correct next time. Although the 190 course, and many like it around the world, now uses DV, the trade-off is the quantity of material you can shoot for mere pennies. Most of the higher-end courses at numerous film schools (including USC) do, of course, still offer 16mm and 35mm filmmaking, the standard in many Hollywood feature films.
Full 16 × 9 HD resolution (1920 × 1080), is just shy of what’s called 2K (2048 × 1080); however, full 35 mm film resolution of a theatrical film or digital projector is closer to around 4K (3656 × 1976). This is a big difference in quality. The larger the format of the film (8 mm, 16 mm, 35 mm …) the higher the quality; thus, IMAX’s ability to showcase 70 mm film on a 60-foot screen.
Film also retains the capacity to easily create a narrow depth of field (or shallow focus). This is most often seen in personal or romantic Hollywood film moments when the actors are crystal sharp, but the background is extremely soft and blurry. Achieving this shallow depth of field on video is far more difficult, but can be most easily achieved by using longer (telephoto) lenses (more on this in Chapter 5, Camera Angles, Lenses, and Framing).
A final great perk of film is its latitude. Latitude is the range of light and dark areas that get exposed in your film, and it is far greater in film than in most video standards. This means that bright areas are less likely to blow out into white, and dark areas are less likely to just look black on film. Although all video cameras differ in the amount of latitude they offer, particularly for capturing low-light situations, it is a safe bet to say that none are as versatile as film. So from the overall quality and latitude, to the shallow focus and film grain, there are many reasons why film looks so good to the human eye.
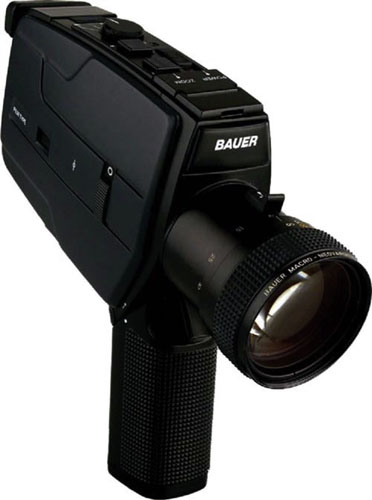
If you want to test the waters with film, the cheapest and easiest means of entry is with a Super8 camera (see Figure 2-7). Often bought and sold for under $100 online in stores such as eBay, these cameras offer easy-to-use cartridges that just pop in and out, and can be purchased with developing and transfer packages from places such as Pro8mm in Burbank, California. Although a high-end Super8 camera with a nice transfer can yield a good image, many provide a very grainy and scratchy old-film look that many action-sports cameramen try to emulate with video shoots. You will find various old-film or Super8 filters that can be added to video during post; however, nothing as of yet will give you that true look of original Super8.
Figure 2-7 Bauer Super 8mm film camera.
Film is still used in many big-budget action-sports films. Snowboarding and Freestyle Moto-X films, for example, very consistently shoot 16mm or Super16 film for enormous sections of the latest videos. The reason is because snowboarders and Moto-X riders usually go huge on every hit, so film makes sense. Whether they land it or crash, the stunt is probably going to make the cut. It’s also fair to say that any higher-profile video can afford to shoot film. Skateboarding, BMX, and aggressive in-line are far more technical in comparison, and thus far less consistent. If you’re rolling film on a skateboarder trying a very technical trick on a ramp or on the street, it may take countless tries before they land it — by which point you’ve burned through seven rolls of film … and your wallet. If you’d like to see a great example of just how good film can look with action sports, check out one of my all-time favorite sections in the Tony Hawk Birdhouse video The End, directed by Jamie Mosberg. This features numerous film segments that all culminate in an epic vert-ramp scene at an old bullfighting arena in Mexico. The music, the skating, and the cinematography all seamlessly integrate into a phenomenal section.
Figure 2-8 Tony Hawk in the Birdhouse skate film The End.

Sound Gear
If every video camera comes with a built-in microphone, then why should you worry about sound gear? This is a very fair question, and the truth lies once again in determining what you’re shooting. For the average video hobbyist, the onboard mic will suffice. However, if you plan on distributing your video via DVD or the Internet, or if you just want it to look and sound better, then you may want to consider some aftermarket sound options.
A movie with bad sound is like a house with no roof — it’s just not good. Anytime someone watching your video is struggling to understand what an athlete is saying, or the sound from the action seems chintzy or shallow, it’ll be a distraction from enjoying the piece for what it should be. Great sound can be recorded in one of three common ways.
The first is often the easiest and most effective; it involves an additional, higher-quality, onboard microphone. Most cameras have a metal bracket or slot on top of them for mounting lights or microphones; this is where you’ll attach most mics. Although you should always read reviews for the microphone you plan to buy, the most common choice for shooting video is a unidirectional mic (see Figure 2-9). This type of mic comes in numerous pickup patterns (the directions and intensity in which a microphone “hears” sounds). The two most common patterns for action sports and documentary shooting are found with the shotgun mic and the cardioid mic. My personal preference is the shotgun.
Figure 2-9 Common pickup patterns for microphones.
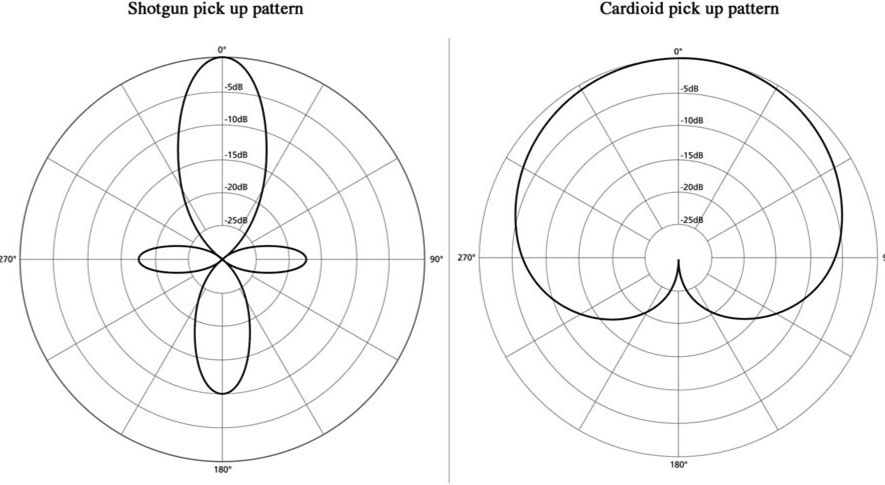
As you can see from Figure 2-9, the shotgun mic (named for its ability to cancel out audio from the sides and focus primarily on what’s in front of it) and the cardioid mic (named for its heartshaped pickup pattern) are ideal for shots requiring you to focus on a single subject in front of you. If you need to get short sound bites or OTFs (on-the-fly interviews) from your subject while also shooting action in a dangerous environment, these light onboard mics are truly ideal for that “gun and go” documentary style. Prices can start as low as a couple hundred dollars for an entry-level microphone, and go all the way up to a few thousand and beyond. The Sennheiser MKH 416-P48 has been a staple of my arsenal for many years. It records crystal-clear sound and is able to focus in on one subject while shooting in loud environments. I’ve captured countless live events with only this mic mounted on my camera. At the Vans Cup in Northstar at Tahoe in 2006 and 2007, I recorded brief sound bites using this mic while snowboarders sat on the start box with music blasting, spectators screaming, and Mother Nature dumping. At a distance of 2 to 4 feet from the athletes, the sound quality was perfect and made most of the shots usable.
However, if you’re doing followcam or anything that may be action-only oriented, you may opt to settle for the internal mic as a means to save weight and energy. Oftentimes the onboard microphone will give you all you need for action shooting; then you can use a mic for your interviews or more-personal moments. You will also have the opportunity to sweeten up the natural sound when you get into post (see Chapter 9).
The second way to mic is with a boom. Also known as a fishpole, this lightweight long arm can reach exceptionally far out to capture your subjects. Booms can then be either hardwired directly to your camera or to a wireless audio transmitter that can send the sound to a receiver attached to your camera. Booms usually get you better audio than an onboard shotgun mic because they generally get closer to your subject. The ideal scenario for booming is when the talent knows and expects you to be there, and you are recording multiple people interacting. The downside to the boom is its cumbersome size and obvious presence; it can be an enormous distraction to your subjects, and thus a hindrance to what you’re shooting. I also wouldn’t recommend it when recording action — the boom can get in the way and even become a dangerous obstacle for an athlete. The key to using a boom is a knowledgeable boom operator and a controlled environment. I typically boom only professional shoots in which the athletes are there to work with us for a specific goal.
Figure 2-10 Boom mic versus lavaliere mic.
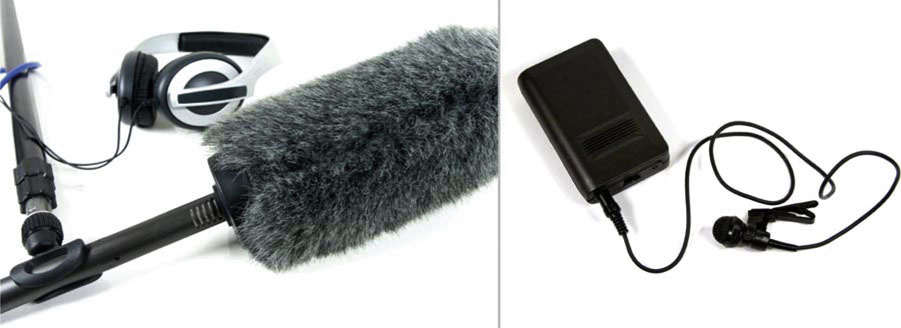
The third and final technique is the lavaliere microphone (or lav or lapel mic). These are small dynamic microphones that clip or attach to the collar of your subject’s shirt. They provide an excellent source of audio, but only for the person wearing them; don’t expect to capture good sound from people standing next to your subject, though a little pickup will happen. These mics also take more time and energy to set up, so plan on making time to stop your subjects while you wire them and find a safe place to stash the transmitter — often the athlete’s front pocket, where the mic is less likely to fall. Just remember to put in fresh batteries before you walk away!
One of the largest drawbacks to using a lav mic is that some athletes don’t like the idea of being recorded when they don’t see the camera around; there’ve been many stories of what Hollywood actors and professional athletes have said and done when they forgot they were mic’d … but we won’t go there. As noted in the section on cameraman/athlete etiquette in Chapter 1, most talent simply doesn’t like to be distracted or bothered when skating — and thus, lavs are out. If you are able to use lavs, just remember that they will also need to patch into your camera’s first or second audio input; so if you need to mic more than one or two people, this may also be a hindrance. Most prosumer cameras do have at least two audio inputs, so patching one lav mic in and then using the second input for an onboard shotgun mic can work extremely well. There are also numerous third-party adapters (for example, from BeachTek) that can split single audio inputs into additional inputs. These adapters, however, may allow audio to “bleed” between channels — which can work for or against you, depending on the goal.
Figure 2-11 Director Bill Kiely shoots a USAF walk-and-talk interview.
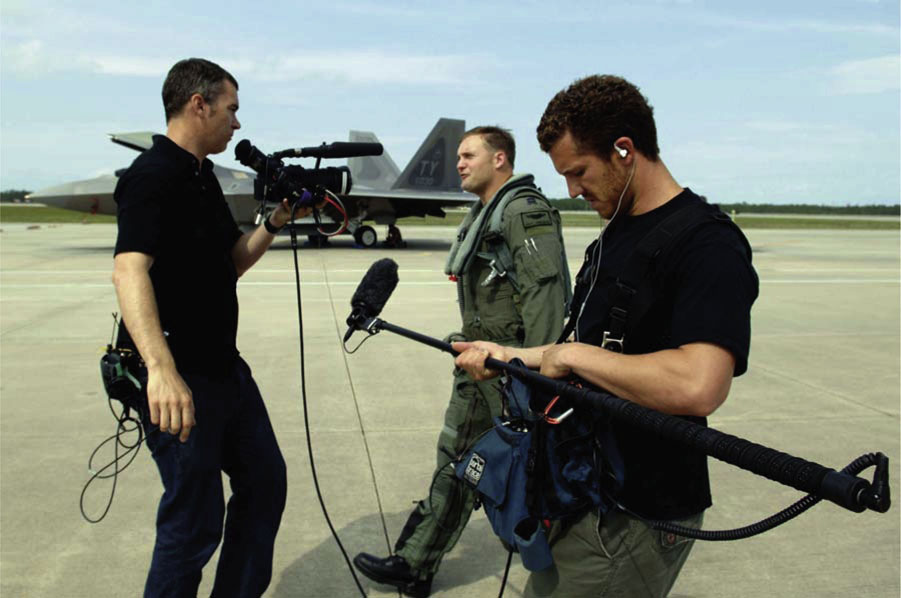
The U.S. Air Force and advertising agency GSD&M launched a campaign titled “Do Something Amazing” in 2006. I was fortunate enough to shoot and field-produce many of the broadcast and web spots with director Bill Kiely for Windowseat Pictures. Bill and I would spend countless hours at bases around the country, working with and filming real Air Force personnel who aren’t used to cameras. Although we would always have a sound operator with a boom and lav close by, there were numerous instances in which we would use only the shotgun mics. The benefit was threefold: being untethered from a soundman, and thus able to move more quickly; being smaller in operation and able to get into smaller areas such as fighter-jet cockpits; or simply being able to remain unobtrusive and keep our talent acting naturally.
So there are the three primary approaches to recording sound. You will have to consider if it’s worth the expense for your projects, but I can’t reiterate enough how much of a difference good sound will make. In my sophomore year of college, a USC professor wanted to demonstrate to us the importance of sound. He proceeded to show us the legendary Indiana Jones scene from Raiders of the Lost Ark in which Indy is running for his life from an enormous boulder careening through a cave after him. Presented in 35mm film on a large-format movie screen, the scene was every bit as intense and harrowing as I remembered it … that is to say, until our professor screened it again with only the original sound that had been recorded on set. Now you could hear Harrison Ford’s heavy breathing, the hollow set echoing his footsteps as “Indy” ran, and that massive boulder sounding like the plastic prop it actually was. We watched that scene four times. Each time, we added a level of audio quality: first, the nat sound followed by the sound effects; then the music; and eventually, the full mix as it had been seen and heard in theaters. For me, the lesson would never be forgotten: sound can make up nearly 40 percent of a film. So the next time you’re shooting your project and you consider slacking a little bit on the sound quality, just picture Indiana Jones running through a cave and being chased by a big old plastic rock.
Rigs, Mounts, and Specialized Gear
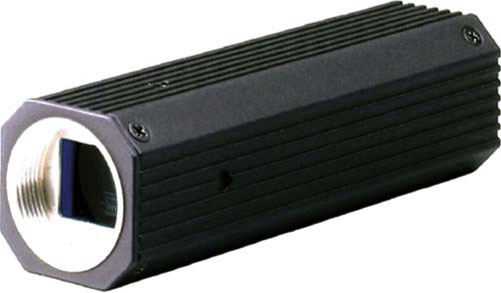
This section could cover a wide range of customizable gear. Instead, we’re just going to focus on some of the more popular and practical toys: lipstick cameras, specialty mounts, dollies, Steadicams, and jib arms and cranes. Let’s begin with the lipstick camera. Also referred to as a cigar cam, these small tubular-shaped cameras are now made by most of the big camcorder companies. For years, the most popular model was the Sony XC-999 ultracompact camera module.
Even today, with hundreds of other small cameras on the market, the Sony XC-999 has held its own with a high-quality RGB image and an extremely rugged and durable design. With 470 lines of resolution and 768 × 494 pixels, as well as fully interchangeable lenses including telephoto and fish-eye options, the XC-999 can be placed almost anywhere on almost anything. For a stunt motorcycle documentary called The Outsiderz, some friends and I mounted XC-999s on the bikes for all sorts of insane stunts and crashes; this added extra production value to the shoot by giving the audience unique angles they rarely get to see.
Figure 2-12 Sony XC-999 camera module.
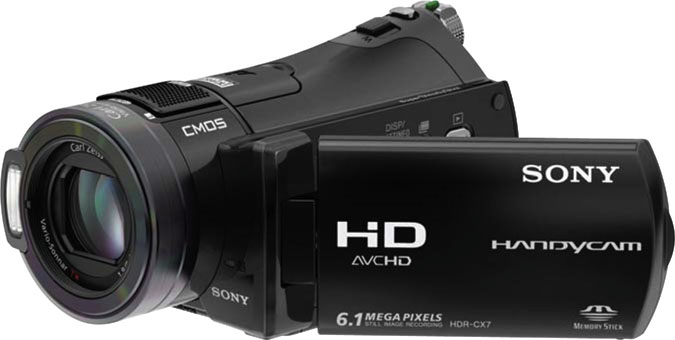
Mounting options for these cameras can be on an athlete’s helmet, to the side of the bike, or even underneath a skateboard. Limited only by your imagination, some of the most creative filmmaking I’ve ever seen has employed the use of lipstick cameras and clever mounts. Most require an external record source, so plan to tether them to your video camera or a basic portable recorder, often called a clamshell. With HDV- and HD-resolution lipsticks slowly becoming more realistic on shoots, the quality of your work will also increase. One consideration, however, is that if you don’t absolutely need to get the camera in a small spot, many consumer DV and HDV camcorders are now so small that they rival old lipstick cams. Rather than buying a lipstick camera and a recording device that will require mounting and cabling for both, consider these small camcorders as a very real option. Many record to tape or even internal hard disk, making them simple, compact, and perfect additions to your camera arsenal.
The more angles and coverage you get during your shoot, the more options you’re going to have in the edit bay; thus the expression “coverage, coverage, coverage.” Always remember: if you don’t get it, you won’t have it.
Figure 2-13 Sony HDR-CX7 hard-disk camcorder.
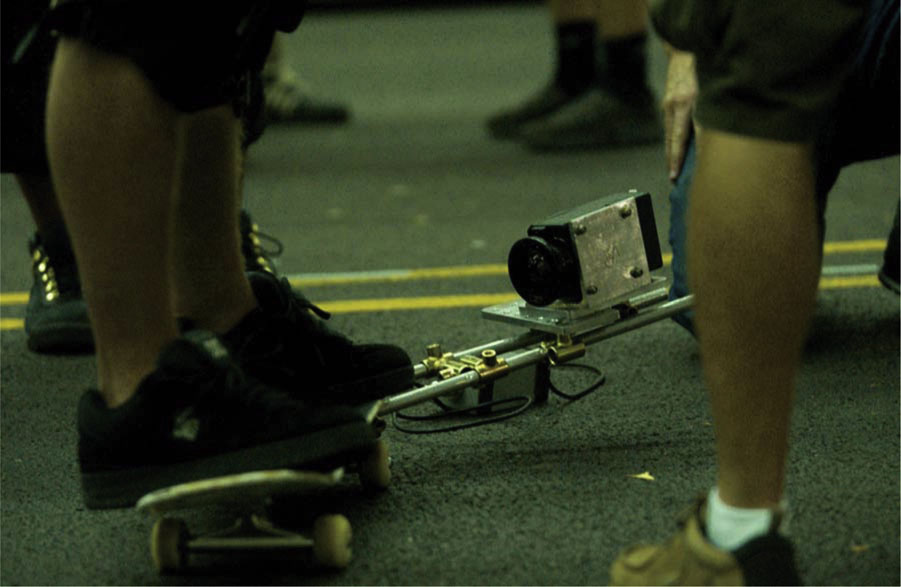
Other unique ways to capture your subject include specialty mounts. Manfrotto is just one of many companies that make various clamps and mounts for all types of cameras. One unique mount is a suction cup that will adhere to most smooth surfaces, such as the side of a car or the nose of a snowboard. Because a mount can break free, I would always recommend safe tying. A simple rope or clasp can run from the handle of your camera to a secure point on whatever you’ve mounted to, ideally somewhere higher than the mount. That way, if it does break free, the camera will hang there, as opposed to hitting the ground and dragging. Suction mounts can be great for getting that killer point of view outside a race car or even on the side of a motorcycle.
One of my favorite types of clamps is called a Magic Arm. This fully articulated arm extends up to 20 inches, and features two elbows that rotate a full 360 degrees. By loosening an easily twistable knob, you can precisely align your camera, then twist the knob to lock off all the joints. Just note that with the arm fully extended, any serious movement or bouncing will shift the camera. I typically lock off a second arm to the top if possible; this creates a more stable triangle lock.
If you don’t have access to these types of mounts, remember that you can almost always build your own using basic parts from a hardware store. For a Nissan 350Z spec commercial I made with pro skater Danny Way, I wanted to get a distinctive angle on the front of the skateboard as he power-slid to a stop. To make sure our small 16mm film camera would remain locked off relative to the board, we attached the camera using small hollow aluminum tubes and plates. It worked perfectly without breaking the bank.
Figure 2-14 16mm GSAP camera mounted to pro skateboarder Danny Way’s board.
Lastly, let’s talk about specialized gear such as dollies, Steadicams, jib arms, and cranes. All of these devices can add a serious level of production value to your shoot. Unfortunately, they can also cost a great deal, take a lot of time to set up, and be just about as obtrusive as it gets. The first immediate benefit of these rigs comes from the idea that your camera is moving smoothly. Many lower-budgeted productions are plagued with a tripod or handheld syndrome. Too many tripod shots, and your project can start to feel too static; too much handheld, and you’ll need to give out Dramamine with copies of your film. The balance can come from doing both handheld and tripod (or lock-off) shots. Camera movement often creates intrigue, and adds a layer of complexity to your piece. Inexpensive jib arms and dollies are a great way to get in some basic movement. There are ways to imitate this gear as well, and we’ll talk about them more in Chapters 5 and 6.
The X Games and similar events love to use cranes, jibs, and even cable cams (cameras running along high wires over the competition course). Most large events avoid Steadicams and dollies because they require the operator to be too close to the talent, and they’re often too smooth to be a main camera; they take away from the intensity of the tricks being performed by the athletes. These are all considerations that you’ll have to tackle prior to your shoot. Just remember that the equipment pieces you choose to employ are nothing more than tools; you should never use a cool piece of equipment just because you can.
Editing Software and Hardware
When it comes to postproduction, you will have many options to choose from. In the old days, films were cut linearly by actually splicing and taping pieces of the film together. One of the many problems, however, was that every splice would require you to cut out a frame of footage, so there was no going back once the cut was made. In 1989, Avid introduced their first ever nonlinear editing system. Nonlinear editing (NLE) is a system that can access your original material at random without first going past the content that came before it (consider an audio CD compared to the linear requirements of an audiocassette tape). Avid, in its many forms, went on to become the staple of motion picture editing. It has remained the Mercedes of edit systems, and maintains a hefty price tag (well over $50,000 for its high-end complete turnkey system). Originally based solely on the Macintosh computer platform, the Avid is still used today by many Hollywood studios for editing, although its top competitor, Apple’s Final Cut Pro HD (FCP), has been wowing professionals more and more with each new release.
A common misconception about FCP HD and FCP Express is that they can rival Avid for their low $1,200 and $299 price tag, respectively. This is only partly true. Final Cut Pro is software based, meaning that it runs on your computer from installed software and requires no additional tools or hardware (please read on, though, for FCP setups that do require some hardware). Hardware-based edit systems are typically far more powerful and may even offer more or expanded features. Avid now makes a software-only version of their system that is closer in price to FCP.
Figure 2-15 Final Cut Pro HD nonlinear editing.
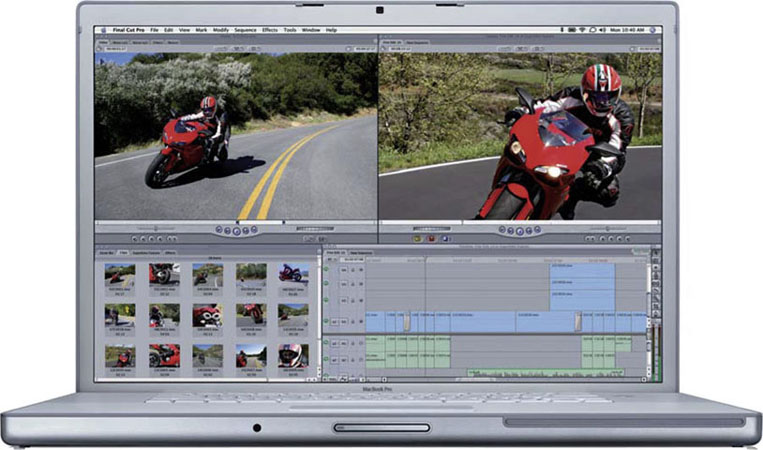
Courtesy Apple.
Apple computers have long been considered ideal for creative work such as editing, particularly for their user-friendly interface, intuitive design, and exceptionally crash- and freeze-resistant operating system. However, unlike Avid, which is available on both Mac and PC platforms, Final Cut Pro HD is solely for Macs. Today, there are more than 100 options when it comes to NLE systems.
Choosing the right one for you depends largely on your assets and intentions. If you have a PC, then one of the most popular systems, Final Cut Pro, is out. If you are on a tight budget, then Avid is likely not an option. You’ll also want to consider what you’re going to be editing. Many basic editing programs that come with computers, such as Apple’s iMovie, are more than sufficient for basic edits and effects as long as you’re capturing and working in DV or HDV. Also, companies such as Adobe, Pinnacle, and others offer inexpensive alternatives to the higher-end programs for your PC and Mac computer. I’d recommend searching what’s new out there when it comes time to buy, and reading reviews on web sites such as CNET.com and PCMAG.com, where you’ll find user and professional reviews of the latest software systems.
Next, you will want to consider what camera you are shooting on and what format you want to edit in. The most popular format for editing is DV, followed by HDV, which is growing in popularity. DV and HDV mean that you’ll be able to connect your camera directly via FireWire 400 and 800 (also known as IEEE 1394), or USB 2.0 to your computer to capture (or digitize) the footage. DV as a codec, or type of compression, blew older formats out of the water when it was released, and has managed to hang on as the most used and sold camera and compression format to date. The downside to DV is twofold. One, its format is standard definition, not high definition. And two, DV will begin to break down in quality as it gets compressed and recompressed repeatedly. Imagine squeezing a bunch of your favorite clothes into a small suitcase. Now pass the suitcase on to someone who will put your suitcase inside of theirs, which just happens to be even smaller. If this goes on for a while, eventually, when you get it all back, your clothing is going to be far too squished and wrinkled to wear. Unfortunately, when it comes to DV, there’s no way to iron it back to its original quality.
There is an upside to DV: it is extremely manageable in size, very inexpensive, and now used by the majority of all consumer and prosumer devices. To avoid the suitcase scenario, you can use a higher-end NLE system to capture the footage uncompressed. This means that, although the footage was originally compressed by the camera to fit onto the DV tape, you can uncompress it for editing, as opposed to recompressing it again and again. This technique, however, is where we get into more-complicated editing options (hardware and software based).
These days, many computers are fast enough and have enough storage to handle DV internally. But if you want to edit in uncompressed — or, for that matter, in high def or any number of higher-quality standard-definition formats — you’ll need the assistance of hardware. In order to handle the larger bitrates and data-file sizes of these formats, the higher-end Avid and Final Cut Pro HD systems will require additional external high-speed hard drives, SD or HD capture cards with optional breakout boxes, and sometimes even additional processor hardware boxes. These devices allow the real-time playback, editing, and layering of these data-intensive formats, typically too much for your computer to handle on its own. A faster hard-drive array may include two or more 10,000rpm drives striped together to help chomp on the data. These devices will sit in an enclosure that, depending on the format (Ultra-640 SCSI being one of the fastest), will then connect via cable to an SCSI or other card in the computer. Such drives will vary widely in price based on capacity and format; expect to pay at least $1,000 for a decent array.
Figure 2-16 Uncompressed versus compressed video.
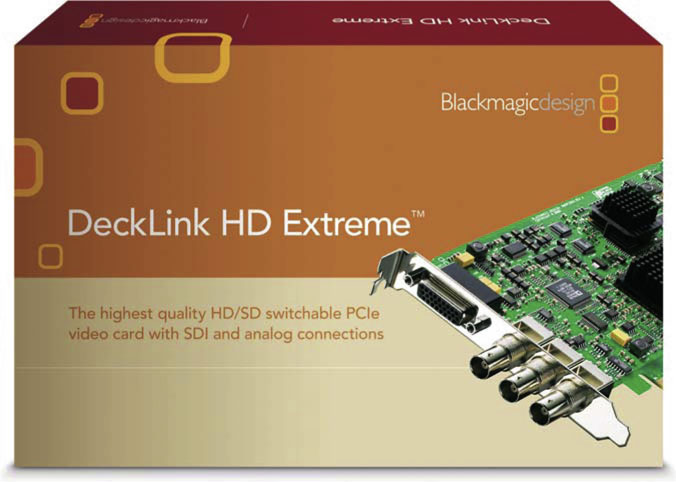
Your capture-card options will allow you to connect cameras and playback/record decks directly to your computer using higher-quality cables than FireWire or USB. Typically, only professional cameras will offer these output options, so make sure your camera (such as the Panasonic AG-HVX200)0 offers this before buying a capture card. These cards will range from a few hundred dollars all the way up to several thousand, but they are well worth the expense if you’re working in HD or any other high-end format. A popular card that can handle standard def and high def is the DeckLink HD Extreme (see Figure 2-17). Two great places for additional research, or if you’re interested in pricing out turnkey systems, are DV.com and ProMax.com. The first site offers a wealth of knowledge on the constantly changing field of technology. Just about all editing is digital nowadays, so as an excellent guideline always remember Moore’s Law: technology doubles every 18 months.1
Figure 2-17 DeckLink HD Extreme capture card.
Deciding to Rent or Buy?
Okay, so you’ve chosen what camera you want to shoot on, what mics you want to record with, what mounts you’re going to use, and what system you want to edit on. Now you need to decide if it’s worth buying all this equipment or just renting.
Even if you own some gear already, you can always rent your accessories to complement your camera, or even just try out a new camera you’re considering buying. Like the demo shop at a ski resort, there is a lot of stuff to try and plenty of places to rent it. If you don’t live near a big city, try calling a local production company and asking if they rent gear, or have them refer you to a rental house.
If you are shooting for a living and think you’ll be making back the cost of purchasing your new gear within the first year, then I always think it’s worth the investment. Remember, you can always charge an equipment-rental fee on top of your usual fee even after you’ve paid off your gear. On the other hand, if you just shoot for fun or don’t think you’ll be able to pay off the purchase in a short time, then renting is always a safe option.
When I got into production in the mid-’90s, I began trying to accrue as much stuff as I could. But in the past ten years alone, the technology behind formats and quality has been changing so rapidly that I’ve been opting to rent most high-end gear, and purchase only less-expensive cameras and editing equipment. The devices I use on a regular basis — a Final Cut Pro HD bay, a Panasonic AG-DVX100A and AG-HVX200, a Sennheiser shotgun mic, and so on — I own. The higher-end HD and film cameras and fully uncompressed 10- and 12-bit HD edit and graphics bays, I opt to rent.
Notes
1 Although this is the common interpretation of Moore’s Law, the actual law stated in 1965 by Intel co-founder Gordon Moore said that the number of transistors on a chip doubles about every two years.