
9 Postproduction
The final step in the process of film and video production is “post.” Postproduction will include all aspects of the post process as listed in Table 9-1. This step can literally shape your piece in any number of directions. Even with the narrative story you’ve shot, you’ll have options from sound to colors that can change the entire tone and feel of your project.
Table 9-1 Important stages of postproduction
|
• Tape logging and organization • Capturing or digitizing footage • Creating an assemble edit • Editing rough cuts • Adding a sound track • Adding sound effects • Locking picture • Adding special effects and CG • Locking the audio (sound design, VO, music, etc.) • Color timing • Mixing • Rendering • Outputting |
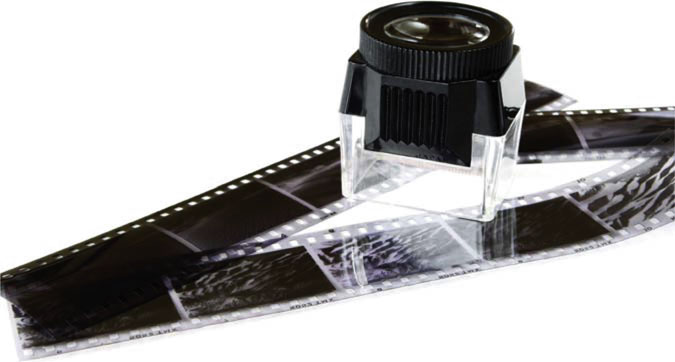
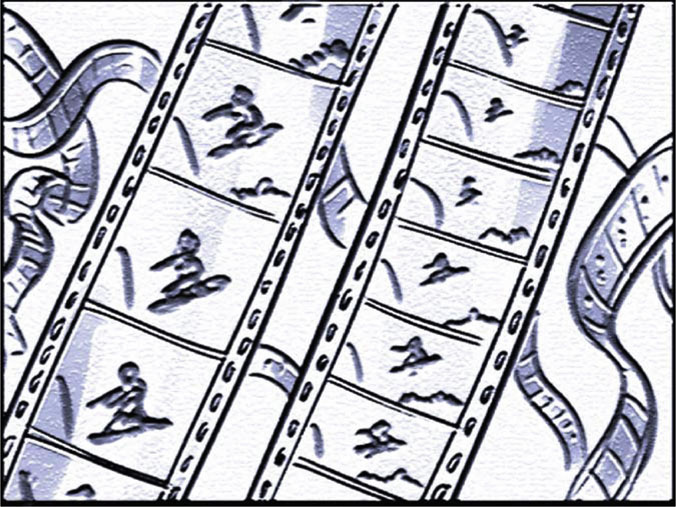
Film editing took place originally on machines or by hand. Many college film schools offer classes that begin with splicing and viewing film on a Moviola or a flatbed such as a Steenbeck (see Figure 9-1). This is where you can learn to appreciate the finer details of film and the editing process. It is, however, not as efficient or easy as today’s technologies. As discussed in earlier chapters, nonlinear-editing (NLE) systems have taken over (see Figure 9-2).
Figure 9-1 Steenbeck film editing by hand.

Figure 9-2 Nonlinear/digital editing.
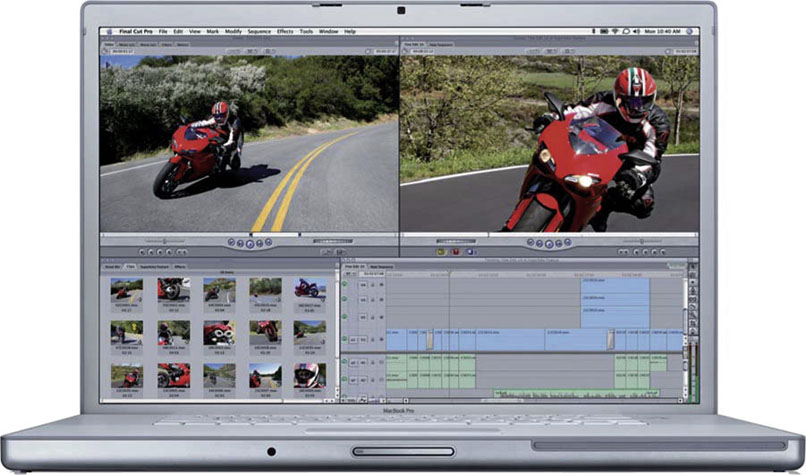
Courtesy Apple.
When I was in college, the first editing course I took presented an experiment in which they gave everyone the raw, unedited film (the dailies) from an episode of an old television program called Dallas. We were not given a script or any guide as to what the writers or director had intended, but we were asked to review the footage on our own and then edit the show however we thought it best played. As you can imagine, the result was a massive variation in versions from student to student. People put scenes in a different order; shots were cut side by side in one show, then nowhere near each other in another. The professor’s point was made. It was simple: no matter what you shoot, no matter what you intend to make, it all comes together in post. There were no wrong answers. Every edit that I saw worked and was entertaining. As you sit down to cut your project, consider that regardless of what your original intention was, this is now a new step with a virtually clean slate.
Many directors and producers of action-sports videos will stay heavily involved, if not do it themselves, throughout the post process. I find that, if possible, it can be a great help to have someone else involved. Chris McKinley, a very talented editor whom I met in college, has cut a good many projects with me over the years. Although I might have final say on what I’m going for in the end, I will always ask Chris to make his first cut on our projects without my being involved. This is usually called an editor’s cut or rough cut. There have been countless times that Chris will think that a shot I’m in love with is completely useless to the story, and I’ll realize he’s right. Or he’ll look at shots and make connections between them that I never saw. Giving someone whose opinion you trust the freedom to make a clean pass on the project can open your eyes to ideas you may never have realized. If you must cut alone, then I strongly suggest getting a friend to view the edits as you go. Your friend can offer constructive criticism as to what feels right and what doesn’t. You don’t want to believe that the piece is done, and screen it for a group of friends — only to conclude that the pacing is off or the shots all linger too long. Don’t be afraid of feedback; it’s always an ally.
Logging and Selecting
The first official thing you should do when you wrap a shoot is consider backing up all your tapes. Digital video (DV), high-definition video (HDV), and other small-tape formats are not nearly as stable as large formats such as HDCAM and Digibeta. Most tapes will last many years, but these smaller formats are more susceptible to scratches and tears that can result in digital hiss or other glitches.
It’s crucial to also label all of your tapes exceptionally well. I’d suggest tape numbers for capturing, then also include dates, locations, and any key elements you may want to revisit down the road. Five or ten tapes may not seem like much, but after years of shooting, you can end up with hundreds or thousands of tapes. A simple mistake early on, such as writing the day and month but not the year, can haunt you later when you’re trying to find a shot from your early days of shooting. To many people, old footage is just that: old. So why keep it around or organized for later? The answer is that ten years from now, you may shoot a new video or spot with an athlete, at which time you want to show how far they’ve progressed or what they looked like when they were young. I’ve even had companies approach me for stock footage or repurposing my tapes as cell-phone content and web videos based on old segments I shot with pros.
Once you’ve labeled, you’re going to want to decide if you need to capture all your footage, or capture only selects (the shots you think you’ll use). Prices for hard-drive storage drop every year and will continue to do so, which can mean hundreds of hours of DV or HDV storage on a small external drive. It will be up to your system and your budget to decide if you have the space. I have always edited DV and HDV on a Final Cut Pro HD system using a Mac Pro desktop with ample internal SATA drives striped together (see Figure 9-4), as well as a few external FireWire 800 drives. For high-bit-rate HD footage, you’ll need a much faster system (see Chapter 2, The Tools of Action-Sports Filmmaking). The upside to capturing all your footage is the time you’ll save by letting tapes digitize unsupervised, and not worrying three weeks from now about looking for that one shot you didn’t capture. Some editors like to make notes and watch the footage capture, but I feel that if you shot it and know what’s there, you can spend your time more wisely scanning through it after the footage has been captured at a faster rate. In any case, you should do what works best for you.
Figure 9-3 Keep your tapes organized and labeled.
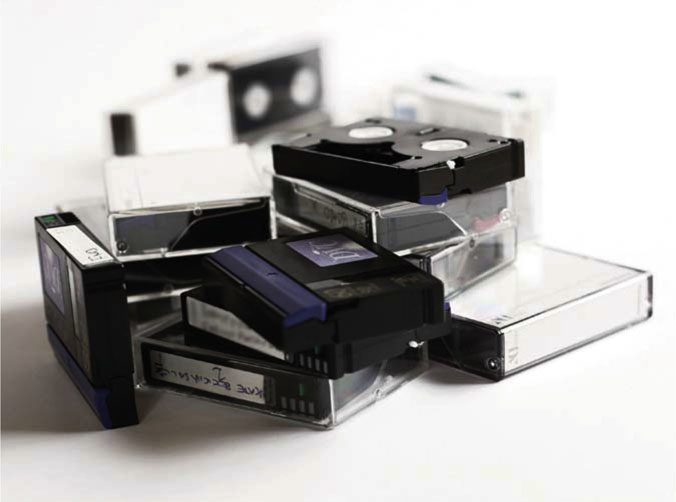
Figure 9-4 Mac Pro with four internal SATA drives.

Courtesy Apple.
One more key consideration in capturing is what codec you will capture in and through what cables. Digital cables such as FireWire and USB 2.0 connect directly to most computers and cameras, and carry a signal that includes tape timecode. If you accidentally lose your media later, you’ll be able to batch-capture any one of your tapes by opening up the autosave backup versions of your project. To do this successfully, you are going to need to clearly label all your tapes, and make sure the label information corresponds exactly to what you enter when you begin capturing each tape.
DV, DVCAM, HDV, and a few other formats will allow you to use FireWire cables to capture. Most higher-end formats will have too much information associated with the footage to travel through FireWire. As a result, you can sometimes capture FireWire for your off-line (lower-res) edit for these higher-res formats, but to get the full quality of what you shot, you’ll need to later use an online HD edit bay to batch-capture. The problem most people see in DV codec is that it compresses the footage quite a bit to get so much into such a little space. Although you may have shot DV, that doesn’t mean you need to edit in it. Every time you capture, record, lay back, output, or re-anything in the DV codec, you are compressing it again. Most projects won’t show a difference with a few compressions, so if you shot DV, then you may not be worried about getting the pristine image that true HD offers you. But if you are concerned, you can consider capturing in a higher-quality format such as uncompressed 8 bit. This will help maintain the quality of the footage you shot, but it will also take up a lot more hard-drive space. I usually keep DV projects in DV, then output them in uncompressed 8 bit for DVD burning or tape mastering. If the DV footage is part of an HD project, then I capture and work with it in uncompressed 8 bit before finally up-resing it to HD.
Editing
If you have a script, then that’s the ideal place to begin by assembling and laying your shots out in order. On the other hand, if you were shooting a road-trip or trick-montage project with no script, then you’re going to want to sit down with all of the footage and begin a paper edit. A paper edit can be as simple as a basic outline with approximate running times, based on how much usable footage you think you have for each section. It can also be as detailed as laying out your shot order, song choices, and even selecting interview bites.
One creative decision that differs by person is whether you begin to rough out your project with or without music. Some editors love to choose a temp or final track of music to cut to; it’s a great way to set the tone or pace of a scene. Other editors will first lay out everything in a single broad stroke, then slowly make sweeping passes over it, adding layers of revision and polish as they go. Either way, editing is an art form. In many ways, it takes trial and error to discover a process that will work best for you.
As you begin to find a structure that works well for you, you’ll need to consider at what point in your edit a sound track and sound design will be temped in. If you have someone composing music for you, then it may be best to be editing to a track as close as possible to what the final will be. You can also hire a sound designer, responsible for adding sound effects and various supporting audio work such as Foley.1 Sometimes sound effects can make such a significant difference in how a piece feels that I’ll even begin to temp them in early on in the process to get a better feel. These effects can come from stock sound-effects libraries, which you can find online, or even from creative programs such as Apple’s Soundtrack Pro.
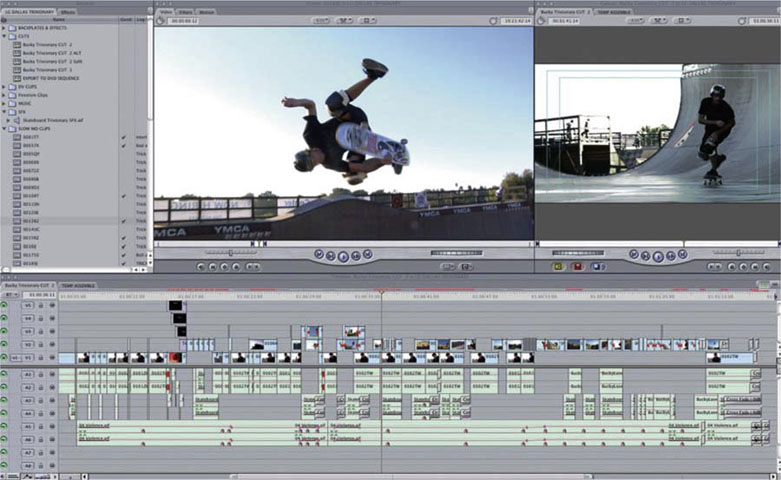
Figure 9-5 A Bucky Lasek trixionary editing timeline.
If you shot a documentary or trick video and you don’t want to do a paper edit, then your options are twofold. First, you can cut to the music. This is a popular technique in action-sports videos because their lack of a unifying story will leave the footage without a sense of structure. By using music to create structure, you’re giving the viewer that important sense of geography. All music has a definitive beginning, middle, and end, so if you incorporate 10 songs for a 35-minute video, then viewers can skip to their favorite section throughout the piece.
Editing to the music often involves cutting shots to and off the beats. Many skate videos will go so far as to make sure that every trick is further emphasized by having the rider either take off or land right on key beats of the music. Rarely are videos edited with the shots themselves cutting on the beats. This is because the tricks are far more important than the editing in most montages and trick videos. Don’t let that fact discourage your efforts as an editor, however; remember that almost all editors possess the incredible power to make a piece have far more impact than it ever could have if it had merely been slapped together.
Figure 9-6 Cutting to music-track beats as seen as a waveform.
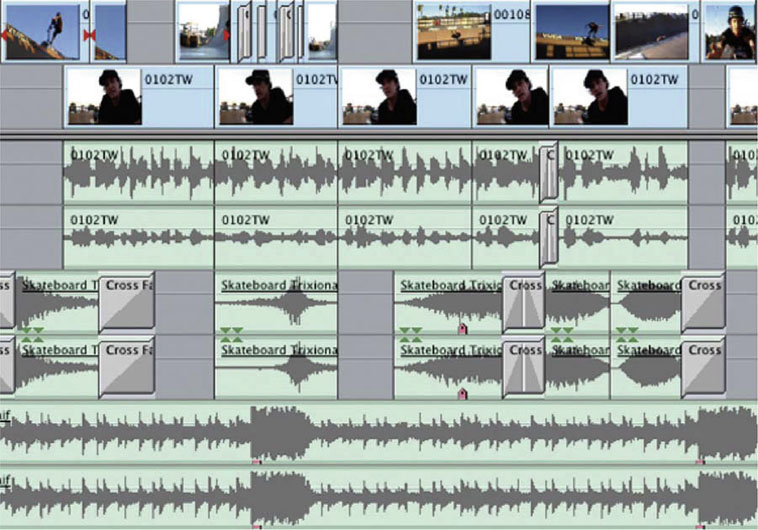
Another great perk of cutting to the music is that you have the innate ability to create rhythm visually. Many times the pacing of a piece will feel off if longer shots are intercut randomly with shorter ones, and vice versa. With music, particularly with good music, the pacing has already been set in a way that is pleasing and smooth. Even if you are cutting dialogue or a scripted piece, many editors choose to use music as a guide for beats and rhythm.
The second option you have is to add a score (original music) to the edits. This is the classical way of editing, in which you will cut the entire piece or section first, based on how you feel it should go, then lay the music down second. In the event of sound tracks, this is a far more difficult way to go because the song in the sound track is already locked in pacing and tone. However, if you are composing your own tracks, then you will be able to match the music almost exactly to the visuals.
This technique requires a bit of planning ahead so that music can be smoothly put to the order and pacing of the visuals. If you don’t consider the timing of your edits before trying to compose music for them, then you or your composer may find it hard to constantly change up the tempo or rhythm throughout the piece. Film editors often cut with beats and tempo in mind, depending on the goal or feel of the piece. An action sequence might be accelerating toward a climactic finish, and so the edits will be getting shorter and shorter as the pace of the piece speeds up. As this is happening, the music is also accelerating to match it all. The result of a seamless visual and audio scene of this nature will be a suspenseful, edge-of-your-seat experience as that big finale approaches.
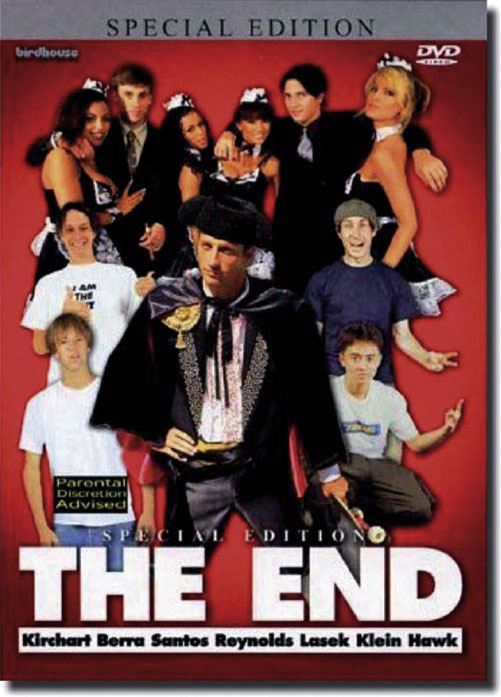
Many action-sports videos will have elements of the climactic ending, depending on the flavor of the project. The climactic finish in Jamie Mosberg’s Birdhouse film The End (see Figure 9-7) is a perfect example of this technique. In the end scene with Bucky Lasek and Tony Hawk skating and playing against each other, the pace rapidly accelerates to a massive visual and audio climax in which Bucky triggers explosives, killing Tony and becoming the number one skater. The pacing of this segment is all edited to a powerful Propellerheads track titled “On Her Majesty’s Secret Service,” which grows electronically and in orchestral intensity to enormous proportions and, eventually, a big finale.
Figure 9-7 Climactic finale from the Birdhouse video The End.
But perhaps you aren’t going for that suspenseful climax or ramping “pedal to the metal” pace. Maybe you’re just cutting a chill surf video or slow-motion lifestyle piece. In those instances, you’re probably looking for a much more relaxed pace and editing style. This can be achieved through the use of dissolves, longer shots, and fewer cuts per minute. Whereas the fast-cut, upbeat pace of a video can have as short as three-or even two-second shots (that’s nearly 30 cuts per minute), the video with a more relaxed pace can average five- to ten-second shots (or even longer, for that matter). Many artistic shots can be slowed down in post, taking the pacing of your video to a whole different realm of visual candy. An amazing trick in your sport, or even an amazing shot, can often warrant a post slow-motion effect. Although some cameras can shoot slow motion in camera (see Table 9-2), most cannot. Chances are, you will need to slow down the footage in the edit bay. Final Cut Pro HD, for example, will offer seriously slow speeds, but you’ll be degrading the quality of the footage for every bit that you slow it down.
Table 9-2 Some cameras that shoot variable speed
|
• The RED ONE digital camera • Sony HDW-F900H • Sony PDW-F350 XDCAM • Panasonic AG-HVX200 • Panasonic AJ-HDC27H VariCam |
Standard NTSC video shoots at approximately 30 frames per second.2 Assuming you want to run the footage at 50 percent speed but didn’t shoot that speed, then you’ll need 60fps to do it. In order to calculate and render that shot at 50 percent, edit programs will go through a complicated process called interpolation in order to add frames between the ones you shot. If you do this effect in post, though, and then scroll through the new shot frame by frame, you’ll see that every other frame or two has a ghosting image that may stutter on your screen. This is the result of the interpolation because those added frames were technically fabricated. The only way to bypass this and get true crystal-clear slow motion is to overcrank3 while shooting film and video.
It can take some toying around in post, but by experimenting with slow motion at slightly different speeds (say, 40 percent versus 60 percent), and depending on what shutter speed and frame rate you shot your video at, you can find an ideal slow-motion speed for your footage.
Editing Film
If you shot film on your project, then you’re most likely going to be cutting that film digitally. In what is quickly becoming the old days, film editors were called negative cutters. They would actually splice an entire movie or documentary together by hand. With growing postproduction technology, now most film shoots remain only as film, until the developing process.
Exposed film is taken to a developer, where reels are spliced together, processed (or developed), then sent on to telecine.4 The resulting footage can be of any quality, ranging from low-quality videotape (for screening purposes or off-line rough cutting), all the way up to 4 K digital files that are of movie theater quality. If you’ve opted to shoot film and go through this process, then you’re most likely going to be finishing the post process with your tapes, and not the film, from this point forward.
Top action-sports videos often incorporate 16 mm and Super 16 mm film, so this is a common process for many film and video producers. If you take this route, the telecine house will also give you a disk with Flex files on it, along with your tapes. If you plan to ever go back to the film for any reason, then these Flex files will be important in the post process. If you don’t need to go back at all, then you should be okay now to move forward without them. Flex files are a series of codes that will help to translate, frame by frame, your video timecode to your film’s Keykodes (the numbers running along the edge of the film). Many top programs such as Final Cut Pro HD come with software that integrates the program seamlessly for importing your Flex files for editing. The final step from here will be to batch-capture your footage into the computer. Now you’re ready to cut!
If you’re cutting on a nonlinear system, or even cutting film by hand, there is a strong difference between being an editor and knowing how to edit. The latter phrase refers to a person who knows quite literally how the edit system functions, and so they sit down, load their footage (or somebody else’s), and starts chopping away. This person may not understand why certain cuts belong where, or in what order, but they know how to do it. Oftentimes a director might sit with someone who knows how to edit, and simply tell them what they want. This person is essentially functioning as a tool for the director.
Figure 9-8 Film frame from Vans Triple Crown of Surfing.
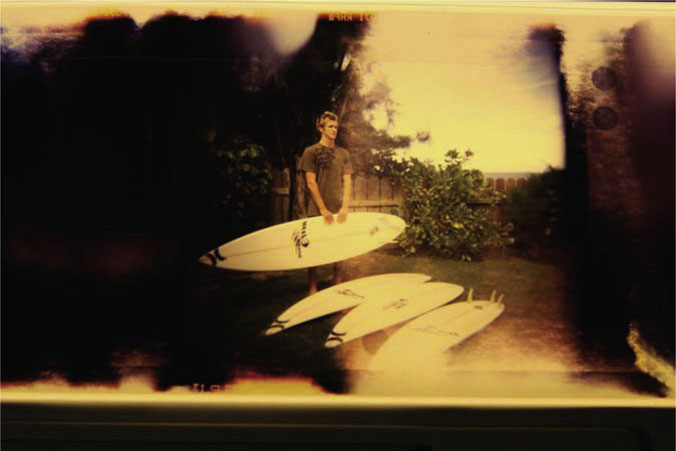
Courtesy Windowseat Pictures.
On the other hand, actually being an editor means you understand how and why to edit what, when, and where. A true editor will take the project to a whole new level. They will add funny moments to a comedic scene through timing, audio, and cuts. An editor may also be able to take the director’s vision and add ideas and perspective the director didn’t see originally. As discussed, they say editors make the best directors, but the reverse can also be true. Directors make the best editors because they understand pacing, style, and how a piece should feel. The problem is often that, even if they could be great editors, they may not technically understand how to edit, and so a person with the technical know-how and strong sense of story and timing will usually make the best editor.
Music: Do You Need Rights?
Before we jump into deciding if you need music rights, let’s first break down how many types of rights there are and what they all mean. Music rights are broken up into four categories: synchronization rights, mechanical rights, master-use rights, and performing rights. To better understand these, consider a track by your favorite big-name band. When they wrote that music and laid it down as a track, much like writing a screenplay, there is a copyright that U.S. law grants to the performer. When you play the song again, that is essentially a performance; thus, you have the performing rights. Next, the publisher of the song paid for and did the final mixing and releasing of the song, so they own the master-use rights. When you decide to cut the song into a video or film project and sync the music up to various images, you’re affecting the artistic expression of the music, so you’ll need synchronization rights. And finally, if you plan to take your finished DVD or movie with that song on it and make copies that you’ll sell or physically hand out, you’ll have to also get the mechanical rights.
Illustration 9-1 Illegally using music.

Don’t worry; you’re not going to jail over it all just yet. I know that rights can sound daunting at first, but consider this subject to be the fine print of the music industry. With the large volume of user-generated content and ease of file sharing on the Internet today, publishers are scrambling to hang on to any control they can with content they own. In the same fashion that you should be paid for your finished action-sports project, so should musicians get paid for the use of their music in your video. At least, that’s how the industry feels.
There are countless online and other music clearance-professionals who can go through your list of music and, for a small fee, take care of all the paperwork, phone calls, and effort to grant you the rights, or clearances, you need to make a free-and-clear piece. There are also several options that don’t fall explicitly under the four rights mentioned above. One of these options is if you choose to record a song yourself, or “cover” a band or track you like. In this case, you will still need to get certain rights for the copyright owner of the original piece of music, but you may not need all of the mechanical rights and master rights. Oftentimes this can make it a great deal cheaper when you’re trying to get rights to popular tracks from the past.
The next exception to getting all the rights comes in the form of the two sweetest words in production: “public domain.” The best definition I’ve ever heard for public domain says very simply that it’s anything that can’t be claimed as owned or private property under copyright law. Unfortunately, public domain can also be somewhat of a gray area.
Essentially, once a work enters public domain, it is no longer owned or protected under copyright law. The terms for public domain have changed over the years, so read up online or ask a lawyer to make sure you’re clear about this. The oldest, most common standing law dates back to 1909, and says that 75 years after the last surviving author passes away, the work enters public domain. This means that any work falling into that category is fair game, and you can use it without getting a license.
One of the aforementioned gray areas, however, is if the work has been rerecorded by another artist, or if it first appeared within another work that is copyrighted by another party. For example, if you take the rock version of Beethoven’s Fifth Symphony that was recorded in 1985 by Falco, it was certainly recorded long after Ludwig van Beethoven died in 1827. Although the original version of the music is fair game, this newer version is not, because you don’t have the mechanical rights from Falco. As another example, let’s say you use a version of Beethoven’s Fifth that was recorded by an artist who died in 1925 and left no surviving owners. Because both the performer and composer are now public domain, and because more than 75 years have passed since their deaths, then you may use that version without obtaining rights.
A final important note on public domain is that the rules do not apply to every piece of material. On both sides of the fence, there are exceptions that can work either for you or against you, so check with an attorney before you do anything. There are even a few nice perks out there based on various slipups and accidents in the public domain. For example, some television shows, such as four Three Stooges episodes, have wound up in the public domain by accidentally not being renewed.
Figure 9-9 Some Three Stooges episodes are even public domain.

So you have the basic understanding of music rights, but now you want to know if you should even bother with them. That’s the million-dollar question. There are two very distinct schools of thought on this. If you buy a CD, edit it into a sports video of you and your friends, then give out copies to your buddies, technically, you still need the rights to the music. However, if you contact a big publisher and try to get the rights for this scenario, most of the time they won’t even want to deal with you on such a small project. Now any logical person might deduce that if they don’t have the time to take what little money you have now (when you’re offering), then odds are they aren’t going to take the time to harass you later. I’ve seen this logic hold true for a great many projects that all operate “under the radar” of big publishers. Many times, if your project is distributing low numbers of units (by Hollywood standards) — such as a couple thousand, as compared with large projects that distribute tens of thousands or even millions of units — then you might find it difficult or even impossible to get all the rights to the music you want. Of course, it is always better to follow the letter of the law if you’re unsure.
There have been instances when small projects have become popular and then turned big. In the case of a few select recent skateboard and snowboard films, video producers opted not to get rights to their projects in the beginning. Then, when their videos became hugely successful, they suddenly popped up on the radar of the music industry. The video companies then found themselves getting legal letters that often came in the form of a cease and desist. This essentially means that the company has to either immediately remove all product from the stores, swap out that record label’s music, and reship every copy they have — or simply call the label, negotiate to purchase the music, and hope for the best. The problem here is that they’re now negotiating for music clearances with a publishing label that isn’t too happy with them, and on a project that has already proved successful. This is a lose-lose scenario. If you’re making a film or video that is going to incorporate owned music, then do yourself a favor and speak with a music-clearance professional about how to proceed.
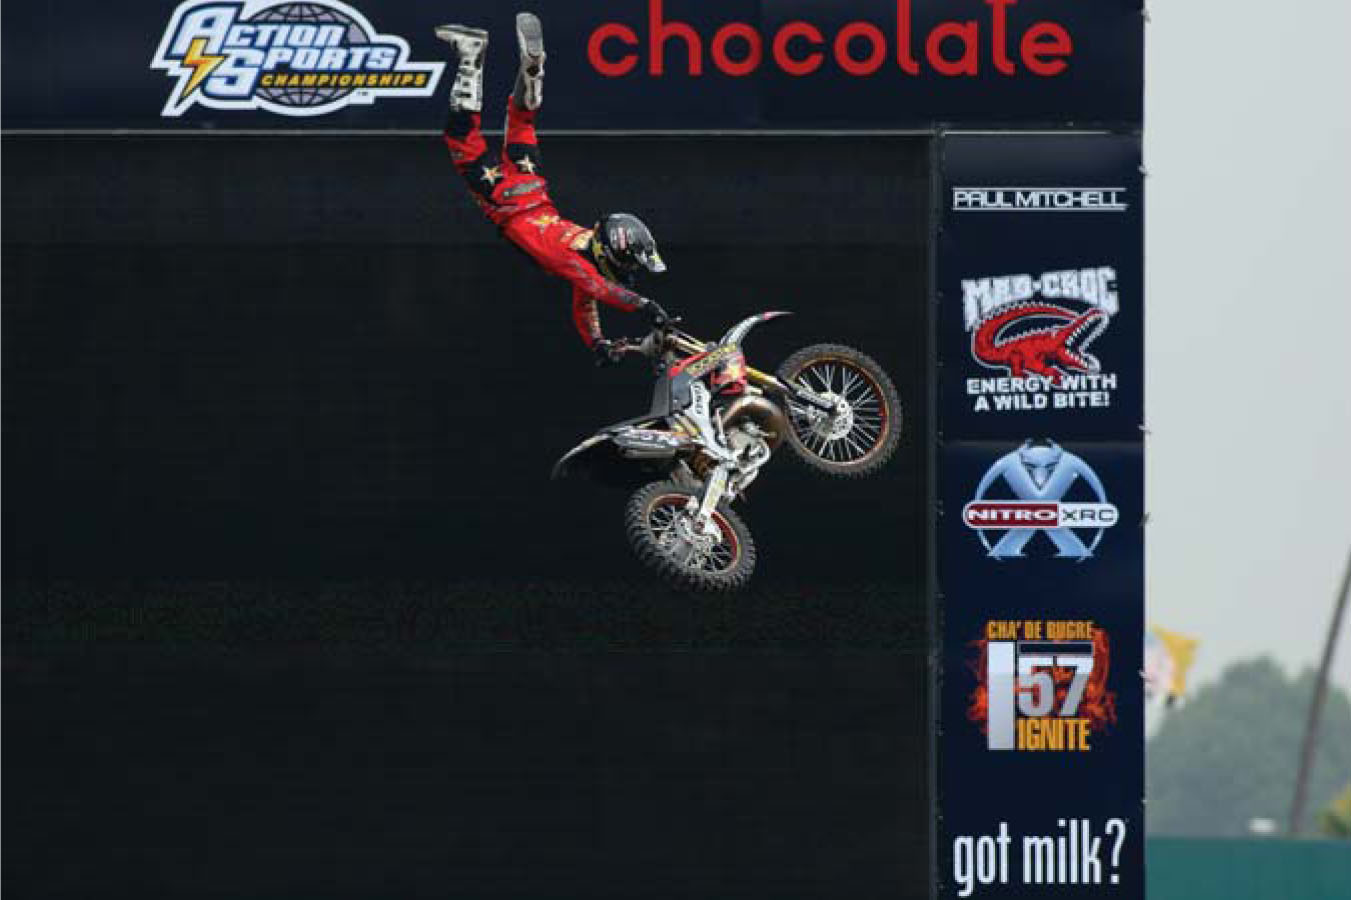
Figure 9-10 FMX at the LG Action Sports Championships.
Visual Effects: How, What, and When?
Visual effects have long been a tool that filmmakers have used to enhance or help tell a story. Only in recent years, with the proliferation of inexpensive effects programs and increased computer power, have pieces that are entirely effects driven become standard. From animated films to shots enhanced by visual effects, you’ll see some level of visual effects in almost anything you watch today.
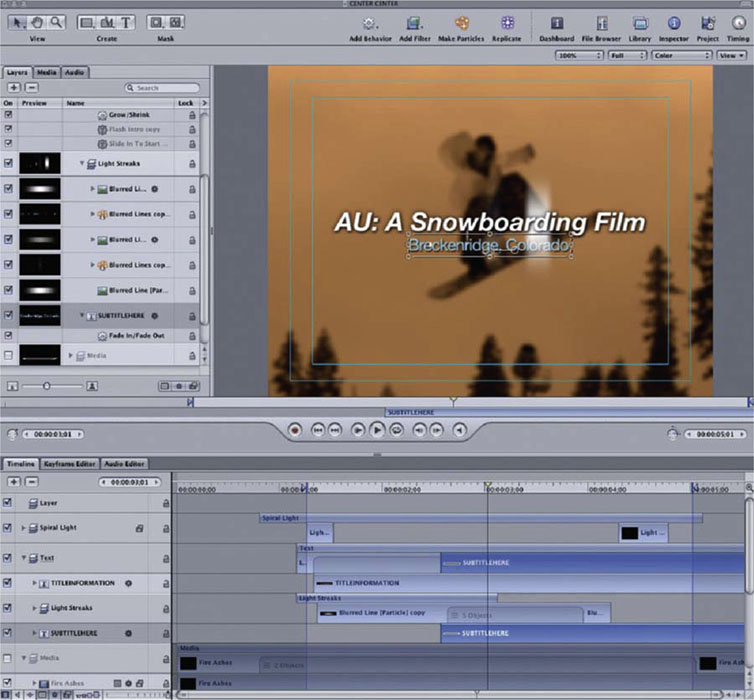
Visual effects can come in all shapes and sizes. Typical action-sports effects include computer-generated imagery (or CGI) that is often composited into live-action shots. This can come in the form of opening-title sequences, chapter cards created in Apple’s Motion (see Figure 9-11), or even enhancement to shots themselves. In the case of Spike Jonze’s Yeah Right! video, the visual-effects work in the more popular sections involved the removal of green skateboards to create the surreal illusion of athletes floating over handrails, streets, and curbs.
Figure 9-11 Sample effects in a chapter card.
Because visual effects involve the manipulation of frames of video, usually over long periods of content, the process can be slow and meticulous. Most complicated effects are done frame by frame, which can result in hours or even days of work for some shots. Computer processing power, which is responsible for the time necessary to render these shots into real time, has thankfully been growing exponentially over the years. This added power results in faster renders and better effects.
Top effects programs for working with video come in a wide range of prices and styles. The most popular program, and possibly the longest running, is Adobe’s After Effects. Very similar to Photoshop, this program simply adds time to the dimension of work space, allowing users to create and alter images in almost any way, and then to duplicate and track those changes over the duration of the shot. Other popular programs include Apple’s Shake and Motion. After Effects is a fully functioning visual-effects program that integrates almost seamlessly with Final Cut Pro HD, allowing for everything from stabilization of shaky footage and keying of blue and green screen shots to the creation and manipulation of advanced digital imagery. Motion, on the other hand, comes with Final Cut Pro HD Studio and has a very intuitive user interface that allows for advanced particle and text generation, motion-graphics creation, and much more.
All of these programs interact directly together, which can be a great asset when editing and doing the effects yourself. A final top effects program is Autodesk’s Combustion, which does most of the same effects as listed above, and operates as a smaller version of the far more powerful Inferno and Flame compositing systems. These latter systems have a great history in Hollywood for top commercial and film-effects work throughout the years. Some people feel that they’re overkill for small action-sports projects because most Apple programs are bundled together and less expensive, although it should be noted that some of the lower-priced programs aren’t as capable as their higher-priced competition. If your work consists primarily of shooting, editing, and then doing effects on your own for smaller action-sports projects, then chances are you won’t need the processing power or complexity of a high-end system.
The key to most visual-effects work is the idea that less is more. Visual effects should be nothing more than a tool you use to get your project to its destination. Much as you’d use a wide lens and long lens to shoot your piece, visual effects and CGI should support your project, not define it.
A cautionary tale can be taken from a recent experience a college friend of mine had with his first big project. Throughout college, he skated and made skate-related projects, always with a strong understanding of visual effects. This knowledge of effects helped to get him his first job, with a financing company that wanted to get more into the effects realm. The financiers of the project saw big-budget Hollywood films such as Spider-Man and other CG-driven films doing well, and so they thought that was where they should take their project. When all was said and done, the relatively simple live-action script that they had set out to make had become an overblown visual-effects-laden piece of flare for the company. The quantity and quality of the effects became more important throughout the process than the quality of the film itself. After losing sight of why everyone had liked the project in the early stages, the flashy effects now dominated the horizon on every shot. In the end, the project was met with mixed reviews, and wasn’t nearly as good as it could have been.
Figure 9-12 Visual-effects shot from Barely Dead.
Finishing and Outputting
When it comes time to lock your picture5 and prepare to output, you’re going to need to make a few key decisions. First, to what format are you outputting? Second, can you dump the media, or should you back it up? And third, are you absolutely sure you’re locked?
Let’s start with the last question because you really need to know this before you output. As you work in the film industry, you will discover that projects will often “finish” many times. If you’re not under a deadline for delivery or duplication, then this isn’t bad. As you cut your project, you might become so immersed in it that you lose sight of what is good and what isn’t. This is referred to as “getting too close” to your project. In this case, you’ll want to finish the cut, step away from it for at least a day (a week if you can), and then watch it again with fresh eyes. I will “finish” my edits at least three to five times throughout the process — only to leave my work for a night or two, then watch it again and decide it needs more trimming. Although there is no rush to finish some projects, you should also be very careful not to spend the rest of your life working on them. It’s easy to keep going back and trying to bring a project up to the level you might be at now. Remember that as you grow and progress as a filmmaker, so do your abilities, and any project that takes a year to make will be finished by a person who could now do better. This can get some filmmakers stuck in a Groundhog Day effect — seeing what you could do better, working on it, making changes, then noticing something else you could do better, and so on. It’s important at some point to cut yourself off from changes and simply move on to the next project.
Another interesting problem arises when filmmakers shoot their own footage. Then, in the edit bay, they’ll have a nostalgic feeling attached to the shot, which will prevent them from wanting to cut it. This is called “falling in love with your footage.” As humans, we sometimes make bad decisions when we’re in love, and this happens with filmmaking as well. If your friends are telling you that a shot doesn’t belong in your project, then do yourself two favors: first, stop and remember that this is your project, not theirs; second, consider that they might be your only objective opinion, and you may in fact not be looking at the shot clearly. If the latter is the case, then consider cutting it.
It’s normal for many shots to end up on the cutting-room floor … well, metaphorically, that is. In the old days, film would literally be tossed aside. Thanks to today’s digital technology, you can put unused shots in a bin and consider them later.
Figure 9-13 The cutting-room floor.
If you’re an editor by nature and you know what feels right, you may still spend heaps of time trimming as opposed to cutting. Directors are notorious for trying to add or remove even single frames from a shot’s head or tail. Any editor will tell you that a single frame really can make a difference. I’ve seen cuts of 45-minute action-sports documentaries that distributors or producers said felt “long.” They then asked the editor to cut 5 or 10 minutes out of the piece. Now that may not seem like much when it’s not your work, but cutting more than 10 percent of what was already the best of your best can be quite painful. The solution? Try going back in and trimming frames from almost every shot. Oftentimes the pacing of a piece is not directly related to how many shots it has in it, but rather, to how tightly packed together the shots are. Every time you introduce a new shot and the users have to refocus on all the new information, you’re holding their attention. This technique is simple but very effective, and usually won’t result in an edit that is that much shorter.
Let’s say that you’ve now decided it’s time to picture-lock your project. The effects, the cuts — everything in your timeline is locked. You’re ready to output now, which means you’ll need to decide what format. As mentioned earlier, any format can be digitized in any number of codecs. This means that you don’t necessarily have to output in the same format you captured in. If you plan to duplicate your project, you should talk to the dub house and ask them what format they prefer. They may not want a miniDV tape, or perhaps they don’t have an HDV playback deck. Many duplicators will accept DV tape, but they’ll prefer a more solid tape format such as DVCAM, BetaSP, or Digibeta. Newer dub houses will sometimes allow you to bring in uncompressed Quick-Time files on a data disk or external hard drive. This latter option will save you a single-generation loss and allow you to deliver the highest quality possible, even if you can’t afford it.
Illustration 9-2 By tightening shots instead of cutting them, an edit can feel much shorter.
When I shot the Bucky Lasek trixionary for the LG Action Sports Championships show on CBS, they asked that I deliver the final cut on HD. I had shot the piece in 1080i/24p at variable frame rates on the Panasonic AG-HVX200, and then edited it in Final Cut Pro HD on my own system. The problem was that there wasn’t an HDCAM deck available, so I instead outputted from the editing program as an HD Quick-Time file, and then simply burned it to a disk. This allowed me to deliver pristine-looking HD content without needing a pricey deck or HD tape stock.
Figure 9-14 Bucky Lasek HD trixionary shoot.
If your project is long, then an HD output may not fit onto a single data DVD. If you have access to an external hard drive or HD data disk, then this may be your best solution, although you’ll need to get your drive back from the duplicator. I always recommend outputting several backup versions of your piece to avoid problems on their end. Sometimes certain codecs may not read the same on every computer. By outputting a second codec of equal quality, you’re simply covering yourself. High-definition DVD burners are also dropping in price, so other options include HD DVD and Blu-ray DVD disks. The latter version of these competing formats will give you up to 50 GB on a dual-layer disk.
Finally, if you’re on a tight budget with your project, you can output your program straight to Apple’s iDVD or DVD Studio Pro, Roxio’s Toast, or any other DVD-burning program (assuming you have a DVD burner in your computer). From here, you can burn a regular playable DVD-R with menus, and then send this disk to a dub house to have copies burned. You will take a slight quality hit going down this road, but the process will be exponentially simpler and cheaper.
With your project off your computer and on its way out, you should consider whether or not you want to back up all of the content you shot and edited, or dump it. As a general rule, I’d always recommend keeping it all online for at least a few weeks after completion. If you can, save and back up your project’s EDL (edit decision list), then output another copy of the film with split audio tracks. Separate the music onto one track, and the rest of the sound (dialogue and sound effects) on another. This way, if you do need to swap out or pull a music track down the road, you can do so easily and quickly. Hard-drive prices have been dropping, so you may also want to back up any important projects for future use. I try not to dump media (delete it) from any project nowadays; if possible, I purchase a small external drive, and copy all projects, media, and related files onto it for safe-keeping. I have made videos that featured one athlete, and then, years later, we decided to do an expanded piece on that athlete. Having quick access to the original bin in which he or she had been placed became a real asset.
Figure 9-15 250 GB and 500 GB backup drives for media.
Courtesy LaCie.
Finally, remember that if you are shooting to disk (such as the Panasonic AG-HVX200 with P2 Media cards), and not to tape, then you aren’t going to have tape backups of your footage at all. In this case, hard-drive backups are critical. As a general rule, just keep all footage online until you absolutely have to dump it — and even then, stop and consider all of the possibilities for your project before you make a decision.
Notes
1 A Foley artist in a film is a person who records and lays down environment and general sounds such as footsteps, doors closing, and so on.
2 30 frames rounded up from NTSC actual 29.97fps, as discussed in Chapter 2.
3 Overcranking, or shooting in slow motion, is a reference to when film cameras were hand-cranked. So by cranking faster, you were shooting more frames per second than was needed. This meant that in regular-speed playback, the image would be in slow motion.
4 Telecine is the now-common process of transferring film to a videotape or digital format. Telecine machines project light through the film as it runs, sending an image to a sensor for recording.
5 Locking picture refers to the near-finished point in the editing process when all visual changes have been done and approved, allowing for what’s called “picture lock.”