
8 Storytelling Techniques
Storytelling in film and video is a narrative event portrayed through a series of moments of sounds and images. Key tools often used are character development, character arcs, and plot. In the case of action sports, you might be wondering what story you have to tell or why it’s even worth telling. So let me say this: whether you write a screenplay or shoot a trick video, you are going to be telling a story to some degree, and the best stories are told visually. Anyone can recapitulate a story through a long monologue or on-screen text that explains what’s going on, but the true test of a good storyteller is how well you do it visually.
Illustration 8-1 Basic storytelling: A skater finds a rail, attempts a trick, and conquers it.
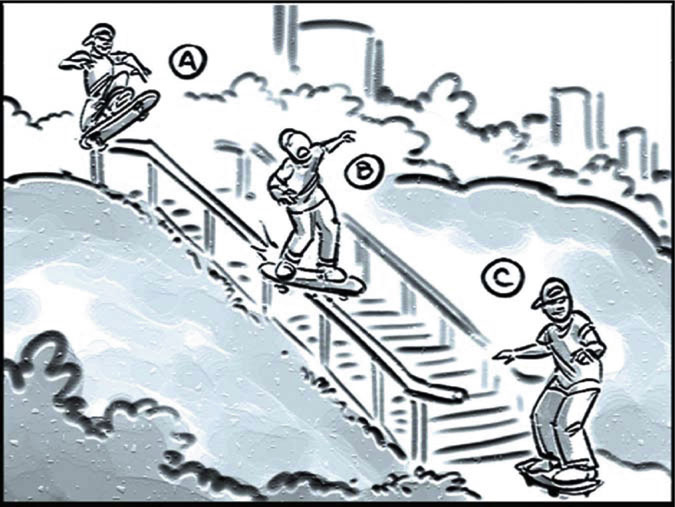
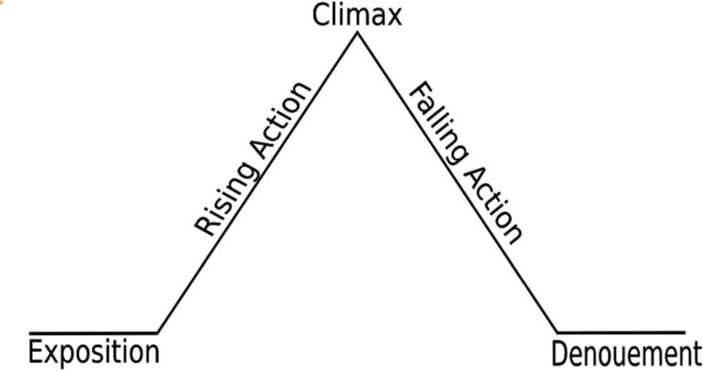
As noted, the complexity of your story can vary greatly. You don’t have to be making a narrative piece to still consider how to best tell your story. Like the illustration above, it can be as simple as an athlete trying to land a new trick or even covering in detail a trick itself. One of the most popular analyses of dramatic structure is built on five acts and came from the famous 19th-century German writer Gustav Freytag (see Illustration 8-2).
Illustration 8-2 The German Gustav Freytag’s five-act dramatic structure.
In its simplest form, the foundation for a character arc or story is best described by the Greek philosopher Aristotle in three basic steps: a beginning, a middle, and an end. Consider the story of Tony Hawk’s landing the 900; it was powerful and emotional. Tony’s story was that of the underdog: a man struggling to overcome the impossible. Act 1: Tony decides to try a trick many had thought impossible. Act 2: Tony’s repeated attempts and failures begin to stack up as the fans cheer on. Finally, Act 3: Tony lands the trick, and victory is his. This story was iconic for action sports, demonstrating to the mainstream audience just how amazing the stories in these sports and their athletes can be (something many athletes already knew from their own personal failures and victories).
If you aren’t shooting Tony Hawk, or even an impossible trick, then consider the simplest forms of story you can still tell, such as your friends going to a skate park for the day. Act 1: several friends leave the house and head to the skate park; they arrive, check out the surroundings, decide what to do, and get ready to roll. Act 2: the session of tricks, falls, and interaction between the friends; some of them land new tricks or pull off old ones on new obstacles; others get hurt and decide to throw in the towel. Act 3: some with victory and others with defeat, they all leave, and the day ends (see Figure 8-1).
Figure 8-1 Act 1: A group of friends take a road trip.

Photo by Chris Mitchell.
This may seem like a very basic way of breaking it down, and it is, but this three-act summary shows just how simple storytelling can be. A random montage of back-to-back tricks — with no sense of who, why, where, or when — will almost always leave viewers confused or just not as fulfilled as they could have been. The only exception might be when you’re making a trick video solely for fans of those riders, and all the fans care about is seeing the latest tricks. Even here, though, some sense of who, what, and why will help.
Although you may get away with minimal stories, you should always have structure. It’ll give your audience a sense of geography, and this can make all the difference between whether or not they enjoy your project.
Figure 8-2 Act 2: A session takes place at a skate park.
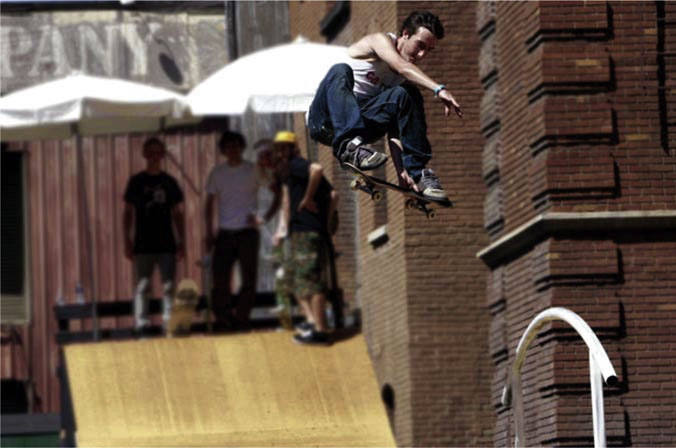
Courtesy Windowseat Pictures.
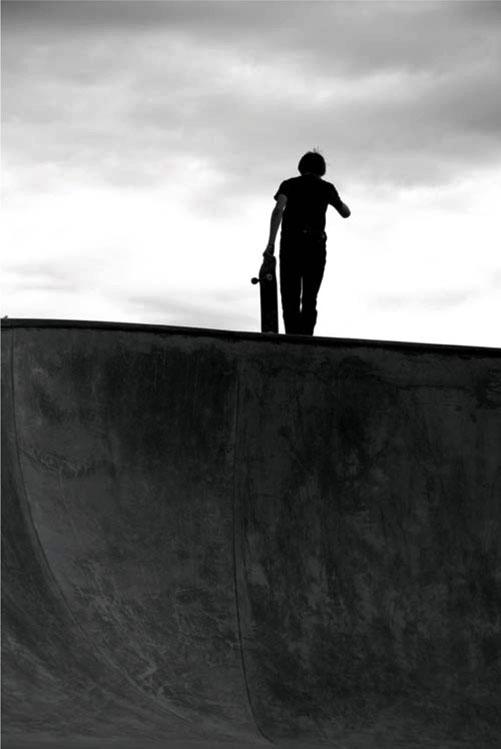
Figure 8-3 Act 3: Heading home for the day.
You should try and always incorporate the basic key elements of storytelling, which are plot progression and character arcs. If you are documenting real athletes, then character arcs will be mostly out of your control, but like the triumphant arc of Tony Hawk, it is critical that you keep your eyes open for them as they begin to form. When you shoot any road trip, documentary, or other project in which you’re following a group of people for any length of time, you should quickly try to identify which ones are the most outgoing, colorful, and open to the camera — these athletes could make great main characters and possible storytellers themselves. Then decide who is the most likely to overcome or accomplish something great throughout the shoot — this might be your character arc. By identifying these personality types early on and quietly watching them develop, you will get more material and better material because of your knowledge. I always try to have a few key athletes I use regularly for updates and info on camera. They’re the go-to people for when something happens and I need a quick sound bite of what went down. If you don’t identify people early on, you run the risk of grabbing anyone in the moment and either being rejected or simply not getting a good sound bite.
The Dangers of Working Too Close
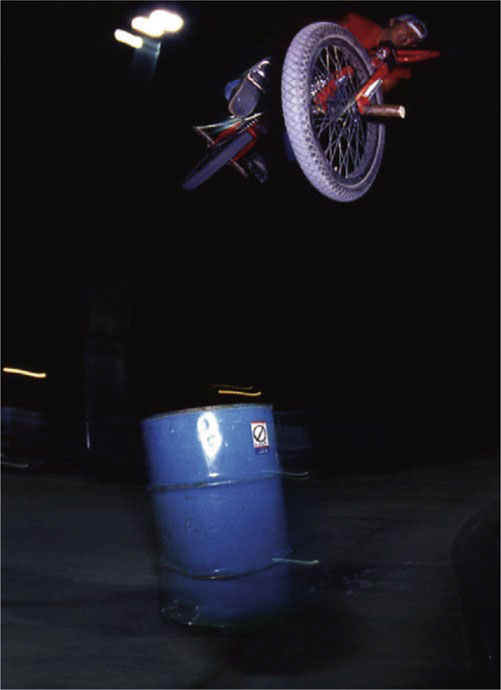
Coverage, coverage, coverage. If you haven’t got that in your head already, it’s a crucial element for you to remember. The more you can shoot on the day, the more options you’re going to have in post, so always shoot for coverage. Even a snowboarder hitting a jump is a mini-story in and of itself. Even Aristotle would likely break it down to the takeoff, the air, and then the landing as your three-act structure. Because of this, it’s always crucial to get in there and get the coverage. Unique angles and creative shooting may put you right in the middle of the action. Although this is great for creativity and storytelling, it can also get dangerous.
From annoying athletes by being too close to their tricks, to focusing too hard on the shot when a board comes flying at your head, there are many critical reasons to keep your eyes open when you’re getting in close. Minor risks can be worth it because the up-close-and-personal coverage will also give your viewer a more intimate feeling of what and whom you’re shooting. Fish-eye lens shots of grinds and general sound bites up close with athletes are always great things; the more you cover, the more likely you’ll have enough material to make a successful piece.
Figure 8-4 Capturing athletes at the LG Action Sports Championships.
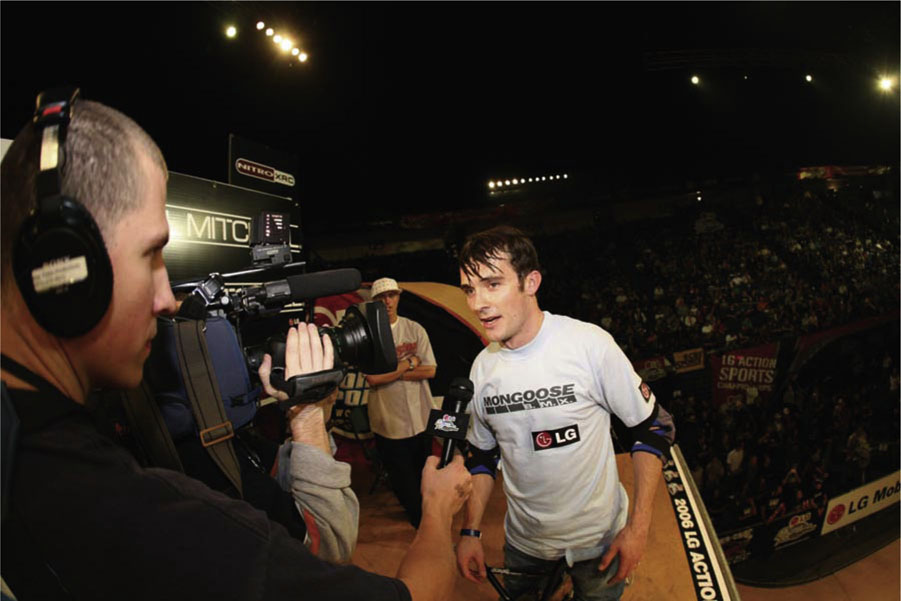
Photo by Mike Opalek.
At those times when you have to be so close that you’re in harm’s way, you have a few options for getting the storytelling shots without getting wrecked. Keep an active stance, not sitting down or hanging over an edge. If you keep one leg far enough behind you, you’ll be able to pull out and get away quickly if the athlete loses control.
These up-close-and-personal shots can cut perfectly with long-lens distant shots on the same rail, ramp, or obstacle. When you arrive for the session with friends or to shoot pros at an event, take it all in before you start shooting. I prefer to stay wide and consider all the angles I might want before I gear up. You’ll also have a chance to capture some of those storytelling moments of interaction between friends right before a session begins. These personal moments can add a lot to a section when athletes are considering what they might do or talking about what they’re afraid of. Once they start warming up, you can use this opportunity to back off, give them some distance, and get your wide masters. As the athletes begin to start hitting tricks, this is a great time to now start working your way in for the coverage. Eventually, you should try to get in tight and grab some close-ups, but keep a strong sense of awareness of how welcome you are. If an athlete is getting annoyed at a trick or frustrated with anything at all, he or she might redirect that anger at you if you’re too close at the wrong moment. Essentially, you just want to keep one eye on your shots (developing story), and another on the riders and their attitudes.
Figure 8-5 Keeping an active stance.
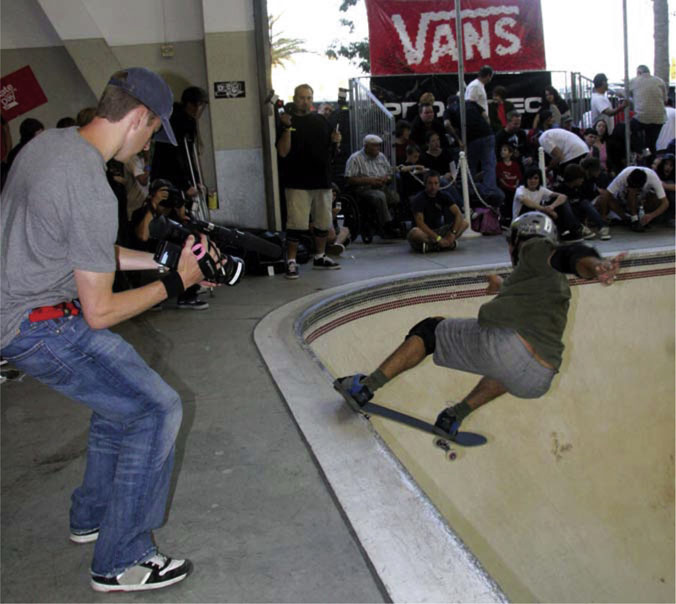
Courtesy ASA Entertainment.
“Make It Sexy, Jazzy” — and Why Someone Said That
It was 1998, and some friends and I were doing stunts for a TV movie. Several skaters and industry people were involved in the film. Beyond that, it was a fairly studio (or corporate, as the description goes) production. The director of the film was very laid back, a nice guy with a great knowledge of directing. His understanding of action sports, however, was limited.
On one particular day, take after take, we would charge down a hill, hit a ramp, and fly into a series of large PORTaPITss landing pads. It got to a point where the director wasn’t happy with how it looked, and we were going as fast and as far as was possible, so he began to get frustrated. The technical adviser on the project was Chris Mitchell, a former athlete and X Games writer and photographer with a great sense of composition. Chris asked the director what was wrong, and he responded that “it doesn’t feel right,” followed by a frustrated: “Make it sexy; make it jazzy.” Essentially, what was happening was that the camera placement was too high for the tricks being done; it didn’t show the intensity or complexity of what was happening, only the story element. Chris helped find an angle that best captured the action of the tricks — and all of sudden, the shot worked.
The point of this story is that what the director was seeking is the same thing we all look for in our shots: compelling angles that are either unique or tell the story best. His terminology may have been foreign to most action-sports enthusiasts, but his intentions were the same.
Building Suspense and Drama
Aristotle wrote many great bodies of text, including Poetics. Though most of it was lost through time, Poetics explains the importance of suspense for building and creating drama. Aristotle wrote of how critical it is to have elements of impending danger, yet to maintain some degree of hope. In many ways, this is the very principle upon which action sports are built. Every trick, every progression within every sport, is done out of hope that it is possible, though the clear and present danger is always there.
Figure 8-6 A compelling angle on a trick.
Courtesy Windowseat Pictures.
World champion in-line vert skater Eito Yasutoko, and many before him, knew just how to build up this suspense for an audience. In many ways, Eito is a pioneer of action sports; he has pushed the limits of what is physically possible on a half-pipe. At contests, his fans expect Eito to do new tricks with more rotations, higher out of the ramp. And it is at these events that he has mastered the art of building suspense for a live audience. Whether it’s a Best Trick contest or a demo for fans of the sport, if Eito comes out with an enormous spin or flip trick and falls repeatedly before landing it, the emotional response from the crowd is far more powerful than it would have been had he just pulled it off first try. This is a very basic show technique that crosses over to film and video as well.
You may not be able to shape when an athlete lands a trick, but if there is a serious degree of difficulty involved, then shoot enough coverage and get enough sound bites to properly build up the suspense in the edit. Again, coverage, coverage, coverage. On the other hand, if you have scripted a project and the athletes are working with and for you, then help create the suspense within your piece by establishing the danger and risks early on. Clearly show how wrong things could go, and add in a countdown or a ticking clock of some sort.
In 2002, I was shooting a documentary on the making of xXx with Vin Diesel (xXx: A Filmmaker’s Diary). The first week of shooting was called the drug farm; it was the film’s opening segment, featuring an exciting escape on a dirt bike. The sequence included numerous FMX jumps over exploding elements while military helicopters were firing weapons at Vin’s character, Xander Cage. The culmination of the scene was that the entire large barn in the center of the field would explode while Xander was jumping it. To help create the suspense for this section, we took cameras inside the barn during prep and showed just how many explosives there were. For safety’s sake, the prep time was long, which meant the night shoot was racing to happen before the sun rose. So we built up the element of a ticking clock by constantly showing the fight to beat the sunrise. Then, through the use of suspenseful music and intercutting sound bites with the cast and crew, the countdown to the stunt began. With the audience well aware of just how dangerous this stunt actually was, there was no lack of suspense in the final edit. The film cameras begin to roll, and the explosives all go hot. Xander pins the throttle and hits the jump; he goes airborne as a helicopter rises behind him, firing round after round. The special-effects team triggers the explosion, which engulfs the barn and the air around it in a massive fireball — and Xander, staying true to that splinter of hope, flies clear of the fireball and lands, riding to safety away from the flying debris.
The three-act structure, the ticking clock, the looming sense of danger — all of these things helped to tell the compelling story of what happened that day. Even if you’re not shooting explosions and large movie sets, these tools for building suspense will still apply. The ticking clock can be established in any environment at almost any time. You can show it visually between an athlete and a big trick they’re about to do by intercutting the approaching danger, alluding to what is basically a countdown to when the “event” is going to happen. The key is to identify how you can best implement these elements based on what you have to work with, and then move forward. If you are making a documentary, just be patient and pay close attention because some of the best story arcs will come together while you’re shooting.
Figure 8-7 Rob Cohen, director of xXx, on set.
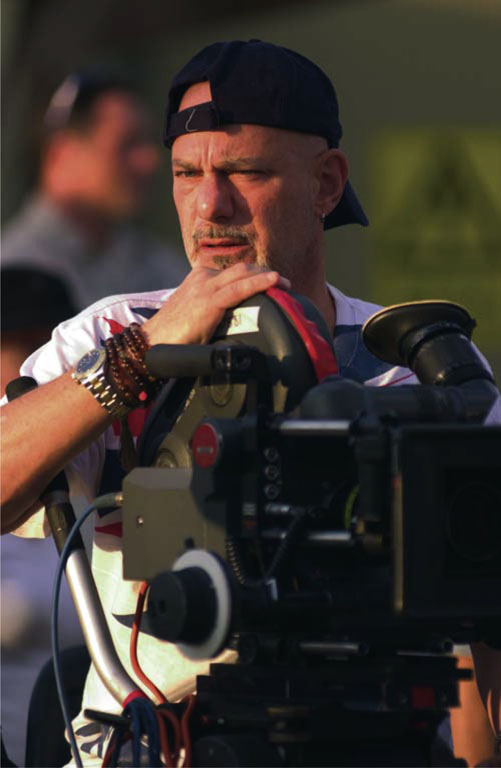
Courtesy Sony Pictures.
Documenting a Road Trip
One of the most common formats in action-sports video is the road trip. If you plan to hit the road with a group of athletes, there are some very key elements you will want to cover. First, you need to identify what your story is. It might be a group of friends going away for a weekend to ride, or it could be about an epic spot you’ve heard about, and you’re all going out to find it. There’s no limit to what story you can tell, but defining one will help you know what the goal and tone of your piece will be from the beginning.
The next key element is preparation. Make sure you have everything you need to properly cover the trip. From camera gear and batteries to weather gear and flashlights, pack the necessities. It’s no big deal if you overpack, but remember: there’s no home or office to duck into if you forget a charger or other important gear.
Figure 8-8 A simple night shot with an onboard light.
Courtesy Todd Seligman.
Assuming that the basics of the trip are already taken care of (food, transportation, places to stay, and so on), now it’s time to start shooting. It is a good idea to do a brief sit-down interview or some OTFs (on-the-fly interviews) with your athletes prior to the trip. Ask about expectations, who’s going, where they’re going, and why each one decided to do it. Your questions here are part of the first act of your journey. This is where you want to set up some goals that you hope to achieve, as well as to establish that sense of geography for your viewers. The scope of the trip should also come across in pretrip interviews.
Now it’s time to hit the road. To tell a road-trip story completely, it’s great to get a few shots of the departure. If you can get an exterior of the car pulling away, without your getting left behind, go for it. This shot could be picked up (or cheated) at a later time if the location you’re departing from is fairly generic looking. The real goal here is to get the emotion — the excitement or nervousness or impatience of the “here we go” moment. This might be a great place for a montage later in which you can add voice-over, so get plenty of B-roll shots on the road. Table 8-1 has a list of some key B-roll shots for road trips and montages.
Table 8-1 Classic road-trip montage shots
|
• Speedometer at speed • Yellow dashes on the road going by • Key highway signs such as location and towns • Interesting roadside billboards and signs (capture local flavor) • Establishing shots of your athletes in their vehicles • Character-building shots of the athletes • People sleeping, eating, laughing, staring out the window • Landscapes and the passing world • Road-trip vehicle in motion (tires spinning, passing by places) • Sunsets and sunrises |
As you get into the journey and begin to document everyone on the trip, you’re going to want to start to build characters. If you are going to get your audience involved in your athletes — whether it is to love them, cheer for them, or even not like them — it is key that your viewers have a sense of who these athletes are. To do this, you want to focus on capturing the unique traits and quirks of each one. Examples might include showing that someone is always asleep or being messed with by the others, or perhaps one of them is always on their cell phone or smoking, or maybe there’s a funny one in the group. Just as in documentaries, these characteristics are important parts for road trips because you’re relying on people’s interest in your characters as much as their interest in the tricks. Don’t be afraid to capture too much of these character-building moments; just keep a respectful eye on how receptive everyone is to your filming.
The next key element in a road-trip documentary is arrival at the location. As you begin to get close to the area, you should be ready to roll the camera and jump out and stay with everyone if they stop and get out right away. Although it is good to try to get establishing shots of where you’re pulling into from inside the vehicle, remember that you can always go back to get those later. You can’t reshoot an athlete’s reactions to when he or she first sees the location, so concentrate on those shots when you arrive. Cover the reactions of the athletes while they look out the windows in excitement and anticipation. When you come to a stop, you can either follow them out, or even ask them to let you out first and give you 30 seconds to set up so you can shoot their exit. This latter option is a question of how much you want to cover and how willing they are to work with you. If they aren’t willing to hold up life for the camera, then go with the flow and get what you can. As the athletes exit, there’s nothing wrong with cutting from inside the vehicle straight to one of them hitting an obstacle if it suits your story.
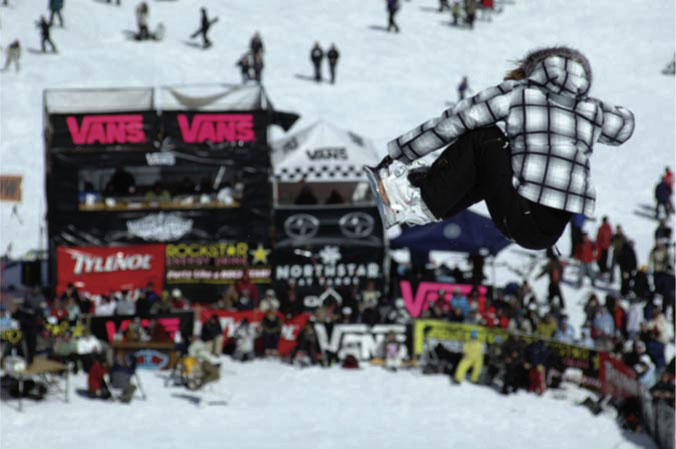
Figure 8-9 A snowboarder about to begin his session.
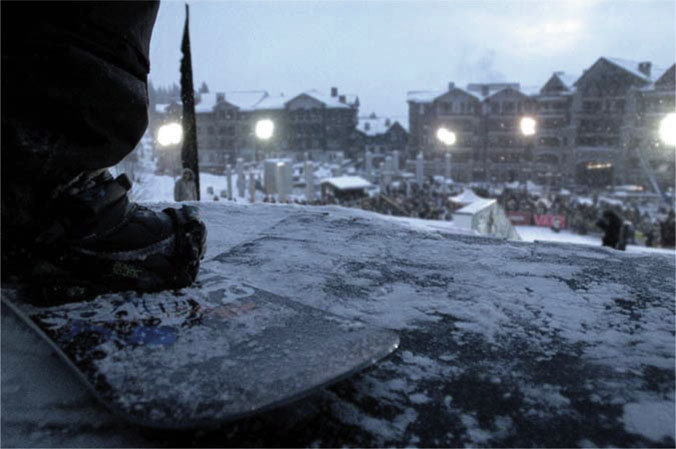
Courtesy Windowseat Pictures.
The primary goal of shooting a road trip is still very similar to how you’d shoot most action sports locally; the real difference is that you’ll want to include more lifestyle and personality shots than you normally would. Capture athletes reacting to each other, interacting with each other, and doing any of their unique character-building traits you centered on earlier. The real goal here will be to get enough footage to cut together a solid riding section. Whereas most trick videos are all about the latest and best tricks, sessions in road trips are more about the people and the story of the trip; so here, you can get away with shooting more-basic tricks because your audience will be engaged with the story and the characters, and not just waiting for shots of the next trick.
Finally, as the day finishes up and you either head home or move on to the next spot, you should capture closing sound bites or OTFs of the athletes recapping how it all went. You won’t want to show much of the return trip home unless something monumental happens, but you should shoot it regardless to try and get any shots that you missed on the way out. Getting a few shots of athletes sleeping, resting, and being worn out from the trip can always be a nice close to your story. You can also think of the return trip home as a take two of the entire trip out. Because the athletes may be bruised and tired, this is a good opportunity to get all of your cutaways of the passing world.
When you get back home, it’s a good idea to set up interviews again with the key riders you’ve shot the most (or even all of the athletes). Talk about how the trip went, if expectations were met, and what the vibe was like coming home. As described in Chapter 7, you can even have them recap some of the days in present tense so that you can intercut B roll of the actual day over the interview.
In the end, if all goes well, you will have a complete story that takes viewers on the road, introduces them to some interesting characters, and gives them closure to the events of the road trip. The format of the action-sports road trip has been used in everything from typical skate and action-sports videos to true-to-form documentaries. Perhaps most legendary in this format is the original 1966 surf film The Endless Summer, in which director/cinematographer Bruce Brown followed two young surfers around the world, trying to find the perfect wave. This film is a prime example of just how much heart and soul a road-trip story can have.
Figure 8-10 A setting sun ends the day.
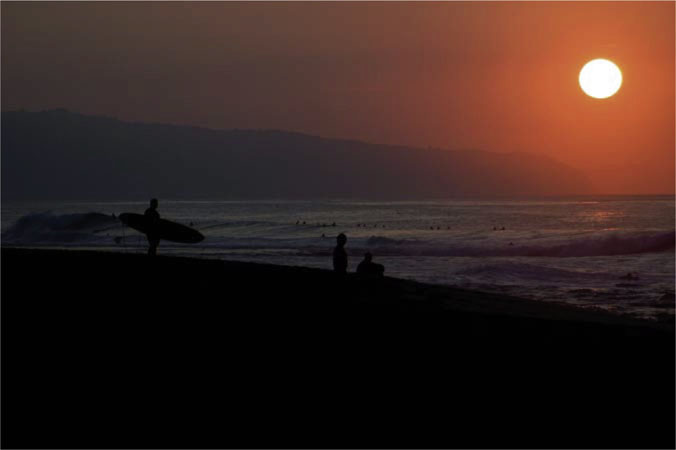
Photo by Dave Mead, Windowseat Pictures.
Trick Tips and How-tos
A final popular action-sports segment you might want to make is the how-to section. Sometimes referred to as a trixionary (trick tips), this section usually features a single athlete talking into the lens, explaining how a specific trick is accomplished. Because this format usually takes place in the moment, it’s okay to not shoot formal sit-down interviews, and instead focus on OTF-styled sound bites at the location of the actual trick.
Whether it’s how to land a snowboarding jump or how to drop in on a mini-ramp on a bike, trick tips have become very popular online and in the media. After creating an athlete-participant wiki site devoted entirely to defining and explaining all tricks in action sports (wikitrick. com), I was shocked to learn how many participants are eager to find out how tricks are done. The ease of creating how-to segments has made them very popular. With the progressive nature of action sports adding new tricks every day, it’s no wonder people want to learn and see how new moves are accomplished.
The format of the trick tip is simple. It usually opens with an athlete introducing himself or herself and explaining the trick they’re going to break down. That’s typically followed by footage of them setting up for the trick, or even seeing simpler versions of the trick, which act as stepping-stones. This all typically culminates in multiple angles and even slow-motion playback of their trick. If the athlete discusses an intricate detail of how to grab the board or lock onto a rail, then you might want to cover that element separately from an angle that best shows the detail.
Because the goal of trick tips is essentially to share the knowledge of how something is done, the most important thing is usually the information, then, second to that, the artistic shooting style. You can get very creative in how you cover the athlete and trick. Just remember that the ultimate goal of the piece is to clearly explain and show a trick.