
So far, we have created and extended classes in the Playground. In fact, we could execute the same sample code in the Swift REPL and the web-based Swift sandbox.
Now, we will create a simple iOS app based on the Single View Application template with Xcode. We will recognize the usage of object-oriented code included in the template, that is, before we add components and code to the app. Then, we will take advantage of the GameRepository class we created in the previous chapter and use it to populate a UI element.
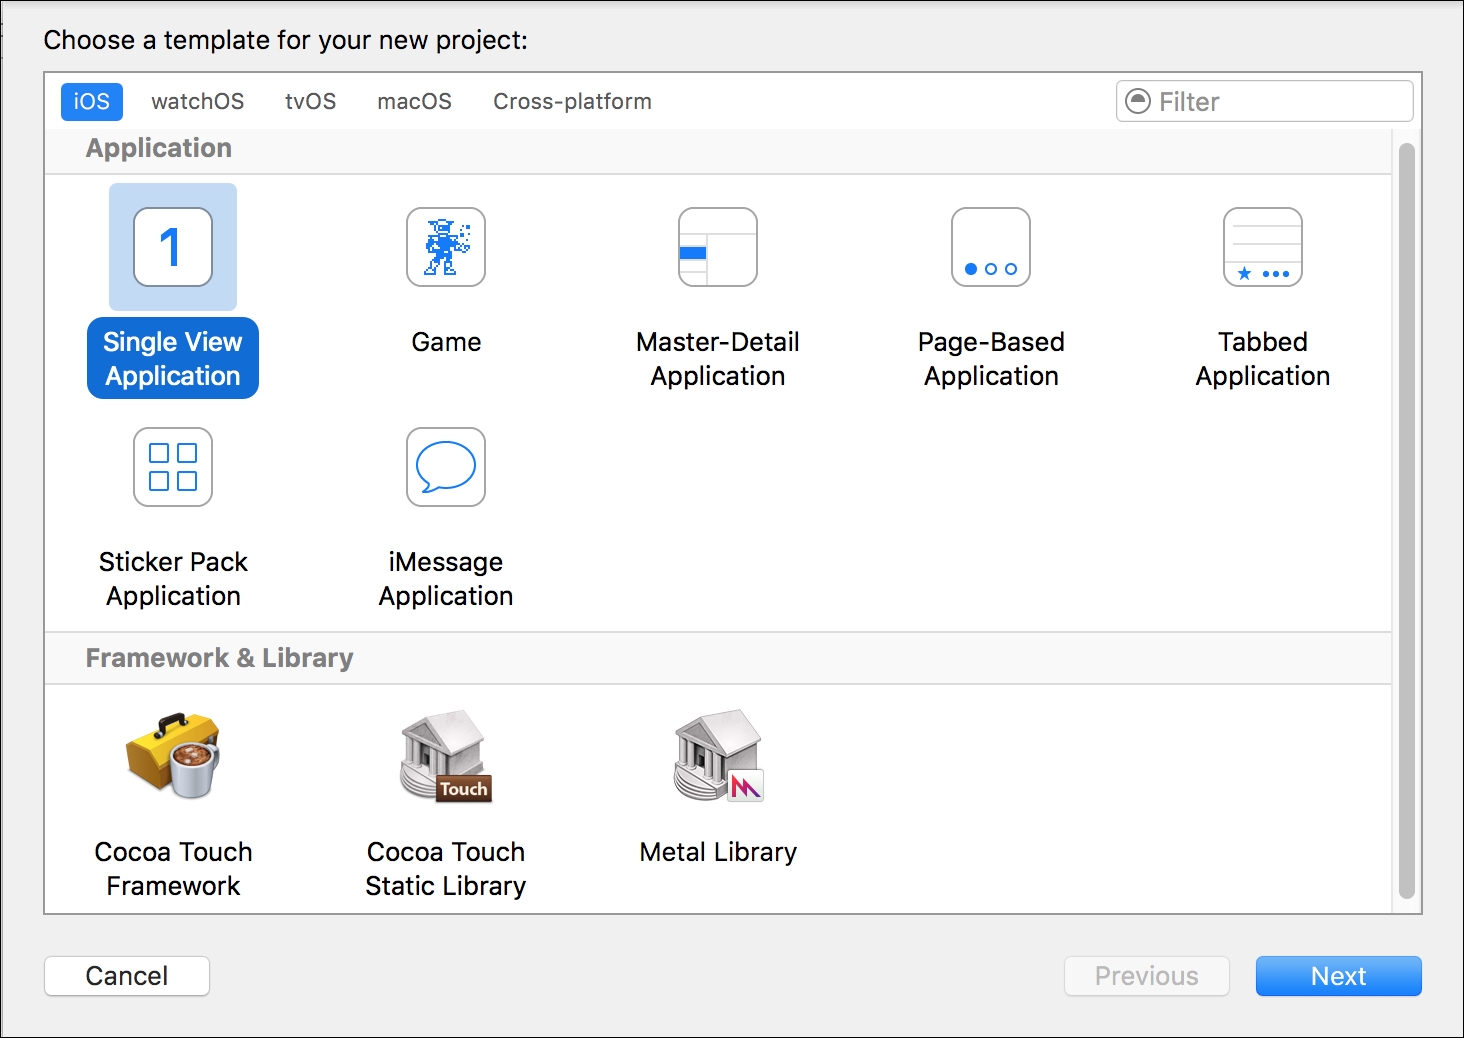
Navigate to File | New | Project... in Xcode. Click on iOS at the top of the Choose a template for your new project dialog box. Select Single View Application and click on Next, as shown in the following screenshot:
Enter Chapter 8 in Product Name and select Swift in language and Universal in Devices, as shown in the next screenshot. This way, we will create an app that can run on both iPad and iPhone devices. Then, click on Next:

Select the desired folder in which you want to create the new project folder; ensure that Don't add to any project or workspace is selected in the Add to the drop-down list in case this option is shown in the dialog box, and click on Create. Xcode will create the new project and all the related files. The following screenshot shows the project navigator located on the left-hand side of the Xcode window:

Now, let's take a look at the initial code for the two Swift source files included in the Chapter8 module:
AppDelegate.swift: This declares theAppDelegateclass, and it is the entry point to our applicationViewController.swift: This declares theViewControllerclass
The following lines show the initial code for the AppDelegate.swift source file that declares the AppDelegate class without the comments that the template includes in each method. The code file for the sample is included in the swift_3_oop_chapter_08_09 folder.
    import UIKit

    @UIApplicationMain
    class AppDelegate: UIResponder, UIApplicationDelegate {

      var window: UIWindow?


      func application(_ application: UIApplication,
                       didFinishLaunchingWithOptions launchOptions:
                       [UIApplicationLaunchOptionsKey: Any]?) -> Bool {
        return true
      }

      func applicationWillResignActive(_ application: UIApplication) {
      }

      func applicationDidEnterBackground(_ application: UIApplication) {
      }

      func applicationWillEnterForeground(_ application: UIApplication) {
      }

      func applicationDidBecomeActive(_ application: UIApplication) {
      }

      func applicationWillTerminate(_ application: UIApplication) {
      }
    }
The @UIApplicationMain attribute included at the top of the declaration of the AppDelegate class indicates that the class is designated as the delegate of the shared UIApplication object in any iOS app. The AppDelegate class is a subclass of the UIResponder class and conforms to the UIApplicationDelegate protocol. The class declares a window stored property of the UIWindow type optional (UIWindow?) and six instance methods. All the methods receive an application argument of the UIApplication type, which is another subclass of UIResponder. The application argument will always be the same instance of UIApplication that represents the current iOS app, that is, our app. The application method receives a second argument named launchOptions that provides a dictionary with keys indicating the reason that your app was launched for. This method is the only one that has code and just returns true.
Tip
As you learned in Chapter 3, Encapsulation of Data with Properties, Swift 3 normalized the first parameter declaration in methods and functions. As a result of this, by default, Swift 3 externalizes the first parameter. All the methods that receive an application argument of the UIApplication type in the previous code supress externalization of the argument label for the first parameter by adding an underscore (_) followed by a space before the parameter label (application) in each method's declaration. This way, the code generates methods that we can call without specifying the argument label for the first parameter, that is, with the default behavior we had in Swift 2.3 and 2.2.
The following lines show the initial code for the ViewController.swift source file that declares the ViewController class without the comments that the template includes in each method. The code file for the sample is included in the swift_3_oop_chapter_08_09 folder.
    import UIKit

    class ViewController: UIViewController {

      override func viewDidLoad() {
        super.viewDidLoad()
      }

      override func didReceiveMemoryWarning() {
        super.didReceiveMemoryWarning()
      }
    }
The ViewController class is a subclass of the UIViewController class and overrides two parameterless instance methods: viewDidLoad and didReceiveMemoryWarning. Both methods include a line of code that calls the method with the same name in its superclass.
It is important to take into account that the UIViewController class---that is, the superclass for ViewController---is a subclass of the UIResponder class and conforms to the following protocols: NSCoding, UIAppearanceContainer, UITraitEnvironment, UIContentContainer, and UIFocusEnvironment.
We just created a new project based on a template, and we are already working with classes that have superclasses, conform to protocols, declare stored properties, define instance methods, and override inherited instance methods. Everything you learned in the previous chapters is extremely useful to adding object-oriented code to the initial templates for any kind of app or application, and it is also useful to understand how to interact with the different object-oriented frameworks based on our targets.
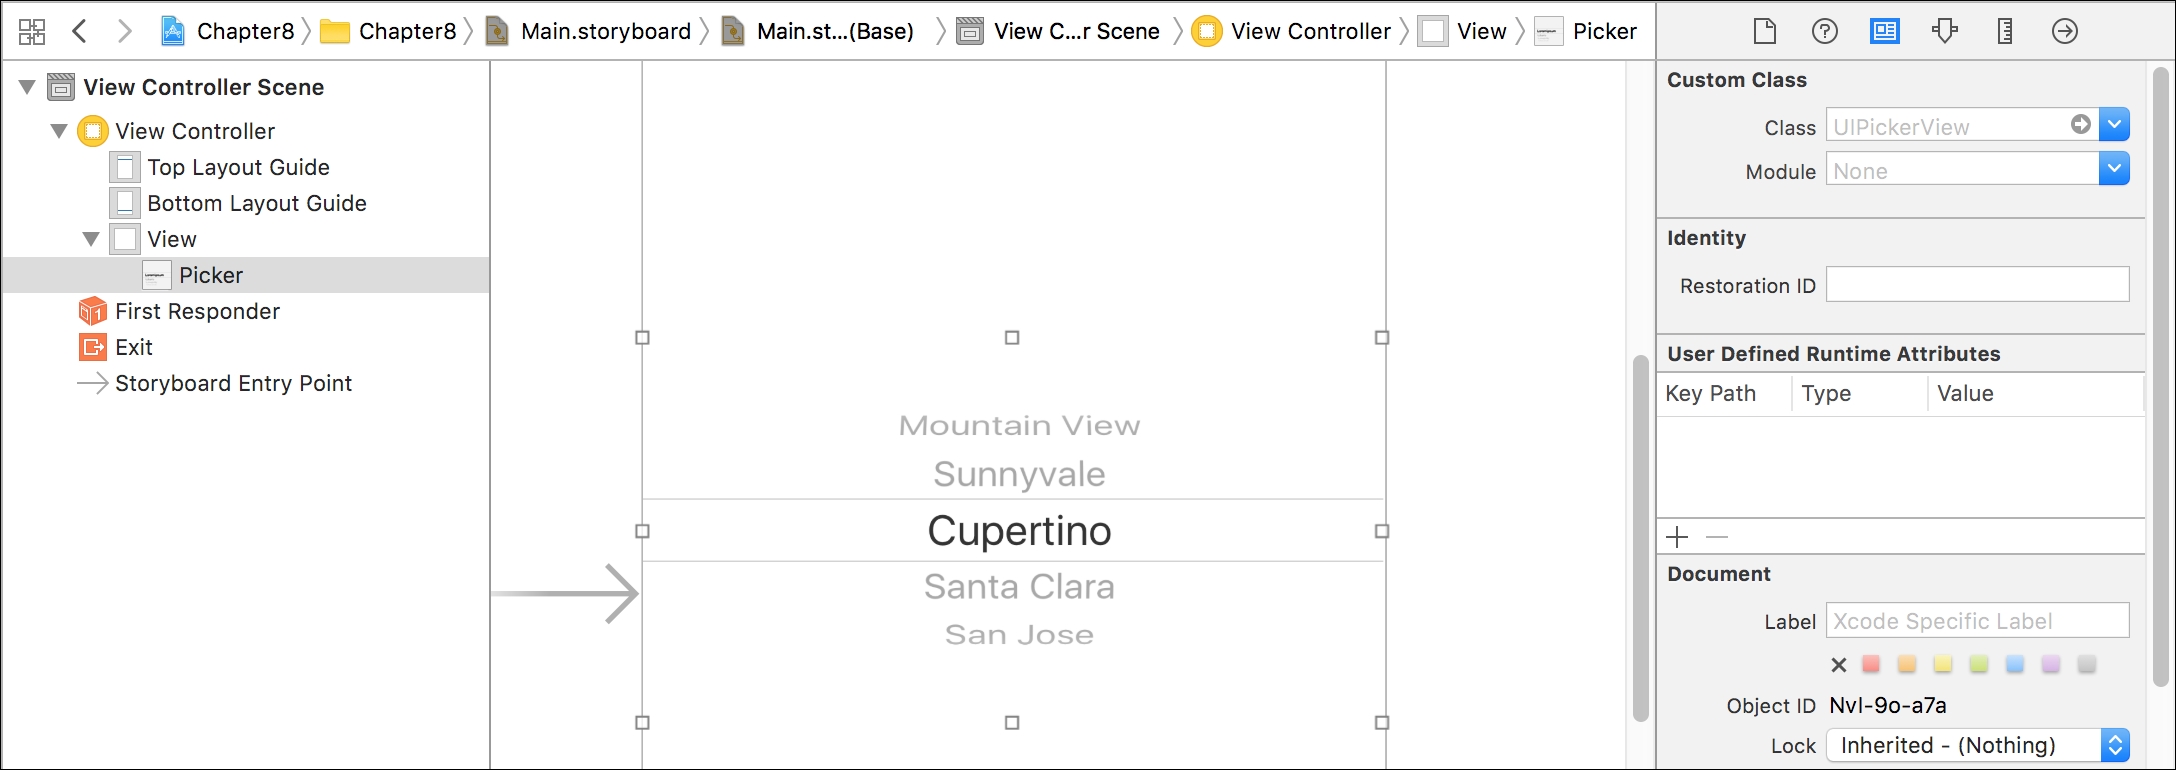
Click on Main.storyboard in the Project Navigator on the left-hand side of the Xcode window. The editor will switch to a design view that displays how the view will look. Click on View Controller under View Controller Scene. Make sure that you see the Utilities pane on the right-hand side and check the values for Identity Inspector. In order to do so, navigate to View | Utilities | Show Identity Inspector or press
Command + Option + 3
. The value for Class will be ViewController under Custom Class, as shown in the following screenshot:

The previously introduced ViewController class is the custom class associated with the View Controller tab in the main storyboard for the iOS app. We will add code to this class later.
Now, we want to add and connect a simple UI element that will allow us to make a selection from multiple choices---specifically a UIPickerView instance. A picker view uses a spinning-wheel or slot-machine metaphor to show one or more sets of values. We can select the desired values by rotating the wheels and making the desired row of values align with a selection indicator.
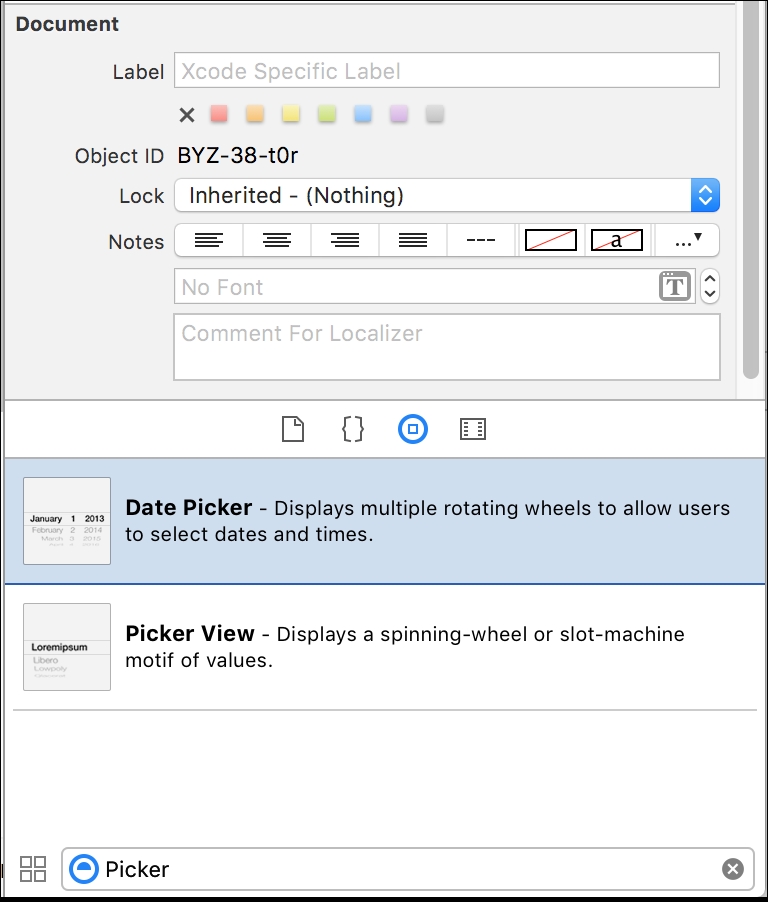
Make sure that the Object Library tab is visible in Library View, which Xcode displays in the bottom half of the Utilities pane on the right-hand side. You just need to click on the Show the Object Library button at the top of the bottom half. Click on the Filter textbox located at the bottom and type Picker. Object Library will display all the objects that contain Picker, and one of them is Picker View, as shown in the following screenshot:
Drag Picker View from the previously shown list to the rectangle that defines the view in the preview. This way, we will have a Picker View component on the view in the main storyboard, as shown in the following screenshot. Note that the class is UIPickerView:
We added a Picker View component to the view. Now, we have to expose the component to make it accessible through code in the previously analyzed ViewController class.
Navigate to View | Assistant Editor | Show Assistant Editor in the Xcode menu or simply click on the button with two intersecting circles in the upper-right corner (the second button). Xcode will display the source code for the ViewController class on the right-hand side of the view preview for the main storyboard.
Press the
Ctrl
key and hold it while you drag the recently added Picker View component from the view to the blank line after the ViewController class declaration. Xcode will display a line and a tooltip with the following legend at the position to which you are dragging the mouse: Insert Outlet or Outlet Collection. Release the
Ctrl
key, and Xcode will display a pop-up dialog box asking us for a name for the new property and IBOutlet that it will create. Enter picker in the Name textbox and then click on Connect:

After we click on the Connect button, the following highlighted line will appear within the ViewController class body. The code file for the sample is included in the swift_3_oop_chapter_08_09 folder.
    class ViewController: UIViewController {

      @IBOutlet weak var picker: UIPickerView!
The new line uses the @IBOutlet decorator to indicate the outlet connection. The line declares a picker stored property as a weak reference to an implicitly unwrapped optional UIPickerView. The weak keyword instructs Swift to use a weak reference that allows the possibility of the object that the property points to become nil and avoids retain cycles.
The exclamation mark (!) after the UIPickerView class name indicates that Xcode wants Swift to treat picker as an implicitly unwrapped optional UIPickerView class. This way, the optional will be automatically unwrapped whenever the property is used. However, if it points to nil, it will trigger a runtime error.
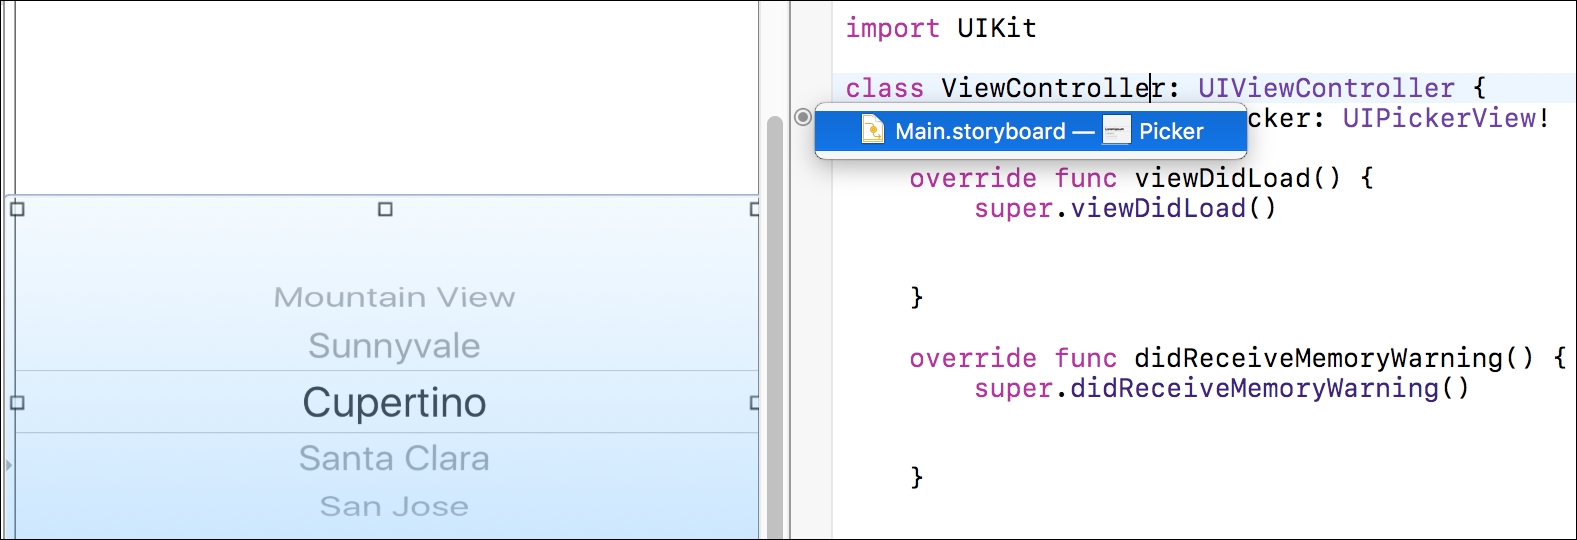
You will notice there are two small circles on the left-hand side of the new line of code. If you let the cursor hover over this small icon, Xcode will highlight the Picker View component in the view connected to this property. If you click on the icon, Xcode will display a tooltip with the story board name, Main.storyboard, and the related component, Picker, as shown in the following screenshot:
We can easily interact with the Picker View component through the recently added picker property in our ViewController class.