
Now, we have to add code to the ViewController class in the ViewController.swift source file to make the class conform to two additional protocols: UIPickerViewDataSource and UIPickerViewDelegate. The conformance to the UIPickerViewDataSource protocol allows us to use the class as a data source for the UIPickerView class that represents the Picker View component. The conformance to the UIPickerViewDelegate protocol allows us to handle the events raised by the UIPickerView class.
The following lines show the new code for the ViewController class. The code file for the sample is included in the swift_3_oop_chapter_08_09 folder.
    class ViewController: UIViewController, UIPickerViewDelegate,
    UIPickerViewDataSource {
      @IBOutlet weak var picker: UIPickerView!

      private var gamesList: [Game] = [Game]()

      override func viewDidLoad() {
        super.viewDidLoad()
        // Do any additional setup after loading the view, typically from a nib.
        picker.delegate = self
        picker.dataSource = self

        let gameRepository = GameRepository()
        gamesList = gameRepository.getAll()
      }

      override func didReceiveMemoryWarning() {
      super.didReceiveMemoryWarning()
      // Dispose of any resources that can be recreated.
    }

    func numberOfComponents(in pickerView: UIPickerView) -> Int {
      // Return the number of columns of data
      return 1
    }

    func pickerView(_ pickerView: UIPickerView, numberOfRowsInComponent component: Int)
    -> Int {
      // Return the number of rows of data
      return gamesList.count
    }

    func pickerView(_ pickerView: UIPickerView, titleForRow row: Int,
    forComponent component: Int) -> String? {
       // Return the data for the row. In this case, we don't have columns
       return gamesList[row].name
    }

    func pickerView(_ pickerView: UIPickerView, didSelectRow row: Int,
    inComponent component: Int) {
      // Retrieve the game for the selected row
      let selectedGame = gamesList[row]
      print("Selected game name: (selectedGame.name). Highest score:
      (selectedGame.highestScore)")
    }
  }
We made changes to the class declaration to make it conform to the two additional protocols. We declared a private gamesList stored property of the Array<Game> type. We used the [Game] shortcut for this type. We then added the following lines to the overridden viewDidLoad method.
    picker.delegate = self
    picker.dataSource = self

    let gameRepository = GameRepository()
    gamesList = gameRepository.getAll()
The code assigns the current instance of the ViewController class identified by self to the picker.delegate property. We can do this because the ViewController class conforms to the UIPickerViewDelegate protocol. Then, the code assigns the current instance of the ViewController class to the picker.dataSource property. We can do this because the ViewController class conforms to the UIPickerViewDataSource protocol. This way, we can specify the data source and delegate for Picker View.
Then, we will create an instance of the GameRepository class and save Array<Game> with the list of games returned by the getAll method in the gamesList property. This way, we will be able to use gamesList later.
Then, we implemented two methods declared in the UIPickerViewDataSource protocol:
func numberOfComponentsInPickerView(in pickerView: UIPickerView) -> Int: This returns the number of columns to display in Picker View. In this case, we just want to display the name for each game, so we added code to this method to return 1.func pickerView(_ pickerView: UIPickerView, numberOfRowsInComponent component: Int) -> Int: This returns the number of rows to be displayed in each component or column. In this case, we just have one column, and we will display the number of games included ingamesListArray<Game>. Thus, we added code to this method to returngamesList.count.
Finally, we implemented two methods declared in the UIPickerViewDelegate protocol:
func pickerView(_ pickerView: UIPickerView, titleForRow row: Int, forComponent component: Int) -> String?: This returns the data for the row to be displayed in Picker View. In this case, we just want to display the name for each game, so we added code to this method to return thenameproperty for thegamesListelement at the receivedrowvalue.func pickerView(_ pickerView: UIPickerView, didSelectRow row: Int, inComponent component: Int): Whenever the user makes a change to the Picker View selection, this method is executed, and therowargument includes the value for the selected row. We use therowvalue to retrieve theGameinstance corresponding to the same index value for thegamesListarray and then call print to display the selected gamenameandhighestScoreproperty values on the target output.
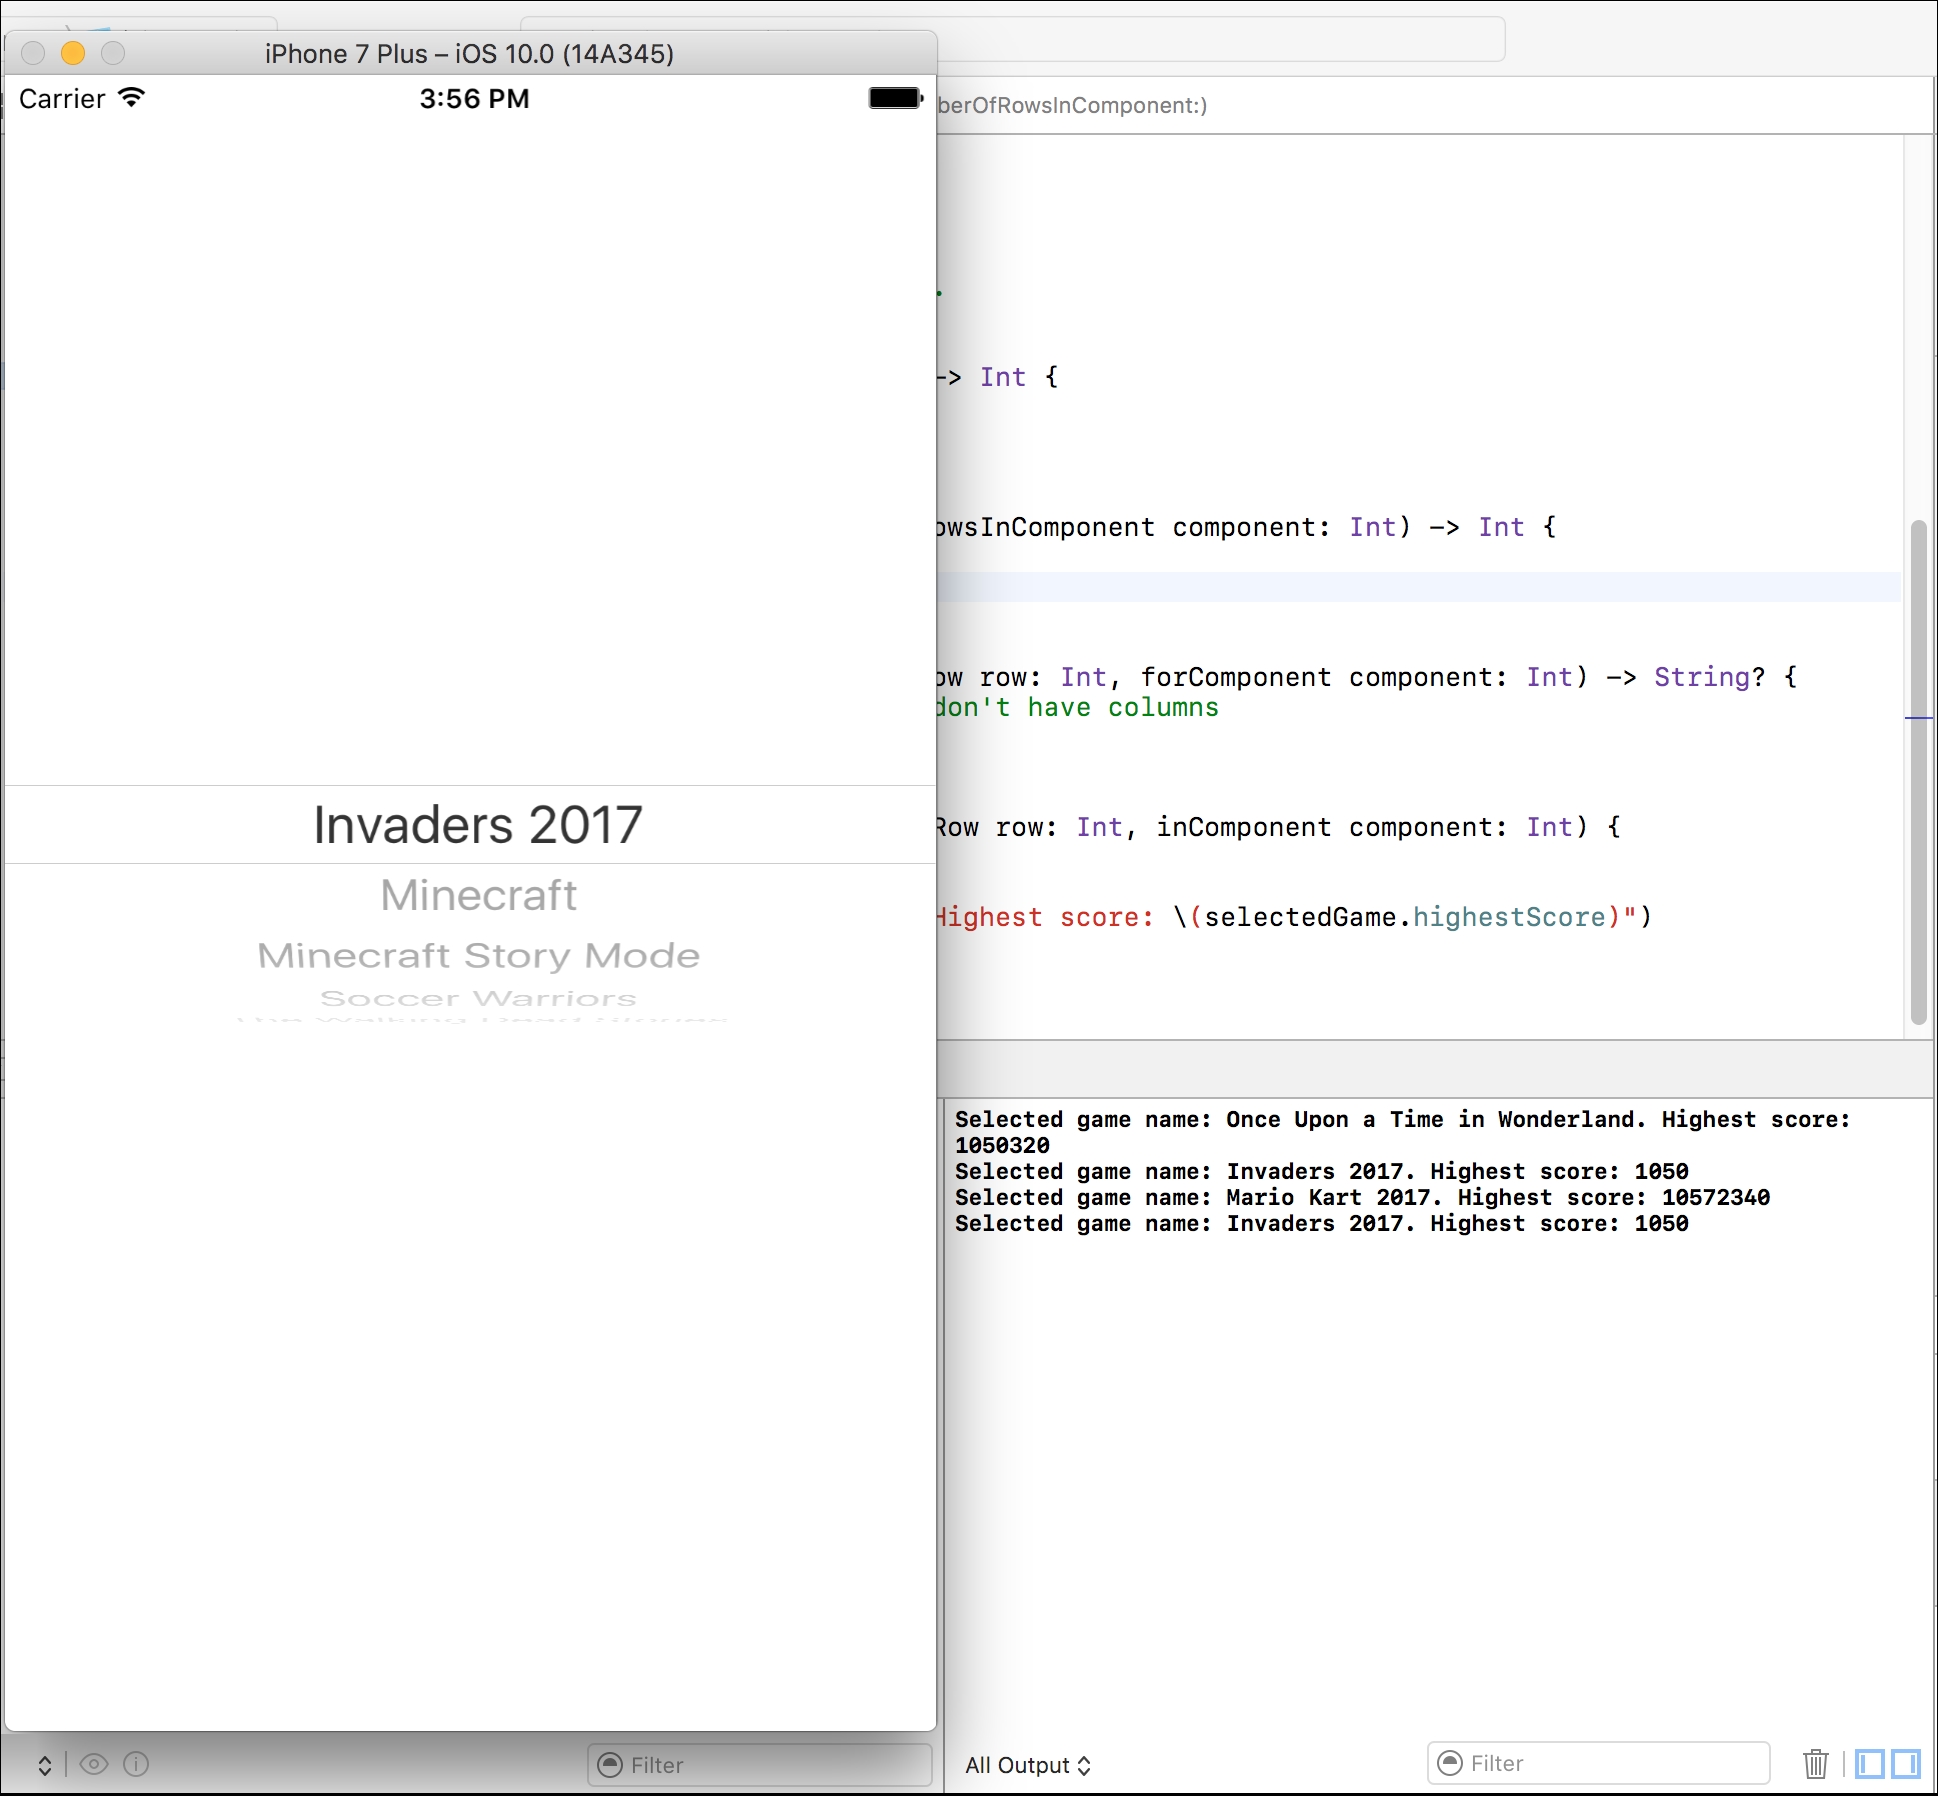
Now, we can debug the iOS app on an installed iOS simulator running iOS 10, such as an iPhone 7 Plus. Click on the Play button in the upper-left corner of the Xcode window. Once the simulator launches and the app begins its execution, you will see the Picker View component displaying all the game names. When we select a game in the Picker View, the target output will display the selected game name and its highest score, as shown in the following screenshot:
Go to the Xcode editor for the ViewController.swift source file and move the cursor to the following line in the ViewController class:
    print("Selected game name: (selectedGame.name). Highest score:
    (selectedGame.highestScore)")
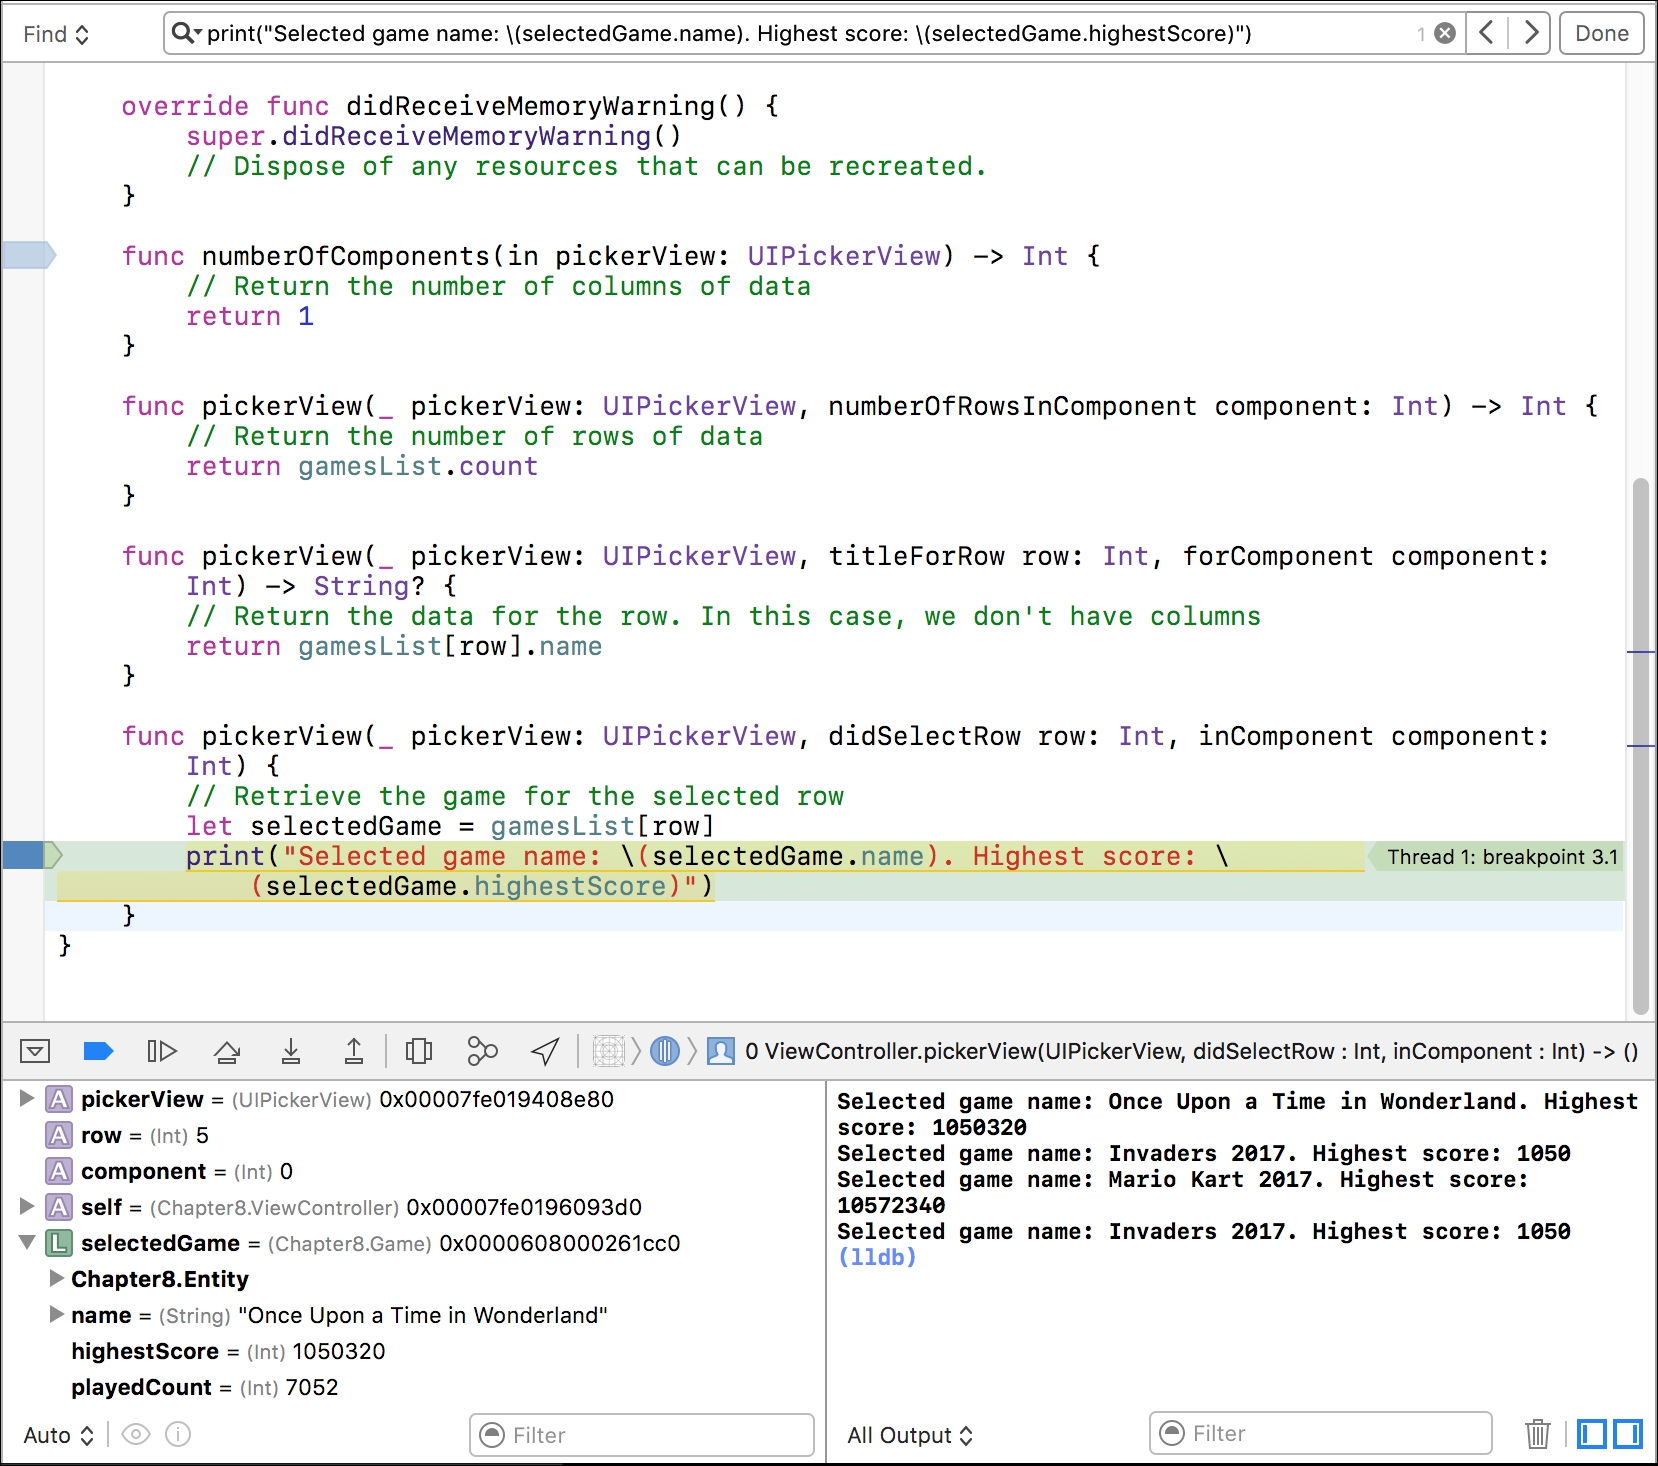
Navigate to Debug | Breakpoint | Add Breakpoint at Current Line. Go back to the simulator and select a different game name from Picker View. Xcode will hit the break point, and we will be able to inspect the value for the selectedGame constant that references an instance of Game. The debugger will display the ID property as part of Chapter8.Entity because this property is inherited from the Entity class. The values for the other properties defined in the Game class are listed after the id property, as shown in the following screenshot:
In this case, we have just a few Game instances in the game list. However, we must take into account that sometimes, it won't be convenient to have all the instances alive in case they have a big impact on memory consumption. We can transform the data from the instances to instances that have less memory footprint and retrieve the entire instances by a related ID when we change the selection in Picker View. For example, we can generate instances that only have a few stored properties instead of working with instances with all the properties. In this case, the Game instance doesn't have too many properties. However, in other cases, we might have instances that have dozens of properties.
Tip
Object-oriented code is great. However, we should not forget memory footprint, as the number of required instances to keep alive increases in certain use cases. In our previous example, it doesn't make sense to transform the Game instances into simpler values because the code won't cause any memory issues.