
One of the many benefits of owning and using a digital camera is the ability to take an almost unlimited number of photos without incurring additional costs, such as film and processing fees. You can take and download so many photos to your computer that sorting and organizing them is often challenging. In this chapter, you discover how to use the Organizer workspace in Photoshop Elements to sort and organize your photos so that it is easy to view and find a particular photo.
Why Use Image Editing Programs? 118
What Is a Digital Editing Workflow? 120
The Welcome Screen Choices in Photoshop Elements 122
Understanding the Organizer Workspace 124
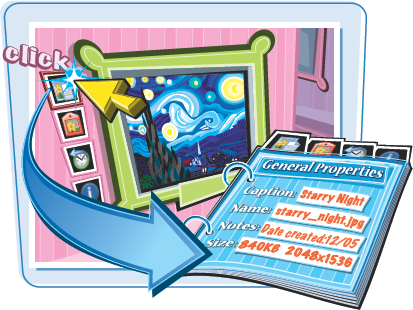
Understanding Metadata in Your Photos 126
What Are Raw Digital Photos? 127
Create a New Catalog and Import Photos 128
Review, Compare, and Sort Your Photos 130
Organize with Tags 134
Organize with Collections 136
Image editing programs allow you to view and modify photographic images. You are able to open your digital photos, as well as crop, color correct, and enhance them. With some image editing applications, you can even create special effects, add text, and convert images to different formats for various uses.
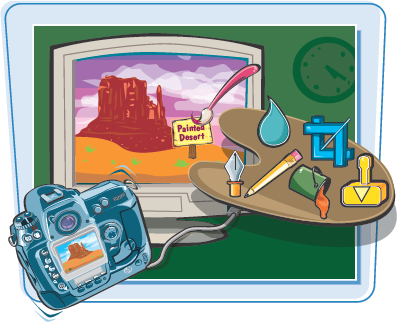
Image Editing Programs
You can choose from a variety of image editing programs. In fact, many digital cameras and photo printers include a simple image editing program. Such bundled programs are usually more limited in scope than those that are purchased separately. Instead of trying multiple image editors, such as the ones that came with the camera and printer, using a more comprehensive application makes downloading, fixing, and sharing your photos much easier.
Use a Complete Image Editing Program
Although it is often bundled with hardware such as a Wacom digitizing tablet and some scanners, Photoshop Elements is considered a stand-alone image editing program. It is the most popular program available and because it is based on the most widely used professional image editor – Photoshop – it is also a powerful and versatile program. Photoshop Elements not only allows you to download images to your computer, correct photo problems, and apply special effects, it also includes a photo organizer that simplifies the task of viewing and organizing your digital images.
Enhance Digital Photos with Photoshop Elements
Using Photoshop Elements, you can fix red eye and correct the color, contrast, and saturation in your digital photos. You can also remove or add elements, such as people or objects. Elements can help you prepare and print your photos on your home photo printer, or send them for printing to a commercial photo lab. Elements can also help you easily resize pictures and attach them to e-mails to send to friends and family.
Why Use an Organizing System for Digital Photos?
When you start taking photos with a digital camera, the number of photos you take will increase dramatically. It is not unusual to take more than 100 photos at a birthday party or other event. With so many photos, you need a way to sort, group, and save them in specific locations on your hard drive or external media.
Change Ordinary Photos into Digital Creations
With Photoshop Elements, you can easily add text to a picture and turn any photo into a greeting card. You can use your favorite photos to create a personalized calendar or create a slide show from any group of photos and save it with music and transitions.
Stay Organized with Photoshop Elements
You can import photos from your camera directly into the Organizer workspace in Elements and categorize or tag them for easy reference. You can then use the Photo Browser in the Organizer workspace to find and view specific photos while keeping them in their original location on your hard drive.
A digital editing workflow is a sequence of steps for importing, organizing, editing, and sharing your digital images. Following a workflow that fits your particular needs ensures that all your photos are imported, reviewed, organized, corrected, or enhanced, and prepared for sharing in a simple, straightforward manner.
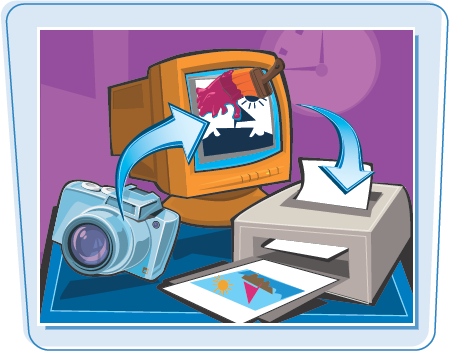
Import and Organize Your Photos
The first steps of the digital workflow include moving the photos from your camera to your computer, reviewing the photos, assigning tags that can be used to identify them, and grouping them into collections – which are similar to traditional photo albums with photos grouped by themes.

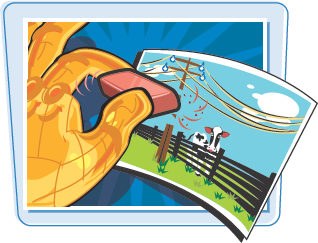
The next steps include making changes to the photos to correct image rotation, removing defects such as red eye, and making adjustments to color and lighting. At this stage, you can also make other enhancements such as removing objects or people from a picture, creating a composite of several pictures, and adding text or special effects.
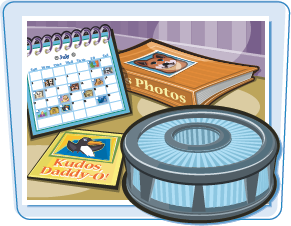
Make Digital Photo Creations
Optionally, you can use any photo to create special greeting cards or postcards, design photo calendars, and put together slide shows and photo albums.
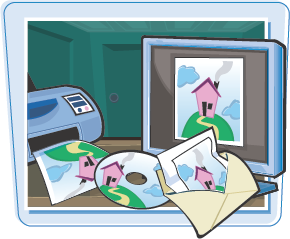
Output Photos for Print, CD, DVD, the Web, and E-mail
The final step of the digital workflow is to print your images or creations or share them by burning a CD or DVD, making a Web photo gallery, or sending photos as e-mail attachments.
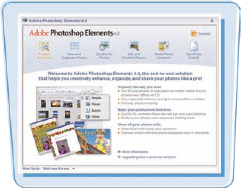
When you launch Photoshop Elements, the first thing you see is a welcome screen. From this starting point, you select what you plan to do and Elements starts the application with the corresponding workspace. Hovering the cursor over each icon choice opens a subscreen with a simple description.
The product overview is a quick way to familiarize yourself with everything you can do with Photoshop Elements. This icon is simply informational. From this screen, you can get information on the application in general or click Upgrading from a previous version and learn what has changed since the previous version.
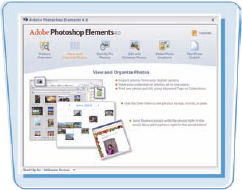
When you click View and Organize Photos, Photoshop Elements starts with the Organizer workspace and the Photo Browser. From here you can import, view, and sort your photos.
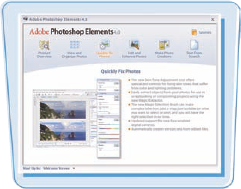
When you click Quickly Fix Photos, the application launches into the Quick Fix mode of the Editor workspace. You can open individual photos and make quick corrections, while comparing your changes with the original image.
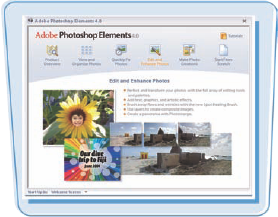
Clicking Edit and Enhance Photos opens Photoshop Elements in the main Editor workspace called Standard Edit. In this mode, you can open, improve, and add text and special effects to your photos, using all the possibilities of this powerful image editor.
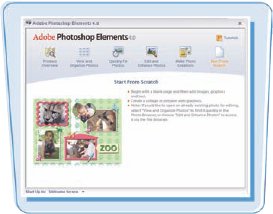
Click Start From Scratch to launch Photoshop Elements in Standard Edit mode with the New dialog box automatically opened so you can select the name, size, and color for your new page.
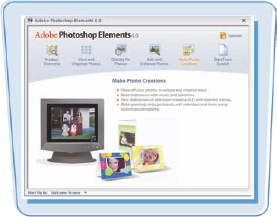
Make Photo Creations
When you click Make Photo Creations, Elements launches into the Organizer with a Creation Setup screen superimposed. You select the type of creation you want to make, such as a slide show or a calendar page. When you click OK, you follow the on-screen steps to select the styles and photos for your creation.
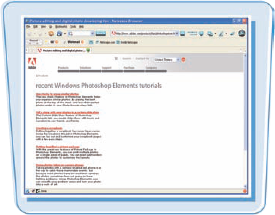
Clicking Tutorials launches your Web browser and links you directly to the Adobe Tips Web site where you can view a number of useful tips and tutorials for using Photoshop Elements.
The Organizer in Photoshop Elements is used at the beginning and end of your digital workflow. It can help you organize photos and other media files including music files, and has the tools to import, review, sort, and create cool projects using your photos.
Shortcuts Bar
In addition to a normal menu bar, the Organizer includes a shortcuts bar for quickly moving between different tasks in Photoshop Elements.
Photo Browser
Displays your photos as thumbnails at any size you select.
Status Bar
Shows the number of items selected.
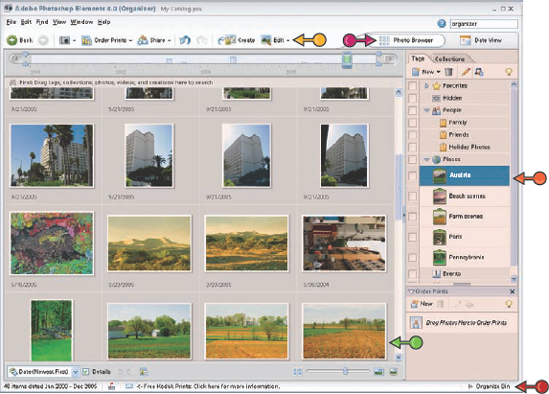
Photo Browser and Date View Buttons
View your photos either as a group of images or on a calendar with the images showing the date they were taken.
Organizer Bin
Contains the Tags and Collections palettes for labeling your photos, as well as a section for ordering prints directly.
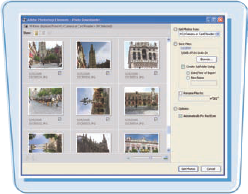
Move Photos into Your Computer (Step 1)
When you plug your camera or card reader into your computer, the Photo Downloader automatically launches and searches for new images. You can select a folder to store the photos and optionally change the filenames. When you click Get Photos, the downloader automatically downloads them into the Organizer. You can also launch Photoshop Elements and select Get Photos from the menu to start the process manually.
Review the Photos (Step 2)
After copying the photos into your computer, you can sort through your photos and delete any that are out of focus, underexposed, overexposed, or that you just do not want. The Photo Organizer provides a full-screen preview to review your photos and includes the ability to view different photos side by side for comparisons.
After you have removed the undesirable photos and identified the ones you want to keep, the next step is to attach tags to those photos to identify them. Photos can have multiple tags. For example, a photo of Bob on vacation in Hawaii may have the following tags attached: Family, Bob, Hawaii, or Vacation. Tagging your photos is an important part of maintaining an organized image library.
Group Images into Collections (Step 4)
You can further organize your photos into collections, which are similar to digital photo albums. You can group photos with different tags into the same collection and even save the photos in any order within the collection.
One of the unique features of photos taken with digital cameras is that there is a lot of information about the camera settings and more stored with each image. When you release the shutter on a digital camera, it records more than just the scene you captured. The camera attaches descriptive data known as metadata to each image file on the digital media card. Many different types of data can be attached to an image. Some cameras even provide a Global Positioning System (GPS) receiver connection, thereby precisely pinpointing the location where the photograph was taken.
What Is EXIF? EXIF stands for Exchangeable Image File Format. It is the most commonly used metadata. It was developed to standardize the exchange of data between imaging devices such as a camera and software. EXIF is the information that is stored by the camera with each photo and includes the date and time, the make and model of the camera, the white balance settings, whether the flash was used, and other details about the image capture. 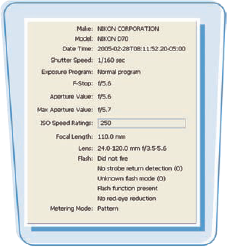 |
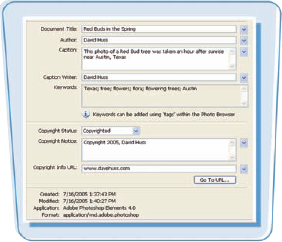 Personalize Metadata You can add your own information to the file's metadata to help identify and organize your images. When you add titles, tags, and descriptions in the Organizer, Photoshop Elements stores that data with the photo file. In fact, when you edit photos in Elements, the edit history is also added to the metadata. |
Most high-end digital cameras can save photos in a format called Raw. The term Raw is not an acronym. It means that the image data coming off the camera sensor is not processed or compressed before being saved to the memory card. Although Raw format files are larger than JPEG files, they give the photographer more control over exposure, color, and tonal correction of the photo when it is processed on the computer.
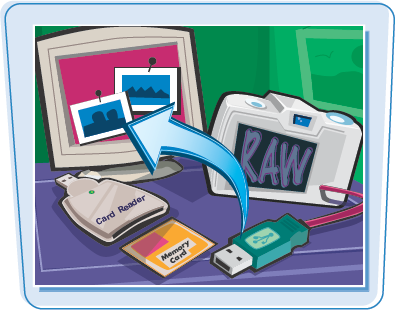
Processing Raw Format Digital Photos Before you can use a Raw format file on your computer, you must first convert it into a standard graphics format. There are several ways to process Raw digital photos on your computer. You can use conversion software provided by the camera manufacturer, use a third-party conversion program, or you can use the Raw file conversion software that is now included in many popular image editors. Regardless of the process you choose, the end result is an image in a format that can be used with your image editor. 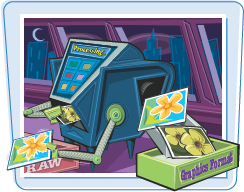 |
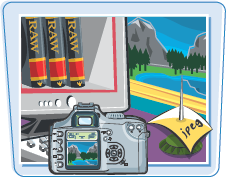 Advantages of Raw Format When you take a photo using a JPEG format, the image sensor data is processed using the camera's current white balance, exposure, contrast, saturation, and many other settings. After the JPEG image is saved to the memory card, these settings cannot be changed. When an image is saved as a Raw file, the actual data produced by the photo sensor is stored on the memory card. The photographer can then visually control the color and tonal corrections as he or she processes the image on the computer. The advantages of such controlled processing easily outweigh the extra steps required to process a Raw image and its larger file size, which reduces the number of images that can be stored on one memory card. |
When you bring photos or any other media files into Photoshop Elements, a catalog called My Catalog is automatically created. You can use that one catalog to store all your files, or you can create multiple catalogs with specific names.

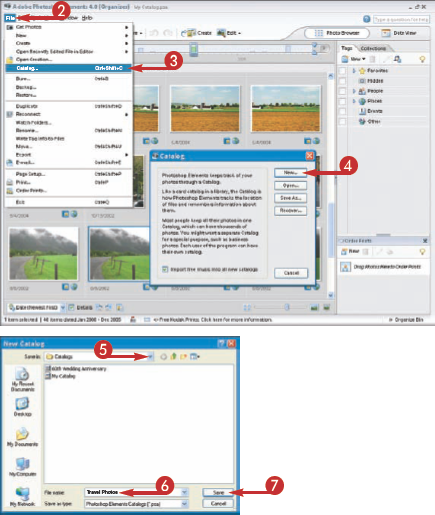
Create a New Catalog and Import Photos
CREATE A NEW CATALOG
The Catalog dialog box appears.
The New Catalog dialog box appears.
Note
Do not type MMy Catalog or you will overwrite the default catalog and any images already stored there.
Photoshop Elements creates and opens a new empty catalog.
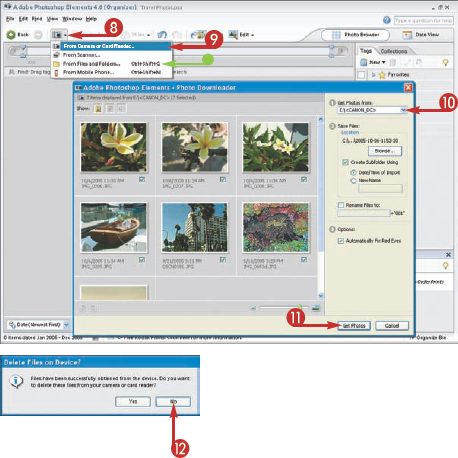
IMPORT PHOTOS
• If the photos are already on your hard drive, select From Files and Folders and use the dialog box that appears to navigate to the folder on your hard drive to select the images to import.
The Adobe Photoshop Elements Photo Downloader dialog box appears.
Photoshop Elements copies all the photos to the open catalog.
Photoshop Elements then asks if you want to delete those files from your camera or card reader.
Note
It is always best to format the memory card in the digital camera after you have downloaded the files to the computer. Formatting erases all the images on the card and prepares the card to record photos from that particular camera. If you delete files using the computer, you can encounter memory card problems because bits of data may be left on the card.
Tip
What is a catalog?
A catalog is a list of thumbnails and the data stored with them. It does not contain the actual photos themselves. You can also import music files into a catalog. You can browse through one catalog and see all the images wherever they are located on the hard drive, even if they are stored in separate folders or located on separate hard drives.

How many catalogs should I have?
You can create as many catalogs as you want. However, because you can only open one catalog at a time, and you cannot move photos or tags between catalogs, Adobe recommends keeping all your photos in a single catalog. You can keep separate images grouped using the Tags and Collections palettes. See the tasks "Organize with Tags" and "Organize with Collections," both later in this chapter, for more.

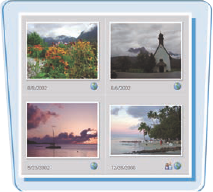
After the photos are in your computer and have been added to the catalog, the next step is to carefully review them, compare similar images, and decide which ones should be kept and which should not. Why not keep all of them? Photos take up space on your hard drive, so keeping photos that you do not need wastes your time — when looking through the catalog — and occupies space on your hard drive.

Review, Compare, and Sort Your Photos
The photo fills the screen, and the Full Screen View Options dialog box appears.

The photo fills the screen with a filmstrip on the right showing all the photo thumbnails.

A control bar appears.
How can I rotate a photo?
Click the Rotate 90° Left icon (

How do I return to the Photo Browser window?
Click the Exit-Esc icon (

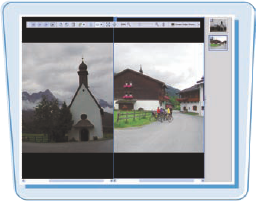
Being able to compare two similar photos side by side is particularly useful when taking photos of people. You can instantly decide which one best captures the personality or the moment, or quickly delete any images where the subject's eyes are closed or the smile is crooked.

Two images appear on-screen.
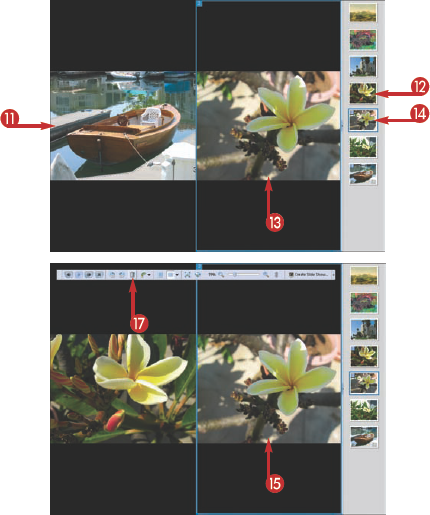
The two images are viewed side by side.
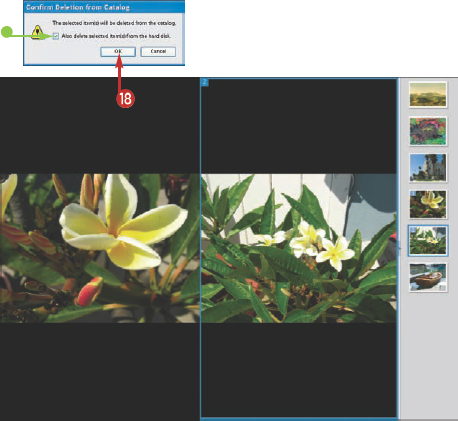
The Confirm Deletion from Catalog dialog box appears, telling you that the photo you selected will be deleted from the catalog.
You can select this option to delete the photo from the hard drive as well (

The next photo in the filmstrip appears.
Tip
Can I zoom in to a photo in Comparison view?
Yes. Click a photo to select it. Then click the Zoom in (

Can I zoom in and move around both photos at once?
Yes. Click the Sync Pan and Zoom icon (

After the photos are reviewed and sorted, you can assign tags, keywords you assign to photos, and group them by subject without manually moving them into separate folders. Tags are grouped under categories, such as People or Places, and make it easy for you to locate a single photo or a group of related photos in a large image catalog.

Organize with Tags

The Create Tag dialog box appears.
The new tag is listed in the Tags palette.
ASSIGN THE TAG TO PHOTOS
Note
The first photo selected for each tag appears in the Tag icon.
FIND PHOTOS BY TAGS
The box fills with a binoculars icon (
Only the photos with that tag assigned appear in the Photo Browser window.
Tip
Can a photo have multiple tags?
Yes. You can create tags for any type of content, so a photo can have multiple tags. You can easily remove one or more tags from a photo by right-clicking the Tag icon under the photo and selecting Remove the category tag from the menu that appears.

Elements can help you by isolating all the faces in the photos in a catalog so you can tag them more quickly. Click the Find Faces icon (

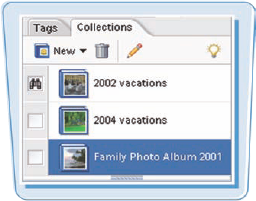
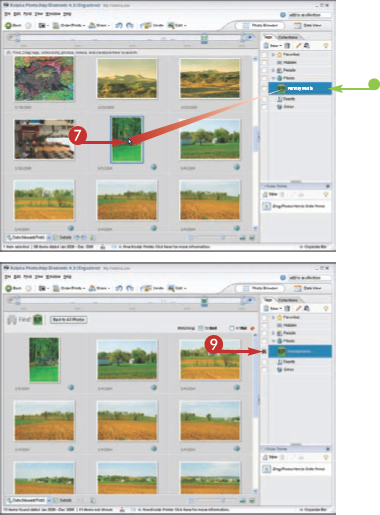
You can group your photos into collections. Collections allow you to view all the photos as you would in a traditional photo album. For example, you might have your Hawaii vacation photos in one collection and your European vacation photos in another collection. Photos in a collection are automatically numbered as you put them into the collection. If you change the position of the photos to view them in a different order, all the thumbnails will be renumbered accordingly.
Organize with Collections
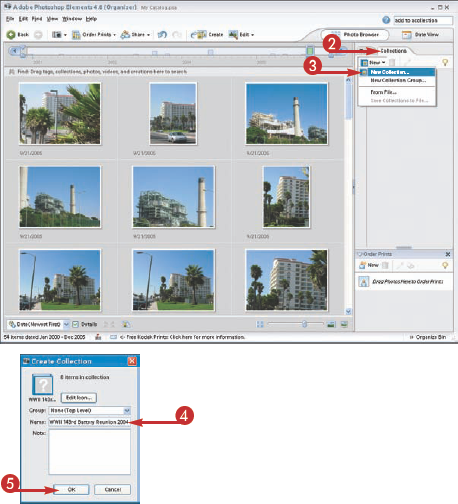
The Create Collection dialog box appears.
A new collection with a question mark icon appears in the Collections palette.
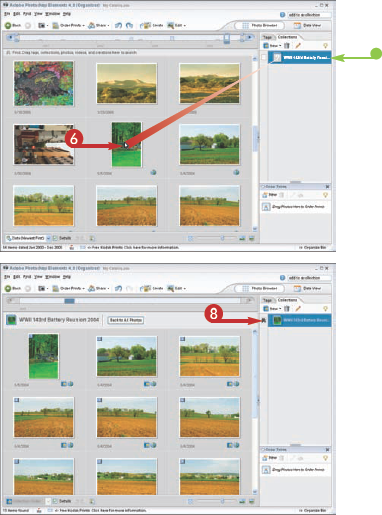
ADD PHOTOS TO THE COLLECTION
You can also add photos to the collection by clicking and dragging one or more photos over the new collection's icon in the Collections palette.
The icon in the Collections palette shows a thumbnail of the first photo in the new collection.
VIEW PHOTOS IN THE COLLECTION
The box fills with a binoculars icon (
Only the photos in the new collection appear in the Photo Browser window, and each photo is numbered.
Tip
Can I use photos with different tags in the same collection?
Yes. Collection photos can have different tags and a photo can be included in several collections. You can even attach tags to photos while you are viewing them in a collection. With the collection open in the Photo Browser, click the Tags palette and click and drag a tag over one or more photos in the collection.

How do I change the order of the photos in a collection?
Click the box next to the collection's name in the Collections palette to view all the images. Click and drag a photo in the collection to another location in the Photo Browser. Release the mouse when the cursor is where you want to view that photo in the collection.
