
You can make all your photos look better with Photoshop Elements. Start by adjusting your monitor to better display your photos. Then you can crop, improve the color and contrast, remove red eye, and tint or change color images to black and white for a special effect. This chapter introduces the basics of digital image editing.
Why Calibrate and Profile Your Monitor? 140
Calibrate and Profile with Adobe Gamma 142
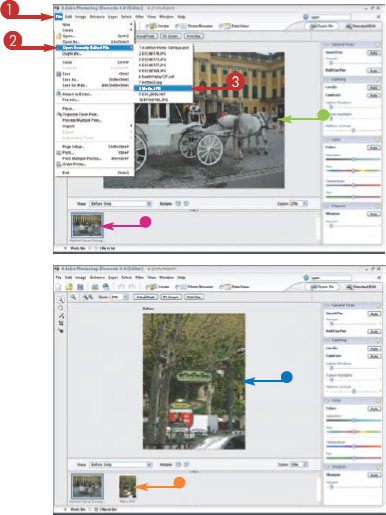
Open the Photoshop Elements Quick Fix Workspace 144
Get Familiar with the Quick Fix Workspace 145
Open a Photo to Fix 146
Open a Raw Photo File 148
Zoom In and Out 150
Move Around the Image 151
Rotate an Image 152
Select a Comparative View 153
Improve Composition by Cropping 154
Use the Quick Fix Auto Buttons 156
Try an Auto Fix for a Quick Improvement 157
Remove Red Eye with One Click 158
Undo Changes 159
Convert a Color Photo to Black and White 160
Add a Colored Filter Effect to Any Photo 161
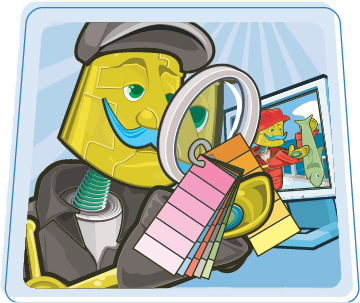
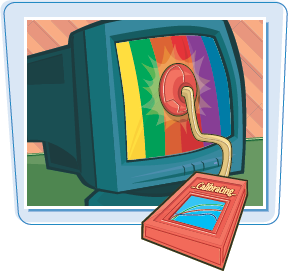
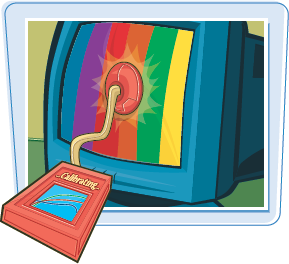
Your monitor is used for viewing your photos. If your monitor is dull or changes the colors that are in the image, you cannot accurately edit your photos for color or tone. You can calibrate and profile your monitor for more accurate color. This section and the task that follows explain why and how to get better color from your monitor.
What Are Calibration and Profiling? When you calibrate your monitor, you check and compare the color values it displays to a known standard. You then create a profile or a description of how your monitor displays color at that particular moment.  |
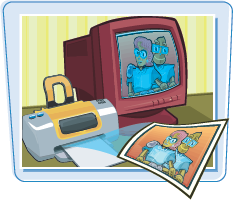 Why Should I Calibrate and Profile My Monitor? You need the monitor to show consistent and predictable color so you can more accurately view and color correct your images. Making sure the monitor is as accurate as possible also helps ensure that the print reflects the colors you see on-screen. | Different Kinds of Monitors CRTs and LCDs are the two basic types of computer monitors. A CRT uses a cathode ray tube and is more like a traditional TV. An LCD is a flat panel display, which uses liquid crystals in the viewing area. Both can be calibrated and profiled with hardware and software methods, however, CRTs generally require a warm-up time of 30 minutes before proceeding.  |
Calibration and Profiling Methods
You can use either a software-only method or a hardware-software combination to calibrate and profile. With the software-only methods, your eyes are the determining factor in judging the accuracy of the color as displayed on the monitor screen. Using a hardware device called a colorimeter along with its corresponding software is far more accurate. The colorimeter measures the actual output of color. The software with both methods produces the profile, a data file describing how your particular monitor shows colors as compared to a known ICC, or International Color Consortium, standard. The video card inside your computer uses the new profile to compensate for your monitor and to display the color according to the standard.
The Software "Eyeball" Method
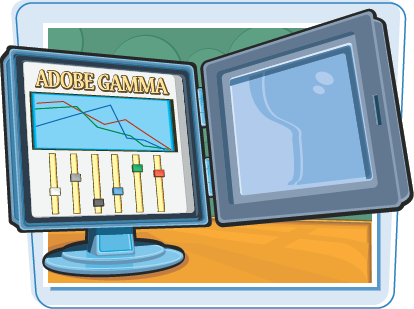
You can use the Adobe Gamma software automatically installed with Photoshop Elements to calibrate and create a monitor profile. Because youreyes are the measuring tool with this method, you should dim the lights to avoid reflections on-screen. You should also wear neutral colors such as gray or black so that no colors reflect from the screen and change your color vision.
Hardware Methods
Using a hardware colorimeter to calibrate and profile your monitor is easier and results in more consistent color. The device is small, attaches to the monitor while you calibrate and profile, and reads color patches that its software produces on-screen. GretagMacbeth's Eye-One and X-Rite's Optix are excellent colorimeters.
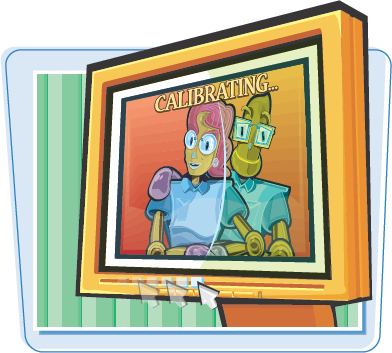
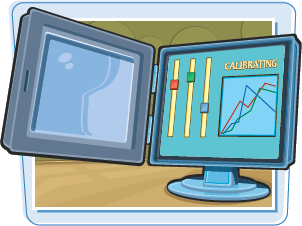
Using Adobe Gamma to calibrate and profile your monitor is a simple first step for making your photos look better both onscreen and in print. Make sure you are wearing neutral-colored clothing, that the lights in the room are dim, and that there are no external reflections on-screen. If you have a CRT monitor, make sure it has been running for at least 30 minutes before starting this task.
This task can only describe the general settings in the steps that follow because the calibration wizard includes specific choices that depend on your type of computer and monitor.
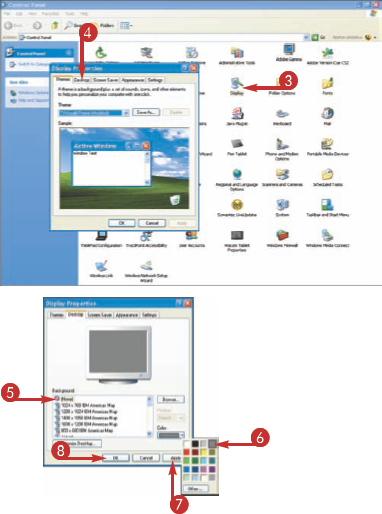
Calibrate and Profile with Adobe Gamma
MAKE THE BACKGROUND A NEUTRAL GRAY
The Control Panel window opens.
Note
Depending on how you have set up your computer, you may access the Control Panel another way.
The Display Properties dialog box appears.
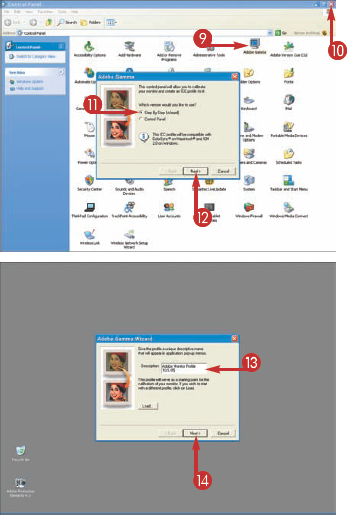
START THE ADOBE GAMMA WIZARD
The Adobe Gamma dialog box appears.
The Control Panel closes, showing the neutral gray background you chose in Step 6.
Tip
Should I change the other monitor settings?
Yes. You should always use your monitor with the greatest number of colors it can display. Double-click the Display icon in the Control Panel. In the Display Properties dialog box, click the Settings tab. Make sure your monitor is set to Highest (32 bit) for color quality or at least to Medium (16 bit).
Should I use the buttons on the front of my monitor?
If you have buttons or knobs on your monitor to control brightness and contrast, set these to the middle position before starting the Adobe Gamma Wizard. The wizard's on-screen steps direct you to change your brightness and contrast settings using these buttons as you proceed through the steps.

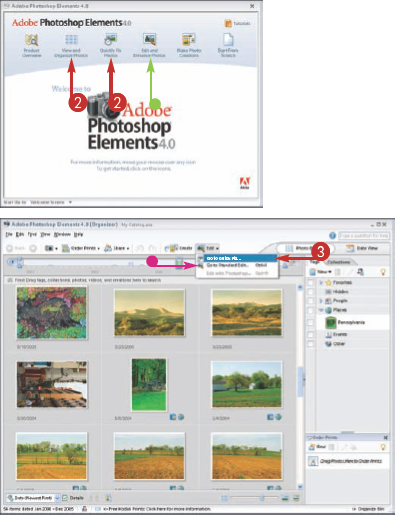
Photoshop Elements includes two Editor workspaces that you can open directly from the Welcome screen or from within the Organizer. The two workspaces are the Quick Fix workspace and the Standard Edit workspace. You can use either one, or start with the Quick Fix to make changes to an image, and then move on to the Standard Edit to make further enhancements. This task shows you two ways to open the Quick Fix workspace.
Open the Photoshop Elements Quick Fix Workspace
USE THE WELCOME SCREEN
You can click Edit and Enhance Photos to open the Standard Edit workspace.
Photoshop Elements opens in the Quick Fix Editor workspace.
USE THE ORGANIZER
Photoshop Elements opens in the Organizer.
You can select Go to Standard Edit to open the Standard Edit workspace.
The Quick Fix Editor workspace appears.
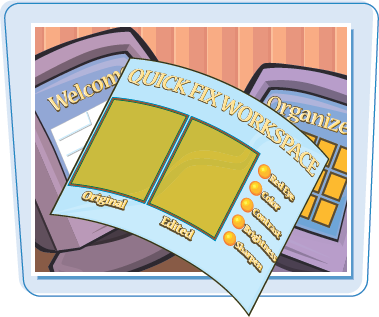
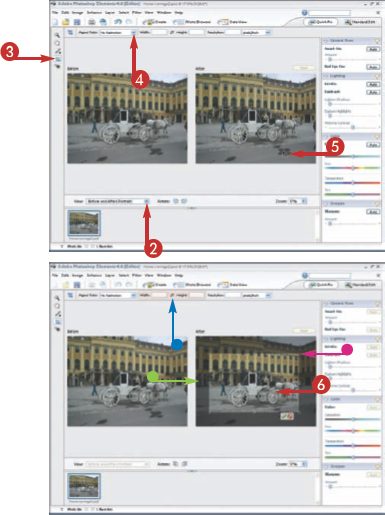
The Quick Fix workspace offers simple and easy-to-use tools for making basic photo edits and comparing the changes you make side by side with the original photo. You can view and move around the image at various sizes, correct red eye, make a variety of color and tonal enhancements, crop, and sharpen all from this workspace.
Access the Tools
Using the tools on the left side of the image window, you can zoom in and out of the photo, move around a zoomed-in image, select a specific area to change, crop the image for composition, and fix red eye quickly.
Change Your View
In the area below the main image window, you can select a before and after view, change the orientation to portrait or landscape, rotate the image, and change the zoom percentage.
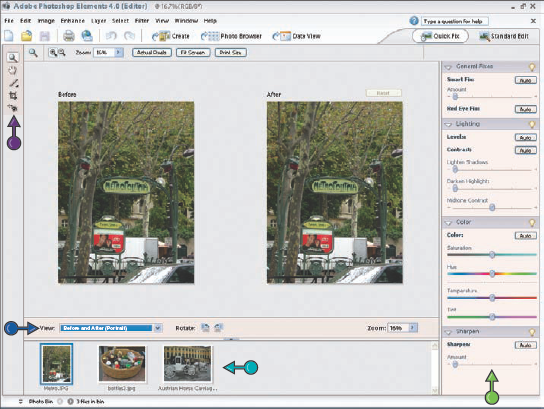
View All Open Photos
The Photo Bin shows thumbnails of all the open images. You can easily switch between images in the main window by clicking another image in the Photo Bin. Use the Previous and Next buttons (
Make Quick Fixes
Try the Auto fixes on the right side of the screen. Starting at the top, apply one Auto control to see if it makes the color and tonal changes you want. You can click the Reset button and try the next Auto control for a different effect. The Sharpen control is always applied last on any image.
You can open almost any image on your hard drive with Photoshop Elements. You can also open several photos at once, or open a recently viewed photo without navigating to the location where the photo is stored.
Open a Photo to Fix
OPEN ONE OR MORE IMAGES
Note
You can also click the Open button (
The Open dialog box appears.
Note
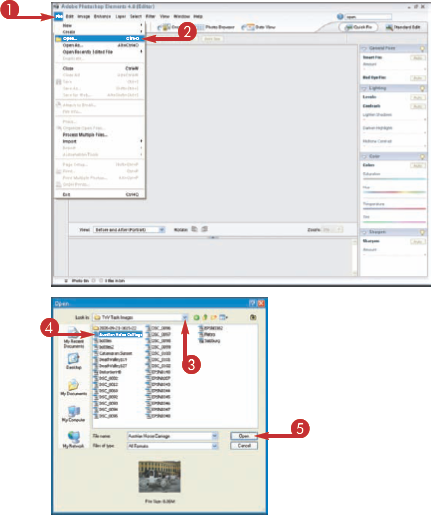
OPEN A RECENTLY EDITED PHOTO
Photoshop Elements opens the image.
The image also appears in the Photo Bin.
Tip
What types of files can Elements open?
Elements can open most of the common image file formats in use today. You can specify the ones you want Elements to open. From the menu, select Edit and then File Association. In the File Association Manager dialog box that appears, select any of the file types (
File Type | Description |
|---|---|
JPEG (Joint Photographic Experts Group) | The standard format for digital photos. |
TIFF (Tagged Image Format File) | The industry standard graphics file format |
Native file format for Photoshop and Photoshop Elements. | |
BMP (Bitmap) | A Windows image format. |
GIF (Graphics Interchange Format) | A format for Web images with limited colors. |
Raw (unprocessed camera sensor data) | Unique format that mustbe converted to a standard graphics format before the image can be used. |
Raw images are different from other images produced by a digital camera. The Camera Raw file format includes all the original digital data as it is captured by the camera's sensor. Because a Raw file has not been processed or compressed, you can use Photoshop Elements to set the white balance, tonal range, contrast, saturation, and sharpening for your requirements.
Photoshop Elements saves a sidecar file labeled .xmp with each Raw photo you open. The original file is not overwritten. When you click Save in the Raw dialog box, you can save the file with another name and format. When you click Open, you open the file to continue editing it in Photoshop Elements.
Open a Raw Photo File
The Open dialog box appears.
The dialog box for the Raw file from your camera opens.
You can use these tools to change the view for adjusting the image:
You can use these options to adjust settings.
Note
The Auto options, which are selected by default, are not always the best for your photo. You can move the sliders to adjust your specific image.

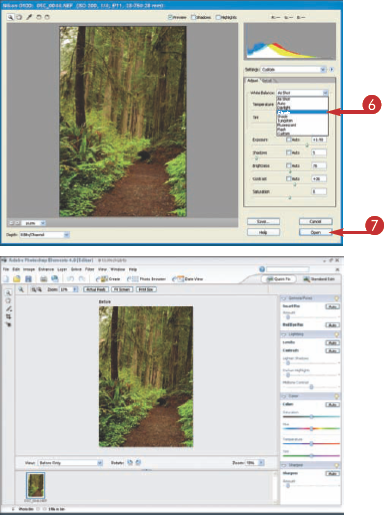
The file opens in Elements with the Raw settings applied.
Tip
Can I change my mind and reprocess the file after it is converted?
Yes. When you select Open in the Raw dialog box, Photoshop Elements saves your changes and creates a new image as it opens the Raw photo. You can reprocess the original Raw file in different ways as many times as you like and get multiple versions from the same original image capture.

Can all digital cameras produce Raw files?
No. Only some point-and-shoot digital cameras have a Raw setting. However, most prosumer cameras and all professional digital cameras or digital SLR – single lens reflex – cameras allow you to capture and save Raw files. You must set this option in the camera's shooting preferences.
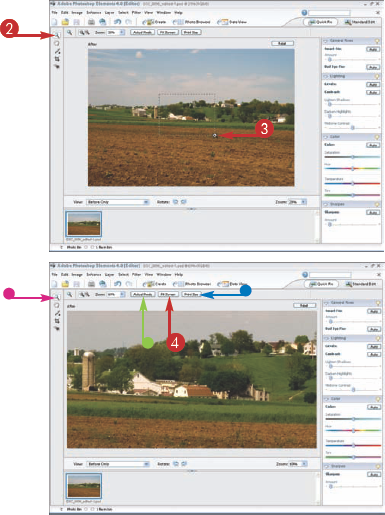
When editing images, you can zoom in on certain areas to see them better and then zoom back out to view the whole image. You can change views quickly and efficiently using the Zoom tool along with certain keyboard keys and the options in the Options bar.
If you press and hold the spacebar after you start to click and drag, the zoom marquee moves to another area.
You can also click anywhere in the image to arbitrarily zoom in.
Press and hold the
Elements zooms in on the area you selected in Step 3.
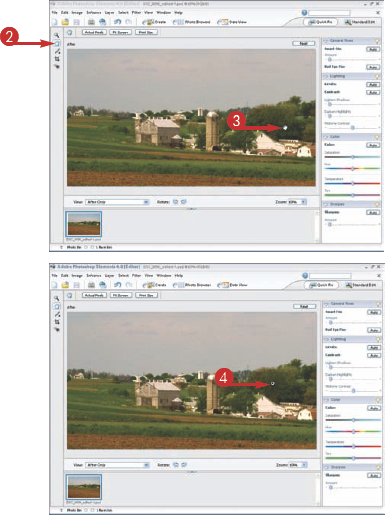
Click Actual Pixels to view the image at 100 percent.
Double-click the Zoom tool to automatically zoom the image to 100 percent.
Print Size shows an approximate printed size depending on the actual document size and the size and resolution of your monitor.
When you zoom in to work on an area, you may need to move around in the image using the zoomed-in state. You can use the Hand tool to move around easily. You can also use the keyboard keys to switch between the Hand tool and the Zoom tool to make moving around the image much quicker.
Move Around the Image
You can press and hold the
You can also press the spacebar to temporarily access the Hand tool (
Your digital photo files likely include images shot both horizontally and vertically. You can easily rotate any image in Photoshop Elements using either a menu selection or a shortcut button. You can even use the Rotate menu command to flip an image either horizontally or vertically.
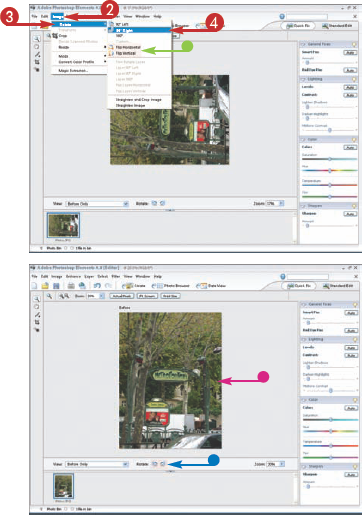
Rotate an Image
You can click Flip Horizontal or Flip Vertical to reverse the image.
Elements rotates the photo.
You can also click the left or right Rotate Shortcut button (

Being able to compare the original photo with your edited version makes your work more efficient and effective. You can easily set the Quick Fix workspace to display two versions of the photo at once, and dynamically update the after version as you make changes.
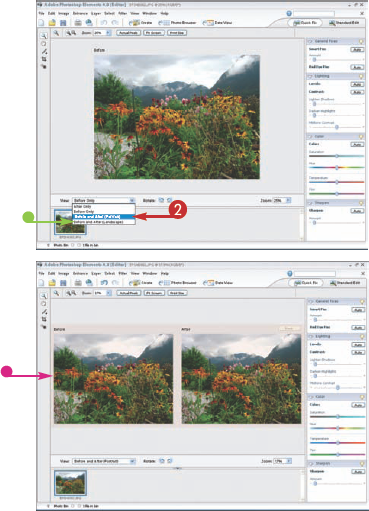
Select a Comparative View
You can select Before and After (Landscape) depending on the photo.
Photoshop Elements displays two identical images side by side for Portrait.
The photos appear above and below for Landscape.
Note
When you close Photoshop Elements, the view that is in use becomes the default view when you open Elements again.
You can remove parts of an image, such as parts of a distracting background, to help focus your image and improve your composition. Using the Crop tool in Photoshop Elements, you can crop to arbitrary dimensions or you can specify the width, height, and resolution.
Improve Composition by Cropping
A crop marquee appears as a box around the area of the photo to keep. The areas outside the crop are darkened.
You can click and drag a corner handle of the marquee to adjust it.
You can type a specific width and height in the data fields in the Options bar above the image.
The marquee selection moves.
You can click

Elements crops the image.
Tip
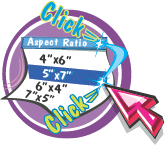
Is there a quick way to crop to traditional photo sizes?
Yes. Click the Aspect Ratio
Do I have to enter a number in the Resolution data field in the Options bar?
Not necessarily. When you use the Crop tool (
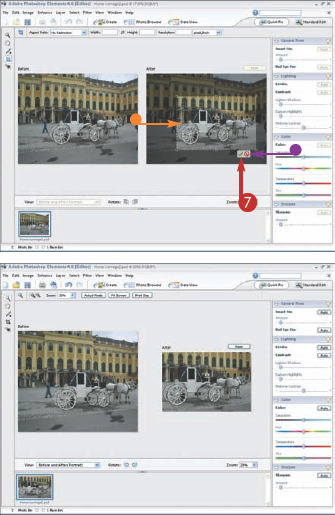
Photoshop Elements includes many easy-to-use editing tools in the Quick Fix workspace. Depending on the image, the Quick Fix Auto buttons may be all you need to improve a photo. Because you can select a before and after view in the view area just below the image window, it is easy to see the results of each Auto button by comparing with the original photo.
Use Multiple Auto Buttons
You can apply one auto fix and then another. Although you can compound the effects of clicking the Auto buttons multiple times, you rarely need more than two or three to improve most photos. You can apply these in any order, with the exception of the Sharpen Auto Fix button, which should always be applied last.
Click and Slide to Adjust Photos
Clicking an Auto button makes the correction according to the software presets. You can make further edits or reduce the amount of the correction by using the sliders in each section. To apply the correction, click the Commit check mark, or click the Cancel icon to cancel the changes.
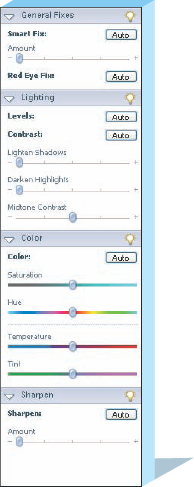
Auto Buttons Overview
The Smart Fix makes changes to the overall color balance in the photo including adjusting the highlights and shadows. It applies a more general correction. The Red Eye Fix automatically finds and removes red eye in the photo. The Auto Levels adjusts the contrast and the colors using the lightest and darkest pixels in the image, while the Auto Contrast only changes the contrast. The Auto Color fixes the contrast and color according to the highlights, midtones, and shadows. The Auto Sharpen sharpens the edges in the image using a default setting.
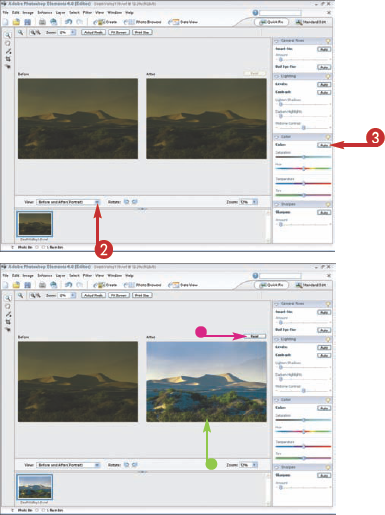
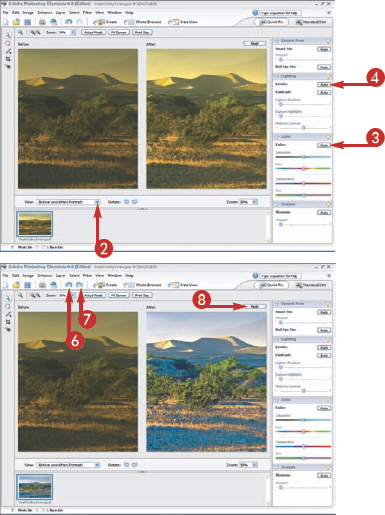
Clicking any one or a combination of Quick Fix Auto buttons is a fast way to make general improvements to an image. If an Auto correction does not improve the photo, you can step backward by clicking Edit from the menu and selecting Undo. You can also start the editing all over again by clicking the Reset button above the after image.
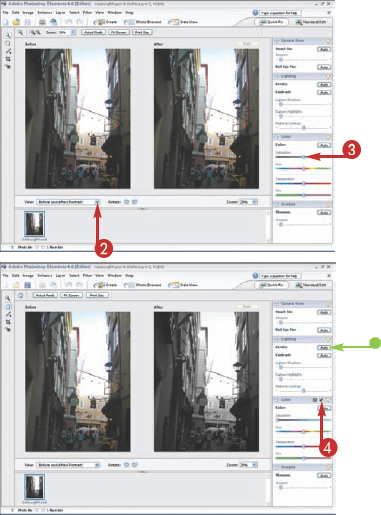
Try an Auto Fix for a Quick Improvement
The color and contrast of the after view change.
You can click Reset if the change does not improve the photo.
You can repeat Step 3 using a different Auto button to find the appropriate correction.
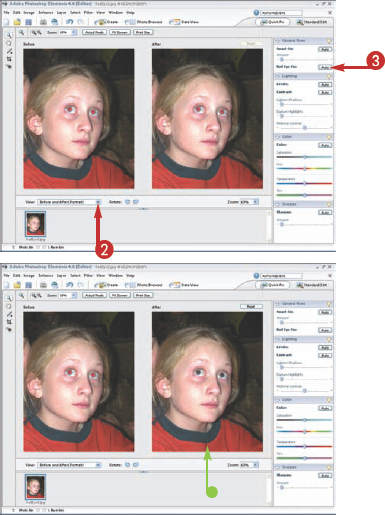
Using a flash in a darkened room when the subject's pupils are enlarged often creates a red eye effect. Although many newer digital cameras can automatically remove red eye, Photoshop Elements includes a simple fix for this phenomenon.
Remove Red Eye with One Click
The subject's red eye is automatically removed.
In the Quick Fix workspace, Photoshop Elements allows you to undo changes one step at a time using the Undo arrow in the Menu bar. You can also use the opposite arrow, or Redo arrow, to step forward again through your steps. The Reset button in the main image window erases all the steps at once, returning your image to its original state.
Undo Changes
You can easily change any color photograph to a black-and-white image, also called a grayscale image, using Photoshop Elements. Here is one quick way of making this conversion in the Quick Fix workspace.
Convert a Color Photo to Black and White
The photo changes to black and white.
If the photo appears flat, you can click the Auto Levels button.
You can visually change the time of day or alter the entire mood of a photo by changing its overall color. By applying the digital equivalent of a colored lens filter in Photoshop Elements, you can repurpose any image, even a bland one, quickly and easily.
Add a Colored Filter Effect to Any Photo
The image appears to have a purple filter applied.
Note
You can click and drag the Temperature slider to the right to add a red tone. You can click and drag the Tint slider to the left to add a green tone.
