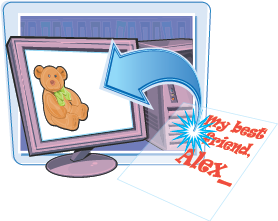
Although the Quick Fix workspace allows you to make quick and easy edits to your photos, the Standard Edit workspace in Photoshop Elements offers a full line of powerful image editing tools. You can select the Standard Edit workspace from the Welcome screen or from within the Organizer. You can use the layers in this flexible workspace to adjust areas, crop with creative shapes, colorize, and more, and never alter your original image.
What Are Layers and Why Use Them? 164
Find Your Way Around the Layers Palette 166
Straighten a Crooked Photo 168
Add a Quick Colored Matte 170
Make a Creative Crop 172
Select an Area of a Photo 174
Whiten Teeth Digitally 176
What Are Photoshop Elements Filters? 178
Duplicate the Background Layer 179
Reduce Digital Noise 180
Use Special Effect Lighting 182
Liquify a Photo for Effect 184
Add Motion Blur 186
Colorize a Black-and-White Photo 188
Create a Sepia-Toned Photo 190
Understanding Styles and Effects 192
Customize the Palette View 194
Add a Quick Vignette 196
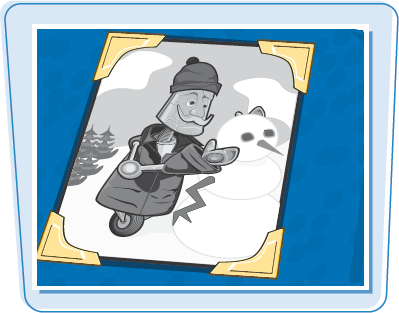
Add Digital Photo Corners 198
Turn a Photo into a Drawing 199
Frame a Photo with a Background Layer 200
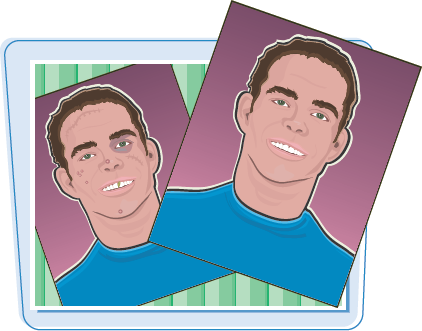
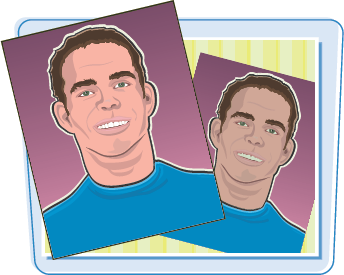
Remove Blemishes with One Click 204
Fix Skin Tone 205
A layer is like a sheet of glass over the main image or photo. Photoshop Elements uses different types of layers to help you improve your photos or completely change them without altering the original image. You can change the way each layer interacts with the layers below it by changing the layer's blend mode and the layer's opacity. Using layers is the key to digitally altering photos and creating various effects, including changing color and adding frames.
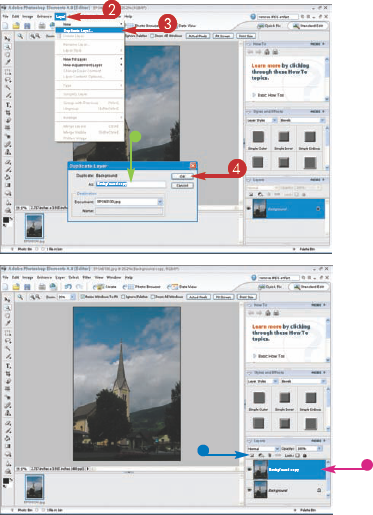
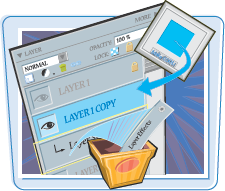
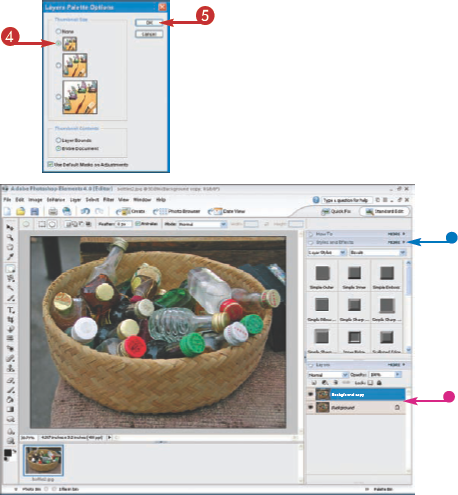
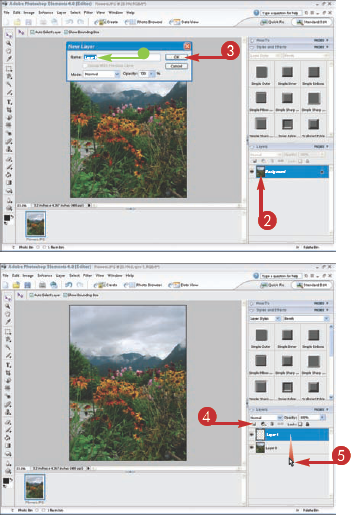
Duplicate the Background Layer When you open a photo in the Editor workspace, you have one layer named Background in the Layers palette. It is a locked layer, meaning you cannot make certain types of changes to it. You can change the locked Background layer to an unlocked and editable layer by double-clicking the layer in the Layers palette and renaming the layer in the dialog box that appears. A preferable option is to create a duplicate of the Background layer by clicking Layer and then Duplicate Layer. Elements places a new identical but unlocked layer called Background copy above the Background in the Layers palette. You can then make changes to the duplicate, never risking the original, and you can delete the copy if you do not like your changes.  |
 Add Other Image Layers You can click and drag other open photos onto the Background image and Elements adds these as regular image layers. You can resize the individual image layer and make changes to the way it blends into or hides the image below. You can also add a new blank layer above the other photo layers by clicking the Layer menu and then New or by clicking the Create a New Layer icon ( | Add an Adjustment Layer An Adjustment layer is a transparent overlay that allows you to make adjustments to the color and tones of the underlying layers. When you add an Adjustment layer, Elements places both a layer thumbnail and a layer mask thumbnail side by side in the Layers palette. You can add an Adjustment layer from the Layer menu or by clicking the Adjustment Layer icon ( 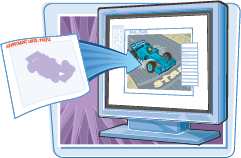 |
Layer masks in Elements are attached to Adjustment or Fill layers and are used to hide or reveal areas of the image below the Adjustment layer. The mask starts out filled with white, making the adjustment cover the entire image below. You can remove parts of the mask and reveal portions of the underlying image by painting areas of the mask with black. Painting with darker or lighter shades of gray removes the mask in corresponding levels of transparency. Layer masks are often used to create composite images in which multiple photos blend into one another.
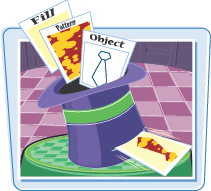
Other Types of Layers
You can add Fill layers, which can contain a colored gradient, a solid color, or a pattern, and then blend the layer into the image using the layer blend mode or the layer opacity settings. You can also add Shape layers that are similar to Type layers and must be simplified so you can apply multiple colors or use filters on them.
Add a Type Layer
When you select the Type tool (
You can add as many layers as your computer's memory allows; however, layers increase the file size. You can merge some layers together to reduce the file size, and you can flatten all the layers when you are completely finished working on the image. Merging and flattening are permanent actions, and should be done only when you are finished editing the photo. You must flatten the layers to save the image for the Web or as an e-mail attachment.
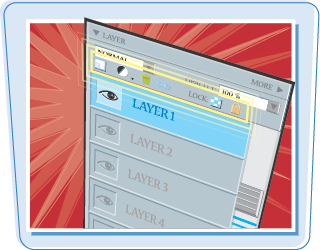
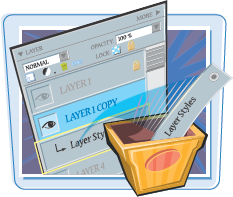
The Layers palette is the key to working efficiently with layers in Photoshop Elements. The palette includes a thumbnail and the name of the layer. The icons and drop-down menus in the Layers palette allow you to make a variety of changes to the layers and to your overall image. You can access any of the commands that affect layers from Element's main menu; however, using the icons on the Layers palette is much quicker and easier.
Move the Layers Palette All the layers for the open photo or image are listed in the Layers palette in the order in which they are added. You can move layers and change the order by clicking and dragging one layer above or below another layer in the Layers palette. Each time you add a layer, the list gets longer. You can extend the Layers palette by clicking and dragging on the bottom-right corner of the palette. Because it is so useful, you may want to drag the palette by its title tab out of the Palette Bin to make sure you can see all the layers on-screen. If you close the Layers palette, you can open it again from the main menu by clicking Window and then Layers. 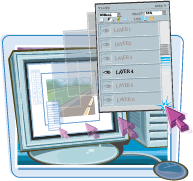 |
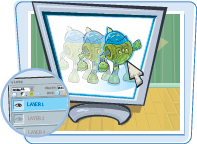 Active Layers and Visibility The layer you are currently working on is called the active layer. It is highlighted in blue. To make a change to the layer, such as applying a filter or erasing an area, you need to target and highlight the layer by clicking it. You cannot make certain types of changes to the original Background layer until you change it to a normal unlocked layer, as described in the previous section, "What Are Layers and Why Use Them?" You can hide or show a layer by clicking the Visibility icon ( |
The Layers Palette Icons
You can use the icons at the top of the Layers palette to apply many changes to the image quickly. Click the Create a New Layer icon (
What Are Blending Modes and Opacity?
The Layers palette includes a drop-down menu for selecting the blend mode as well as the master opacity for each layer. The blend mode determines how the pixels on that layer affect the pixels in the layer below. In Normal mode, whatever is on that layer acts as a completely new image and blocks the layer below. The other blend modes are grouped in the list by the way they interact with the layer below, for example, darkening or lightening the image. Click the Opacity arrow (
There Is More!
You can click the More
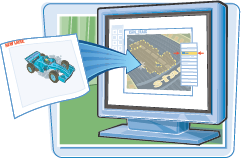
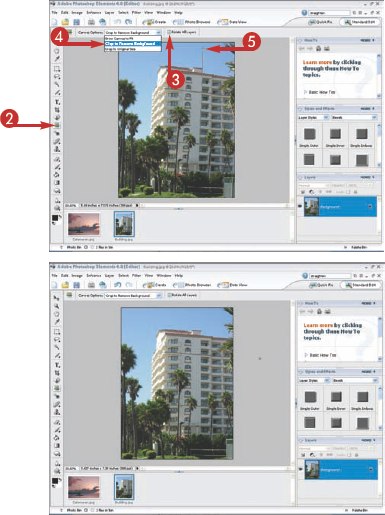
You may have photos where the horizon is not quite level or a vertical building is leaning over. Photoshop Elements 4 includes a new Straighten tool to help you align the horizon or adjust a vertical line. You can even have Elements automatically remove the blank background areas that are created when straightening an image.
Straighten a Crooked Photo
STRAIGHTEN A HORIZON
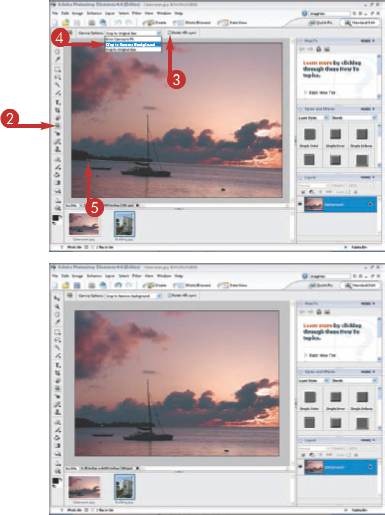
The photo is straightened and cropped to remove any blank background.
STRAIGHTEN A VERTICAL BUILDING
The photo is straightened and cropped to remove any blank background.
Tip
Are there any other choices for the background?
Yes. When you click the Canvas Options
How do I make my photo open on a gray background as in the examples?
You can view your photo as a photo file with a gray background by clicking the Maximize Mode icon (
You can use Photoshop Element's Crop tool to add a white or colored matte to any photo. You can set the background color in the toolbar to any color for your matte and then use the Crop tool to create a reverse crop and make the canvas larger than the original photo. This technique is useful to visually preview your photo on a colored background or for off-setting the photo for a greeting card.
Add a Quick Colored Matte
This leaves a wide gray border around the photo.
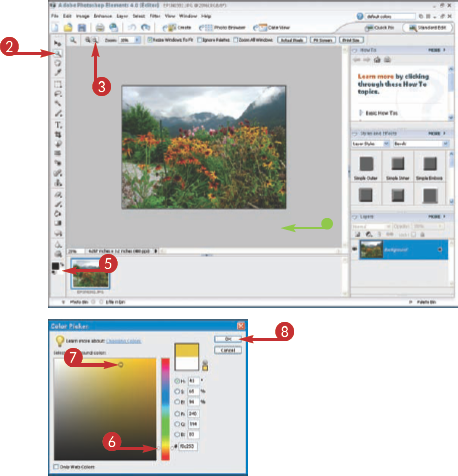
The Color Picker appears.
The background color is set to the new color.
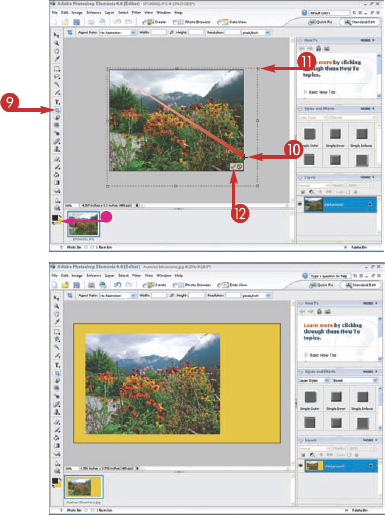
The photo appears on a large colored matte.
Note
You determine the proportions of the colored matte visually when you drag the corners of the Crop marquee. To create a matte with exact proportions, see the task "Frame a Photo with a Background Layer," later in this chapter.
Tip
Is there a quick way to make a white matte?
Yes. Instead of clicking the Background color to open the Color Picker, click the small default color boxes (

Can I make a black matte?
Yes. First click the small default color boxes (
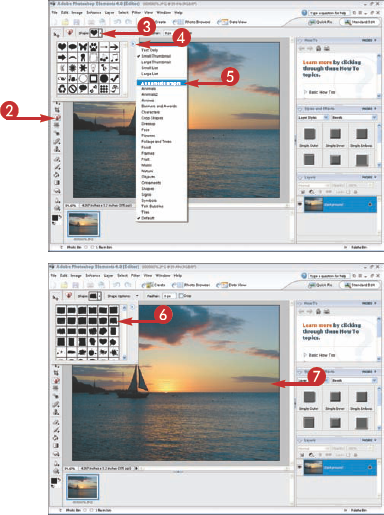
Photoshop Elements includes a Cookie Cutter tool to help you crop your photos into unique shapes. Although the default set of shapes is limited, the application includes more than 500 shapes, which you can load into the Custom Shape Picker. Turn your photos into various shapes or give them a custom brushed edge by cropping them with the Cookie Cutter.
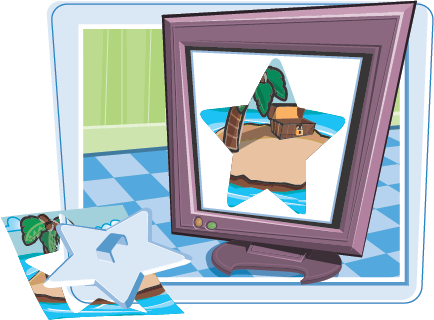
Make a Creative Crop
LOAD SHAPES INTO THE CUSTOM SHAPE PICKER
The Custom Shape Picker opens.
You can choose a shape from what is visible in the Picker.
Elements loads additional shapes into the Custom Shape Picker.
CROP THE PHOTO
The photo is cut out to fit the shape on a transparent background.
You can click and drag the handles to resize the shape to better fit the photo.
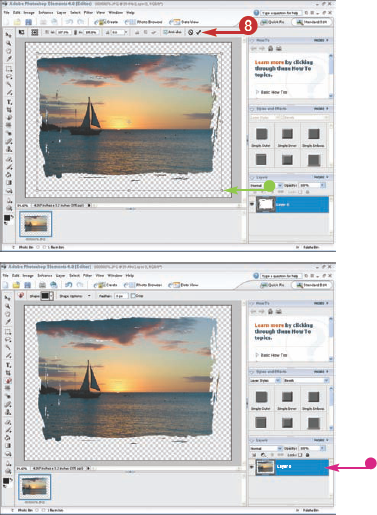
The photo is cropped to the unique shape.
The Background layer is automatically changed to Layer 0.
You can edit and adjust a specific area of a photo, such as a person's teeth or the petals of a flower, by making a selection. You can use the new Magic Selection Brush tool to scribble on an area. Photoshop Elements then makes the selection based on the color and texture of the scribbled area. You can add to or remove areas from the selection using the Indicate Foreground and Indicate Background brushes in the Options bar.
Select an Area of a Photo
Note
An explanation dialog box appears. Click OK to close the dialog box or click Don't show again (
Note
A red scribble appears temporarily on the photo.
A selection border appears around the area.

A selection border only appears around the desired area.
Tip
Are there other ways to make selections?
Yes. You can use the Rectangular Marquee tool (
Can I save a selection to make more changes?
Yes. After your selection has a selection border, click Select and then Save Selection. The Save Selection dialog box appears. Type a name for the new selection in the Name box, make sure the

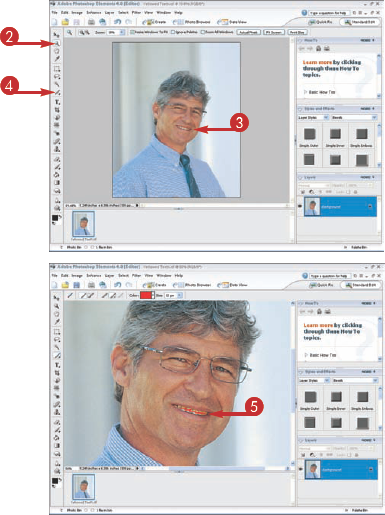
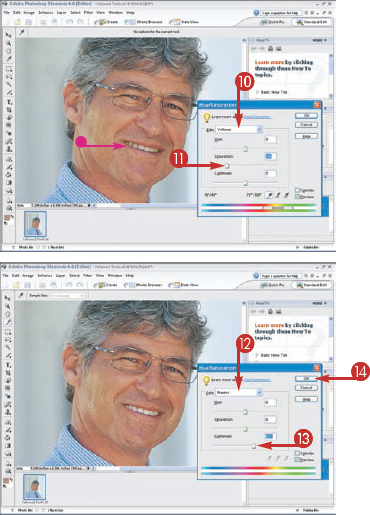
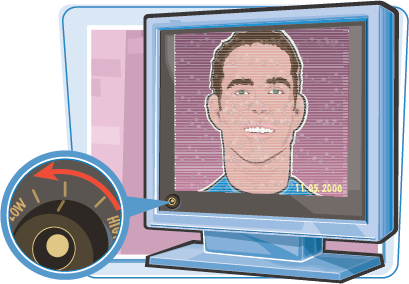
You can quickly improve any portrait photo by lightening the teeth of a smiling subject. This three-step technique involves making a selection, removing the yellow, and lightening the teeth. Be careful to not make the teeth too white and the enhancement unrealistic.
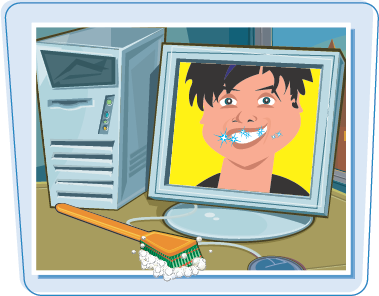
Whiten Teeth Digitally
The Feather Selection dialog box appears.
Note
Hiding the marquee makes it easier to judge the color as you adjust it.
The teeth remain selected, but the selection marquee is not visible.
Note
This is a totally visual technique. You should zoom out to view a large area of the photo before you make adjustments.

The Hue/Saturation dialog box appears.
Note
Move the dialog box, if necessary, to see the selected area.
The teeth will have a slight gray tone.
Tip
What does feathering the selection do?
Feathering a selection creates a soft transition between the selection and the surrounding area by blurring the edges. By softening the edges, the colors blend smoothly and the enhancement appears more natural. To feather the selection of teeth in a portrait, a feather of 1 to 2 pixels is generally sufficient.

To what do Hue, Saturation, and Lightness refer?
Hue is the actual color, such as red or green, and Saturation is the intensity or purity of the color. The Lightness slider controls the lightness or tonal range of the color and works with the other two sliders. If you change the Lightness slider without a selection, the tonal range of the entire photo is affected.

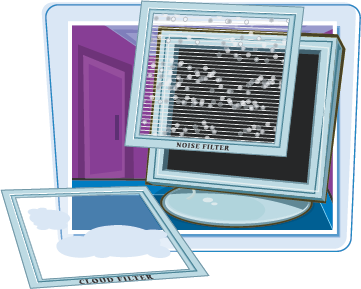
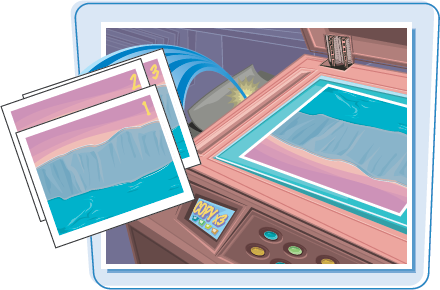
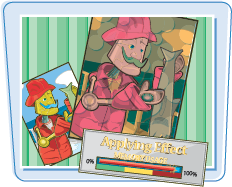
The numerous filters included in Photoshop Elements help you retouch or enhance your photos in different ways. Filters allow you to make specific improvements, such as reducing the noise in an image or changing the lighting, as well as making a totally new image out of the original photo. You can apply a filter to the entire photo or to a selection on a photo.
Use Photoshop Elements Filters on Separate Layers By applying a filter to a duplicate of the original Background layer, or to a selection placed on a separate layer, you can alter your photo and never alter the original. You can use a duplicate layer to make it easy to compare the effect on the photo by clicking the Visibility icon ( 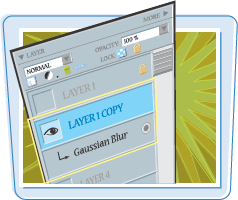 |
 Types of Photoshop Elements Filters Photoshop Elements includes a wide variety of filters grouped into various categories according to the effect that is created. Other software companies, such as nik multimedia, Inc., make filters that you can install in Photoshop Elements. After they are installed, the added filters appear at the bottom of the Filter menu. These third-party filters often make better improvements or help you make photo corrections more easily. | Adjustment Filters and Adjustment Layer Options Some filters can be applied as an Adjustment layer, a special layer that floats over the photo layer and alters the colors or tones of the image underneath. When you apply a filter as an Adjustment layer, you select it from the Layer menu rather than the Filter menu. Unlike a filter from the Filter menu, which only affects one layer, a filter applied as an Adjustment layer affects all the layers below it in the Layers palette. 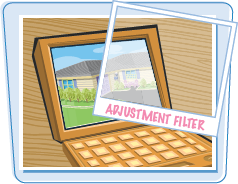 |
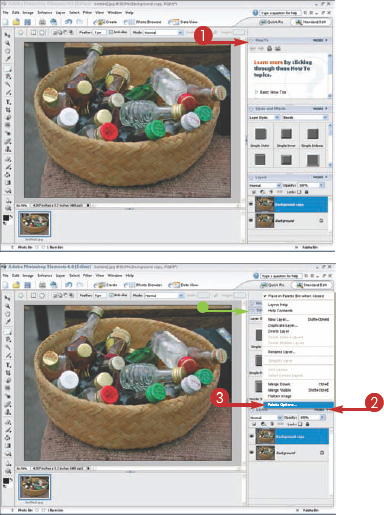
Duplicating the Background layer is a safety step in correcting digital photos. By applying filters or making other alterations to the Background copy layer, your original photo remains untouched. You can easily compare the before and after images by clicking the Visibility icon on and off next to the Background copy layer. You can also quickly delete the Background copy layer to revert to the original photo.
Duplicate the Background Layer
The Duplicate Layer dialog box appears.
You can accept the default duplicate layer name, Background copy, or you can type another name.
The Background copy layer is placed above the Background layer in the Layers palette.
You can click and drag the Background layer over the Create a New Layer icon (

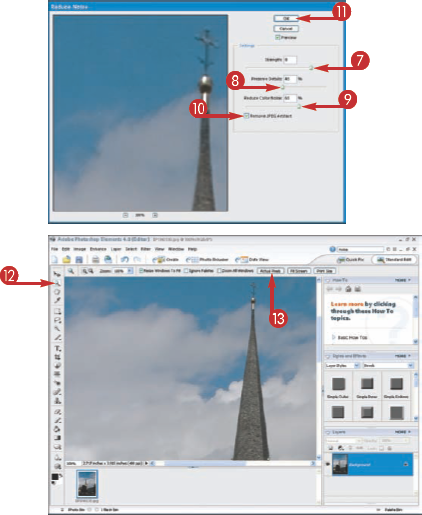
Many photos show stray pixels of color or appear grainy. Such digital noise is most apparent in photos shot without a flash in low light conditions or at high ISO settings. (See Chapter 4 for more about ISO settings.) You can reduce the amount of such unwanted artifacts by applying the Reduce Noise filter in Photoshop Elements.
Reduce Digital Noise
The Reduce Noise dialog box appears.
Note
Because noise is more visible in large areas of color such as the sky, you need to view some of the detail areas, such as the steeple in the example, as you apply the filter to make sure you do not blur edges or lose details in the photo.

The filter is applied to the Background copy layer.
The photo shows fewer artifacts and smoother areas of color.
Tip
What does the Remove JPEG Artifact check box do?
JPEG artifacts are lighter colored pixels or halos that are created every time an image is saved as a JPEG. Selecting Remove JPEG Artifact generally lessens these undesirable blocks and halos in the photo.

Why is there more noise in the photo when I click in the Preview window to move the image around?
Clicking and holding the mouse in the Preview window shows the photo before the noise filter is applied. This is a quick way to see the before and after views, even before you apply the filter.

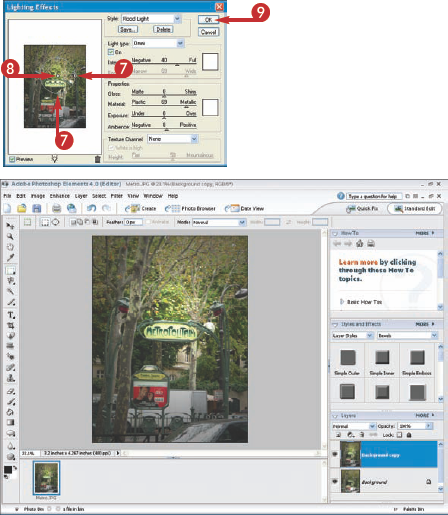
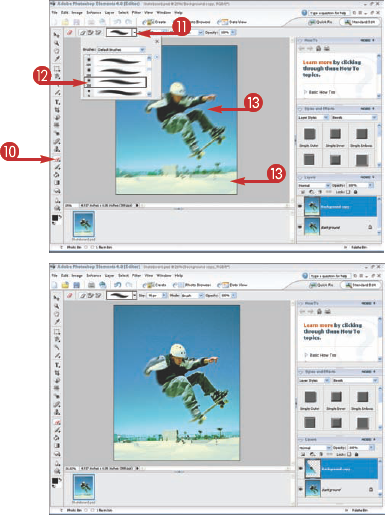
You can change the overall lighting in the photo and even simulate studio lighting after the photo has been shot using the Lighting Effects filter included in Photoshop Elements. You can focus attention on a specific area of the image or concentrate on the main subject, or completely change the mood of the photo with the type of lighting effect you apply.
The Lighting Effects dialog box appears.
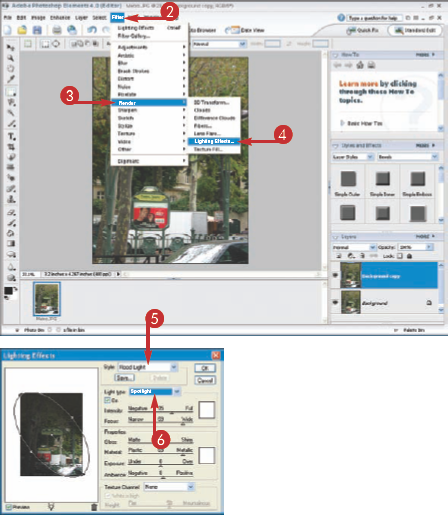
Photoshop Elements applies the lighting effect to the photo.
Tip
Can I save a special lighting style to apply it to multiple photos?
Yes. You can create a special lighting style using any sliders and options you want. To save the style, click Save in the Lighting Effects dialog box. In the dialog box that appears, type a name for the style and click OK. Your new lighting style appears in the Lighting Effects dialog box Style menu.
What do the Properties options do?
The sliders under the Properties section of the dialog box give you options to control how the light reflects from the surface of the photo using the Gloss slider or from the object on which the light is cast using the Material slider. You can also control how much light is applied using the Exposure slider and whether the new light source is pure or mixed with the ambient light with the Ambience slider.

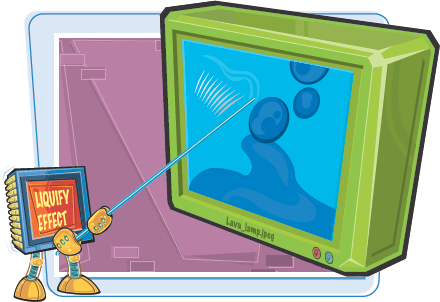
The Liquify filter in Photoshop Elements allows you to move pixels in the photo as if you were sculpting clay. You can push, pull, pucker, or bloat pixels and more. You can use this filter to correct shapes of objects and people, or to completely exaggerate items for effect.
Liquify a Photo for Effect
The Liquify dialog box appears.
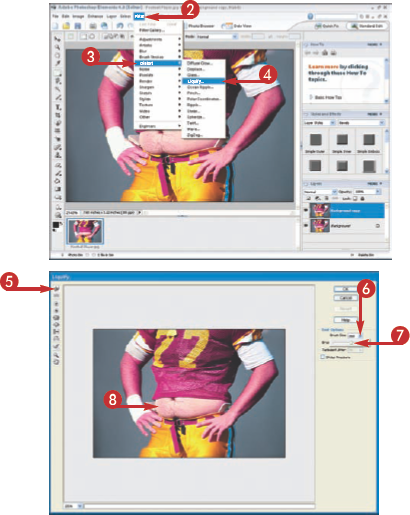
Photoshop Elements applies the changes to the photo.
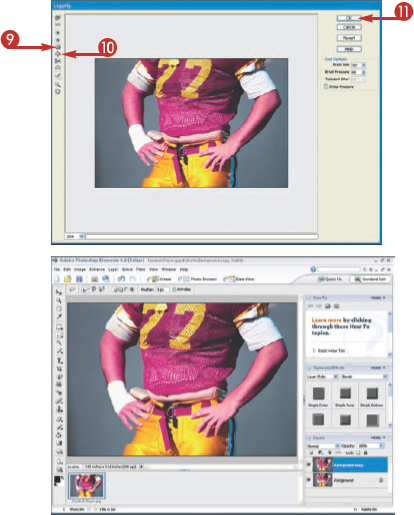
Tip
How do I determine the brush size?
The brush size depends on the area of the image you are adjusting. You want the brush size to be larger than the area you are moving to avoid a rippled appearance.
What if I liquify too much?
You can move pixels slowly back and more toward their original position by clicking the Reconstruct tool (
When you set an exposure time to take a photo of a moving object, or when you pan to take the photo, the objects in the photo appear to be moving because some areas are blurred. You can add this effect in Photoshop Elements using the Motion Blur filter and even control the direction and angle of the blur. By adding the motion blur to a duplicate layer, you can erase parts of that layer allowing the original image to show in areas that do not have motion.

The Motion Blur dialog box appears.
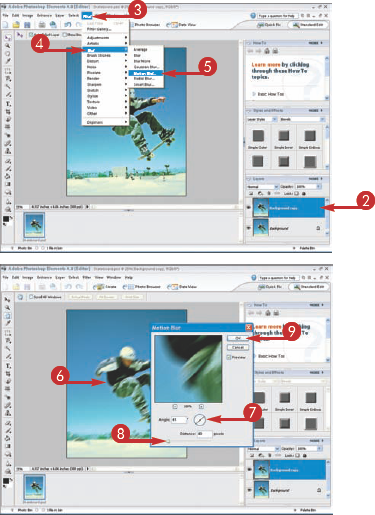
Photoshop Elements applies the motion blur to the entire photo layer.
Photoshop Elements erases those areas on the Background copy layer, allowing the unchanged parts of the original background photo to show through.
Tip
What is a large soft-edged brush?
You can select various types of brushes in the Brush preset list. The soft-edged brushes are the ones that show fuzzy edges in the thumbnail. You can use the soft-edged brushes when you want the parts of the photo to blend into one another smoothly.

When do I use the other types of blur filters?
Click Filter and then Blur for other blur filters. You can select the Gaussian Blur to produce a soft focus effect, the Radial Blur to simulate a rotating camera, and the Blur and Blur More filters to smooth any color changes or transitions in the photo. You can use the Smart Blur filter to precisely control the amount and distance of a camera blur and create depth of field digitally.

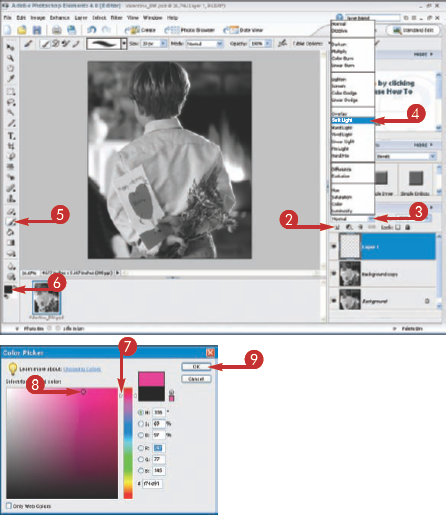
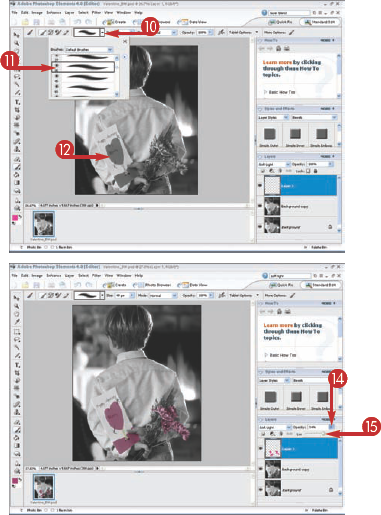
You can make any black-and-white photo appear hand-colored using a separate layer and the Soft Light layer Blending mode. You can select the colors for different areas and hand color the entire photo, or only color specific areas for effect.
Colorize a Black-and-White Photo
The Color Picker appears.
Note
Press
Note
Repeat Steps 10 and 11 to select a different brush size, if necessary.
Tip
What does the Soft Light Blending mode do?
The Layer Blending modes determine how the pixels on the top layer blend with the pixels in the layer below. The Soft Light Blending mode applies the new color to the gray tones in the black-and-white photo, without changing the lightness values of the pixels. The colors appear as a colored veil over the image.

Is there a faster way to change brush size?
Yes. With the Brush tool (

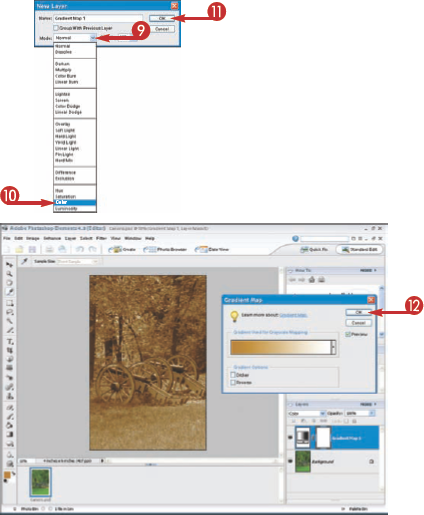
You can create an "old style" sepia-toned photo from any color or black-and-white image using Photoshop Elements. You can add an Adjustment layer with a brown color as the foreground color and change the Layer Blending mode to blend the sepia with the image on the layer below. You can even change the color of the sepia at any time to suit your taste.
Create a Sepia-Toned Photo
CHANGE THE FOREGROUND COLOR
The Color Picker appears.

The New Layer dialog box opens.
A Sepia tone Gradient Map Adjustment layer is applied to the image.
The Gradient Map dialog box opens.
Tip
Why use an Adjustment layer?
An Adjustment layer allows you to change colors and tones in an image without changing the original image. You can use multiple adjustment layers and delete any or all of them without affecting the original photo. You can also change the tonal and color adjustments any number of times without changing the original photo.
How do I choose a different color after the Adjustment layer is applied?
Depending on your photo and your personal preference, you can select a different shade for the sepia-toned photo, or change it to another color altogether, even after applying the Gradient Map. Double-click the Gradient Map thumbnail in the Layers palette. The Gradient Map dialog box appears. Click inside the gradient in the Gradient Map dialog box to bring up the Gradient Editor. Double-click the sepia Color Stop to open the Color Picker. Click another color in the color field and then click OK. Click OK to close the Gradient Editor, and again to close the Gradient Map dialog box.
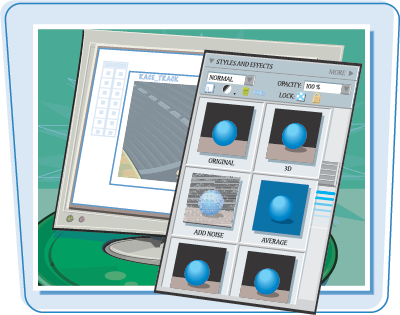
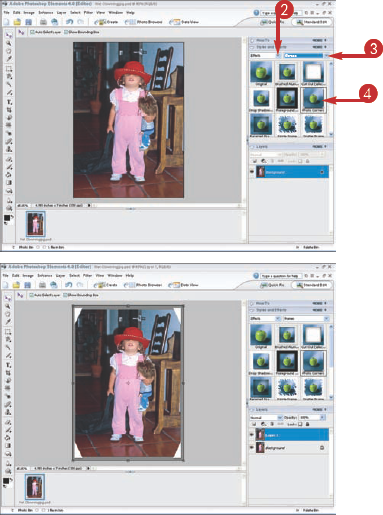
Photoshop Elements includes not only numerous filters to help you alter or enhance your photos, but it also has many effects and layer styles. These special effects and preconfigured layer styles are found in the Styles and Effects palette, so you can apply them with a click of the mouse.

What Are Layer Styles? Layer styles apply a predesigned image style to the entire layer. The style is nondestructive, meaning it acts as an adjustment layer and does not permanently change the pixels in the original image. Styles affect the layer's content. If you change what is on the layer, the style is applied to the new content.  |
 Different Types of Layer Styles Layer styles include Bevels, Shadows, and Glows, which give borders to the layer. Other layer styles, such as Glass Buttons, Patterns, and the Wow libraries, totally cover the entire layer. | Create Custom Styles Layer styles are cumulative. You can continue to click the Style thumbnails in the Styles and Effects palette to add one style onto another creating an original style. You can edit the attributes of certain styles by double-clicking the f icon (  |
You can remove all the layer styles applied to an individual layer by clicking the Layer menu and selecting Layer Style and then Clear Layer Style. However, you can also click and drag the f icon (
What Are Effects?
Effects are actually a series of steps that are programmed to give a specific look to the image. Although effects include filters, layer styles, and other functions, you only click and see the resulting effect. Some effects can only be applied to a selection on a layer or to type. Others require the layers to be flattened or combined as they can only work on the Background layer. Still other effects automatically create a duplicate layer and apply the effect to that layer. Effects include Frames, Image Effects, Text Effects, and Textures.

Apply and Remove Effects
Unlike layer styles, which are applied by clicking once on the thumbnail in the Styles and Effects palette, you can apply an effect by doubling-clicking its thumbnail. To remove an effect, click the Undo arrow (
Effects and Memory
Effects like filters use a lot of your computer's memory (RAM) to create and apply changes to photos. The larger the photo file you are working on, the more memory is required to apply effects and filters. To free up as much memory as possible so Photoshop Elements can function efficiently, you should exit from other applications. You can also make more memory available by clicking Edit, Clear, and then All to clear the undo history and Clipboard within Photoshop Elements.
In addition to the Layers palette, the Styles and Effects palette makes it easy to use all the image editing power of Photoshop Elements. From this palette, you can not only apply the various layer styles and effects, but also access almost all the filters listed in the Filters menu. Customizing the Palette view can make you much more productive.
Customize the Palette View
The Styles and Effects palette automatically moves up in the palette bin.
The Layers Palette Options dialog box appears. You can change several Layers palette settings in this dialog box.
The Layers palette thumbnails become smaller, so more layers can fit in the palette.
You can also click the Styles and Effects palette's More

Tip
How can I see all the different types of styles and effects?
Click the left
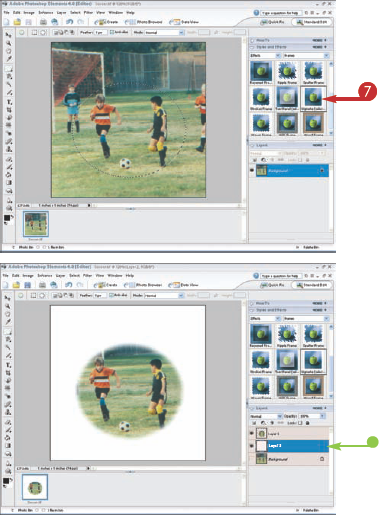
A vignette gives any photo a traditional look. You can easily add a vignette by first making a selection of the main focus of the photo and applying an effect from the Styles and Effects menu.
Add a Quick Vignette

Photoshop Elements creates a new white layer and places the vignette on the top layer.
Tip
Can I create a vignette with a different shape?
Yes. You can select a rectangle or square using the Rectangular Marquee tool (

How do I change the white background to a different color?
Click the white layer to highlight it. Click Edit and select Fill Layer. In the Fill Layer dialog box that appears, click the Use

Photoshop Elements includes a variety of photo frame styles in the Effects category of the Styles and Effects palette. Try applying digital photo corners to make any image look as though it came from a traditional photo album.
Photoshop Elements applies the photo corners to the photo on a new layer.
You can use the Image Effects library from the Effects category of the Styles and Effects palette to quickly turn an ordinary photo into a stylized drawing without any drawing skills.
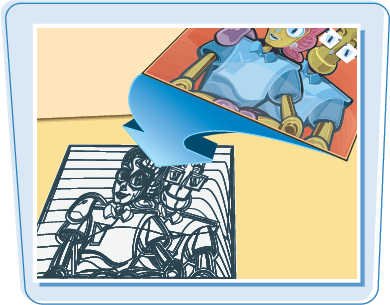
Turn a Photo into a Drawing
Photoshop Elements applies the image effect to the photo.

You can use layers and the Styles and Effects palette in Photoshop Elements to give any photo a finished look by placing it on a new background. Add drop shadows or bevels to create the illusion of a frame or to just add depth to the overall image.
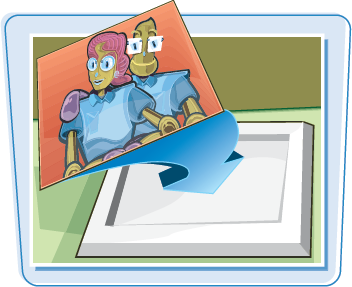
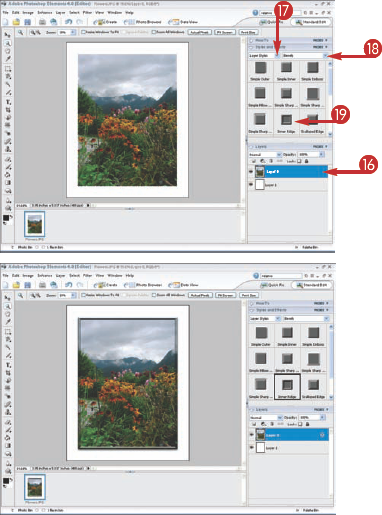
Frame a Photo with a Background Layer
CHANGE THE BACKGROUND LAYER TO A REGULAR LAYER
The New Layer dialog box appears.
You can accept the default layer name, Layer 0, or you can type another name.
The Background layer name changes to Layer 0.
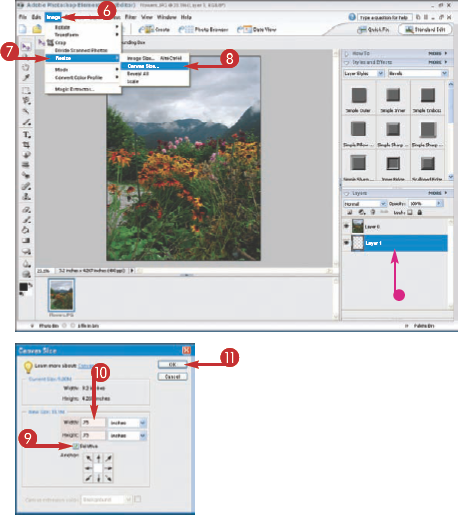
INCREASE THE CANVAS SIZE
Make sure the blank layer, Layer 1, is highlighted.
The Canvas Size dialog box appears.
Note
The number you type represents the increased area around the photo.
Tip
How can I add a simple black outline to the photo?
Press
Because the Photo layer is separate from the background, you can easily create many different looks with the same photo. You can have one version on a white background with a beveled edge, another on a colored background with a drop shadow, and even a version with a simple black line around the photo.
FILL THE NEW BACKGROUND WITH WHITE
The photo is now on a larger empty background.
The Fill Layer dialog box appears.
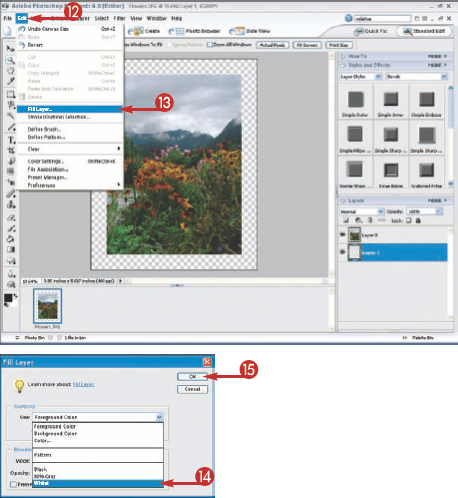
ADD A LAYER STYLE TO THE PHOTO
The new background called Layer 1 fills with white.
The bevel is applied to the photo making it stand out on the background.
Tip
How can I add a colored background?
In the Fill Layer dialog box, you can click the Use
Can I add a drop shadow and a bevel to the photo?
Yes. In the Styles and Effects palette, after you click
Photoshop Elements can help you hide blemishes easily. You can use the Spot Healing Brush to clear blemishes or even smooth out wrinkles and freckles with one click. Adjust the size of the brush for each imperfection and Elements magically makes them vanish with each click.
Remove Blemishes with One Click
Note
The brush size should be just slightly larger than the blemish.
Note
You can click and drag on slightly larger imperfections.

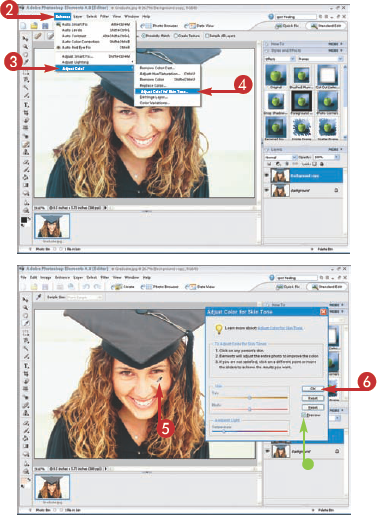
The new Skin Tone Adjustment in Photoshop Elements brings out more natural skin colors in photos of people. Although the changes are subtle and depend on the individual photo, most images can be quickly improved with enhanced skin tone.
The Adjust Color for Skin Tone dialog box appears.
Make sure that Preview is selected (

Photoshop Elements makes an automatic correction.
You can click and drag the Tan, Blush, or Temperature sliders to fine-tune the adjustment.