15. The End Is Tri
Story Summary
![]() Meet The Tri at Octan Tower
Meet The Tri at Octan Tower
![]() Visit Middle Earth and face The Tri once again
Visit Middle Earth and face The Tri once again
![]() Rescue three friends from inside The Tri
Rescue three friends from inside The Tri
![]() Discover the source of The Tri’s power
Discover the source of The Tri’s power
This chapter provides details on solving puzzles and facing The Tri in the LEGO Movie Story Mode adventure.
Destruction of the Dimensions
The heroes have arrived at Octan Tower, but for some reason the gravity is out of whack. The Tri arrives, landing on the side of the building. It shoots a blast at the trio and destroys part of the building. The heroes must make their way across a debris-filled section of the wall (Figure 15.1) in order to take on The Tri, who waits on the opposite side of the building.

The Tri activates its own version of the Elemental powers, and then you can place the heroes’ minifigs on the colored pads to give them powers. Change to Batman and carefully walk across the beam to the platform that has small fires on it. Fight any enemies that appear. If you destroy the various objects that appear, you can use them to build an orange handle on the bookcase. Then use Batman’s Grapple ability on it (B) to tip the bookshelves over and reveal a flowerpot.
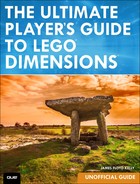
Change to Gandalf and destroy two flowerpots—one that is out in the open, and one that is revealed by Batman’s Grapple ability. Then use the bouncing pieces to build a grow pad. Move Gandalf’s minifig to the green (round) pad to give him the Earth element and hit the grow pad (LJ and X) with a blast of leaves. Three large vines grow (Figure 15.2), and the heroes can use them to cross over to the next section of the building.
Cross to the next section and fight off any enemies that appear. Destroy the Octan Energy container at the back-left section of the platform and use the parts to create a Batarang target. Hit the target with the Batarang (B) to open up a panel in the floor to the right and reveal a handle. Pull the handle (B) to turn off the electricity that is surrounding the stairs to the left.
Place Batman’s minifig on the red pad and move him up the stairs. The small fires will not hurt you.
To the far right of the walkway, hit the floating object on the right wall with your flames (LJ and X) until you see an orange handle. Lift Batman’s minifig from the red pad and place it down again to disable the Fire element. Use Batman’s Grapple ability on the handle (B) to reveal a secret LEGO minikit.
Lift Batman’s minifig again and place it down on the red pad to gain the Fire ability again. Move to the right of the thin platform and jump across the flames to the next section of the platform. Destroy the objects here and use the bouncing parts to build a device that launches a line across (Figure 15.3) to the section of building where The Tri is located. Jump up (with Batman), grab the line, and slide across to the other side. The Tri opens up a vortex that pulls in the heroes.

Worlds are starting to merge. The heroes find themselves in a mine, with The Tri taunting them in the distance from Sauron’s tower. Fight off any enemies that attack. There is a Game Save tool here, so use it if you’d like to save your progress.
Tip: And Another Hidden Minikit
Move to the right and fight off any enemies that appear. Use Batman’s Grapple ability on the orange handle to the left of the vertical wall to pull down another section of vertical wall that Wyldstyle can climb (A) to find a secret LEGO minikit.
The Tri’s strange power is still in effect, and it appears to be similar to the Scale keystone’s power. Move a minifig to the orange pad, and then move that shrunken character through the tiny door near the cage at the back of the mine.
Inside the cage is a handle you must push to raise a bucket—you’ll have to move that minifig to the round pad to return to normal size to push the handle. Change to Gandalf and use his Magic on the bucket. Bouncing parts appear. Once again, use Gandalf’s Magic to build a ladder that allows the heroes to move up. Jump on the clouds to get to the higher platform and fight off any enemies you find there.
Destroy any objects on this platform and use the bouncing parts to build a ladder. Take one character up the ladder, and then move that character’s minifig to the orange pad to shrink it. Move that character onto the orange section on the floor, and then move that same character’s minifig to the green pad to make it large so it can push up a section of the tube puzzle.
Change to a second character and drop down to the platform below. Move that character’s minifig to the orange pad to shrink it, move onto the orange section, and then move that same minifig to the green pad to make it large so it can push up the other missing section of the tube puzzle.
Change to the third character and shrink him/her on the orange pad and then enter the tube puzzle. Climb up and into the clear box on the left and push the button (B) to open the door. Then have the shrunken character enter the center clear box and push a button inside the box (that requires moving that character’s minifig to the round pad to return to normal size to push the button). The final door to the clear box, on the far right, opens. Before moving the shrunken character out of the middle clear box, change to the large character on the lower level and move that character up the ladder to the higher platform.
To the right of the upper platform is a large box. Move the large character (not the one still holding up a section of the tube puzzle) and pick up the box (B). After placing this first box in the first missing section, move to the right again (past the water wheel), until you find a second large box that you should pick up and place (LJ and X) in the second missing section. Move the shrunken character into the clear box, move that same character’s minifig to the white (round) pad to return to normal size, and pull the handle (B).
A door opens beneath the tube puzzle, revealing an accelerator switch. Drive the Batmobile onto the switch to start the water wheel spinning.
Move a character onto one of the small sections of the water wheel. Being careful not to fall off, wait until the water wheel has spun and your character sees a walkway on the opposite side. Jump over (A) and run all the way to the far right and fight any enemies that appear.
Tip: And Yet Another Minikit
Move Gandalf’s minifig to the white (round) pad to use his Illuminate power to light up the cave to reveal a secret LEGO piece.
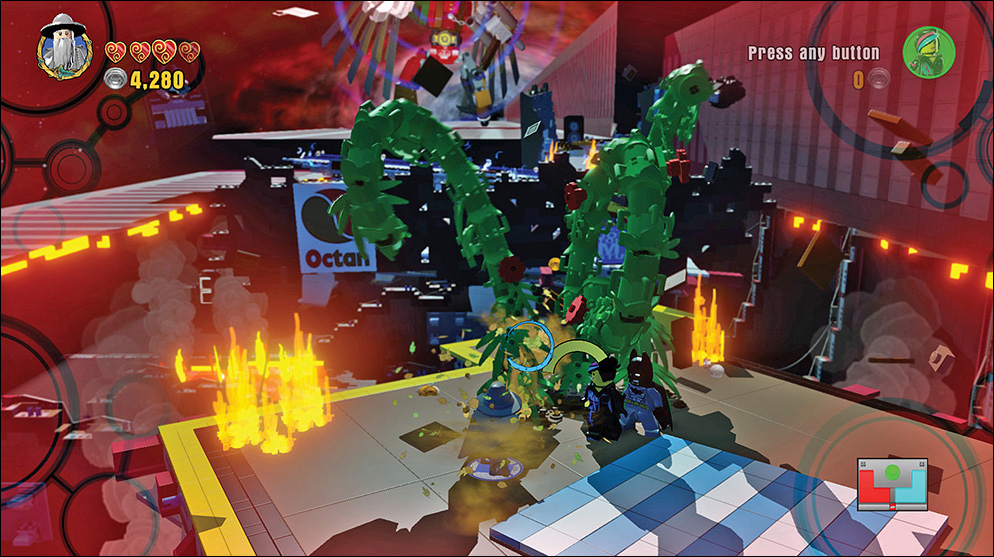
Against the back wall is a wooden elevator. Move a character onto the wooden section to lift the elevator and reveal a new room (Figure 15.4). With The Tri watching from high above, defeat any enemies that appear.
Explore this area carefully. To the left is one of three pieces of the puzzle map solution to a Chroma puzzle. Make note of the color and which pad it shows. Use Gandalf’s Magic (B) to rotate the crank and raise up the blue pad used for an upcoming Chroma puzzle.
Beneath the caged skeleton are some bouncing parts. Use them to build an orange handle on the bottom of the cage. Then use Batman’s Grapple ability on the crank (B) to reveal the red pad. Look behind the red pad to find the second piece of the Chroma puzzle map solution. Make a note of its color and which pad it shows (left, right, or round).
Change to Wyldstyle and move her onto the far-right purple target. Use LJ and A to jump up to the top of the platform to reveal the third piece of the puzzle map solution as well as the yellow pad.
When you solve the Chroma puzzle, a vortex appears at the top of the stairs, and once again, the heroes are pulled in.
Note: What Is The LEGO Movie?
The LEGO Movie, released in 2014 (with a sequel scheduled for 2018), introduced a number of new characters, including Wyldstyle and the bad guy Lord Business (seen in The Simpsons Story Mode adventure). In the movie, the hero, Emmet, discovers that the world he knows comes from the imagination of a young boy in “the real world.” You can learn more about the movie at https://en.wikipedia.org/wiki/The_Lego_Movie.
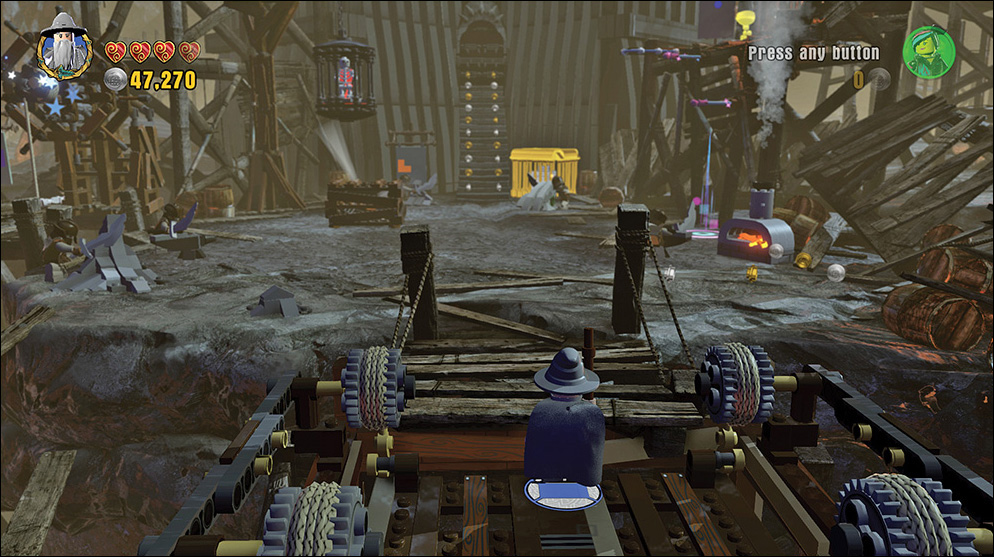
Not-So-Nice Tri
High in the sky of Gotham are two vortices. LEGO parts from each vortex fly into the other. The heroes find themselves on the roof of a large skyscraper.
Move toward the middle of the skyscraper, and The Tri falls from a vortex and traps itself in the roof. When The Tri swings its sword, press A to jump and avoid it. Also watch for its freeze beam (shooting from Robin’s eyes), which traces a path on the roof and freezes you like an ice cube.
Fight off enemies as they appear from numerous vortices that open. As objects fall to the left side of the building, destroy them. Use the bouncing parts to build a boost pad (Figure 15.5).
Drive the Batmobile onto the boost pad, and it blasts through the chest of The Tri and into a room with three boxes on the back wall protected by energy shields. Metalbeard is trapped in a strange energy cage to the far right. Near Metalbeard, examine the machine trapping him to find a Chroma puzzle map solution.
Change to Gandalf and use his Magic on the object on the back wall to reveal a Batarang target. Hit it with Batman’s Batarang to reveal a red pad (for a Chroma puzzle) in the right side box. Each time you hit the Batarang target, one of the energy shields drops and gives you access to a different Chroma pad.
At the far left side of the back wall, destroy the two objects there and use the bouncing parts to build an orange handle for Batman to pull with his Grapple ability (B). When the vertical wall appears and while the energy shield is down, have Wyldstyle climb (LJ and A) to the top and access the yellow pad.
Solve the Chroma puzzle, and a handle appears near Metalbeard’s energy cage. Pull the handle (B) to free Metalbeard, who is then pulled into a vortex and taken back to the Gateway on Vorton.
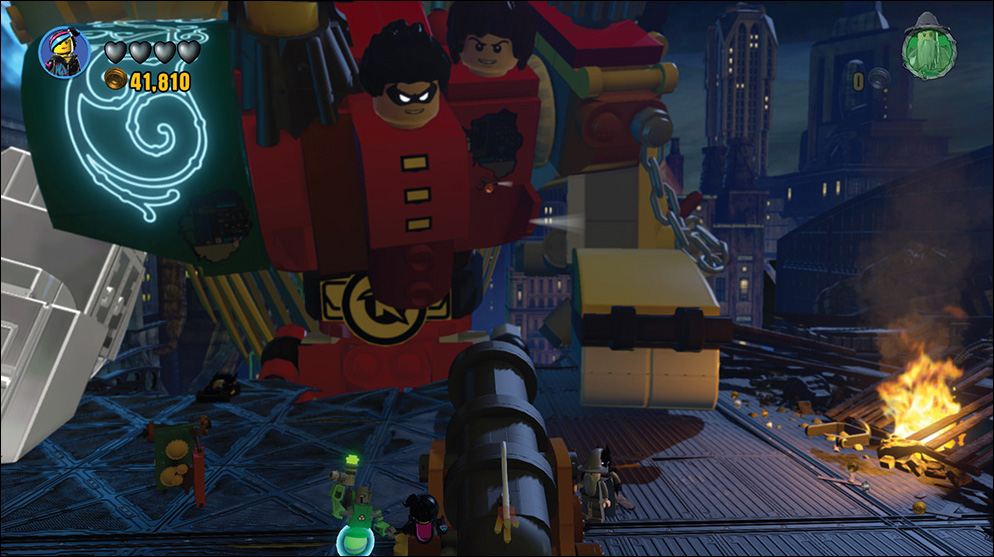
Move a character through the opening on the left side of the room to return to the rooftop. The Tri is angry, and after a few enemies attack, it slam its fist down and creates a pile of rubble. Change to Wyldstyle and move her to the purple target so she can use her Master Builder ability to build a giant cannon (Figure 15.6). Move to the cannon, press Y to jump on it, and use the LJ to aim it at a spot just beneath Frodo’s head to reveal an orange handle.
Change to Batman and use his Grapple ability on the orange handle (LJ and X) to pull him up and into a new room inside The Tri. There is a huge tube puzzle here to solve. Note that Frodo is being held prisoner inside another energy cage to the far right of the room.
Starting on the rear-left wall, use Batman’s Grapple tool (B) on the orange handle high above to release a large box. Change to Gandalf and use his Magic high above the center of the tube puzzle to release a second large box. Change to Wyldstyle and use her Relic Scanner to the far right of the tube puzzle to locate another orange handle for Batman to pull (B) that releases a third large box.
Move a minifig to the green pad to make this character large. Place the three large boxes in the three missing spaces (orange squares) on the back wall. Use B to pick up a box and LJ and X to place it. Look carefully at the boxes and notice the orange lines on them. Each box works only in one particular location. The box with the two lines running horizontally must go in the center orange section. The box with the two lines running vertically must go in the far-right missing orange section, and the box with the curved orange lines must go in the far-left missing orange section.
Move a minifig to the orange pad to shrink this character. Move the character into the tube puzzle, climb up to the first large box on the left, and pull the handle. A green light on a device in the center of the room lights up (Figure 15.7).

Move the minifigs for the two characters outside the tube puzzle to the orange pad to shrink them. Then move these two characters onto the small orange squares on the floor. Move these two minifigs to the green pad to make them large so they can push up the two missing sections of tube puzzle.
Now the shrunken character can move to the middle clear box. Pull the handle, and another green light appears on the strange device. Exit the center clear box and then move the shrunken character into the tube puzzle, using the small doors on the far right. In the top clear box, pull the handle until you see a third green light. Drop down to the clear box below and pull that handle until the fourth green light is lit. Then pull the handle (B) that appears.
Frodo is freed, and X-PO pulls him into a vortex and back to Vorton and the Gateway. Head back out the exit on the left to return to the rooftop.
Fight off another wave of enemies until The Tri drops some more debris in the center of the roof. Use those parts to build a new contraption aimed at The Tri. Hit the Batarang target on the back of the device to fire some projectiles just above The Tri’s belt. A hole appears, along with some boxes beneath the hole that you can destroy and then use to build a bridge. Run across the bridge and enter The Tri’s body again. (If you get really close, you can also try to jump across without the bridge, but it’s risky!)
Robin is trapped by an energy cage to the far right. Move Gandalf to the right and use his Magic on the computer against the back wall. When you see a gold wall, move a character to the red pad to activate the Fire element, and then use LJ and X to cut around the outline on the wall (Figure 15.8).

When you see a power coil, move a character to the blue pad to get the Electric element. Then hit the coil with electricity (LJ and X) to activate one of the blue lights on the machine in the center of the room.
Change to Wyldstyle and move her minifig to the red pad to give her the Fire element. She can now safely climb the stairs on the left side of the room. Move her to the purple target, and then jump up (A) to grab the blue handle and reveal another coil. Once again, give a character the Electric element and hit the coil with electricity to activate another blue light on the machine and raise a handle. Pull that handle to free Robin, who is then pulled into a vortex and returns safely to Vorton with Metalbeard and Frodo.
When a fire starts on the rear wall, move a character to the blue pad and put out the fire to reveal a passage deeper into The Tri’s robotic body and a video scene starts.
Batman spots a single block from Lord Vortech’s body, and hits it with his Batarang. Deep inside The Tri, the walls shake, the ground rumbles, and alarms are going off. The heroes jump into a vortex and join their friends back on Vorton, but they know defeating Lord Vortech is going to take a lot more help—so they open up vortices and pull in the Ghostbusters, Doctor Who, the Defender spaceship, GLaDOS (!!), and a repaired X-PO (thanks to The Doctor!). What will the heroes do next? They actually discuss it over coffee (see Figure 15.9)!

Up Next...
It’s all come down to this—the final battle with Lord Vortech. You’ll have to take all the skills you’ve mastered with the various keystone elements to defeat him, but you won’t be alone. Batman, Wyldstyle, and Gandalf will have some friends they’ve helped out on this adventure show up to provide some much needed assistance. Time for the showdown....