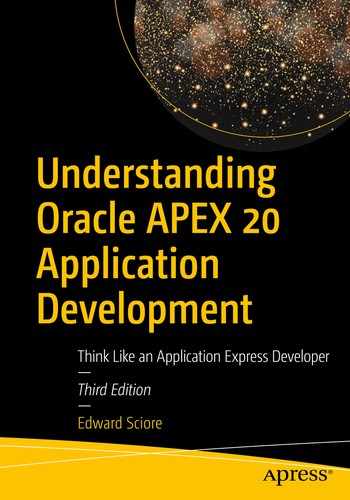
Congratulations! You are on the brink of learning how to build APEX web applications. But before you can begin, you need an APEX account. There are several ways to obtain an account: you can register for a free account through the apex.oracle.com website, you might be given an account to an APEX server at your job, or you can even install an APEX server yourself and create your own account to it.
APEX login screen
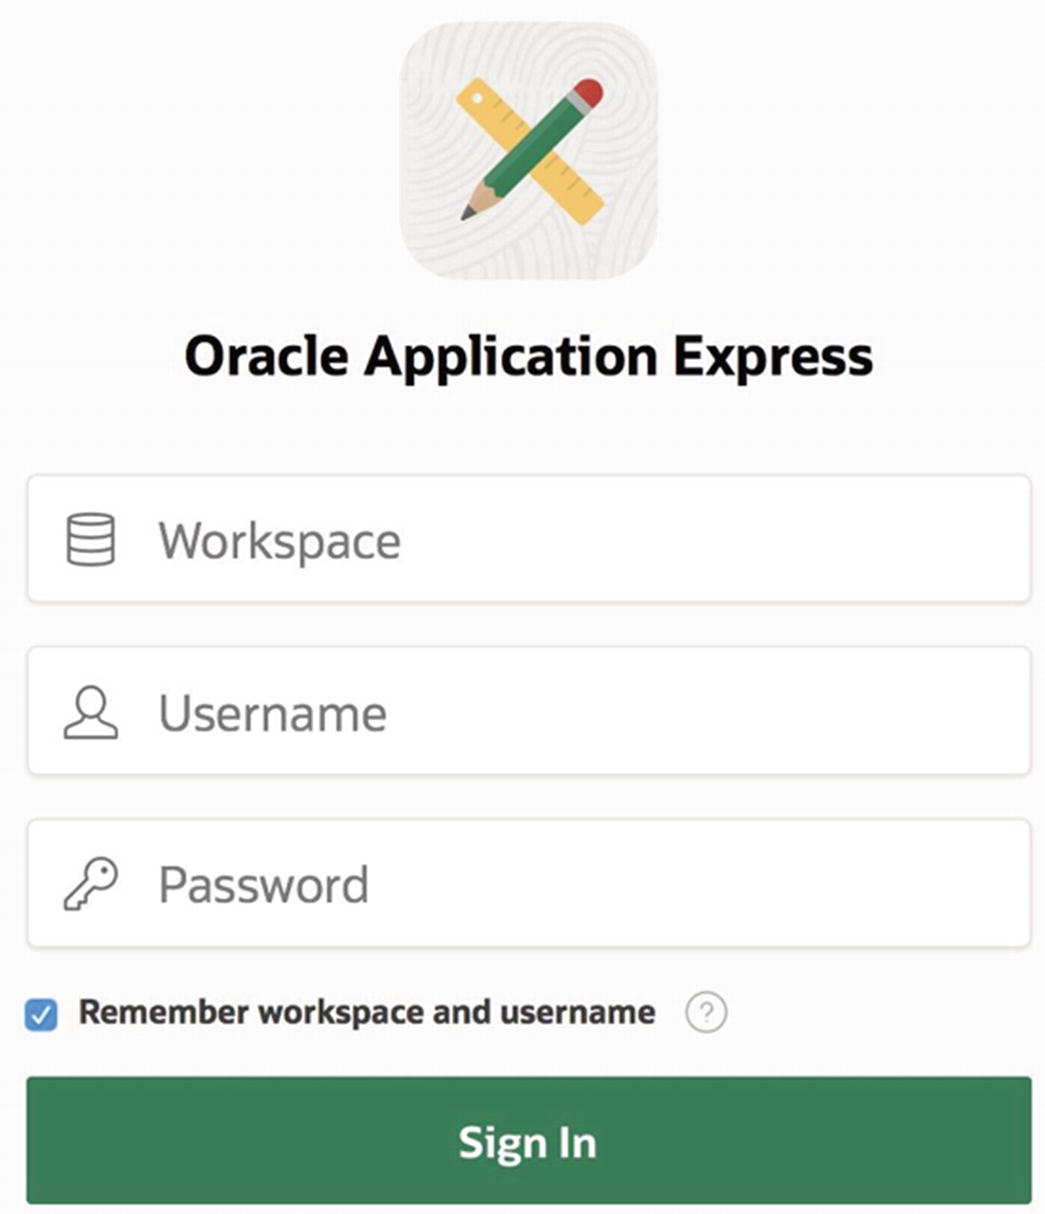
APEX home screen
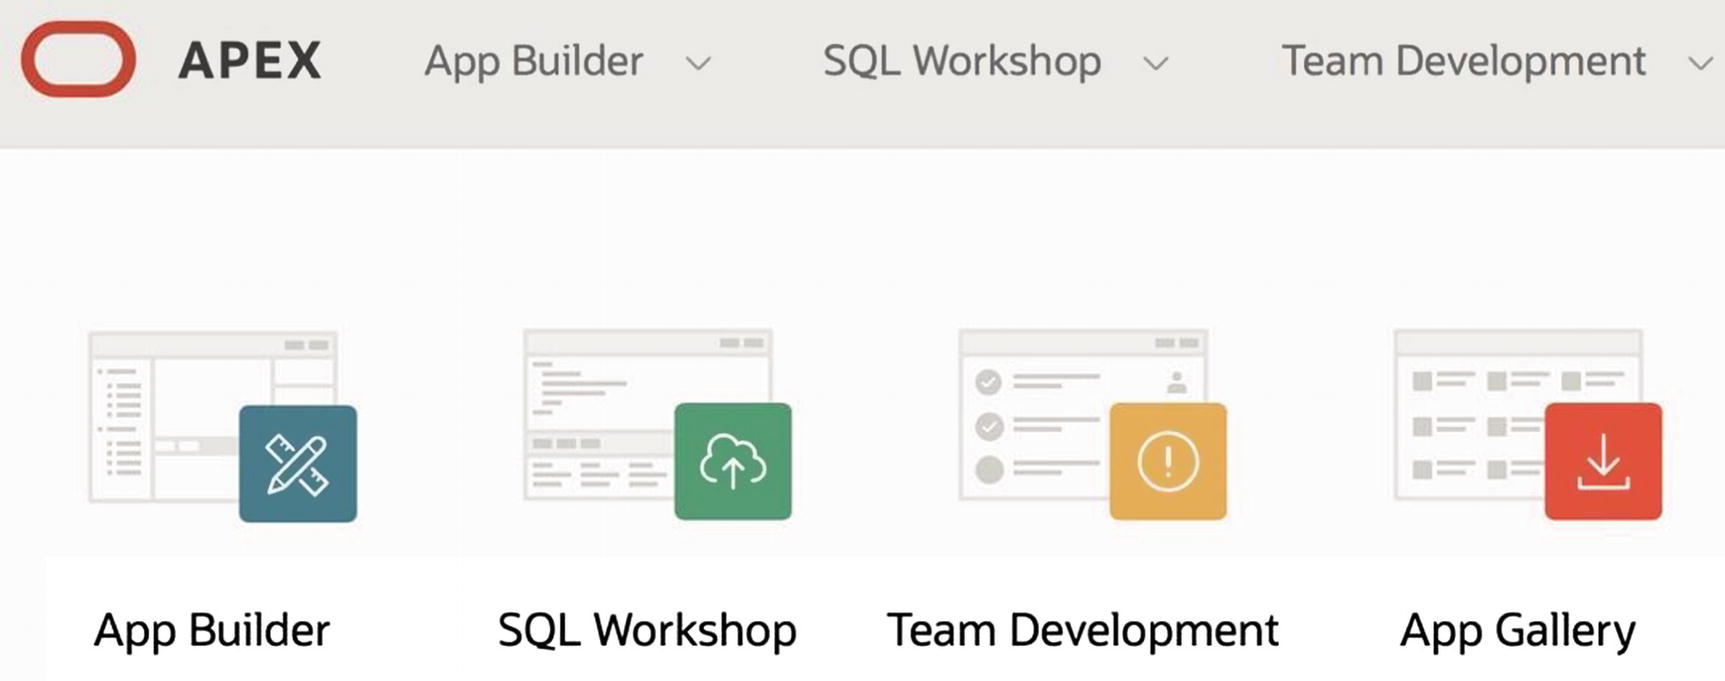
The APEX development environment contains several tools. Of primary importance is the App Builder tool, which will be covered in depth starting in Chapter 2. We begin here by looking at two tools in the APEX SQL Workshop: the object browser and the SQL command tool. These tools allow you to directly access the database—the object browser lets you manipulate a graphical user interface, and the SQL command tool lets you execute SQL statements and PL/SQL code blocks.
The object browser reminds you of the database objects and their structures. For example, a typical application involves several tables, each of which can have numerous columns. It is often impractical to memorize the details of each one. When building a page that references a table, you can use these tools to help refresh your memory.
To modify the structure of the database. For example, these tools are the easiest way to execute the alter table command given in the introduction.
To modify the contents of the database. For example, you might want to insert or modify records to test the behavior of a page with new or altered data, or to reset the database after testing the page.
To examine the contents of the database tables. After running a page, you can verify that the database updated correctly.
To debug an SQL statement or PL/SQL block. By executing code in the SQL commands tool first, you can verify that it produces the expected result before you actually assign it as the value of some property on a page.
SQL Workshop home screen
Downloading Tables
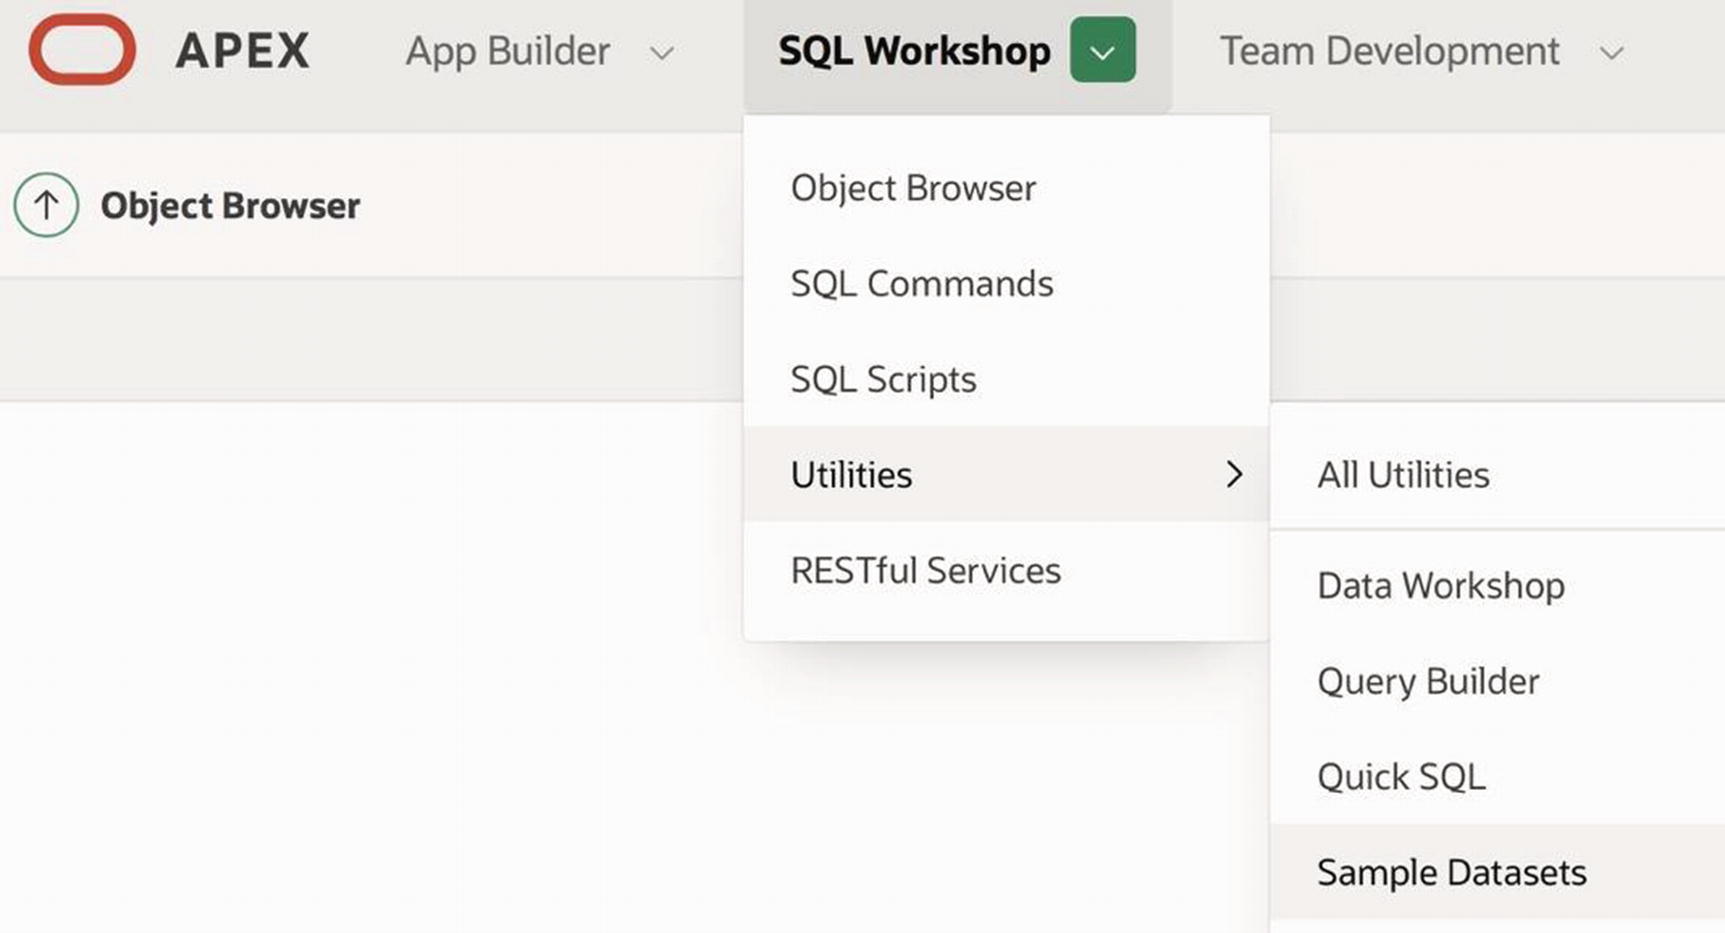
Getting to the sample datasets
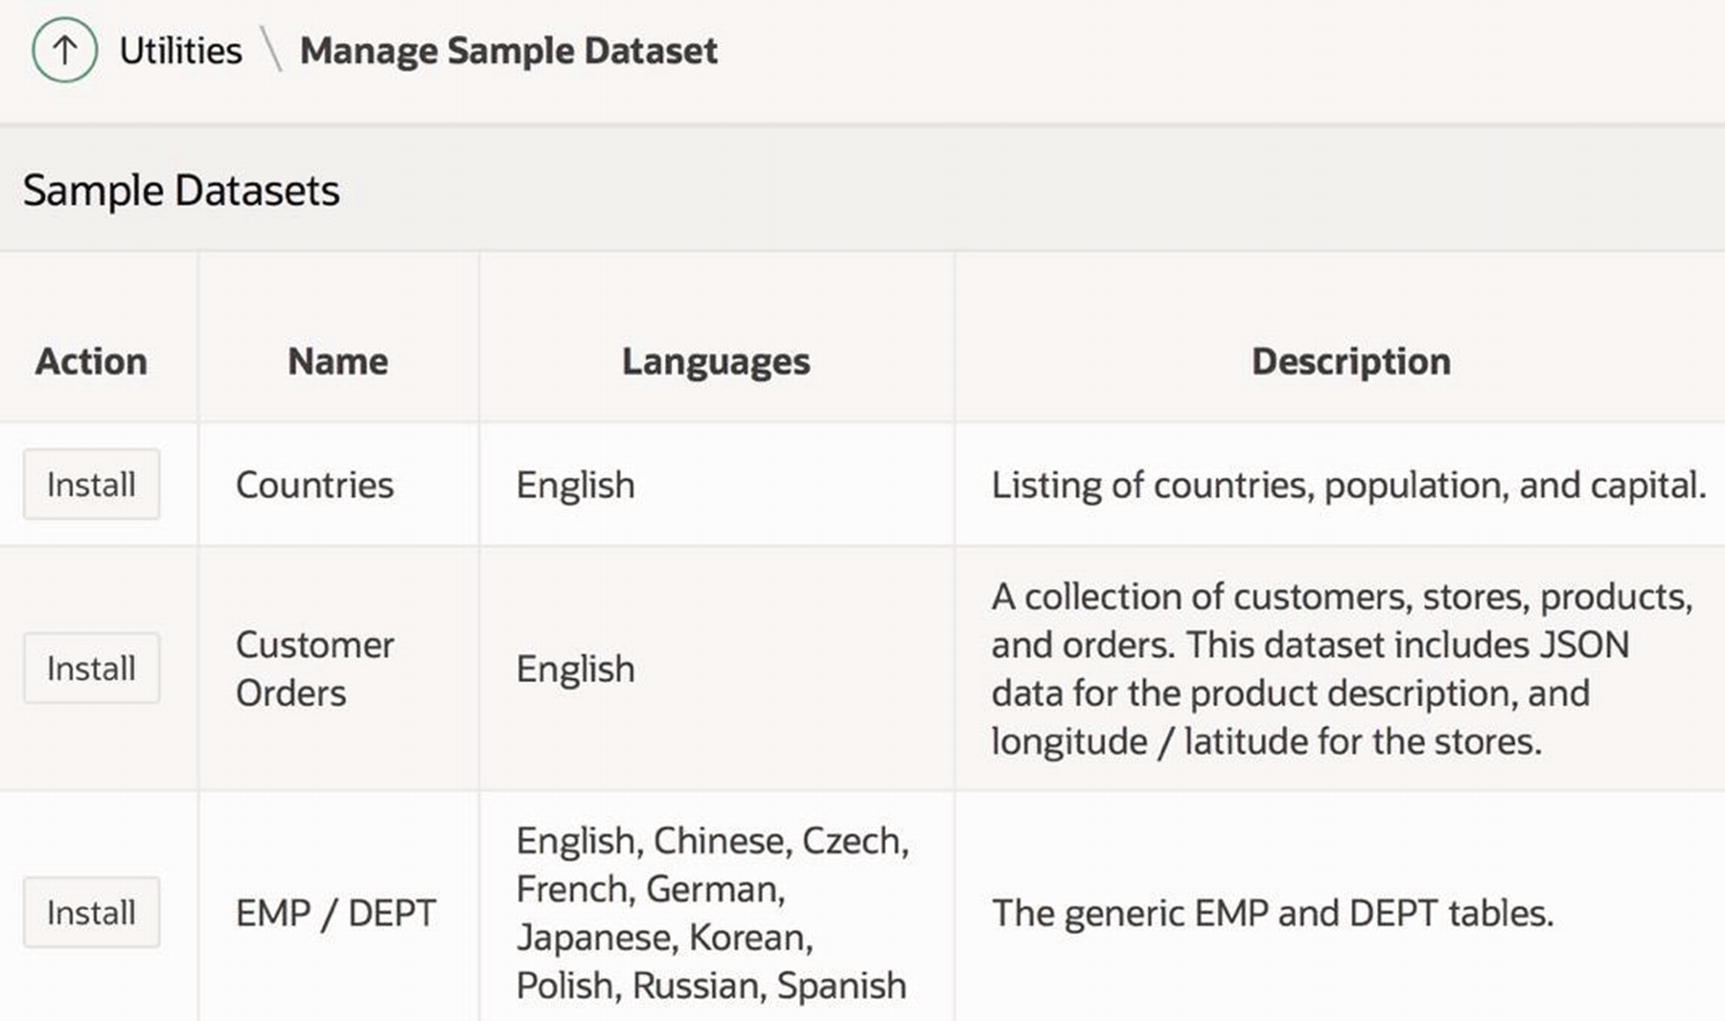
The Sample Datasets screen
To verify that the tables have been installed, return to the SQL Workshop home screen (as shown in Figure 1-3). Entries for EMP and DEPT should now appear in the Recently Created Tables region.
Object Browser
The object browser lets you interact with your tables quickly and easily. From it, you can examine the description of each table—that is, the types and properties of its columns and its constraints, indexes, and triggers—as well as its contents. You can also use the object browser to make simple changes to the description or contents of a table.
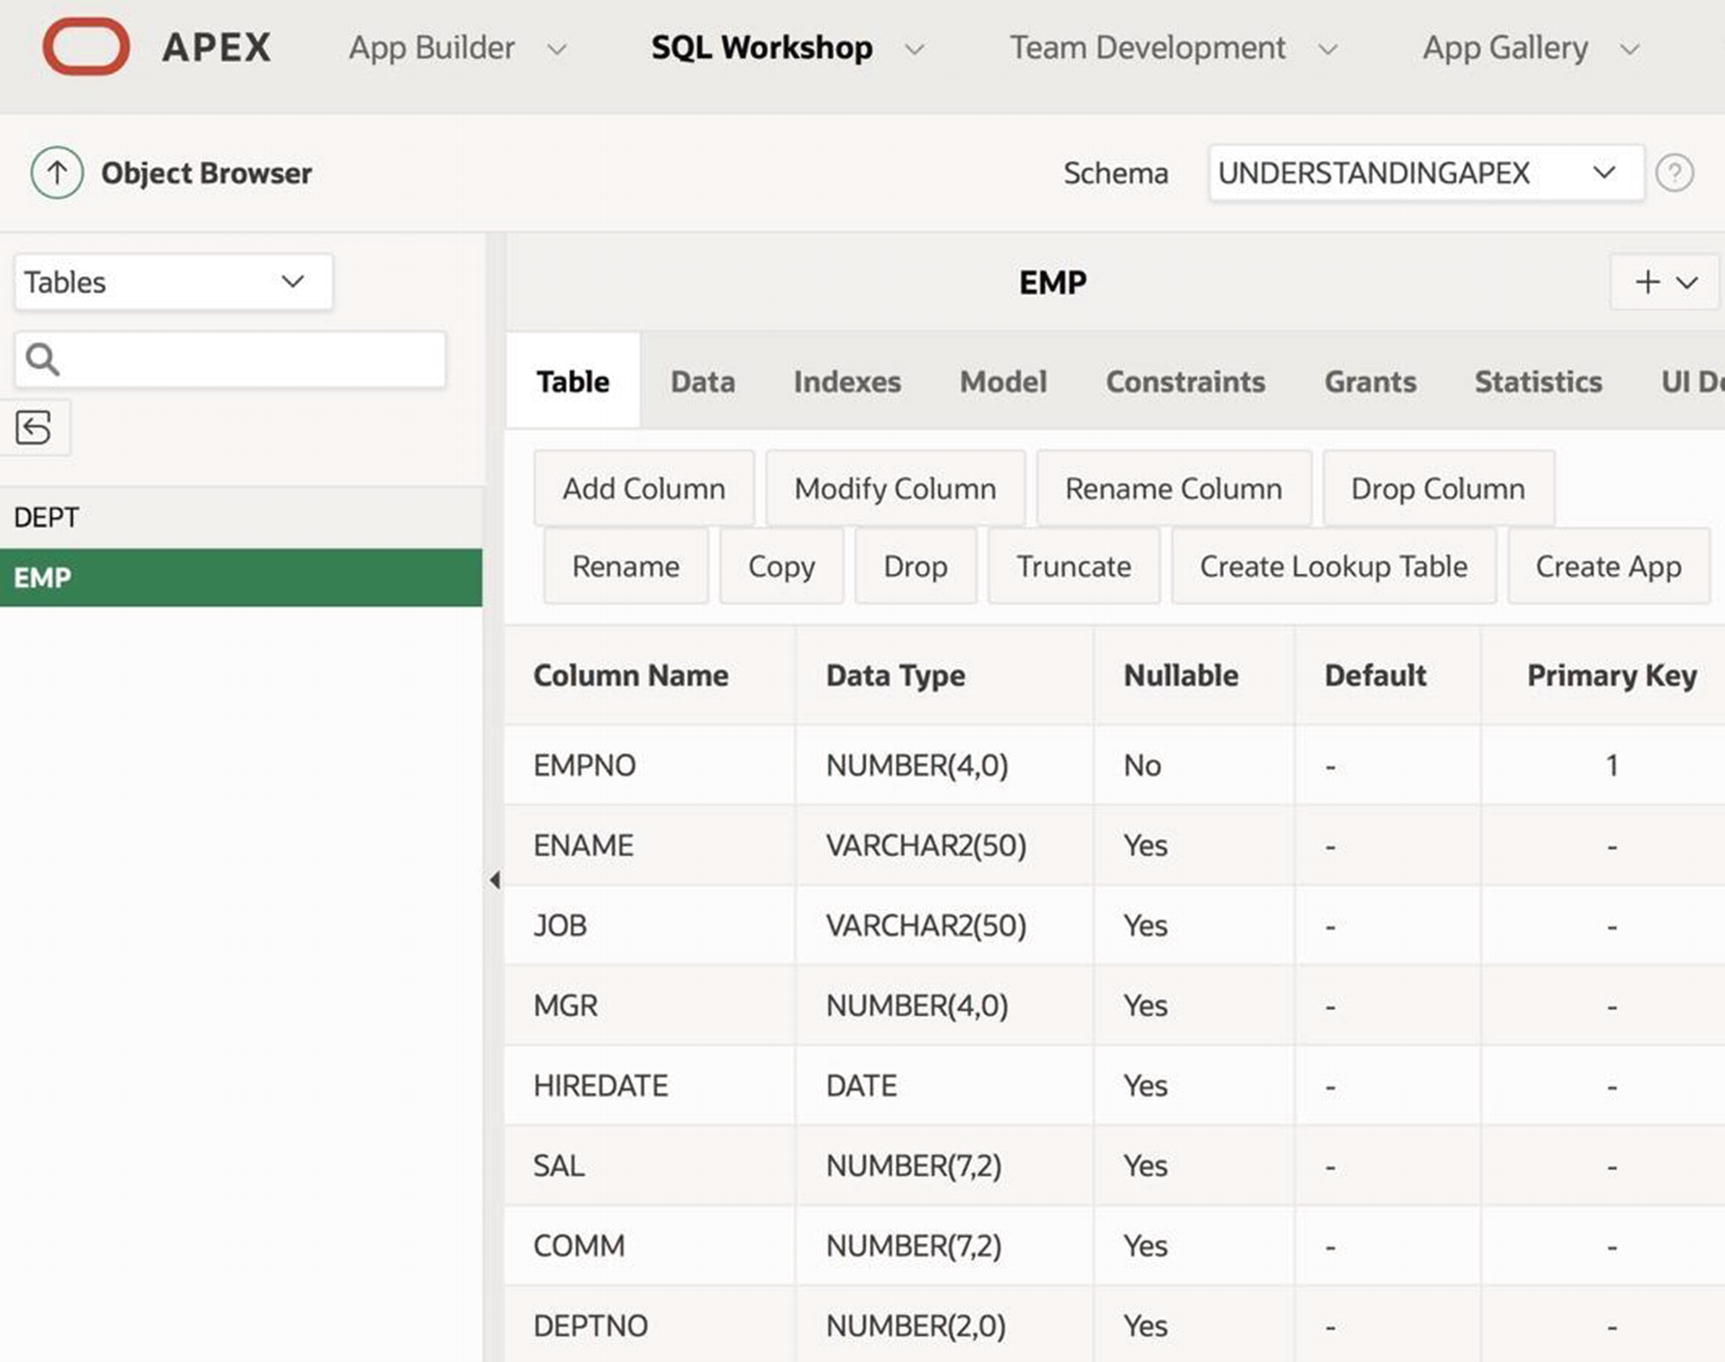
Viewing the EMP table from the object browser
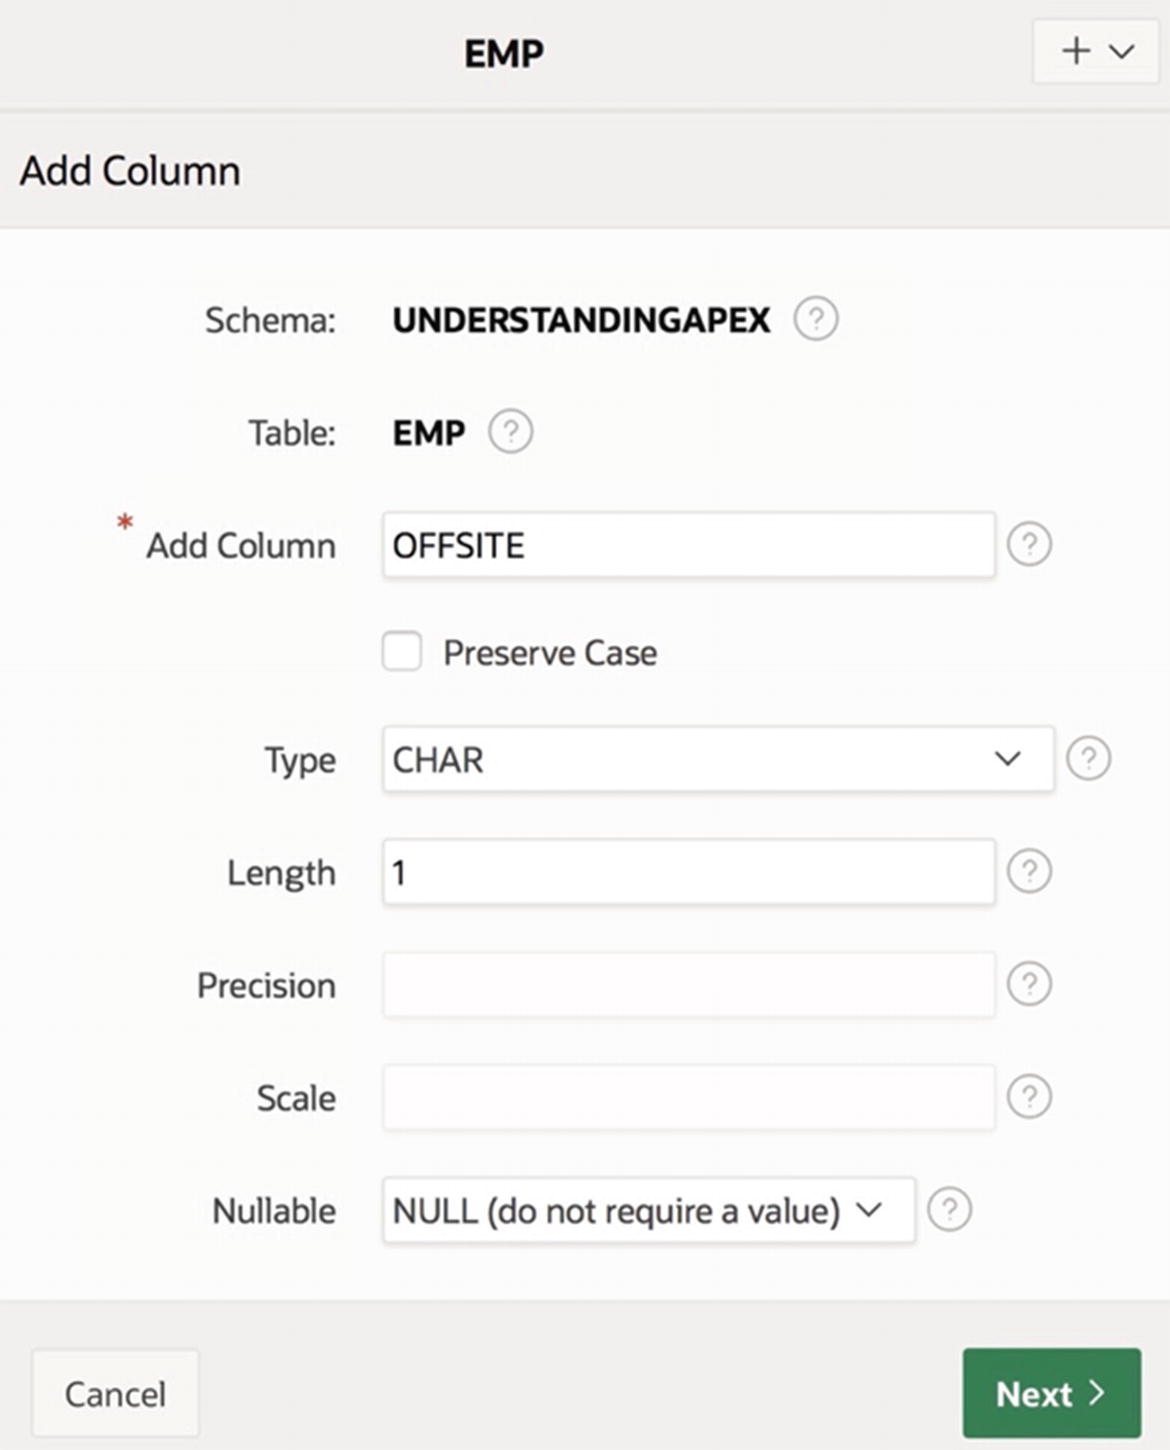
Adding a new column to EMP
Clicking the Next button takes you to a confirmation screen; from there, click Finish to complete the action. The EMP screen should now display the new column.
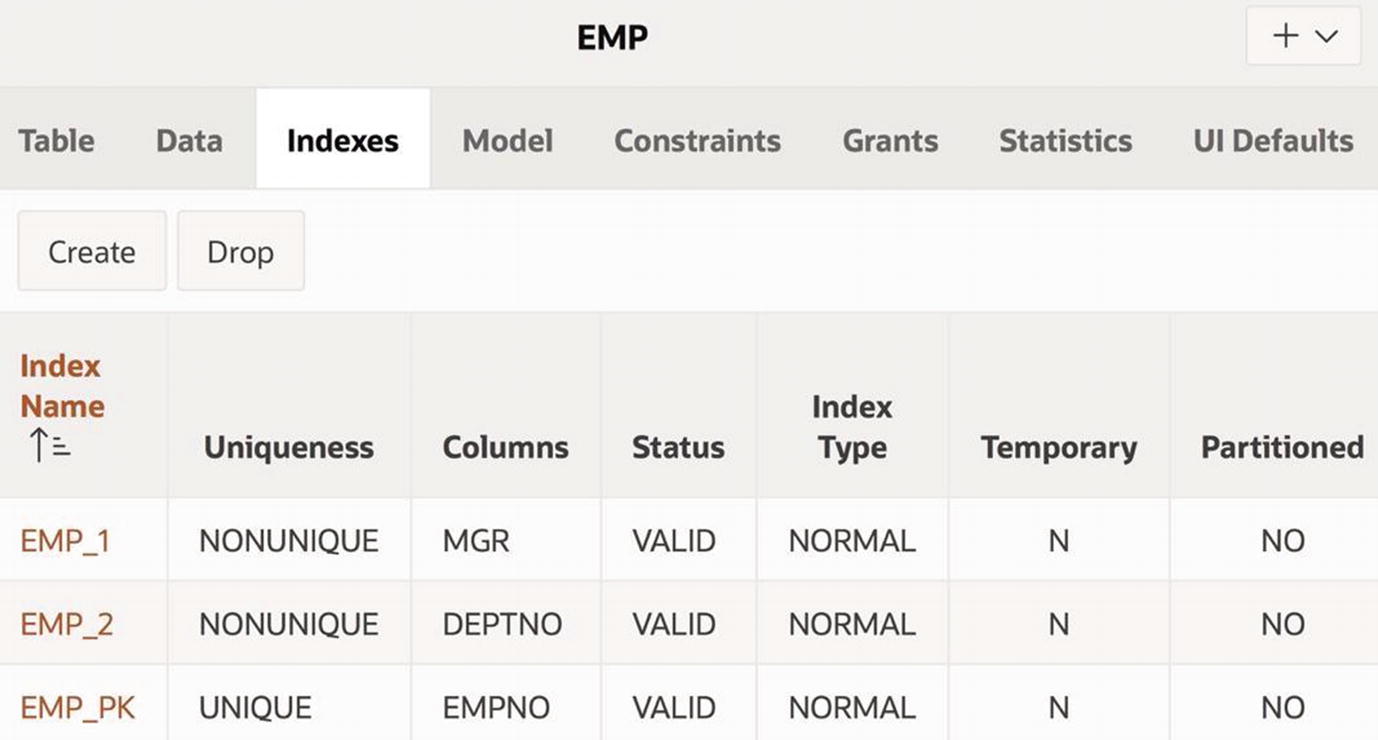
Browsing the indexes of EMP
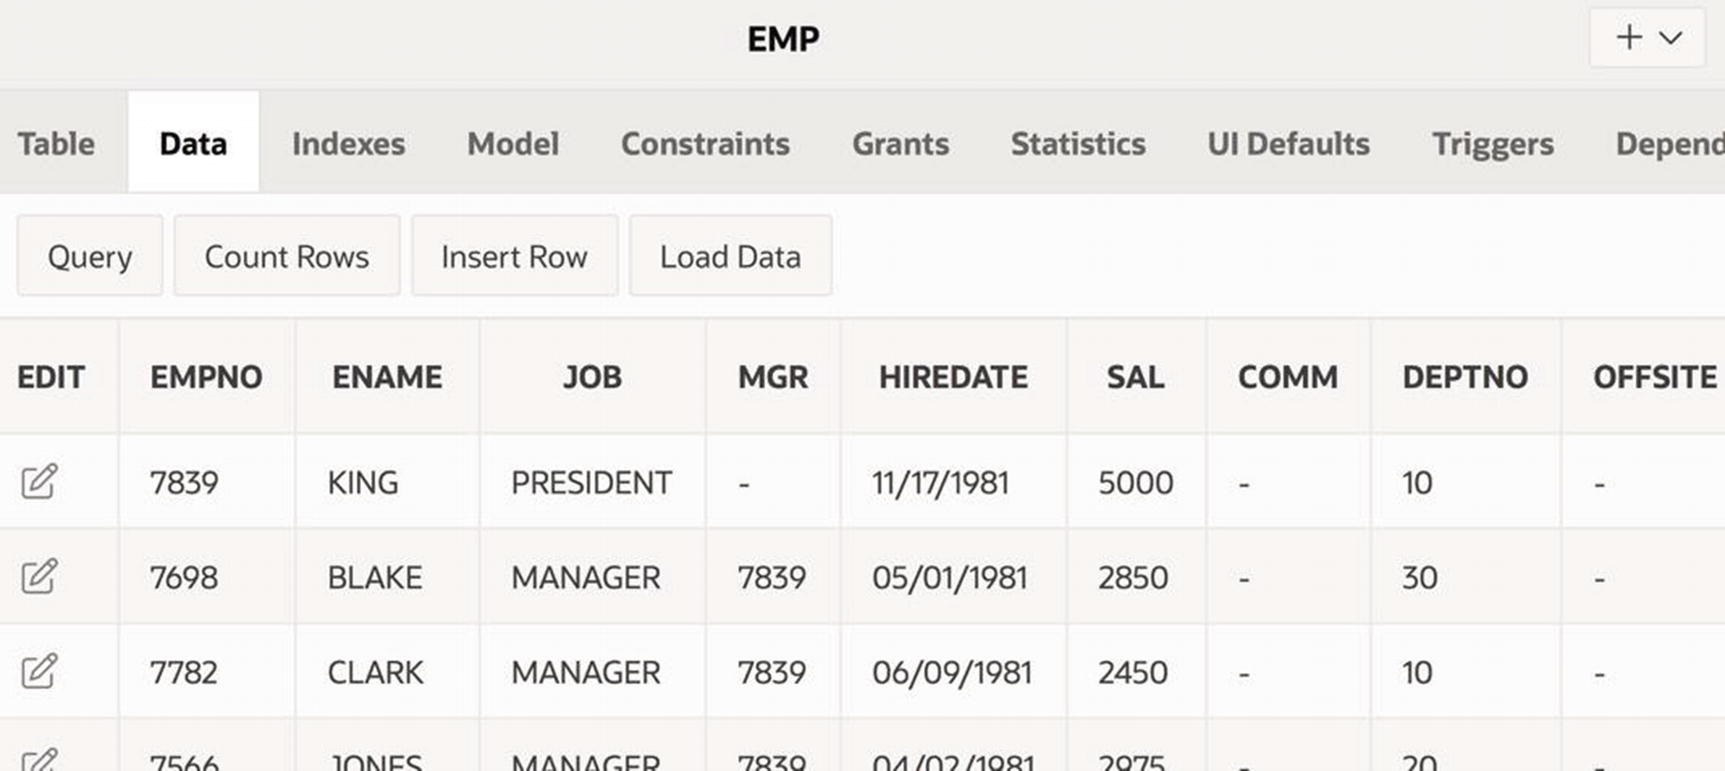
Viewing the contents of EMP
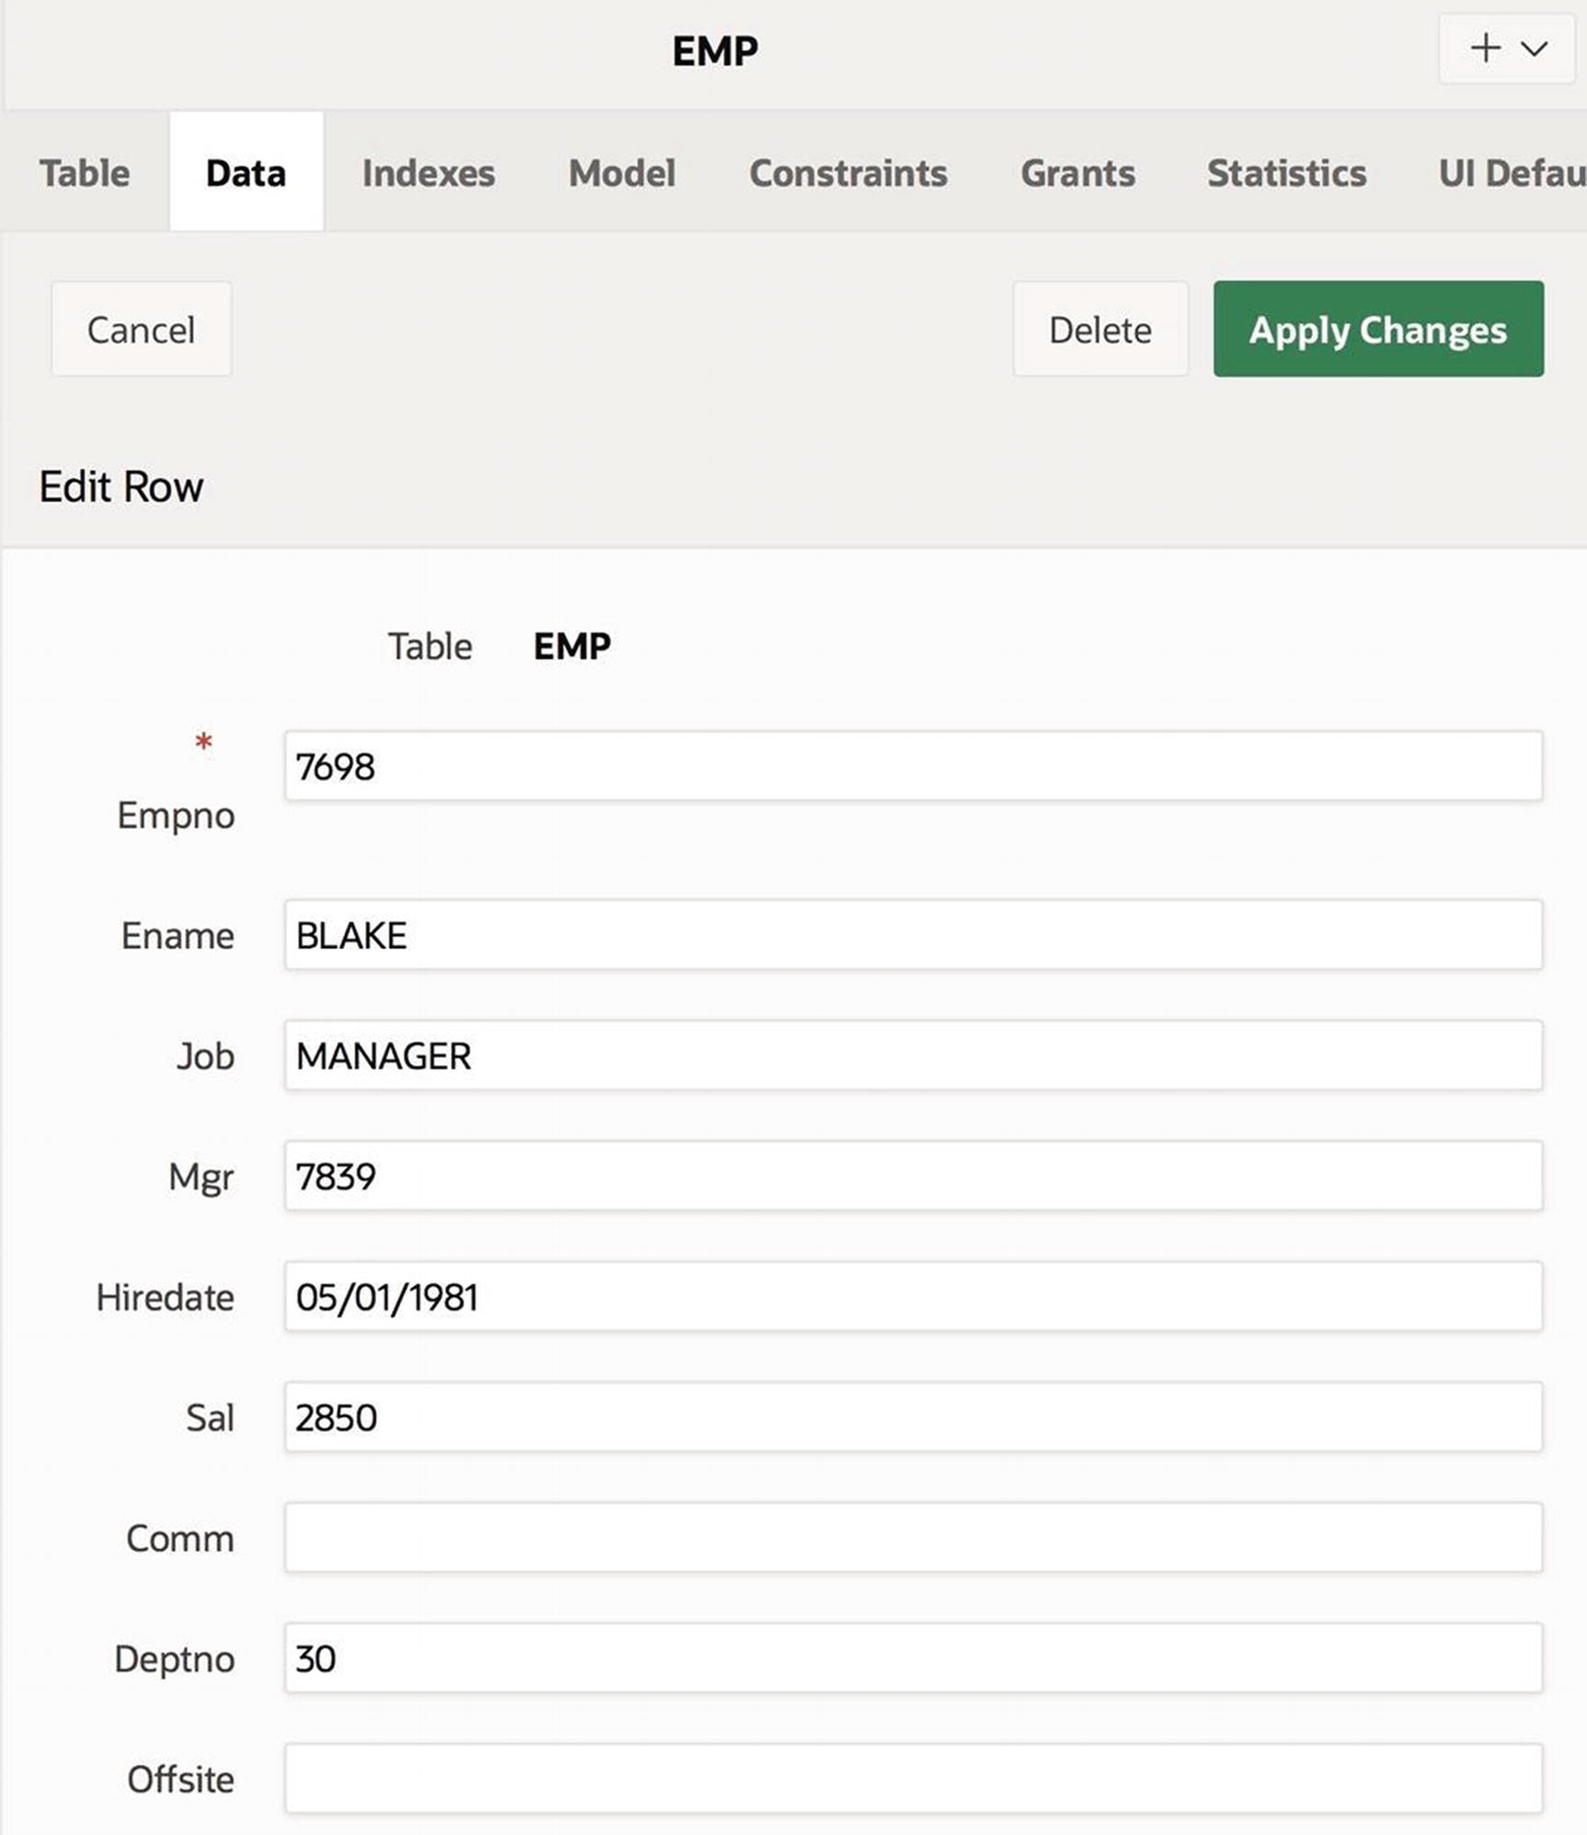
Editing the contents of employee 7698
If you wish, you can edit this record, setting the value for Offsite to N. You can then proceed to edit the other records, setting their column value to Y or N as desired. Given the tediousness of this approach, however, it is easier to use the SQL command tool, which is discussed in the next section.
SQL Command Tool
Most of the actions that you can perform in the object browser correspond to one or more SQL statements. In effect, the object browser is merely a convenient way to formulate and execute simpler SQL statements. If you want to perform more complex activities, use the SQL command tool.
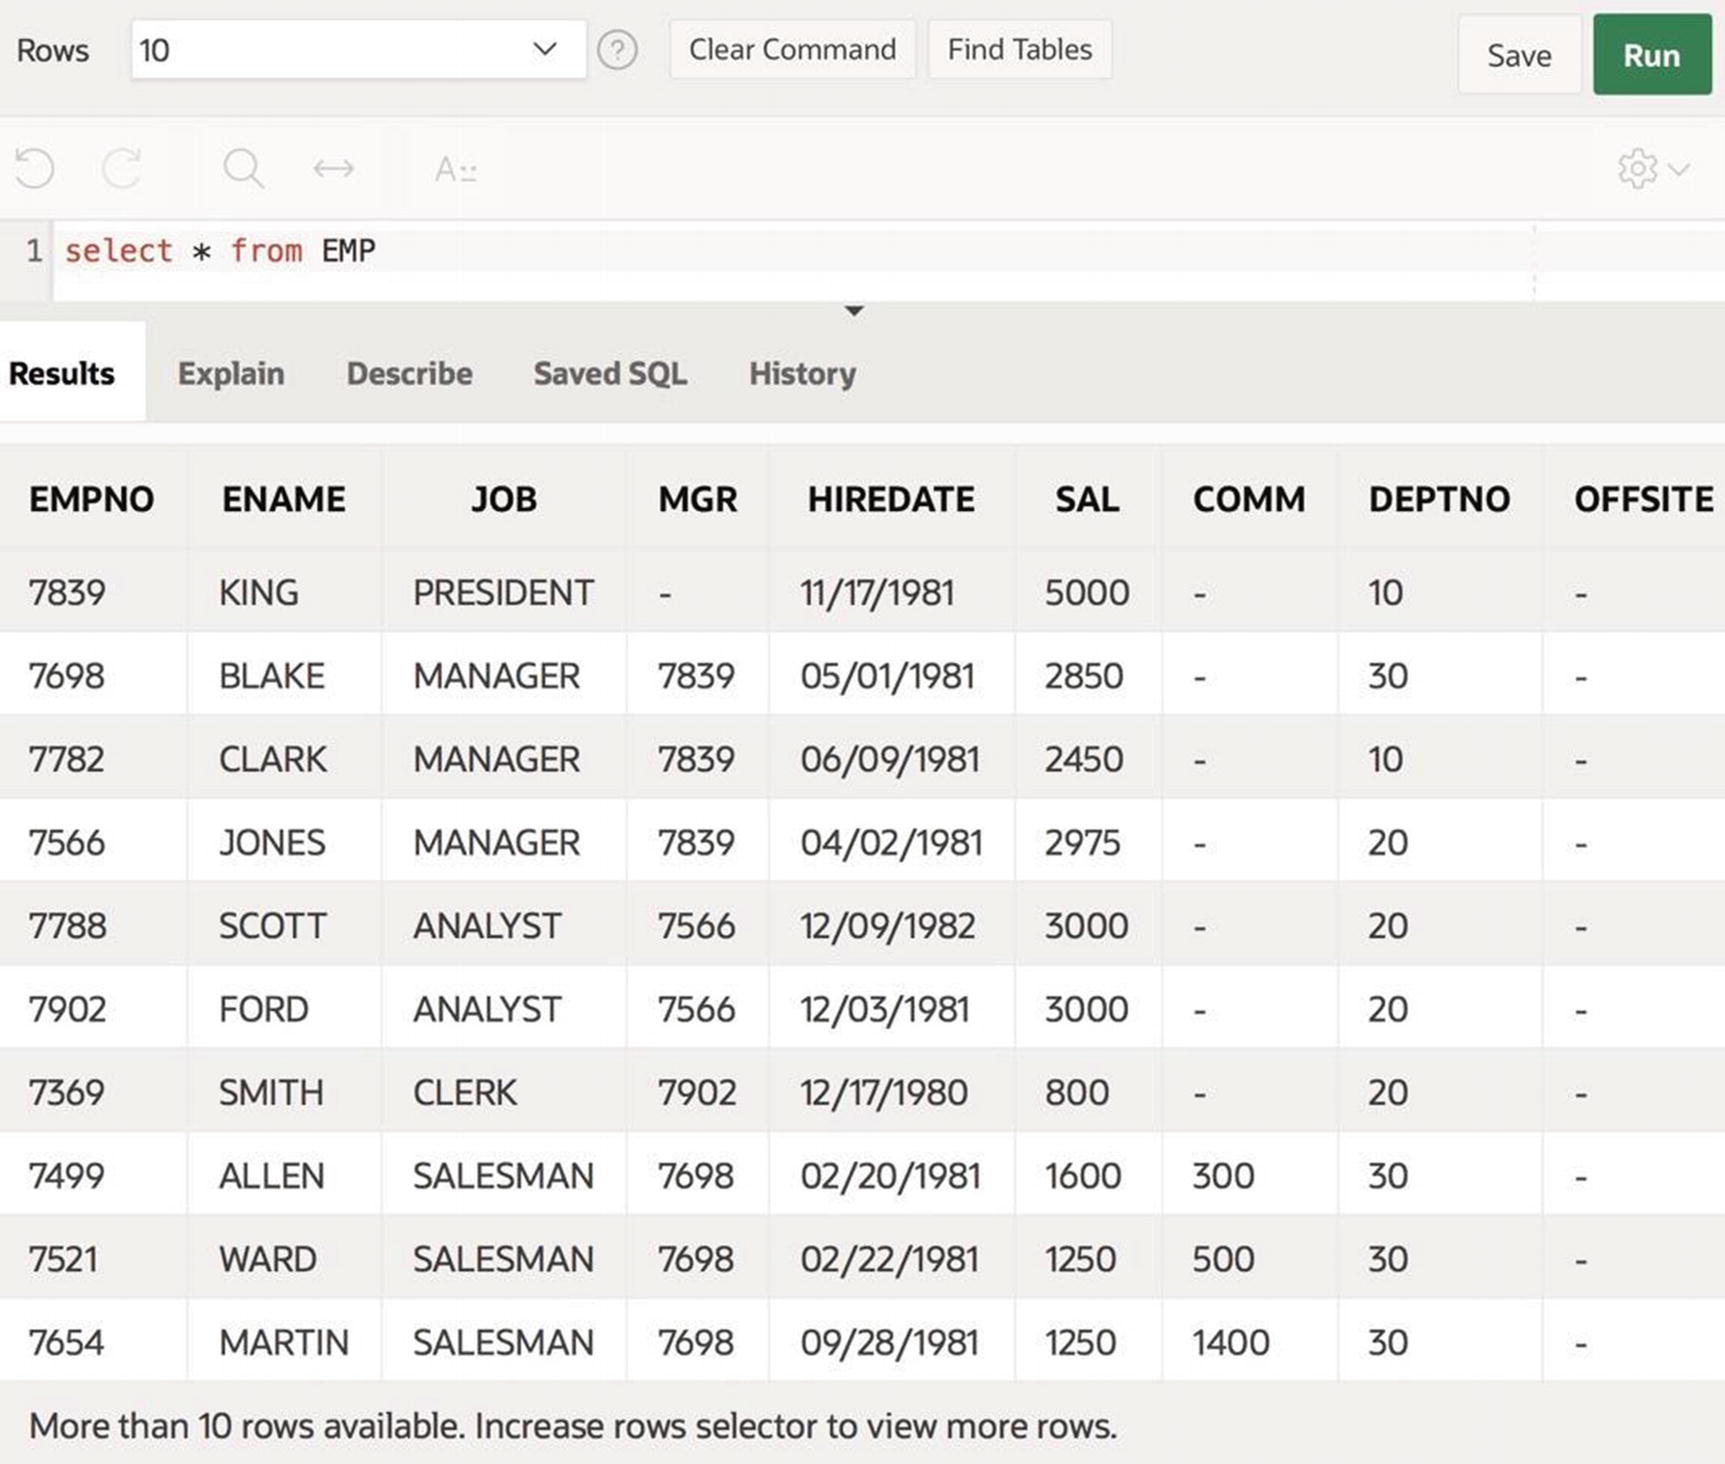
Using the SQL command tool
APEX displays only 10 of the 14 employee records. The reason is due to the select list labeled Rows at the top of the figure, whose value specifies the maximum number of rows to display. By default, its value is set to 10; if you want more rows displayed, you must first select a larger number. This feature is intentional. By forcing you to explicitly specify the output size of your query, APEX protects you from yourself. Suppose, for example, that you execute a multi-table query in which you forgot to include the join conditions. The resulting output could easily have billions of records that, if not truncated, would cause your APEX session to be unusable.
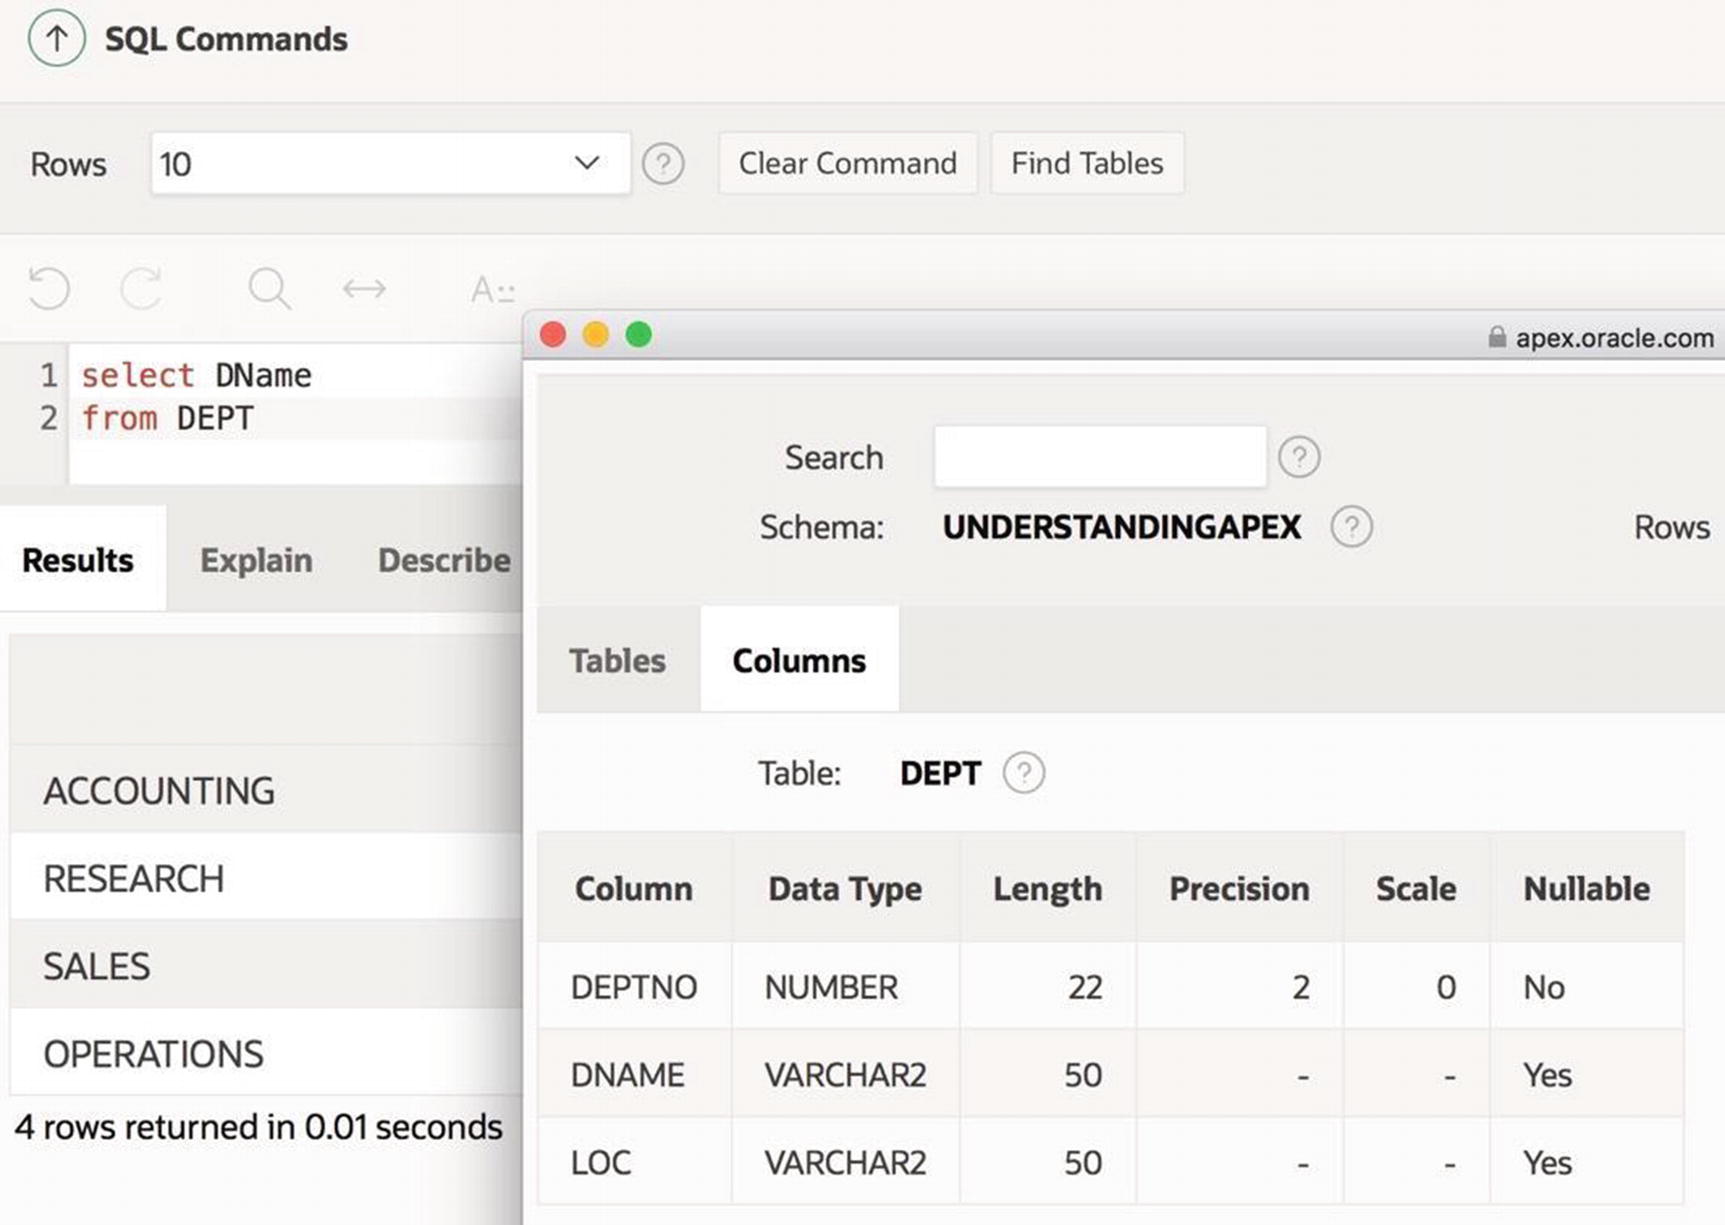
Using the Table Finder window
A PL/SQL Block to Assign Offsite Values
Summary
This chapter examined the object browser and SQL command tools in the APEX SQL Workshop. Both tools allow you to view and modify the database, but via very different interfaces. The object browser provides a visual interface, in which you perform tasks by clicking buttons and filling out forms. The SQL command tool provides a command-based interface, in which you perform tasks by executing SQL statements.
The object browser is ideal for performing common and simple tasks. As its name implies, the object browser is also well suited for exploring the database. The point-and-click interface makes it easy to discover the various tables in the database and explore their columns. The object browser also does not require familiarity with SQL, so it is especially suitable for casual users.
The SQL command tool, on the other hand, assumes that the user is both familiar with the database structure and proficient in SQL. The command tool is therefore suitable for experienced users of the database. If you know the appropriate SQL, you can perform many tasks much more easily from the SQL command tool than from the object browser.