
In this recipe, we will see how to create a simple MP3 player with the Play, Pause, Stop, Next, and Previous buttons. Here, the focus will be on how to learn the interaction between UI and the Audio Source (Script) component within a script. Furthermore, we will see how to use the Event Trigger (Script) component to call all the functions in our script. These will actually implement the logic behind the MP3 player.
- First, we can create a panel by right-clicking on the Hierarchy panel and then clicking on UI | Panel. Rename it to MP3Panel. We should also resize it so that we can see the entire panel on the screen. This is the panel that will contain all the buttons of our player.
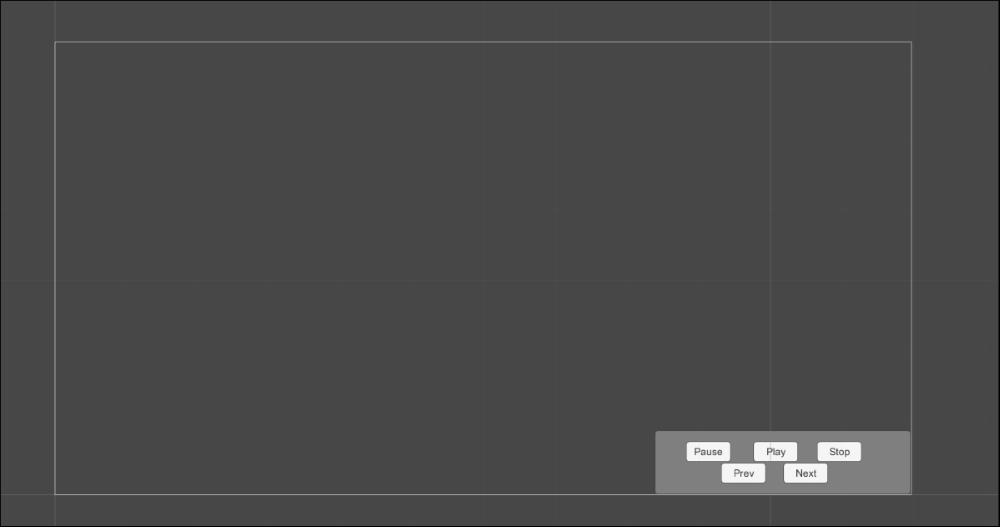
- Next, we need to create five buttons inside the panel. To do this, we can right-click on MP3Panel in the Hierarchy panel and then click on UI | Button. We can easily duplicate it four times by pressing Ctrl + D. Each time, place the button on the screen as shown in the following screenshot. We should rename them to PlayButton, PauseButton, StopButton, PrevButton, and NextButton, and also change the text of these buttons respectively to Play, Pause, Stop, Prev, and Next. Finally, we should have something that looks like this:
- We also need to add an Audio Source (Script) component to MP3Panel. To do this, click on Add Component | Audio | Audio Source. As a result, our player can now act as an audio source. This means that it is able to reproduce music.
- Now, we need to create our script on MP3Panel. Therefore, click on Add Component | New Script and name it MP3PlayerScript. Then click on Create and Add.
- Double-click on the script in order to edit it. This time, we don't need to add the
using UnityEngine.UI;statement at the beginning of the script. But before the class, we add this line:[RequireComponent(typeof(AudioSource))](without the semicolon at the end). In this way, we are saying that, to use this script, an Audio Source (Script) component attached to the same game object of this script is required. If it is not present, it will be added automatically. - Before we add any functions, we need four variables. The first is a private variable for storing
AudioSource, where all the sounds will be reproduced. The second one is an array ofAudioClipfor storing our entire playlist, and it is public, so we can set the music from the Inspector. The third one isprivate int, and it stores the index of the current song. The last one isprivate bool, and it stores information on whether the player has stopped the music or not. So, we can write these lines:private AudioSource audioSource; public AudioClip[] musicList; private int index=0; private bool isStopByPlayer;
- In the
Start()function, we assign the Audio Source (Script) component that is attached to the same game object of this script to theaudioSourcevariable:void Start () { audioSource = GetComponent<AudioSource> (); } - Now, we have to write one public function for each button, which means five functions in total. The first one is the
Play()function, in which we call thePlay()function onaudioSourceand set theisStopByPlayervariable tofalse, since the player has just pressed play and not one of the stop buttons. So, we can write the following:public void Play(){ audioSource.Play (); isStopByPlayer = false; } - The second one is the
Pause()function, in which we call thePause()function onaudioSource. Also, since the player has just pressed one of the stop buttons, we set theisStopByPlayervariable totrue:public void Pause(){ audioSource.Pause (); isStopByPlayer = true; } - The
Stop()function is similar to the previous one. It calls theStop()function onaudioSourceand, since the player has just pressed one of the stop buttons, we set theisStopByPlayervariable totrue:public void Stop(){ audioSource.Stop (); isStopByPlayer = true; } - In the
Next()function, we need to take care with the index of the playlist and play the next song that is on the list. If the current track is the last one, we play the first one. Therefore, we start increasingindexby1. Then we check whetherindexhas reached the last track, and if so, we changeindexto0in order to make it point to the first track. Finally, we assign the track pointed byindexin the music list to theclipvariable ofaudioSource. After that, in the final line, we call thePlay()function, which we have written before:public void next(){ index++; if (index == musicList.Length) index = 0; audioSource.clip = musicList [index]; Play (); } - As we did in the preceding function, in the
previous()function, we have to worry about the index of the playlist and reproduce the previous track of the list. Thus, if the current track is the first one, we need to play the last one. Therefore, we start decreasingindexby1. Then we check whetherindexhas reached the first track, and if so, we changeindexto make it point to the last track. Finally, we assign the track pointed byindexin the music list to theclipvariable ofaudioSource. And in the final line, we call thePlay()function, which we have written before:public void previous(){ index--; if (index == -1) index = musicList.Length-1; audioSource.clip = musicList [index]; Play (); } - In the
Update()function, we check whether the track is finished and is not stopped by the player. If so, we call thenext()function that we wrote before. It will play the next track from the music list:void Update () { if (!audioSource.isPlaying && !isStopByPlayer) next (); } - Save the script and come back into Unity. Now, we need to set the events. We select all the five buttons so that we can multi-edit them, and click on the + sign in the bottom-right corner of the
OnClickevent panel in the Inspector. Then drag MP3Panel into theobjectvariable. - For the next step, we need to set the event differently for each button. So, for each of them, select in the drop-down menu MP3PlayerScript and the corresponding function: PlayButton with the
Play()function, PauseButton with thePause()function, StopButton with theStop()function, NextButton with thenext()function, and finally PrevButton with theprevious()function. - Since we don't want the player to press PlayButton while a track is being played, we have to enable and disable it dynamically. To do this, we select PlayButton, StopButton, and PauseButton so that we can multi-edit them. In the OnClick event panel, click again on the + sign in the bottom-right corner to add a new event. Drag PlayButton in the object variable. Finally, in the drop-down menu, select Button | Interactable.
- By default, the boolean value should be
false(not checked), and it is fine for PlayButton but not for the other two. Therefore, select StopButton and PauseButton and check the boolean to make ittrue. - Since the MP3 player will start at the beginning of the scene, we have to disable PlayButton even at the start. Hence, after we have selected it, we can uncheck the Interactable variable from the Inspector.
- The final step is to load some nice tracks into the MP3Panel inside the Inspector. Click on the play button to test the scene and listen to some nice music.
Each button has an attached Event Trigger (Script) that will call the respective function of our script. In fact, our script contains a function for every component. This last one will control the Audio Source (Script) component to create an MP3 player.
The next section teaches us how to display the name of the song in our MP3 Player, to the player.
It would be a great improvement for the MP3 player if we displayed the name of the song that is currently being played, providing the player with more information during his experience. We can achieve this by using a Text (Script) component and modifying our script a little.
First, select MP3Panel in the Hierarchy panel. Then select UI | Text and rename it to MP3Text.
Before we modify our script, we need to add the using UnityEngine.UI; statement at the beginning of the script. In fact, here we are going to use the Text class.
Then, we add a new public variable to our script:
public Text uiText;
This will store the reference to the Text (Script) component of MP3Text so that we can keep track of it.
After this, let's add these lines at the end of the Update() function:
uiText.text = audioSource.name;
By doing this, we display the name of the song (the name of AudioClip) in the text variable of the Text (Script) component on uiText.
Finally, we can click on play to verify that everything works as expected.
Tip
Since the name of the song could be longer than the text component, ensure that MP3Text is long enough. We can stretch it with the Rect tool.
Otherwise, we can implement other solutions. Let's explore three of them. The first is the easiest, and it requires us to use the Content Size Fitter to make the text dynamically fit within MP3Text. Another solution, which is a bit more effective, is to write a script that truncates the name of the song, if it is too long. For instance, we can add ... at the end of the name. Finally, if it is important to show the entire name, we can make the name scroll gradually, by programming this behavior within our script.