
In this recipe, we are going to see how to provide the player with the ability to completely customize the color of something. In this case, we will allow the player to customize an Image (Script) component. It is important to keep in mind that we are not limited to customizing just the Image (Script) component. In fact, we can change everything that has a color, including lights. Changing lights is useful if you want to create ambience and immersive UIs. This is associated with what you learned in Chapter 4, Creating Panels for Menus, in the Making UI Elements affected by different lights recipe. Compared to the Creating a button that changes color and Creating a slider that changes colors gradually recipes, here the player will be able to change colors in a better way. He will be able to tweak every color channel.
In order to implement all of this, we need to create a slider that controls, through a script, the single color channel, and modify the Image (Script) component accordingly.
- To create the slider, right-click on the Hierarchy panel and then go to UI | Slider and rename it RedChannelColorSlider. Of course, it is possible to resize it, change the Source Image, change the text inside, and finally place it as we wish in Canvas.
- Select the slider. Then, in the Inspector, navigate to Add Component | New Script, name it ChangeColorChannelSliderScript, and click on Create and Add.
- Double-click on the script in order to edit it. Since we are going to use the Image class, we have to add the
using UnityEngine.UI;statement at the beginning of the script. - For this script, we only need one
publicvariable. Here, we are going to store the Image (Script) component whose color we want to modify through our slider by a single channel. So, we can write this:public Image img;
- The next step is to write a function that changes one color channel of the Image (Script) component, stored in the
imgvariable. In this step, we are going to change only the red channel, but in the There's more... section, you will see that it is possible to change other channels as well. In order to get it, our function takesvalue, afloat, as a parameter and assigns anew Colortoimg. Here, all the parameters of the color channels are the same, except the red one; it is assigned withvalue. This is our function:public void changeRed(float value){ img.color = new Color (value, img.color.g, img.color.b, img.color.a); } - Now, we can save the script and come back to Unity. As usual, we have to call our function using an event, and in this case, we can use the one in the Slider (Script) component. Select RedChannelColorSlider and click on the + sign in the On Value Changed (Single) event tab. Finally, we drag our script into the object variable, and we should have the event tab looking as follows:

- Next, in the drop-down menu, select ChangeColorChannelSliderScript.changeRed. Be sure to select changeRed in the first set of functions, labeled Dynamic float, as displayed in the following screenshot:

- The last thing that we have to do is assign a value to the
imgvariable in the Inspector. To do this, let's create a new panel and right-click on the Hierarchy panel. Then go to UI | Panel and rename it ChangeColorPanel. Again, keep in mind that it is possible to resize it, modify the Source Image, and finally place it wherever we want in the Canvas. - We drag ChangeColorPanel in the
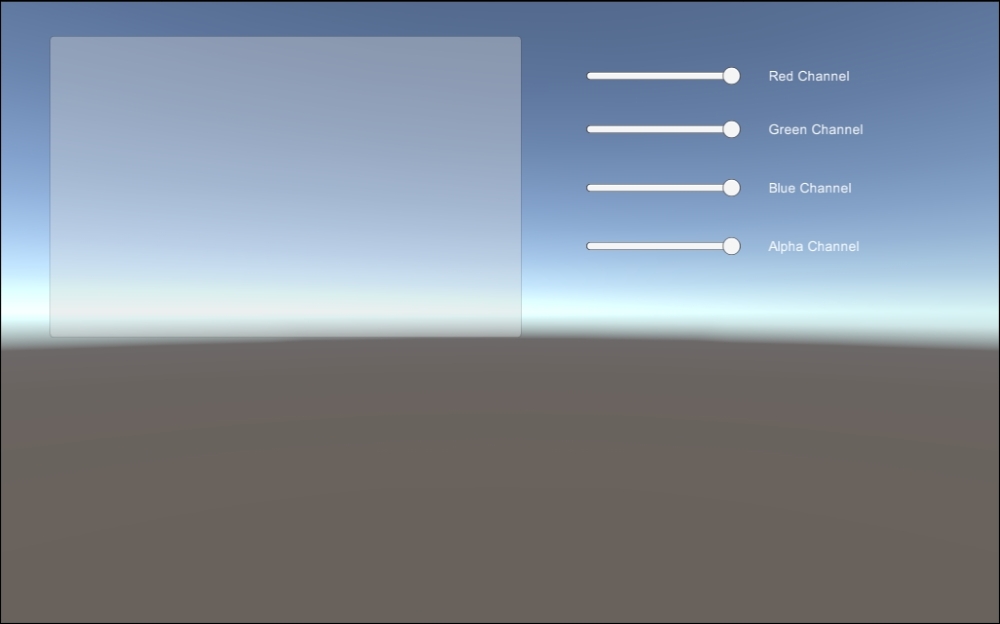
imgvariable onto our ChangeColorChannelSliderScript. If we want, we can also add a text label next to the slider so that we can show to the player what color channel the slider changes. - Finally, save the scene and click on play to check whether everything works as expected:

We started by creating a script that takes a float as a parameter and uses it to change the red color channel. In fact, it creates a new color that has all the channels, including alpha, with the same value of the previous color. After all, we have acquired them from it. We assigned the value that was received as a parameter in the red channel.
Lastly, in order to call our function, we set the On Value Change () event so that it is triggered every time the value of the slider changes. Instead of selecting the Static parameter, we chose the same function in the Dynamic float set. By doing this, we can automatically pass the value of the slider itself as a parameter to the function. Finally, this function assigns a new color after it has tweaked its color channels.
We can definitely extend the concepts that have been learnt in this recipe to the other channels, including the alpha channel, or applying this to lights.
If we give a player the ability to change the color of something, which in this case was the Image (Script) component, it would be ideal if we could also provide the player with the ability to change the other two color channels.
In order to do so, we need to add two other functions, one for each channel. We can call them changeGreen() and changeBlue(). Similar to changeRed(), which we have written before, they take value as a float parameter and change the color to the Image (Script) component stored in img. They work exactly in the same way, but instead of assigning a value to the red channel, they assign a value to their channel and keep the red one unaltered.
So here are our new functions:
public void changeGreen(float value){
  img.color = new Color (img.color.r, value, img.color.b, img.color.a);
}

public void changeBlue(float value){
  img.color = new Color (img.color.r, img.color.g, value, img.color.a);
}
Of course, the next step is to create two other sliders (if we want, we can also create text labels), and rename them GreenChannelColorSlider and BlueChannelColorSlider respectively. Then we have to follow the steps starting from step 6, and instead of selecting the changeRed function, we select the function pertaining to what we want the player to change:

If we want to provide the player with an additional level of customization, we can allow him to adjust the alpha channel. Again, we can achieve this in the same way — by leaving all the color channels untouched and changing only the alpha channel.
Let's create another function:
public void changeAlpha(float value){
  img.color = new Color (img.color.r, img.color.g, img.color.b, value);
}
Like the previous section, we need to create a new slider. Once we have done this, we can call it AlphaChannelColorSlider and again follow all the steps from step 6 onwards:
Tip
Sometimes, we don't want to allow the player to make the object completely disappear while he is tweaking the alpha channel by setting it to 0, or make the object completely appear on the screen by setting it to 1. So, to ensure that this will not happen, we can select AlphaChannelColorSlider. Then, in the Inspector, we set a bigger value for Min Value or a smaller one for Max Value.
Of course, this can also be applied to the other sliders if we wish.
If we really want to provide the player with the idea that something is blocked in the slider — something that he will be able to unlock later — we can do this using what we covered in the Adding upper and lower bounds to the slider recipe in Chapter 4, Creating Panels for Menus.
Since these sliders are very powerful tools, and they provide the player with options for real-time customizations, they can also be used to change other components, such as lights. This is especially true if these lights affect our UI, as we explored in the Making UI Elements affect by variable lights recipe in Chapter 4, Creating Panels for menus.
First of all, we cannot use the img variable anymore, since it cannot store a light. So, we can erase it. Having done this, we can also delete the using UnityEngine.UI; statement at the beginning of the script, since we won't use UI classes anymore. Therefore, let's replace the old variable with the new one, that is, Light:
public Light light;
Now we have to replace every occurrence of img with light. So, the changeRed() function will be as follows:
public void changeRed(float value){
  light.color = new Color (value, light.color.g, light.color.b, light.color.a);
}
Here is what the changeGreen() function looks like:
public void changeGreen(float value){
  light.color = new Color (light.color.r, value, light.color.b, light.color.a);
}
The changeBlue() function becomes like this:
public void changeBlue(float value){
  light.color = new Color (light.color.r, light.color.g, value, light.color.a);
}
And finally, we have the changeAlpha() function:
public void changeAlpha(float value){
  light.color = new Color (light.color.r, light.color.g, light.color.b, value);
}
For the final step, we need to set the light variable in the Inspector by dragging a light from the Hierarchy panel. We might also use the one that we created in Chapter 4, Creating Menus and Panels, and if needed, we can set the events on the sliders again.
- In order to integrate this recipe in amazing ways inside your game, you can refer to the Making UI elements affected by variable lights and Adding upper and lower bounds to the slider recipes in Chapter 4, Creating Panels for Menus.
- Furthermore, we should also refer to the official documentation about lights at http://docs.unity3d.com/Manual/class-Light.html.