
Taking and Formatting Notes
In this chapter, let’s look at some of the ways in which you can type notes, bring information into OneNote, and format it in ways that make the content more useful to you and others. Later in this book, you’ll learn ways to organize, share, and protect that information.
As in the previous chapters, I encourage you to follow along and try out these steps so you can see for yourself how easy using OneNote really is.
Taking Notes
In the world of OneNote, the phrase “taking notes” means a bit more than it says. Sure, you can use OneNote to take notes in meetings or in class, but after seeing more of its features and learning how to use them, it’s unlikely that taking notes is all you’ll want to do with this useful program.
Typing and formatting text in OneNote works much the same as you’re probably already used to from other Office programs like Microsoft Word. However, unlike other programs that restrict your editing area by well-meaning lines, rows, columns, cells, or fields, the OneNote canvas is truly free-form and you can place content on a page wherever you want it.
![]() LET ME TRY IT
LET ME TRY IT
Typing Notes on a Page
To start taking notes on a page, follow these steps:
1. In the Practice Notebook you created in Chapter 4, “Notebooks, Sections, and Pages,” create a new, blank page.
2. Type a title into the dotted page title area at the top of the page.
3. Click anywhere in the blank part of the page underneath the page title.
4. When you see a flashing cursor, begin typing your notes (see Figure 5.1).
![]()
Figure 5.1 A line of text typed inside of a note container.
As you type in OneNote, a small gray frame appears around the text you type. These frames are called note containers. They are only visible while you type or format the text within them, or while you move the mouse over them. Think of note containers as little helpers that make it easier for you to line up text and objects on your page. They don’t show up when you print a page or share a page with someone over e-mail.
You can resize a note container by clicking the tiny double arrows shown on the right side of the frame’s top border and then dragging the mouse to the left or to the right to make the container smaller or larger. This lets you quickly adjust the wrapping of text, the way a text box would in a page layout program. For example, to make a long, continuous paragraph of text easier to read and format, you could make its note container narrower to mimic a column in a newspaper or magazine.
If a note container doesn’t appear quite where you want it, you can freely move it around on the page by clicking its top border (marked with a short row of small rivets) and then dragging the container to the position on the page you want.
 SHOW ME Media 5.1—Taking Notes in OneNote
Access this video file through your registered Web Edition at my.safaribooksonline.com/9780132182447/media.
Note containers can be copied and pasted, deleted, or dragged and merged into other note containers on the page. This kind of flexibility makes OneNote ideal for brainstorming, ruminating over ideas that are still changing and taking shape, and planning projects that will change often over time (such as the outline for this book, for example, which I created entirely in OneNote).
You can type all of your notes into a single note container or click around the page and create several different note containers and then line them up the way you want. It’s up to you.
![]() LET ME TRY IT
LET ME TRY IT
Copying and Pasting Text
Aside from typing, one of the easiest ways to bring information into OneNote is by copying text from any file, document, or web page and pasting it on your notes pages. You probably already know how to do this, but OneNote 2010 has a few new paste options that give you greater control over the ways that copied information can appear in your notebook.
To copy and paste text, follow these steps:
1. In OneNote, on any notes page, select a line of text.
2. On the Home tab, in the Clipboard group, click Copy (or press Ctrl+C on your keyboard) to copy your text selection. This keyboard shortcut is a standard Windows shortcut, so if you want to copy text from another document or program, select the text there and then press Ctrl+C before switching to OneNote.
3. In OneNote, click in a blank part of the notes page where you want to paste the copied selection of text.
4. On the Home tab, in the Clipboard group, click the small downward-facing arrow under the large Paste button to reveal additional choices.
At this point, OneNote presents you with a small menu of four icons that you can click (see Figure 5.2).
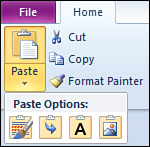
Figure 5.2 The Paste Options menu as it appears under the Paste button on the ribbon.
Moving the mouse over each icon displays a ToolTip that tells you what will happen to pasted text when you click that particular button:
• Keep Source Formatting will paste your copied text with its original formatting intact. For example, if you copy red, bold text and paste it elsewhere on your page, the copied text will still appear red and bold. This option is the default paste option if you click the Paste button on the ribbon or whenever you press Ctrl+V to paste copied text.
• Merge Formatting will paste your copied text and match the style formatting of the text paragraph you’re pasting it into. For example, if you copy red, bold Calibri 11 text and you paste it into an existing paragraph of black, italic Arial 10 text, your pasted text will still appear red and bold, but the font will be changed to Arial 10 and it will turn italic.
• Keep Text Only will paste the copied text as standard text, stripped of any formatting. This is the easiest way to bring clean text from multiple sources into OneNote.
• Picture will create a small, digitized image of the copied source text. You might find this option useful when you want to preserve the exact appearance of the source text (for example, if it was rendered on a web page in a particular font that you don’t have installed on your computer). Although this option creates a picture of the copied text that you cannot edit after pasting, OneNote can include such pictures in search results when you search your notebooks for keywords that are shown in pasted images.
For a faster way to paste copied text in the way that you want, right-click the page where you want the copied text to appear, and then, on the shortcut menu (see Figure 5.3), click the Paste Options button you want.

Figure 5.3 Paste Options on the right-click shortcut menu.
If you prefer to paste text without first choosing a paste option, that’s okay. You won’t miss out on the new paste options in OneNote 2010. That’s because OneNote lets you adjust the formatting of text even after it has been pasted on the page.
Near the bottom of pasted text, OneNote displays a small button with a clipboard icon. You can click this button—or press the Ctrl key as a simple shortcut—to open the Paste Options menu (see Figure 5.4). When you click the option you want, the formatting of the pasted selection is updated to your preference.
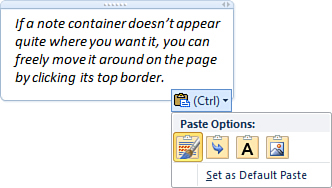
Figure 5.4 The Paste Options button appears after you’ve pasted copied text.
If you don’t like the result, you can click the button again to reopen the menu and make a different choice.
![]() LET ME TRY IT
LET ME TRY IT
Changing the Default Paste Option
If you prefer a different default formatting option for text you’ll paste into OneNote (for example, if you always want to paste plain, unformatted text), you don’t have to override the default setting with the Paste Options menu each time. Instead, follow these steps to set a different default option:
1. On any notes page, copy and then paste a line of text.
2. At the bottom of the pasted text, click the Paste Options button that appears (or press Ctrl).
3. Click the icon of the paste option you want (for example, click the A icon for Keep Text Only if you prefer to always paste copied text without formatting).
4. Now click the Paste Options button again (or press Ctrl again) and then click Set as Default Paste.
Once you have set a new paste option, it is automatically applied whenever you paste text using the Paste button on the ribbon or whenever you press Ctrl+V on your keyboard. If you change your mind again later, you can set a different default paste option by repeating the previous steps and choosing a new paste option in step 3.
![]() LET ME TRY IT
LET ME TRY IT
Creating More Writing Space in the Middle of a Page
Ever take notes in a paper notebook during a class or a meeting, only to find the presenter jumping back to a previous topic, erasing part of the whiteboard, and writing down more important things? Now you have to scribble little subnotes on your paper pages to later remind you of the order in which the information was talked about.
With OneNote, you can not only move existing notes around, you can also create more writing space wherever you need it—even in the middle of a page that’s already full of notes.
To create more writing space, follow these steps:
1. Open a notebook page that contains a bunch of notes, such as a long paragraph of text. (If you don’t yet have a page with a lot of notes on it but you want to try this example, you can copy and paste some text from a web page.)
2. On the ribbon, click the Insert tab, and then click Insert Space. The button will turn orange to let you know that you’re in the Insert Space mode.
3. Slowly move the mouse pointer back over your page containing the notes. You will see a thick horizontal line moving up and down with your mouse pointer (see Figure 5.5). Position the line where you want to create space and then click and drag the mouse downward in the direction of the arrow.
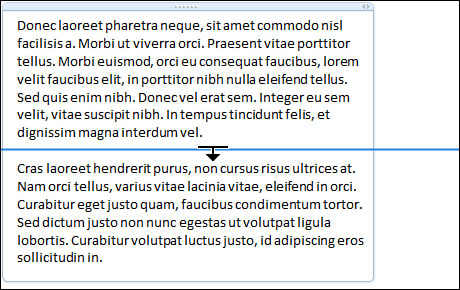
Figure 5.5 Align the bar and arrow where you want to begin creating writing space.
4. As you drag the arrow, OneNote shows you where displaced text and objects will move below the space you’re creating (see Figure 5.6). Release the mouse when you have created as much space as you want or need.

Figure 5.6 Click and drag downward to create writing space between paragraphs.
SHOW ME Media 5.2—Creating More Space on a Page
Access this video file through your registered Web Edition at my.safaribooksonline.com/9780132182447/media.
If you have any trouble the first time and you create too much or too little space, remember to use the Undo command on the Quick Access Toolbar (or press Ctrl+Z) and then start over.
![]() LET ME TRY IT
LET ME TRY IT
Creating More Writing Space at the End of a Page
If you’re taking or pasting a large amount of notes on a page and you don’t want to keep writing near the bottom edge of the OneNote program window, you can quickly create about half a page of space at the end of your notes.
To create more writing space at the end of the page, follow these steps:
1. Open a notebook page that contains a bunch of notes, such as a long paragraph of text. (If you don’t yet have a page with a lot of notes on it but you want to try this example, you can copy and paste some text from a web page.)
2. Look for the vertical scrollbar that appears near the right side of the OneNote program window and just to the left of the page tabs. If there is not enough text to fill the page, type or paste some more text to extend its note container past the current page display.
3. Under the vertical scrollbar, look for a small page icon just below the scrollbar arrow. This is the Scroll Down by Half Page button (see Figure 5.7).

Figure 5.7 The Scroll Down by Half Page button appears under the vertical scrollbar.
4. When you click this button, OneNote scrolls to the very end of the current page and then creates about half a page of blank space so you can continue typing in the middle of the screen.
You can click this button as often as you like to keep creating more space at the end of the current page. Using this button is a bit faster than repeatedly pressing the Enter key to create several blank lines of writing space at the end of a notes page.
![]() LET ME TRY IT
LET ME TRY IT
Checking the Spelling of Your Notes
Like the other programs in the Microsoft Office suite, OneNote lets you verify the spelling of words in your notes. This is most useful when you plan to share your notes with other people and grammatical accuracy is important.
To check the spelling of your notes, follow these steps:
1. Open the page for which you want to check the spelling.
2. If you want to only check the spelling of a particular paragraph of text, select the text you want to check. Otherwise, if you do not make a text selection, OneNote will check the entire page.
3. On the ribbon, click the Review tab, and then click Spelling.
4. If OneNote detects any words that are possibly misspelled, they will be displayed in the Spelling task pane near the right side of the screen. There, you can change a misspelled word to its correct form, ignore a suggested correction, or add any particular word to your custom dictionary, so that OneNote will not question it again in the future.
5. When OneNote tells you that the spell check is complete, click OK to dismiss the Spelling task pane.
Saving Notes
Over the years, computer programs have taught us a fundamental lesson: If you care about it, make sure you save it. Indeed, clicking the Save button periodically has long been second nature to most of us.
Why am I mentioning this? Well, by now you might have noticed something rather curious: OneNote does not have a Save button anywhere. Rest assured that this isn’t some terrible oversight but an intentional choice.
To make writing in your OneNote notebooks as natural and intuitive as scribbling in a paper notebook, OneNote saves your work continuously, without you having to remember it or think about it. Any changes that you make to your notes are saved instantly, as are any changes you make to your notebook’s organization and structure. You can freely switch pages, sections, and notebooks at any time, without having to save anything first. You can even shut down OneNote immediately after typing something without ever worrying about losing that information. Don’t believe me? You can try this for yourself; I promise that the last thing you typed before shutting down OneNote will appear in your notebook the very next time you start OneNote again.
Although a Save As command is provided in the Backstage View, it is intended to let you export specific pages or sections from your OneNote notebook to publish elsewhere or to share with others. Be sure not to use the Save As command as a Save replacement or you may inadvertently create duplicates of your notes in multiple locations. For day-to-day use of your notes, learn to fully trust OneNote to do all of the saving for you!
Taking Audio and Video Notes
Note-taking and capturing information in OneNote isn’t just limited to typing or importing text. In certain situations where you’re given more information than you can jot down quickly (for example, in a class lecture, in a group presentation, or in an interview), you can make use of OneNote’s excellent audio and video recording features.
Audio and video clips that you record in OneNote are stored as part of your notes, so even though they are saved in their native Windows Media formats, you’ll always have everything together in your notebook, even if you move it to a different location.
In OneNote 2010, audio recordings are particularly useful. That’s because spoken words in audio clips can be included in a notebook search. If an audio clip (or the audio portion of a video clip) contains the words or phrase you’re looking for, the clip will be included as a search result. Additionally, you can link audio recordings that you create with OneNote to notes you type during the recording. When you play back the audio clip afterward, OneNote automatically moves the cursor through your notes to indicate which paragraph of text goes with a particular part of the audio recording.
The usefulness of audio and video notes in OneNote 2010 should not be underestimated, especially by people in certain professions. Journalists, doctors, attorneys, teachers, students, corporate trainers, administrative assistants, and people in similar professions may consider these features to be indispensable.
![]() LET ME TRY IT
LET ME TRY IT
Creating an Audio Recording
Before you attempt to create an audio recording with OneNote, make sure you have a microphone connected to your computer. Many laptops have a built-in microphone, which can also be used.
To create an audio recording, follow these steps:
1. On the ribbon, click the Insert tab, and then, in the Recording group, click Record Audio.
2. OneNote displays the contextual Audio & Video ribbon tab at the top of the program window (see Figure 5.8). This tab contains the controls and commands for using audio and video recordings in OneNote.

Figure 5.8 The Audio & Video tab appears when you create an audio or video clip.
3. When you have finished recording an audio clip, click the Stop button in the Playback ribbon group.
When the recording begins, OneNote places a WMA (Windows Media Audio) file icon on the current page and marks it with a date and time stamp (see Figure 5.9).
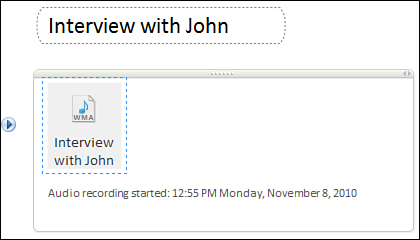
Figure 5.9 An audio recording file icon as it appears on the current page.
While OneNote is recording the audio clip, you can type notes underneath the audio icon in the same way you would normally do on a notes page. Taking notes while recording audio establishes an automatic link between the recording’s timeline and the position of your cursor within your notes. When you later play back the recording, you can choose to see the playback cursor move from line to line in your notes to show you which parts of your notes correspond to segments in your recording.
![]() LET ME TRY IT
LET ME TRY IT
Playing Back an Audio Recording
To play back an audio clip in OneNote, you can do any of the following:
• Click to select the WMA audio file icon on the page and then click the Play button in the Playback group on the ribbon.
• Click to select the WMA audio file icon on the page and then click the small, round Play icon that appears just to the left of the notes container.
• Double-click the WMA audio file icon on the page.
• Right-click the WMA audio file icon on the page and then click Play on the shortcut menu. (Alternately, click Open if you want to play back the audio file in Windows Media Player instead.)
![]() LET ME TRY IT
LET ME TRY IT
Exporting an Audio Recording
Any audio recordings that you create with OneNote will automatically be saved as part of the notebook they appear in. If you copy or move the notebook folder, the recordings travel with the notebook. However, there might be times when you want to export a particular audio recording to your file system so you can use it in other programs or send a copy to other people. To export any OneNote audio recording, follow these steps:
1. Right-click the WMA audio file icon of the recording you want to export, and then click Save As on the shortcut menu.
2. Navigate to the folder on your hard drive where you want to save the file, and then click Save.
![]() LET ME TRY IT
LET ME TRY IT
Creating a Video Recording
Before you attempt to create a video recording with OneNote, make sure you have a webcam connected to your computer. Many laptops have a built-in webcam, which can also be used.
To create a video recording, follow these steps:
1. On the ribbon, click the Insert tab, and then, in the Recording group, click Record Video.
2. OneNote opens a pop-up window that lets you monitor the current recording. Behind it, the contextual Audio & Video ribbon tab containing the audio and video controls appears at the top of the OneNote program window.
3. When you have finished recording a video clip, click the Stop button in the Playback ribbon group.
When the recording begins, OneNote places a WMV (Windows Media Video) file icon on the current page and marks it with a date and time stamp (see Figure 5.10).
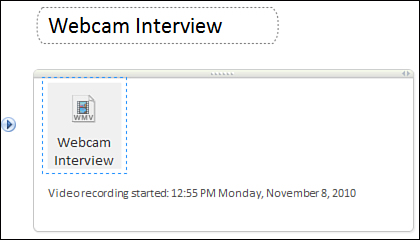
Figure 5.10 A video recording file icon as it appears on the current page.
Playing Back a Video Recording
To play back a video clip in OneNote, you can do any of the following:
• Click to select the WMV video file icon on the page and then click the Play button in the Playback group on the ribbon.
• Click to select the WMV video file icon on the page and then click the small, round Play icon that appears just to the left of the notes container.
• Double-click the WMV video file icon on the page.
• Right-click the WMV video file icon on the page and then click Play on the shortcut menu. (Alternately, click Open if you want to play back the video file in Windows Media Player instead.)
![]() LET ME TRY IT
LET ME TRY IT
Exporting a Video Recording
Like audio recordings, any video recordings that you create with OneNote will automatically be saved as part of the notebook they appear in. If you copy or move the notebook folder, the recordings travel with the notebook. However, there might be times when you want to export a particular video recording to your file system so you can use it in other programs or send a copy to other people. To export any OneNote video recording, follow these steps:
1. Right-click the WMV video file icon of the recording you want to export, and then click Save As on the shortcut menu.
2. Navigate to the folder on your hard drive where you want to save the file and then click Save.
Enabling Searching in Audio and Video Recordings
One of OneNote’s most impressive features is the ability to instantly find any information again in your notes. You’ll learn more about the search features in Chapter 7, “Organizing and Searching Notes.” However, if you plan to frequently record audio or video notes instead of typing them, you can enable the ability to search for keywords and phrases within your OneNote recordings.
To enable searching in audio and video recordings, follow these steps:
1. Click the File tab and then click Options.
2. In the OneNote Options dialog box that appears, click the Audio & Video category in the left column.
3. On the right side, under Audio Search, select the Enable searching audio and video recordings for words check box.
The success rate of finding spoken words in audio recordings and in the audio portion of video recordings depends on the sound quality of each recording. This, in turn, depends on several factors, including the quality of the audio components in your computer, proper tuning and configuration of your microphone and webcam, the right distance between the speaker’s mouth and the microphone, and the presence of ambient noise. Before you routinely make recordings with OneNote, spend some time fine-tuning your equipment to make sure the results match your expectations.
Taking Notes in Your Own Handwriting
If you have a Tablet PC running Windows XP Tablet Edition or any edition of Windows 7, or you have a Single Touch or Multi-Touch PC running any edition of Windows 7, you can use the handwriting capabilities that are built in to OneNote 2010. Instead of typing notes on your keyboard, you can handwrite them in your notebooks by writing directly on your computer’s screen with a stylus or Tablet pen.
If you’re running OneNote 2010 on Windows 7, you can easily determine if your PC has Touch capabilities by clicking the Start button on the Windows taskbar, and then right-clicking the word Computer (look for it near the right column on the Start menu). On the pop-up menu that appears, click Properties. In the System dialog box that opens, look for the Pen and Touch confirmation under the System heading. If you see “Pen and Single Touch Input Available” or “Pen and Multi-Touch Input Available,” you can use OneNote’s handwriting features. If you see “No Pen or Touch Input is available for this display,” you’ll have to stick to the keyboard for now.
Handwriting features can have a number of benefits in electronic note-taking. For starters, if you handwrite better and faster than you type, taking notes will obviously be easier for you in this mode. In meetings or in a classroom, typing notes on a noisy keyboard in front of others can be distracting and even considered poor etiquette, whereas handwriting your notes is virtually silent. Additionally, if you frequently draw or sketch as part of your work, you can do so right on the notes page you’re writing on, without having to rely on predrawn shapes or imported images.
Another nice feature of digital handwriting is that your pen strokes can be formatted much like text (for example, you can change the thickness and color of your handwriting) and OneNote can even convert a selection of handwriting to text whenever you want to send a copy of your handwritten notes to colleagues or classmates in a more legible and reusable text format.
The following step-by-step procedures assume that you’re using OneNote on a Tablet PC. If you don’t yet have a device that lets you enjoy OneNote’s handwriting features, feel free to skip this section for now.
![]() LET ME TRY IT
LET ME TRY IT
Handwriting and Drawing Notes
OneNote defaults to typed text input, but you can easily switch to Pen mode for handwriting and drawing on a page.
To use the handwriting and drawing notes features, follow these steps:
1. On the ribbon, click or tap the Draw tab. You’ll notice that the Select & Type button appears orange, which means it’s currently selected and you’re using the keyboard and mouse for input (see Figure 5.11).
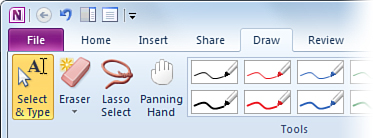
Figure 5.11 The Select & Type tool on the Draw tab is highlighted whenever you’re working in normal text-based input.
2. In the Tools ribbon group, move the mouse over any of the color pens until a ToolTip appears, informing you of the precise thickness and color of each available pen.
3. Click or tap the pen that you want to use. As soon as the pen is active, note that the Select & Type button is no longer selected, signaling you that you’re now in Pen mode.
4. Now pick up your Tablet PC pen or stylus and begin drawing or writing notes directly on your screen.
5. To end Pen mode, click or tap the Select & Type button on the Draw tab again.
SHOW ME Media 5.3—Handwriting and Drawing Notes
Access this video file through your registered Web Edition at my.safaribooksonline.com/9780132182447/media.
![]() LET ME TRY IT
LET ME TRY IT
Displaying Additional Pens and Highlighters
At first glance, the Draw tab on the ribbon shows you only 10 pens of different colors and degrees of thickness and four highlighters in as many colors. By expanding the gallery to full view, you can reveal additional presets.
To display additional pens and highlighters, follow these steps:
1. On the Draw tab, in the Tools group, click the More drop-down arrow in the lower-right corner of the box showing the pens and highlighters (see Figure 5.12).
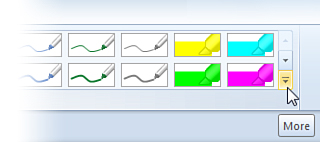
Figure 5.12 Clicking the More drop-down arrow in the lower-right corner of the pens and highlighters box reveals additional choices.
2. Click or tap any of the additional pens that are displayed in the Built-in Pens section of the gallery.
![]() LET ME TRY IT
LET ME TRY IT
Customizing a Pen or Highlighter
If the colors and line thickness of the pen and highlighter presets don’t meet your needs, you can create your own custom pens by following these steps. Although it might seem tempting to click the big Color & Thickness button that’s shown on the Draw tab of the ribbon, that command applies only to shapes and existing ink strokes.
To change the color and thickness of pens and highlighters, do the following:
1. On the Draw tab, in the Tools group, click the More drop-down arrow in the lower-right corner of the box showing the pens and highlighters (see Figure 5.12).
2. Click or tap the More Colors and Thickness Options command that appears near the bottom of the menu.
3. In the Pen Properties dialog box that opens (see Figure 5.13), click or tap a custom line thickness and color that you want your new pen or highlighter to have. You can rest the mouse pointer over the thickness and color swatches to display a ToolTip describing the line thickness and color properties.
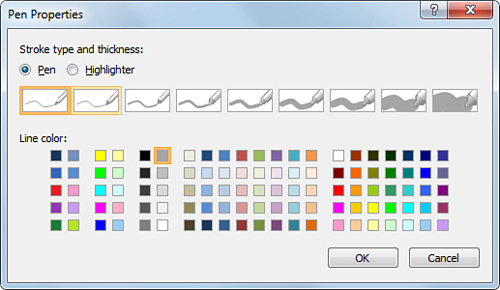
Figure 5.13 In the Pen Properties dialog box, you can create custom pens and highlighters by choosing the line thickness and line color you want.
4. Click OK to create the new pen or highlighter with the properties you selected. New pens and highlighters are automatically added to the Favorite Pens list on the ribbon. Click the More drop-down arrow (see Figure 5.12) whenever you want to see the full list of your pens and highlighters.
![]() LET ME TRY IT
LET ME TRY IT
Choosing a Handwriting Mode
When you use the handwriting features in OneNote 2010, it allows for the creation of both handwriting and drawings at the same time. If necessary, you can override this default setting to a more specific selection. For example, on a particular page, you could restrict your handwriting to only create drawings so that OneNote will know not to attempt to convert these drawings to text later on.
To choose a handwriting mode, follow these steps:
1. On the Draw tab, in the Tools group, click the More drop-down arrow in the lower-right corner of the box showing the pens and highlighters (see Figure 5.12).
2. Click or tap the Pen Mode command and then click or tap any of the three options you want.
If you’re not sure what mode to use, leave the default setting Create Both Handwriting and Drawings.
![]() LET ME TRY IT
LET ME TRY IT
Selecting Handwriting or a Drawing on a Page
Once you’ve handwritten or drawn something on a OneNote page, it appears as digital ink, which can appear free-form on the page canvas or within note containers.
You can select digital ink strokes in much the same way as you would select typed text on a page.
To select handwriting or a drawing on a page, follow these steps:
1. On the Draw tab, make sure that the Select & Type tool is selected (it will appear orange).
2. On the page, click any part of your handwritten text or drawing. OneNote will automatically include neighboring strokes that were created at the same time as the part of the handwriting you’re clicking.
3. While selected, eight control handles will surround the handwriting object to let you know you can now interact with the ink selection (see Figure 5.14). You can click and drag any of the handles to enlarge, shrink, stretch, or squeeze the selection as many times as you like.

Figure 5.14 You can click and drag the center of a selected handwriting object to move it to another location or click and drag the object handles surrounding the selection to change its appearance.
![]() LET ME TRY IT
LET ME TRY IT
Creating a Custom Selection from Handwriting or from a Drawing
On occasion, OneNote’s best guess about which ink strokes belong together to form a selection might not be to your liking. In these cases, you can easily create a custom selection by using the Lasso Select tool.
To create a custom selection from handwriting or from a drawing, follow these steps:
1. On the Draw tab, click the Lasso Select tool.
2. Click and drag a circle around only those ink strokes that you want to include in your selection (see Figure 5.15). For example, you might select only a single handwritten word or character in a line of text.

Figure 5.15 Using the Lasso Select tool, click and draw a selection border around the ink strokes you want to select.
3. When you release the mouse button, OneNote selects only the ink strokes that were included in the selection circle you drew (see Figure 5.16).

Figure 5.16 OneNote selects only the ink strokes that were included in the selection circle you drew.
Once handwritten text or the ink strokes of a drawing are selected in the way you want, you can apply formatting to the selection or cut or copy and then paste the selection to another location. You can also have OneNote convert handwritten notes and handwritten mathematical expressions to text.
![]() LET ME TRY IT
LET ME TRY IT
Changing the Formatting of Handwriting or a Drawing
To change the color and thickness of your selected ink strokes, follow these steps:
1. Select the parts of your handwriting or drawing that you want to format.
2. On the Draw tab, in the Insert Shapes group, click the Color & Thickness button.
3. In the Color & Thickness dialog box that opens, change the thickness or color (or both) and then click OK to apply the changes to your selection.
![]() LET ME TRY IT
LET ME TRY IT
Converting Handwriting to Text
The built-in handwriting recognition in OneNote 2010 can convert a selection of handwriting to standard text. This is useful whenever you want to send a copy of your handwritten notes to colleagues or classmates in a more legible and reusable text format.
To convert handwriting to text, follow these steps:
1. Select the parts of your handwriting that you want to convert.
2. On the Draw tab, in the Convert group, click the Ink to Text button.
Text recognition depends on the quality and legibility of the selected handwritten text. If you repeatedly have trouble getting OneNote to recognize your handwriting, try again with larger and more legible writing.
If the Ink to Text command is not available on the ribbon or on the shortcut menu, you most likely selected Create Drawings Only mode. See “Choosing a Handwriting Mode” earlier in this chapter for instructions for how to create handwriting objects that can be converted.
Erasing Specific Parts of Handwriting or a Drawing
Although you can easily erase handwriting on most Tablet PCs by moving the back of your pen or stylus over your digital ink strokes, OneNote offers several built-in eraser options for greater control.
To erase specific parts of handwriting or a drawing, follow these steps:
1. On the Draw tab, click the small arrow under the Eraser button.
2. On the menu that appears, select the Small, Medium, or Large Eraser. The icon on the button will change to remind you of your selection, and moving the mouse pointer over the button will display the name of the eraser you have chosen.
3. Move the mouse pointer over the page containing handwriting or a drawing. Click and drag the eraser mouse pointer over the parts you want to erase.
If you make a mistake, remember to click the Undo command on the Quick Access Toolbar or press the Ctrl+Z keyboard shortcut.
In addition to the Eraser options, OneNote 2010 also recognizes the scratch-out gesture built in to Tablet PCs to delete unwanted handwriting or drawings. Using your Tablet PC pen or stylus, quickly scratch out existing handwriting on the page—the same way you would rapidly scribble lines of ink back and forth over text on a piece of paper. Using the scratch-out gesture will cause the crossed-out text on your page to disappear.
Erasing an Entire Selection of Handwriting or a Drawing
To quickly erase a large amount of handwriting or a large drawing on your notes page, do the following:
1. Using the mouse or the Lasso Select tool on the Draw tab, select the parts of your handwriting or drawing that you want to erase.
2. On the Draw tab, in the Edit group, click Delete.
![]() LET ME TRY IT
LET ME TRY IT
Scrolling Through Ink Selections on a Page
Normally, the horizontal and vertical scrollbars that appear in OneNote will suffice for getting around on a page. However, because handwriting and drawing objects are typically larger than typed text objects, scrolling can take more time and increase the chance of deselecting a complex selection of ink strokes that you want to bring into view.
To quickly scroll through the page without using the scrollbars, follow these steps:
1. On the Draw tab, in the Tools group, click the Panning Hand button (see Figure 5.17).
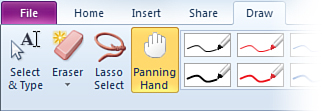
Figure 5.17 Using the Panning Hand tool, you can bring other parts of the page into view without accidentally deselecting any handwriting objects on the current page.
2. In this mode, the mouse pointer will change to the panning hand icon when you move it over the page.
3. Click and drag the panning hand in any direction to quickly bring other parts of the page into view.
4. When you release the mouse button, you’re left on the position of the page that you were last looking at and all selected objects on the page will remain selected.
Formatting Text
Although OneNote is still a comparatively young program compared with flagship Microsoft Office applications like Word and Excel, it boasts an impressive arsenal of formatting tools. Although many of these are almost identical to the tools in other Office applications that you’ve learned to depend on over the years, there are some that are decidedly different because of OneNote’s unique canvas.
In this section, let’s take a closer look at some of the ways in which you can add formatting to your notes pages and the information you collect on them. Almost every single formatting feature serves as a reminder why a traditional paper notebook can’t hold a candle to the things you can do with your OneNote notebooks.
![]() LET ME TRY IT
LET ME TRY IT
Setting the Default Font
Typed text in OneNote 2010 defaults to 11-point Calibri—a very legible font that’s included with all Microsoft Office 2010 applications. If you have a different preference for how new text should appear in your notes, you can specify your preferred default font, font size, and font color.
To set the default font, follow these steps:
1. On the File tab, click Options.
2. In the OneNote Options dialog box that opens, look for the Default Font section.
3. Select your preferences from the Font, Font Size, and Font Color drop-down menus, and then click OK. Your preferences will be applied to all new text that you create in your notes.
Changing Basic Text Formatting
If you’ve ever used text formatting tools in Microsoft Word, WordPad, or most other Windows programs, you likely already know most of the basic text formatting tools that are also available in OneNote.
SHOW ME Media 5.4—Applying Basic Formatting to Text
Access this video file through your registered Web Edition at my.safaribooksonline.com/9780132182447/media.
Using the boxes and buttons in the Basic Text group (see Figure 5.18) on the Home tab of the ribbon, you can apply any of the following formatting choices to text that you have selected:
• Font
• Font size
• Bold
• Italic
• Underline
• Strikethrough
• Superscript or subscript
• Text highlight color
• Font color

Figure 5.18 The Basic Text group on the ribbon contains the text formatting tools. If you rest the mouse pointer over any button, a ToolTip tells you what it does.
If you do a lot of text formatting on a page and prefer not to repeatedly move the mouse back and forth between the ribbon and your page, you can use the Mini toolbar that appears when you’re selecting text on a page (see Figure 5.19). As soon as you see the Mini toolbar appear over the text you’re interacting with, move the mouse pointer directly over the toolbar, and then click the drop-down menus and buttons to make your formatting selections.
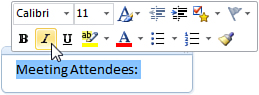
Figure 5.19 The Mini toolbar appears when you select text on a page. Its formatting commands and buttons work the same as they do on the ribbon.
![]() LET ME TRY IT
LET ME TRY IT
Using the Styles Gallery
OneNote 2010 is the first version to support a basic gallery of styles that let you easily apply predefined text formatting. Using styles can give your notes a consistent look, improve their legibility, and speed up your note-taking and formatting.
To apply a style from the gallery, follow these steps:
1. On the page, select the text you want to format with a style.
2. On the Home tab, in the Styles group, click the name of the style you want to apply (see Figure 5.20). If the style you want is not visible, either scroll through the list or click the More button in the lower-right corner of the Styles gallery to display the entire list of styles.
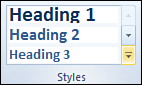
Figure 5.20 The Styles gallery lets you apply preset formatting combinations to selected text. On the right, click the two scroll buttons to move through the list, or click the More button in the lower-right corner to see all styles at once.
SHOW ME Media 5.5—Using the Styles Gallery to Format Notes
Access this video file through your registered Web Edition at my.safaribooksonline.com/9780132182447/media.
Although it is not possible to modify or customize these styles like you can do in Microsoft Word 2010, you can easily use any of the 11 built-in styles as the basis for any further text formatting that you manually apply.
For example, you can apply the “Heading 3” style from the list, and then, while the text is still selected, click the Underline button in the Basic Text group to also add underline formatting to the heading. Using this method, you can apply as many combinations of style formatting and manual text formatting as you want.
If you plan to apply styles to your notes rather frequently, you might want to learn and use the keyboard shortcuts that are available for some of them (see Table 5.1).
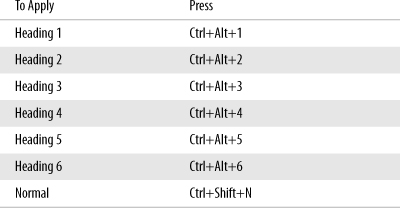
Note that the Page Title, Citation, Quote, and Code styles cannot be applied with keyboard shortcuts.
![]() LET ME TRY IT
LET ME TRY IT
Inserting Symbols and Special Characters
Aside from applying styles and changing the appearance of your notes text with different fonts and font sizes, you might need to generate any variety of foreign language characters, currency symbols, diacritical marks, and other special characters into your notes. OneNote 2010 has a full repository of these available at your fingertips.
To quickly apply a simple symbol (such as a trademark symbol or a Euro currency symbol) in your notes, do the following:
1. In your notes, place the insertion point where you want the symbol to appear.
2. On the Insert tab, in the Symbols group, click Symbol. A pop-up menu appears (see Figure 5.21).
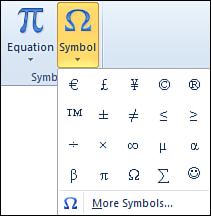
Figure 5.21 The Symbol button lets you pick from commonly used special characters that you can quickly insert into your notes. It also provides the entry point to a full repository that contains many more special symbols.
3. Click the symbol you want to insert. If the symbol you want is not shown on the pop-up menu, click More Symbols to open the Symbol dialog box where you can choose from additional special characters.
When you click the More Symbols command on the pop-up menu that appears after clicking the Symbol button on the ribbon, OneNote displays the Symbol dialog box, where you have many additional choices for inserting special characters into your notes (see Figure 5.22).
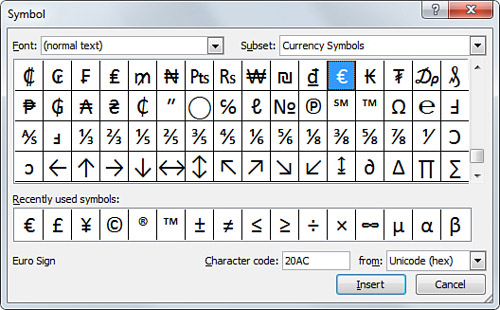
Figure 5.22 The Symbol dialog box button lets you access a sophisticated repository of special characters. You can optionally select a specific font and symbol subset before making a choice.
To insert a symbol from the dialog box, click the symbol you want, and then click Insert. Once you have used a symbol in this way, it will be added to the row of recently used symbols (see Figure 5.22) so you can easily find it again the next time you open this dialog box.
![]() LET ME TRY IT
LET ME TRY IT
Copying and Applying Formatting with the Format Painter
The Format Painter (see Figure 5.23) is a useful and time-saving way in many Office programs that lets you copy the formatting of a selection of text and then apply (“paint”) the exact same formatting to additional text on a page.
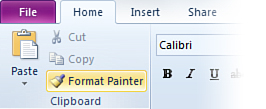
Figure 5.23 The Format Painter tool on the Home tab lets you copy the formatting from one selection of text and paste it to another. If you click this button once, it will let you paste a copied formatting style once. If you double-click the button, you stay in Format Painter mode until you turn the tool off again, so you can paste a copied formatting style multiple times.
This is most useful when you’re supplementing existing notes (or notes you’ve received from someone else) with new information and you want the new notes to be formatted in the same way. Alternately, if you have a large amount of plain notes and you don’t want to repeatedly go through multiple steps to apply a combination of formatting, the Format Painter lets you accomplish the same thing with just a couple of clicks.
SHOW ME Media 5.6—Using the Format Painter
Access this video file through your registered Web Edition at my.safaribooksonline.com/9780132182447/media.
To copy and paint a single occurrence of text formatting, do the following:
1. Go to a page that contains text whose formatting you want to copy and then select any part of that text. Your selection need not be precise because you are only copying the formatting style of the text you select, not the text itself.
2. On the Home tab, in the Clipboard group, click Format Painter.
3. The mouse pointer changes to an insertion point with a paintbrush symbol next to it (see Figure 5.24).
![]()
Figure 5.24 When the mouse pointer changes to an insertion point with a paintbrush symbol next to it, OneNote is waiting for you to select the text to which you want to apply (“paint”) the copied formatting.
4. Without clicking anywhere else on the page, navigate to the text to which you want to apply the formatting you just copied, and then drag the insertion point over the text to apply the copied formatting.
The Format Painter in OneNote can be used in an alternate way to help you save time when formatting multiple words or paragraphs of text.
By double-clicking the Format Painter button on the ribbon after you select the text from which you want to copy its formatting, OneNote will stay in Format Painter mode so you can apply the copied formatting to multiple selections of text until you turn off the tool. To do this, follow these steps:
1. Go to a page that contains text whose formatting you want to copy and then select any part of that text.
2. On the Home tab, in the Clipboard group, double-click Format Painter. Whereas single-clicking the button lets you paste a copied formatting style once, double-clicking the button causes OneNote to remain in Format Painter mode so you can paste a copied formatting style multiple times.
3. When the mouse pointer changes to the paint cursor (see Figure 5.24), navigate to the first occurrence of text to which you want to apply the formatting, and then drag the insertion point over the text.
4. After the text adopts the copied formatting, navigate to the next occurrence of text to which you want to apply the same formatting.
5. Repeat step 4 as many times as needed until the appearance of all of the target text on your pages has changed to the copied formatting.
6. When you’re done applying the copied formatting, click the Format Painter button on the ribbon (or press the Esc key) to turn off Format Painter mode.
Although the steps in the preceding two procedures work well with quick little selections of words, phrases, or fairly short lines of text in your notes, there’s an easier way to apply copied formatting to entire paragraphs of text with a single mouse click.
To do this, don’t drag the paint cursor over a bunch of text when you see the paint cursor after clicking the Format Painter button. Instead, move the paint cursor over the note container of a paragraph that you want to format, and then click the four-headed arrow icon that appears just to the left of the note container (see Figure 5.25). All of the text will immediately adopt the copied formatting of the source selection. This method makes formatting large amounts of notes in a consistent way much less time-consuming.
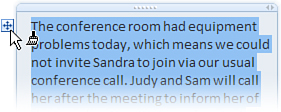
Figure 5.25 While in Format Painter mode, clicking the four-headed arrow icon next to the note container whose text you want to format will apply the copied formatting to the entire paragraph of text without the need to manually drag over the entire text.
![]() LET ME TRY IT
LET ME TRY IT
Clearing All Formatting from Text
Now that you know several different ways how to add formatting to the text in your notes, you’re probably wondering if it’s just as easy to get rid of text formatting. The answer is yes.
Removing all text formatting is especially useful when you’re working with various notes that you’ve received from other people and you want a fresh start before applying your own formatting choices. Or, you simply might not need the emphasis of certain formatting anymore. No matter what the reason, the following steps let you change your text back to the basics:
1. Select the text whose formatting you want to clear.
2. On the Home tab, in the Basic Text group, click Clear Formatting (see Figure 5.26).
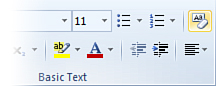
Figure 5.26 The Clear Formatting button near the upper-right side of the Basic Text group on the Home tab instantly clears all of the formatting from a selection, leaving only the plain text on the page.
Formatting Paragraphs
Whereas text formatting changes the appearance of the typed characters in your notes, paragraph formatting lets you modify the alignment, spacing, and ordering of lines of text in your notes.
Like many other basic formatting tasks, these options are nearly the same in OneNote 2010 as they are in some of the other Office 2010 programs you might already be familiar with. Still, let’s take a few moments to have a closer look at these features.
![]() LET ME TRY IT
LET ME TRY IT
Creating a Bulleted List
Bulleted lists are useful for arranging several pieces of written information on a page without the need to keep them in any particular order.
You can create a bulleted list in your notes by following these steps:
1. Place the insertion point on a new line where you want the bulleted list to start.
2. On the Home tab, in the Basic Text group, click the Bullets button (see Figure 5.27).
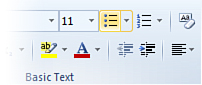
Figure 5.27 Clicking the Bullets button on the Home tab starts or ends a bulleted list in your notes. The small arrow next to this button reveals the Bullets Library.
3. When the first bullet appears, type the first item, and then press Enter. OneNote will keep creating bullets each time you press Enter.
4. To finish the bulleted list, press Enter twice in a row.
![]() LET ME TRY IT
LET ME TRY IT
Creating a Numbered List
Numbered lists are useful for arranging several pieces of written information on a page in a specific, numeric order—much like the numbered procedure steps you see in the “how to” sections in the chapters of this book.
You can create a numbered list in your notes by following these steps:
1. Place the insertion point on a new line where you want the numbered list to start.
2. On the Home tab, in the Basic Text group, click the Numbering button (see Figure 5.28).
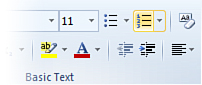
Figure 5.28 Clicking the Numbering button on the Home tab starts or ends a numbered list in your notes. The small arrow next to this button reveals the Numbering Library.
3. When the first number appears, type the first item and then press Enter. OneNote will keep creating numbered items each time you press Enter.
4. To finish the numbered list, press Enter twice in a row.
Aligning Text on a Page
Text alignment options in OneNote let you quickly move text to a specific location within its note container. You can choose to center text, flush it to the left, or flush it to the right.
To align text on a page, follow these steps:
1. Click anywhere within the line of text that you want to align.
2. On the Home tab, in the Basic Text group, click Paragraph Alignment (see Figure 5.29).
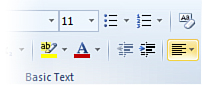
Figure 5.29 Clicking the Paragraph Alignment button on the Home tab lets you control text alignment for a selected line of text.
3. On the pop-up menu that appears, select the alignment you want—Align Left, Center, or Align Right.
Unlike a word processor, which typically uses the full dimensions of the current page, OneNote uses the dimensions of the note container containing the text that you want to align.
![]() LET ME TRY IT
LET ME TRY IT
Changing Paragraph Spacing
By default, OneNote will use the default font or the font with which you formatted the text on a page to determine how much space to keep between the lines of text in a paragraph.
You can easily change the spacing of any paragraph by following these steps:
1. Click anywhere within the paragraph whose line spacing you want to change.
2. On the Home tab, in the Basic Text group, click Paragraph Alignment.
3. At the bottom of the pop-up menu that appears, click Paragraph Spacing Options (see Figure 5.30).
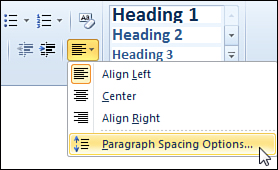
Figure 5.30 The Paragraph Spacing Options command appears on the Paragraph Alignment button’s pop-up menu.
4. In the Paragraph Spacing Options dialog box that appears, enter the amount of space (in points) that you want OneNote to apply before or after a line of text. You can also set a minimum line spacing value in the last field (also in points).
5. Click OK to apply your preferences to the current paragraph.
Indenting Text on a Page
To help you format notes in a simple outline structure, you can increase or decrease the indent position of a line of text by following these steps:
1. Click anywhere within a line of text that you want to indent.
2. On the Home tab, in the Basic Text group, click Increase Indent Position (see Figure 5.31).
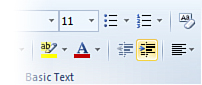
Figure 5.31 The two Indent Position buttons on the Home tab let you decrease or increase the indent of a line of text. You can add multiple levels of indentation for quick and easy outline-style note-taking.
3. If necessary, click the Increase Indent Position button any number of additional times to further increase the indent position.
Once you have increased the indent position of a line of text by at least one level, the Decrease Indent Position button on the ribbon becomes available so you can remove the indentation again later.
Creating a Hierarchical Outline in Your Notes
Outlines offer a condensed view of a particular subject. They’re often created to plan and summarize a project (like this book, for example), and to account for its preparation and successful execution. Outlines are often created in the brainstorming or idea-gathering phase of a project or task, which means that the information is likely to change quite often. This is where paper notebooks have always failed us—once written down, you can never easily change the order of things again. OneNote, of course, offers all of the flexibility and benefits of electronic note-taking, never running out of paper and allowing its pages and content to be changed on a whim.
When you take notes in a hierarchical outline format, you can use the built-in level selection features in OneNote 2010 to quickly select text at certain levels of your outline. This type of selection makes formatting or rearranging of large outlines easier than ever before. Another benefit is the ability to collapse or expand any level of notes with the click of a mouse. This puts you in control of the information at all times—whether you want to see only the high-level headings of your outline or prefer to see all of the detail.
SHOW ME Media 5.7—Structuring Notes as Outlines
Access this video file through your registered Web Edition at my.safaribooksonline.com/9780132182447/media.
So, what does this look like? Let’s imagine you have an outline with a main heading at the top and three levels of main points below—each of which with three lines of detail below that (see Figure 5.32).
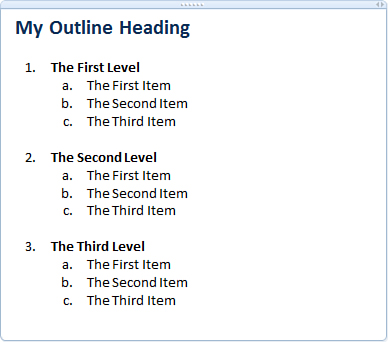
Figure 5.32 This sample outline consists of a main heading, three levels, and three detail items underneath each level. The longer this outline gets, the more difficult it would be to format or view it. With OneNote, however, these tasks are easy.
To create this outline, I applied the Heading 1 style from the Styles gallery to the outline heading I typed. Next, I started a numbered list for the three outline levels. For each of the three lines of detail underneath each level, I pressed the Tab key to increase the indent position. OneNote detected that I was creating an outline and automatically changed the list formatting accordingly.
No matter how many levels or items you have in your outline, you can interact with it immediately. The first method is OneNote’s excellent selection model, which lets you select specific text in your outline at common levels for the purpose of reordering or otherwise formatting that text.
To select levels in an outline, follow these steps:
1. Move the mouse pointer over the main outline heading and watch for the four-headed arrow icon that appears next to it (see Figure 5.33).

Figure 5.33 Interacting with text in an outline is the same as with normal text. Move the mouse pointer over a line of text, such as the outline heading in this example, and then right-click the four-headed arrow icon for more options.
2. Right-click the arrow icon and then, on the shortcut menu that appears, move the mouse over the Select command.
3. On the Select flyout menu, you can choose which level of the outline you want to select. For example, choose All at Level 2 to select all of the numbered headings in the list (see Figure 5.34).
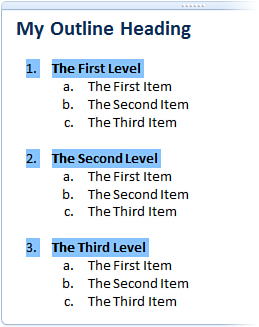
Figure 5.34 In this outline, selecting All at Level 2 causes OneNote to select all of the numbered headings. While selected, you can format the headings or change their hierarchical level by using the indentation commands on the ribbon.
While a level in your outline is selected, you can apply bulk formatting to it (for example, you can make all of the numbered headings bold or change them to red text) or you can use the Increase Indent Position and Decrease Indent Position buttons on the ribbon (Home tab, Basic Text group) to change the order of the selected items in the outline.
As mentioned at the beginning of this section, there is another really great outlining feature in OneNote 2010, which lets you move entire blocks of your outline around and also allows you to control the amount of information that you see in your outline at any one time. With the click of a mouse, you can collapse (and later expand again) any level of notes.
Let’s say that your outline has become quite lengthy and, to gain oversight, you want to see only the numbered level headings, not all of the detailed items below them. Hiding the details requires far less scrolling through the full outline and you can then more easily check to see whether the main points are still in the right order. If they’re not, you can then move an entire level with all of its subitems to a new location in the outline. For written projects such as a book or a paper that you’re outlining for school, this is especially useful.
In the sample outline, do the following:
1. Move the mouse pointer over the first numbered level heading (in the preceding example, “The First Level”) and watch for the four-headed arrow icon that appears next to it (see Figure 5.35).

Figure 5.35 When you single-click the four-headed arrow icon next to an outline level heading, the icon turns yellow to indicate that the entire level is selected. You can now double-click the arrow icon to collapse the detail items below the heading. Double-clicking the icon again restores the full view of the related items. To move the selected block to another location in the outline, click and drag the arrow icon and then drop the text where you want it.
2. Click the arrow icon once. It will turn yellow to indicate selection, and all of the text at this level—including the subitems below it—will be selected.
3. To hide (collapse) the subitems below the numbered level heading, double-click the arrow icon next to the heading. Only the text of the level heading will remain shown, and the arrow icon will appear stacked to let you know that it has been collapsed (see Figure 5.36).
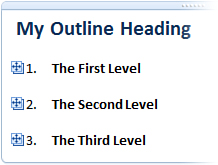
Figure 5.36 When you double-click the arrow icon next to an outline level, all subitems below that level will be hidden from view, and the arrow icon will appear stacked to indicate it can be expanded by double-clicking the icon again.
4. If you want, you can click and drag a collapsed arrow icon to move the heading and the subitems it contains to another location in your outline. Once you’ve moved an item, you can double-click the collapsed arrow item again to unhide the subitems below it.
Aside from organizing an outline for yourself, the ability to show and hide detail in this way is helpful in other situations, too. For example, you could type a list of vocabulary words and then add their definitions in a level below them and then test your knowledge of these words using the show/hide functionality, much like paper-based flash cards. It’s a great way to study for any question-and-answer-based subject.
Another situation where this feature comes in handy is when you’re speaking during a presentation and you need to stay on script. You can keep only the level headings shown to keep you on track overall, but you can also easily double-click any of the headings to remind you of important details that you might not remember in the moment. This is an easier way to quickly locate information than staring at the wall of text of an entire outline.
By the way, the simple outline example in the screenshots isn’t meant to suggest that you must use a numbered list. You can use any available style of bullets and numbering or choose not to use them at all and only rely on multilevel indentation for your own outlines.
However you decide to make use of OneNote’s useful outlining features, they’re sure to help you stay organized and save time.