
Using OneNote on Your Mobile Phone
In Chapter 9, “Sharing Notes with Other People,” you learned about the benefits of sharing notebooks—either with yourself across the different computers you may be using, or with other people for the purpose of truly collaborating on a project together. I also briefly introduced you to the free OneNote Web App, which lets you view and even edit your shared OneNote notebooks in a web browser.
If you purchased a smartphone in recent months, you have an additional option for using OneNote on the go, especially when you don’t have access to a computer or you don’t want to lug a laptop around with you. It’s called OneNote Mobile (see Figure 11.1), and it’s currently available on Windows Phone 7 and on the iPhone.
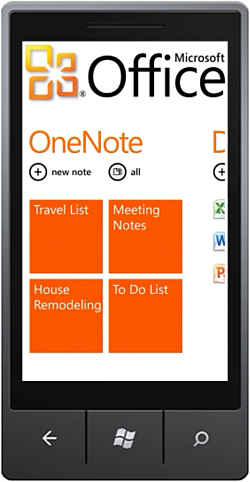
Figure 11.1 The OneNote Mobile app offers yet another choice for managing all of the information in your busy life on the go. OneNote Mobile is currently available for your Windows Phone 7 smartphone or your iPhone.
Attempting to document something like an ever-changing mobile phone app in a book might seem counterproductive, considering that the development and release cycles of such apps are dramatically faster than that of the full-featured desktop apps in Microsoft Office. Indeed, by the time you read this chapter, the features in the two flavors of OneNote Mobile are likely to have evolved and improved. Nevertheless, I wanted to briefly cover basic OneNote Mobile functionality in this overview to give you an understanding of how the various flavors of OneNote may suit your needs and fit into your life. You can learn more about OneNote Mobile on Windows Phone 7 at http://www.microsoft.com/windowsphone, and more information about OneNote Mobile for iPhone is available by searching for Microsoft OneNote in the iTunes AppStore at http://www.itunes.com.
OneNote Mobile on Windows Phone 7
Not surprisingly, probably the best way to experience any Microsoft Office mobile app is on Microsoft’s own smartphone platform, called Windows Phone 7. Although the individual devices that support this operating system vary with different North American cell phone providers, the complete version of Office Mobile—including OneNote Mobile—is included for free on all Windows Phone 7 devices.
The following procedures outline the basic tasks for getting started with this version of OneNote Mobile.
![]() LET ME TRY IT
LET ME TRY IT
Starting OneNote Mobile on Windows Phone 7
On your Windows Phone 7 device, do the following:
1. Near the upper right on your phone’s Start screen, click the circled arrow pointing to the right. Alternately, you can swipe your finger across the screen from the right side to the left.
2. In the list of installed apps that appears, swipe your finger upward to scroll down to the app named Office.
3. With your finger, tap the Office app. The Microsoft Office hub appears, giving you access to OneNote Mobile, Excel Mobile, Word Mobile, and PowerPoint Mobile.
You might notice that the Office hub displays OneNote right on its home screen. This allows fast access to all of your notes, making capturing and accessing your information on the go less cumbersome.
![]() LET ME TRY IT
LET ME TRY IT
Exploring the OneNote Mobile Guide
The square, orange tiles on the Office home screen represent individual notes that you’ve created or opened in OneNote Mobile. To open a note, tap its orange tile.
If you don’t have any of your own notes there yet, take a moment to read the short OneNote Mobile Guide, which is included as a OneNote note. It briefly outlines the features that are available in OneNote Mobile on Windows Phone 7.
To explore the OneNote Mobile Guide, do the following:
1. On the Office Mobile home screen, tap the orange tile labeled “Explore OneNote.” This is how you open any of your OneNote Mobile notes for viewing or editing.
2. When the note opens, read the information provided. Swipe your finger upward across the screen to scroll down and display the rest of the page.
3. To return to the Office Mobile hub, tap the Back button at the bottom of your phone or device.
![]() LET ME TRY IT
LET ME TRY IT
Creating a New Note
To create your first note in OneNote Mobile on your Windows Phone 7, follow these steps:
1. On the Office home screen, under the OneNote app heading, tap the New Note button (see Figure 11.2).
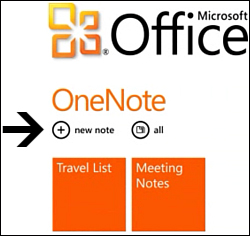
Figure 11.2 Tapping the New Note button on the home screen of the Office hub launches OneNote Mobile on Windows Phone 7. Each note you create will be shown as an orange tile on the home screen, giving you easy access to all of your mobile notes.
2. When the note opens and the onscreen keyboard appears, tap the words Enter title at the top of the screen.
3. Type a page title to describe the note. This page title will appear on the note’s orange tile on the home screen and it will also be used as the page title when you view the note in the OneNote Web App or in the full version of OneNote 2010 on your computer.
4. Tap below the line that appears under the page title and then use the onscreen keyboard to type notes.
As with the full version of OneNote 2010, you don’t need to explicitly save your work when you’re done taking notes in OneNote Mobile. It will save your notes as soon as you’ve written them, which means you can tap the Back button or the Start (Windows logo) button at the bottom of your phone or device at any time to quit your session of OneNote Mobile. The next time you return to the Office hub, you’ll see your note on the OneNote home page.
![]() LET ME TRY IT
LET ME TRY IT
Correcting Text in a Note
If you’re using any Microsoft Office program on your computer, you’re already familiar with the convenient spell-checking feature, which underlines potentially misspelled or unknown words with a red squiggly line. In OneNote Mobile, this feature works, too. Given that the onscreen keyboards on cell phones are much more error-prone than using a real, physical keyboard, this is a welcome and useful feature, allowing you to make corrections easily, especially if you’ll be sharing your mobile notes with others.
To check spelling in a mobile note, do the following:
1. Open or create a new note.
2. Look for text that is underlined with a red, squiggly line.
3. Tap the questionable word once with your finger to select it and then inspect the word list that’s displayed just above the onscreen keyboard.
4. To substitute a misspelled word with a word that appears in the list, tap to select the correct word. To substitute a misspelled word with a new word that doesn’t appear in the word list, type the correct word.
![]() LET ME TRY IT
LET ME TRY IT
Formatting Text in a Note
Excluding the page title, OneNote Mobile on Windows Phone 7 supports basic text formatting that you might already be used to from any of the programs in the full version of Microsoft Office on your computer.
You can format any part of your notes text in any of the following styles:
• Bold text
• Italic text
• Underline text
• Strikethrough text
• Yellow highlighted text
To apply text formatting to any part of your notes, do the following:
1. Open or create a note whose text you want to format.
2. Tap the text you want to format to select it. If you want to extend the selection, tap and hold either of the two small arrows that appear underneath the selection highlight and then drag them to include all of the text you want to format. If you make a mistake, either start over or format the remaining text separately.
3. At the bottom of the screen, to the right of the round command icons, tap the More (...) icon to display the action menu.
4. At the bottom of the menu that appears, tap Format.
5. In the Format menu, tap the formatting style you want. Because the text will stay selected, you can easily apply any additional formatting style to the selected word or paragraph. To do so, repeat steps 3–5 in this procedure to apply the additional formatting.
![]() LET ME TRY IT
LET ME TRY IT
Creating Lists in a Note
Besides text formatting, you can format lines or paragraphs of text in your note as lists. OneNote Mobile supports numbered lists and bulleted lists. You can also use text indentation for creating a basic text outline without any list formatting or to create additional levels of detail in a numbered or bulleted list. No matter which format you choose, list formatting can be applied to any blank line in your note or to a selection of existing text.
Numbered lists are best for showing items in sequential order (for example, the steps in a list of driving directions). To start a numbered list, do the following:
1. Open or create a note.
2. Place the cursor on a new, blank line, and then tap the round Numbered List command icon at the lower left of the screen.
3. When 1. appears as the start of the list, type the first list item by using the onscreen keyboard.
4. Tap the Enter key (the L-shaped arrow on the lower right of the onscreen keyboard) to continue the list with the next item. To end the list, tap the Enter key twice.
To format existing text as a numbered list, do the following:
1. In your note, tap the line of text that should become the first item in a numbered list.
2. Tap the round Numbered List command icon at the lower left of the screen.
3. Tap to select any additional lines of text underneath the current line and then repeat step 2.
Bulleted lists are best for showing items that belong together but don’t require a logical order (for example, a shopping list). To start a bulleted list, do the following:
1. Open or create a note.
2. Place the cursor on a new, blank line.
3. At the bottom of the screen, to the right of the round command icons, tap the More (...) icon to display the action menu.
4. On the menu that appears, tap Bulleted List.
5. When the first bullet symbol appears, type the first list item by using the onscreen keyboard.
6. Tap the Enter key (the L-shaped arrow on the lower right of the onscreen keyboard) to continue the list with the next item. To end the list, tap the Enter key twice.
To format existing text as a bulleted list, do the following:
1. In your note, tap the line of text that should become the first item in a bulleted list.
2. At the bottom of the screen, to the right of the round command icons, tap the More (...) icon to display the action menu.
3. On the menu that appears, tap Bulleted List.
4. Tap to select any additional lines of text underneath the current line and then repeat steps 2–3.
If you want, you can easily switch back and forth between numbered and bulleted list styles by selecting the list text and then choosing the new style you want. Similarly, you can remove list formatting altogether by selecting the formatted list text and then applying the same list style that’s currently applied. This removes the selected list formatting.
![]() LET ME TRY IT
LET ME TRY IT
Adding a Picture to a Note
If you want to insert a picture into your notes, do the following:
1. In your note, tap to activate the cursor where you want the picture to be inserted.
2. At the bottom of the screen, tap the round Picture (+) icon.
3. From the Choose Picture screen that appears, do either of the following:
• To use an existing picture, tap any of your existing photo albums and then tap to select the picture you want to insert into your notes.
• To take a new picture, tap the round Camera icon at the bottom of the screen, take a new picture, and then tap Accept to insert it into your notes.
To delete a picture that you’ve inserted, tap outside and to the right of it and then tap the Backspace/Delete key on the onscreen keyboard.
![]() LET ME TRY IT
LET ME TRY IT
Adding an Audio Recording to Your Note
Inserting an audio recording into your notes is a great way to capture spoken information on the go when you can’t or don’t want to type. For example, you could record a spoken lecture in class or record an interview that you’re conducting as part of a research project.
To add an audio recording to your note, do the following:
1. In your note, tap to activate the cursor where you want the audio clip to be inserted.
2. At the bottom of the screen, tap the round Audio (microphone) icon.
3. Start speaking or recording.
4. When you’re done, tap the Stop button. OneNote inserts an audio clip icon in your notes. You can play the audio again by tapping this icon.
To delete an audio clip that you’ve inserted, tap to the right of it and then tap the Backspace/Delete key on the onscreen keyboard.
![]() LET ME TRY IT
LET ME TRY IT
Sending a Note in E-mail
To quickly send a snapshot of your note in e-mail, do the following:
1. On the Office home screen, tap the note you want to send.
2. At the bottom of the screen, tap the round Email icon.
3. Tap the name of the e-mail account you want to use.
4. Add one or more recipients to the To line and, if necessary, modify the Subject line and message body.
5. For additional options, tap the More (...) icon before sending the message.
6. When ready, tap the round Send icon.
![]() LET ME TRY IT
LET ME TRY IT
Synchronizing Your Notes with SkyDrive
When you first begin to use OneNote Mobile on your Windows Phone 7, it creates your notes on the phone.
To synchronize your default notebook on Windows Live SkyDrive (see Chapter 9 for more information) for the first time, do the following:
1. On the Office home screen, tap All (see Figure 11.3).
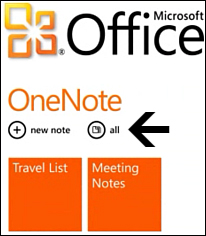
Figure 11.3 The All button provides access to all of your mobile notes, including notes that might not be listed as orange tiles on the Office home screen. This command also provides access to the option of synchronizing your notes with Windows Live SkyDrive.
2. At the bottom of the screen, tap the round Refresh icon.
3. When the Sync with SkyDrive? prompt appears, tap Yes.
4. Watch the very top of your screen for status messages. When OneNote has finished signing in and synchronizing your account, a personal notebook named “Personal (Web)” will be created in your My Documents folder on SkyDrive. Notes you create or edit here will be automatically synchronized with SkyDrive.
To view the contents of your “Personal (Web)” notebook on SkyDrive, tap All on the Office home screen and then, at the top of the screen, tap Notebooks.
To open any page in your “Personal (Web)” notebook, tap the notebook in the Notebooks list and then tap the page you want to open. Any changes you make to the page will be automatically synchronized with your SkyDrive account.
You should never rename or delete the “Personal (Web)” notebook or the Unfiled Notes section within it while a sync relationship between your Windows Phone 7 and SkyDrive exists. Doing so may result in the loss of some of your notes.
If you want to open a different OneNote notebook that you’ve stored on SkyDrive, do the following:
1. On your Windows Phone 7 device, tap the Internet Explorer icon on your phone’s Home screen.
2. At the bottom of the screen, tap the More (...) icon and then tap Settings.
3. On the Settings page, under Website Preference, make sure the Mobile Version option is selected (tap it, if necessary).
4. Tap the Back button at the bottom of your phone or device to return to the previous screen.
5. Tap the Address bar in Internet Explorer, type http://office.live.com, and then tap the Go button (the right-facing arrow on the onscreen keyboard).
6. On the Windows Live sign-in screen, enter your Windows Live ID and password and then tap Sign In.
7. In your folder list, tap the folder containing the notebook you want to open and then tap the name of the notebook.
8. When the notebook properties are displayed, tap the big OneNote icon to open the notebook and then tap any page to view or edit its notes.
Searching Your Notes
OneNote’s wonderful Instant Search feature that you’ve likely come to appreciate in the full version of OneNote 2010 is also available on Windows Phone 7.
To find specific text in any of your notes pages, do the following:
1. On the Office home screen, tap All (see Figure 11.3).
2. While in the Pages list, tap the Search button at the bottom of your phone or device.
3. In the Search box that appears at the top of the page, type a word or phrase for which to search your notes.
4. Tap any of the pages that appear in the results list to go to the note containing the occurrence.
To cancel searching without going to a note, tap the Back button at the bottom of your phone or device.
![]() LET ME TRY IT
LET ME TRY IT
Deleting Notes
To erase notes you no longer need, do the following:
1. On the Office home screen, tap All (see Figure 11.3).
2. In the Pages list, tap and hold the title of the page you want to delete.
3. When the pop-up menu appears, tap Delete.
4. When the confirmation prompt appears, tap Yes to delete the note.
Checking for Updates
OneNote Mobile is part of Office Mobile, which is installed and updated as part of the Windows Phone 7 operating system.
To make sure you’re alerted of occasional software updates, do the following:
1. Near the upper right on your phone’s Start screen, click the circled arrow pointing to the right. Alternately, you can swipe your finger across the screen from the right side to the left.
2. In the list that appears, scroll down and then tap Settings.
3. On the Settings screen, scroll down and then tap Phone Update.
4. If necessary, tap the check boxes here to enable the update notification option.
5. Tap the Start (Windows logo) key at the bottom of your phone or device to save your settings.
If you’re notified of updates to your Windows Phone 7 operating system (which might or might not include functionality changes and updates for Office Mobile), connect your phone or device to the Windows Phone 7 software installed on your computer and follow the upgrade prompts.
This covers the basic features of OneNote Mobile on your Windows Phone 7. Mobile apps and platforms change continuously, so if the instructions in this chapter don’t exactly match the version you’re using by the time you read this chapter of the book, be sure to look online for the latest documentation for your version and device. As is the case with the OneNote Web App discussed in Chapter 9, the OneNote Mobile apps do not support all of the features that are available in the full version of OneNote 2010 on your computer, but they’re a great way to keep basic versions of your notes in sync, no matter where in the world you may find yourself.
OneNote Mobile on iPhone
OneNote Mobile for iPhone marks the first time Microsoft has released an Office 2010 application on another company’s mobile operating system. This is wonderful news for OneNote users because it’s just another example of how you can integrate OneNote into your life, even if you decide to adopt a mix of different technologies and devices to suit your lifestyle.
Though the features available in OneNote Mobile differ somewhat between the Windows Phone 7 and the iPhone versions, the basics of accessing and using your shared notebooks on SkyDrive are supported equally. However, whereas OneNote Mobile is already built in to Windows Phone 7 devices, you first must download it and install it on your iPhone. Depending on your region, there may also be an App Store fee for purchasing the app.
The following procedures aim to outline the basic tasks for downloading OneNote Mobile for iPhone and how to get started with the app after you have it installed. Please keep in mind that the features and design of this app have been rapidly changing, so if the information here does not precisely match the version of the app that you’re using, remember to search online for the latest documentation—either in the iTunes App Store or on Microsoft’s Office.com website.
![]() LET ME TRY IT
LET ME TRY IT
Downloading OneNote Mobile for iPhone
Before you can use OneNote Mobile for iPhone, you must download the app from Apple’s iTunes App Store and install it on your iPhone by doing the following:
1. On your iPhone, tap the App Store icon.
2. At the bottom of the screen, tap the Search icon.
3. Tap the Search box at the top of the screen, type Microsoft OneNote, and then tap Search.
4. In the results list, tap Microsoft OneNote.
5. On the details screen, tap the Price button and then tap Install.
At the time this book went to print, OneNote Mobile for iPhone was supported on any iPhone or iPod Touch running Apple iOS 4.2 or later. Because mobile apps are frequently updated, you should always carefully read the system requirements of any later versions of OneNote Mobile for iPhone.
Although the iPhone version of OneNote Mobile can be used on the iPad in compatibility mode, a native iPad app had not yet been developed when this book was released.
The following procedures and screenshots are based on OneNote Mobile for iPhone version 1.2, which was the current version when this book was released. If you’re using a newer version of OneNote on your iPhone, the basic steps should remain the same, but you might need to poke around the interface a bit more to find commands and interface elements that were moved, changed, or deprecated in the newer version.
![]() LET ME TRY IT
LET ME TRY IT
Starting OneNote Mobile for iPhone
You can run OneNote Mobile for iPhone as soon as it has finished installing. Do the following:
1. Tap the OneNote app icon when it appears on your iPhone.
2. When the title screen appears (see Figure 11.4), sign in using your Windows Live SkyDrive account (see Chapter 9 for more information). If you didn’t create one, you can tap Learn More on this screen to sign up. You must sign in before you can use OneNote Mobile on the iPhone.
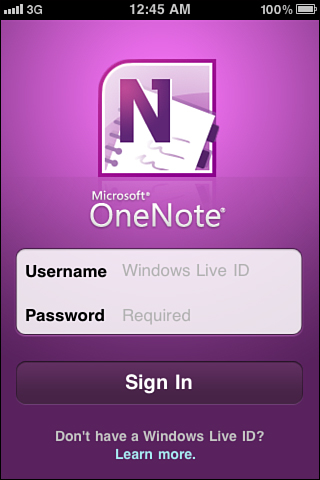
Figure 11.4 Before you can use OneNote Mobile for iPhone, you must sign in with your Windows Live account so that the app knows with which SkyDrive notebooks you want to synchronize your notes.
3. When you’re signed in, OneNote creates a “Personal (Web)” mobile notebook. The Home screen that appears displays all of your available notes and notebooks that will be synchronized between your iPhone and your Windows Live SkyDrive account.
![]() LET ME TRY IT
LET ME TRY IT
Creating a New Note
To quickly create a new note, do the following:
1. In the lower-right corner of the Home screen, tap the New Page icon.
2. When the note opens and the onscreen keyboard appears, tap the words Add title at the top of the screen.
3. Type a page title to describe the note. This page title will appear in the page list when you view the contents of notebooks on your iPhone and it will also be used as the page title when you view the note in the OneNote Web App or in the full version of OneNote 2010 on your computer.
4. Tap below the line that appears under the page title and then use the onscreen keyboard to type notes.
As with the full version of OneNote 2010, you don’t need to explicitly save your work when you’re done taking notes in OneNote Mobile. It will save your notes as soon as you’ve written them, which means you can exit the current page or the OneNote Mobile app at any time without manually saving your work.
Creating Lists in a Note
With OneNote Mobile for iPhone, you can format text in your note as bulleted lists, which is useful for creating groups of unordered items that belong together, such as the items on a shopping list.
To start a bulleted list, do the following:
1. Open or create a note.
2. Place the cursor on a new, blank line.
3. On the command bar above the onscreen keyboard, tap the List icon.
4. When the first bullet symbol appears, type the first list item by using the onscreen keyboard.
5. Tap Return to continue the list with the next item. To end the list, tap the Return key twice.
To format existing text as a bulleted list, do the following:
1. In your note, tap the line of text that should become the first item in a bulleted list.
2. Tap the List icon.
3. To add additional items to this list from existing text, tap to select any additional lines of text underneath the current line and then repeat step 2.
![]() LET ME TRY IT
LET ME TRY IT
Adding a Picture to a Note
If you want to insert a picture into your notes, do the following:
1. In your note, tap to activate the cursor where you want the picture to be inserted.
3. From the menu that appears, do either of the following:
• Tap the Camera button to take a new picture that you can then insert into your notes.
• Tap the Photo Library button to choose an existing image on your iPhone that you can then insert into your notes.
To view a full-screen version of the picture that you’ve inserted, tap it once in your notes. Use the return button in the upper-left corner of your screen to return to the notes page containing the picture.
To delete a picture that you’ve inserted, tap outside and to the right of it, and then tap the Backspace/Delete key on the onscreen keyboard. When prompted, tap Delete.
![]() LET ME TRY IT
LET ME TRY IT
Sending a Note in E-mail
To quickly send a snapshot of your note in e-mail, do the following:
1. Open or create the note you want to send.
2. If the onscreen keyboard is visible while you view the page, hide it by tapping the keyboard icon.
3. In the upper-right corner of the screen, tap the Action button (arrow icon), and then tap Email This Page.
![]() LET ME TRY IT
LET ME TRY IT
Synchronizing Your Notes with SkyDrive
Because you must sign in to a Windows Live SkyDrive account to begin using OneNote Mobile for iPhone, your notes are automatically kept in sync from the very first time you use OneNote on your iPhone.
To check when the last synchronization occurred, or to force a manual sync after you’ve typed or changed a lot of notes, do the following:
1. On the Home screen in OneNote Mobile, tap the Settings button in the upper-right corner of the screen.
2. At the very top of the Settings screen, note the “Last sync” date and time. This indicates when OneNote Mobile last synchronized your notes automatically.
3. If you want to manually sync your notes for any reason, tap the Sync Now button.
4. If you encounter any temporary sync errors (for example, if you lose your cellular or wireless signal while OneNote attempted synchronization), they will be displayed underneath the Sync Now button on the Settings screen. To try and resolve temporary sync errors, tap the Sync Now button to force a manual sync when your signal has been restored.
5. If you like, explore any of the other options on this screen. To exit the Settings page, tap the Close button in the upper-right corner of the screen.
![]() LET ME TRY IT
LET ME TRY IT
Searching Your Notes
OneNote Mobile for iPhone version 1.2 or later includes the wonderful Search function in OneNote, which lets you quickly find the information you need. This is extremely useful in a variety of situations, especially if you take full advantage of keeping all your notes uploaded to your free SkyDrive account.
To find specific text in any of your notes pages, do the following:
1. On the Home screen, tap Search.
2. On the Search Results screen, type a word or phrase for which to search your notes, and then tap Search.
3. Tap any of the pages that appear in the results list to go to the note containing the match.
To cancel searching without going to a note, tap the Close button in the upper-right corner of the screen.
Deleting Notes
To delete mobile notes on your iPhone, do the following:
1. Open the note you want to delete.
2. If the onscreen keyboard is visible while you view the page, hide it by tapping the keyboard icon on the far right of the command bar.
3. In the upper-right corner of the page, tap the Action button (arrow icon), and then tap Delete This Page. There is no confirmation prompt for this action, so take care not to tap this button too quickly.
![]() LET ME TRY IT
LET ME TRY IT
Checking for Updates
Because it’s still a new development effort, OneNote Mobile for iPhone may be updated more frequently than typical mobile apps.
To make sure you’re alerted of occasional software updates, do the following:
1. On your iPhone, tap the App Store icon.
2. At the bottom of the screen, tap the Updates icon.
3. If Microsoft OneNote appears in the results list, tap it to display the results screen. Here, you can read about what’s been added and changed in the app.
4. To update OneNote Mobile for iPhone to the newer version, tap the Update button on the details screen. If prompted, enter your iTunes password (not to be confused with your OneNote Mobile sign-in password).
5. When the app has been updated, tap the OneNote icon on your iPhone to restart the app. You might need to sign in to your Windows Live account again.
This covers the basic features of OneNote Mobile for iPhone. As is the case with the OneNote Web App discussed in Chapter 9, the OneNote Mobile app does not support all of the features that are available in the full version of OneNote 2010 on your computer, but it’s a great way to keep basic versions of your notes in sync, no matter where in the world you may find yourself.