
17. More Ways to Share Your Photos
Discover a few additional ways to share your photos in iPhoto ’11.
So far, you’ve learned about many different ways to use iPhoto to edit and enhance your photos and then share them—both in the real world and in cyberspace. There are, however, several more ways you can use iPhoto ’11 to showcase and share your favorite digital photos.
This chapter discusses how to publish photos onto a website using the Share to iWeb feature of iPhoto ’11. You also discover how to customize your Mac’s Desktop wallpaper and screen saver using your photos and how to enjoy your favorite images while you’re on the go by transferring them to your iPhone, iPod, or iPad using iTunes’ Sync feature.
![]() To learn more details about burning a large number of your photos to CD or DVD in iPhoto ’11, to share, view, or archive them, see Chapter 18, “Burning Photos to CD or DVD from iPhoto ’11.”
To learn more details about burning a large number of your photos to CD or DVD in iPhoto ’11, to share, view, or archive them, see Chapter 18, “Burning Photos to CD or DVD from iPhoto ’11.”
Creating a Web Page with iWeb
When you access the Share pull-down menu and select the iWeb option, you’ll discover an option for creating a photo page or blog. In addition to publishing single or multiple photos from Events or Album folders in iPhoto ’11 onto the Web using iWeb, you can also use this feature to publish slideshows created in iPhoto ’11.
To use this feature, first highlight and select an Event or Album folder or individual images in a folder (or a slideshow listed on the Source list) that you want to publish. Next, select the Photo Page or Blog command under the Share pull-down menu.
iWeb is one of the other applications built into the iLife ’11 suite of applications. When you select the iWeb feature, this app automatically launches (assuming you have it installed on your Mac). If iWeb isn’t installed, the menu option in iPhoto ’11 is not available to you.
Tip
iWeb is a separate application from iPhoto ’11, but it’s also part of the iLife ’11 suite of applications. To learn more about iWeb, its features, and how to use this program, visit www.apple.com/ilife/iweb.
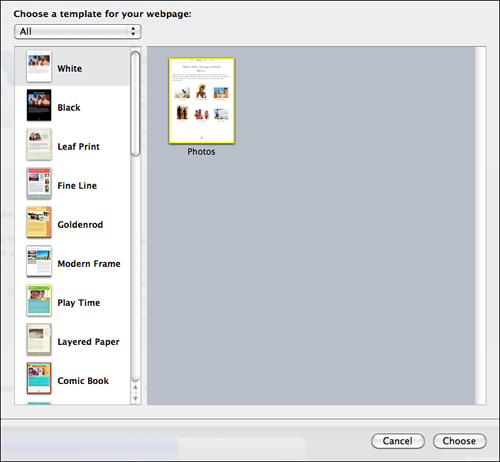
When iWeb loads, you are asked to select a template for your photo page or blog. Click on your favorite template and then click the Choose icon to continue (see Figure 17.1). The images you preselected in iPhoto ’11 are automatically exported and loaded into iWeb and placed in the photo page or blog you’re now creating.
Figure 17.1. iWeb allows you to publish photos from iPhoto ’11 on the Web in the form of a photo page or blog entry.
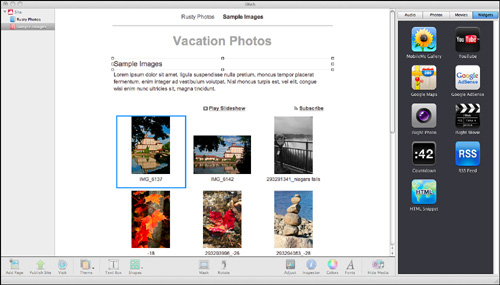
You can now begin customizing the page using iWeb’s various features. For example, you can add or modify the headline and text on the page, add widgets (which are built into iWeb to add functionality to the photo page or blog), or customize the color scheme and other elements of the page itself. An example of a basic web page created in less than two minutes using iWeb is shown in Figure 17.2. These photos were automatically imported from iPhoto ’11 and formatted on the page based on the template that was selected.
Figure 17.2. Creating a custom web page to showcase your photos takes just a few minutes.
After customizing the page using iWeb, click the Publish command located at the bottom of the screen. A progress bar appears, and your photo page or blog is published online.
iWeb automatically assigns a unique URL to all websites, blogs, or photo pages created. When the site is published, a message appears on the screen informing you of your new URL (website address).
Click on the Announce icon to share details about your new site to others via email. Alternatively, click on the Visit Site Now icon to launch your Mac’s web browser (such as Safari) and visit your new site on the Web. You can also click the OK icon and return to iWeb.
Note
Creating a photo page or blog entry offers different customization options than creating a MobileMe online gallery, so how your photos look when someone visits the web page versus an online gallery will be different. Photo pages and blog entries created with iWeb can easily be integrated into existing websites or blogs.
Originally, iWeb was created as a way to design web pages for the MobileMe online service (which requires a paid membership). This is no longer the case. Although the default is for this application to seek out a MobileMe account when trying to publish a website, photo page, or blog, for example, you can adjust the settings in iWeb so that you can publish your pages or sites using any website hosting service.
To customize where your iWeb creations will be published, while in iWeb, click on the Sites heading at the top-right side of the screen. This allows you to access the Site Publishing Settings screen. In the Publishing section of this screen, use the Publish To pull-down menu to determine where you want your creations published. Based on your selection, you are prompted to enter specific information pertaining to your website or blog account and hosting service.
If you’re already a MobileMe member and you choose to publish your site or page creations using MobileMe, all the settings are automatically adjusted for you, and your MobileMe account information is automatically imported and used by iWeb.
Customizing Your Mac’s Desktop Wallpaper and Screen Saver
In iPhoto, select and highlight one photo that you’d like to make your Mac’s Desktop wallpaper image. Use the Share pull-down menu and then choose the Set Desktop option. Immediately after doing this, when you view your Desktop, you’ll discover the photo you selected is displayed behind the icons and the Dock. This is a great way to personalize your overall experience using your Mac.
Figure 17.3 shows what a photo looks like when it’s used as a Desktop wallpaper on a Mac. (This particular image was taken at a beach in Bermuda. You can use your own vacation photos to help you reminisce while you’re supposed to be hard at work on your computer.)
Figure 17.3. Be able to reminisce about a vacation by choosing your favorite photo from a trip and using it as your Desktop wallpaper image.
Another thing you can do is create an animated screen saver that showcases a selection of your images. To do this, begin by selecting a group of images and create a separate Album. Alternatively, you can simply use all the images in an Event folder, for example.
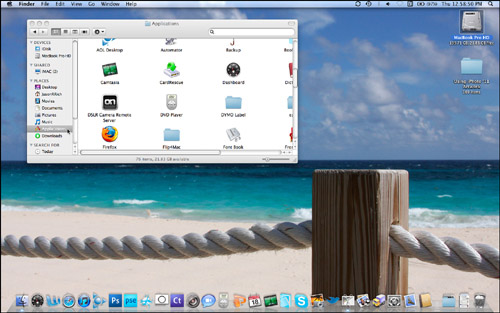
Next, access the Mac’s System Preferences by clicking the System Preferences program icon on the Dock or by using the Finder to access your Applications folder. From the System Preferences window, click the Desktop & Screen Saver option.
Click the Screen Saver tab at the top of the Desktop & Screen Saver window. On the right side of this window is a list of files and folders under the Screen Savers heading. Scroll down to the iPhoto heading and choose the Album or Event name that contains the photos you want to use as your animated photo screen saver.
A preview of the screen saver appears on the right side of the Desktop & Screen Saver window (see Figure 17.4). Immediately under this window are three command icons with the heading Display Style; they allow you to choose the animation style used to display your screen saver photos. Click the Options icon to see a list of check box options that allow you to further customize your screen saver. The Test icon shows a preview of the screen saver after you’ve adjusted the customization options.
Figure 17.4. You can access the Desktop & Screen Saver window from your Mac’s System Preferences.
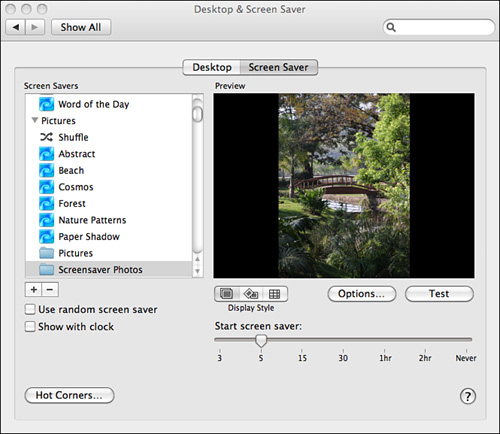
Use the slider labeled Start Screen Saver below the screen saver preview window to determine how many minutes of inactivity the Mac will wait before it begins displaying the screen saver. You can choose between three minutes and two hours, or you can move the slider to the extreme right to turn off the screen saver option altogether.
When you exit this window by clicking on the red dot in the upper-left corner, your screen saver is saved and ready to use.

SHOW ME Media 17.1—Customize Your Mac’s Desktop Wallpaper and Screen Saver
Access this video file through your registered Web edition at http://www.quepublishing.com.
Transferring Photos to Your iPhone, iPod, or iPad
If you have an iPhone, iPod, or iPad, and you want to transfer some or all of your iPhoto photos to your mobile device, you can easily do so by using iTunes’ sync capabilities.
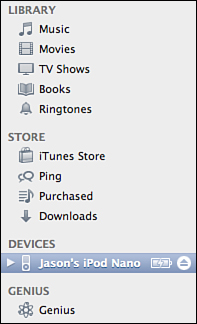
Connect your iPhone, iPod, or iPad to your Mac using the USB cable that came with your device and launch iTunes on your Mac. On the left side of the iTunes screen is a list of connected devices (under the Devices heading), as shown in Figure 17.5. Click and highlight the device to which you want to send your photos.
Figure 17.5. In iTunes, select the Apple mobile device to which you want to send your photos.
When the selected device’s summary screen appears in the main area of the iTunes screen, click the Photos icon located at the top of the screen to the right of the TV Shows and Books icons.
From the Photos screen that appears, you can opt to send all your Events, Albums, Faces, and other picture folders (and all images in each folder) to your Apple mobile device by clicking on the All Photos, Albums, Events, and Faces option located near the top of the screen (see Figure 17.6).
Figure 17.6. Select which Events, Albums, or Faces folders you want to sync between your Mac and your iPhone, iPod, or iPad.
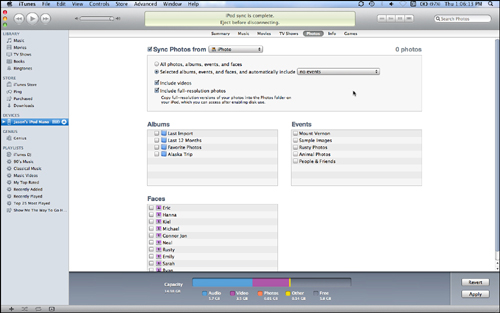
The alternative is to click on the Selected Albums, Events, and Faces... option, and then manually pick and choose which Albums, Events, and Faces folders you want to export (transfer) to your iPhone, iPod, or iPad. Using the mouse, place check marks next to each Album, Events, or Faces folder name.
In the upper-right corner of the screen, the number of photos you’ve chosen to transfer is displayed. When your selections are made, click on the Sync icon located in the lower-right corner of the window.
iTunes then syncs with your Apple mobile device, and your selected images are transferred. This process could take several minutes, depending on the number of images and sizes of the files being transferred.
When the sync process is done, eject your mobile device from iTunes and view your images by accessing the Photos app on your Apple mobile device.
Note
If you’ve taken photos using the camera built into your iPhone, for example, when you initiate a Sync, iPhoto ’11 launches and you are prompted to import those images from your iPhone directly into a new iPhoto ’11 Events folder. This process is covered in Chapter 3, “Loading Your Digital Images into iPhoto ’11.”
SHOW ME Media 17.2—See how to transfer photos from iPhoto ’11 to your Apple mobile device (iPhone, iPod, or iPad)
Access this video file through your registered Web edition at http://www.quepublishing.com.
![]() LET ME TRY IT
LET ME TRY IT
Transferring Photos from iPhoto ’11 to Your Apple Mobile Device
To transfer images in iPhoto ’11 to your Apple mobile device without having to first manually export them from iPhoto ’11, follow these steps:
- Connect your Apple mobile device to your Mac using the USB cable supplied with your iPhone, iPod, or iPad.
- Launch iTunes on your Mac.
- Under the Devices heading on the left side of the iTunes screen, click on your Apple mobile device.
- When the Summary screen for that device appears in the main iTunes program window, choose the Photos option at the top right of the page.
- Choose to transfer all images stored in iPhoto ’11 to your mobile device or select individual folders.
- Click on the Sync icon located in the lower-right corner of the iTunes screen to initiate the transfer.
Note
After you customize your sync preferences in regard to which iPhoto ’11 Events, Albums, or folders to synchronize, whenever you make changes in iPhoto to any of those folders, the corresponding images and files on your Apple mobile device are updated accordingly the next time you sync your Mac and your mobile device. You can set up different customized photo synchronization preferences for each separate Apple mobile device you own.