9. Shapes: Customizing
In This Chapter
• How can you quickly create and arrange clones?
• How can you put shapes in their place using Size and Position tools?
• How many ways can you format your shapes?
• How can you work with Text Blocks using Edit Text and Text Block tools?
Several previous chapters touched on shapes, and this chapter builds on information about shapes considered in Chapter 5, “Working with Shapes,” modifying groups from Chapter 6, “Manage Shapes,” and customizing text considered in Chapter 8, “Making Advanced Diagrams.” As you understand more about shapes and their capabilities, you are able to quickly produce more creative- and professional-looking diagrams using some of the tools considered here. In this chapter, you also look at tools for fine-tuning format, position, and size, which can take your abilities to another level.
Duplicating Shapes
Clones have a bad rap. They were used to establish the evil emperor in Star Wars, and in the new Battlestar Galactica they manipulated and confused us. (I still feel bad for Colonel Tigh.) In Visio, however, clones or copies of shapes are predictable, and you can make good use of them if you remember some basic pointers.
Creating duplicates or copies of shapes likely has become a habit. You used the Duplicate feature in Chapter 8 and you might recall that you can create a simple duplicate of a selected shape by pressing Ctrl+D. Now look at a few more tasks that you can accomplish with duplicates.
Making Several Copies
Suppose you need to create several copies of something. First, you need to create a honeycomb. Open a new drawing by selecting New, Basic Diagram.
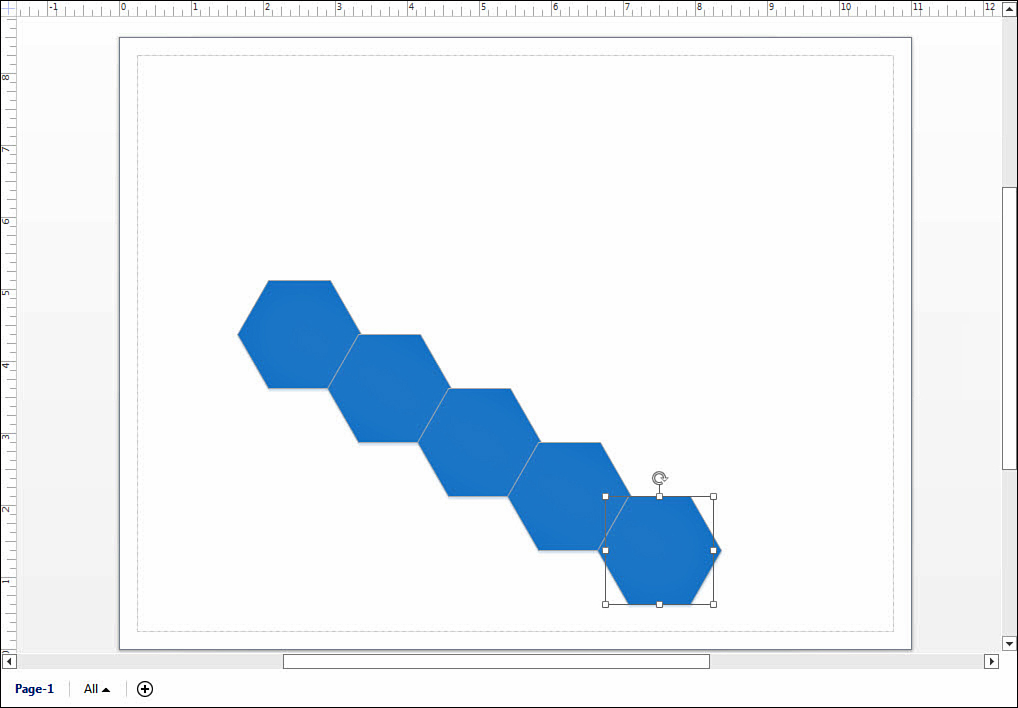
1. Drag a hexagon to the drawing window.
2. Select the shape and press Ctrl while dragging to create a duplicate; then place the copy next to the original so that they share a side.
3. Press Ctrl+Y or F4 to add another duplicate shape. Notice how another shape is added in line with the first duplicate. Repeat a couple more times until your drawing window looks something like Figure 9.1.
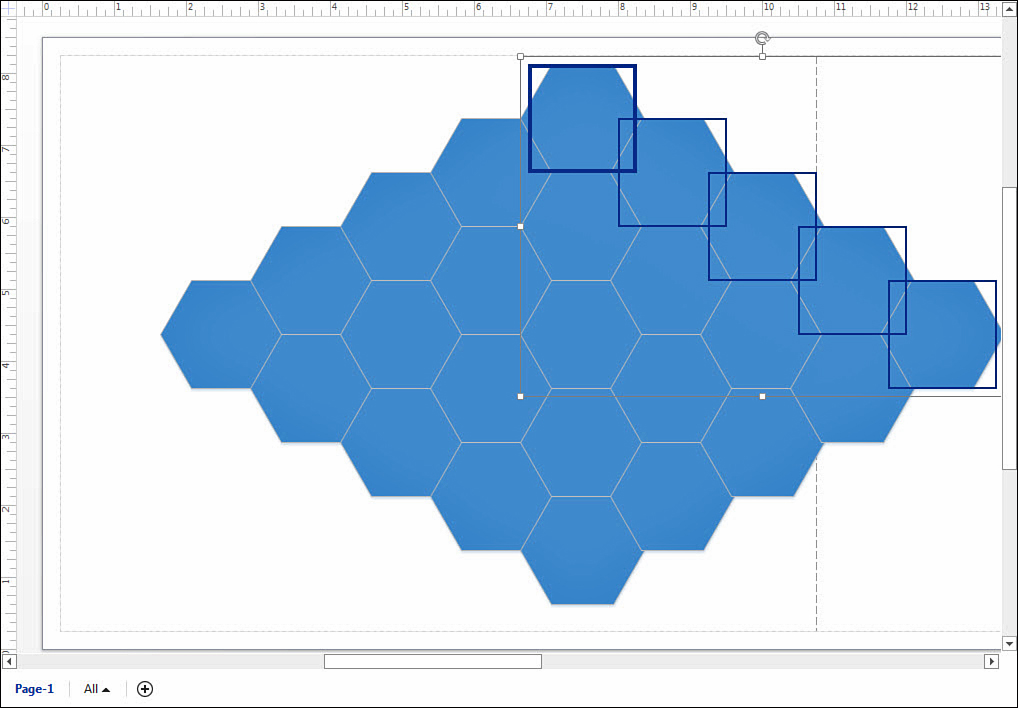
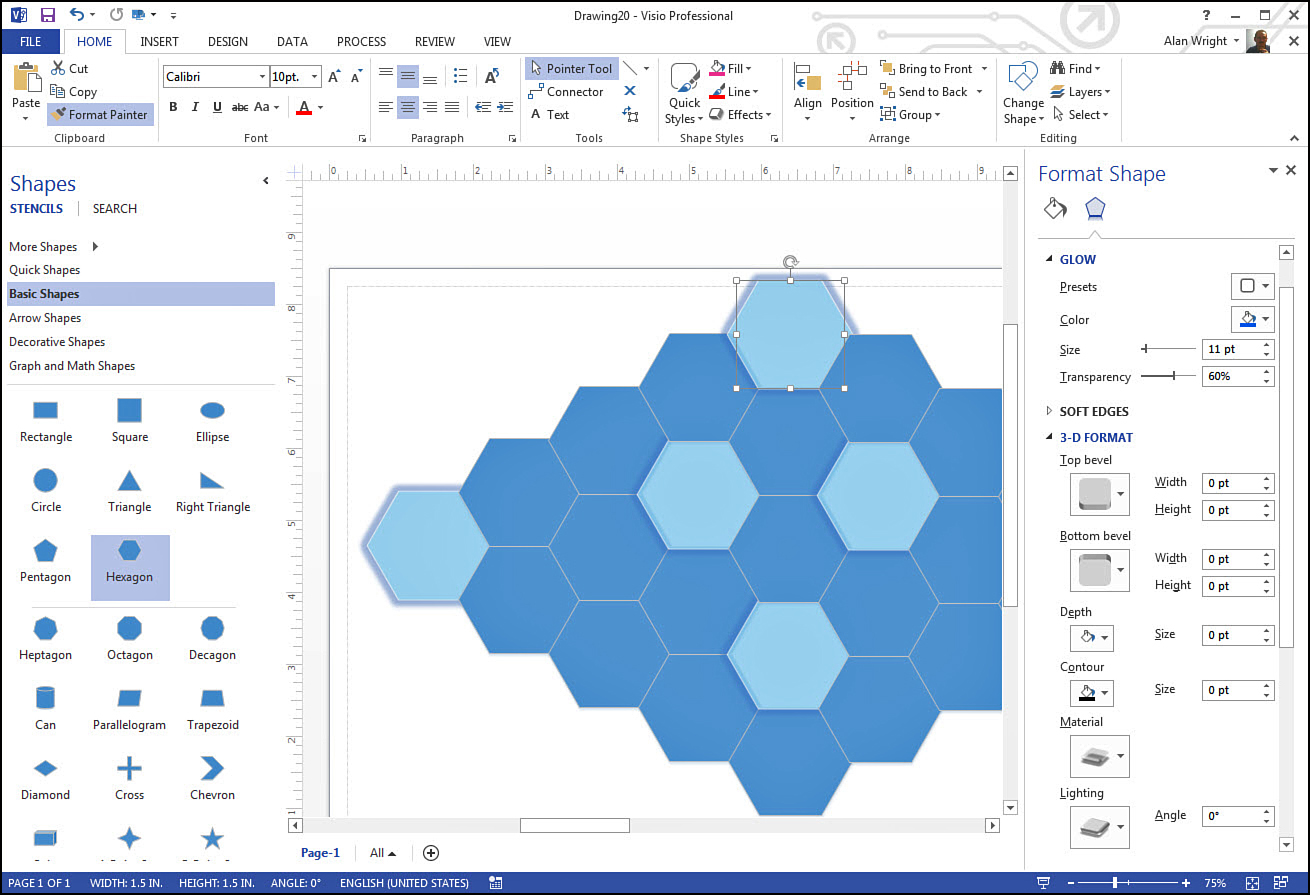
4. Now drag and select the whole row of shapes. While this row is selected, hold Ctrl again while dragging the row to create a duplicate of the whole row. Position this group to create an attached row above the first row.
5. Press Ctrl+Y or F4 to repeat a few more times until you have something resembling Figure 9.2.
This certainly is faster than dragging several shapes over and worrying about the positioning each time. This technique can be used to create copies of tables, patterns, or copies of clusters of shapes.
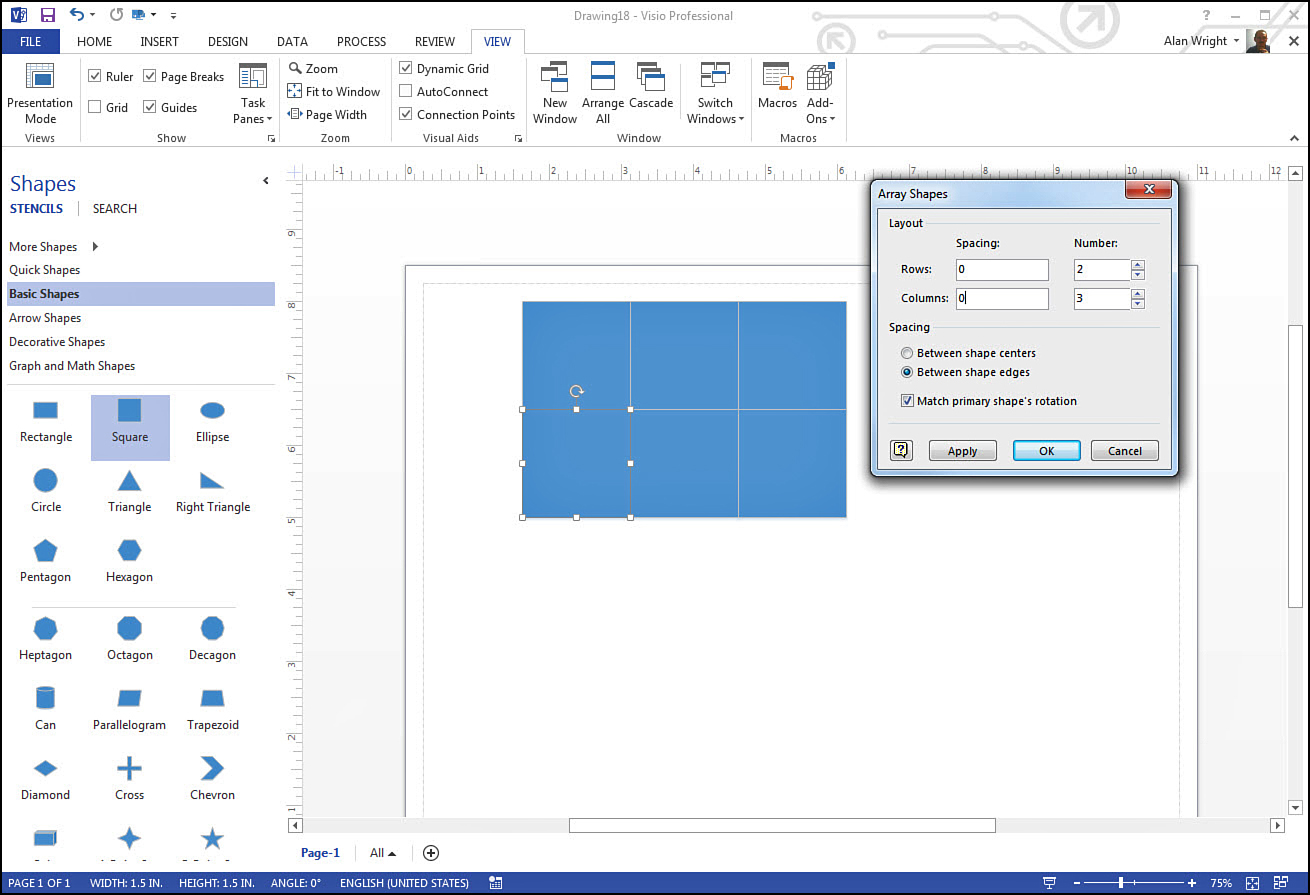
With Visio Professional you can use several macros for similar effects. From the View tab open the Add-Ons menu from the Macro section and select Visio Extras. Look at the Move Shapes and Array Shapes options. Move Shapes allows you to duplicate selected shapes, whereas Array Shapes allows vertical and horizontal copies to be generated from a selected shape. In Figure 9.3 notice the layout created using the settings in the Array Shapes dialog box.
Resizing Shapes
Resize handles are one of the first things you notice when selecting a shape or object in Visio. Most 2D shapes resize easily enough in Visio, but you may be frustrated by the tendency to maintain aspect ratio. If you want to override aspect ratio when resizing, try holding down the Shift key when you drag the control handle. A few shapes are meant to maintain an aspect ratio such as a square, and this override is not enabled in their case.
1D shapes such as lines can be resized by selecting an endpoint and dragging. If you hold down Shift while dragging, notice the direction is constrained to horizontal or vertical right angles.
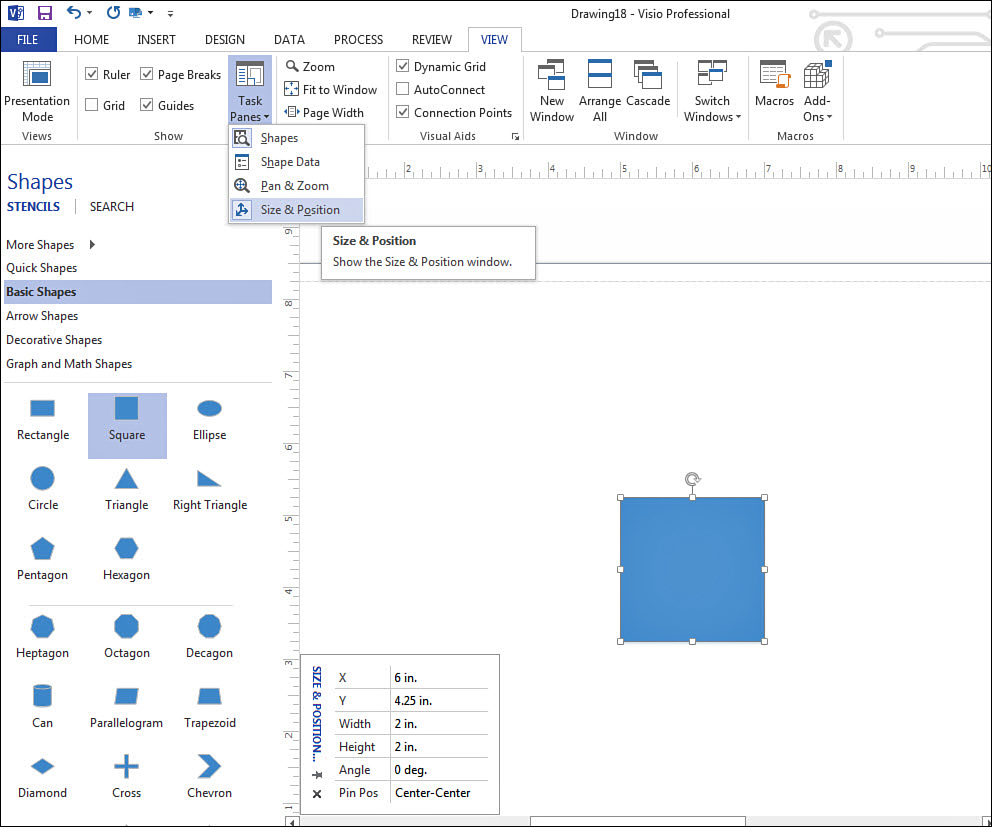
Visio also provides a dedicated pane to working with size. From the View tab select Task Panes and enable the Size & Position pane. From here you can manually type in the size for a shape, as shown in Figure 9.4.
 Note
Note
If you are having trouble with selecting a shape to resize it, check to see if the object is assigned to a layer that has locked content. From the Layer properties you can unlock the content and resize the shape. If a shape is placed on a background page, you need to resize the shape on the background page.
Rotating Shapes
There are a few ways to rotate a shape. Chapter 6 looked at the Rotate tools located on the Home tab, under Position in the Arrange tool group. Rotate Shapes allows you to rotate selected shapes using 90-degree increments and even flip vertically or horizontally.
Many people grab the rotate handle that is visible when selecting a shape, as shown in Figure 9.5, and drag to rotate the shape to the desired angle. This particular method leaves exact positioning to guess work; perhaps you have been frustrated when trying to rotate a shape to a particular angle. The further you are from the shape when using the rotate handle, the more granular the degree of rotation. Dragging the handle closer to the shape rotates by an increment of 5 or 10 degrees.

FIGURE 9.5 There are several ways to rotate a shape, including via the rotate handle and the Size & Position pane.
With the rotate handle, you can also move the center point used for rotation. Select the point and drag it to another place on the shape. This changes the center of rotation.
In Figure 9.5 the Size & Position pane is open to show how to use the rotate handle to get an exact 45-degree angle. You can also type 45 into the Angle field of that pane to achieve the same.
→ To learn more about Rotate Shapes tools, see page 114.
How to Format a Shape
To change the appearance of shapes, you can use many predefined themes and variations built in to Visio. If you need to change the appearance of a shape without themes, or you do not see what you like, there are many ways to directly format shapes.
Modifying Common Format Attributes
From the Home tab you can change many attributes with options in the Shape Styles tool group shown in Figure 9.6. Another way to see those same tools is to select Styles from the context menu, also shown in Figure 9.6.
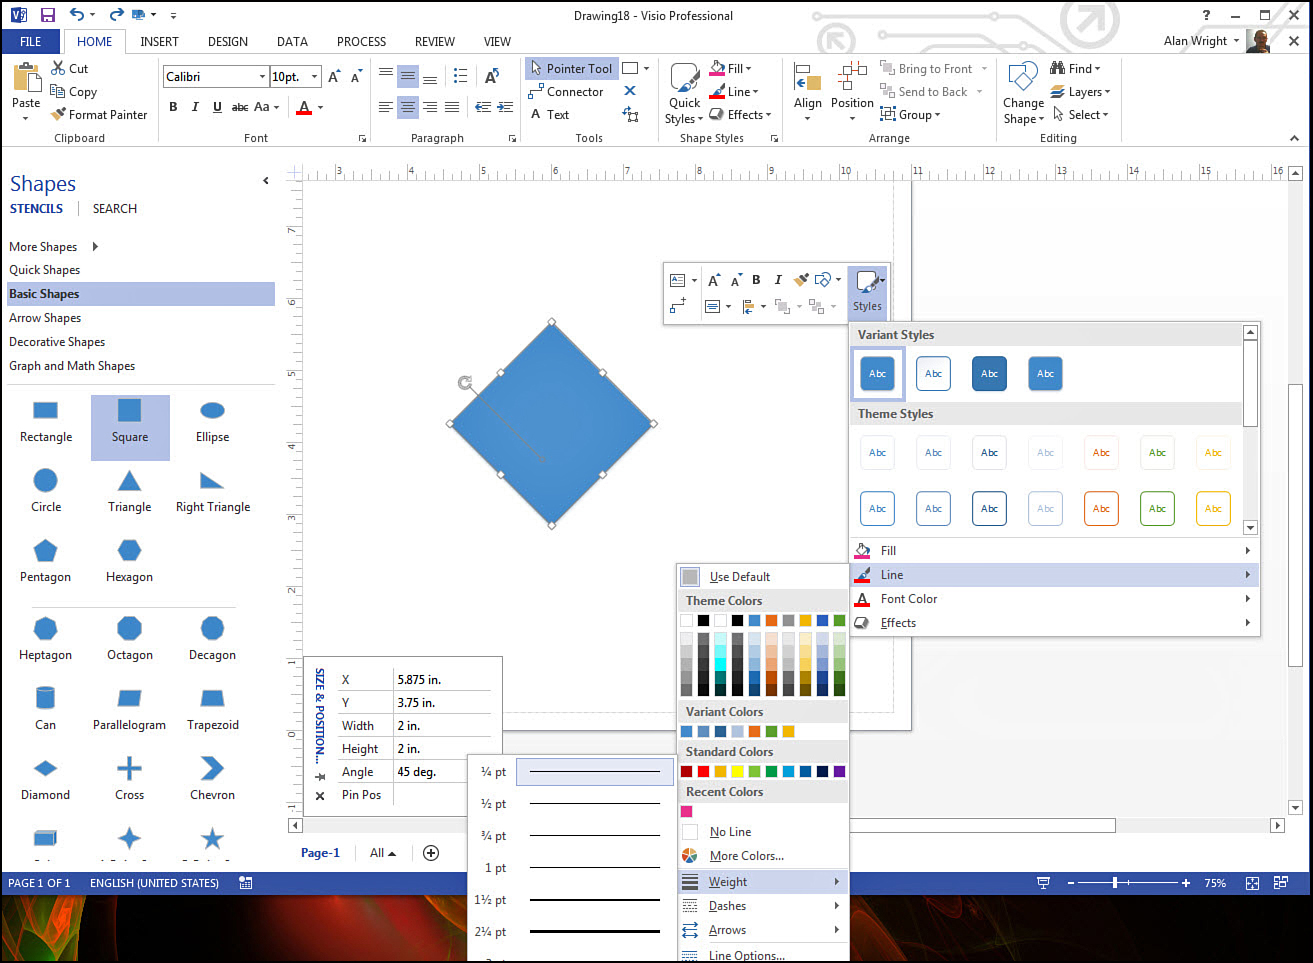
FIGURE 9.6 Many common formatting changes can be made from the Home tab or by using the context menu and selecting Styles.
These more common attributes include:
• Fill provides fill colors that include Theme Colors and Variant Colors, which change if the theme for the page is changed. Use Standard Colors or More Colors to ensure that colors stay.
• Line also provides the same types of color options as Fill, which are applied to the outline of shapes or to 1D lines and connectors. Additionally, you can change the line style, thickness (weight), and endpoints used (arrows, dots, or none).
• Effects provides many format options for things like shadows, bevels, reflection, glow, and so on.
Modifying Less Common Attributes
Visio 2013 makes it easier to work with many lesser-used attributes from the Format Shape pane. This can be opened from the Home tab and the pane launched from the Shape Styles tool group (see Figure 9.7). You can also right-click a shape and select Format Shape from the context menu.
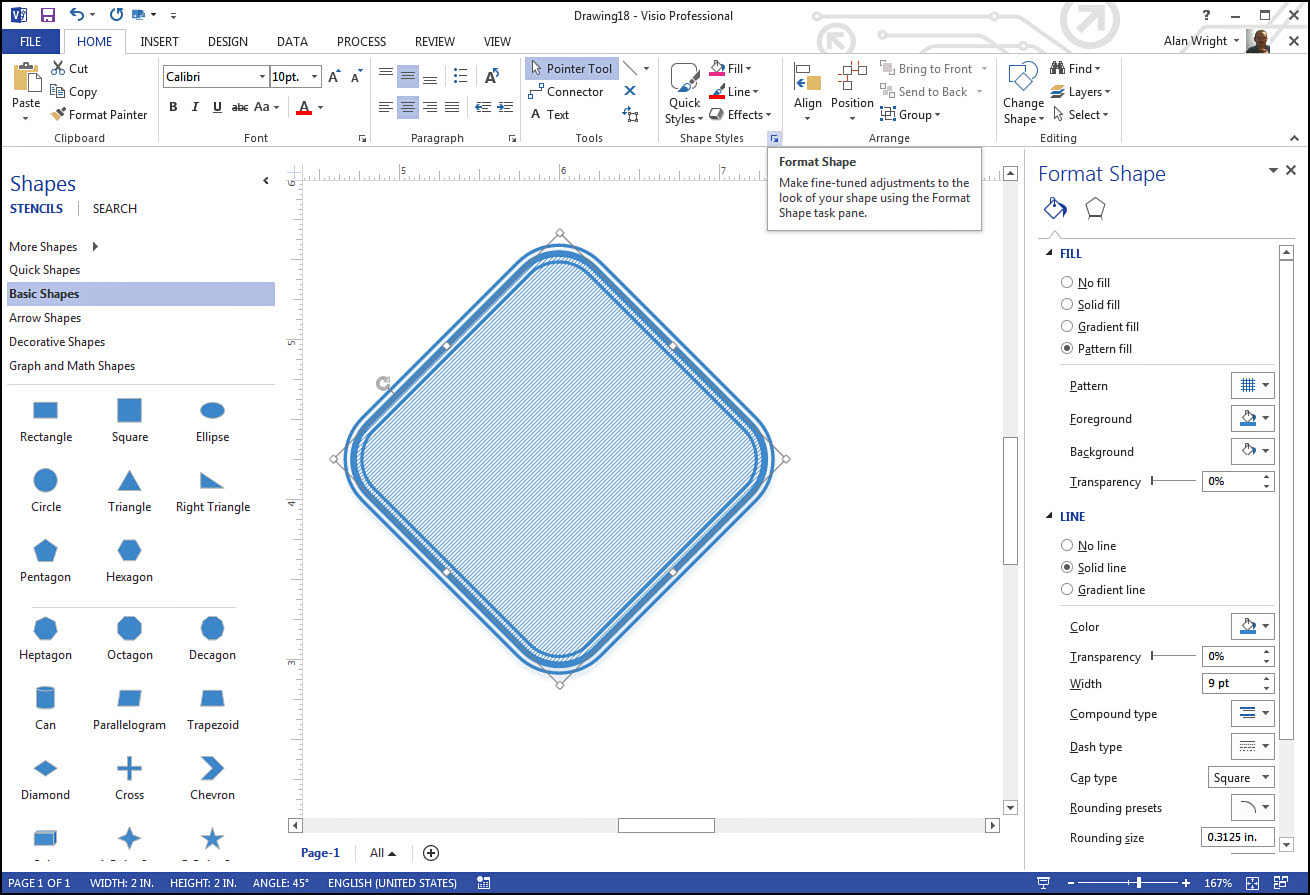
There are two parts to the Format Shape pane. The first uses a fill paint bucket for a tab icon and contains expanded Fill and Line menus that include additional controls for gradient and pattern fills, transparency, and compound and gradient lines. The square in Figure 9.6 has been formatted in Figure 9.7 with compound lines, pattern fill, and rounded corners.
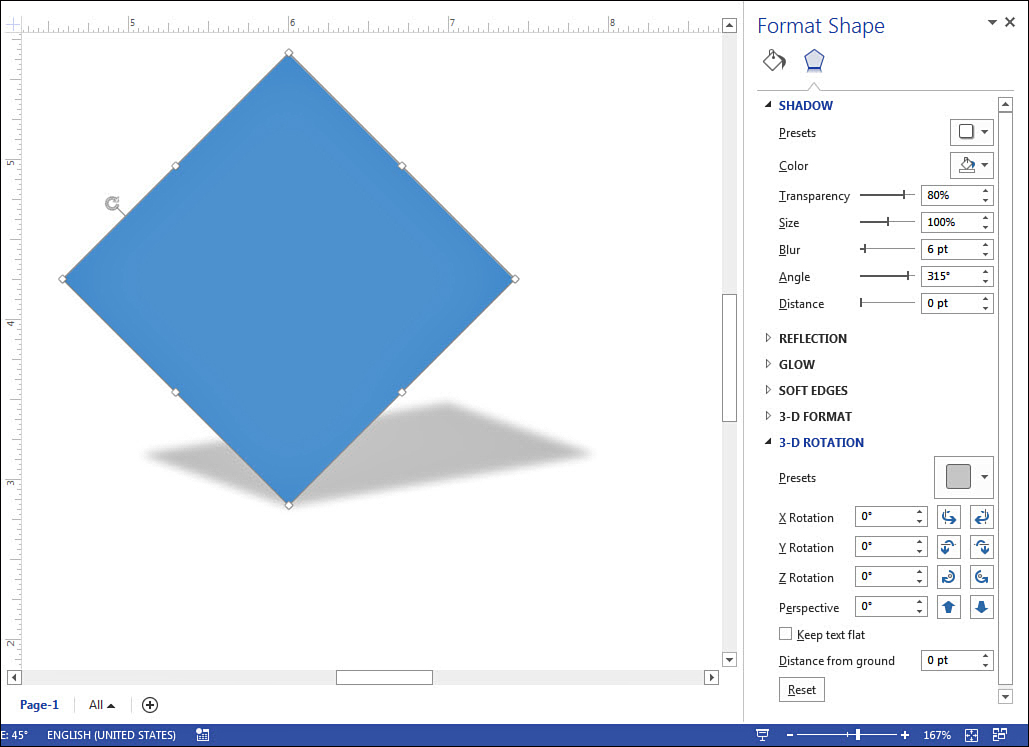
The second part of the Format Shape pane uses a pentagon for a tab icon. This contains the same Effects headings with many more control options. (Rather than Bevel, you find 3-D Format, which contains the Bevel controls.) Notice in Figure 9.8 that options like shadow color, transparency, and blur can be manipulated. This same level of detailed formatting is found in the other Effects menus, which can be expanded or collapsed with a simple click.
Using Format with Groups
There are a couple of ways to format multiple objects. You can select a group using various methods and format away, or you can use the Format Painter tool (see Figure 9.9). This is a handy tool that has long been a part of the Office suite.
By working with one object and getting your formatting down you can do complex formatting over a period of time without losing your focus on a group. After your group is the way you want it, select the formatted shape and click Format Painter once to apply formatting once, or double-click to keep the Format Painter enabled while you select multiple objects that can even span different pages. When you’re finished, you can press Esc or click Format Painter again to disable the tool. (The keyboard shortcut is Shift+Ctrl+P. I like keyboard shortcuts, but I do not often use two-handed shortcuts.)
Changing Text
When you work with shapes, text has two elements that can be formatted: the text itself and the space around the text. This section looks at some of the tools you need to understand when working with text in Visio.
Editing and Formatting Text
Anyone who has spent any time with Word, Excel, or just email in general is familiar with basic text editing. In Visio there is an expectation that you use text because shapes are, by default, text blocks, and they easily accommodate text; it is as simple as selecting a shape and typing text. There are many ways to edit and format your text after it has been entered into a shape.
Text Edit Mode
When you need to edit text for a particular shape, the easiest way is to double-click the shape containing the text. You are instantly placed into edit mode and can make your changes. To exit, press Esc or click outside of the shape.
If you need to change the text in a few different shapes, you can enable the Text tool as shown in Figure 9.10. From the Home tab, select Text from the Tools group. Any shape you select opens the text block to allow editing of the text rather than the normal handles for moving and resizing the shape. To exit you can press Esc a few times or click Text again to return to the Pointer tool.
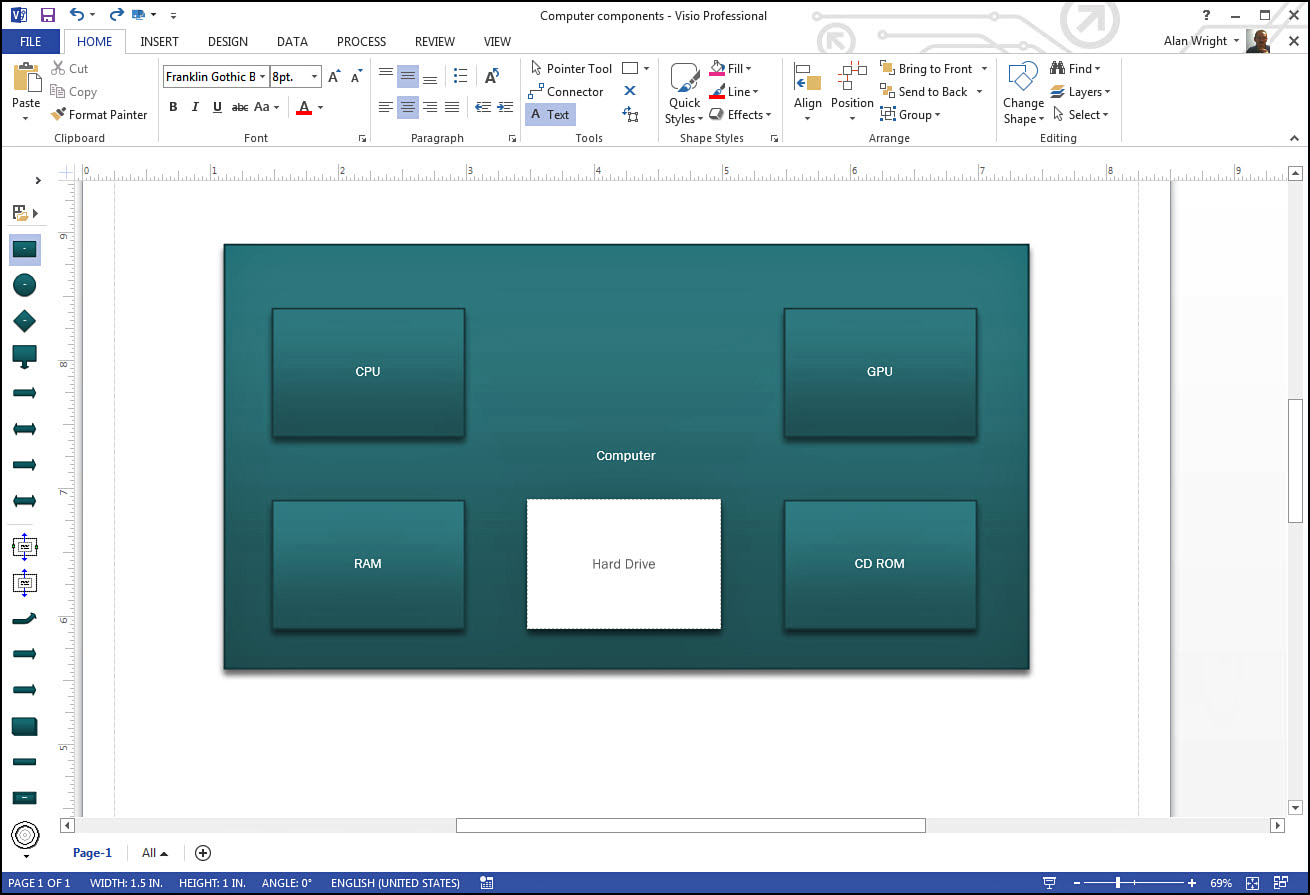
FIGURE 9.10 The Text tool puts you into edit mode for those times you need to do a lot of work with text.
Formatting Text
Working with text in Visio is different from other Office products in a few ways. For example, formatting text can be done by selecting the shape. Notice in Figure 9.11 that only the large block shape is selected. Working from the Home tab, you can change the text format using the Font tool group. To format portions of text, you need to enter Text Edit mode and select the portions of text to target your format changes.
To find a few more options, you can launch the Text dialog box by navigating to the Home tab and clicking the launch button from the Font tool group or by pressing the F11 key on your keyboard. Notice in Figure 9.12 that you can also change language and transparency for your text.
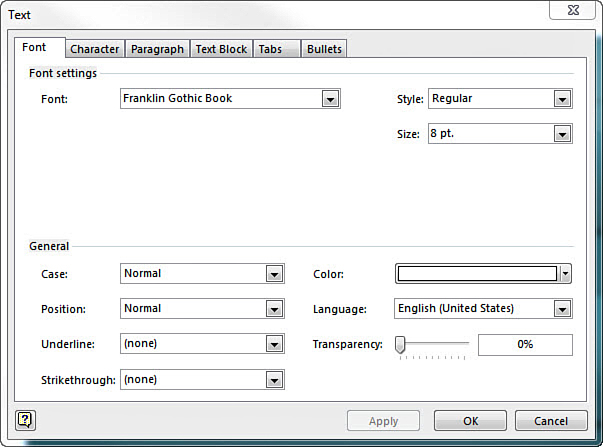
Besides the Font tab, the Character tab of the Text dialog box lets you change scale and spacing for the text. The Tabs tab allows you to establish how tabs are used inside of a shape to create columns of text.
Resizing Text
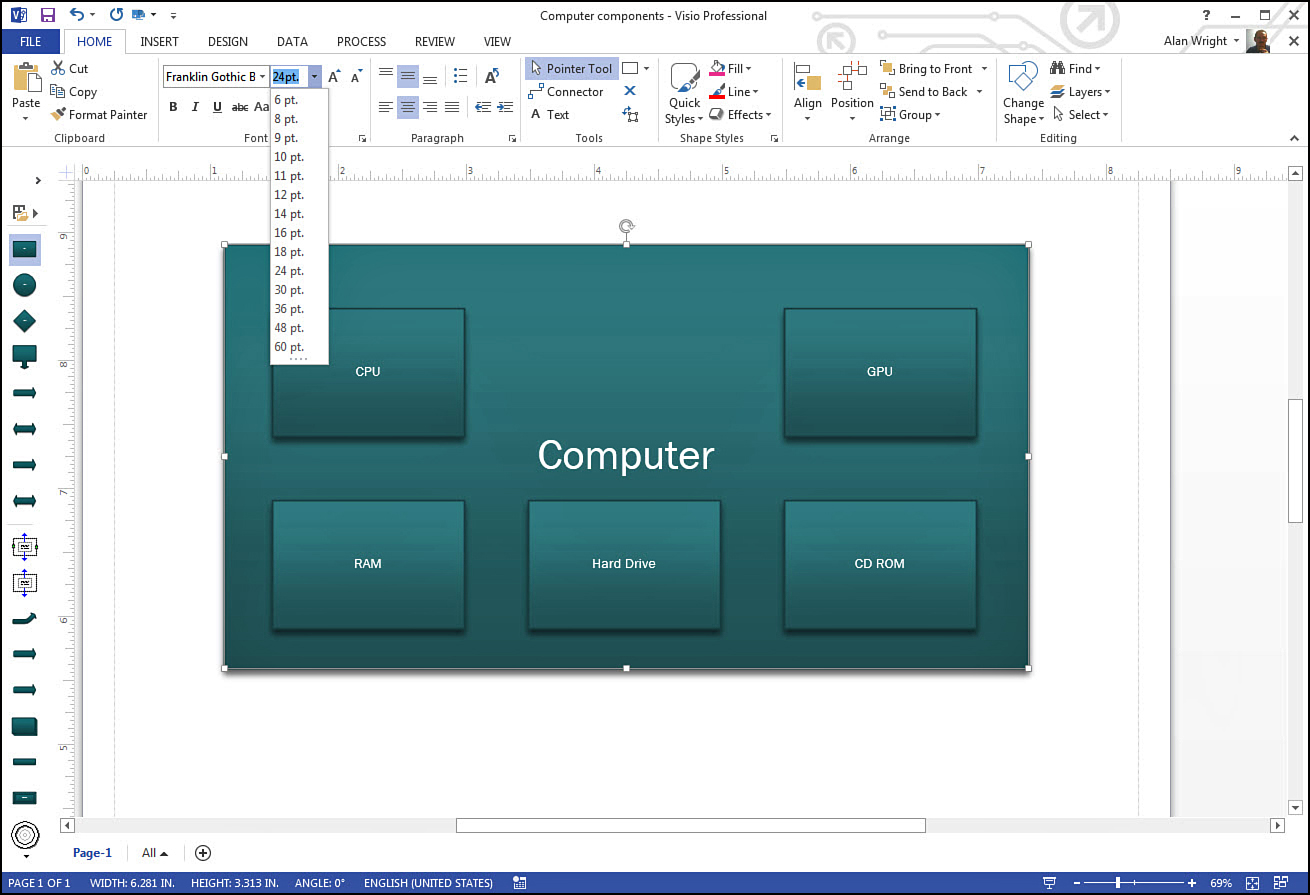
To change the size of text, you can use the Font group from the Home tab, as shown in Figure 9.11. To the right of the font size you can choose to Increase or Decrease font size by one point using the two buttons with a larger and smaller A. These two buttons are also available in the context menu for shapes.
Aligning Text
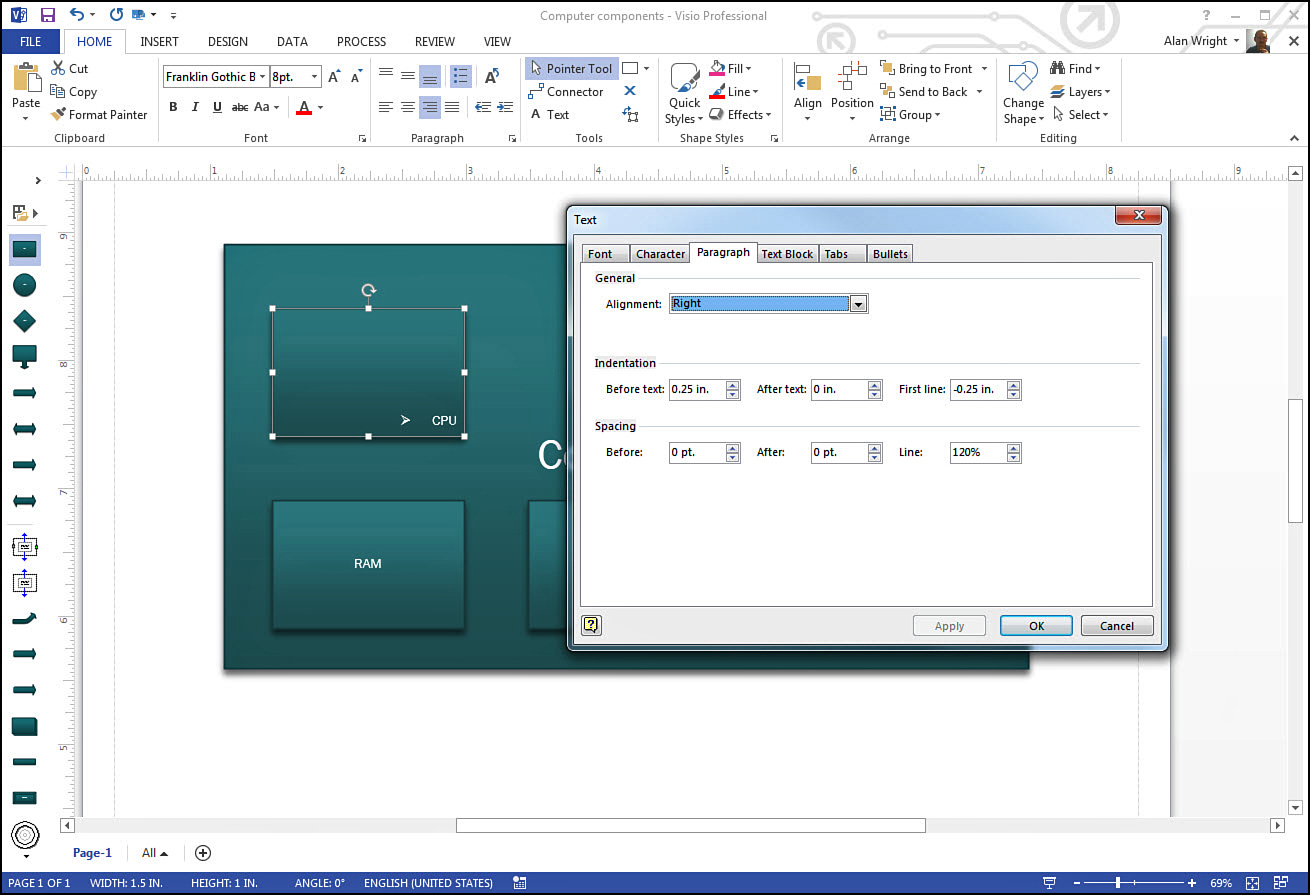
In the Home tab you also see a set of Paragraph tools. These tools allow you to easily change the position of the text inside of a text block just as you might do in a cell from an Excel spreadsheet. Use the launch button to open the Text dialog box to the Paragraph tab for more fine-tuning options. Both options are shown in Figure 9.13 where the text alignment is set to right. The modified default bullet was done by selecting a different bullet format from the Bullets tab in this dialog box.
Modifying Text Blocks
Text blocks refer to the shape that actually holds your text. They can be created apart from shapes, but most often you deal with text blocks that start life when a shape is placed on a drawing. As mentioned earlier, shapes by default are prepared to accept text. You can think of a text block as a transparent skin that sits on shapes. When text has been entered, it can be treated like a separate shape, but it remains attached to the shape it started with.
In the Home tab, the Text Block tool has an icon that appears as a selected box with an arrow suggesting rotation. Select this and you have entered Text Block edit mode. You can create new text blocks or move, resize, and rotate existing ones while using this tool.
Note
Both the Text tool and the Text Block tool allow you to create new text blocks in your diagrams. Enable one and then click and drag to establish the size and location of your text block. You can press Esc to exit out of either tool and return to the default Pointer tool.
Moving Text Blocks
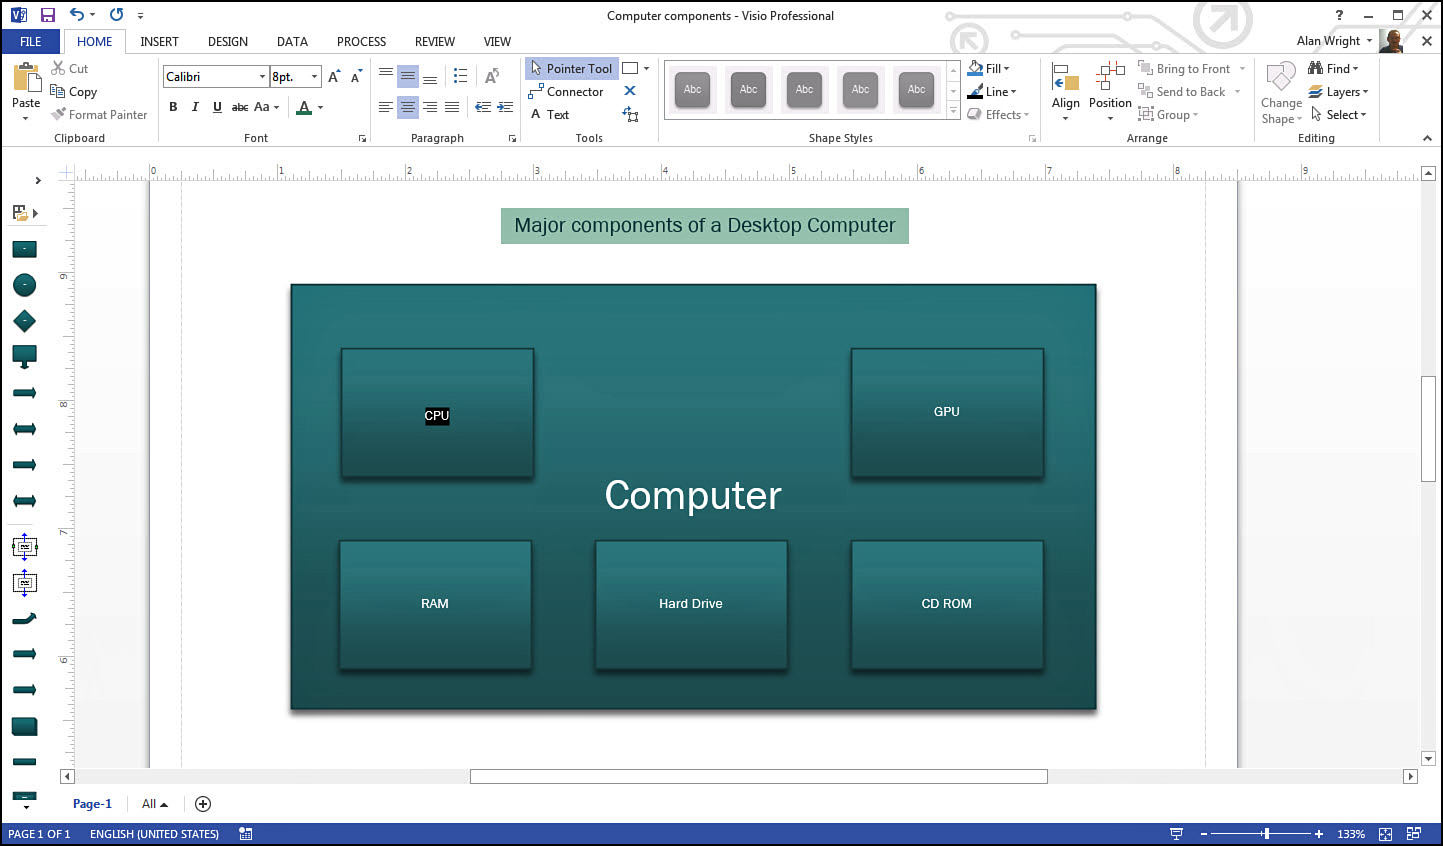
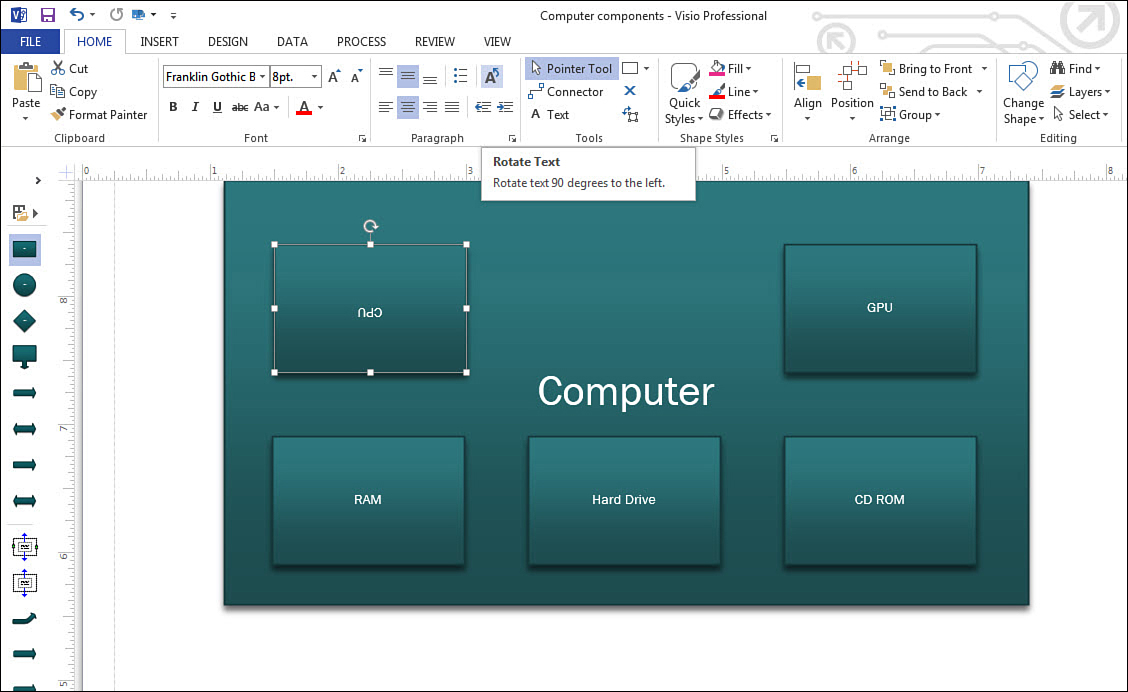
There are a few reasons you may want to move text around when working with shapes. If you have created a new text block for a diagram, it is not unusual to move it around as your diagram evolves. Changes to the orientation of text are desirable in some situations. Whereas resize and rotate handles behave the same for text blocks as for shapes, Visio offers a specific tool for rotating text. In Figure 9.14 you can see that the CPU has been rotated 90 degrees twice until it is upside down. In the Paragraph tool group you can use the Rotate Text tool to execute 90 degree clockwise turns of the text block.
Don’t forget that the text block continues to be subject to the shape it came from. Figure 9.15 shows how you can drag a text block to a different location away from the shape it was added to. Figure 9.16 shows that moving the shape also moves the text with the shape. This is to illustrate the relationship between a shape and the text block skin. Be cautious when moving text blocks away from shapes because this could cause problems later. The text block in Figure 9.15 would, of course, disappear if the original shape were deleted.
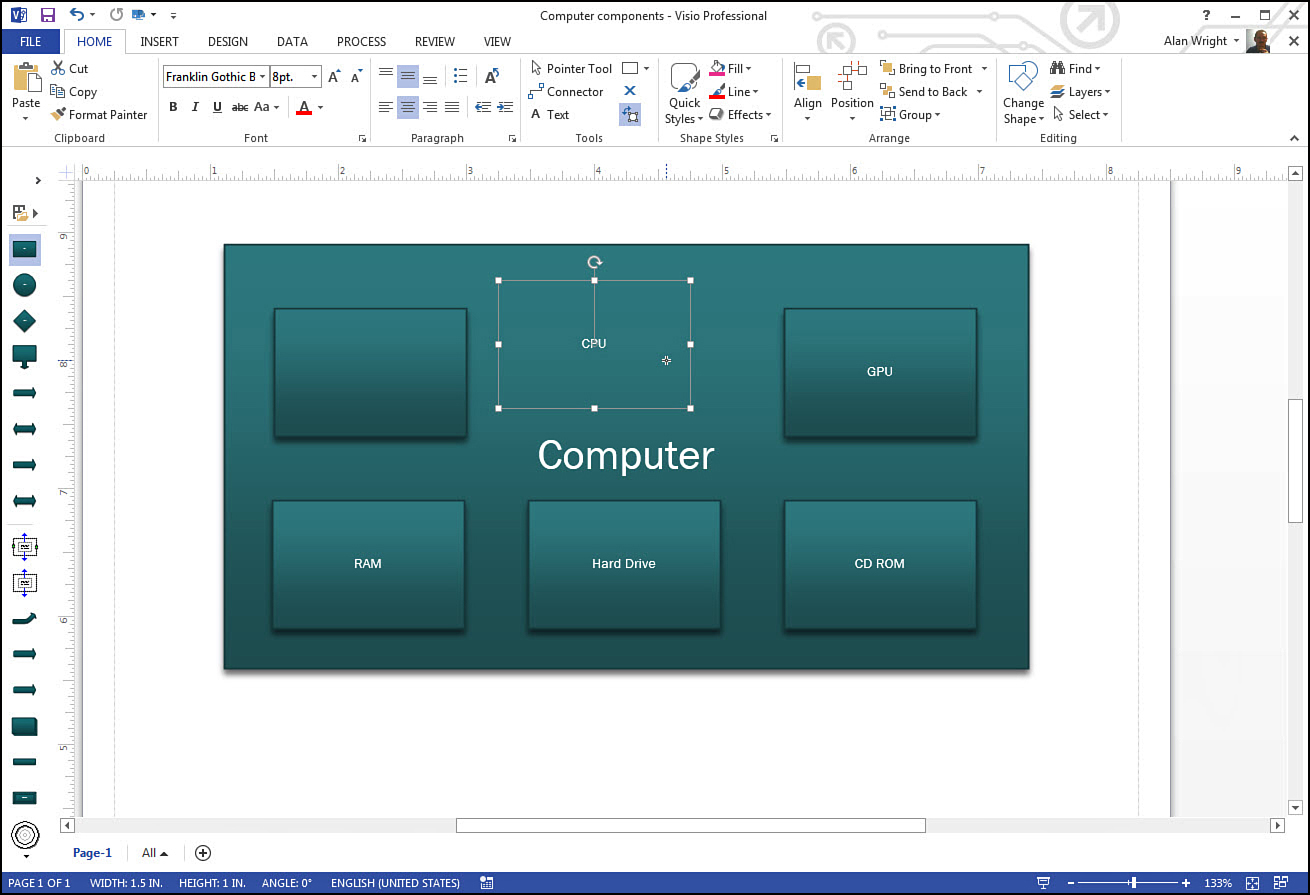
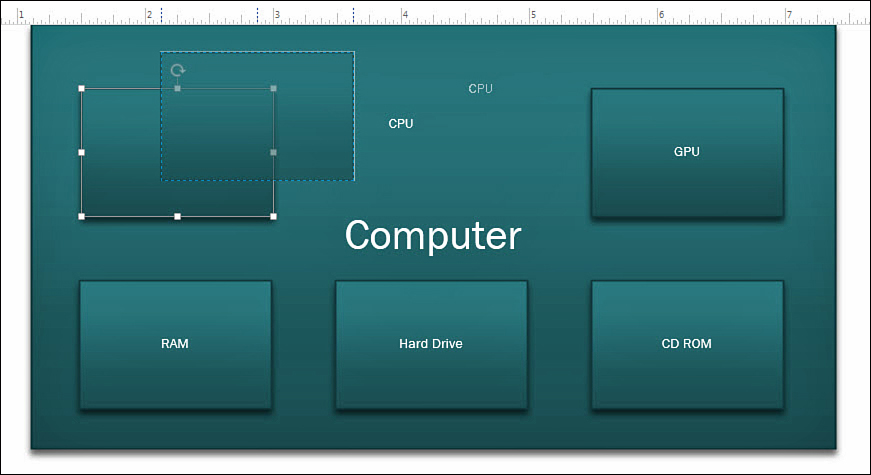
FIGURE 9.16 Text blocks continue to move with shapes because they continue to be a property of the shape.
Changing Backgrounds
Although the background of a text block is normally transparent, you can certainly add color. This might be helpful to make text easier to read or to provide a background to text blocks that were created as titles or labels.
There are a couple of ways to do this. One involves using the Fill tool for titles. Select Fill from the Shape Styles section of the Home tab, as shown in Figure 9.17, and choose your color. You may need to change the text color if you are adding a background color, so the Home tab is a handy place to be. You can also do this from the context menu by selecting Styles.
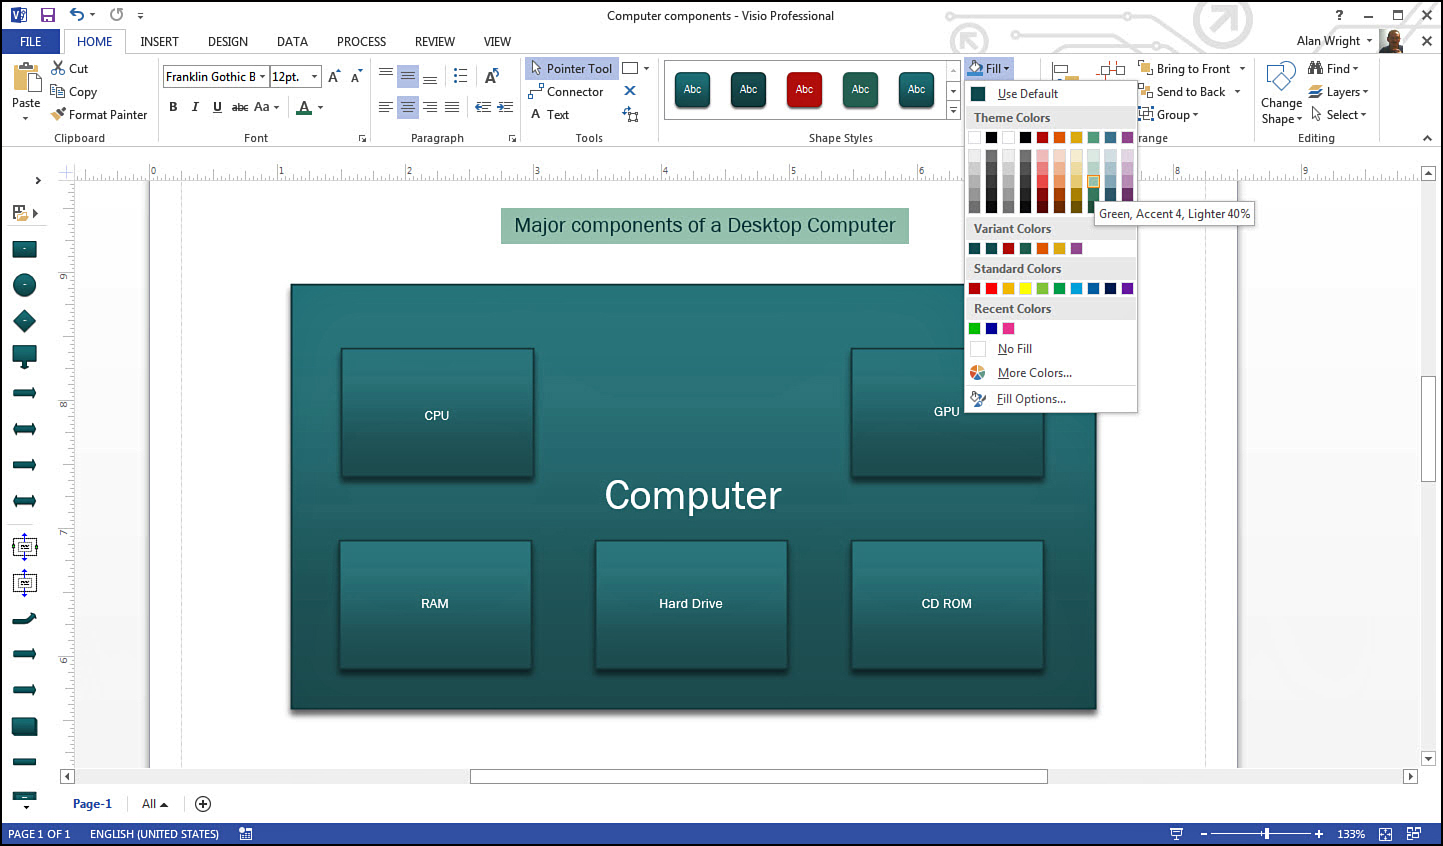
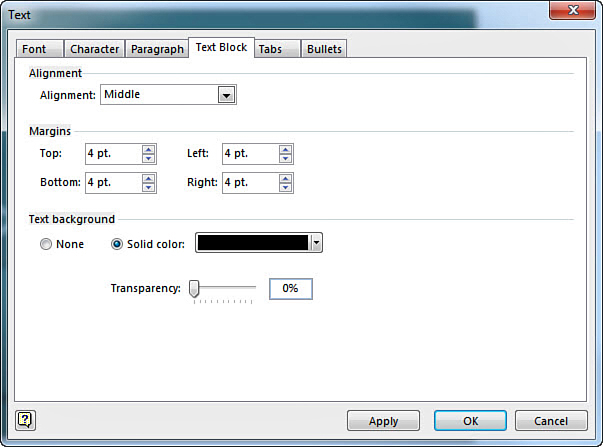
When a text block is on a shape or connector, you can get better results by opening the Text dialog box and selecting the Text Box tab to fine-tune the background color (see Figure 9.18). The adjustable Margins determine the region that receives background color; by default it is just the area surrounding text. This is different from the way Fill fills the entire shape. Figure 9.19 shows the settings shown in Figure 9.18 applied to the CPU text box.