The Graphics class represents a drawing surface at a logical level. Below that level, a Graphics object is attached to a Bitmap or Metafile object. Those objects understand the slightly lower-level needs of managing more physical data structures. For example, a Bitmap object maps abstract drawing commands such as DrawLine and DrawEllipse to colored pixels that can be displayed on a PictureBox or saved into a file. Similarly, a Metafile maps the Graphics object's abstract commands into metafile records that you can play back on a drawing surface, or save in a graphical metafile.
This chapter describes the more down-to-earth Bitmap and Metafile classes. It explains methods for building, modifying, and manipulating these objects. It shows how to load and save them from graphics files and, in the case of Bitmap classes, how to work with files saved in a variety of graphic formats such as BMP, GIF, JPEG, TIFF, and PNG.
An Image object represents some sort of picture that you can draw on, copy, transform, and display. Image is an abstract (MustInherit) class, so you cannot create instances of this class directly. Instead you must make instances of its derived classes Bitmap and Metafile.
Note
You can also derive your own class from Image if you want, although that's a fairly advanced technique, so it isn't covered here.
The Image class provides useful graphical methods that the Bitmap and Metafile classes inherit. Many other objects can work with any type of Image object, so you can pass them either a Bitmap or a Metafile. For example, the Graphics object's FromImage method takes an Image object as a parameter and returns a Graphics object attached to that Image. This parameter can be either a Bitmap or a Metafile. The following code creates a new Bitmap object, attaches a Graphics object to it, and then uses the Graphics object to draw a rectangle on the Bitmap:
Dim bm As New Bitmap(100, 100)
Using gr As Graphics = Graphics.FromImage(bm)
    gr.DrawRectangle(Pens.Black, 10, 10, 80, 80)
End Using
The Image class itself provides several useful methods, particularly Load and Save. The following table describes these and some of the class's other useful properties and methods.
PROPERTY OR METHOD | PURPOSE |
|---|---|
| Frees the resources associated with this image. See the sections "Loading Bitmaps" and "Saving Bitmaps" later in this chapter for more information. |
| Returns attribute flags for the image. These provide information such as whether the pixel data contains alpha values and whether the image is a gray scale. For more information, see |
| This shared function loads an image from a file as in |
| This shared function loads a Bitmap image from a Windows bitmap handle. (A bitmap handle is a 32-bit integer that gives a value associated with the bitmap in the GDI environment. Windows uses the handle to refer to the bitmap when it needs to manipulate it. In the .NET environment, you generally work with Bitmap and Image objects and don't need to worry about bitmap handles. It's useful to know about this method, however, in case you need to manipulate a bitmap loaded using older GDI routines.) |
| This shared function loads an image from a data stream. |
| Returns a RectangleF structure representing the rectangle's bounds. |
| Returns the color resolution (bits per pixel) for a specified PixelFormat. |
| Returns a thumbnail representation of the image. |
| Returns the image's height. |
| Returns the horizontal resolution of the image in pixels per inch. |
| Returns True if the specified PixelFormat contains alpha information. |
| Determines the ColorPalette object used by the image. |
Returns a SizeF structure giving the image's dimensions in pixels for Bitmaps and 0.01 millimeter units for Metafiles. | |
| Returns the image's pixel format. This property can take such values as Format24bppRgb (24-bit red/green/blue data), Format32bppArgb (32-bit alpha/red/green/blue data), and Format8bppIndexed (8-bit index into a 256-color table). For more information, see |
| Returns an ImageFormat object representing the image's raw format. The ImageFormat class has shared members for each of the standard image types. For example, the following code checks whether the Bitmap bm was loaded from a JPEG file: |
| Rotates, flips, or rotates and flips the image. The parameter indicates which combination of flips (vertical, horizontal, or both) and rotation (0, 90, 180, or 270 degrees) to use. |
| Saves the image in a file or stream with a given data format (BMP, GIF, JPEG, and so on). See the sections "Loading Bitmaps" and "Saving Bitmaps" later in this chapter for more information. |
| Returns a Size structure containing the image's width and height in pixels. |
| Returns the vertical resolution of the image in pixels per inch. |
| Returns the image's width. |
The Bitmap class represents an image defined by pixel data. You can use a Bitmap to create, load, modify, and save image data to sources that display pixel data such as screen objects (PictureBoxes, Forms, UserControls, and so on) and image files (BMP, GIF, JPEG, PNG, TIFF, and so on).
Many of the Bitmap class's most useful properties and methods are inherited from the Image class. These include Height, HorizontalResolution, Palette, RawFormat, Size, Width, GetThumbnailImage, RotateFlip, and Save. See the section "Image" earlier in this chapter for information about those and other inherited properties and methods.
The following table describes some of the most useful methods that the Bitmap class adds to those inherited from the Image class.
METHOD | PURPOSE |
|---|---|
This shared function loads a Bitmap image from a Windows icon handle. (An icon handle is a 32-bit integer that gives a value associated with the icon in the GDI environment. Windows uses the handle to refer to the icon when it needs to manipulate it. In the .NET environment, you generally work with Icon objects and don't need to worry about icon handles. It's useful to know about this method, however, in case you need to manipulate an icon loaded using older GDI routines.) | |
| This shared function loads a Bitmap image from a Windows resource. |
| Returns a specified pixel's Color. |
| Locks the Bitmap class's data in memory, so it cannot move until the program calls UnlockBits. |
| Makes all pixels with a specified color transparent by setting their alpha components to 0. |
| Sets a specified pixel's Color value. |
| Sets the Bitmap class's horizontal and vertical resolution in dots per inch (DPI). |
| Unlocks the Bitmap class's data in memory so the system can relocate it if necessary. |
For most applications, the GetPixel and SetPixel methods provide adequate performance when manipulating pixels, but there is some overhead in moving through the different layers between the program's code and the actual pixel data. For applications that work with very large images or that need to process pixel data on many images very quickly, performance may be an issue.
In cases where speed is an issue, you can access the pixel data more directly using so-called unsafe access. The program locks the Bitmap class's data, reads and updates the pixel values, and then unlocks the data. See the section "Pixel-by-Pixel Operations" later in this chapter for more information and examples.
Loading a Bitmap from a file is simple. Simply pass the file's name into the Bitmap class's constructor. The following code loads the bitmap file whose name is stored in the variable file_name, and then displays it in the PictureBox control named picImage:
Dim bm As New Bitmap(file_name)
picImage.Image = bm
After you have loaded a Bitmap, you can attach a Graphics object to it, draw on it, display it, and save the results in a new bitmap file. The following code loads the bitmap file, attaches a Graphics object to it, uses that object to draw an ellipse, and displays the result in the picImage control:
Dim bm As New Bitmap(file_name)
Using gr As Graphics = Graphics.FromImage(bm)
    gr.DrawEllipse(Pens.White, 0, 0, bm.Width - 1, bm.Height - 1)
End Using
picImage.Image = bm
Unfortunately, the Bitmap object holds some sort of attachment to the bitmap file. If you try to delete the file while the program is running and still using the Bitmap, the operating system complains that the file is locked by another process. Similarly, if you open the file in a program such as Microsoft Paint, make some changes, and try to save the file, the operating system complains about a sharing violation.
To release the file for other programs to use, you must dispose of the Bitmap object that opened it. However, if you assign the Bitmap to a property (such as Image property of a PictureBox), the property keeps a reference to the Bitmap and will later generate an error when it tries to use the Bitmap that you have disposed.
One solution to this problem is to create a second Bitmap that is a copy of the first Bitmap, as shown in the following code. Then you can safely dispose of the first Bitmap. Because the second Bitmap was never associated with the bitmap file, the file is not locked.
' Load the bitmap file.
Dim bm As New Bitmap(file_name)

' Make a copy.
Dim new_bm As New Bitmap(bm)

' Dispose of the original Bitmap.
bm.Dispose

' Draw on the new Bitmap and display the result.
Using gr As Graphics = Graphics.FromImage(new_bm)
    gr.DrawEllipse(Pens.White, 0, 0, new_bm.Width - 1, new_bm.Height - 1)
End Using
picImage.Image = new_bm

You can use a Bitmap object's Save method to save the bitmap into a file or data stream. By default the image is saved in PNG format, so if you want to use the PNG format you only need to pass Save the name of the file. To save the image in some other format, pass the format as the Save method's second parameter.
Note
The Save method uses its second parameter, not the file name's extension, to determine the file format. For example, if you pass the Save method only the string "Test.bmp." you'll get a PNG file with a .bmp extension. To avoid confusion, explicitly specify the data type that matches the file name's extension.
The following code generates a 256 × 256 pixel bitmap from scratch and saves it in a JPEG file. Because the program doesn't specify a path for the file, it is created in the program's current directory.
' Make a 256x256 pixel Bitmap.
Dim bm As New Bitmap(256, 256)

' Draw on it.
Using gr As Graphics = Graphics.FromImage(bm)
    gr.Clear(Color.White)
    gr.DrawEllipse(Pens.Red, 0, 0, bm.Width - 1, bm.Height - 1)
    gr.DrawLine(Pens.Green, 0, 0, bm.Width - 1, bm.Height - 1)
    gr.DrawLine(Pens.Blue, bm.Width - 1, 0, 0, bm.Height - 1)
End Using

' Save the result as a JPEG file.
bm.Save("test.jpg", ImageFormat.Jpeg)

The ImageFormat enumeration defines the values Bmp, Emf, Exif, Icon, Jpeg, MemoryBmp, Png, Tiff, and Wmf.
You can find information about the different file formats on the Web. For example, you can find some general descriptions of various formats at en.wikipedia.org/wiki/Graphics_file_format. Also see Microsoft's article "Guidelines for selecting the appropriate picture format" at support.microsoft.com/kb/272399.
If you save a Bitmap image in the Wmf (Windows metafile) or Emf (Enhanced metafile) format, the Save method creates a metafile that contains a bitmapped image. If you create a metafile by using a Metafile object, on the other hand, the result is a metafile that contains records that draw lines, curves, text, and so forth. The difference can have a couple of important consequences.
First, if the image is large, the bitmapped version may take up a lot more space than the version that records only drawing commands. It may also take a lot longer to draw a large bitmap than it would to draw a few circles and lines.
Second, you can transform a metafile that contains commands more readily than you can transform a metafile that contains a bitmap. If you enlarge a metafile containing commands, the result contains enlarged lines, curves, and other output. If you enlarge a metafile containing a bitmap, the result is a relatively blocky enlarged bitmap. Anti-aliasing may help a little, but the metafile containing drawing commands will produce a much better result.
On the other hand, not all programs understand all metafile commands. You may load a metafile containing drawing commands into another application and find that your ellipses and text don't work. Although a metafile containing a bitmap won't resize nicely, at least it should look similar to what you created.
See the section "Metafile Objects" later in this chapter for more information on metafiles.
In Visual Basic 6 and earlier versions, the Form and PictureBox objects had an AutoRedraw property. If you set this property to True, anything you drew on the object was automatically saved. If the object was later obscured and redrawn, the drawing was automatically restored.
This method required Visual Basic to allocate a chunk of internal memory to store the image, so it was not free. However, it could be a lot easier and faster than redrawing a complex image from scratch every time the drawing is exposed. For example, drawing a Mandelbrot set or other complex fractal may take 10 or 20 seconds even on a relatively fast computer. Some of the complex images used in modern computer animated movies take hours or days to build. Redrawing these images from scratch every time a form was exposed would be impractical.
The bad news is that Visual Basic .NET has no AutoRedraw property. If you want similar functionality, you must implement it yourself. The good news is that Visual Basic .NET has a couple of controls that can display a persistent image, and they can do a lot of the work for you.
The Form object's BackgroundImage property holds an image that covers the form's background. If the image is too big to fit, it is cropped. If the image is too small to cover the whole form, it is repeated to tile the form.
The PictureBox object's Image property also displays a persistent image. The control's SizeMode property determines how Visual Basic uses the image to cover the control. This property can take the values Normal (the image is drawn at full scale in the upper-left corner of the PictureBox and is cropped if it is too big), StretchImage (the image is stretched or squashed to fit the control, possibly changing its shape), AutoSize (the PictureBox resizes to fit the image), and CenterImage (the image is drawn at full scale in the center of the PictureBox and is cropped if it is too big).
One relatively easy method for implementing AutoRedraw is to make a Bitmap and assign it to a PictureBox object's Image property. Then the PictureBox automatically redisplays the image whenever it is exposed.
Some programs don't need to redraw their images when the form resizes. For example, a mapping application might display its map at a specific size. In that case, you don't need to redraw the map in the form's Resize event handler. Instead, you would probably add menus and buttons to let the user zoom in and out, and scroll to different parts of the map. In an application such as that one, the code would need to draw images only when the content changed. The rest is automatic.
Other applications draw in several routines and not just in the form's Load and Resize event handlers. For example, a drawing program might let the user draw various shapes (such as lines, rectangles, ellipses, and free-form curves). The program would add these shapes to a Bitmap as they were drawn and then display the result.
In programs such as this, you can create Bitmap and Graphics objects at a module or application level and then use them whenever the user modifies the image.
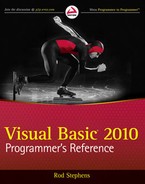
The Scribble example program, which is available for download on the book's web site, uses this approach to allow the user to draw free-form curves. When it starts and when the user selects the File menu's Clear command, the program makes Bitmap and Graphics objects at the module level. It displays the Bitmap in a PictureBox control's Image property.
The program's MouseDown, MouseMove, and MouseUp event handlers allow the user to draw lines on the Bitmap. Each time the program makes a change it re-displays the Bitmap in the PictureBox.
Figure 33-1 shows program Scribble in action.
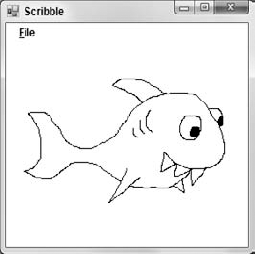
Figure 33.1. Program Scribble automatically redisplays its image when the form is hidden and exposed.
A final issue related to AutoRedraw is resizing. If the user makes the form larger or smaller, you need to figure out what to do about the AutoRedraw image. There are several approaches you can take, depending on your application.
The simplest approach is to not allow the user to resize the form or at least not to resize the PictureBox that displays the AutoRedraw image. Then you can ignore the whole issue.
A second approach is to create a new Bitmap of the new correct size. Use a Graphics object's Clear method to erase the new Bitmap. Then use the object's DrawImage method to copy the contents of the old Bitmap into the new one.
In this approach, if the new Bitmap is larger than the old one, all of its data is saved. If the new Bitmap is smaller, some of the old drawing is lost. You can preserve that information if you only allow the Bitmap to grow and never shrink. When the user resizes the form, you make the new Bitmap object's width and height the larger of the old Bitmap object's size and the form's new size.
Finally, if you think the program will often run maximized, you could just allocate a really big Bitmap when the program begins and forget the whole resizing issue.
The Bitmap object provides two methods, GetPixel and SetPixel, that let a program easily read and write pixel values in the image. The following discussion describes an example that uses these methods to invert an image.
GetPixel and SetPixel are easy to use and fast enough for many applications. For high-performance graphics, however, they are relatively slow. The section "Unsafe Pixel Manipulation" later in this chapter explains how you can use unsafe methods to access pixel data more directly. This is a bit more difficult, but it is much faster for large images.
The Bitmap object's GetPixel method returns a Color structure for a pixel in a specific X and Y location. SetPixel sets the Color of a pixel at a particular position. These two methods are quite easy to use and provide good enough performance for many applications.
Example program InvertImageGetSetPixels uses the InvertImage subroutine shown in the following code to invert the pixel colors in a Bitmap:
Private Sub InvertImage(ByVal bm As Bitmap)
    ' Process the image's pixels.
    For y As Integer = 0 To bm.Height - 1
        For x As Integer = 0 To bm.Width - 1
            ' Get this pixel's color.
            Dim clr As Color = bm.GetPixel(x, y)

            ' Invert the color's components.
            clr = Color.FromArgb(255,
                255 - clr.R,
                255 - clr.G,
                255 - clr.B)
           ' Set the result pixel's color.
            bm.SetPixel(x, y, clr)
        Next x
    Next y
End Sub

Subroutine InvertImage loops over all of the pixels in the image. It uses the bitmap's GetPixel function to get the color of each pixel. It inverts the red, green, and blue components of the pixel's color by subtracting them from the maximum allowed value 255. It then calls the destination Bitmap's SetPixel method to set the result pixel's value.
The first argument to the SetPixel method is the new color's alpha value, which gives the color's opacity. Setting alpha = 0 means the color should be completely transparent. Setting alpha = 255 means the color should be completely opaque. Subroutine InvertImage sets alpha to 255 for each pixel so the result is completely opaque.
Figure 33-2 shows the program in action. The output image on the right is essentially the photographic negative of the original image on the left.
The GetPixel and SetPixel methods are very easy to use, and they are fast enough for many applications. For example, a program that generates fractals such as the Mandelbrot set spends a considerable amount of time calculating colors for each individual pixel. If it takes the program 5 seconds to generate the image and a tenth of a second of that time is spent by the SetPixel method, then SetPixel is probably fast enough. Using unsafe array methods may shave a few hundredths of a second off the total time, but the program's time is dominated by the code that calculates the pixels' colors, so it's hardly worth the extra complication.
However, suppose that you need to transform a series of images very quickly to display an animated sequence. In that case, the time spent by GetPixel and SetPixel may be significant. In that case, you may get much better performance using unsafe methods.
The basic idea is to directly access the array of bytes containing the red, green, and blue component values for the image's pixels. The Bitmap object's LockBits method copies the pixel data for a rectangular part of the image into a temporary buffer where you can manipulate it. Later, you call the UnlockBits method to copy any changes you made back into the bitmap.
Unfortunately, the LockBits method returns the buffer of data as a pointer to memory and Visual Basic cannot work directly with that kind of pointer. To resolve this problem, you can use the Marshal class's Copy method to move the data into a Visual Basic array. You can then modify the data and, when you are finished, use Marshal.Copy to move the results back into the buffer.
The following code shows the BitmapBytesRGB24 class that makes this somewhat simpler for the main program. This class works with 24-bit image representations. Your call to LockBits can specify other formats, but this one is particularly easy to work with because it uses one byte for each of the pixels' red, green, and blue components.
Imports System.Drawing.Imaging
Imports System.Runtime.InteropServices

Public Class BitmapBytesRGB24
    ' Provide public access to the picture's byte data.
    Public ImageBytes() As Byte
    Public RowSizeBytes As Integer
    Public Const PixelDataSize As Integer = 24

    ' A reference to the Bitmap.
    Private m_Bitmap As Bitmap

    ' Save a reference to the bitmap.
    Public Sub New(ByVal bm As Bitmap)
        m_Bitmap = bm
    End Sub
    ' Bitmap data.
    Private m_BitmapData As BitmapData

     ' Lock the bitmap's data.
    Public Sub LockBitmap()
        ' Lock the bitmap data.
        Dim bounds As Rectangle = New Rectangle(
0, 0, m_Bitmap.Width, m_Bitmap.Height)
m_BitmapData = m_Bitmap.LockBits(bounds,
Imaging.ImageLockMode.ReadWrite,
Imaging.PixelFormat.Format24bppRgb)
RowSizeBytes = m_BitmapData.Stride
' Allocate room for the data.
Dim total_size As Integer = m_BitmapData.Stride * m_BitmapData.Height
ReDim ImageBytes(total_size)
' Copy the data into the ImageBytes array.
Marshal.Copy(m_BitmapData.Scan0, ImageBytes, 0, total_size)
End Sub
' Copy the data back into the Bitmap
' and release resources.
Public Sub UnlockBitmap()
' Copy the data back into the bitmap.
Dim total_size As Integer = m_BitmapData.Stride * m_BitmapData.Height
Marshal.Copy(ImageBytes, 0,
m_BitmapData.Scan0, total_size)
' Unlock the bitmap.
m_Bitmap.UnlockBits(m_BitmapData)
' Release resources.
ImageBytes = Nothing
m_BitmapData = Nothing
End Sub
End Class

The class's ImageBytes array will contain the pixel data stored as a one-dimensional array. Each pixel is represented by a byte for its blue component, a byte for its green component, and a byte for its red component, in that order.
The RowSizeBytes property tells how many bytes are stored in the array per row of pixels. The system may pad the array, so the number of bytes in each row is a multiple of four or some other number that is convenient for the operating system. Thus, RowSizeBytes may not always be three times the number of pixels in each row.
The constant PixelDataSize is 24 for this class because it works with 24-bit (3-byte) pixel data.
The class's constructor takes as a parameter a reference to a Bitmap and saves that reference for later use.
The class next declares a BitmapData object named m_BitmapData. This object will contain data describing the bitmap.
The LockBitmap method creates a Rectangle bounding the bitmap. This is the area in the bitmap that the routine will lock. This class doesn't mess around with pieces of the image, so it simply locks the entire bitmap.
LockBitmap calls the Bitmap object's LockBits method, passing it the bounding Rectangle, a flag indicating that it wants to lock the data for reading and writing, and a flag indicating that we want to work with 24-bit pixel data. LockBits returns information about the bitmap in a BitmapData object, which the routine saves in m_BitmapData. The routine sets the RowSizeBytes value so that it is easy for the main program to use.
LockBitmap then calculates the total number of bytes needed to hold the pixel data, makes the ImageBytes array big enough, and calls Marshal.Copy to copy the pixel data into the array.
The class's UnlockBitmap method copies the modified pixel data back into the bitmap. It recalculates the size of the array and uses Marshal.Copy to copy the data from the ImageBytes array back into the buffer allocated by LockBits. Finally, it calls the Bitmap object's UnlockBits method.
The following code shows how a main program can use the BitmapBytesRGB24 class to invert an image's pixels. The code creates a new BitmapBytesRGB24 object, passing the constructor the Bitmap that it wants to modify. It then calls the object's LockBitmap method to copy the pixel data into the object's ImageBytes array. Next, the program loops over the rows in the image. For each row, the code calculates the position in the pixel data that holds the row's first pixel's information. It then loops over the pixels in the row, modifying each pixel's blue, green, and red components. Remember that the components are in stored in the order blue, green, red. When it has finished modifying the pixel data, the program calls the BitmapBytesRGB24 object's UnlockBitmap method to copy the results back into the bitmap.
' Invert the pixel values in this Bitmap.
Private Sub InvertImage(ByVal bm As Bitmap)
    ' Make a BitmapBytesRGB24 object.
    Dim bm_bytes As New BitmapBytesRGB24(bm)

    ' Lock the bitmap.
    bm_bytes.LockBitmap()

    Dim pix As Integer
    For y As Integer = 0 To bm.Height - 1
        pix = y * bm_bytes.RowSizeBytes
        For x As Integer = 0 To bm.Width - 1
            ' Blue component.
            bm_bytes.ImageBytes(pix) = CByte(255) - bm_bytes.ImageBytes(pix)
            pix += 1
            ' Green component.
            bm_bytes.ImageBytes(pix) = CByte(255) - bm_bytes.ImageBytes(pix)
            pix += 1
            ' Red component.
            bm_bytes.ImageBytes(pix) = CByte(255) - bm_bytes.ImageBytes(pix)
            pix += 1
        Next x
    Next y
    ' Unlock the bitmap.
    bm_bytes.UnlockBitmap()
End Sub

This is quite a bit more complicated than the previous program that uses GetPixel and SetPixel, so it's not the best method for simple applications. For high-performance image processing, however, the extra complication is sometimes worth it. In one set of tests on a 798-MHz Athlon 64 processor, the previous version using GetPixel and SetPixel took roughly 1.109 seconds to invert an 800 × 600 pixel image, while the version using the BitmapBytesRGB24 class took only 0.047 seconds.
The Metafile class represents image data defined by metafile records. These records encapsulate typical graphics commands that scale, rotate, draw lines, display text, and so forth. Using a Metafile object, you can build the metafile records and save them into a metafile, load a metafile, and play the metafile records on a display surface such as a Bitmap.
Many of the Metafile's most useful properties and methods are inherited from the Image class. These include Height, HorizontalResolution, Palette, RawFormat, Size, Width, GetThumbnailImage, RotateFlip, and Save. See the section "Image" earlier in this chapter for information about those and other inherited properties and methods.
The following table describes some of the most useful methods that the Metafile class adds to those inherited from the Image class.
To build a Metafile, you create a Metafile object, attach a Graphics object to it, and then use drawing methods to draw into the metafile. In that respect, the Metafile behaves just like a Bitmap does.
The Graphics object also provides two special methods for working with its Metafile. AddMetafileComment adds a comment to the metafile. EnumerateMetafile sends the metafile's records to a callback subroutine one at a time. You can use that routine if you want to play back only some of the Metafile's records.
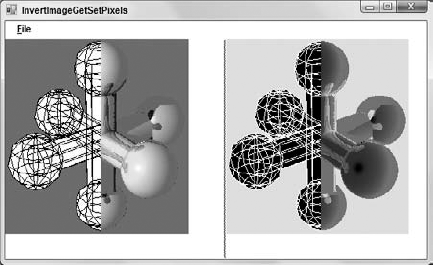
Example program MakeMetafile uses the following code to make and use a metafile. It starts by building a file name for the metafile. If the file already exists, the program deletes it. Next the program makes a Graphics object to get a handle to its device context. It uses that handle as a parameter to the Metafile object's constructor. It also passes the constructor the name of the file, a RectangleF that defines the metafile's bounds, and the units used by the bounds.
Private Sub Form1_Load() Handles MyBase.Load
    ' Make a bitmap.
    Const WID As Integer = 200
    Dim bm As New Bitmap(WID, WID)

    ' Find the WMF file's path and delete the file if it exists.
    Dim path_name As String = Application.StartupPath
    If path_name.EndsWith("in") Then
        path_name = path_name.Substring(0, path_name.Length - 4)
    End If
    Dim file_name As String = path_name & "	est.wmf"
    If Len(Dir$(file_name)) > 0 Then Kill(file_name)

    ' Make a Graphics object so we can use its hDC as a reference.
    Using me_gr As Graphics = Me.CreateGraphics
        Dim me_hdc As IntPtr = me_gr.GetHdc

        ' Make the Metafile, using the reference hDC.
        Dim bounds As New RectangleF(0, 0, WID, WID)
        Using mf As New Metafile(file_name, me_hdc,
         bounds, MetafileFrameUnit.Pixel)
            me_gr.ReleaseHdc(me_hdc)

            ' Make a Graphics object and draw.
            Using gr As Graphics = Graphics.FromImage(mf)
                gr.PageUnit = GraphicsUnit.Pixel
                gr.Clear(Color.White)
                gr.SmoothingMode = Drawing2D.SmoothingMode.AntiAlias
                Using thick_pen As New Pen(Color.Red, 5)
                    gr.DrawEllipse(thick_pen, bounds)
                    thick_pen.Color = Color.Green
                    gr.DrawLine(thick_pen, 0, 0, WID, WID)
                    thick_pen.Color = Color.Blue
                    gr.DrawLine(thick_pen, WID, 0, 0, WID)
                End Using
            End Using ' gr
        End Using ' mf

        ' Reload the metafile and copy it into a Bitmap.
        Using mf As New Metafile(file_name)
            Using gr As Graphics = Graphics.FromImage(bm)
                Dim dest_bounds As New RectangleF(0, 0, WID, WID)
                Dim source_bounds As New RectangleF(0, 0, WID + 1, WID + 1)
                gr.DrawImage(mf, bounds, source_bounds, GraphicsUnit.Pixel)
                picOrig.SizeMode = PictureBoxSizeMode.AutoSize
                picOrig.Image = bm
            End Using ' gr
        End Using ' mf

        ' Redisplay the result shrunk by 50%.
        Using mf As New Metafile(file_name)
            picSmall.SetBounds(
                picOrig.Right + 10, picOrig.Top,
                picOrig.Width  2, picOrig.Height  2)
bm = New Bitmap(
picSmall.ClientSize.Width,
picSmall.ClientSize.Height)
Using gr As Graphics = Graphics.FromImage(bm)
Dim source_bounds As New RectangleF(0, 0, WID + 1, WID + 1)
gr.ScaleTransform(0.5, 0.5)
gr.DrawImage(mf, bounds, source_bounds, GraphicsUnit.Pixel)
picSmall.Image = bm
gr.Dispose()
End Using ' gr
End Using ' mf
End Using ' me_gr
End Sub

After creating the Metafile object, the program attaches a Graphics object to it. It uses the Graphics object to clear the metafile in white and to draw a circle and two lines.
The program then disposes of the Graphics and Metafile objects. That closes the metafile.
The program then calls the Metafile constructor again, passing it the file's name. It makes a Bitmap and associated Graphics object, and defines source and destination RectangleF structures to use when copying the image. It enlarges the source rectangle slightly so the metafile doesn't crop off the circle's right and bottom pixels.
Next, the code uses the Graphics object's DrawImage method to copy the metafile onto the Bitmap. It then sets the picOrig control's Image property to the Bitmap to display the result.
The program then repeats these steps to display the metafile on the picSmall control. This time it makes the control half as large as the full-scale image and uses a scaling transformation to shrink the metafile data when it calls DrawImage.
Figure 33-3 shows program MakeMetafile in action.
The Image class represents a generic image. Its two child classes, Bitmap and Metafile, represent specific file types.
The Bitmap class lets you manipulate pixel-oriented image data. Its GetPixel and SetPixel methods let you get and set a pixel's color. Those methods are fast enough for most applications, but when performance is really critical, you can use unsafe methods to access the pixel data more directly and manipulate pixels much faster. When you are finished, you can use the Bitmap object's Save method to save the result in many different kinds of graphics files including Bmp, Emf, Exif, Icon, Jpeg, MemoryBmp, Png, Tiff, and Wmf.
The Metafile class represents a collection of drawing commands. Metafiles are reasonably standardized, so you can use them to import and export graphic data between your application and external programs (such as Microsoft Word and CorelDRAW).
Chapters 30 through 33 explain how to draw shapes, text, and images on the screen. Chapter 34, "Printing," shows how to generate similar output on a printer. The basic approach you use for printing shapes, text, and images is the same as it is for displaying those objects on the screen, but when and where you generate printed output requires some new techniques.