chapter 15
TECHNICAL EXPERT TECHNIQUES: LENS CHOICE AND HELPER LIGHT
This chapter covers the two technical expert components: lens choice and helper light. Lenses are tools, and there is the right tool for the right job. Although it is true that one or two basic lenses can take care of a wedding, it does not mean that lens was the best choice given the situation. Identifying the very best lens to bring out the most in any given scenario is an expert component because it is not obvious. A scene can be completely transformed by the lens you choose. As you know, lenses can make close objects appear far away, or they can compress distances. Lenses can also change the perspective and exaggerate a location’s geometric shapes. It takes experience and a good deal of trial and error to identify what is the optimal lens choice given what is in front of you.
As for helper light, we will take a bit of a different approach than in my lighting book Picture Perfect Lighting. To meet the needs of a wedding photographer, we will focus more on using helper light with speed and convenience in mind.
ISOLATION AND PRIORITIES THROUGH LENS CHOICES
In this section, we will have a crucial discussion about lens choices during weddings. Before we begin, I want to make it very clear that lenses won’t make you a better photographer. They won’t take the photo for you. Lenses won’t fix lighting or posing problems. I make such seemingly obvious statements because I witness photographers becoming nearly bankrupt as they get caught up in an endless cycle of buying gear to keep up with the latest and greatest photographic equipment.
On the flip side of the coin, I believe that if you develop a smart financial strategy about how to acquire high-quality lenses and the best cameras available, that strategy can help you significantly. Expanding your tools can help you capture a higher yield of photos that are in focus, are sharper, and have greater contrast and color. The right equipment can help you react to and capture a fleeting moment more quickly, and it can greatly change the aesthetics of your photographs.
Choosing a lens is a very personal decision. It is important to be aware that what works for some photographers might not work for others. Also, please note that the choices and strategy I discuss here are based on my own experiences, which have produced the aesthetics I love and which have resonated with my clients. If you do not choose to utilize the methods I describe here, it does not mean you are doing something wrong. It is a matter of personal taste, and I encourage you to find the lenses that give you the look and feel that you like.
The Complete List of Lenses I Use at Every Wedding
Throughout the years, I have collected, tested, and worked with many lenses. Unlike many other disciplines in photography, top wedding photographers are consistently challenged to produce incredible work in situations where the photographer has very little, if any, control of the location, aesthetics, weather, lighting, time, various personalities, etc. For this reason, I have collected a series of lenses that have helped me to handle every imaginable situation.
Note that, as of the writing of this book, I am a Canon Explorer of Light; therefore, these are Canon lenses. But you can find equivalent lenses from most other manufacturers you choose.
Prime Lenses
- • Canon EF 15mm f/2.8 Fisheye
- • Canon EF 35mm L f/1.4
- • Canon EF 50mm L f/1.2
- • Canon EF 85mm L f/1.2
- • Canon EF 100mm L f/2.8 Macro
- • Canon EF 200mm L f/2
Zoom Lenses
- • Canon EF 11-24mm L f/4
- • Canon EF 16-35mm L f/2.8
- • Canon EF 24-70mm L f/2.8
- • Canon EF 24-105mm L f/4
- • Canon EF 70-200mm L f/2.8
LENS CHOICE BASED ON MAJOR WEDDING SEGMENTS
There are many kinds of wedding photo shoots that we must complete throughout the wedding day. The lenses needed for the getting-ready portion of a wedding are different from those used for the reception. Here I will explain which lenses I use at each part of the wedding and why. Experience, along with trial and error, have helped me develop a sense of which lenses give me the most impact with the least amount of effort and stealth—in that order. I care about the impact first, then I worry about the effort it takes to use that lens to take a photo.
For all segments of the wedding except for the reception, this is my go-to order of operations when choosing my camera settings based on the lens being used and when shooting in a photojournalistic style (as a photo-taker).
How I Choose My Camera Settings Based on a Photojournalistic Approach Throughout the Wedding with the Exception of the Reception
- Choose the appropriate lens for the given situation.
- Set my shutter speed to be at least three times the lens’s focal length (for example, when using a 50mm lens I will set the shutter as closely as possible to 1/150 sec.).
- Choose an aperture that will obtain a proper exposure while maintaining the shutter speed set above.
- Choose the lowest ISO setting possible that will obtain a proper exposure while maintaining the shutter speed and aperture set above.
LENSES FOR THE BRIDE OR GROOM GETTING READY AND FOR PORTRAITS
I use prime lenses as much as possible. If I must, I use zoom lenses. The getting-ready portion of a wedding is a perfect time to use primes. Since we usually have slightly more time during this portion of the wedding, we can also be more creative with the lenses we use. During the ceremony, you can’t always be changing lenses, which would be extremely distracting, but few guests mind how many times you switch lenses earlier in the wedding day. The best thing to do is to have three or four cameras, each with a lens mounted and ready to go from the very beginning. Then, when you need a lens, just pick up the camera that has that lens mounted on it.
Most people getting ready are doing so indoors, perhaps in a hotel room or at their homes. Either way, it is rare that a photographer is able to work in a room with a great deal of light. Furthermore, you must capture people moving around the room. For this reason, primes are my tools of choice, as they offer much larger apertures that can allow two or even three times more light to enter the lens than the best zoom lenses. More light striking your camera’s sensor allows for faster shutter speeds, and faster shutter speeds in a room with weak light provide a greater chance to perfectly freeze the subjects moving around that room.
Also, the smaller size of prime lenses is far less intrusive. When people are just warming up to your presence, the last thing they want to see is you pointing a giant telephoto lens right at their faces. You can be more inconspicuous and capture great moments if you blend in a little. A prime lens is much smaller than a zoom lens, and thus people don’t notice you taking a photo of them as much.
Lastly, because of their better quality and their fixed focal length, primes allow you to concentrate and capture what the lens sees more quickly, since you don’t have to make any zoom decisions to take the photo. Eliminating this one step can be a real benefit, allowing your brain to simply focus on capturing what’s in front of you. These are the prime lenses I use and have ready as soon as I enter the getting-ready room.
Canon EF 35mm f/1.4
This lens is excellent when you want to give the viewer a sense of place and breathing room (Figure 15.1). This photograph makes you feel almost as if you are in the room with the wedding party. You can look around and feel that you know where you are in relation to the room.
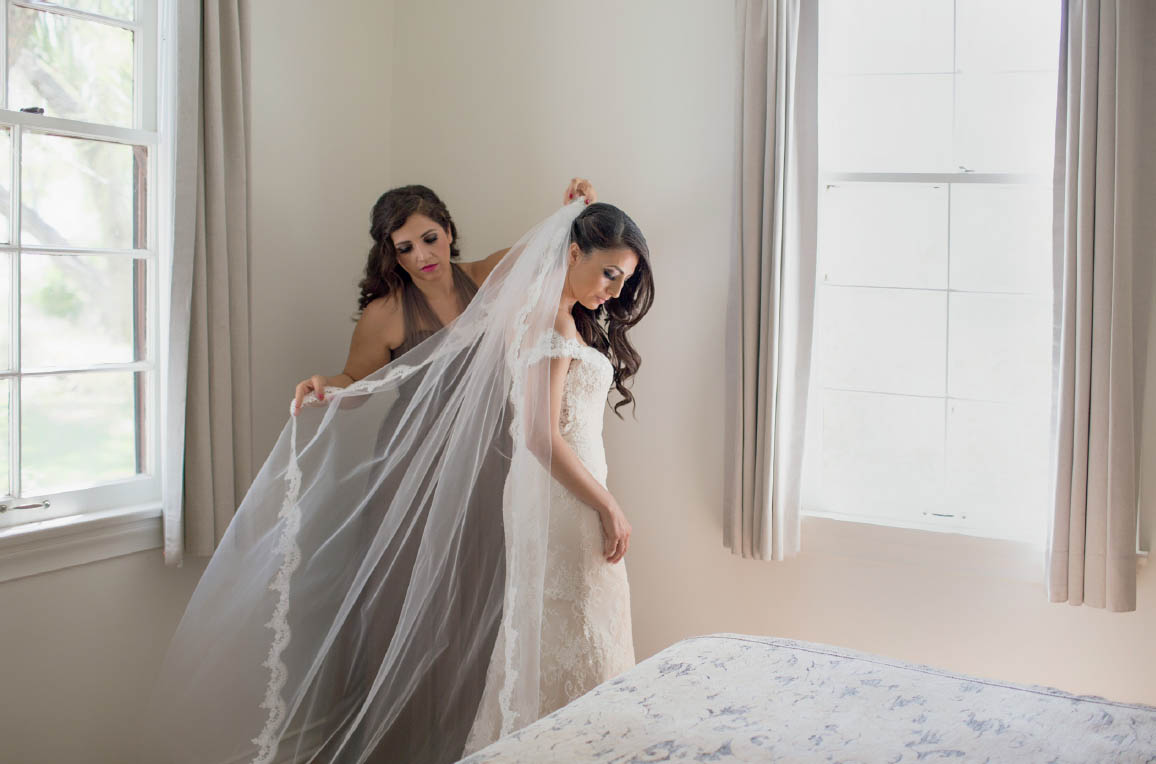
FIGURE 15.1
Photojournalistic photos properly taken with a 35mm focal length at wide apertures, such as f/2, have been among my most successful photographs according to prospective clients looking for a wedding photographer. The keyword here is “properly.” This lens requires that the room be “clean.” A 35mm lens is quite wide, so much more of the space shows in the photo. Cluttered rooms must be cleaned up, as I did here.
When using this lens, you should also be aware of the distance from the camera to the subject. If you are too close, you will distort your subjects, especially those subjects who are near the edges of the frame. When using this lens, I find that my optimal distance from the subjects is at least 10 feet. This greatly minimizes any distortion while still giving the viewer a sense of place.
Canon EF 50mm f/1.2
The 35mm f/1.4 and the 50mm f/1.2 share many of the same characteristics. A 50mm lens is said to give the viewer a similar field of view as the human eye. I mainly choose this lens thanks to its incredibly large aperture of f/1.2. This allows me to work with any lighting conditions at fast enough shutter speeds (Figures 15.2 and 15.3).
When shooting the bride or groom getting ready, they are almost always moving around. To capture and freeze their movement, you need fast shutter speeds. Since this constant movement most likely occurs in low-light indoor situations, I try to have a shutter speed that is at least three times faster than the focal length of the lens being used. For example, if I’m using a 50mm lens, I try—though, admittedly, it’s not always possible—to have a shutter speed of at least 1/150. In terms of full stops, that would be 1/125. Anything slower than that could run the risk of motion blur. Naturally, if I am taking a portrait, the subject is standing relatively still. In that case, I do not have to worry about having a fast shutter speed to freeze movement. You should gauge how fast your subjects are moving to determine an appropriate shutter speed.
FIGURE 15.2
FIGURE 15.3
The 50mm lens has a narrower field of view than the 35mm, so not as much of the room will show in the frame. This means that you don’t have to worry as much about tidying up the room as when using the 35mm.
When using a 50mm f/1.2, there is also significantly less distortion near the edges of the frame when compared to the 35mm.
For all these reasons, this is the lens I use the most when photographing the getting-ready portion of the wedding.
Canon EF 85mm f/1.2
There is one major difference in performance between the 85mm f/1.2 and the 50mm f/1.2: focusing speed. The 85mm is one of the top portrait lenses available, but it does not achieve focus quite as quickly as the 50mm. I only use this lens for actual portraits or for photos I help arrange. Basically, I need to have control of the situation. For this reason, I don’t use it for capturing photojournalistic moments. This lens’s focal length is better suited for getting close and personal (Figures 15.4 and 15.5). At an 85mm focal length, this lens does not allow for much context of the room, so even if the room is a mess, you probably won’t see it. The rest of this lens’s characteristics are very similar to the 50mm f/1.2.

FIGURE 15.4
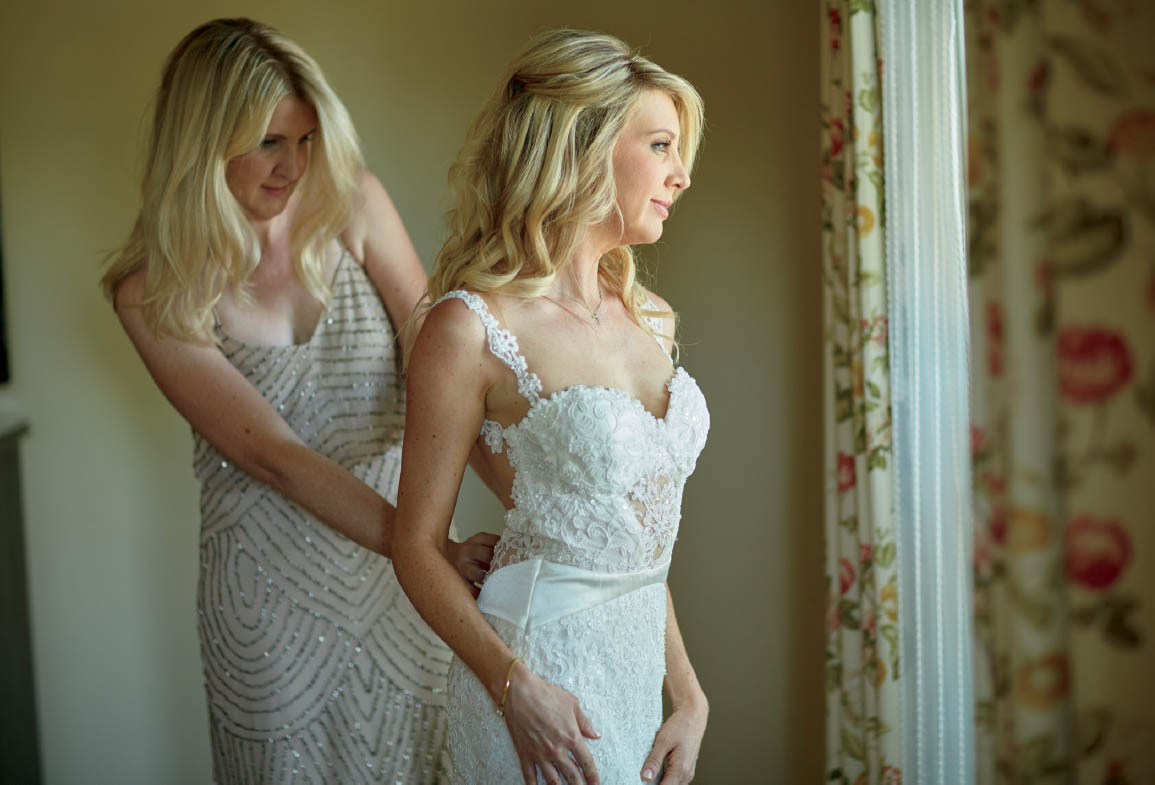
FIGURE 15.5
Canon EF 100mm f/2.8 Macro
This is by far one of my all-time favorite lenses. This lens is really two lenses in one. It is a perfect portrait lens and a macro lens for small details. No matter how close you are to your subject, it still achieves focus. This opens up a world of creative opportunities.
That said, this lens does not behave like other lenses. It is more sensitive to movement, so in order to achieve tack-sharp focus, I make sure to move the focusing point exactly where I want it to avoid the need to recompose the shot (more about this at the end of the chapter). If you try to focus and recompose, you will most likely lose focus. When shooting details and I have a little more time, I usually shoot this lens with the mirror locked up to avoid any vibrations from the mirror flipping up and down. This has been a great feature to yield a higher rate of perfectly focused photos. However, when I use this lens as a portrait lens, I do not lock up the mirror. Instead, as soon as I achieve focus, I almost simultaneously fire the shutter. This avoids the focus wandering off when either I move or the subject moves.
Figure 15.6: For this photo, I found a small metal basket that was holding flowers just outside the bride’s room. I placed the rings on top of the cute metal bird and used the 100mm f/2.8 macro to move really close and isolate the rings from the rest of the scene. Both rings had to be on the same focal plane; otherwise, one of them would have been considerably out of focus. Keep in mind that this is a very sensitive lens when it comes to sharpness and focus.
Figure 15.7: There is definitely a distinct look and feel to this lens, more so than other lenses of the same focal length. I love photographing in black and white when using this lens. It has a certain romance to it. Also, with its 100mm focal length, there is no distortion when shooting portraits.
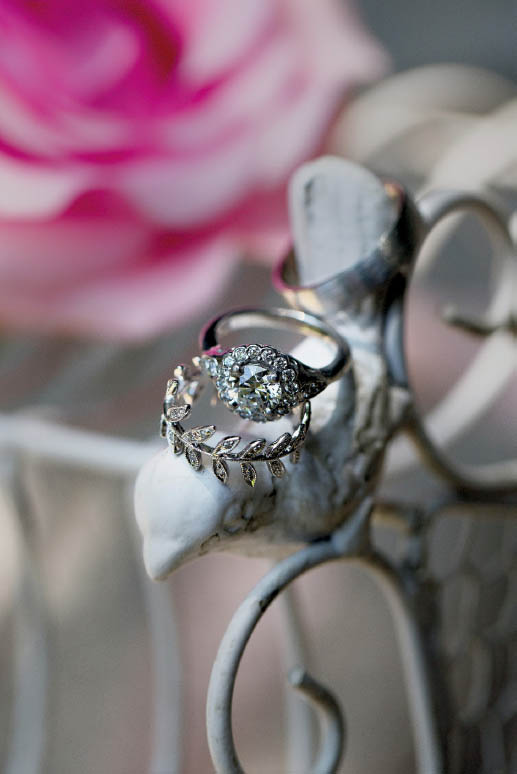
FIGURE 15.6
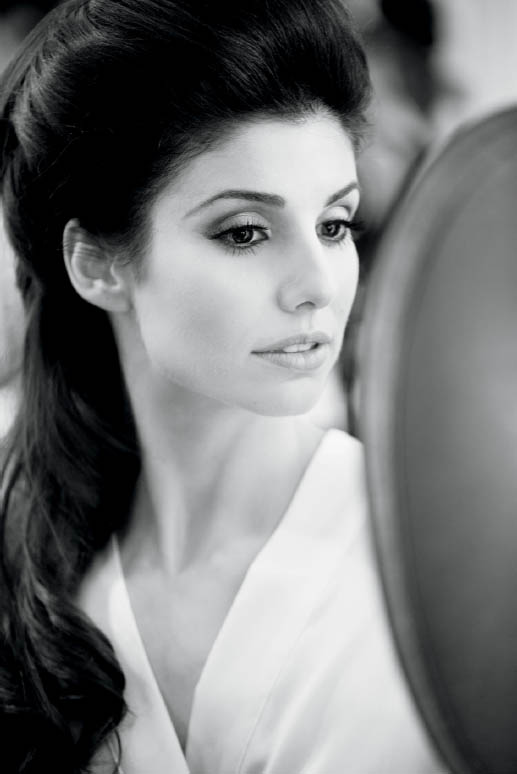
FIGURE 15.7
Figure 15.8: This photo is special to me because it is one of the most iconic wedding photos of my career and is also the cover photo of my first book, Picture Perfect Practice. This photo is the perfect example of why the 100mm macro is such a wonderful portrait lens. A photo taken this close to the bride’s face with another lens would not have been in focus. The lace you notice in front of her face is not the veil, by the way. I have seen many photographers try to replicate this photo, and they always use the veil. Actually, what you are seeing is the hem of her wedding dress. There was beautiful lace decorating the dress, and we arranged it in front of the bride’s face to frame her beautiful eye. The 100mm macro was the perfect lens to achieve this look.
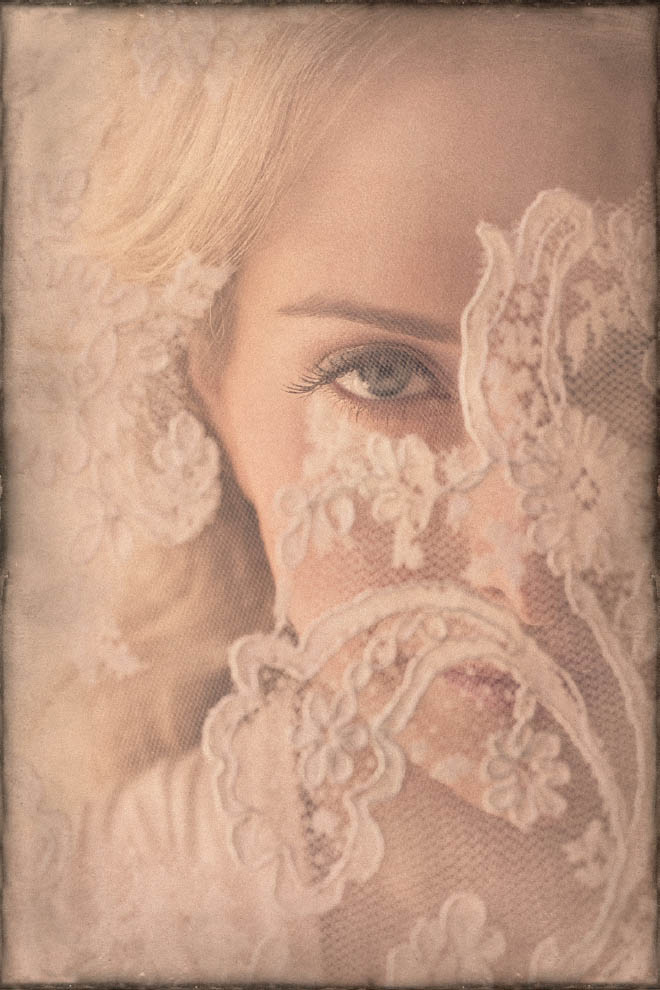
FIGURE 15.8
The rest of the bride and groom portraits, as well as the family and wedding party portraits taken during the time when the bride and groom are getting ready, are all taken with the four prime lenses listed in this section. When I’m photographing the getting-ready segment, I have four cameras ready to go. Each camera has one of the four primes mounted to it. Since the cameras are ready, I don’t have to think about pulling a lens out of my camera bag. It’s all ready to go, and I can focus on what’s happening in front of me.
LENSES FOR THE CEREMONY
There are two kinds of wedding ceremonies: indoor and outdoor. Let’s take each in turn because each location presents unique challenges and opportunities when it comes to lens choices.
Indoor Ceremonies
When shooting ceremonies indoors, I rely on the fast prime lenses listed earlier. These are the 35mm f/1.4, the 50mm f/1.2, and the 85mm f/1.2. They all have the unique ability to operate extremely well in low light. Most indoor ceremonies are quite dark, so even shooting at large apertures such as f/2.8 is often not good enough to gain a fast enough shutter speed to freeze the motion. I try to stay between f/1.2 and f/2.8.
And yes, you can always raise the ISO, but for me that is the last possible resort. I want my clients to receive the very best quality files, and noisy photos are just not acceptable. Remember, noise in a file is damage to the file. When you try to edit it, you damage the file even more. For this reason, I do whatever it takes to keep my ISO as low as possible throughout the entire wedding. That being said, some venues are so dark that you have no choice but to shoot with high ISO settings. Most importantly, there will be moments that are so precious and important that you should not care about the lens you have on your camera or what the ISO setting is. In such situations, I just take the photo before I lose the moment.
Remember this: It is of the utmost importance that a wedding photographer captures amazing moments as they happen, for these moments will be treasured by the families for the rest of their lives. That is priority number one! Clearly, if I am given the choice between taking a photo with a slow shutter or with a high ISO, I will choose the high ISO every time to avoid an unusable, blurry photo. Although I work hard to have little or no noise in my images, I can always use software to remedy the noise or I can turn the photo black and white to lessen the problem. But there is absolutely nothing you can for a photo that has motion blur due to an inadequately slow shutter speed.
Figure 15.9: This is a typical example of a dark church during a ceremony. Referring to the section above (“How I Choose My Camera Settings Based on a Photojournalistic Approach . . .”), all four decision points are well represented here. Let’s go over them:
- Choose the appropriate lens for the given situation. I chose a 35mm prime f/1.4 to reveal the beautiful architecture of the church, as well as the entire wedding party.
- Set my shutter speed to be at least three times the lens’s focal length. I set the shutter speed to 1/90. This is not exactly three times the lens’s focal length of 35mm but it’s close enough. However, at this shutter speed with the 35mm lens, I can rest assured that if anyone slightly moves during the ceremony, I will be able to freeze that motion. During a ceremony, you don’t expect any significant movement anyway, so 1/90 should do the trick.
- Choose an aperture that will allow the shutter speed to be at least three times the lens’s focal length and still obtain a proper exposure. In order to keep my shutter speed at 1/90, I had to set the aperture to f/2.5.
- Choose the lowest ISO setting possible that will allow for the shutter speed to be at least three times the lens’s focal length, the aperture to maintain its setting above, and still obtain a proper exposure. So that I could keep my shutter speed at 1/90 and my aperture at f/2.5, I had no choice but to dial up the ISO to 1600. These settings make it evident that photographers need to know how to work in very dark, indoor locations. It’s hard to believe that although I was shooting at a large aperture of f/2.5, I still had to raise my ISO to 1600 to obtain the proper exposure. But any attempts to lower the ISO would have required the shutter speed to be slowed down below 1/90. That would have been too risky. A noisy photo is much better than a blurry photo, which would automatically be unusable.
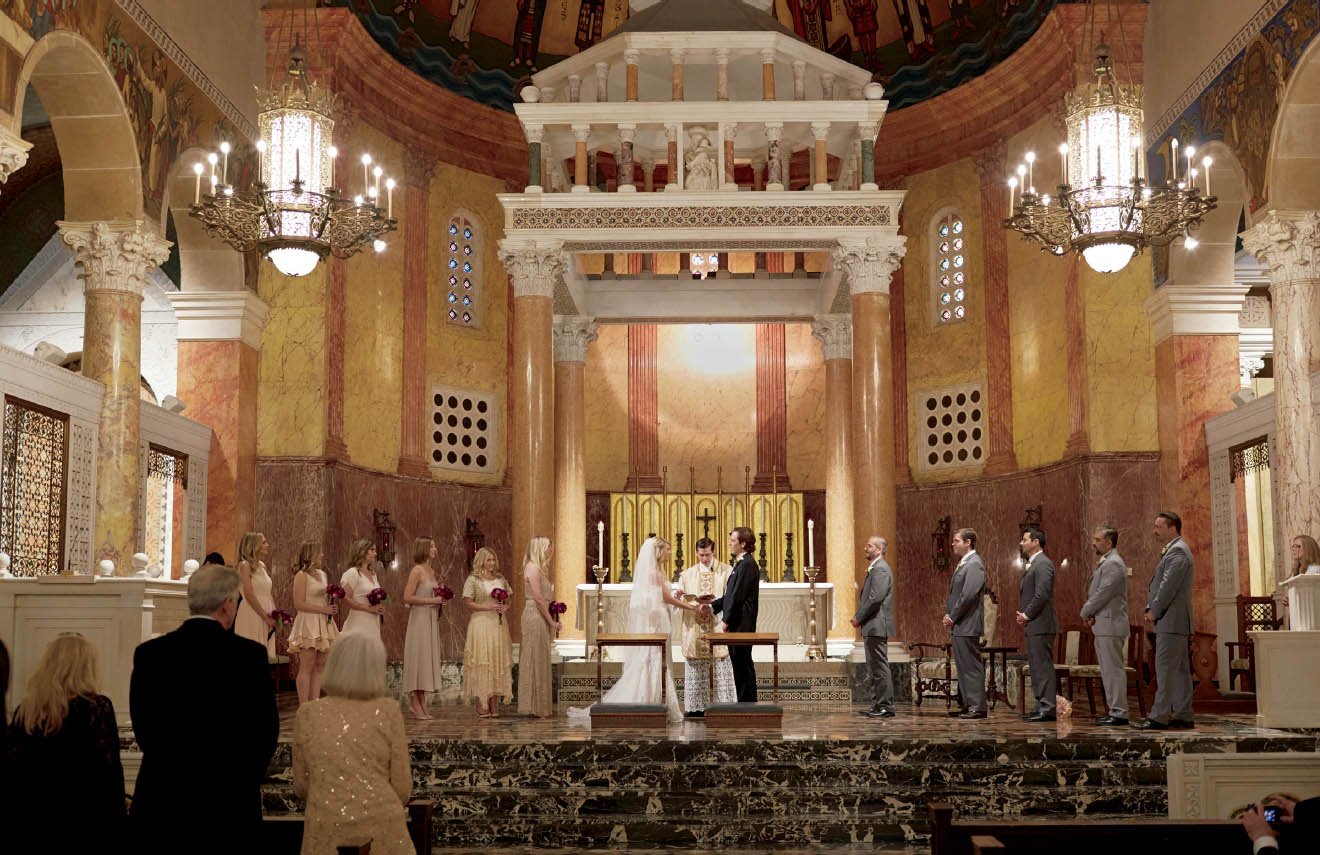
FIGURE 15.9
Figure 15.10: This photograph is an example of how important it is to be able to think on your feet. I had already walked inside the church and set my camera settings to 1/90 sec., f/2, and ISO 1600 in preparation for the ceremony. However, when I walked into the narthex, I was captivated by the beautiful light illuminating the groom. This photo gives you a sense of anticipation just moments before the ceremony. In situations like this, you just have to think quickly and react, because if the groom had turned around, the beautiful light on his face would have disappeared. The fastest setting I could think to change was to raise my shutter speed from 1/90 to 1/180 to achieve a perfect exposure. I kept all other settings as they were. There was no time to change them. The painterly feel of this photo is one of the reasons why I’m such a fan of shooting with primes at big apertures between f/1.2 and f/2.8.
FIGURE 15.10
Figure 15.11: This photo demonstrates why it is smart to be prepared for the unexpected at weddings. Although I prefer to use fast prime lenses at large apertures, I still have my trusty 70–200mm f/2.8 workhorse lens ready to use in case I need to be much closer to a great moment. I don’t switch lenses much at ceremonies because it’s very distracting, and you can drop lenses easily. Instead, as I have mentioned, I have my cameras already mounted with the proper lenses for immediate use. One of my four cameras is equipped with a 70–200mm lens. For this photo, I did not want the little girl to see me or even notice my presence. For this reason, I grabbed the camera with a telephoto lens on it and captured this moment of the flower girl spacing out in her own world with her eyes just peaking above the pews. Although I had to shoot this at ISO 6400 to obtain a proper exposure, the moment was totally worth it.
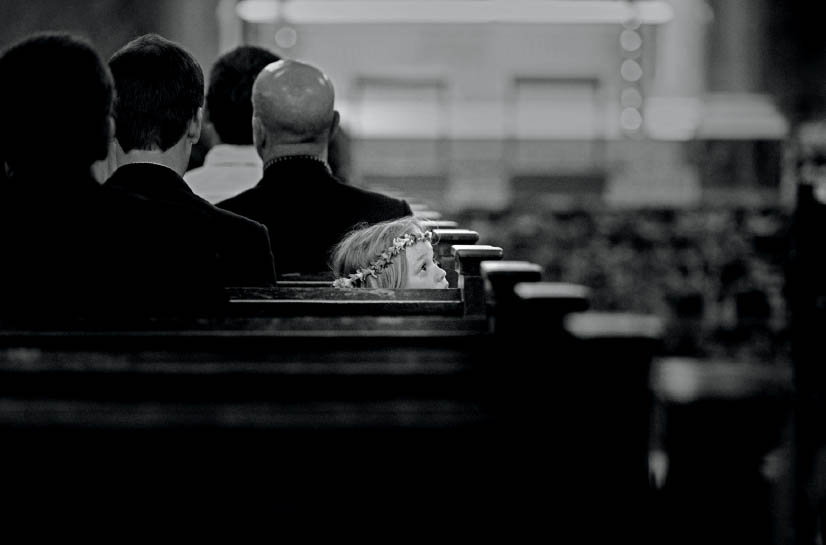
FIGURE 15.11
Outdoor Ceremonies
Outdoor ceremonies provide much more flexibility regarding lens choices and shooting angles. At indoor ceremonies, we are asked to stay within certain areas and to avoid going to many others. We are at the mercy of the people who run the establishment. But at most outdoor locations, we can move around the couple and shoot from any angle. However, outdoor ceremonies are subject to changing weather conditions, so outdoor ceremonies tend to be much shorter; sometimes they can be as short as 15 minutes.
Because of this potentially small time frame, every part of the ceremony must be wrapped up in a very short time, and things move fast. In response to the fast pace of outdoor ceremonies, I tend to use zoom lenses, mainly the 24–70mm f/2.8 and the 70–200mm f/2.8. In the event that there is plenty of space and I have a little time, I occasionally take out the large 200mm f/2 prime lens to achieve the unique bokeh and separation that the lens provides.
With these two zoom lenses, I can more easily create the exact composition I want while still considering the fast pace of the events. And at f/2.8, I can still achieve a decent separation between the intended subjects and the background.
Canon 70–200mm f/2.8
The 70–200mm f/2.8 lens is arguably the must-have lens for all wedding and portrait photographers. It’s focal length of 70–200mm is the perfect focal length range to achieve great compression of the scene, it is very flattering for people, and at f/2.8, you can make the background completely out of focus, leaving your subjects tack-sharp for great separation. In fact, if someone were to ask me, “If I had to choose one single lens to photograph an entire wedding, what would it be?” My answer would be the 70–200mm f/2.8, 100%.
Figure 15.12: As mentioned, with most outdoor ceremonies there is a good chance you can walk around the couple. By doing so, you can actually capture a unique angle not usually seen. And in the rare event that every person in the background has a good expression on their faces, you can create a very special photo for your clients. This photo represents that unique angle. You can see the bride’s expression as the groom recites his vows to her, and you can also enjoy the bride’s parents’ expressions during this very special moment. The 70–200mm lens was the perfect choice to create compression in the scene and place the viewer very close to the moment, as if he or she were witnessing this ceremony just inches away. Notice that the bride’s face is the only one that is in focus. That’s beautiful, because it is her expression during this special moment in her life that I wanted to feature in this photograph.
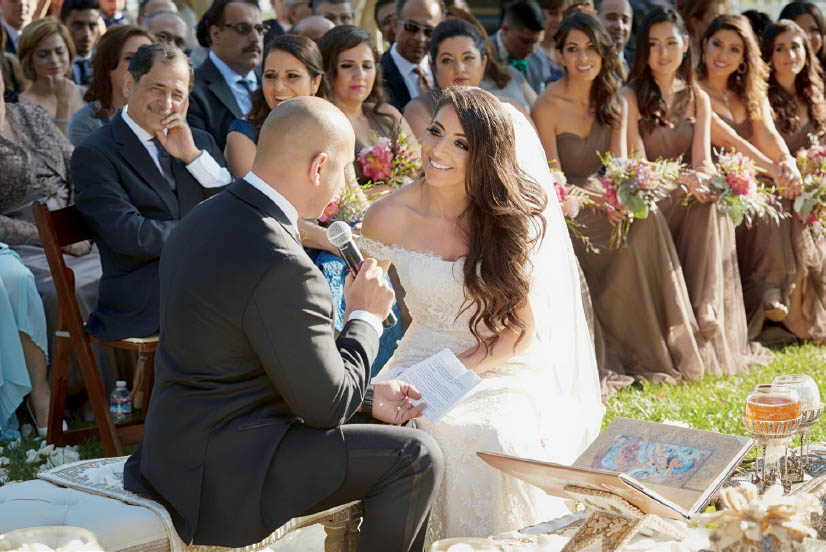
FIGURE 15.12
Figure 15.13: This is a great example that shows how, even when the photographer is fairly far away, the 70–200mm lens allows you to zoom in enough to be right with the action and achieve the perfect composition without having to move an inch. This photo appears as if I were standing just a few feet from the Sofreh.
FIGURE 15.13
Figure 15.14: Having the ability to be far enough away to be undetected allows you to capture moments that would otherwise be impossible. I love the intensity of this flower girl during a prayer. I just adored her perfect posture and delicate demeanor. If she had detected my presence, there is a good chance this moment would have been ruined.
FIGURE 15.14
Figure 15.15: The same fly-on-the-wall technique can and should be used to preserve the parents’ reactions to their children getting married. I enjoy using this telephoto lens because you can capture these intimate emotions in a way that would never be possible if people noticed you.
FIGURE 15.15
Canon 24–70mm f/2.8
I consider the 24–70mm f/2.8 to be a mini-version of the 70–200mm f/2.8 in most of its characteristics. Like the 70–200mm, this lens also has a great focal range and a big aperture of f/2.8. I use it when I simply want to show more context in the location (Figure 15.16). Also, during the ceremony’s processional and recessional, this lens performs better at focusing on moving subjects. The best part about using this lens for the ceremony is that if the people walking toward you blink, don’t smile, make a strange face, sneeze, etc., you can always zoom out and try again, as they continue to walk toward you. Also, during the processional, you must worry about two people having a good expression, not just one.
This is, by far, the best lens for this portion of the wedding. I always start at 70mm and take a series of photos as the people walk toward me for expression purposes, widening the focal range and continuing to shoot until my lens reaches 24mm (Figure 15.17). I find this to be a terrific and proven technique to ensure touching expressions during the processional and recessional.
FIGURE 15.16
FIGURE 15.17
LENSES FOR FAMILY AND WEDDING PARTY PORTRAITS
Depending on the wedding timeline, of course, most family portraits taken with the bride and groom together and their families usually occur after the ceremony. Why? Because most couples still prefer not to see each other until the ceremony. The photographer’s challenge is that after the ceremony, the light is not very strong, since it is often close to sunset. Also, the groups you are photographing vary in size from two people to 20 people, or even more. For this reason, I use three zoom lenses for this segment of the wedding. The zoom allows me more flexibility to accommodate larger groups. However, please note that when photographing people, it’s best to keep your focal length as close as possible to 100mm. This will avoid any distortion near the edges of the frame.
My three go-to lenses for this portion of the wedding are the Canon 70–200mm f/2.8, the Canon 24–105mm f/4 with image stabilizer, and the Canon 24–70mm f/2.8. I don’t have any examples of the 24–105mm f/4 because I dropped mine and broke it to pieces years ago. But I loved using it because its focal length covered the 100mm threshold and it had a great image stabilizer built into the lens. Also, its largest aperture of f/4 worked great, because in groups not everyone is standing the same distance from the camera. I don’t want to risk anyone being out of focus when shooting at f/2.8, so it’s nice to know that with this lens, f/4 is as big as it will let me go. This ensures that I have more people in focus if their distances to the camera varies.
Figure 15.18: This photo was taken with the Canon 70–200mm f/2.8 lens at f/4, 1/350 at a 90mm focal length, and ISO 400. As soon as I begin taking the family photos, I’ve trained myself to automatically change the aperture from f/2.8, which was used during the ceremony, to f/4 for portraits. I have made the mistake of forgetting to change my aperture to f/4 several times in the past, and I had to explain to my clients why some of the people in their group were out of focus.
For these kinds of photos, I work hard to ensure that nobody is very close to the edge of the image, the reason being that most people buy these photos with an 8x10 format for their homes. The 8x10 is almost a square. Therefore, I give myself plenty of space to crop images to an 8x10 and have them look superb. During my early years, I lost a great deal of money on print sales because I used to shoot people edge to edge. When my clients found out that they couldn’t buy the photos for their 8x10 frames without cropping people out, they simply did not buy them.
Figure 15.19: This is the same photo cropped to an 8x10 format. This is the proper way to maximize print sales. Notice that even though it’s cropped to the 8x10 format, there is still a nice space on each side of the composition, giving the photo a pleasing breathing room. I can’t express how important this has been in not only increasing print sales, but in making clients very happy. I have heard countless stories from people complaining to me that their photographer was only thinking of the wedding album, for which size could be altered to their liking. But they couldn’t use the photos for their picture frames at home, and they were quite disappointed.
FIGURE 15.18
FIGURE 15.19
Figure 15.20: This photo was taken with the Canon 24–70mm f/2.8 lens. This is a situation when I would have preferred to use the 24–105mm f/4, but of course I didn’t have it. I shot this at f/4 anyway to ensure that everyone was in focus. Because there was a wall behind me, I stood as far back as I could to try to reach the preferred minimum focal length of 100mm. However, the best I could do was 59mm, so I made sure that no one was close to the edges; otherwise, there would have been some noticeable distortion.
FIGURE 15.20
LENSES FOR THE RECEPTION
From a lens standpoint, receptions are very similar to the first part of a wedding when the bride and groom are getting ready. The getting-ready and reception environments allow the photographer a great deal of creative flexibility to interpret a wide variety of scenarios. Both segments require the photographer to photograph details, portraits, and action shots. The major difference between these two segments is that the getting-ready portion is shot with mainly natural light, while receptions, for the most part, depend on the photographer’s style with flashes or strobes.
For this reason, there is a wide range of lenses photographers can use during receptions, from 15mm fisheye lenses all the way to 200mm focal lengths. After over a decade of trial and error using different lenses for receptions and learning from my mistakes, I narrowed my choices down to three main lenses I use at receptions. They are the Canon 16–35mm f/2.8, the 35mm f/1.4, and the 15mm fisheye. If I’m feeling creative and have the time, I will occasionally use the ultra-wide Canon 11–24mm f/4 lens for a few specialty photos. Why these lenses? I find that wide-angle photos are preferable to show more live action. Also, the big apertures these lenses provide (such as the 35mm f/1.4) allow me to deliver photos that retain the mood the clients imagined when they paid a small fortune on lighting and décor for the reception.
Note that when I set up flashes around the room to help with lighting, my rule of shooting with a shutter speed at least three times the focal length does not apply. In fact, I usually shoot at slow shutter speeds of 1/30–1/90 to maintain the ambiance of the room while relying on the flashes to fire and freeze any movement.
The 35mm f/1.4 is my most frequently used lens during all receptions. If I had to decide to use just one camera and put the rest of my gear away for the night, it would be a camera with the 35mm f/1.4 mounted on it. As an aside, I’ll note that the reception is the time when your gear is the most vulnerable, and it’s when most photographers’ and cinematographers’ equipment is stolen. With all the commotion, music, and people drinking, who is going to notice another person near your camera bag with the intention of stealing it? Even if you trust the DJ or feel that your camera gear is safe near the band, realize that these performers are just as distracted as anyone else. It is best to trust no one. To avoid having my gear stolen like many of us have during receptions, I pack all my stuff and put it away, except for two cameras, one with the 16–35mm f/2.8, and the other with the 35mm f/1.4.
FIGURE 15.21
Figure 15.21: This photo was taken with Canon’s ultra-wide 11–24mm f/4 lens. I do not normally use this lens at receptions; however, this photo was taken before the guests were allowed into the room and I had a few moments to myself to photograph the reception details. Because this lens’s maximum aperture is f/4, it would not be my preference during the actual reception. At f/4, too much of the mood of the room would be eliminated and replaced by flash. For me, keeping the mood of the room is key, which is why, for the most part, I photograph receptions with apertures between f/1.4 and f/2.8. This 11–24mm lens is unique in that it is as wide as you could possibly wish without the extreme distortion of a fisheye lens. It’s a great lens when you want to show an entire room in its full glory with one single photo. Wedding coordinators will love you for such a great perspective of their work.
Figure 15.22: This is a great example of staying true to the mood of the room while still freezing the movement on the dance floor. This photo was taken with the 16–35mm f/2.8 lens at ISO 800, f/5.6, 1/30. That’s right, 1/30. At a shutter speed so slow, this would have come out completely blurry with just the available natural light. But firing the flashes takes care of the freezing of the moment, while the slow shutter collects as much of the ambient light in the room as possible. Notice how nicely balanced the ambient light is with the light from the flashes. Photos such as these have been a tremendous success for me when meeting with prospective clients.
Figure 15.23: This photo was taken at a focal length of 16mm, using the 16–35mm f/2.8 lens. That focal range is very effective at allowing me to zoom out to 16mm and quickly capture as much of the action as possible. Now you can see how many people were in the room participating in this enjoyable Persian tradition. I used the same slow shutter with off-camera flash technique as in Figure 15.22.
FIGURE 15.22
FIGURE 15.23
Figures 15.24 and 15.25: Although the 15mm fisheye lens can be a bit much for most situations, it can be quite effective for a couple of photos here and there during the reception. Both of these images have a unique energy to them because you can see the entire room at a glance. This unique perspective gives the viewer the context of how grand the event was. However, to make the photo more elegant, I thought it was important to hide the fact that the photo was taken with the fisheye lens. The first thing I did was crop out 10–20% of the outside of the frame. This is the area where most of the heavy distortion occurs. Next, I used the lens correction tool in Photoshop to further fix the distortion. The results are not perfect, but they are far better than the initial gimmicky look of the fisheye lens.
FIGURE 15.24
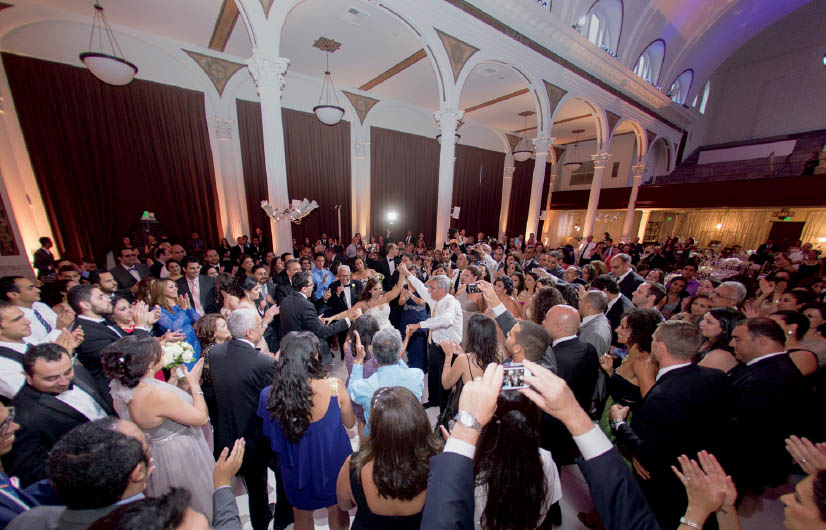
FIGURE 15.25
Figure 15.26: The mood of this photograph with the bride’s precious expression has made this photo one of my favorites. This photograph was taken with the 35mm f/1.4 lens at f/2.8, 1/125, ISO 640. Had I kept my aperture wide open at f/1.4, the groom would have fallen out of focus too much for my taste, considering he is a major part of this story. Therefore, I quickly changed my aperture to f/2.8. Although f/2.8 is still risky, I didn’t want to lose the ambiance of the room. One of the characteristics of wide lenses such as this one is that the focus falloff from shallow apertures is not as sensitive as with telephoto lenses. This is very important to keep in mind. Although this photo was taken at f/2.8 and focused on the bride, the groom is still in decent focus.
Wedding photographers around the world have developed unique styles that resonate with themselves as well as with their clients. Lens choice is a matter of personal taste and style. I make these recommendations based upon my experiences and what has worked well for me from years of trial and error. However, my recommendations are not and should never be interpreted as the only way or the one “right” way. Experiment for yourself and see what works best for you.
FIGURE 15.26
Focus Point Techniques to Avoid Heavy Recomposing
Most modern cameras offer more than 50 focus points. Of these, the most commonly used point is the middle focus point. When photographers tilt their cameras up, down, left, or right until the middle focus point is right over the subject’s eyes in order to lock focus, they will have to recompose their photo to create their desired composition. The problem with this focus-and-recompose technique is that, if the subjects are moving, by the time you lock focus and then recompose the shot, they will have already moved away from the focal plane. This is especially true during the wedding processional, when people are walking up the aisle toward the camera. It doesn’t take much distance for subjects to become completely out of focus when they are walking toward you.
To avoid this, learn your camera’s focusing system and practice moving around the focus points so that you are fast and able to this with your eyes closed. Throughout this chapter, I have often recommended photographing at a shallow aperture range between f1/2 and f/2.8. This creates a much-needed separation between the subject and the background. However, these apertures are ultra-sensitive and have a very narrow focus plane. Therefore, the less you have to recompose your shot after achieving focus, the better your chances of achieving tack-sharp images.
Figure 15.27: The far two rows in any direction of the focus point system are the focus points I practiced on to improve my ability to select a distant focus point. You could use your camera’s focus point shortcuts or any other technique. For this image, I asked the bride to slowly take a few steps forward. Before she started walking, I selected the focus point that would result in the least amount of recomposing distance so that I could achieve a nice composition with the subject and the rest of the frame. Had I chosen the middle focus point, I would have had to shift my camera far left and up, lock focus on her eyes, and then recompose all the way back. By the time all that happened, the bride would have been long past the focal plane.
FIGURE 15.27
Figure 15.28: This is an example of the processional when the wedding party is walking quickly toward the camera. The risk of the subjects walking past the focal plane before you can take the photo is at its highest. So right before the processional was about to begin, I quickly had my second shooter stand where the wedding party would be walking up the aisle and chose the appropriate focus point that would be the closest to their eyes while still achieving a balanced composition. By choosing the correct focus point, it allowed me to minimize the distance required to recompose.
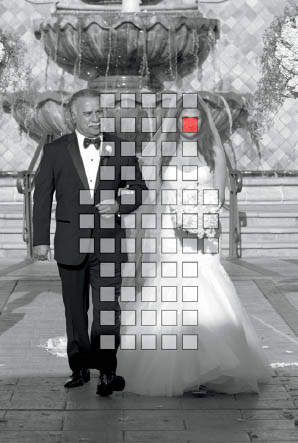
FIGURE 15.28
HELPER LIGHT: A WEDDING RUN-AND-GUN APPROACH
Helper light is, hands down, the most helpful yet underutilized technique that wedding photographers can implement. First, let’s define the term. “Helper light” is light that is added by a photographer to a subject via reflectors, diffusers, LED continuous lights, or flashes (these could be regular flashes or larger strobes, such as Profoto wireless units). The purpose of helper light is to give existing light—or circumstantial light, as I call it—a small boost in intensity, color, or direction to best flatter the subject(s).
There are three major reasons why most photographers don’t implement helper light in their work. Reason 1: There is usually no time to set it up. Weddings proceed at such a fast pace that there is not much time to even think about adding light to the scene. During weddings, most photographers are in a survival mode rather than in an artistic or storytelling mode. Reason 2: Laziness. Deciding to add helper light to a scene in front of you requires more mental and physical work. Reason 3: Technical know-how. Even though most photographers spend a great deal of money on equipment such as flashes, most don’t take the time to really learn those flashes’ features and capabilities, and they don’t know how to work through their menus quickly. A great majority (though not all) of wedding photographers put their flash on TTL mode and hope that the flash’s internal computer can do all the work and thinking for them. When the results are not what they had in mind, they don’t know how to correct for them. For these reasons, most wedding photographers’ work looks almost identical. Which is also why clients have a hard time paying a premium for a photographer if, in their eyes, the results of one photographer look more or less the same as all the other photographers whose work they’ve examined.
This explains why so many wedding photographers rely on discounting their services or collections to the point of minimal profit just to book a wedding. But I can tell you this with confidence: a photographer who uses helper light will stand out. You don’t have to be an expert in photography to recognize the tremendous benefits helper light has on a subject. Helper light can turn average lighting into unbelievably flattering lighting. The difference between helper light for portraiture and helper light for weddings is that, for weddings, you need speed. You must get into the habit of being ready before you even need the helper light, which means you must have your gear ready to go whether you think you need it or not. If you are in the middle of photographing a scene and you realize that the shot could really benefit from some helper light, but you still must pull it out of the camera bag, it will be far too late.
A run-and-gun approach to helper light requires practice and forethought. When under pressure, you can’t be fiddling around with buttons on your flashes and trying to guess how to achieve a specific look. Learning the basics of your flashes is an absolute necessity.
What You Need to Create Helper Light
- •A large reflector. I strongly prefer the Profoto Large (47 in, 120 cm) SunSilver/White collapsible zebra reflector with handles.
- •A large diffuser. I use the Profoto Large (47 in, 120 cm) diffuser with handles.
- •A small 12-inch silver reflector. This small reflector is used to add light just to the eyes or face.
- •Three off-camera flashes with their included mini flat stands, and an adjustable flash clamp. The clamp allows you to clamp a flash to many surfaces and objects, such as poles, bars, tables, light fixtures, etc. In order to get flashes to fire off-camera, a transmitter is necessary. One of the flashes can work as a transmitter (depending on model and brand), or a regular flash transmitter can be used.
- •Basic flash modifiers. I use MagMods because they are quick and easy to use. These modifiers include some basic color correction gels, diffuser plates, grids, etc.
- •A wireless transmitter for your flashes. I strongly recommend that you use transmitters made by your camera’s manufacturer. If you shoot with a Canon camera, use the Canon transmitters. For Nikon cameras, use Nikon transmitters. Third-party transmitters may be cheaper, but you get what you pay for. I’ve witnessed too many problems with those third-party flashes and transmitters.
- •A powerful, portable, and adjustable LED light.
Figures 15.29 and 15.30: These are two images that demonstrate why I strongly believe that if you truly want to create something most people can’t or won’t attempt, you will need to implement helper light into your work. The first photo (Figure 15.29) shows the groom resting against the window with one of his groomsmen helping him with his bow tie. Clearly, to improve the photograph, their positions should have been reversed to give the groom the window light. However, look closely. Although the groomsman is receiving direct light from the window, the light is still far too weak. It was cloudy and stormy outside, so the window light was not very intense. Without helper light, I would have had to shoot at ISO 6400 or more to obtain a decent shutter speed.
Now look at Figure 15.30. My assistant was holding a video light at camera left, pointed at the groom’s nose. This beautiful light gave the groom the same great window light that would only be possible if the subject were standing right in front of a strongly lit window. Notice how nicely and elegantly the groom is lit. It is much more flattering than flat and weak window light, right? This process is not complicated, but it did require some forethought. Remember that being prepared before you even need helper light is the key to applying it. As soon as we walked into that room, I noticed the weak window light streaming in. A storm was brewing outside, and therefore the light intensity was never going to get better, only worse. Immediately, I pulled out the video (LED) light and asked my assistant to point it at the groom’s nose. If the groom moves, my assistant moves with him. “Follow the nose,” I told him. We did not interfere as the groom was naturally going about his business. But we did explain to him that since there was a storm outside, we needed to add light to his face. Not only did he understand, but he really appreciated it!
Once you take a few photos of that particular moment, be considerate and turn off the light. Only turn it back on the next time you want to capture another candid moment. If you are always considerate, your subjects will be far more willing to cooperate with you. With an LED video light, what you see is what you get, so it is a very simple and quick solution for adding light to your main subject and capturing the scene with a much lower ISO setting.
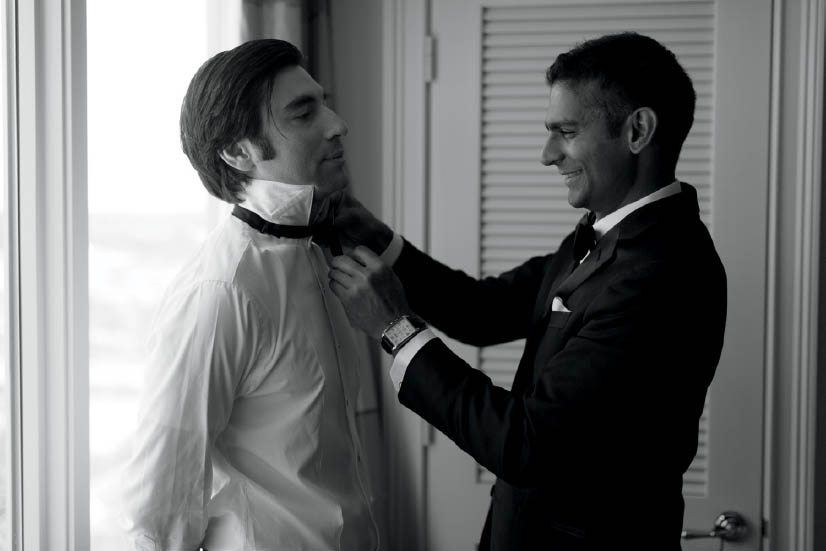
FIGURE 15.29

FIGURE 15.30
REACTIVE VS. ACTIVE HELPER LIGHT
Unlike portraiture, wedding photography is an ongoing combination of photojournalism, portraiture, family photography, etc. Therefore, we need to know what tools and techniques will maximize our efficiency and lower our footprint.
Reactive Helper Light
“Reactive helper light” is used when photographing with a photojournalistic or interactive photojournalistic approach. You are basically “reacting” to the moments unfolding in front of you. Reactive helper light is stationary, meaning that once you place or clamp the off-camera flash somewhere and the perfect settings are dialed in, you leave it there and let it fire away as you capture photographs from the opposite side of the room. The flash is simply adding a bit of fill light to the window light without overpowering the ambient light and without any supervision or attention.
The two main sections of a wedding where I implement reactive helper light are during the getting-ready segment and the reception. During these two segments, the photographer is reacting and capturing the interactions between, for example, the bride and her bridesmaids, the groom and his parents, etc. These interactions happen quickly and without warning, so reactive helper light is the only real option.
Getting Ready
Figure 15.31: Before I begin the coverage of any wedding, I arrive earlier than I said I would so I can make sure all my gear is ready to go. The major reasons for this gear check are to synchronize all the time stamps and to have my helper light(s) linked and ready. Notice that I have my transmitter on my hot shoe; I do not mount a flash on my camera. One of my two flashes is set to group A and the other to group B. I always keep the flashes in Manual mode and, depending on the size of the room, at the weakest or second-weakest power setting, which would be at 1/128 or 1/64 power.
FIGURE 15.31
Remember that the purpose of helper light from a flash is to give the amount of light in the room just a slight boost. If you do it correctly, you will barely be able to notice the influence of the flashes in the scene. Because the light from a flash is a bit warm, I change my white balance on my camera to a range between Kelvin 4500 to 4700. Assuming the color of the walls is a neutral color, this will balance the window light and the warmer color of the flash light very nicely.
Figures 15.32 and 15.33: These are the two major ways I position my helper light flash in a room where the bride or groom are getting ready. In Figure 15.32, using the little flat flash stand that comes with the flash, I mounted the flash to the stand and simply placed it on top of a bed. I pointed the flash toward the wall opposite the window and set the flash to a very weak power on manual mode. Once the flash was set, I took a few test shots and examined my camera’s histogram to see how it moved to the right when the flash was turned on, contributing slightly to the exposure. Figure 15.33 shows the second most common way I position a flash for helper light. In this case, I used the adjustable clamp to affix the flash to a lamp in the room and pointed the flash at the wall, as usual. Then I moved to the opposite side of the room and began to photograph the moments as they occurred without having to worry about the flash.

FIGURE 15.32
FIGURE 15.33
Figures 15.34 and 15.35: This is how subtle using a flash for helper light in a room should be. Figure 15.34 has no flash helper light contribution. The photo looks fine, but the bride’s face and hair have almost no shadow detail. This is how most wedding photographers would take photographs during this part of the wedding. However, look what a beautiful difference it makes to add just a pinch of light to the scene. Figure 15.35 benefits from the flash’s extra light, which is resting on the bed (which you can see in the bottom right corner of the photograph) pointed at the wall opposite the window. Notice how beautifully the bride’s hair and face are lit. The photograph still looks 100% natural, but now you can better appreciate how dazzling the bride looks. In fact, I’ll bet that if I hadn’t told you that I used a flash for Figure 15.35, you probably would not have guessed. When I explain this difference in the photos to clients, this becomes one of the major reasons why they book me instead of the competition. They appreciate that extra lighting effort that makes them look their very best.
FIGURE 15.34
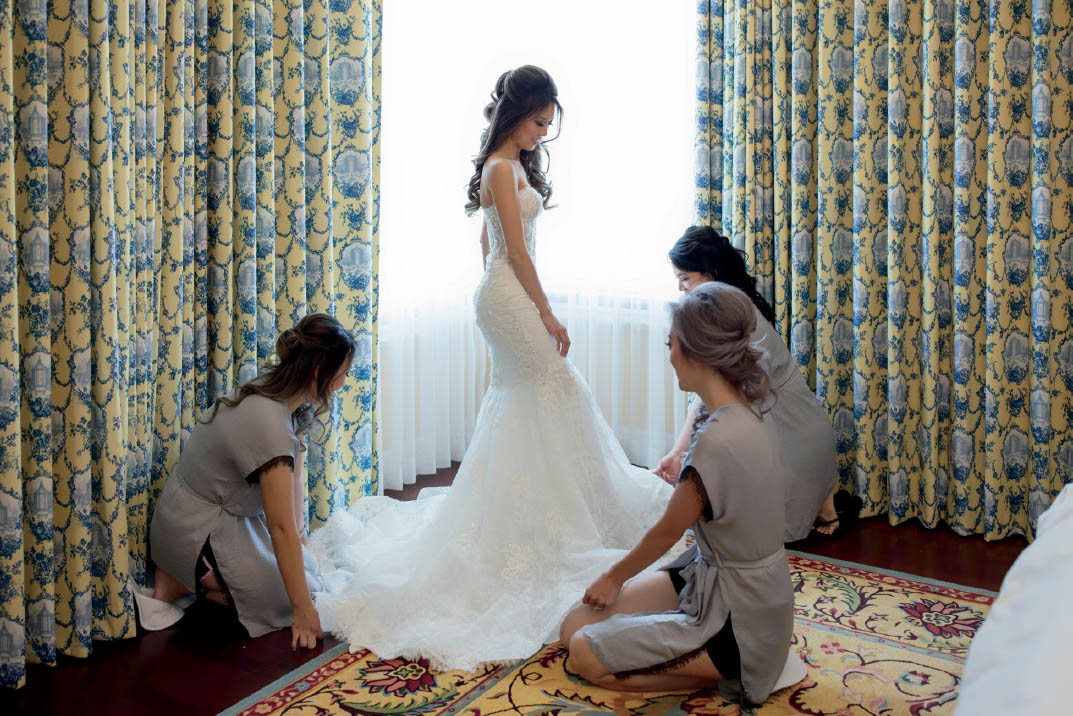
FIGURE 15.35
Figure 15.36: I think this is one of the best examples of the importance of flash helper light. I recognize that it can take a few extra seconds to set up, but it is very hard to deny the rewards. For this photo of Esther, I adjusted the position of the flash, which was already set up on the bed, so that it bounced light right where this portrait was going to be taken. To camera right, there is a large window. I asked the bride to turn her head slightly toward the window, and then I filled the darker side of her face with a gentle use of fill light from the flash. I loved the results! If you look closely, you can actually see a telltale sign of the flash in the slight highlight created by the fold of the veil near the bottom left of the photograph. Without the flash, that highlight would not be there, and the right side of her dress would have been much darker.
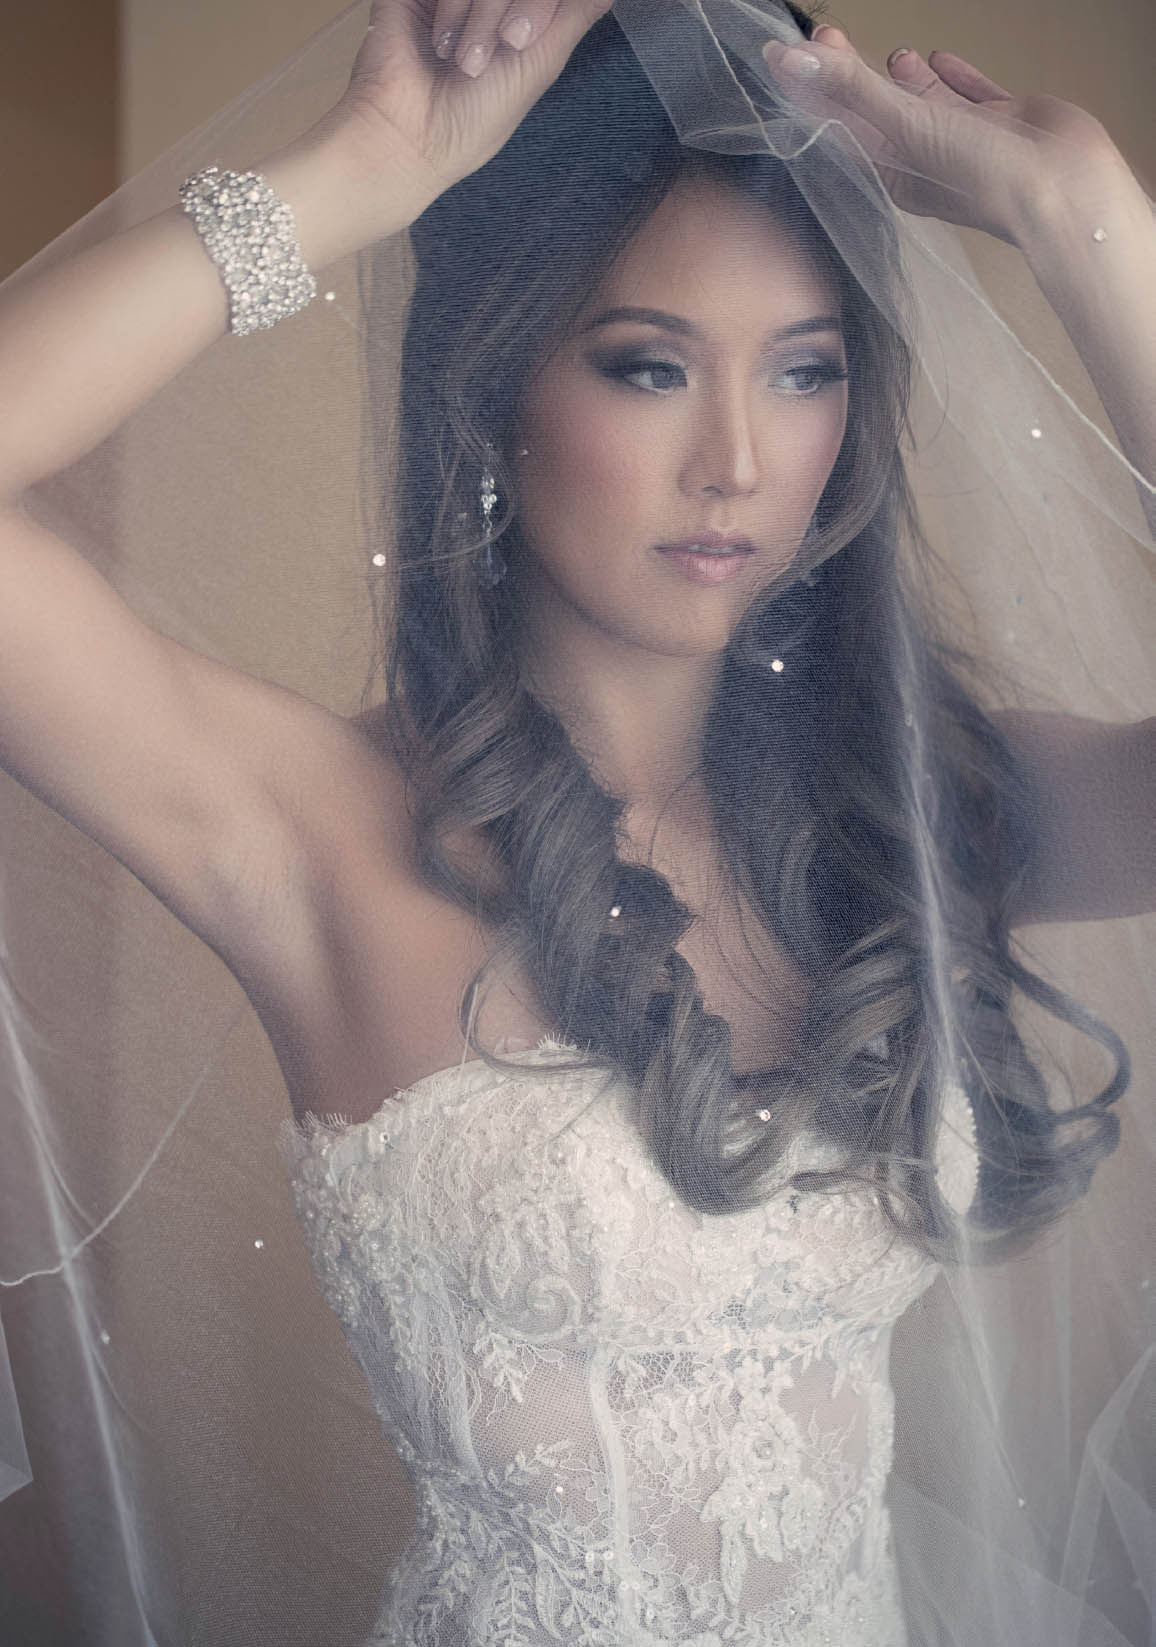
FIGURE 15.36
My reception setup has been modified over and over throughout the years. By diligent experimentation, I have nailed down a look and feel that both I and my clients love. The setup requires three flashes. One flash is on my camera’s hot shoe, and the other two are placed high up on either side of the band stage, approximately 12 feet high and pointed down toward the center of the dance floor. The light stands holding the two flashes are each weighted down with 25-pound sand bags to prevent them from being hit and falling on someone. That would be a lawsuit waiting to happen.
The use of reception helper light needs to be subtle in order to maintain the ambience that the couple worked hard for and paid a lot of money to obtain. Reception lighting, table flower arrangements, décor, candles, etc., all contribute to a specific mood. It is very important to maintain the reception’s mood and integrity. When considering lenses to maintain the mood, I rely on fast, wide-angle lenses, usually the 35mm f/1.4, the 16–35mm f/2.8, and the 50mm f/1.2. Depending on the situation, of course, I try to keep my camera’s ISO at receptions to around ISO 800. The rest of the gear gets put away in the car where it will be safe.
The flash on the camera’s hot shoe is at a low manual power of around 1/64; its function is to provide a little fill flash and to act as a transmitter for the two off-camera flashes. The two flashes on either side of the reception give the dance floor an exciting nightclub feel. Let’s look at some examples.
Figures 15.37 and 15.38: In these two examples, you can clearly see my flash setup. To locate my flashes, just look to either side of the band over the speakers. (Here I used two flashes on each stand, but could have used just one on each stand; using two on each stand just makes the flashes able to fire more quickly.) To show the difference between flat lighting a reception with a single on-camera flash and creating a nightclub scene, I turned off the off-camera flashes in Figure 15.37. I bounced the on-camera flash on the ceiling. You can automatically see how flat the reception lighting appears. Most of the mood is gone, and there is no dimension to the scene. Compare that with Figure 15.38. I turned on the flashes next to the band, then dialed the flashes’ power on manual up or down until the mood was just right. Quite a difference!
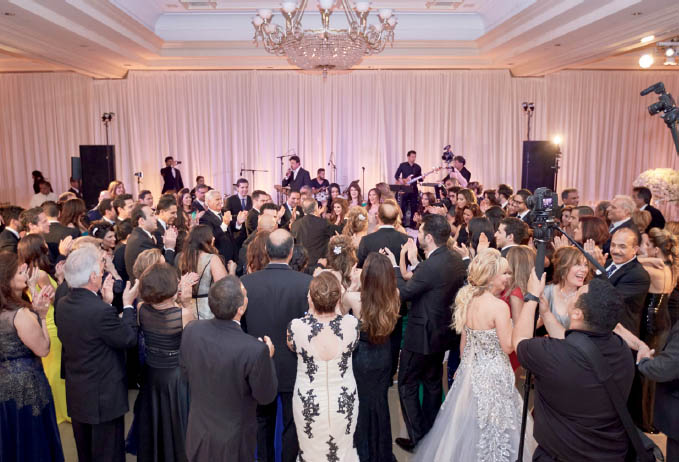
FIGURE 15.37
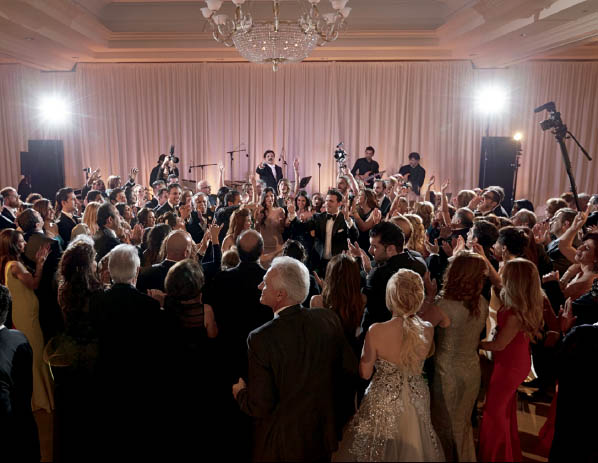
FIGURE 15.38
Figures 15.39 and 15.40: As you probably know, during receptions people often come up and ask if you would take a quick photo of their group. This can happen at any place at the reception venue. The lighting setup described above is meant to create a nightclub feel around the dance floor, but that won’t help you if the people you are photographing are somewhere else. The solution is to use the flash you already have on your camera. In these instances, I quickly turn off the flash transmission to the dance-floor flashes and put the on-camera flash on TTL, angled at 45 degrees with the white bounce card out. See Figure 15.39. This gives you the perfect lighting on the group in front of your camera. After the photo is taken, you can quickly turn the transmitter back on and continue shooting the action on the dance floor.
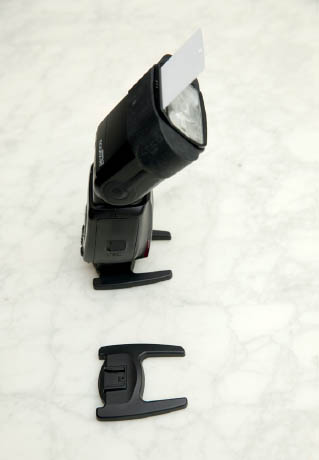
FIGURE 15.39
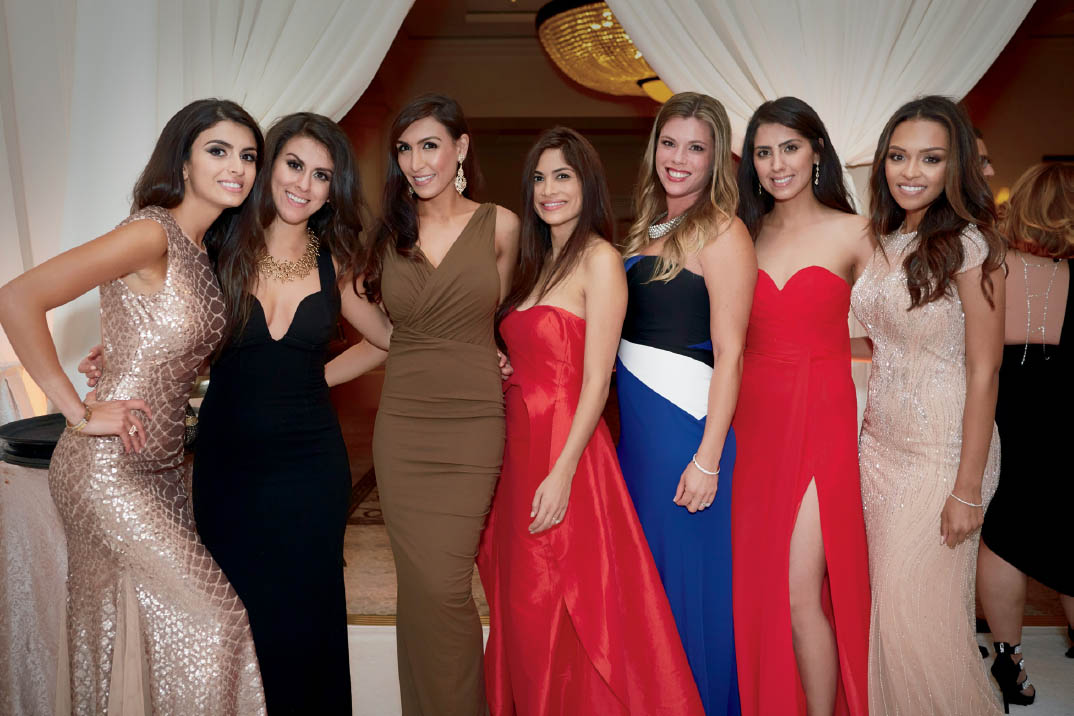
FIGURE 15.40
Active Helper Light
“Active helper light” means that someone is actively moving or holding the helper light to illuminate your subjects. Unlike reactive helper light, active helper light requires two people: the photographer and an assistant to hold the lights or modifiers. Active helper light is used when I have a little more control over the situation.
I always work with all my flashes on manual mode. The only time I use TTL mode is when subjects are in constant movement toward or away from the camera, such as during the ceremony procession. As soon as the procession ends and the actual ceremony begins, I turn all my flashes off to avoid being a major distraction. Most photos taken at weddings are taken quickly and close to a window or in open shade. Both options have some undesirable outcomes. Window light looks good on the person’s side closest to the window, but then the lighting falls off into darkness. Open shade has a blue/green color cast, and it is usually weak light. Either way, there is always the opportunity to improve the lighting on your subjects quickly.
Figures 15.41 and 15.42: For this behind-the-scenes photo (Figure 15.41), the wedding coordinator’s assistant was helping me by holding an LED video light that provided fill light to the right side of the groom’s face. You can clearly see the effect of the light. The resulting photo (Figure 15.42), is quite flattering to the groom. Without the boost from the LED light, this groom’s portrait would have featured an unflattering split lighting. But now you can see a pleasing balance of light between both sides of his face. The gradual decrease in light intensity throughout his face gives this portrait a three-dimensional look.
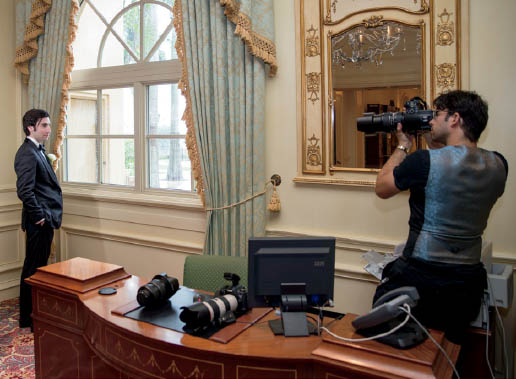
FIGURE 15.41
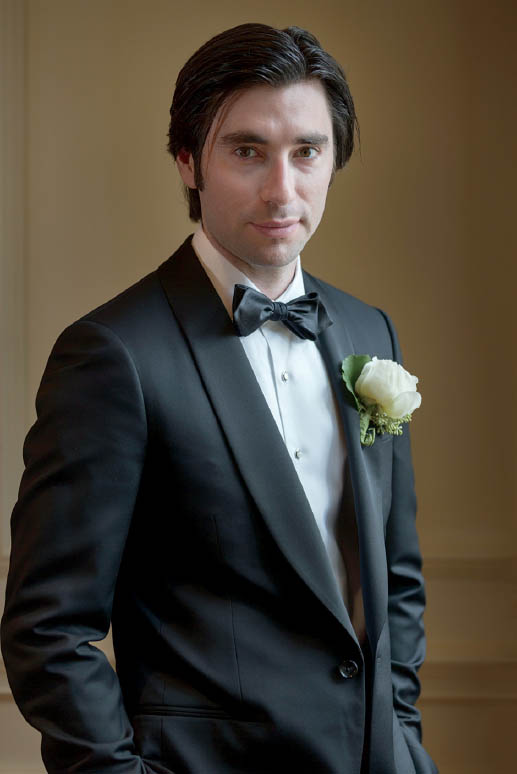
FIGURE 15.42
Figures 15.43–15.45: This example illustrates a frequent situation when photographers rely heavily upon available window light. Figure 15.43 is the result of using only window light in the room to illuminate the moment the bride’s sister is helping the bride with her dress. As you can see, this photo is not flattering at all because the window light is simply not strong enough. Helper light is an expert technique because the photographer must realize quickly when the available light is not enough to flatter the subjects. After taking this photograph, I quickly asked my assistant to get the LED lights that were in another room. Figure 15.44 shows the results, which are stunning! My assistant held a strong LED light and pointed it straight at the bride’s nose. I always tell my assistants to follow the nose with the light to avoid unwanted shadows on the face.
Figure 15.45 is the final edited photo. It was such a simple adjustment, yet it had such a great impact! I love to see the expressions of my prospective clients when I show them how I choose the lighting for their wedding day. Their eyes just light up! (No pun intended.)
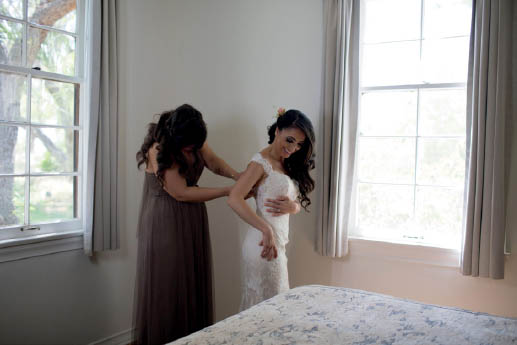
FIGURE 15.43
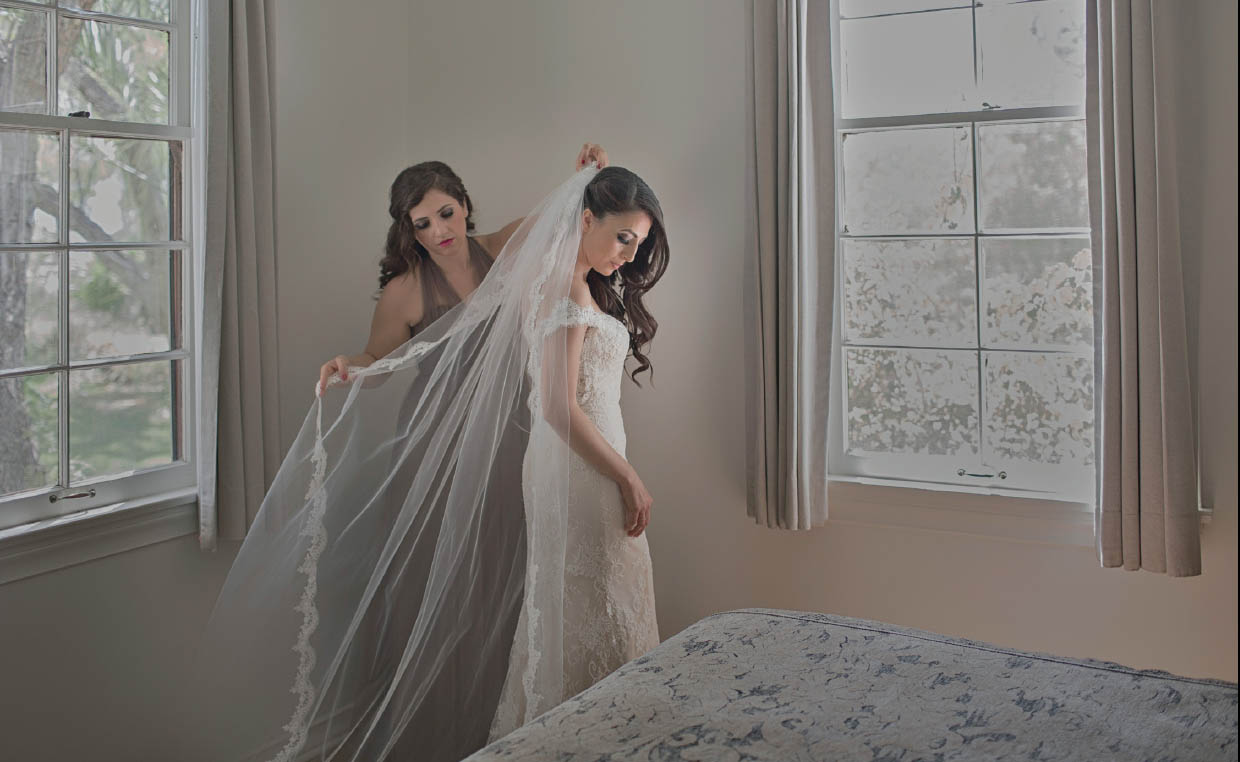
FIGURE 15.44
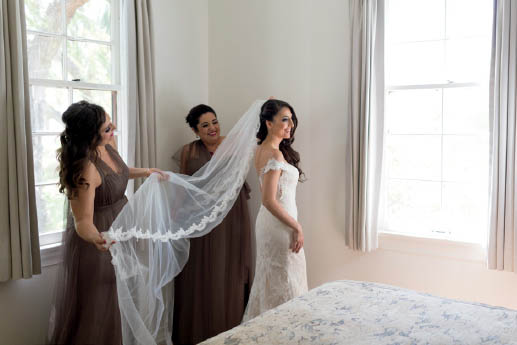
FIGURE 15.45
Figures 15.46 and 15.47: Active helper light allows the photographer to harness more beauty and impact from any location. When I arrived to photograph this wedding, I noticed a unique room with very interesting wall art. The fact that the room was quite dark and the couch was far away from any window light did not deter me from shooting there and taking advantage of that unique environment. In this case, an LED light would not have been powerful enough to illuminate the groom or the room. Therefore, I asked my assistant to get a strobe and stand at camera right until just out of frame, then I shot the flash through a Profoto diffuser. The result is Figure 15.47.
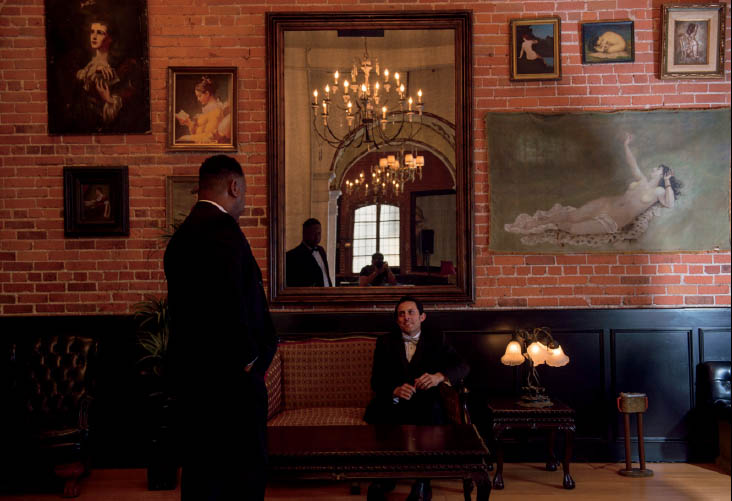
FIGURE 15.46
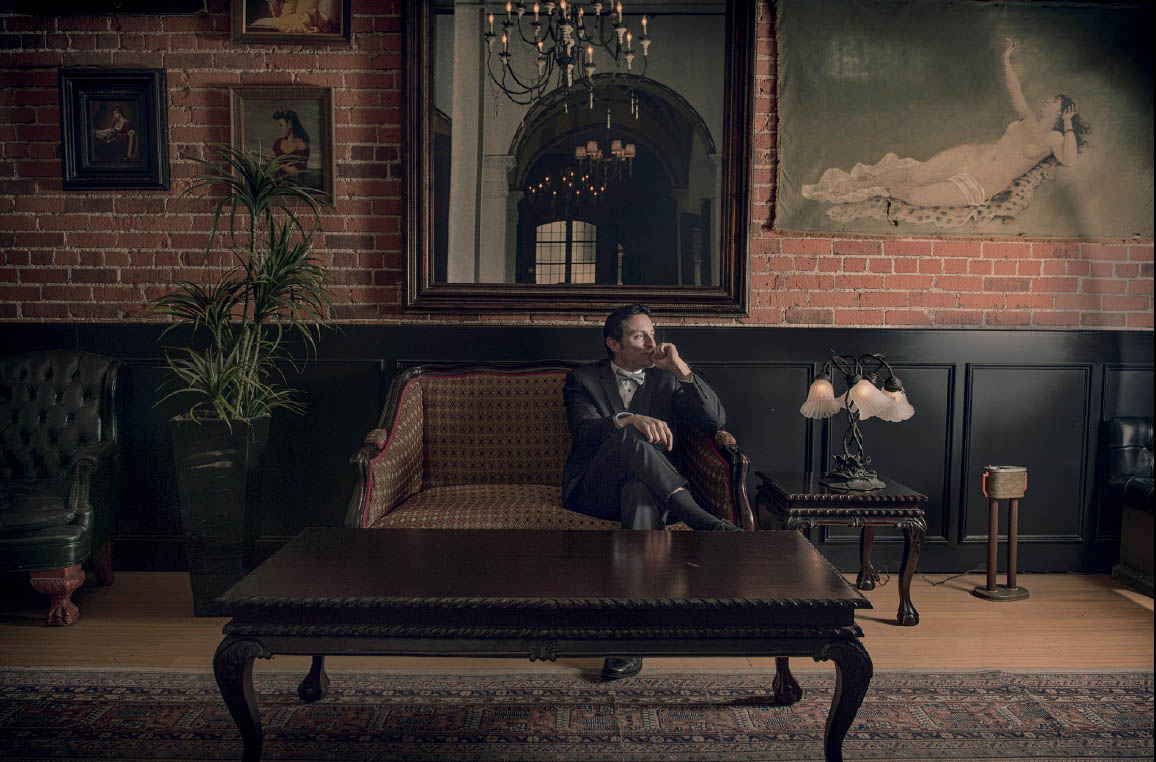
FIGURE 15.47
Figure 15.48: During weddings, I do whatever it takes to use helper light as much as possible. I know for a fact that my portraits will almost always greatly benefit from a little extra light in the right places. During this recent wedding, we had a couple of extra minutes before the couple was called in for their grand entrance. The was in the late afternoon, and the sky was losing much of its intensity. Without even taking a photo, I already knew that this kind of weak, late-afternoon light always leaves dark circles under my subjects’ eyes. Since my assistant was away taking reception detail photos, I had to work alone. I simply put a flash in my pants pocket, and I already had the transmitter on the camera’s hot shoe. I took the couple up some stairs, looking around for one last quick photo opportunity before it turned dark. I discovered a driveway with this lovely wall of flowers, and I used my 70–200mm to compress the scene. Although it was difficult, I had to hold the camera with that big lens with one hand, while my other hand held the flash with a 1/4 CTO gel and diffuser filter attached, extended as far as my arm would allow. The flash fired, and it filled the darkness under their eyes and warmed up the scene beautifully. Unfortunately, I did not take a photo without the flash firing, but I can assure you that it would have looked bad and the photo would have been unusable.
I want to finish this chapter with these words. Apart from the ceremony, where there is nothing you can do with regard to lighting, all other segments of a wedding will greatly benefit from a boost in light. Implementing helper light is definitely an expert technique because it requires a photographer who is dedicated to providing clients with outstanding and skillfully crafted photographs. Lighting is the main ingredient in photography, and therefore it should be at the forefront of your decision-making before you press that shutter button. Effective use of helper light will contribute greatly to your hiring potential.
FIGURE 15.48