chapter 18
PUTTING IT ALL TOGETHER TO BECOME A MASTER STORYTELLER
We have now examined all the wedding storyteller skill components. You are most likely feeling overwhelmed and wondering how in the world you are going to be able to remember all of them under pressure during a wedding. To answer that question, I want you to know that I cannot keep track of everything, either. What I can say is that as you work through the skill components system, you will remember one component or another randomly during a wedding. What you have read or attempted earlier will start popping up in your head as you shoot.
Here is a possible scenario of what will happen. With experience and practice, the activity, location, or people around you remind you that there are skill component opportunities happening at that moment. You recognize an opportunity, and you quickly have your camera ready to fire the shutter. Then, you notice a streak of sunlight hitting the window blinds, creating interesting rays of light on the wall. That’s another opportunity. Seconds later, you watch grandma being brought into the bride’s room to see her granddaughter wearing her beautiful wedding gown for the first time. Your storyteller brain fires and realizes that grandma is a highly valued EVP. You position yourself perfectly to capture the moment when the grandma walks in and sees her granddaughter. Another great skill component opportunity has been captured! But then you notice there is a mirror to your left. Your brain fires again. Could you use that mirror to capture the expert component “Multiple Stories Captured Within a Single Photograph”? Is there a way you can reposition yourself to capture not only grandma seeing her granddaughter, but also catch other EVP reactions to that moment through the mirror’s reflection at the same time?
This is how it works. The more you integrate these various skill components at weddings, the more your brain will remind you of them at future weddings. Eventually, you will have them stored subconsciously in your brain, and you will be able to simply react to stimuli as a master storyteller. You will begin to see opportunities everywhere! It’s the craziest feeling. In the beginning, you need to exert quite a bit of conscious effort to remember and apply these skill components, but later, the process will simply become second nature to you, just as speaking your native language is second nature to you now. You won’t have to think about it.
FOUNDATION COMPONENTS
LOCATION TECHNIQUES
- •Circumstantial Light (Chapter 3)
- •Showing or Removing Context and Clutter (Chapter 4)
- •Depth and Walls (Chapter 5)
- •Compositional Elements (Chapter 6)
- •Luminosity Levels and Contrasts (Chapter 7)
PEOPLE TECHNIQUES
- •Breaking Down Defensive Barriers (Chapter 8)
- •Expert Confidence and Trust (Chapter 9)
- •Being Flexible, Likable, and Professional (Chapter 10)
- •The Situational Approach to Posing (Chapter 11)
- •The Mechanics of Group Posing (Chapter 12)
STORYTELLER APPROACH COMPONENTS
APPROACH TECHNIQUES
- •Photojournalism (Chapter 13)
- •Interactive Photojournalism (Chapter 13)
- •Stylized Aware Posing (Chapter 13)
- •Stylized Unaware Posing (Chapter 13)
- •Story Development (Chapter 13)
EXPERT COMPONENTS
EXPERT TECHNIQUES
- •Emotionally Valuable People (EVP) (Chapter 14)
- •Isolation and Priorities Through Lens Choices (Chapter 15)
- •Helper Light: A Wedding Run-and-Gun Approach (Chapter 15)
- •Creating and Capturing Movement to Achieve a Sense of Spontaneity (Chapter 16)
- •Capturing Peak Action and Achieving Naturally Engaged Expressions (Chapter 16)
- •Increasing Affection Through Touch and Energy (Chapter 16)
- •Unique Perspective and Higher-Skilled Composition (Chapter 17)
- •Creative Cropping (Chapter 17)
- •Story Framing and Meaningful Object Placement (Chapter 17)
- •Multiple Stories Captured Within a Single Photograph (Chapter 17)
APPLYING THE WEDDING STORYTELLER SKILL COMPONENTS TO YOUR OWN WEDDINGS
This book has been written with photographers of all skill levels in mind. If you are reading this book, obviously you wish to take your skillset to a higher level. Regardless of what level you are at right now, there are two starting points for almost every photographer. Then, branching off from those two starting points, you begin a never-ending process of refinement. As you improve, your refinements are accomplished with greater speed and confidence. Eventually, you reach a level where the posing is so well executed that viewers hardly notice it. The lighting illuminating your photos is rich, beautiful, targeted, and consistent; most importantly, expert lighting reaches a point where it is so well balanced that it, too, becomes invisible. Most people won’t be able to point out exactly why they love your photos or what photographic skills you used to create them, but they can’t help but be emotionally drawn to the priceless stories in the photographs you so skillfully captured.
These are the two starting points from which almost every photographer begins his or her photography career. From there, amazing transformations happen.
- •Badly executed photojournalism
- •Overly staged posed photos
Badly Executed Photojournalism
Most often, wedding photographers begin their careers lacking confidence. I’ll give you a likely scenario. You want to be left alone, pretending to know what you are doing by snapping away in any direction you see people moving. You have no knowledge or regard for composition or lighting, so you just shoot in order to not look like an idiot. You lack confidence and don’t feel comfortable directing or moving people to another spot in the room with more flattering light. No matter what they are doing with their bodies, you keep on snapping away. Your clients could be slouching, pointing their elbows toward the camera, and standing or sitting with terrible posture. You don’t care, because you don’t realize that these habits could be corrected with some simple adjustments. It is up to you to correct them, but how can you fix a problem if you don’t know it exists? You can always justify yourself by saying that you like to capture the moments as they are, as a true photojournalist would. But your photojournalistic photos are taken with the wrong lens that distorts your subjects, you don’t stand at the right spot relative to the light, and you don’t know how to use framing or any sort of composition to capture the ongoing moments properly. Furthermore, even though the natural light is weak and inadequate, you don’t know what helper light is or how to use it. Turning on a flash would be a disaster because you don’t know how to use it. If you did decide to turn it on, you would keep it on-camera the whole time and set to TTL so the flash does all the thinking for you. If the photo doesn’t look good, it’s the flash’s fault, not yours.
If this scenario sounds somewhat familiar, you are not alone. I was describing myself in my early years.
I believe we learn a great deal more by understanding why something failed rather than why something worked. Now that you have read the book, you should be able to see for yourself what’s missing. I will go over a single wedding that I photographed during my first or second year as a full-time photographer. Note that I presented these photos to my clients. Out of respect for them, I will keep the commentary purely focused on education and the techniques laid out in this book, and how from inexperience I failed to execute most of the wedding storyteller skill components.
Figure 18.1: I’m standing in the wrong place relative to the light. I could have quickly asked the bride to turn toward the window, but I did not due to a fear of interrupting. Considering the location techniques, the walls of this room are red. A simple flash or LED light pointed toward the bride would have helped correct the color. Even so, it would have been too complicated to fix the lack of light and red colorcast in that room. In this situation, the best decision would have been to ask the bride to move to a better room that was more neutral in color and had much more natural light. Don’t be afraid to ask the bride for permission to move to a better place. Remember that brides want to look their best; they are counting on you to get the job done.
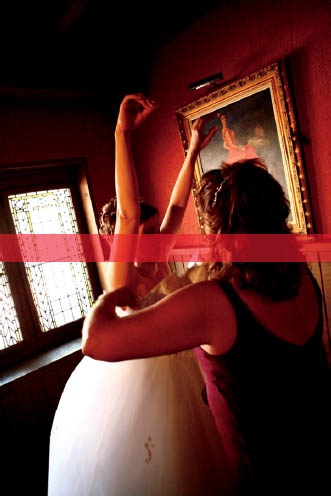
FIGURE 18.1
Figure 18.2: This is a photojournalistic photo without any regard for composition whatsoever. The scene is far too busy, the viewer doesn’t know who the main subject is, and the lighting is horrific. Again, I should have moved them to a more spacious room with better light. There is always a solution if you try to find it.
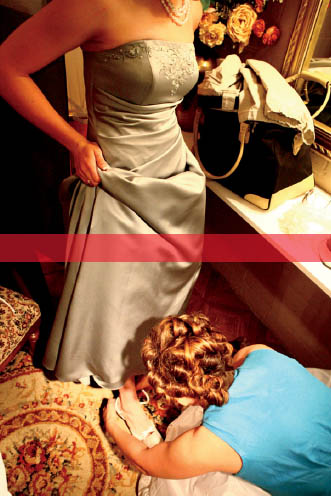
FIGURE 18.2
Figure 18.3: In terms of location techniques, I actually like the beautiful painting as a background. However, the bride is facing away from the light and her posture is unflattering. I’m sure the bride would not have minded fixing her posture and turning around toward the window light. I would have needed helper light to create a fantastic photo in this room with the painting in the background.
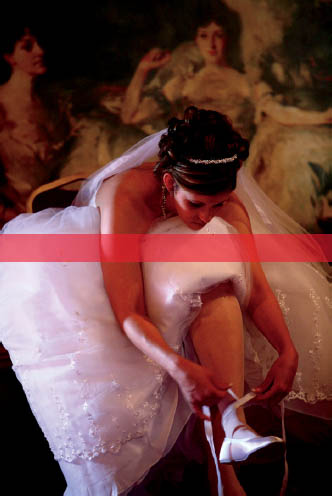
FIGURE 18.3
Figure 18.4: In this photo, the lighting is flat, red, and unflattering. I used the wrong lens, and I’m standing much too close to the action. Taking a close-up of someone’s ear is not an ideal main subject, and it is not a good story. I should have chosen a 50mm lens at f/2, taken a few steps back, and made sure the bride was in better light. I also should have included the person helping her with the earrings so the viewer knows where those random hands are coming from. As stated in the location techniques, including more context would have made a vast improvement.
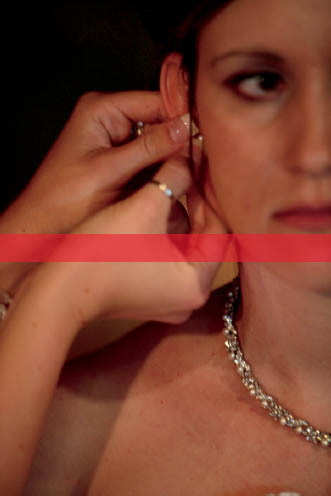
FIGURE 18.4
Figure 18.5: In this case, I did not have a clear idea of who or what my main subject was. As a result, I just pointed my camera and took a senseless photojournalistic photo with no story and no composition. You can’t even see a single person’s face clearly. What is the purpose of this photo?
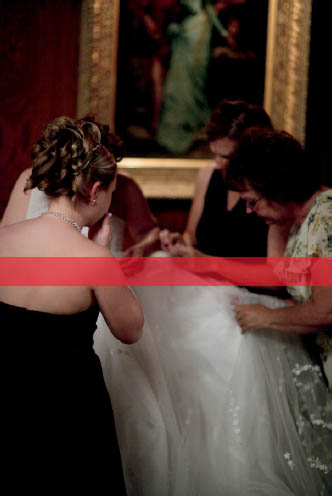
FIGURE 18.5
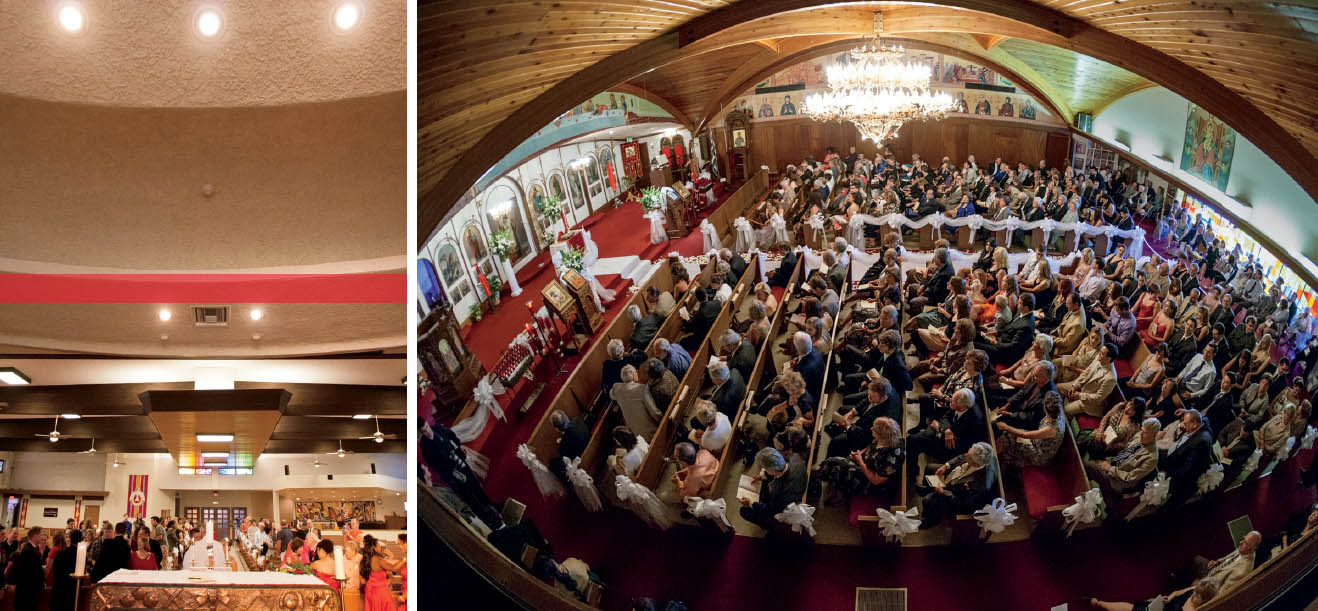
Figure 18.6: Honestly, there is little you can do to control or improve the situation during the ceremony. This is an especially difficult case here because the lighting was so busy and harsh at that location and time. However, in retrospect, I could have used my 70–200mm f/2.8 zoom lens and tried to set the exposure properly on the couple inside the gazebo. The zoom lens choice would have helped reduce the clutter, as stated in the location techniques and in the expert technique “Isolation and Priorities Through Lens Choices.”
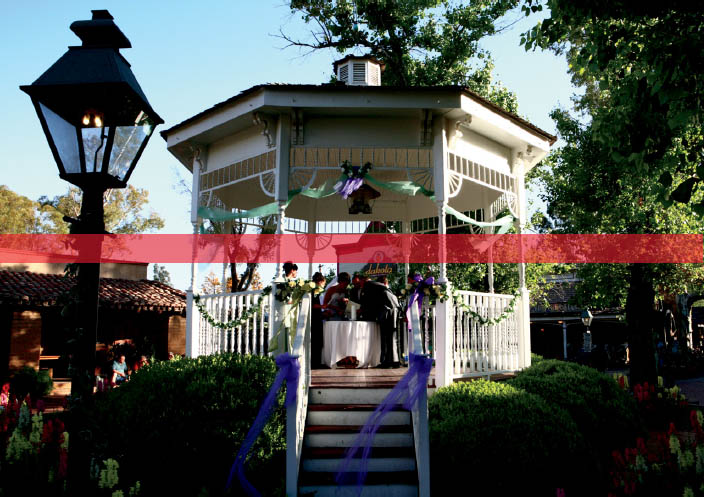
FIGURE 18.6
Figure 18.7: As discussed in Chapter 2 under the expert components section, just because you implement an expert technique does not necessarily mean that your photo will look great or even good. Look at this photograph of the ceremony framed between the decorative gazebo rods. One of the expert techniques discusses “Story Framing and Meaningful Object Placement.” But this choice of story framing is clearly a poor choice. The rods are too close to each other, they are much brighter than the main subject, and they are just ugly and distracting. Don’t forget that there is a poor way of executing the expert components, and there is a masterful way of applying the expert components. It all depends on how refined your skills are.

FIGURE 18.7
Figure 18.8: This is another example of a poorly executed expert component (“Story Framing and Meaningful Object Placement”). In this case, it is the groom and two sons who are framing the main subject, the bride. But again, it’s done in poor taste. There is no order to all the distracting compositional elements inside that gazebo. The dark shadow crossing the bride’s face is clearly not flattering to her. The white fence in the foreground is far too bright and distracting. Even though it is not possible to control the light during the ceremony, you can control where you stand to improve your odds of achieving a great photograph.

FIGURE 18.8
Figure 18.9: This is a photo taken in the photojournalistic style with poor composition and exposure settings. Even though I was wise to include the couple’s children, who are the most valuable EVP possible, I did not do the expert technique “Emotionally Valuable People (EVP)” any justice. The tight composition here does not allow for the photo to have any breathing space. Zooming out and giving the photo some space around the perimeter would have helped. Once again, there are good and bad ways of implementing the expert techniques.
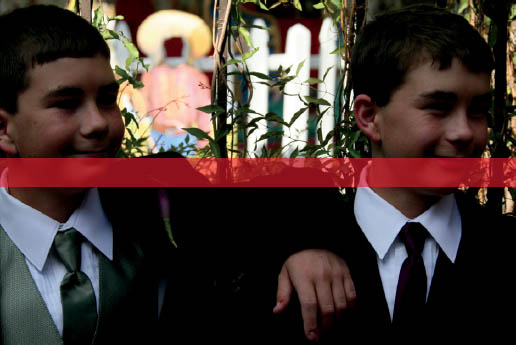
FIGURE 18.9
Figure 18.10: During the reception, I noticed that there was very poor lighting illuminating the dance floor, and the floors and walls were red. As you would expect from a beginner who does not know how to use a flash, I placed my flash on camera and put it on TTL mode. The results are horrendous. To fix this problem, I could have placed my flashes in the setup for receptions described in Chapter 15. Another on-camera flash solution could have been to use a flash modifier, such as a MagMod sphere or MagBounce on top of the flash to prevent the flash from bouncing off the red walls. Furthermore, if I was more comfortable in TTL mode, I could have at least used Flash Exposure Compensation to reduce the power of the flash. I could have also increased my ISO to around 1600 and shot with a wide-angle lens at aperture of f/2, which would have fixed most of the issues and would have yielded better results in such a difficult place. Before the wedding, you should always know what the reception room looks like. I ask to see it. You don’t want to show up unprepared.
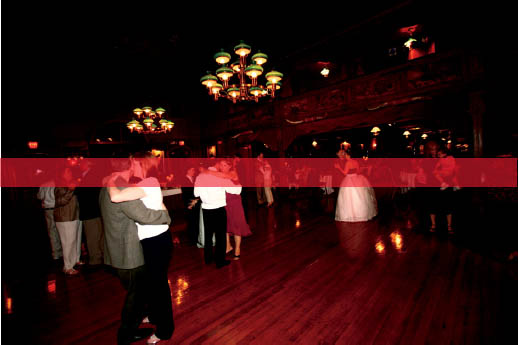
FIGURE 18.10
Overly Staged Posed Portraits
This is where things get really interesting. It is also the main reason why people are anxious about posed photos. When we don’t know how to pose people in a natural, effortless, and non-distracting way, we default to what we see online or in wedding magazines. Again, in an effort not to lose face and appear unskilled, our brains go into survival mode and we try to direct poses that end up looking completely staged and unnatural. When we don’t have any ideas, we just ask the couple to kiss in front of every building, wall, or fountain we can find. It’s a wedding, so kissing seems to be the normal thing to do, right? No!
Kissing shots are by far the most overused pose photographers use. Having two or three kissing shots among many other types of photos is a good balance. But kissing shots have become a quick go-to pose when our minds draw a blank and we do not know what to do. I believe that if you are photographing events such as weddings, you are photographing people. And if you are photographing people, you should have some level of skill regarding how to pose them well so they look and feel their best. If you call yourself a photojournalist, you should still know how to adequately pose a subject. Then, if you are asked to take some portraits, you will do a good job. Knowledge is power, and more knowledge will never hurt you; it will give you a choice of whether to use your posing skills or not. Stay open-minded. A well-rounded wedding photographer can capture amazing photojournalistic moments with refined composition and attention to light, but he or she can also create elegantly posed portraits where the subjects look their very best and the pose looks completely effortless.
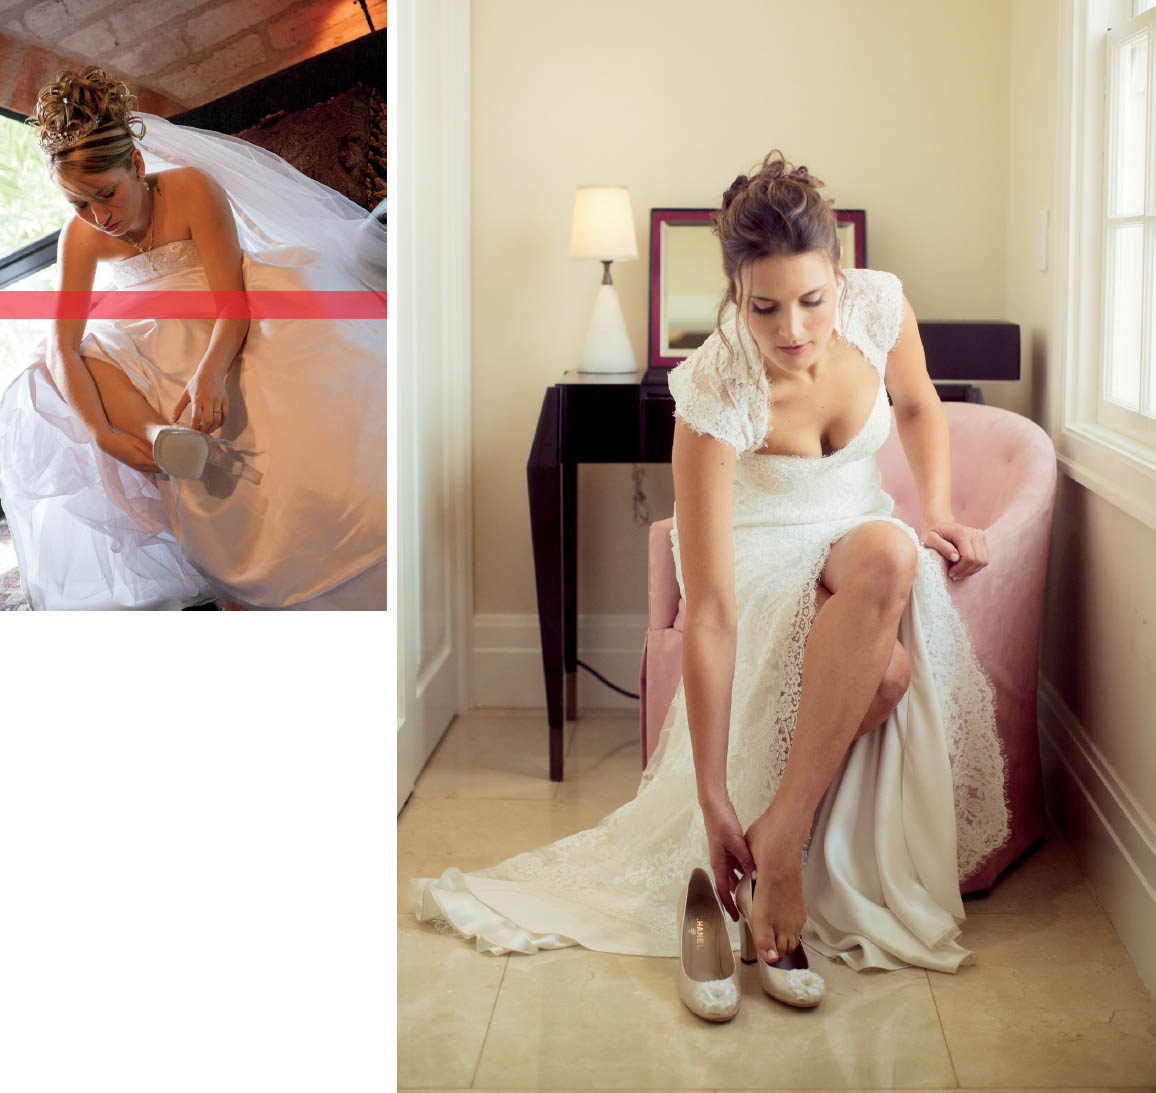
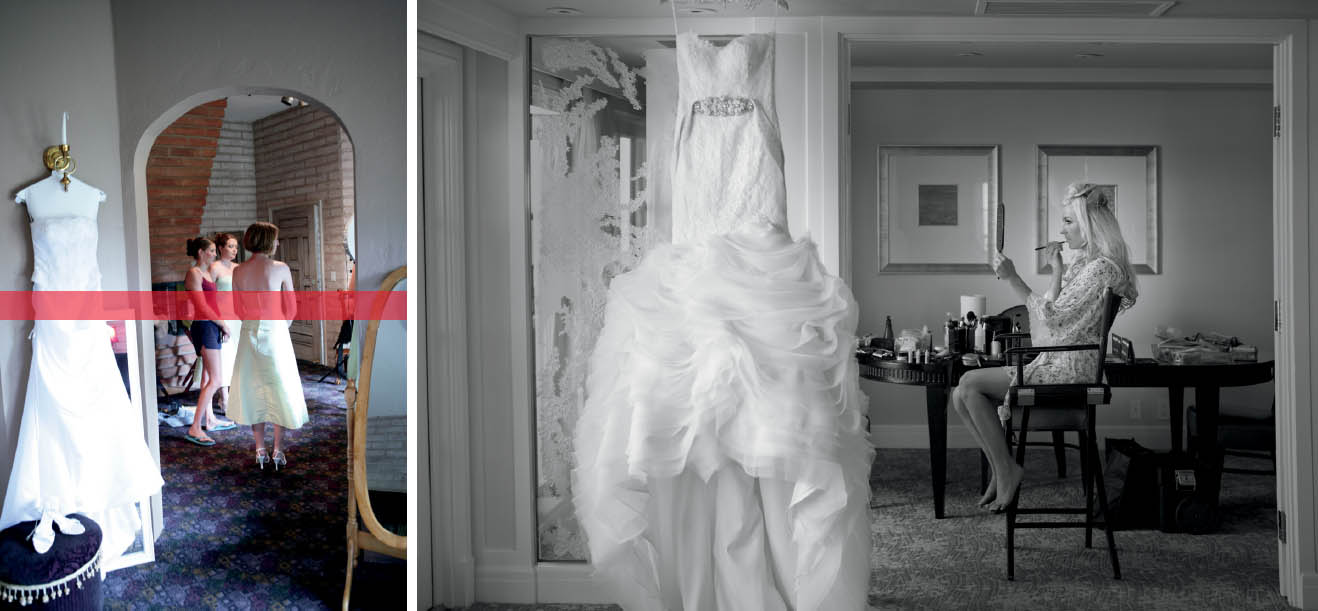
Figures 18.11–18.24 are portraits I took at weddings early in my career. Like the photojournalistic photos I described in the last section, these posed portraits are indeed what my clients received from me. In my early years as a wedding photographer, I never sought to learn more about posing or lighting. I did not have a clue how to direct people, let alone do it with confidence. I was so petrified of the portrait segments at weddings that I began to tell a few of my prospective clients that my preferred style was to be a pure photojournalist. I tried to pitch to them that I preferred to capture the moments as they occurred, uninterrupted and organic. I would tell them that I wanted them to remember their wedding day unaltered as it happened, instead of as a collection of staged ideas from a photographer.
The idea sounded noble, but it did not go well for me. A wedding coordinator called me and asked why I told the couple that I refused to take posed portraits? With a frustrated voice, she told me that people still want family photos, a few bride and groom portraits, and photos with their friends and their wedding parties. Playing the photojournalistic card in an attempt to hide my lack of posing skills just proved to be an uphill battle that I was not going to win. Instead of fighting this battle and trying to convince prospective clients to hire me despite my restrictive conditions, I decided to just buckle down and begin to learn the beautiful art of posing people or, if you prefer the term, “adjusting” people. That decision completely changed the course of my career.
I will save you the pain of going over the countless things that are wrong with each of the poses in these photographs. To do so, I would need to write an entire book. To simplify, here is a list of all the repetitive mistakes that are occurring in the photos in this collection:
1. Because I did not know how to pose, I defaulted to kissing photos for almost 90% of all the bride and groom portraits.
2. The few photos that are not kissing are incredibly corny and ultra-staged. I simply tried to copy popular photos that I found online. I thought taking bride and groom photos meant staging a collection of popular clichéd ideas instead of allowing the couple to be themselves and capturing them in a natural and flattering way with minimal distractions. I never applied the situational approach to posing—where the pose should make sense with the environment—described in the people techniques part of this book.
3. I completely missed the boat on all aspects of circumstantial light and helper light. I was so preoccupied with trying to appear like a pro that I just kept shooting my clichéd poses with zero—and I mean zero!—regard for flattering light.
4. The composition in these photos could not be worse. There are so many distracting elements: camera tilt, unflattering perspectives, inattention to the colors or objects around the couple, terribly executed attempts at framing the main subject, and extremely distracting overexposed hot spots all over the frame. Not a single photo contains clean, simple luminosity levels, as described in Chapter 7, “Luminosity Levels and Contrasts.”
5. These photos simply lack refinement. Remember, do not let locations seduce you; you must be seduced by the beauty of the light. That advice alone will help you avoid so many issues when posing people. Nobody can appreciate the most well-executed pose if there are a hundred distracting elements in your composition. By showing you these photos, it is my hope that you can understand why I created the wedding storyteller skill components and wrote this book. Every component was created from hundreds, if not thousands, of mistakes due to lack of skill and experience.
FIGURE 18.11
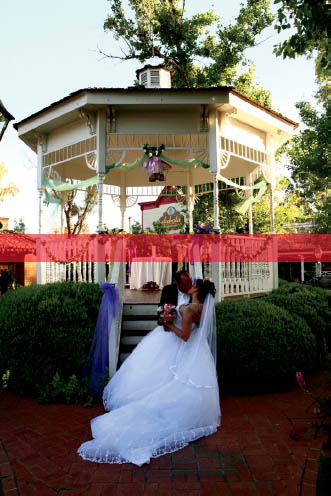
FIGURE 18.12
FIGURE 18.13

FIGURE 18.14
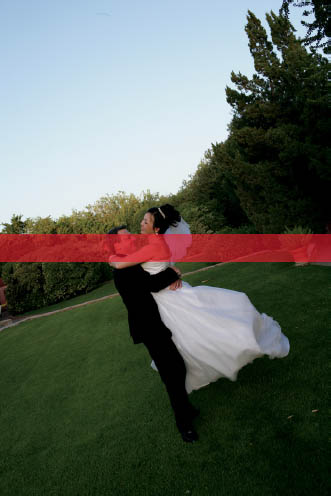
FIGURE 18.15
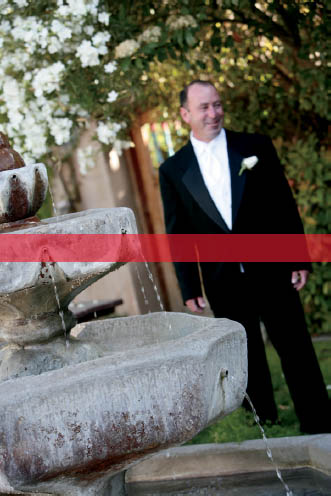
FIGURE 18.16
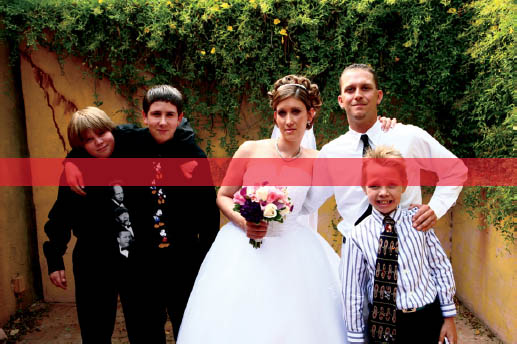
FIGURE 18.17

FIGURE 18.18
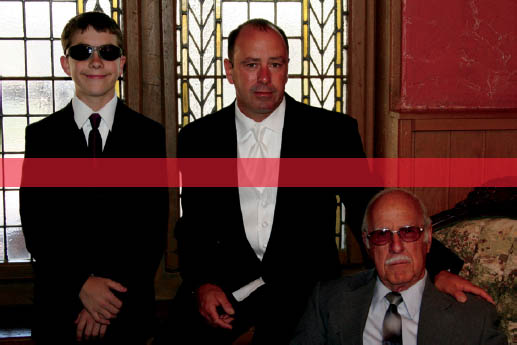
FIGURE 18.19
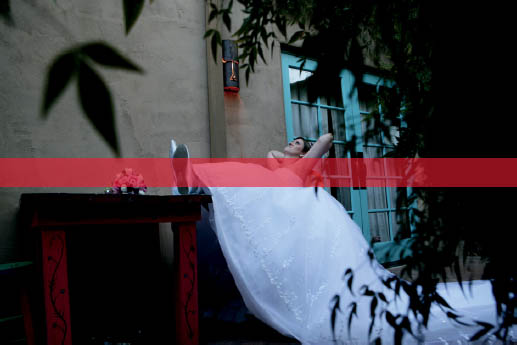
FIGURE 18.20
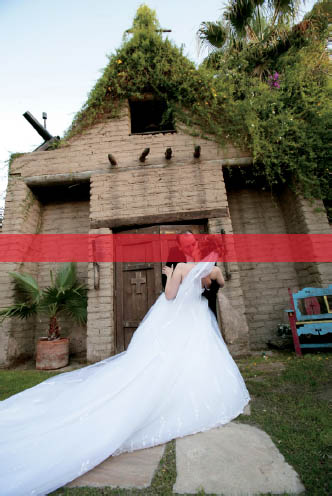
FIGURE 18.21
FIGURE 18.22
FIGURE 18.23
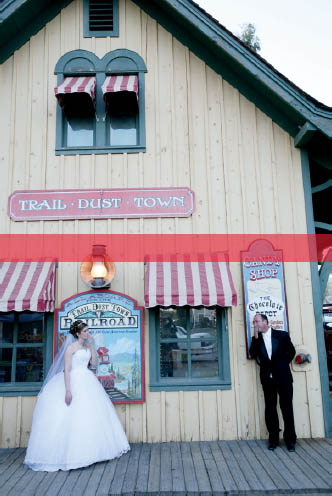
FIGURE 18.24
SKILL COMPONENTS TRAINING EXERCISES
If you are truly dedicated to becoming a great wedding storyteller, implementing these exercises properly will set you well on your way to achieving that goal. In the images that follow, you will see thoroughly explained examples that show a similar situation handled very differently: the first photo of each example details how I failed to apply the wedding storyteller skill components with any level of skill. That’s alright. I was in the early stages of my career when I took these photos, and I learned. The second photo for each example describes how I handled the same or similar situation with much greater skill by implementing the wedding storyteller skill components. I hope it will be interesting and motivational for you to see how the smallest of changes can have such a significant impact in an image, transforming a stale, badly executed photo into a beautiful one.
There are four examples containing two photos each. I go over the elements of the skill components system and share my decision-making strategy with each technique. Your challenge is to pay close attention to my descriptions for both the bad and good photographs, and then try it on your own. After my completed examples, I provide several more examples of pairs of images that you may use to do your own analysis of what was right and what was wrong for each of the applicable skill components.
Learning photography and being able to perform at such high levels of intensity and pressure requires a great deal of deliberate training. That is why I am showing you numerous pairs of photos. Most importantly, though, I am sharing these embarrassing photos with you—photos that I was once proud of!—to demonstrate what happens when we ignore or have not developed the skills explained in this book. By going through all the skill components and troubleshooting what went wrong, you will learn a great deal more than if I just showed you my portfolio pieces. I am not interested in showing you how good I am. My focus is on your learning experience and progress. When going through the exercises, it will be necessary for you to flip through the pages of this book to review the material. Referring to the various chapters will help you remember specific techniques.
For years, this has been the process that I have gone through with my own wedding photos. By painstakingly going through my work, I grew as an artist, because my training carried me through tough situations. Then, the next time I was in a situation I had previously encountered, instead of blanking out, I would find an answer to the challenge in front of me.
If possible, I would recommend reviewing these images with a group of motivated photographers who share your passion for learning and education. When working with a group, everyone benefits from seeing things from other people’s perspectives.
Example 1A: Bride Standing in Front of a Window, Straight Out of Camera—A Failed Approach
See Figure 18.25 for this example.
LOCATION TECHNIQUES
Circumstantial Light: In Chapter 3, in the section “Circumstantial Light Indoors,” I ask three questions that can help you determine the quality of light at that specific chosen location. If you have forgotten, flip back and look at them, because it’s a good refresher, anyway. The large window is the main light source. Even though the window is large, the light seems to be weak because it is coming in indirectly. Judging from the darkness on the left side of the bride’s face and back, there don’t seem to be any walls nearby that reflect the window light back at her.
FIGURE 18.25
Context and Clutter: In Chapter 4, I wrote about the three decision points that can help you determine how much or how little context to show in a scene. Revisit that list. In response to the first decision point regarding clarity, this scene definitely takes visual attention away from the bride. And the lack of context given by this tight crop says nothing about the story. The poor way I cropped this image takes away from any possible symmetry or context that I could have used to create a more visually pleasing photo. And by cropping this image so tightly and horizontally, it begs the question, why? Why did I crop out most of the wedding dress if she was already fully dressed? Is the story that I’m just trying to show her upper back, head, and arm? Even if it were, then why is 90% of her face so dark? I know that I was under pressure to get these photos done and move on with the wedding day, but I will always give this advice to any wedding photographer: Take a moment to breathe and think about what you are doing and what decisions you are making before pressing that shutter button. It will pay off tenfold.
Depth and Walls: This photo was taken indoors with a large window in a door frame as a background, which acts like a wall. Per Chapter 5, there are five advantages to using walls in your portraits. Unfortunately, I did not take advantage of any of those benefits.
Compositional Elements: Although this bride was posed in front of a door, which could have been used as a possible frame, the position where she is standing in relation to the door takes away any chance of framing her.
Luminosity Levels: This is probably one of the biggest reasons why this photo failed. Notice how dark the room is inside and how bright the sun is outside. This is a very high-contrast scene. High-contrast scenes are often very hard on the eyes. The sad part is, had I paid more attention to my surroundings as stated in the location techniques chapters, I would have noticed the sheer curtains to the left and right of that door. Had I closed them, I would have drastically lowered the luminosity differences between the outdoors and inside the room. When all the luminosity levels within the whole frame are relatively close, it will lower the contrast levels of the photograph. A low-contrast scene is much easier on the eyes.
PEOPLE TECHNIQUES
Situational Approach to Posing: Chapter 11 discusses whether a pose is a good fit with the environment. Well, let’s see. Do people normally put their arm outstretched in that position while standing in front of a large window? Do people keep their arm planted on a windowpane and then turn around and look at you? I don’t think so. Experience or not, it is fair to assume that this pose just doesn’t look like it could have happened naturally. The pose is far from elegant or relaxed. Instead, it appears to be quite forced, awkward, and tense. Therefore, the pose does not fit the situation.
APPROACH TECHNIQUES
This photo was taken with the “stylized aware posing” approach; she is being posed and she is looking at the camera. In retrospect, I think the “stylized unaware posing” approach would have been much more fitting.
EXPERT TECHNIQUES
This photo does not contain any well-executed expert techniques. However, if I had to choose one to implement, it would have to be helper light. As you can see, this photograph is in major need of helper light. The room is simply too dark to obtain any kind of reasonable results on its own. Using a reflector would not have worked because the light coming from outside is indirect and too weak. I think a modified off-camera flash on Manual mode would have been the best solution.
CONCLUSION
There are three major problems with this photo. The weak light, the awful crop, and the unnatural and unflattering pose. Her right arm is far exceeding the normal threshold, and the pose makes no sense in this situation. If I had to shoot there today, I would choose a 35mm or a 50mm lens at f/1.4 to gather as much of the light as possible. I would include more context of the scene so that the crop/composition would have space to breathe. I would keep the pose much simpler and more natural. I would ask her to not look at the camera so the portrait would take on a more photojournalistic style. Finally, I would add some helper light from a flash as needed to blend the two types of light and give this photo a fighting chance.
Example 1B: Bride Standing in Front of a Window, Straight Out of Camera—A Successful Application of the Wedding Storyteller Skill Components
See Figure 18.26 for this example.
LOCATION TECHNIQUES
Context and Clutter: From the amount of context I included in this photo, you can clearly discern that the bride is standing in front of a glass door. I chose this glass door because it was clean. There are no wooden frames crossing in odd places.
Depth and Walls: One of the advantages of photographing in front of walls is that they can provide a clean and elegant background. By closing the sheers, I created a sense of a clean white wall in front of the bride. Whatever is going on outside disappears.
Compositional Elements: The composition is clean and very simple. Most importantly, there is nothing distracting you from the bride. With this composition, you can see and admire the beauty of her dress and veil, which are the main subjects in this photograph.
Luminosity Levels: The decision to close the sheers was a key factor in the success of this photograph. Why? Because by doing so, it evened out the entire scene’s luminosity levels. The brightest point and the darkest point in this photo are not too far apart. This creates a low-contrast scene that gives the viewer a sense of calm. I learned my lesson through the years. Being so familiar with these skill components and their visual effects, I’m much better equipped to make quick decisions that create a huge impact, such as closing the sheers.
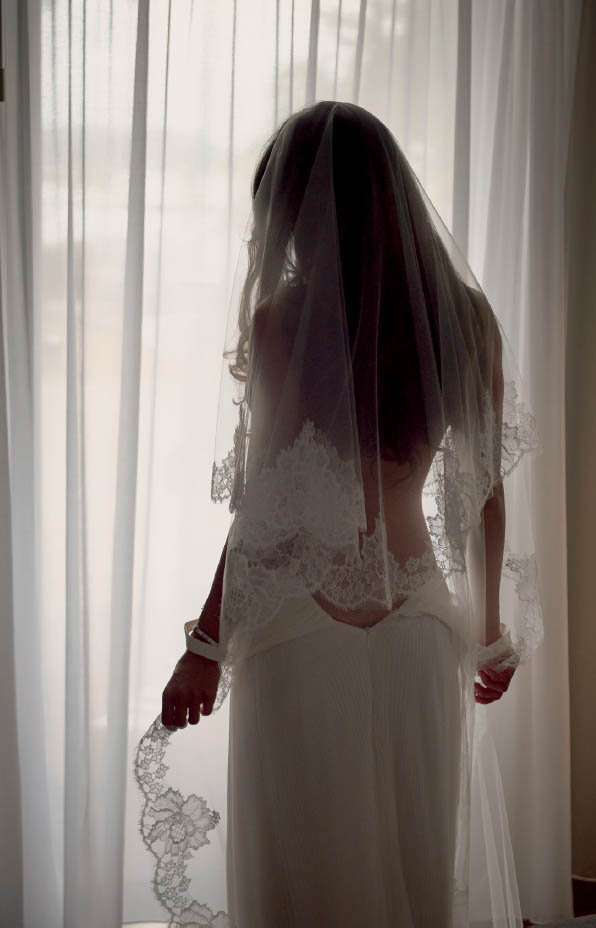
FIGURE 18.26
PEOPLE TECHNIQUES
Situational Approach to Posing: Let’s ask the key question discussed in Chapter 11: Based on the situation or location, could this photo have happened naturally without photographer intervention? Is it possible that the bride could have been getting ready and became distracted for a second to look out the window to see her guests socializing outside? Is it normal the way she is holding the veil to possibly prevent it from wafting in front of her face? I think you can answer a resounding “Yes” to each of these questions.
APPROACH TECHNIQUES
Because I almost always prefer to keep my portraits looking as if they were captured without photographer intervention, I believe the stylized unaware posing approach was the right decision.
EXPERT TECHNIQUES
Isolation and Priorities Through Lens Choices: I chose the 24–70mm lens at f/3.5 for this portrait. I believe this combination of focal length and aperture shows just enough context to keep the photo clean while remaining soft enough to convey a romantic mood.
Helper Light: My assistant was holding a white reflector as helper light behind the bride to ensure that there was plenty of detail in the back of her dress, which was facing away from the window light. Without the reflector’s helper light, this photo would not have worked. Remember, I am showing you this photo straight out of the camera. No edits have been made to this photograph. Showing detail throughout the back of her dress would give me much more flexibility in the edit.
Capturing Peak Action and Achieving Naturally Engaged Expressions: Although the bride was not moving when the photo was taken, I did ask her to see who was outside the window. The purpose of this question was to have her legitimately engaged in something other than the thought of being photographed. I had already finished the pose, given her arms a gentle bend, shifted her weight, arched her back, fixed her posture, and made sure she was holding the veil in a soft manner. The very last step was to achieve a naturally engaged expression. Even though you cannot see her face, you still have a feeling that she is engaged with something going on outside. That’s why this is an expert technique. If a photographer had simply said, “Look outside,” the feeling of being naturally engaged would have disappeared.
CONCLUSION
The most beautiful photos are the simplest. And the difference between an elegant, simple photo and a corny, failed image is nothing more than a series of small but very powerful decisions. Remember that the next time you show up at a wedding.
Example 2A: Young Ring Bearer Walking Down the Aisle During the Ceremony—A Failed Approach
See Figure 18.27 for this example.
LOCATION TECHNIQUES
Context and Clutter: This photo fails because I included too much wasteful context. It’s all about the decisions you make that give your photos the finesse that separates an average wedding photographer from a great one. I did not pay attention to the context, so from the angle this photo was taken, grass and bushes dominate most of the frame. Well, who cares about the grass and bushes? It’s not good enough that I just photographed the ring bearer. I could have captured this moment with much more meaning and charm, as you will see in the next photo.
Depth and Walls: This photo was taken with depth, though it is not very meaningful.
Compositional Elements: My composition decisions also failed me. In Chapter 17, I mentioned the importance of photographing children from their height. Here I didn’t do that. Clearly, I photographed this scene from my own height, and now the perspective looks off. Because of my decision, much more of that distracting, bright grass shows up in the frame.
Luminosity Levels: Because of poor composition, I have a walkway and grass that are much brighter than the ring bearer’s face. My exposure was off, but better composition would have helped. Furthermore, since this is an outdoor ceremony, I could have easily used an on-camera flash on Manual mode to give this backlit ring bearer a small boost of frontal light.
PEOPLE TECHNIQUES
No people techniques were applied.
APPROACH TECHNIQUES
I took this photo during the ceremony. Therefore, it must be captured with the photojournalistic approach. However, that does not mean you lose all control. If I had positioned myself in the center of the aisle and waited for the ring bearer to walk halfway through the crowd, I could have captured the guests’ expressions as they watched the adorable little youngster carry the rings. That’s the power of a great photojournalist—angles and timing. Unfortunately, my timing was off, and I captured none of the guests’ expressions because they were looking away from the camera.
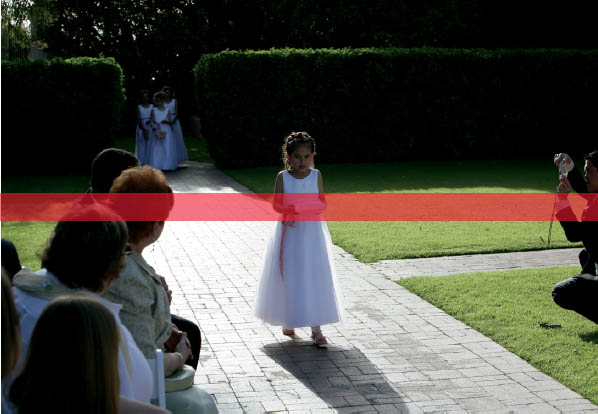
FIGURE 18.27
EXPERT TECHNIQUES
No expert techniques were applied.
Example 2B: Young Ring Bearer Walking Down the Aisle During the Ceremony—A Successful Application of the Wedding Storyteller Skill Components
See Figure 18.28 for this example.
LOCATION TECHNIQUES
Context and Clutter: Now, context is a significant part of the story. By using the widest focal length my lens offers, and by shooting from the correct angle and perspective, almost every item in the frame is part of the story. There is no wasted context. That’s awesome! Photos in which everything in the frame plays a role in the story can be very difficult to compose.
Depth and Walls: This photo was taken with meaningful depth. This time, the depth consists of the many wedding guests cheering on the ring bearer. That’s fantastic!
Compositional Elements: Unlike the previous photo, this one was indeed taken from the ring bearer’s height. Notice how much better this looks? Additionally, I have a large amount of both sides of the aisle included in the composition.
Luminosity Levels: This photo was taken on a cloudy day so all the luminosity levels are quite even and easy on the eyes.
PEOPLE TECHNIQUES
No people techniques were applied.
FIGURE 18.28
APPROACH TECHNIQUES
Obviously, you can’t pose during a photojournalistic moment such as this one. But knowing that my tools as a photojournalist are angles and timing, I did a much better job here with both of those than in the previous photo. This time, I waited until the adorable young ring bearer was halfway down the aisle. That way, I could capture a great number of the guests’ expressions smiling and cheering the youngster on his long walk. You can feel the energy, right? What these skill components are all about is creating something truly special at any moment. Look at this little guy. He totally stole the show! A relatively dull moment was transformed into an exciting one by making the right decisions.
EXPERT TECHNIQUES
Emotionally Valuable People (EVP): There are multiple EVP situated on both sides of the frame. Capturing EVP with such joyful expressions on their faces at a moment of peak action is a double bonus!
Isolation and Priorities Through Lens Choices: The 70–200mm lens shot at 75mm and at f/3.5 created a flattering compression with an elegant bokeh that isolates the ring bearer from anything behind or in front of him. This keeps all the viewer’s attention on the main subject.
Helper Light: On-camera flash was used on Manual mode to give the subject a little boost of light on a cloudy day. You can see the effects of the flash if you look closely at the catchlights in his eyes. This is an expert technique because the flash does not overpower the scene; it simply complements the light perfectly.
Capturing Peak Action and Achieving Naturally Engaged Expressions: This is definitely a prime example of capturing peak action and naturally engaged expressions.
Unique Perspective and Higher-Skilled Composition: Recognizing the need to synchronize the child’s height with my shooting angle definitely makes this an expert technique. As you can see from the previous example, without this perspective decision, the photo would have lost much of its charm. I always find it so exhilarating that in wedding photography you must think so quickly and be so well trained; the smallest or most subtle decision can have a huge impact—positive or negative—on your work.
Example 3A: Groomsmen Group Photo with Son—A Failed Approach
See Figure 18.29 for this example.
LOCATION TECHNIQUES
Context and Clutter: It was quite a poor decision to place the group at this dismal location. The context in the background adds zero value to the group photo. The mix of colors from the green grass, the rocks, the dark reflective windows, and the brick creates too many distractions.
Depth and Walls: This photo is taken with a wall in the background. As you know by now, one of the great benefits of walls is that they can provide you with an easy, clean background for your subjects. Unfortunately, I chose a wall full of distracting shapes and colors.
Compositional Elements: There is little to no thought given to composition. The group is not even centered in the frame.
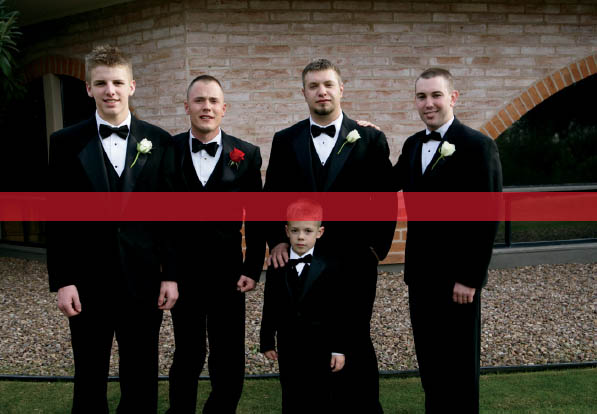
FIGURE 18.29
Luminosity Levels: This photo was taken on a cloudy day, so the luminosity levels are quite even and easy on the eyes. However, overcast skies always require helper light. Notice the darkness in everyone’s eyes? An off-camera flash set on Manual mode would have helped bring more life into this group portrait.
PEOPLE TECHNIQUES
Mechanics of Group Posing: In Chapter 12, I listed four types of wedding party group photos. This photo represents the first type, “Simple and traditional (standing next to or framing the bride or groom).” Choosing the simple and traditional group photo choice does not mean it must be boring. The reason why this photo is dull is because I failed to incorporate any of the “Basic Mechanics for Group Posing of a Higher Standard” techniques, also discussed in Chapter 12.
Breaking Down Defensive Barriers: This is an often-overlooked people technique. Why? When people are not being photogenic or don’t seem to cooperate, we simply wash our hands of the problem and blame them for not wanting to cooperate. I have heard countless photographers share stories complaining, “The groom was just not into it,” or, “The couple was just giving me nothing; it was like pulling teeth getting them to relax,” or, “My last clients were just so depressing; what’s up with their constant, fake smiles?”
I want to tell you that when your clients do not seem motivated to cooperate with you, it is more your fault than theirs. A major part of being an outstanding wedding photographer is having great people skills. Implementing the people techniques laid out in Chapter 8 will help you break down those inevitable defensive barriers people put up when being photographed. Your clients are not actors; they are not used to having a giant lens looming in front of their faces. It is up to you to make them laugh, relax, have fun, and feel comfortable with you. Then, and only then, will the most serious of people open up to you and give you the most beautiful smiles and candid camera-unaware expressions. The reason for the odd expressions on everyone’s faces in this photo is that I was hesitant when posing them, which made them lose confidence in my abilities. Once I was in position, I just stooped in front of the group without making conversation or trying to keep their minds off the shoot. I made no jokes. I said nothing to make them laugh, relax, or elicit a reaction. I just said, “Okay, guys . . . looking good, go ahead and smile for me.” Why should they smile for me? The worst part of it all is I asked them to smile for me in a monotonous tone of voice. There was no energy in my voice, so why should I expect them to give me great energy back?
APPROACH TECHNIQUES
This group photo was taken with the stylized aware posing approach. This is a good approach for a classic group photo where everyone’s face must be clearly seen.
EXPERT TECHNIQUES
No expert techniques were applied.
Example 3B: Groomsmen Group Photo with Son—A Successful Application of the Wedding Storyteller Skill Components
See Figures 18.30 and 18.31 for this example.
LOCATION TECHNIQUES
Context and Clutter: This group portrait of the groomsmen was taken at the groom’s home. There are a few clutter items left, but we did clean up as much as we could with the time that we had. That’s all you can do, because at a wedding you can’t spend 45 minutes tidying up the place for a single photo. You do what you can, and you shoot. The group is spread out enough from edge to edge that they cover most of the frame, allowing little room for clutter to show through.
Depth and Walls: This photo was taken with a wall behind the group. But the wall’s artwork is part of the story since it is the groom’s home.
Compositional Elements: N/A.
Luminosity Levels: The group was posed in front of a large window to achieve flattering lighting on everyone. Because the group itself was the closest thing to the window in the photo, the subjects are, and should be, the brightest points in the composition.
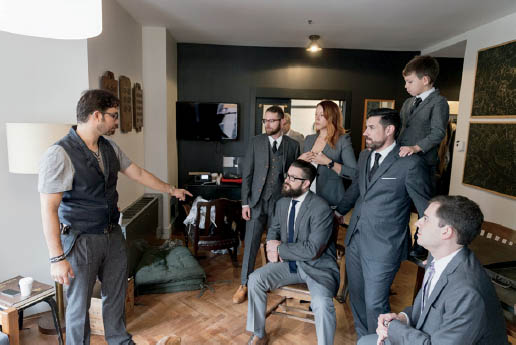
FIGURE 18.30
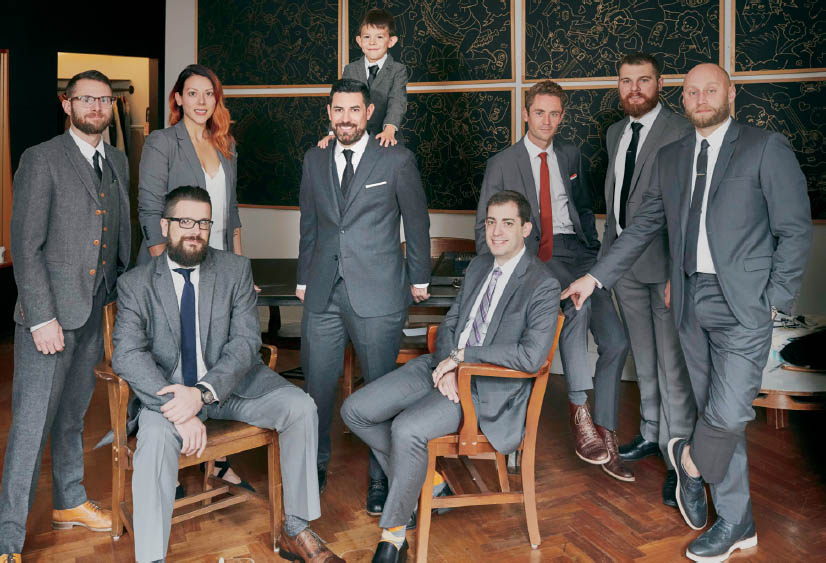
FIGURE 18.31
PEOPLE TECHNIQUES
Mechanics of Group Posing: Now let’s apply storyteller skill components to this group photo to make it shine. As in the previous example, this photo was taken with the “Simple and traditional (standing next to or framing the bride or groom)” option out of the four listed in Chapter 12. This time, all five of the “Basic Mechanics for Group Posing of a Higher Standard” criteria were fulfilled. By placing everyone at different heights, notice how your eye travels up and down across the frame. Some people are standing, two are sitting in chairs, one is sitting on the table, and the groom’s son is standing on the table so that his head becomes the tallest head you see. Being the most valuable EVP, this was a good choice. Notice how the three people on the left side of the image and the four people on the right side of the image are framing the groom and his son in the center. Everyone’s collarbones are facing different directions, which keeps the composition interesting. It is amazing how, by applying the lessons from Chapter 12, you can transform a simple wedding party photo into something visually interesting and well crafted.
Breaking Down Defensive Barriers: I was polite and handled myself with great confidence. When I was posing the group in front of the table, I showed conviction. If I didn’t like something, I didn’t worry about it; I simply moved them around with confidence. People respect that! I kept making funny comments while posing everyone, almost like an entertainer. In less than two minutes, I had everyone in position. Without an ounce of hesitation in my voice, I smiled, took the first photo, and said, “Boom! You guys are killing it! Look at you (insert name of person), you are putting everyone to shame! What kind of group is this?!” Get my drift? I was just saying silly things that made them feel engaged with my personality, and not with the camera. As a result, we have a group photo where everyone is relaxed and their expressions are indicative of their true personalities.
APPROACH TECHNIQUES
This group photo was taken with the stylized aware posing approach. This is a good approach for a classic group photo in which everyone’s face must be clearly seen.
EXPERT TECHNIQUES
Emotionally Valuable People (EVP): The groomsmen are automatically EVP. Including the son makes this photo much more precious to the group, since a son or daughter is the most valuable EVP you can include in a photograph.
Increasing Affection Through Touch and Energy: Being familiar with all the expert techniques will allow you to recognize when it is a great time to use a particular one. For example, this group photo with the groom and his son prompted me to use touch and energy to increase affection. I made the conscious decision to have the groom’s son put both of his small hands on his dad’s shoulders. By doing so, the connection between the father and his son is even closer. This is such an important expert technique because adding touch increases the affection between people, and it can make a photo priceless. Imagine how wonderful it will be when the groom’s son is 30 years old, holding this photo in his hands.
Example 4A: First Dance—A Failed Approach
See Figure 18.32 for this example.
LOCATION TECHNIQUES
Context and Clutter: In Chapter 4, I discussed the three decision points to consider when deciding how much or how little context to show in a scene. Review that chapter to refamiliarize yourself. The second deciding question on that list, regarding storytelling, is particularly important: “Does the scene or context add to the visual story or setting in the photograph, or does it distract the viewer from the story?” Let’s take a look. In this photo, there are dirty tabletops with bottles of beer, a hideous wallpaper that contributes absolutely nothing to the story, a very visible fire alarm, and people who are not engaged with the story. So the answer to this question is a resounding “No!” Everything in this scene distracts the viewer from the story.

FIGURE 18.32
Depth and Walls: There is a wall in the background, which is an awful choice for a first dance photograph. Why? In Chapter 5, the section “The Pros and Cons of Using Depth” states that one of the great benefits of using depth in photos is to create a sense of romance. The moment the bride and groom walk onto the dance floor in front of their loved ones to have their first dance is arguably one of the most romantic moments in their lives. If I had read Chapter 5 at the time I was photographing this wedding, I would never have chosen that shooting angle to capture the first dance. I would have wanted as much depth as possible to make this moment as romantic as it could be.
Compositional Elements: There is nothing in this image that contributes to a pleasing composition.
Luminosity Levels: Early in my career, I did not have a good handle on how to use my flash properly to create mood. Therefore, I would simply put the flash on my camera and fire. The results are so bad it hurts to look at them. Direct on-camera flash will completely flatten the entire scene, and it will hardly look romantic. Instead of isolating your subjects through a strategic and careful use of light, you end up having everything in the scene lit just as brightly.
PEOPLE TECHNIQUES
No people components were applied.
APPROACH TECHNIQUES
This first dance photo must be taken using a photojournalistic approach. But, I still could have moved and changed my angle to include meaningful context, not busy wallpaper.
EXPERT TECHNIQUES
No expert components were applied.
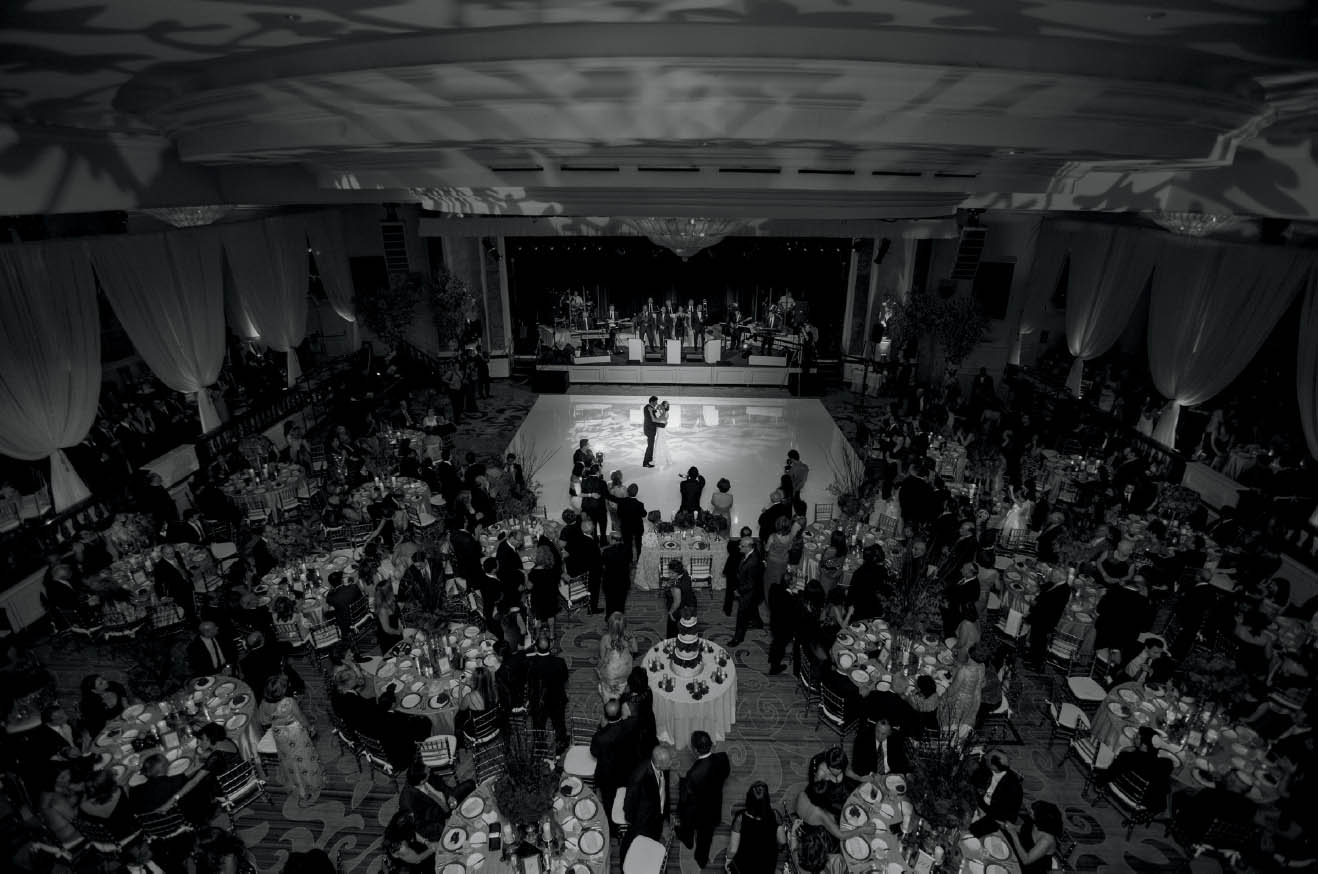
FIGURE 18.33
Example 4B: First Dance—A Successful Application of the Wedding Storyteller Skill Components
See Figure 18.33 for this example.
LOCATION TECHNIQUES
Context and Clutter: Going back to the decision points in Chapter 4, we can ask ourselves the question, “Does the scene or context add to the visual story or setting in the photograph, or does it distract the viewer from the story?” In this photo, everything in the scene is symbolic and meaningful to the bride and groom. This is what I call a homerun—when I create meaningful context in wedding photographs. Before you press the shutter, it is my hope that these skill components make you ask yourself this question: “Am I maximizing the inclusion of meaningful objects or people within the context of my photograph?” If your answer is, “No, most of the items included in my frame are useless clutter,” then stop and look around. Zoom in or zoom out. Do whatever you have to do to increase the inclusion of meaningful context in your photos.
Depth and Walls: This photo was taken with depth. But unlike the previous photo, the depth consists of the couple’s family and friends, as well as the band. Do you see how much more romantic it is to use depth in your composition rather than walls? Walls are dynamic, but depth is romantic.
Compositional Elements: The composition that I chose was to center the dancing couple, surrounded by their guests. I included the ceiling in my composition because the couple paid for its graphic lighting. I also waited as the bridal couple turned during their dance to capture both of them in profile; otherwise, one person would have blocked the other.
Luminosity Levels: Most of the frame is quite dark and moody except for the couple, who are the brightest part of the frame. I did not have to use my own helper light to achieve this effect since there were three videographers shining their LED lights on the couple at the same time. I told my assistant to have an LED light of our own ready to go, in case the video team shut them off after they captured their footage.
PEOPLE TECHNIQUES
No people techniques were applied.
APPROACH TECHNIQUES
This photo was taken with the photojournalistic approach.
EXPERT TECHNIQUES
Emotionally Valuable People (EVP): There are multiple EVP surrounding the couple from every direction.
Isolation and Priorities Through Lens Choice: The ultra-wide 16–35mm lens at f/3.2 was used to ensure that the entire room would be included in the composition.
Helper Light: As previously mentioned, helper light was a critical part of the success of this photo, and fortunately the light was provided by the video team. Without helper light, the couple would have been lit the same as their guests and the rest of the room. The photo would have lost its romantic charm, and your eyes would have not been automatically drawn to the couple.
Unique Perspective and Higher-Skilled Composition: This expert technique allowed for the spacious and romantic feel of this photograph. Capturing this moment with beautiful lighting is one thing, but capturing it from a bird’s eye view takes this photo to a completely different level! Before the reception, when I was taking the table setting photos, I looked around the room to see if perhaps there was some sort of balcony that I could use as a great vantage point. I asked the hotel manager, and he informed me that there was a balcony, but they also had a way to reach a high point near the ceiling that was designed for the lighting maintenance crew. I had to literally crawl through a maze of pipes to get to this vantage point. I had my second shooter taking photos from the floor in case I missed the first dance trying to reach my chosen vantage point area. It was not easy, but it was well worth it!
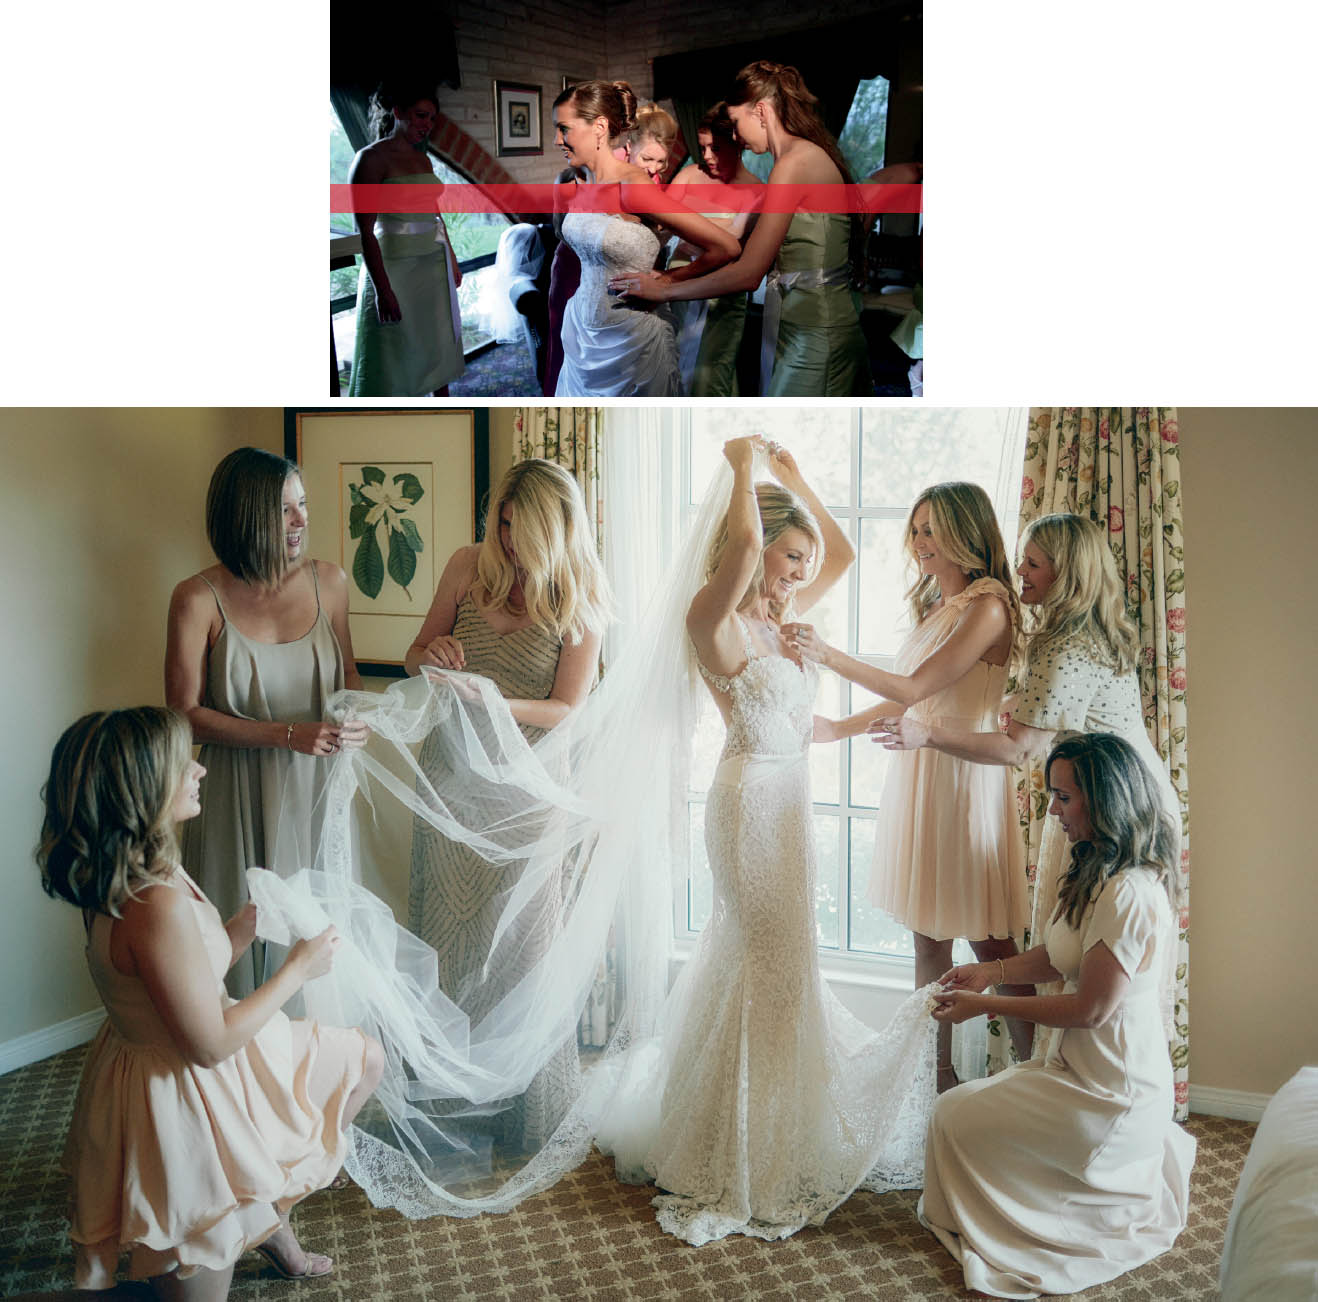
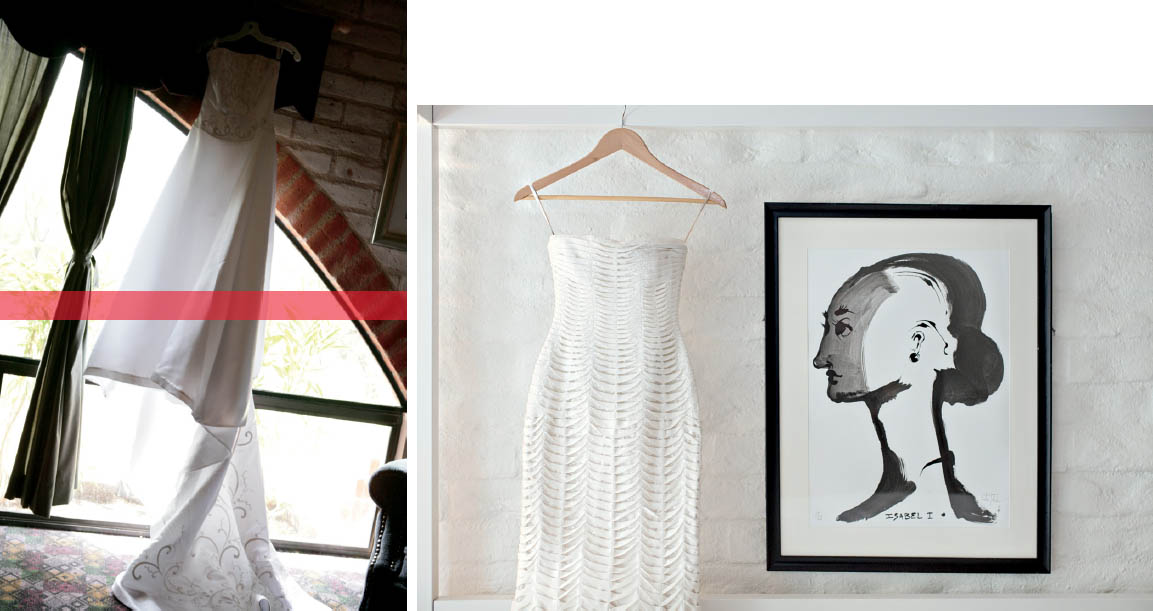
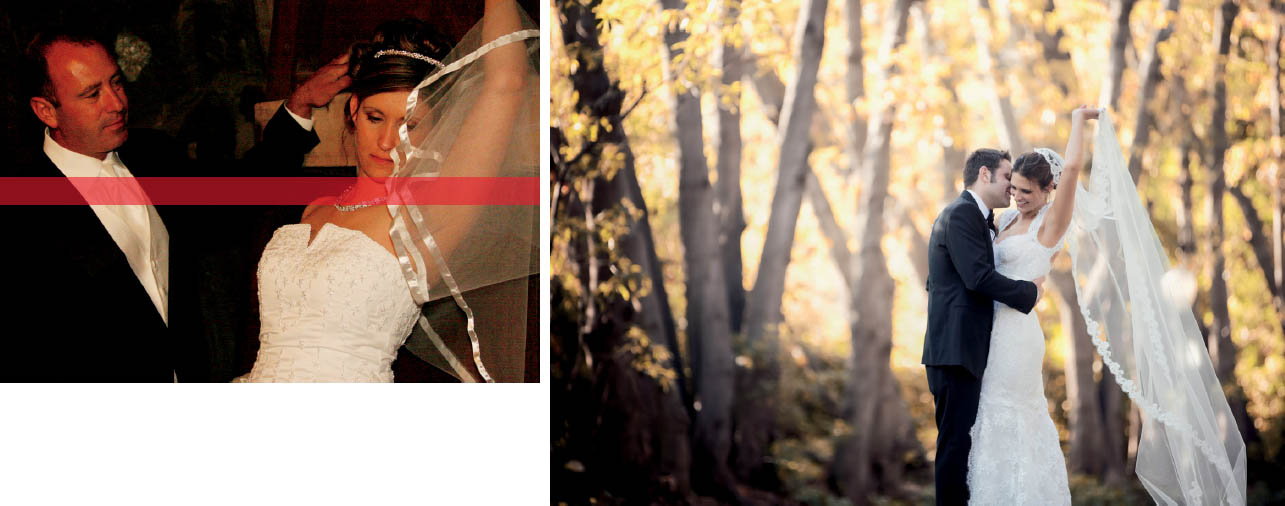
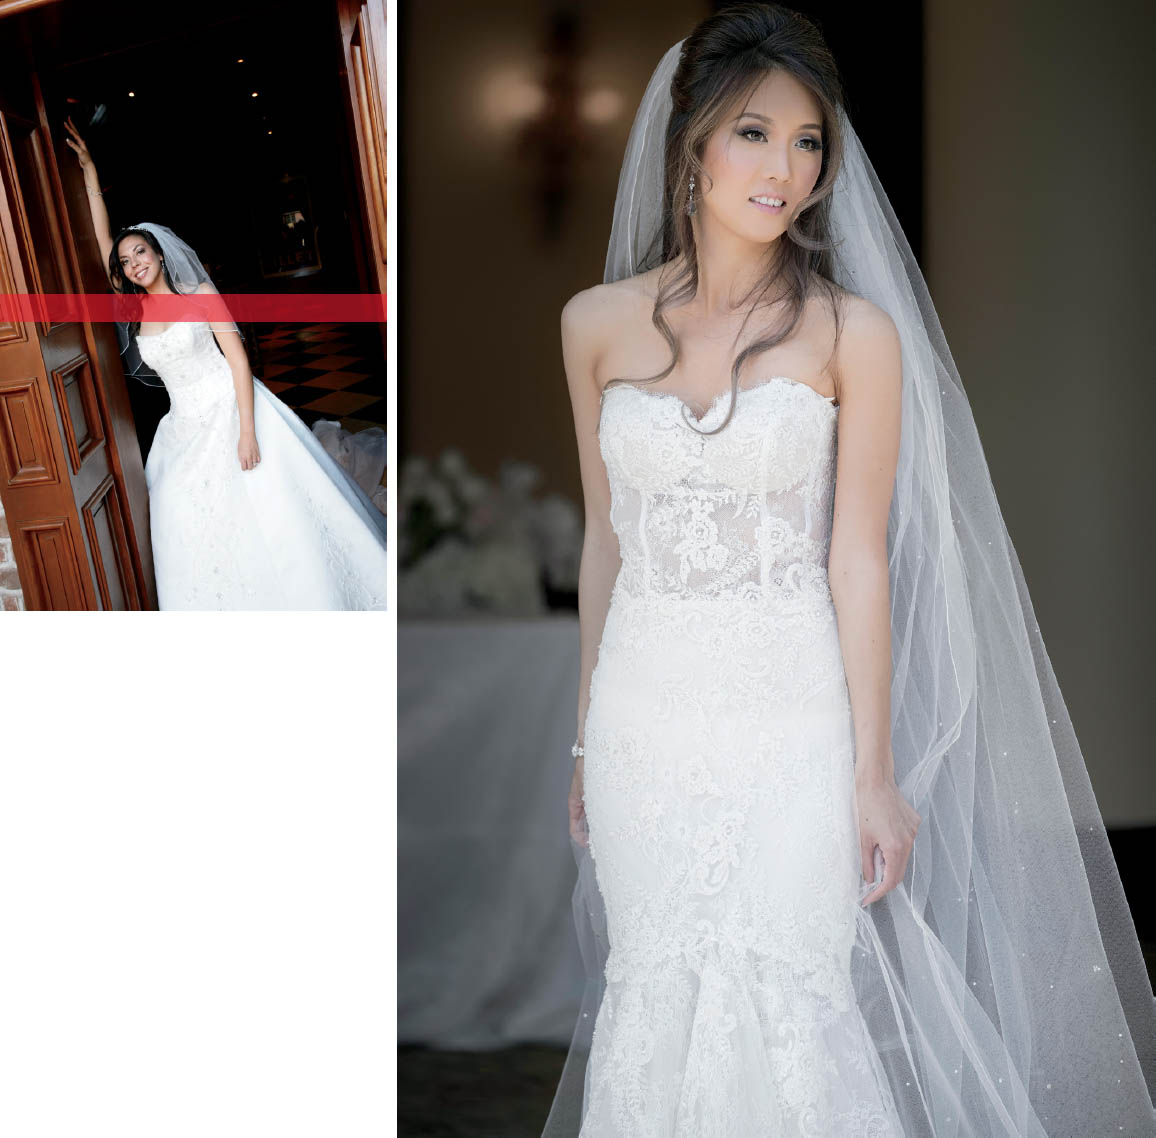
ON YOUR OWN EXERCISE PHOTOS
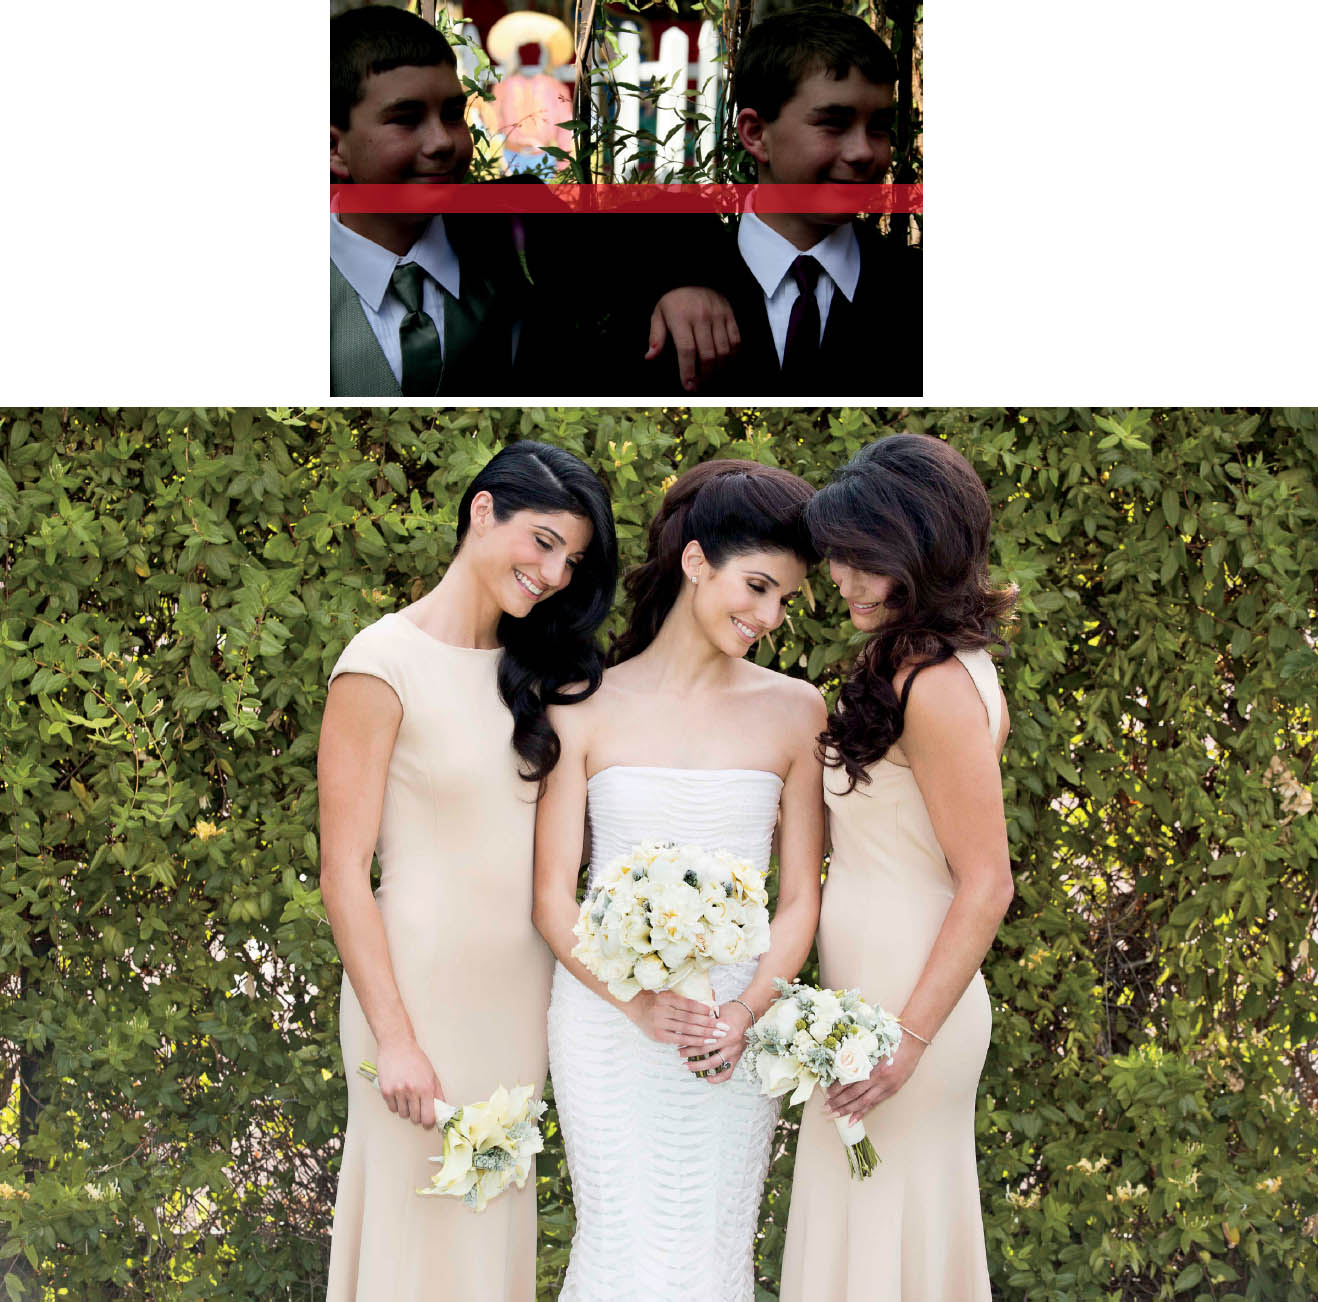
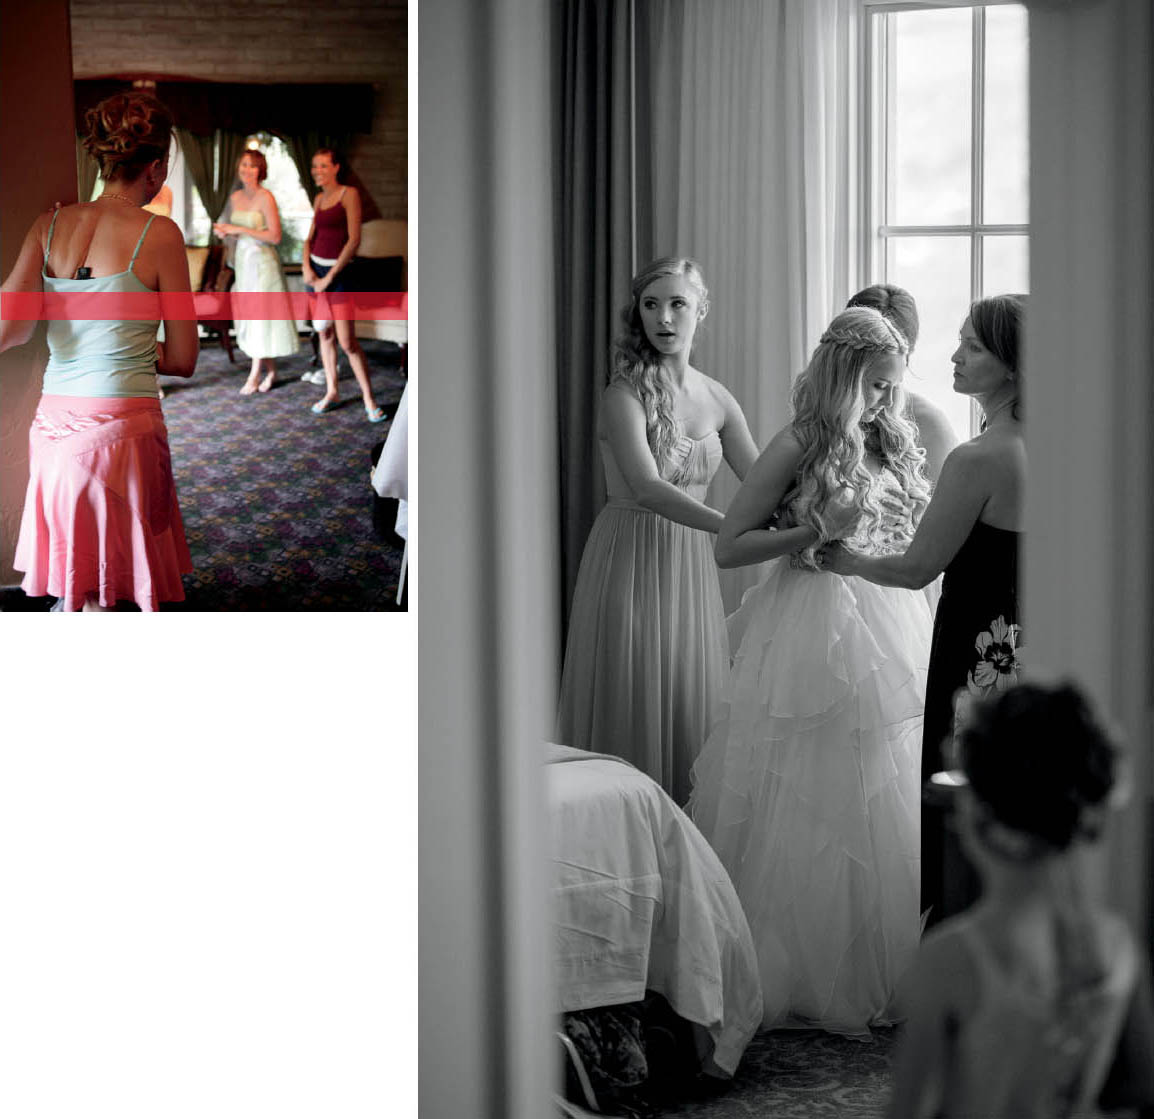
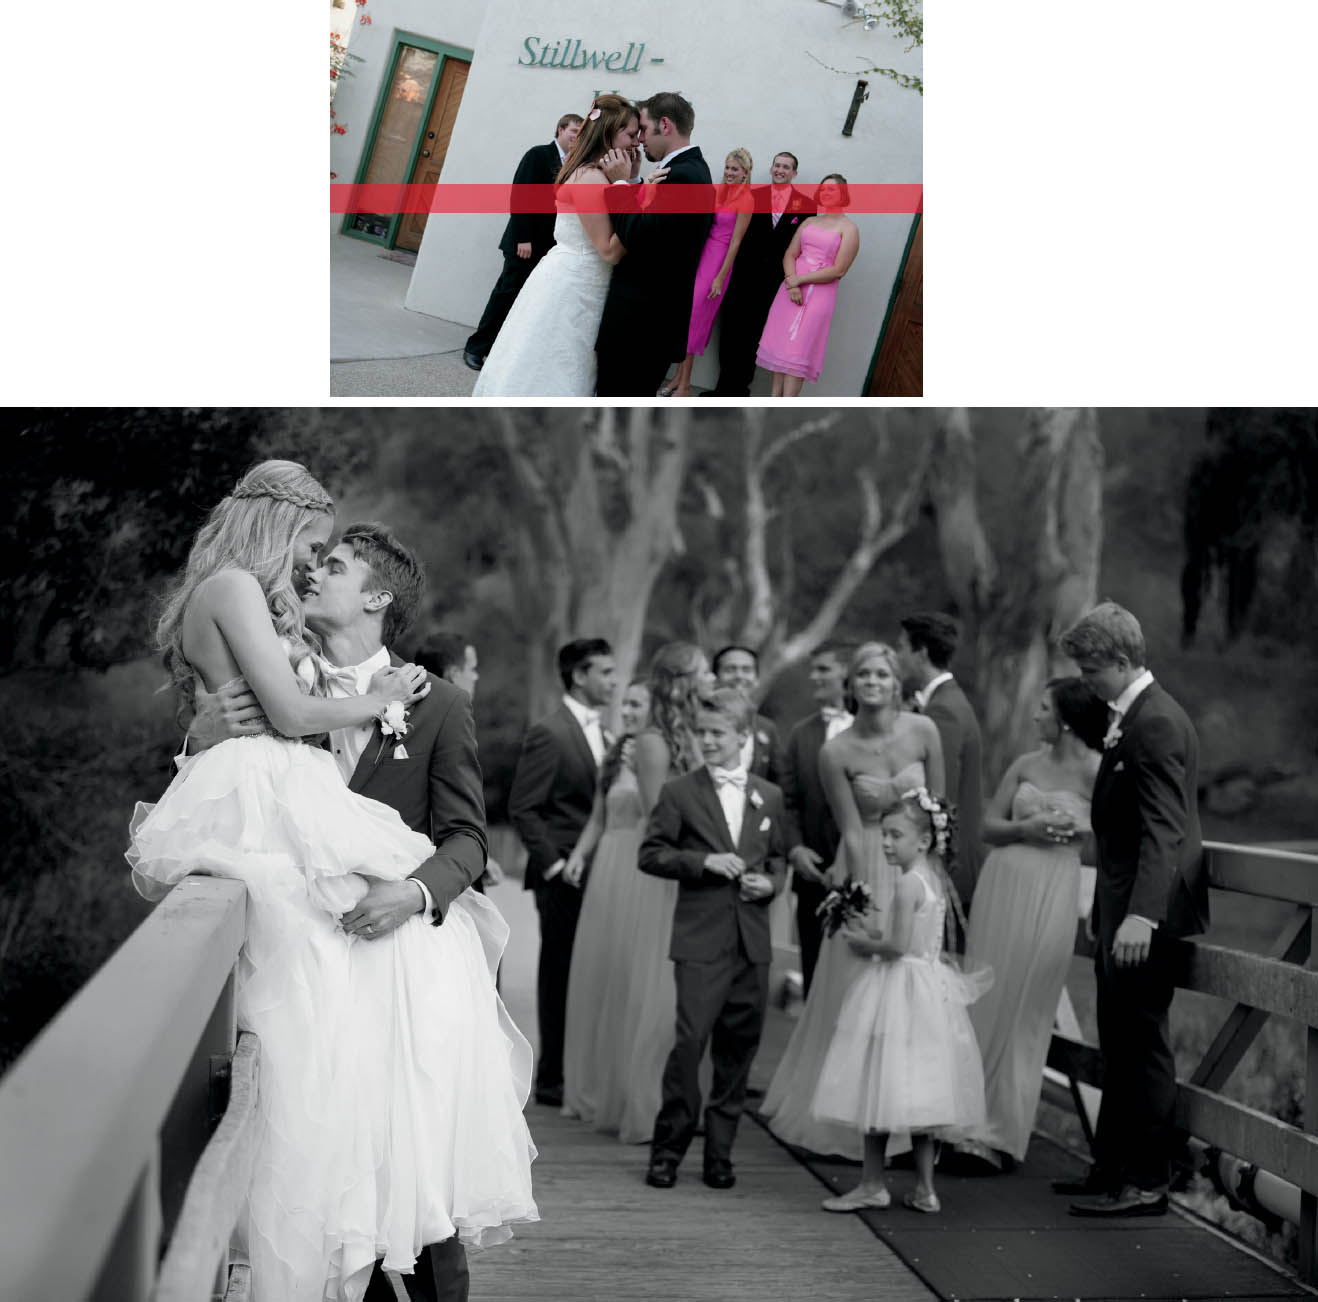
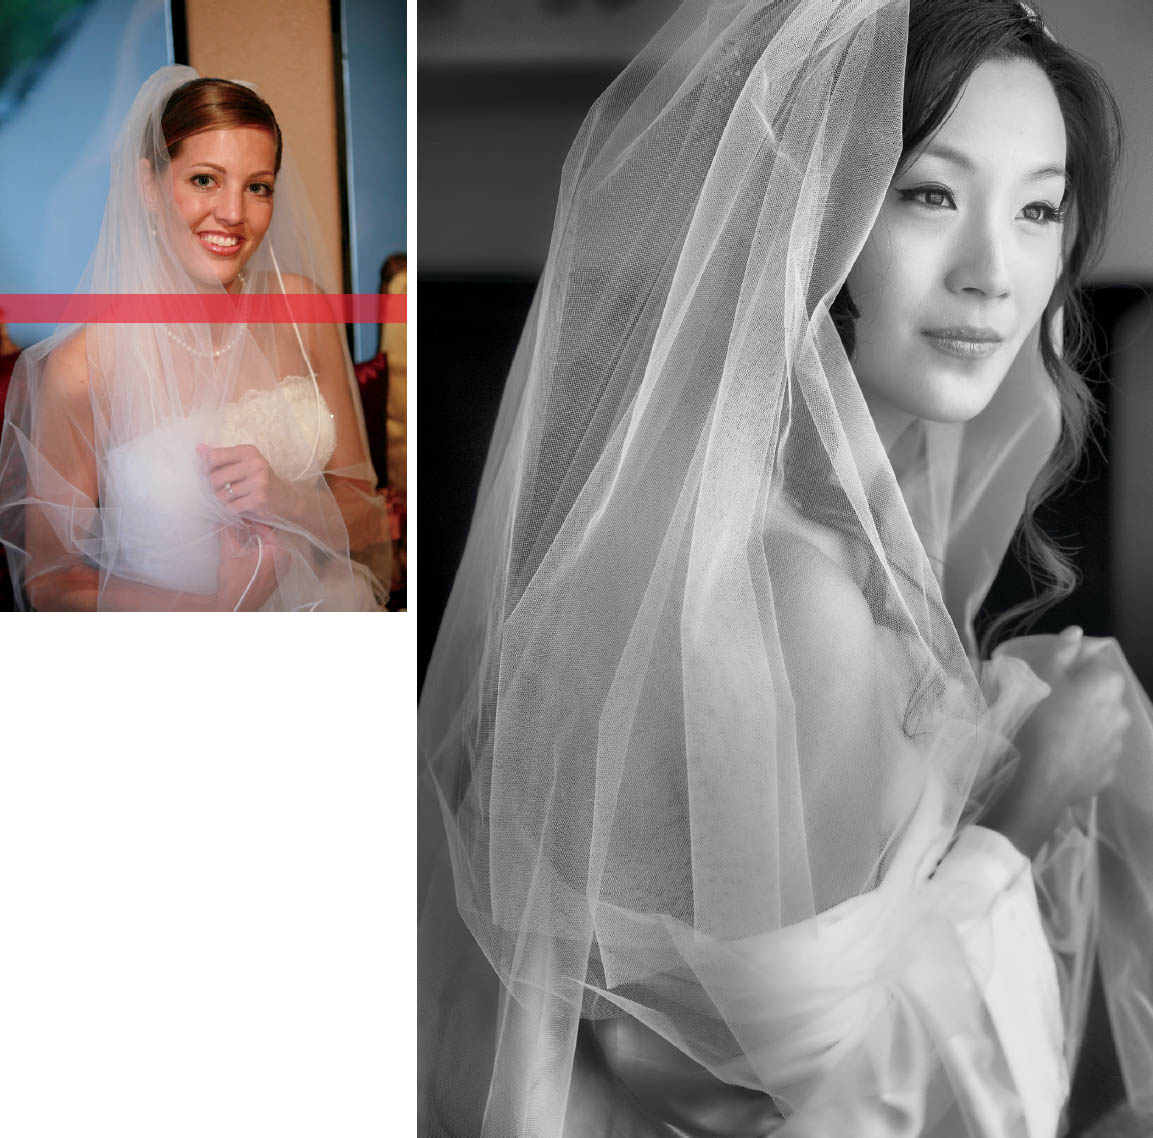
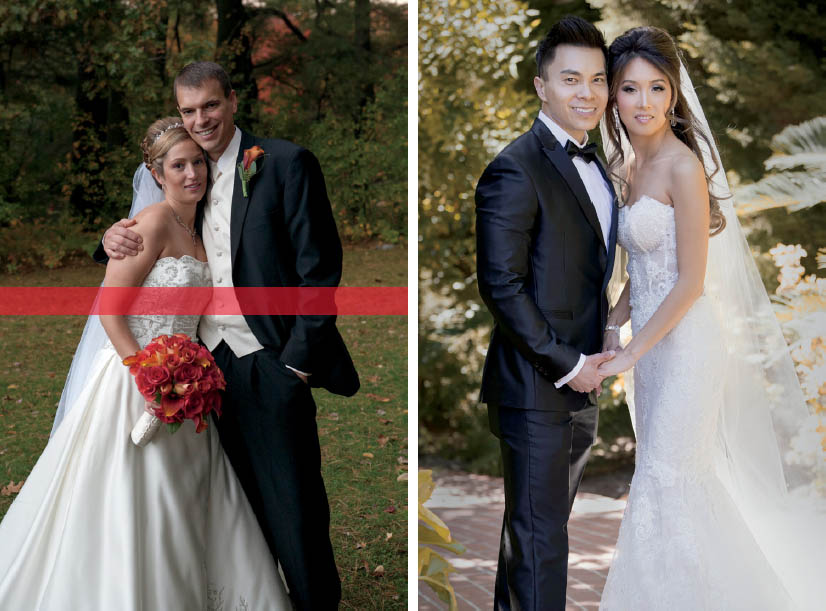
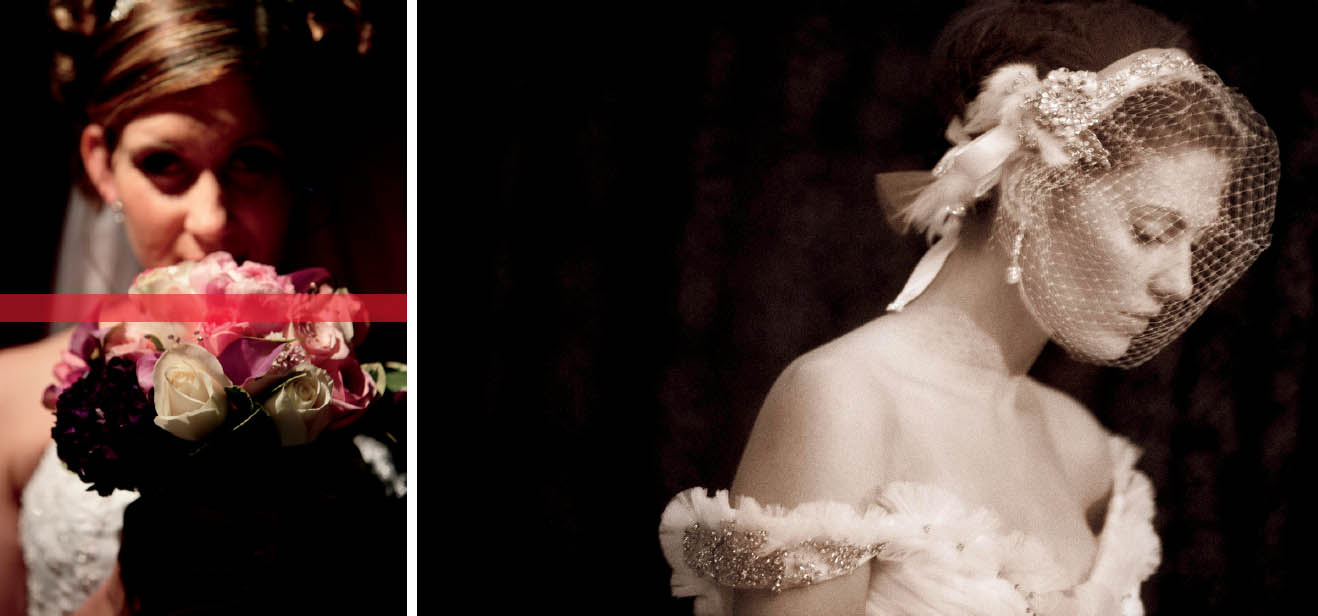
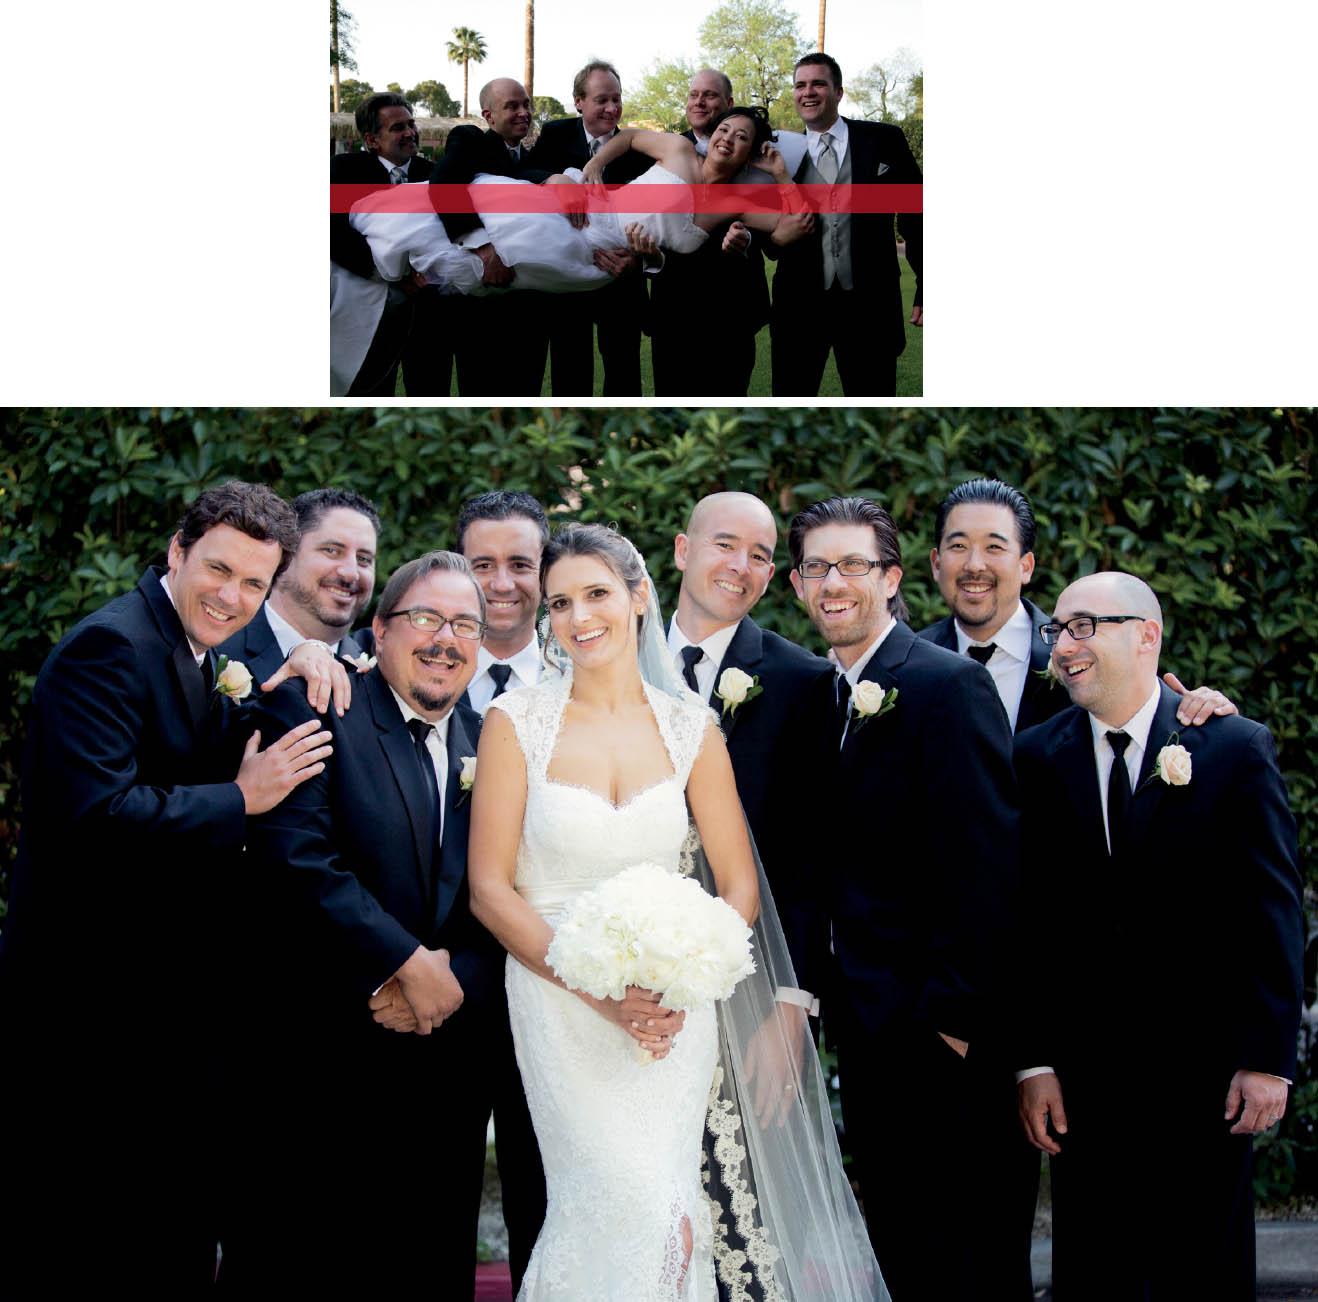
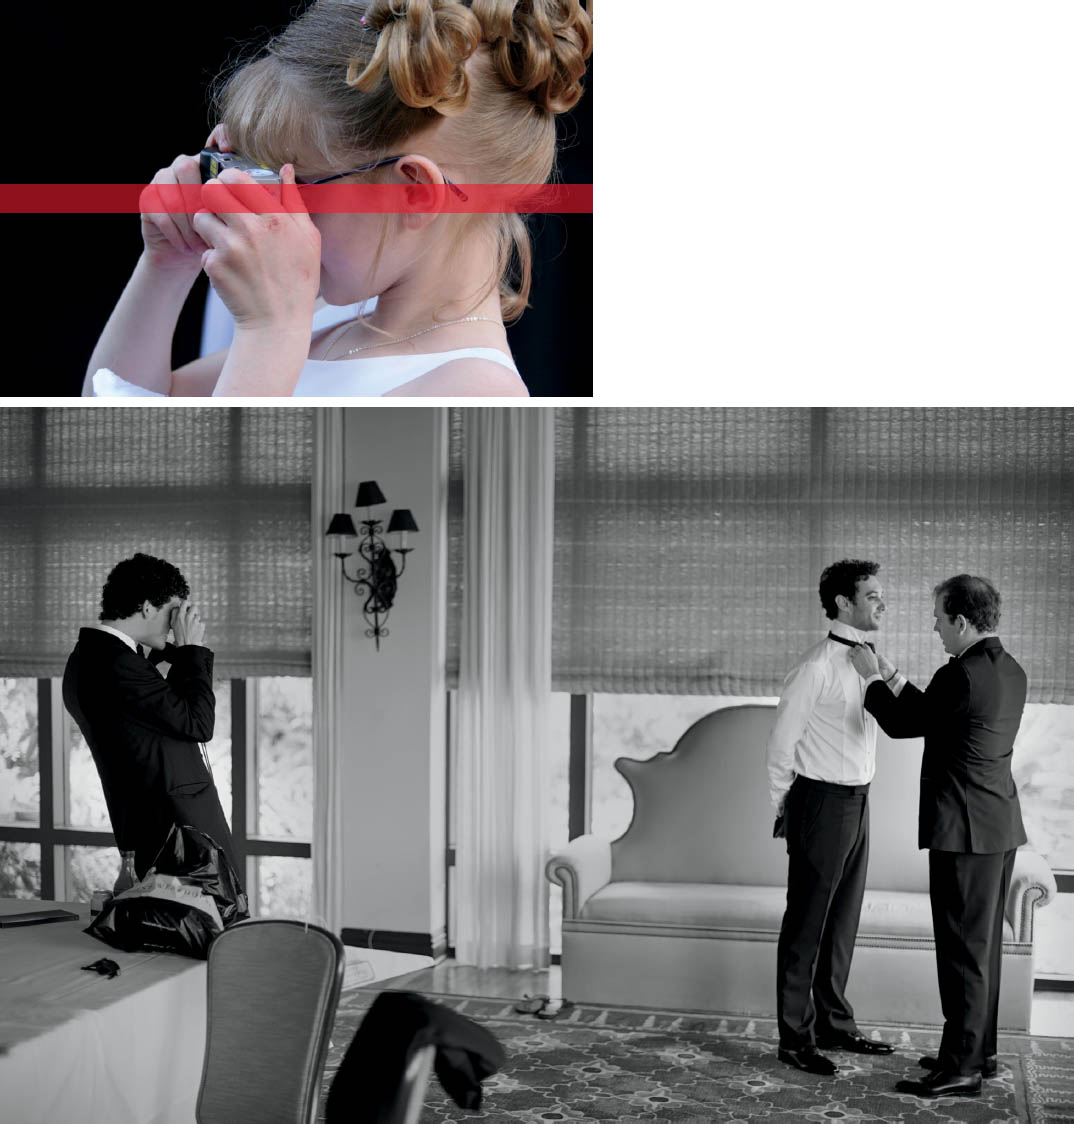
As discussed at the beginning of the previous section, what follows in Figures 18.34–18.75 are several more pairs of images. Your challenge is to analyze what is wrong and what is right for each of the applicable skill components for each photo.
FIGURES 18.34–35
FIGURES 18.36–37
FIGURES 18.38–39
FIGURES 18.40–41
FIGURES 18.42–43
FIGURES 18.44–45
FIGURES 18.46–47
FIGURES 18.48–49
FIGURES 18.50–51
FIGURES 18.52–53
FIGURES 18.54–55
FIGURES 18.56–57
FIGURES 18.58–59
FIGURES 18.60–61
FIGURES 18.62–63
FIGURES 18.64–65
FIGURES 18.66–67

FIGURES 18.68–69
FIGURES 18.70–71
FIGURES 18.72–73
FIGURES 18.74–75