
Using Hyper-V to Create Virtual Machines
Hyper-V is a feature that lets you create virtual machines to run other operating systems within Windows 8. With Hyper-V, you can set up, run, and manage multiple virtual machines for different versions of Windows or other operating systems. You may want to set up virtual machines to test applications and features from other operating systems or run applications that may not be compatible with Windows 8. The previous task explains how to install Hyper-V, so follow that one if you have not yet installed it. For those who have installed Hyper-V in Windows 8, this task explains how to use the tool to create a virtual machine.
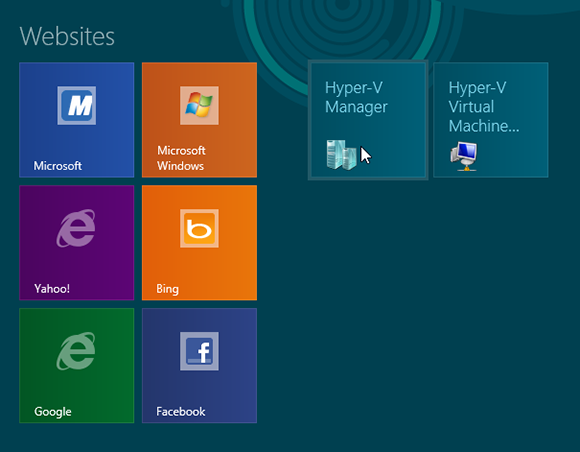
1 Launch Hyper-V: Move to the right end of the Start screen where you see tiles for Hyper-V Manager and Hyper-V Virtual Machine Connector. Click the Hyper-V Manager tile.
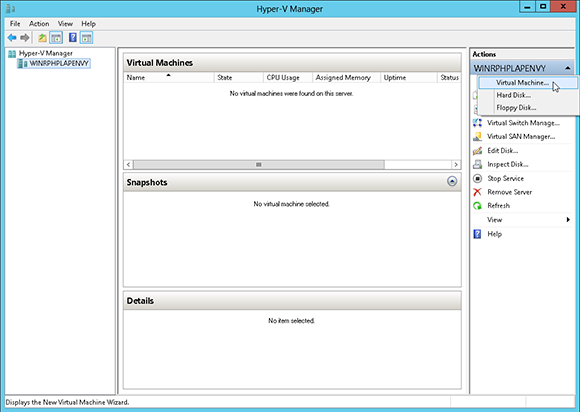
2 Create a virtual machine: In the Hyper-V Manager window, the name of your computer should already be highlighted in the left pane and in the Actions pane on the right. If it does not appear in the Actions pane, click the Connect to Server command in the Actions pane, select Local computer, and then click OK. From the Actions pane, click New, and then click Virtual Machine.

3 Start the New Virtual Machine Wizard: At the Before You Begin screen of the New Virtual Machine Wizard, click Next.
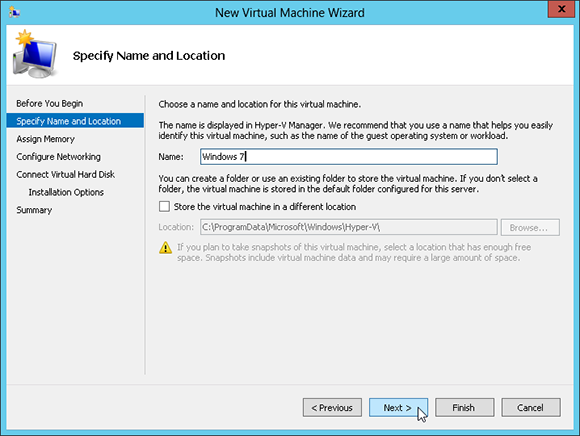
4 Specify name and location: At the Specify Name and Location screen, type a name for your virtual machine. For this example, it is assumed that you are creating a virtual machine for Windows 7. Type Windows 7 in the Name field. Click Next.

5 Assign memory: At the Assign Memory screen, set the amount of start-up memory to at least 1024MB. You can also select the Use dynamic memory for this virtual machine check box, which allocates available memory to your virtual machines as needed. Click Next.
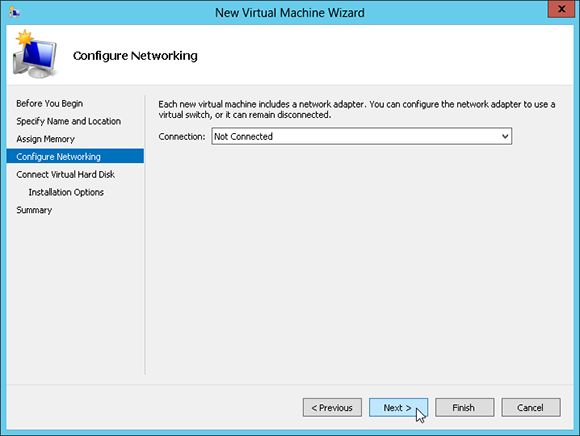
6 Configure networking: At the Configure Networking screen, leave the Connection option as Not Connected. Click Next.
tip By clicking the Snapshot icon on the toolbar, you can take snapshots of the virtual machine to preserve it at certain states.

7 Connect virtual hard disk: At the Connect Virtual Hard Disk screen, type Windows 7 in the Name field for the name of the VHDX file, if it is not already displayed. You do not need to type the vhdx extension; it is automatically added. Leave the other settings alone. Click Next.
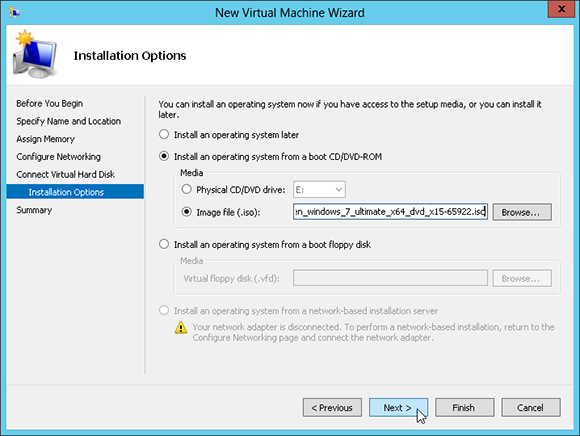
8 Choose installation options: At the Installation Options screen, select the Install an operating system from a boot CD/DVD-ROM radio button. You can either select the Physical CD/DVD drive setting and insert your Windows 7 installation disc, or select the Image file (.iso) setting and point to a downloaded ISO file of Windows 7. After you make your choice, click Next.

9 Review your options: At the Completing the New Virtual Machine Wizard screen, review your options. You can always click Previous to return to a prior screen and make any changes. If all the settings look correct, click Finish. Windows sets up the virtual disk for your operating system.
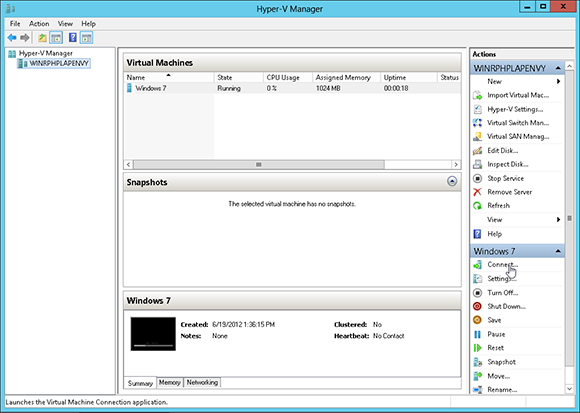
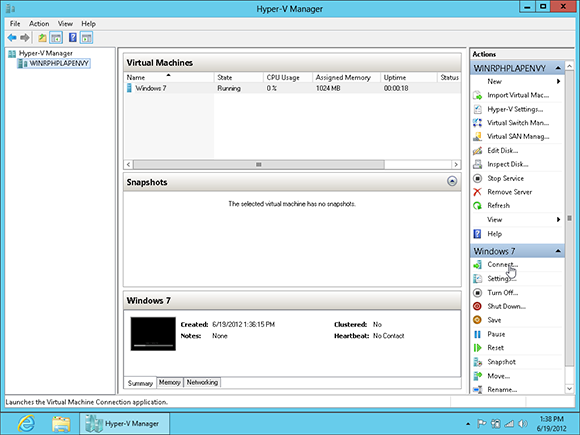
10 Start virtual machine: A new section appears in the lower-right pane with the name of your operating system (in this case, Windows 7). From this section, click Start, and then click Connect.
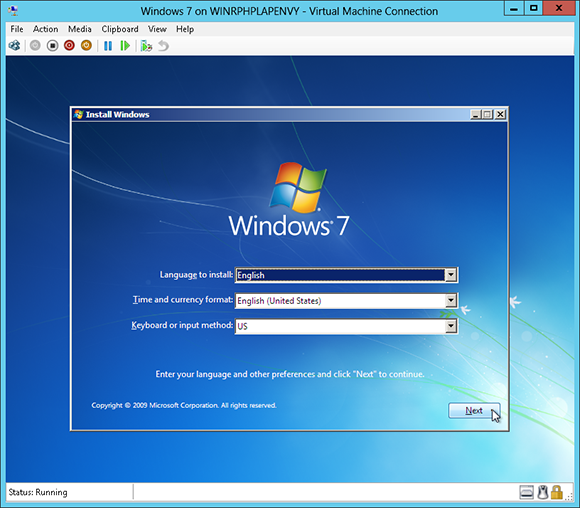
11 Install the operating system: The installation process for the operating system now appears in the virtual machine window. Click the appropriate screens and settings to install the OS.
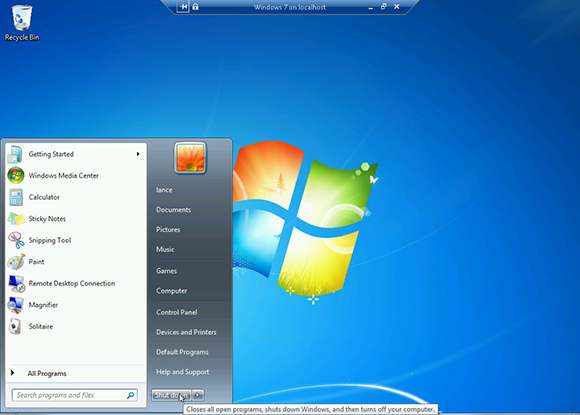
12 Shut down the operating system: After Windows 7 is installed and set up in the virtual machine, shut it down as you would normally; click the Start button and choose Shut down. You can then close the virtual window.
tip Hyper-V is available only in Windows 8 Professional.

13 Launch the operating system: To launch the operating system in the virtual machine again, click Start in the Windows 7 section in the lower-right pane, and then click Connect. Windows 7 launches in its virtual machine.