
Restoring Windows from a Restore Point
A Windows restore point is a snapshot of your entire Windows environment at a specific point in time. You can use restore points to record your Windows environment before you install new applications or make other changes to your system. If you experience problems with Windows or need to undo recent changes, you can restore your environment to a previous point. Windows 8 devotes a certain amount of hard drive space to save restore points. You can create as many restore points as you want. Once the available hard drive space is used up, Windows starts deleting the earliest restore points. This task explains how to restore Windows 8 from a restore point.
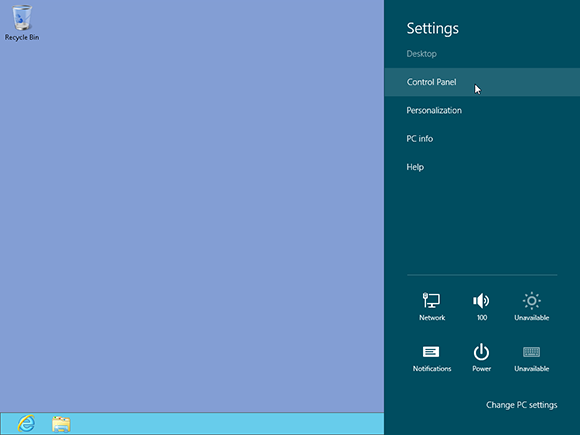
1 Open Control Panel: Launch the desktop by clicking its Start screen tile. Hover your mouse in the lower-right hot corner to display the Charms bar. Click the Settings charm. Click Control Panel at the top of the pane.
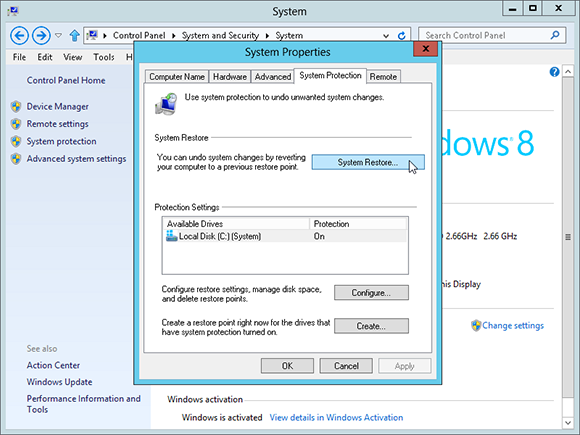
2 Open System Protection: From Control Panel, click the System and Security category and then click System. In the left pane, click System protection.

3 Restore Windows: Click System Restore in the System Properties window. The System Restore window may recommend a recent restore point. If you want to use this restore point, click Next. Otherwise, click the Choose a different restore point option and then click Next. If this recommendation does not appear, then just click Next.

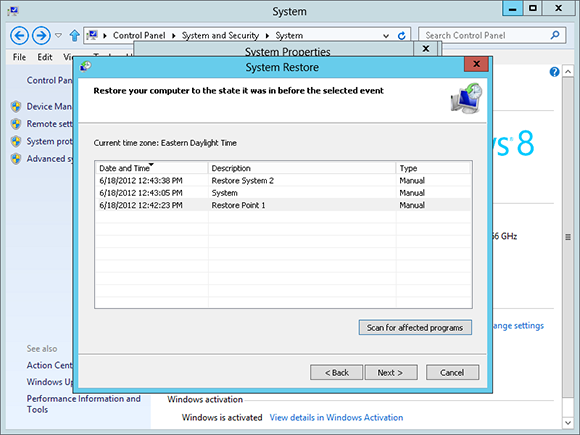
4 View restore points: Windows displays a list of all your restore points with their dates and times.
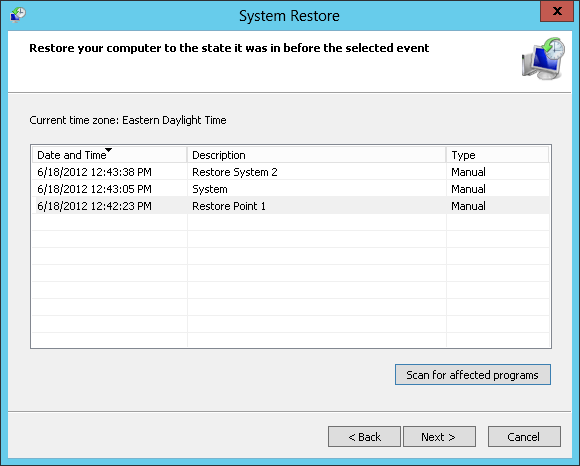
5 Scan for affected programs: Click a particular restore point and then click Scan for affected programs. Windows runs a scan for any applications or drivers that may need to be reinstalled if you choose this specific restore point. If none is detected, then you will not lose any software or drivers if you choose this restore point. If any software or drivers are found, then you may want to try a different restore point or note the programs that need to be reinstalled if you choose this restore point. Click Close.

6 Choose the restore point: Select the restore point you want to use. Click Next.
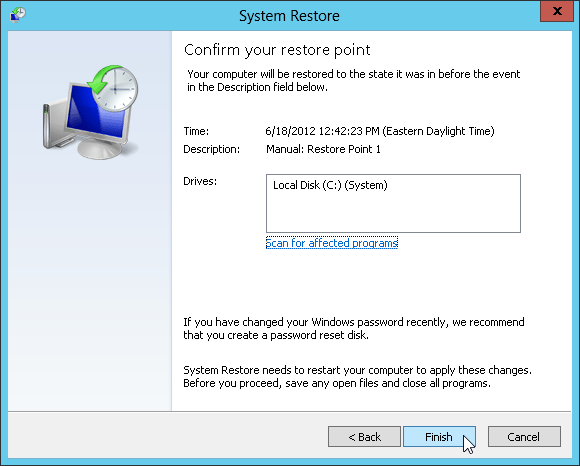
7 Confirm the restore point: Confirm the restore point you want to use. Click Finish.

8 Confirm that you want to continue: Windows asks if you want to continue. Click Yes. You see a message that Windows is preparing to restore your system. After the restore completes, Windows reboots your computer and restores your files and settings. After the restoration, Windows may again reboot your computer.

9 Log back in: Press any key to get past the Lock screen and then log in to Windows.
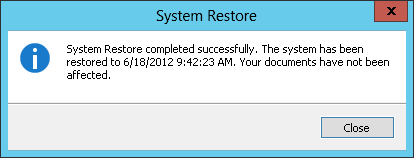
10 View System Restore message: Open the desktop by clicking its Start screen tile. A System Restore message appears explaining the outcome of the process.
tip Creating a restore point is covered in the previous task.

11 Reinstall programs, drivers, and updates: Reinstall any software, hardware drivers, and software updates that were not restored.
tip If you are running low on hard drive space you can delete all your previous restore points. Just remember to create a new restore point afterward.
Quick Fixes
Changing Your Computer Name

Launch Control Panel. Click the System and Security category. Under System, select the See the name of this computer option. In the View basic information about your computer dialog box, select the Change settings option. In the System Properties dialog box, click Change. In the Computer name field, type a new name for your computer. Click OK. Click OK again. Close the System Properties dialog box. Click Restart Now.
Setting Up Automatic Maintenance

Open Control Panel. Click the System and Security category. Select Action Center. Click the drop-down button next to Maintenance. Under Automatic Maintenance, click Change maintenance settings. In the Run maintenance tasks daily at drop-down menu, select a time. Select the Allow scheduled maintenance to wake up my computer at the scheduled time check box if your computer is in sleep mode at the scheduled time.