
As I’ve stated, a smart robot is one that fully uses its sensors. One of the simplest, most useful sensors is the Touch sensor, shown in Figure 9-1.
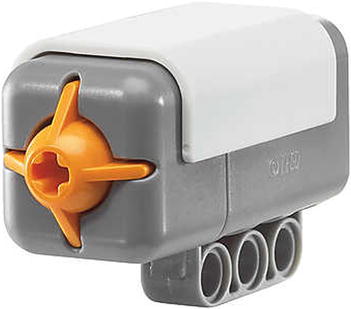
Figure 9-1. LEGO MINDSTORMS NXT Touch Sensor
The Touch sensor allows your robot to “feel” its way around a course and react appropriately. It is very basic—it’s either on or off, depending on the state of the Push button. The Touch sensor provides a hole for an axle in the Push button—giving users more options for incorporating the sensor into their designs.
The Touch sensor reports its status to the NXT as one of three states: Pressed, Released, or Bumped. You see these in the Properties window shown in Figure 9-2.
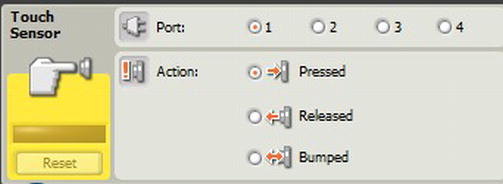
Figure 9-2. The Touch Sensor Properties window
If there is no action or force placed on the button at the front of the sensor, the sensor reports its state as Released. If force is held on the button, then the state of the sensor is Pressed. If the button is pressed and released quickly, the state of the sensor is Bumped. The release must occur within 0.5 seconds to be considered Bumped.
In a Wait block or at the start of a Switch block are good points in your program to place code that uses the Touch sensor. Choose Pressed if you want the block to be triggered at the instant the Touch sensor is pressed. Choose Released if you want the block to be triggered at the instant the Touch sensor is released.
Both the LEGO MINDSTORMS Education NXT Base Set (9797) and the LEGO MINDSTORMS 2.0 retail set include two NXT Touch sensors. Currently, FLL rules allow for multiple Touch sensors. But check the rules each year since they are subject to change. Also, there are companies that make a Touch Sensor Multiplexer that lets you have up to four Touch sensors on one NXT sensor port, but these multiplexers are not allowed in FLL events.
Unlike the Light sensor, the Touch sensor does not need any special calibration to perform its job. It only returns the value of the current state of the sensor—pressed or released. Figure 9-3 shows the sensor being pressed. The mechanism is a simple switch—no calibration is needed.

Figure 9-3. Pressing the Touch sensor
When using the Touch sensor, you must be certain that the button is activated the way you want it to be. If the sensor is not square with the object to be pressed, it may register as Bumped—just a glancing blow. Also, if the robot bounces off an object quickly, the Touch sensor may only register it as Bumped (if it registers at all). It is important to make sure that when you want the Touch sensor pressed, it is squarely pressed and remains pressed.
One purpose of the Touch sensor is to know when the robot has reached an obstacle in its path. It functions as a feeler or bumper for your robot. You can place an axle in the Touch sensor’s axle hole, and depending on the design of your robot, the axle will let the robot know when to turn to avoid an obstacle. Determining the length of the axle is important. You must take into consideration several factors. One is the placement of the Touch sensor. If the sensor is located at the rear of the robot, the axle may not be long enough to reach the obstacle before the front of the robot runs into it, as depicted in Figure 9-4.

Figure 9-4. The Touch sensor may not reach the obstacle in time
Likewise, placing the sensor’s axle probe too close to the obstacle will not leave enough distance to navigate around other obstacles, as seen in Figure 9-5.
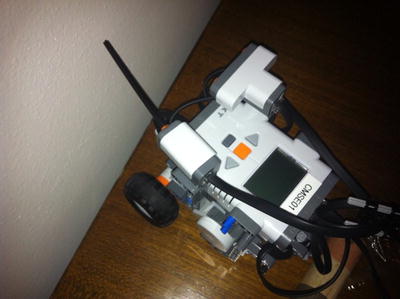
Figure 9-5. The Touch sensor is too close to the obstacle
Therefore, in developing your program to solve a mission using the Touch sensor, it is important that you take note of several factors:
- The overall design of the robot. What does your wheelbase look like? What is its turning radius? Which attachments must you be aware of? Where will the Touch sensor be placed?
- The obstacles that are in your way. How tall or short are the obstacles? What happens if you miss touching an obstacle?
- What happens next. Is there more than one direction to turn after touching an obstacle? How do you determine which direction to turn? Do you have enough room to maneuver the robot around an obstacle, or are other obstacles in the way (e.g., a maze)?
You can use the border walls in a challenge to square your robot and help ensure its position relative to the playing field. Use the lines as described in Chapter 8 to get your bearings on the table. Then use the table borders to square your robot to a mission. Applying both techniques will enable you to consistently score points in a challenge.
Just as you need two Light sensors to align a robot to a line on the playing field, you also need two Touch sensors to align a robot to a border wall. Figure 9-6 shows a common configuration.

Figure 9-6. A robot with two Touch sensors
COMPUTER SCIENCE EXAMPLE
One of the ways to use Touch sensors to square the robot is to mount them so that they are aimed backward, placed parallel to each other and the direction of the robot. Programming the robot then introduces you to the term finite-state machine.
A State machine is any device that stores the status of something at a given time and can operate on input to change the status of and/or cause an action or output for any given change. A finite-state machine is one that has a limited or finite number of possible states 1.
Imagine a device that reads a long sheet of paper, for example. There is a single letter—a or b—printed on every inch of the paper. As the State machine reads each letter, it changes its state, as shown in the following.

The circles represent “states” that the machine can be in. The arrows are the transitions to determine which state to go to next. For example, if you are in state “s” and read an “a”, you’ll transition to state “q”. If you read a “b”, you’ll stay in state “s”.
We can use the finite-state machine to show how we can code the squaring of the robot using two Touch sensors. The following figure is a state transition diagram for driving with two Touch sensors. There are three possibilities coming from each state.
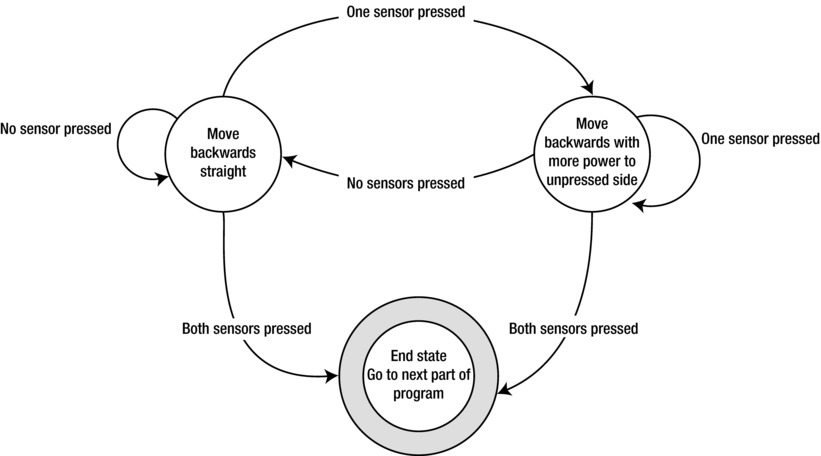
A State machine diagram for squaring
You don’t need to be aware of terms like “finite-state machine” in order to square your robot. However, you’ll gain deeper understanding from knowing this bit of theory. You’ll make a better impression on the judges, too.
In NXT-G, one way to square your robot using Touch sensors is by using code that just keeps driving backward until both Touch sensors are pressed. Before ending the loop, the logic loop tests to make sure that both Touch sensor #1 and Touch sensor #2 are pressed. It then stops the motors. The example shown in Figure 9-7 is the code snippet from within a MyBlock called SquareUp1.

Figure 9-7. A program to square the robot by driving backward until both Touch sensors are pressed
This MyBlock is effective as long as the robot starts the SquareUp1 routine relatively square to the wall. If the robot is not square, then you can use another program that moves the wheels backward independently, as described in our State machine example. Figure 9-8 shows another way to write a MyBlock (SquareUp2) for squaring the robot.

Figure 9-8. An alternate method for squaring the robot
During FLL competitions, you only have 2.5 minutes to solve as many missions as you can. You want to use every second to score as high as possible. If you spend the first three to five seconds fumbling with the orange and gray buttons on top of the NXT, you’re wasting precious time. The Touch sensor can come to your rescue. At the start of a run, you have a short amount of time to set up the robot, get your attachments in order, and prepare for the “3-2-1 LEGO!” start. You can use the Touch sensor as the starting point for your missions by using the code snippet in Figure 9-9 (another candidate for a MyBlock).

Figure 9-9. Wait for the touch release to start the program
Placing a MyBlock that contains 9-9’s code at the start of your mission programs lets you start each program running—without moving. You can align your robot at the start of the clock, and when ready, let the referees know that it’s okay to start the match. You simply press and hold the Touch sensor until you are ready to send the robot on its way. When you release the Touch sensor, the robot will start moving.
One thing about NXT-G is that code blocks will run to completion. This can be a blessing as well as a curse. As you debug your programs, for example, it is helpful to know that a Move block will continue executing until it has reached its end state (e.g., three rotations) and moves to the next block. However, if you are moving an arm or another manipulator to a certain location and something gets in its way, the program will wait for the Move block to complete its rotations before moving on. Of course, something is in the way, so the movement will never complete—making it appear as if the program is stuck or broken. Yet during your robot design, you can incorporate a Touch sensor to act as a Limit switch or an indicator that the robot’s arm has reached its desired location. Such an approach has advantages over simply waiting for a given number of rotations.
A Limit switchis a sensor that prevents the travel of a mechanism beyond a predetermined point. The switch is mechanically operated by the motion of the mechanism itself. In the following example, the robot is going to lower an arm to pick up an object. If you use rotations to lower the arm but you don’t have the arm in the right location to start, then the arm may come down short of your desired location. Or the arm could go too far down, and thus never complete the rotations as it gets stuck pounding against the table.
Using the Touch sensor as a Limit switch ensures that you hit the desired spot to pick up an object every time. Design your robot with the Touch sensor on the arm. Figure 9-10 shows a program that makes use of the Touch sensor as a Limit switch. Move the arm with unlimited duration until the Limit switch (Touch sensor) is pressed. Pick up the target object and raise the arm. You can probably get away with raising the arm any number of rotations on the motor. You can then return your robot to base.

Figure 9-10. Use of a Touch sensor as a Limit switch
Another way to return the arm to the starting position is to add a calculation to return the mechanism the same number of rotations that you used to originally move it. You do this using the built-in rotation sensor on the motor driving the mechanism, as shown in Figure 9-11.

Figure 9-11. Another Limit switch example returns the arm to starting location
Touch Sensor As an Indicator of an Object
Another way to use the Touch sensor is to determine whether you’ve placed an object on your robot. It works similar to placing food on a grocery scale. Place a Touch sensor underneath a platform resting on top of the sensor. When you place something on the platform, the Touch sensor is Pressed.
Summary
Although it is one of the simplest sensors to use, the Touch sensor is also one of the most powerful sensors in your robot toolbox. A full understanding of the Touch sensor—including detecting when it is Pressed or Released—is critical to its proper use in competitions.
1 For more on State machines, see http://blog.markwshead.com/869/state-machines-computer-science and http://searchcio-midmarket.techtarget.com/definition/state-machine.