Chapter 1. Getting Started
Note
Before we begin teaching you all about XNA Game Studio 4.0 you will first need to get your development environment setup and ready for development. There are slightly different steps depending of if you are targeting the Xbox 360, Windows Phone 7 device, or Windows but we will cover them all.
In this chapter you will learn:
• How to install XNA Game Studio 4.0
• How to sign up for an App Hub Membership
• Windows Phone Marketplace registration
• How to write your first XNA Game Studio games for Windows, Xbox 360, and Windows Phone 7
XNA Game Studio enables you to quickly build games. Before you can start to create your first XNA Game Studio game, you need to install the latest version of the product XNA Game Studio 4.0 and set up your Xbox 360 and Windows Phone 7 device.
Installing XNA Game Studio 4.0
XNA Game Studio 4.0 includes a number of components. The XNA Framework consists of the developer APIs that you use in your game to write code against. Visual Studio project templates and tools are provided for the different XNA project types, including games and game libraries for each of the supported platforms. The content pipeline is used to build game content for use in your game. XNA Game Studio 4.0 also installs a number of tools that you can use throughout this book.
In past releases, XNA Game Studio had its own installer that could install different versions of Visual Studio. XNA Game Studio 4.0 is integrated as part of the Microsoft Windows Phone Developer Tools. Even the Windows and Xbox 360 projects come in the Microsoft Windows Phone Developer Tools along with other projects for creating Silverlight-based Windows Phone applications.
The tools install a special version of Visual Studio called Microsoft Visual Studio 2010 Express for Windows Phone. If you have another version of Visual Studio 2010 installed, XNA Game Studio 4.0 is installed into that version, too.
Note
A standalone XNA Game Studio 4.0 installer that can install the Windows and Xbox 360 projects is available at http://go.microsoft.com/fwlink/?LinkId=197288.
Downloading the Tools
The first step to install XNA Game Studio 4.0 is to download the installer from the following link:
http://go.microsoft.com/?linkid=9713250
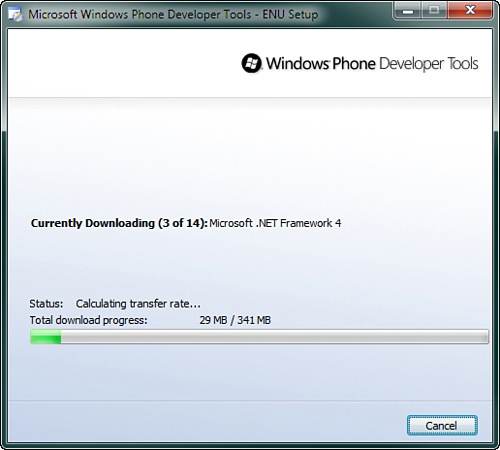
After downloading the installer, double-click it and follow the instructions to complete the installation. Figure 1.1 shows the Windows Phone Developer Tools installer.
Figure 1.1. Windows Phone Developer Tools installer
You might have to restart your PC to complete the initialization.
After the initialization has completed you should have three new top-level menus in your start menu: Microsoft Visual Studio 2010 Express, Microsoft XNA Game Studio 4.0, and Windows Phone Developer Tools.
Clicking Microsoft Visual Studio 2010 Express and then clicking the Microsoft Visual Studio 2010 Express for Windows Phone launches Visual Studio.
App Hub Membership
To develop XNA games for your Xbox 360 and to deploy games to your Windows Phone 7 device, you need to have an App Hub membership. The membership also allows you as a developer to sell your XNA Xbox 360 games on the Xbox LIVE Indie Games marketplace and your XNA or Silverlight games in the Windows Phone 7 marketplace.
To register on the App Hub website and purchase the App Hub membership first go to the following URL.
https://windowsphone.create.msdn.com/Register/
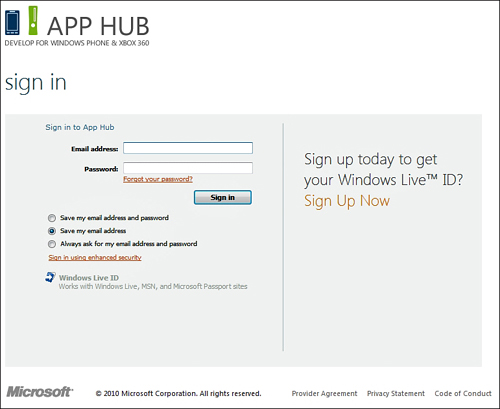
Sign in with an existing Windows Live ID or sign up for a new one (Figure 1.2).
Figure 1.2. Signing in to the App Hub website
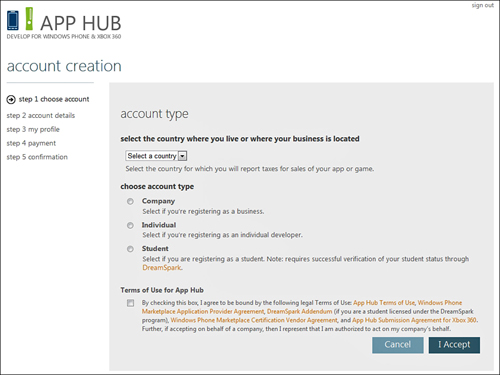
After signing into the App Hub for the first time you will be asked to select a country and an account type of company, individual, or a student. Select the option that best represents you and click the I Accept button (Figure 1.3).
Figure 1.3. Selecting an account type
The next screen will ask for your personal details such as name and address (Figure 1.4). Enter your information and click the Next button.
Figure 1.4. Personal details page

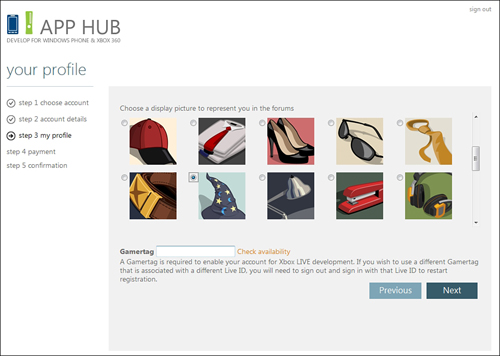
The next page allows you to select an image to represent your profile in the forums and an Xbox Gamertag if you don’t have one already (Figure 1.5). After making your selection press the Next button.
Figure 1.5. Selecting personal image and gamertag
Finally you will need to select a membership and add your payment information (Figure 1.6). A membership currently costs $99 a year.
Figure 1.6. Selecting membership

After you have completed the payment process your membership is complete and you are ready to go.
XNA Game Studio Connect
When you develop your games for the Xbox 360, you write the code in Visual Studio on your Windows PC and then send that code to your Xbox 360 where it runs. You still have the ability to debug in Visual Studio from your PC the code that runs on the Xbox 360.
To connect and send your code over to the Xbox 360, your Xbox needs to run the XNA Game Studio Connect title. You need to download XNA Game Studio Connect from the Xbox LIVE marketplace. Go to the marketplace on your Xbox 360 and select All Games, select XNA Creators Club, and then select the XNA Game Studio Connect.
After the download has finished, you need to launch XNA Game Studio Connect by going to your games and selecting All Games. Scroll down to the bottom of the list and launch XNA Game Studio Connect.
If you see an error message that says you need an XNA Creators Club Premium membership when you launch the XNA Game Studio Connect, this is because the account that is currently logged in does not have the membership and can’t run XNA Game Studio Connect.
XNA Game Studio Device Center
After you launch XNA Game Studio Connect for the first time, notice the 5-by-5 code at the bottom of the screen. This is used to connect your Xbox 360 to your Windows PC that you use for development.
To connect these devices, you need to launch the XNA Game Studio Device Center application. You can find XNA Game Studio Device Center by going to the Start menu, selecting All Programs, selecting Microsoft XNA Game Studio 4.0, and then clicking XNA Game Studio Device Center.
Next, click the Add Device button and select the Xbox 360 as the type of device you want to add. You are prompted to enter the 5-by-5 code that is displayed on the Xbox 360 in XNA Game Studio Connect. After entering a valid 5-by-5 code, your Xbox 360 is connected to your Windows PC. You can close the XNA Game Studio Device Center.
Note
You might notice that the Zune is listed as a device you can add. XNA Game Studio 4.0 does not support developing for the Zune, but past versions did and the option remains to support past releases.
Your Xbox 360 is now ready for development.
Windows Phone Developer Registration Tool
Although you can run your Windows Phone 7 games in the emulator without any additional setup, it is feels amazing to see your code run on a real device. To develop games or applications for your Windows Phone 7 device, you first need to unlock your phone.
To setup your Windows Phone 7 device for development and debugging first plug your phone into your Windows PC using the cable provided with your phone. The Zune client software on your PC should start by default, but if it does not, you need to start the Zune client software.
To register your phone, you need to use the Windows Phone Developer Registration tool that can be found under the Windows Phone Developer Tools Start menu. When you launch the Windows Phone Developer Registration tool, you will see a place to enter you username and password for the account that you created previously. After your credentials are verified, your phone is ready for development and debugging.
Writing Your First Game
Now that you have installed the tools and set up your Xbox 360 and Windows Phone 7 device, you are ready to create your first game. The first game we create is the default template for the three different game types. When you create a new project, a new class inherits from Microsoft.Xna.Framework.Game. This is your game class and overrides some important methods that you will use. For example, a LoadContent method loads all of the game content. An Update method run each frame is where you should handle updating objects and reading user input. A Draw method, by default, clears the screen to a solid color called CornflowerBlue.
Your First XNA Game Studio Windows Game
To create your first XNA Game Studio Windows Game, you need to first open Visual Studio. To create the new project, select File, and then select New Project. In the left column, be sure to select XNA Game Studio 4.0, which is under the Visual C# tree. You can see the number of projects that you can create. Select the Windows Game (4.0) project, give it a name, and click the OK button.
The new project opens to the generated new Game class. You can now run the game by pressing the F5 key. You should see a solid light blue window display. You can press the Escape key or click the Close button on the window to exit the game.
That’s all there is to it. You have created your first XNA Game Studio Windows game.
Your First XNA Game Studio XNA Xbox 360 Game
Now let’s create your first XNA Game Studio Xbox 360 game. Just like before, select the File, New Project menu in Visual Studio. Select the Xbox 360 Game (4.0) project, give it a name, and click OK.
The new project opens to the Game class. If you have XNA Game Studio Connect running, you can start the game by pressing F5.
Again, you can see your game run on the Xbox 360, a light blue screen. Pressing the Back button on the controller exits the game back to XNA Game Studio Connect.
You have now built your first XNA Game Studio Xbox 360 game and run it in on the console.
Your First XNA Game Studio Windows Phone 7 Game
Finally, let’s create a Windows Phone game. Go to File, New Project in Visual Studio. In the New Project dialog, select the Windows Phone Game (4.0) project, give it a name, and click the OK button.
You can run your Windows Phone games on both the Windows Phone 7 Emulator and on the physical Windows Phone 7 device. There is a drop-down selector in the upper left of the tool bar in Visual Studio that enables you to select which to use.
Select Windows Phone 7 Emulator from the drop-down menu and press F5. This launches the Windows Phone 7 Emulator and starts your game. Pressing the Back button on the emulator exits your game but the emulator continues to run. You can leave the emulator running between debugging sessions to speed up your development process.
Now select Windows Phone 7 Device from the drop-down menu in Visual Studio and press F5. If you have your Windows Phone 7 device connected and registered, the game launches on your device showing the light blue screen. Pressing the hardware Back button exits your game.
Download Samples
The samples in this book can be downloaded from the following URL:
http://www.informit.com/title/9780672333453
There are also many educational resources available on the App Hub site at the following URL:
Summary
Congratulations, you have in a short period of time created games that run on three different platforms including Windows, Xbox 360, and Windows Phone 7. As you continue to read this book, you will learn much more about how to create a compelling game that uses 2D and 3D graphics, audio, input, storage, media, avatars, gamer services, and networking.
Now that you have your development PC, Xbox 360, and Windows Phone 7 device set up for development, you can start to create some games. Don’t forget that you can download all of the samples from this book at http://www.informit.com/title/9780672333453.
In the next chapter, we start to draw and animate 2D images to the screen.