
Viewing images
You can view your image at any magnification level from 0.29% (Photoshop) or 12.5% (ImageReady) to 1600% of the image’s actual size. Adobe Photoshop displays this percentage in the image window title bar. When you use any of the viewing tools and commands, you affect the display of the image, not the image dimensions or file size.

Using the View menu
To enlarge or reduce the view of an image using the View menu, do one of the following:
- Choose View > Zoom In to enlarge the display of the image.
- Choose View > Zoom Out to reduce the display of the image.
- Choose View > Fit on Screen. The size of the image and the size of your monitor determine how large the image appears on-screen.
Each time you choose a Zoom command, the view of the image is resized. The percentage at which the image is viewed is displayed in the Title bar and in the lower left corner of the image window.
Using the zoom tool
In addition to the View commands, you can use the zoom tool to magnify and reduce the view of an image.


Scrolling an image
You use the hand tool to scroll through an image that does not fit in the active window. If the image fits in the active window, the hand tool has no effect when you drag it in the image window.
1. | Drag the lower right corner of the image window inward to reduce the window size so that only part of the image fits in the window. |
2. | Select the hand tool ( Like the zoom tool, you can select the hand tool from the keyboard without deselecting the active tool. |
3. | Select any tool but the hand tool. |
4. | Hold down the spacebar to select the hand tool from the keyboard. Drag to reposition the image. Then release the spacebar. |
5. | Double-click the zoom tool to return the image to 100% magnification. |
Note
To return the window to its original size at 100% view, select Resize Windows to Fit in the zoom tool options bar, and then double-click the zoom tool.
Using the Navigator palette
The Photoshop Navigator palette lets you scroll an image at different magnification levels without scrolling or resizing an image in the image window. (ImageReady does not have a Navigator palette.)
1. | If you don’t see the Navigator palette, choose Window > Show Navigator to display it. |
2. | In the Navigator palette, drag the slider to the right to about 300% to magnify the view of the skater. As you drag the slider to increase the level of magnification, the red outline in the Navigator window decreases in size. |
3. | In the Navigator palette, position the pointer inside the red outline. The pointer becomes a hand. Dragging slider to 200%
200% view of image
View in Navigator palette
|
4. | Drag the hand to drag the red outline to different parts of the image. In the image window, notice that the area of the image that is visible also changes as you drag in the Navigator palette. You can also draw a marquee in the Navigator palette to identify the area of the image you want to view. |
5. | With the pointer still positioned in the Navigator palette, hold down Ctrl (Windows) or Command (Mac OS), and draw a marquee over an area of the image. The smaller the marquee you draw, the greater the magnification level in the image window will be. |


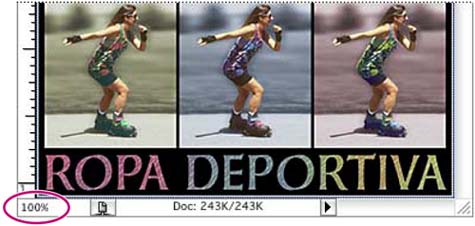
Using the Info bar
In Photoshop, the Info bar is positioned at the lower border of the application window (Windows) or the lower border of the image window (Mac OS). This area displays the current magnification, an area for specific choices of information types, and context-sensitive information about the currently selected tool. In ImageReady, the Info bar appears at the lower border of the image window.
You can click an arrow button on the Info bar to open a pop-up menu of different categories of information. Your selection from the menu determines what kind of information appears next to that arrow on the Info bar.
Note
The pop-up menu on the Info bar is not available if the window is too small.
Photoshop Info bar

ImageReady Info bar

By default, the file size for the active image appears in the Info bar. The first value indicates the size if saved as a flattened file with no layer data; the second value indicates the size if saved with all layers and channels.
 | In ImageReady, you can use the percentage pop-up menu in the Info bar to change the view of an image by a preset zoom percentage. For complete information on the ImageReady Info bar options, see “Looking at the Work Area” in ImageReady 7.0 online Help. |