
Working with image maps (ImageReady)
An image map is an image that contains multiple hypertext links to other files on the Web. Different areas, or hotspots, of the image map link to different files. Adobe ImageReady creates client-side image maps and server-side image maps.
Creating image maps is one of the functions that you must do in Adobe ImageReady. You can use Photoshop to create slices, which share certain functionality with image maps, but you cannot create image maps with Photoshop.
Note
For information about slicing an image into multiple image files and linking each slice to another Web page, see Lesson 15, “Adding Interactive Slices and Rollovers.”
Using layers to create image maps
In this procedure, you’ll create an image map in an existing image. You define hotspots using layers or one of the image-map tools. Then you’ll assign each hotspot to an URL, linking it to a site on either a local computer or the World Wide Web.
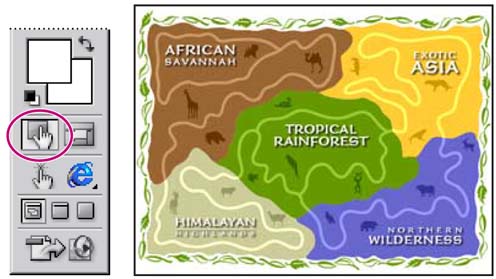
You’ll use a version of the zoo-map image that places each colored region on its own layer. You’ll convert each layer to an image-map hotspot. By using layers to define the hotspots, you easily gain control over the shapes of those areas.
1. | |
2. | In the Settings menu on the Optimize palette, choose GIF 64 Dithered. |
3. | In the Layers palette, select the African Savannah layer. |
4. | |
5. | |
6. | In the Quality option on the Image Map palette, drag the slider or type 90 to make the red line more closely conform to the savannah area shape. Now that you’ve defined the hotspot area, you can link it to another file in your Web site or to a different location on the Web. For the purposes of this lesson, you’ll link your hotspots to fictitious URLs for the zoo. |
7. | In the URL option in the Image Map palette, type the fictitious address of a Web site, http://www.adobe.com/african_savannah.html, in the URL text box. In the Layers palette, a pointing-finger icon now appears on the African Savannah layer, indicating that the layer has a layer-based image map.
Note If you prefer, you can use other URLs for this exercise, linking the hotspots to your own local intranet pages or to some of your favorite sites on the World Wide Web. |
8. | (Optional) For more practice with image maps, select the other four areas of the zoo map (Exotic Asia, Tropical Rainforest, Himalayan Highlands, and Northern Wilderness) and, one layer at a time, repeat steps 3 through 7 to create more layer-based image maps. Use the same settings, but change the “african_savannah” part of the URLs, replacing it with the name of the layer used to create the image map. Don’t worry now about any mistakes you might make when you type in your URLs. You’ll learn how to edit image-map information later, in “Creating the HTML file and editing image-map information” on page 447. |
9. | Choose File > Save. |


Adjusting the cross-platform gamma range
Before you take your final steps to publish your image-mapped illustration of the zoo image on your network or the Web, you’ll verify whether or not the brightness of your image is compatible across monitors on different platforms. Machines running Windows generally display a darker midtone brightness, or gamma, than Macintosh machines.
Note
Before starting this part of the lesson, be sure to calibrate your monitor so that it displays color accurately. For information, see Lesson 17, “Setting Up Your Monitor for Color Management.”
1. | In the ImageReady toolbox, click the Toggle Image Maps Visibility button (
|
2. | Choose View > Preview > and then choose a command as follows, to preview the image as it will appear on the platform you’re not using:
|
3. | Choose Image > Adjustments > Gamma. |
4. | Click the appropriate button:
|
5. | Choose File > Save Optimized As. |
6. | In the Save Optimized As dialog box, choose Images Only from the Format menu, use the default name 14Start4.gif, and click Save. Now you’ll preview your image map in a Web browser. |
7. | |
8. | In the browser window, move the pointer over the different zoo regions, and notice that these elements contain hypertext links. If you had a modem and an Internet connection and if these were authentic URLs, you could click the hotspots to jump to the specified page of the zoo site.
|
9. | Quit your browser to return to Adobe ImageReady. |


Creating the HTML file and editing image-map information
When you save an image map in an HTML file, the basic HTML tags needed to display the image on a Web page are generated automatically. The easiest way to do this is simply to choose the HTML and Images Format option when you save the optimized image.
Once you have created the HTML file, it can easily be updated to reflect any changes, such as new or modified image-map areas or URLs.
1. | |
2. | In the Save Optimized As dialog box, select the HTML and Images option on the Save As Type pop-up menu (Windows) or the Format menu (Mac OS). Use the default name 14Start4.html, and save the file in your Lessons/Lesson14 folder. If the Replace Files dialog box appears, click Replace. When you select the HTML and Images option, an HTML page containing the image is saved automatically, in addition to the graphic file. This HTML file will have the same name as the image, but with the .html extension. Now you’ll use ImageReady to change one of the URL links and update the HTML file. |
3. | In the toolbox, select the image map select tool ( |
4. | In the image window, click to select the African Savannah image-map area. |
5. | In the Image Map palette, change the URL to http://www.adobe.com/newafrica.html.
|
6. | When you finish making changes, choose File > Update HTML. |
7. | |
8. | Choose File > Close to close the image. Don’t save changes, if prompted. |

You can use your Web browser to open and view 14Start4.html. You can also open the file in a text editor, or a word-processing or HTML editing program to make your own revisions to the HTML code
For the Web: HTML File-Naming ConventionsUse the UNIX® file-naming convention, because many network programs truncate (shorten) long filenames. This convention requires a filename of up to eight characters, followed by an extension. Use the .html or .htm extension. Do not use special characters such as question marks (?) or asterisks (*), or spaces between the letters in your filename—some browsers may not recognize the pathname. If you must use special characters or spaces in the filename, check with an HTML editing guide for the correct code to use. For example, to create spaces between letters you will need to replace the space with “%20”. |