
Chapter Eight. Aligning, Arranging, and Clipping
Illustrator objects can be aligned and arranged in three dimensions. You can align objects horizontally or vertically, and you can move objects in front of or behind each other. As you might expect, Illustrator provides many options for each of these processes. You can align objects in two dimensions using the Align panel or, alternately, rely on snapping to gridlines. You can roughly locate and align objects with a ruler (and guides), or you can precisely locate objects using the Info panel.
Similarly, there are many ways to “crop” objects in Illustrator. There are several ways to define a printable area of an illustration. You can rely on the artboard or the artwork itself, define a specific printable area, or use an object such as a cookie cutter to trim artwork.
This chapter explores the options for aligning, arranging, and clipping objects.
#73. Aligning and Distributing Objects
Alignment and distributing objects is managed in the Align panel.
Tip
Press the Command key and click (Mac) or right-click (Windows) on a selected object(s). Then choose Arrange from the context menu to access the four arrange options.
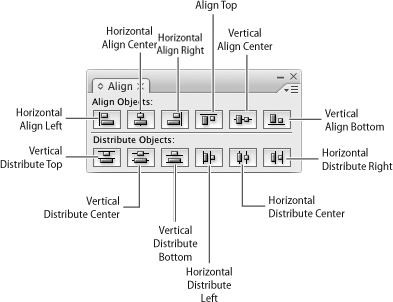
To view the Align panel, choose Window > Align. The six icons in the top row of the panel align selected objects left, horizontal center, right, top, vertical center, or bottom. The icons in the bottom row distribute (space) objects using the top, vertical center, bottom, left, horizontal center, or right side of the selected objects (Figure 73a).
You can automatically align and evenly space selected objects in Illustrator. Automatic horizontal alignment can be applied to the top, center, or bottom of objects, and vertical alignment can be applied to the middle, left, or right of objects.
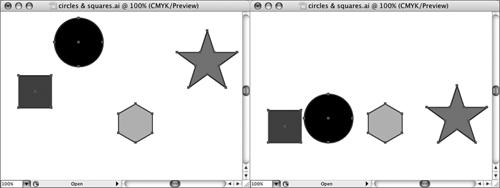
Top alignment aligns the tops of objects using the highest object as the alignment point. Center vertical alignment aligns the centers of objects using the center point of the selected objects as the alignment horizon. Bottom alignment aligns the bottoms of objects using the lowest object as the alignment point (Figure 73b).
Figure 73b. Objects on the left have been bottom aligned on the right.
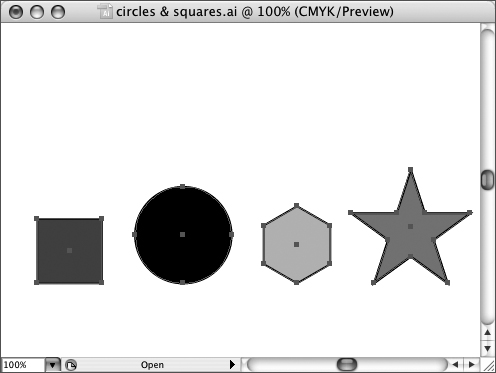
Distribution (spacing) options in the Arrange panel allow you to redistribute the location of objects to equalize spacing between them. Horizontal Distribute Left, for example, creates equal spacing between selected objects using the leftmost object as the left anchor.
When you apply distribution, the left and right objects (or top and bottom objects when you distribute vertically) don’t move, but the other objects respace. Horizontal and vertical center distribution keeps the left and right (or top and bottom) objects in place but uses the center point between them as the alignment point for respacing. Spacing is calculated from the centers of selected objects (Figure 73c).
Figure 73c. Distributing a set of objects to create even spacing between them.
#74. Snapping to Grids
The Align panel quickly and automatically aligns selected objects. For more flexible alignment processes, you can display and snap objects to regularly spaced gridlines. If you’re working on technical drawings, maps, floor plans, layouts, or other illustrations that rely on measurements, gridlines can be very useful.
Note
For details on defining grids, see #5, “Creating and Using Grids.”
To use Snap to Grid, first display grids by choosing View > Show Grid (Figure 74a).
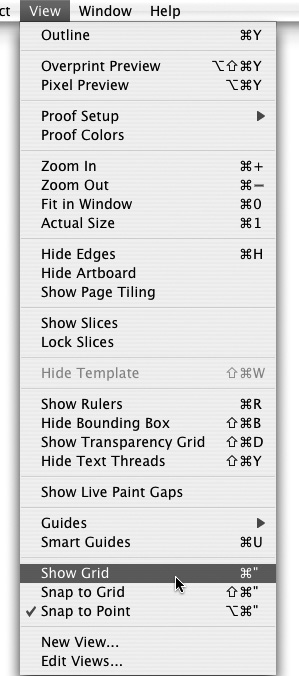
Turn on Snap to Grid by choosing View > Snap to Grid. The key to effectively using the Snap to Grid feature is defining grids spaced in increments that match your project and tweaking snapping sensitivity without so much “magnetic” pull to the gridlines that you can’t draw anywhere near a gridline.
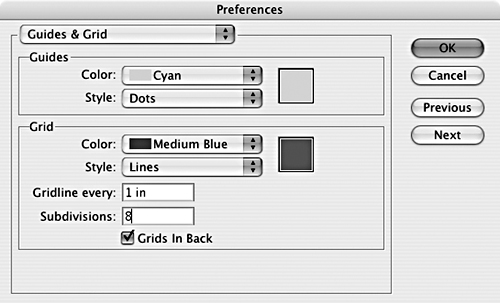
To change grid spacing, choose Illustrator (Mac) or Edit (Windows) > Preferences > Guides & Grid. In the Guides & Grid panel of the Preferences dialog, enter grid spacing in the Gridline every box, and enter the number of subdivisions (tick marks) you want to display in the Subdivisions area (Figure 74b).
Figure 74b. Defining grid spacing.
#75. Measuring and Placing Objects
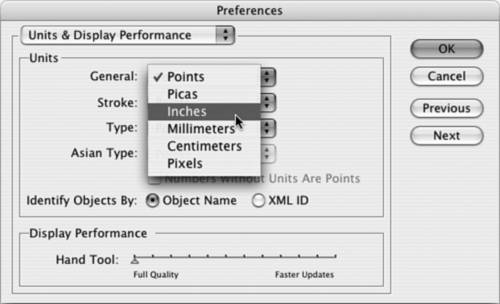
Rulers allow you to eyeball the dimensions and location of objects. You can view rulers by choosing View > Show Rulers. Hide rulers by choosing View > Hide Rulers. Set the unit of measurement on the ruler by choosing Illustrator (Mac) or Edit (Windows) > Preferences > Units & Display Performance. The General drop-down menu in the Units panel of the Preferences dialog defines the unit that is displayed on the ruler (Figure 75a).
Figure 75a. Defining the units of measurement for the ruler.
While rulers work for quick-and-dirty measuring and locating, you can perform these functions more accurately using other tools. For instance, to define exact sizing, view the Info panel (Window > Info) and resize with the Scale tool. Better yet, use the Transform panel, which allows you to interactively enter exact values for size and location of a selected object (Figure 75b).
Figure 75b. Locating precisely with the Transform panel.
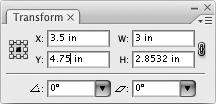
The Info panel displays the X (distance from the zero position of the horizontal ruler) and Y (distance from the zero position of the vertical ruler) coordinates.
#76. Managing Stacking
The stacking hierarchy in Illustrator is:
• Layers
• Sublayers
• Stacking, within a layer
In complex illustrations, you’ll use all three of these stacking options. You might organize large elements of an illustration by layer, with more complex layers divided into sublayers. Then, within layers (or sublayers), the question “What’s on top?” is answered by stacking order.
Move selected objects up or down in the stacking order by choosing Object > Arrange, and then choosing Bring to Front, Bring Forward, Send Backward, or Send to Back (Figure 76).
Figure 76. Sending selected objects to the back of a stack.
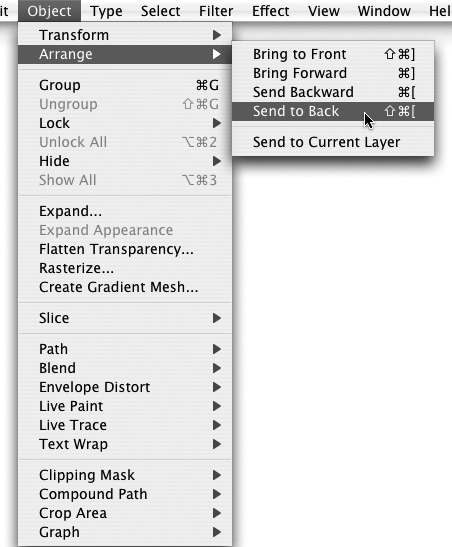
• Bring to Front moves the selected object(s) in front of all objects on the selected layer.
• Bring Forward moves the selected object(s) forward (up) one stacking layer at a time.
• Send Backward moves the selected object(s) backward (down) one stacking layer at a time.
• Send to Back moves the selected object(s) behind all objects on the selected layer.
#77. Using Clipping Masks
Raster images are fairly easy to crop. You use a cropping tool, draw a marquee, and click. Trimming vectors is more complex, since you are dealing with defined vectors, not a group of unassociated dots.
To “crop” a vector image, you generally mask it. You need two things to mask an object:
• A masking object, which can be any vector object (but not a raster object)
• An object that will be masked (trimmed)
Note
A masking object can be type. See #78, “Masking with Type,” for details.
To create and apply a mask, follow these steps:
- Create artwork; vectors and rasters can be masked.
- Draw a path or shape that will serve as a masking object.
- Make sure the masking object is above the masked object in the stacking order. If it’s not, move it to the top of the stacking order.
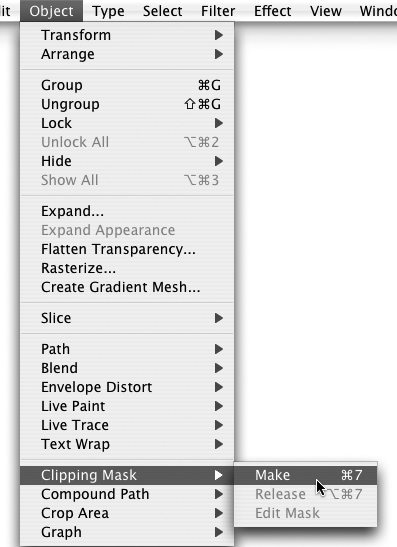
- Select both the masking and masked objects, and choose Object > Clipping Mask > Make (Figure 77a).
Figure 77a. Creating a clipping mask.
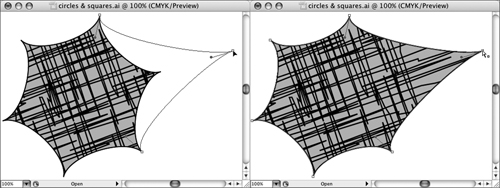
You can edit the shape and location of the mask interactively. Use the Direct Selection tool to edit the path of a masking object, and edit the size, shape, location, or anchors as you would any path (Figure 77b).
Figure 77b. Reshaping a clipping mask with the Direct Selection tool.
#78. Masking with Type
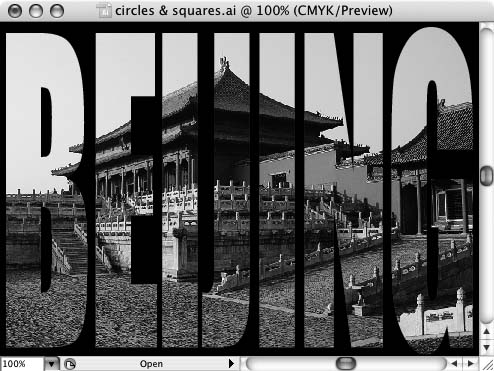
Using type as a masking object is a fun technique. A common use is to impose type over a photo, letting some of the photo show through the type (Figure 78a).
Figure 78a. Using type as a clipping mask.
To apply type as a mask, follow these steps:
- Create some type—either point type or area type.
Note
Impact typeface works particularly well for type that will serve as a mask because it is very basic and thick, revealing a lot of the masked object.
- Create artwork to be masked. This can be any artwork—vectors, gradient fills, patterns, or just plain vector drawings.
- Place the type on top of the artwork to be masked (select the type and choose Object > Arrange > Bring to Front, if necessary).
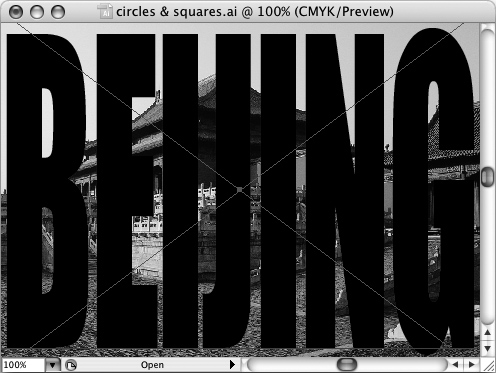
- Select both the type and the artwork to be masked, and choose Object > Clipping Mask > Make (Figure 78b).
Figure 78b. Preparing to generate a mask from type.
#79. Applying Opacity Masks
Opacity masks combine masking and transparency. The path of the opacity masking object creates a mask, just like a regular mask. But within the masked area, the darkness or lightness of the color of the fill defines how much the masked area will be revealed.
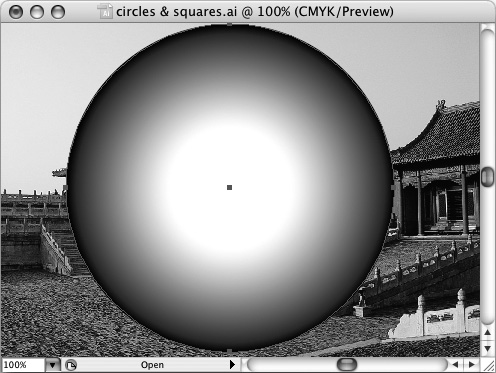
Typically, masking objects have gradient fills. By default, the dark areas of an opacity masking object reveal less of the masked object, whereas light areas reveal more of the masked object (Figure 79a).
Figure 79a. A circle filled with a black-to-white gradient works well as an opacity mask.
To apply a gradient fill as an opacity mask, follow these steps:
- Create artwork to be masked. This can be raster and/or vector art, or type.
- Create a shape to use as an opacity mask and fill it with a black-to-white gradient fill.
- Locate the opacity masking object over the artwork to be masked.
- View the Transparency panel (Window > Transparency).
- Select both the opacity masking object and the artwork to be masked.
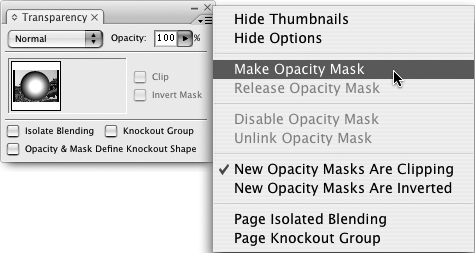
- From the Transparency panel menu, choose Make Opacity Mask (Figure 79b).
Figure 79b. Generating an opacity mask from the Transparency panel.
- Click outside the masked set to reveal the results of the opacity mask.
By default, a link icon appears in the Transparency panel when an opacity mask is applied. The link icon indicates that the mask and masked objects are linked (and cannot be edited separately). You can unlink the opacity mask from the underlying image by clicking the link icon. When the mask and masked object are unlinked, you can edit or move either the masked object or the opacity mask to change the area that is revealed through the mask.