
Chapter Nine. Transparency, Filters, and Effects
Filters and effects apply a wide variety of attributes to distort paths. They are really nothing more than sets of transformations applied to an object’s path and fill, changes you could tediously make individually with tools and fills. The advantage of using filters and effects is that they combine and package sets of stroke and fill changes, allowing you to quickly assign changes ranging from drop shadows to arrowheads to paths.
The fundamental difference between filters and effects is that effects do not alter the underlying path of the object to which they are applied. Filters, on the other hand, alter the object’s path. Effects can be adjusted, changed, and removed.
While attributes such as transparency and blending are not usually thought of as effects, it’s helpful to think of them as effects because, like other effects, they do not affect underlying paths and can be removed or adjusted.
The techniques in this chapter explore Illustrator’s wide variety of effects and filters.
#80. Applying Transparency
A semitransparent object allows underlying objects to be partly visible, like a foggy day partially obscures the sun. A fully transparent object is invisible and has no effect on objects that it is stacked on top of. At the other end of the spectrum, a fully opaque object completely covers objects below it in the stacking (or layer) order.
Opacity and transparency are opposites. An object with 100% opacity is a fully opaque object, and an object with 100% transparency (or 0% opacity) is a completely invisible object.
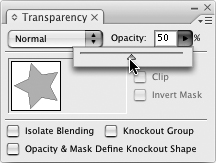
Choose Window > Transparency to view the Transparency panel. The value in the Opacity slider box defines how much transparency is applied to a selected object (Figure 80a).
Figure 80a. Defining 50% transparency.
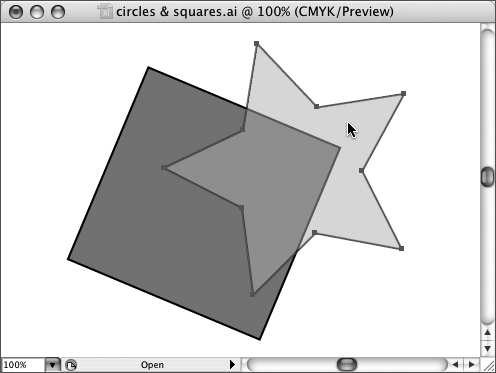
When you move a semitransparent object on top of another object, the covered section of the bottom object is partially visible (Figure 80b).
Figure 80b. Placing a semitransparent object over another object.
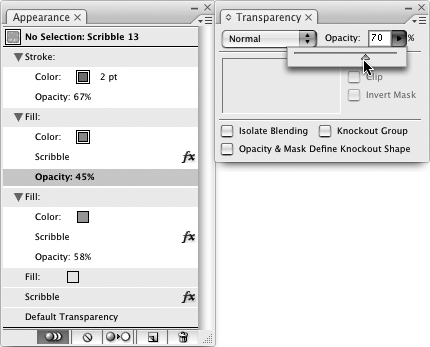
You can apply transparency settings to only the stroke or fill of a selected object. To do this, select the object to which you want to apply transparency and view the Appearance panel. Click Stroke in the Appearance panel and adjust the transparency for the selected stroke in the Transparency panel. Similarly, click Fill in the Appearance panel and adjust the transparency for the fill separately (Figure 80c).
Figure 80c. Defining transparency for a stroke.
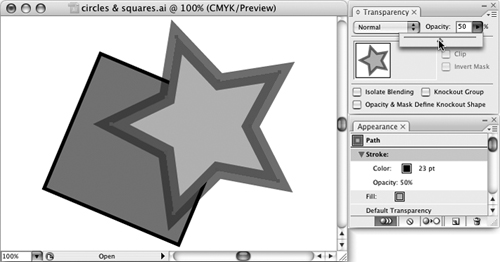
In this way, you can apply different fill and stroke transparency settings to the fill and stroke of an object.
The Blending Mode drop-down menu in the Transparency panel offers alternate ways to apply transparency. Blending modes work like tinted lenses, altering not just the brightness or darkness but the color of underlying objects.
The following blending effects are available from the Blending Mode drop-down menu in the Transparency panel.
• Normal Plain transparency, no distortion of color
• Darken Changes underlying colors that are lighter than the overlay color to the overlay color
• Multiply Darkens color of underlying objects
• Color Burn Darkens the underlying object
• Lighten Lightens underlying colors that are darker than the overlay
• Screen Lightens color of underlying objects
• Color Dodge Brightens the underlying object
• Overlay Sharpens the contrast of a color (or pattern) of underlying objects by intensifying contrast
• Soft Light Lightens the color of underlying objects if the filtering object color is lighter than 50% gray. Otherwise, the underlying object is made darker.
• Hard Light Simulates shining a bright light on the underlying object
• Difference Generates a new color based on the difference between the brightness values of the overlapping colors
• Exclusion Changes color using the same kind of calculation as the Difference effect, but the contrast between the original color and the changed color is muted and less dramatic than the Difference effect
• Hue Retains the color of the top filtering object while adopting the saturation (intensity) and brightness of the bottom object(s)
• Saturation Retains the saturation (intensity) of the top filtering object(s) while adopting the brightness and color of the bottom object(s)
• Color Retains the hue and saturation of the top filtering object(s) while adopting the brightness of the bottom object(s)
• Luminosity Retains the brightness quantity (intensity) of the top filtering object(s) while adopting the saturation (intensity) of the bottom object(s)
#81. Step and Smooth Blends
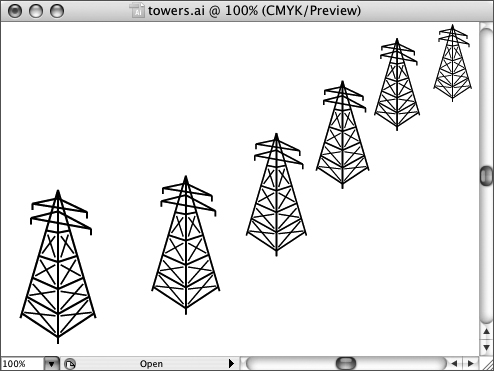
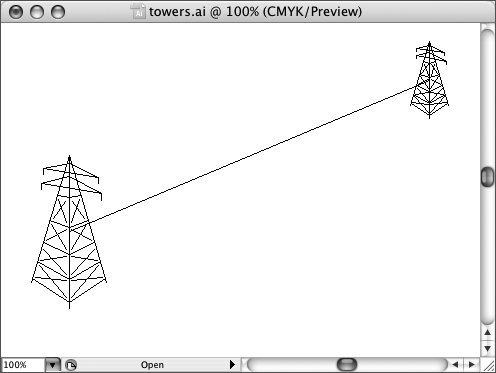
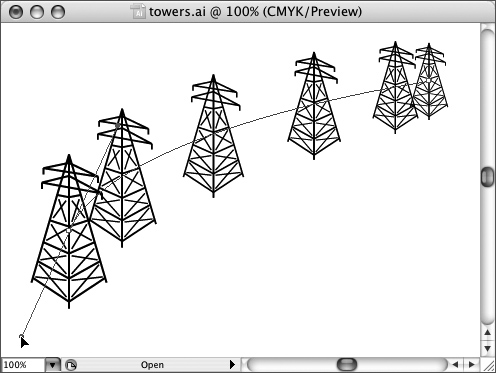
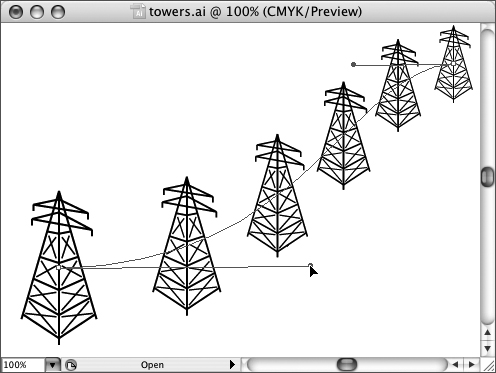
Illustrator blends generate many transitory objects between two objects. Blends have two main functions. You can use blends to save time by generating many objects. For instance, you can create a quick set of utility towers by blending the first and last tower. More often than not, you’ll use a step blend for this kind of work, generating identifiable and distinct blend objects in between two blended objects (Figure 81a).
Figure 81a. Using a step blend to generate a set of utility towers.
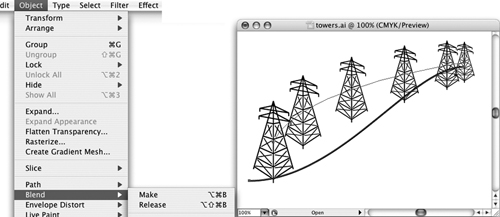
You can blend two selected objects by choosing Object > Blend > Make. But before generating a blend, you should define blend options. Choose Object > Blend > Blend Options to open the Blend Options dialog (Figure 81b).
Figure 81b. Defining blend options.
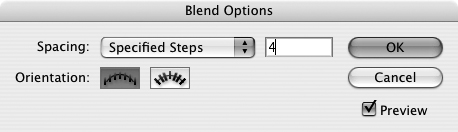
In the Spacing drop-down menu, choose from Smooth Color, Specified Steps, or Specified Distance. Smooth Color creates a gradient-like effect. Specified Steps allows you to define a set number of steps. Specified Distance lets you define the distance between steps (for instance, you can space steps one fourth of an inch apart by entering .25 inches).
You can redefine blend options for an existing blend by selecting the blended objects and choosing Object > Blend > Blend Options.
#82. Adjusting Blends
In addition to adjusting the steps in a blend, you can change the spine (path) of the blend, replace the spine of a blend with another path, and adjust the spacing of blends interactively.
To adjust the path of a blend, you edit the spine, which is a regular Illustrator path connected by two anchors. The hard part is finding the spine, since it has no stroke color. One solution is to view the document in Outline view (View > Outline) and select the spine in Outline view (Figure 82a).
Figure 82a. Viewing a blend spine in Outline view.
Note
You can revert to Preview mode by choosing View > Preview.
With a blend spine selected, edit the anchors to change the path (Figure 82b).
Figure 82b. Editing a blend spine.
You can replace a blend spine with another path by selecting both the blend and the alternate path, and choosing Object > Blend > Replace Spine (Figure 82c).
Figure 82c. Replacing a blend spine.
You can interactively adjust spacing of a blend by converting one or both of the blend spine anchors to smooth points and editing the length of the anchor control point handles. This is a very dynamic technique that allows you quick and detailed control over the spacing of generated blend objects. It takes a bit of practice, but once you get the hang of it, your ability to manage blends will increase exponentially (Figure 82d).
Figure 82d. Adjusting the spacing of generated blend objects by changing the distance of an anchor control point handle from the anchor itself.
Note
See #19, “Drawing with the Pen Tool,” for advice on changing anchor properties.
#83. Applying Filters
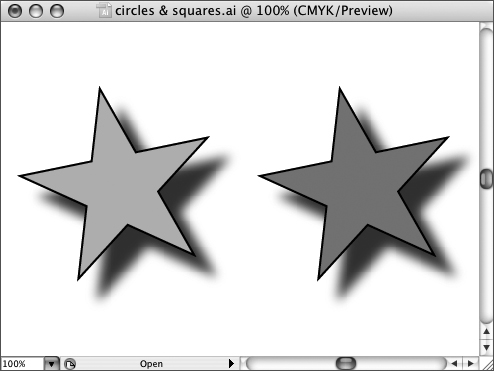
Many filters and effects produce the same appearance. For instance, if you apply a drop shadow filter and a drop shadow effect to a path, the appearance of both objects is the same in Preview mode (Figure 83a).
Figure 83a. The drop shadow filter (left) and effect (right) produce the same appearance.
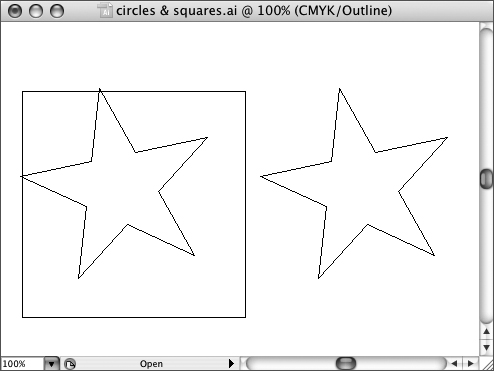
The main difference between effects and filters is that effects do not change the path of an object, but filters do. You can verify this by viewing objects with effects and filters applied to them in Outline view (Figure 83b).
Figure 83b. The drop shadow filter (left) and effect (right) appear differently in Outline view, where only the path is displayed.
Note
To apply Photoshop filters in Illustrator, see #85, “Using Photoshop Effects.”
Photoshop filters are applied in a dialog that lists all available filters and provides sliders to edit the filter. Photoshop filters can only be applied to embedded, not linked, placed images.
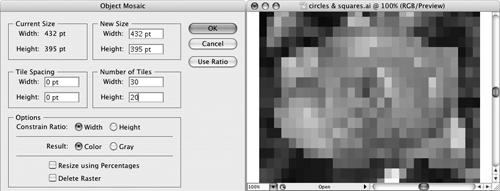
The Create submenu (Filter > Create) has two options. The Crop Marks menu option generates crop marks around the selected object(s). The Object Mosaic menu applies only to rasters (such as photos) and transforms illustrations into mosaic paintings (Figure 83c).
Figure 83c. Applying a mosaic filter.
#84. Applying Effects
Effects change the appearance of an object without changing the path. Apply an effect to selected objects by choosing an effect from the Effect menu and adjusting options in the Effect dialog. Like filters, effects are divided into two types. Illustrator effects are mainly designed for vectors.
Note
For more information on applying Photoshop effects and filters, see #85, “Using Photoshop Effects.”
To apply Illustrator (mainly vector-based) effects to selected object(s), choose the effect from the Illustrator section of the Effect menu. Illustrator effect dialogs for each effect include a Preview check box, so you can interactively adjust the effect settings and preview the results on the artboard (Figure 84a).
Figure 84a. Applying a warp effect and previewing the results on the artboard.

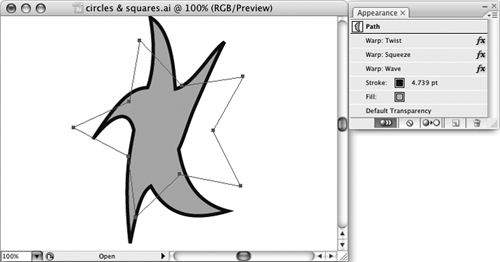
You can monitor (and edit or remove) applied effects for a selected object in the Appearance panel. Select Window > Appearance to view the Appearance panel (Figure 84b).
Figure 84b. The effects applied to the path are listed in the Appearance panel.
The main groups of Illustrator effects include:
• 3D effects generate extruded and revolved objects. For more information on 3-D effects, see #88, “3-D Extrusion Effects,” #89, “3-D Rotation and Revolve Effects,” and #90, “Mapping Symbols onto 3-D Effects.”
• Convert to Shape effects convert selected artwork to rectangles, ellipses, or rounded rectangles.
• Distort and Transform effects warp, wrinkle, pucker, bloat, and apply other preset changes to selected paths.
• Path effects display path attributes (such as stroke) away from the actual path.
• Pathfinder effects apply changes similar to those in the Pathfinder panel (see #41, “Using Pathfinders”).
• Rasterize effects create the appearance of rasterization without permanently converting a vector object to a raster.
• Stylize effects include the widely used drop shadow and arrowhead effects.
• SVG filters look like other filters—the difference is that they are based on SVG code used for programming digital graphics for devices like cell phones. See #94, “Sharing Editable Illustrator Files,” for a discussion of SVG format.
• Warp filters apply over a dozen preset waves and warps to selected objects.
#85. Using Photoshop Effects
Illustrator has a little bit of Photoshop in it. The Photoshop sections of the Filter and Effect menus provide access to many of the tools used to distort and play around with photos in the Filter menu in Photoshop or the same filter in Photoshop Elements (Figure 85a).
Figure 85a. Applying a Photoshop filter to a photo in Illustrator.
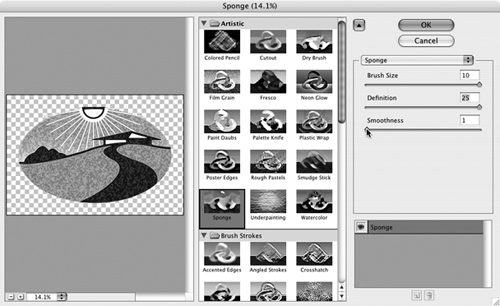
Access to Photoshop effects (in the Effect menu) in Illustrator allows you to apply photo effects to vectors to produce unusual results (Figure 85b).
Figure 85b. Applying a Photoshop effect to vector art.
Note
The Photoshop filters in the Filter menu can be applied only to raster images. If you want to convert selected vector art to a raster object to apply these filters, choose Object > Rasterize. And, you must embed (not link) images to be able to apply filters to them.
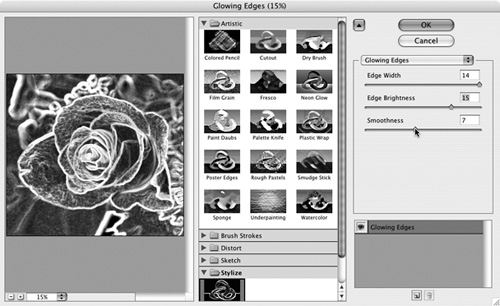
The easiest way to access most of the Photoshop effects or filters for selected artwork is to choose Filter > Filter Gallery, or Effect > Effect Gallery. The gallery provides access to the Artistic, Brush Strokes, Distort, Sketch, Stylize, and Texture sets of effects.
All effects and filters in the galleries provide several option sliders. As you experiment with them, preview the changes in the preview area on the left side of the dialog. Use the Zoom drop-down menu to zoom in and out.
Once you define a filter or effect, click OK.
#86. Warping with Liquify Tools
Illustrator calls the Warp, Twirl, Pucker, Bloat, Scallop, Crystallize, and Wrinkle tools liquify tools because they allow you to edit path objects with the flexibility of an almost liquid surface. Liquify tools are found on the Warp tool gallery (Figure 86a).
Figure 86a. The liquify tools.

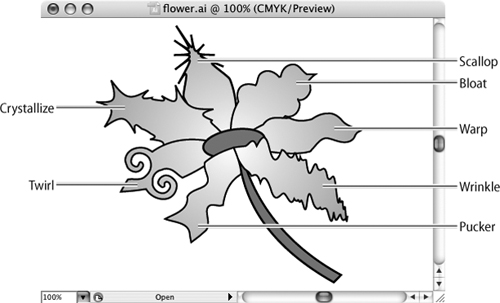
Different liquify tools have different value options as well as different combinations of complexity (Figure 86b).
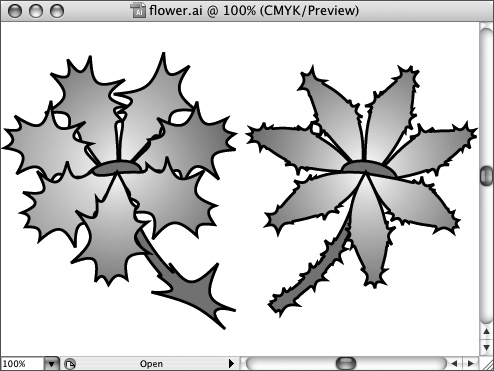
Figure 86b. Applying all the liquify tools to a flower.
Liquify tools are applied interactively to selected objects. Each liquify tool has a set of options. Double-click any of the tools to open the options dialog for that tool. Liquify tools all have adjustable brush sizes and shapes. Larger brush sizes produce more striking changes, whereas smaller brushes produce more subtle effects (Figure 86c).
Figure 86c. The Crystallize tool applied with a large brush (left) and a small brush (right).
#87. Using Graphic Styles
More than one effect can be applied to an object. Effects can also be grouped. For example, you can group arrowheads and a drop shadow, or a defined warp, blur, and texturize effect.
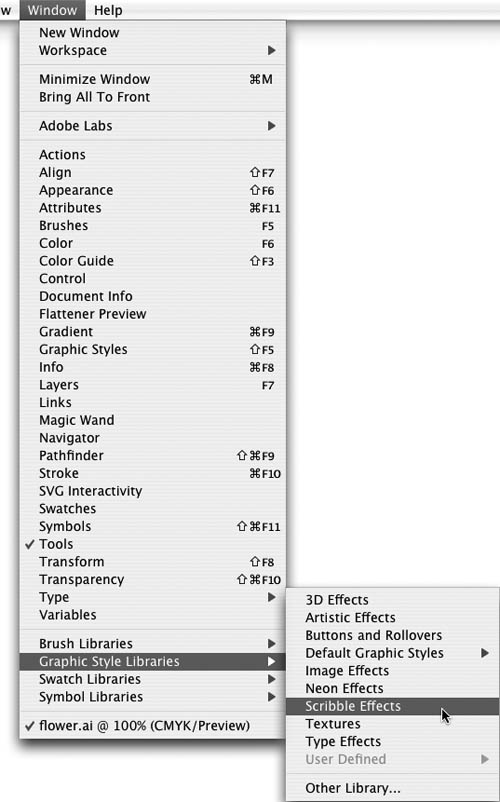
Graphic styles can include other attributes as well. Stroke and fill colors, stroke style, transparency, and fills can be included in graphic styles. Illustrator comes with nine preset graphic style libraries. Access them by choosing Window > Graphic Style Libraries (Figure 87a).
Figure 87a. The Scribble Effects set of graphic styles.
Since they are sets of effects, graphic styles don’t edit the paths in your artwork; they alter the appearance of objects. It’s helpful to think of the relationship between a graphic style and the affected artwork as a link. If a graphic style is edited, the object to which it is applied changes. If the graphic style is removed, the object reverts to its previous appearance without the styles.
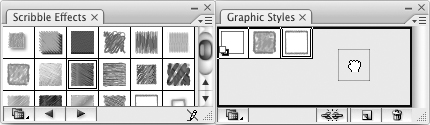
With the Graphic Styles panel open (Window > Graphics Styles), you can easily move graphic styles from any of the libraries onto the Graphic Styles panel, where they will be saved with your document and easily accessible. To do this, with both a styles library and the Graphic Styles panel open, just click a style in the style library. Alternately, you can drag a style from any of the graphic style libraries into the Graphic Styles panel (Figure 87b).
Figure 87b. Adding a style from a library to the Graphic Styles panel.
Applying a graphic style to a selected object, or objects, is easy: Simply click on a style in the Graphic Styles panel (or a graphic style library).
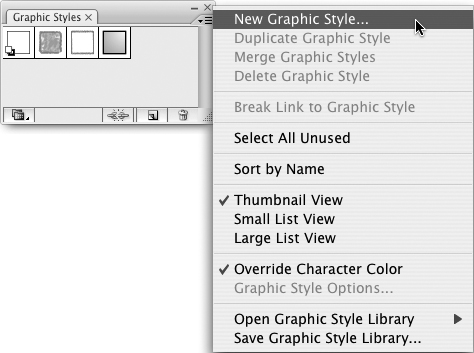
To create a new graphic style of your own, select an object and apply all the effects (you can also define stroke, fill, and other attributes) that you want to save as a graphic style. With the object still selected, click the New Graphic Style button in the Graphic Styles panel, or choose New Graphic Style from the Graphic Styles panel menu to create a new style with the attributes of the selected object (Figure 87c).
Figure 87c. Creating a new style.
Once you have defined your own custom style, you can apply it to selected objects by clicking on it in the Graphic Styles panel.
You can also edit graphic styles. When you do, the changes are applied to all objects in the document to which the style was applied. To edit a graphic style, follow these steps:
- Deselect any selected objects (Select > Deselect).
- Select the style to be edited in the Graphic Styles panel.
- View the Appearance panel (Window > Appearance). In the Appearance panel, double-click any of the attributes of the selected style to open the appropriate panel and edit the attributes (Figure 87d).
Figure 87d. Editing the transparency setting of a style element.
- With changes defined, choose Redefine Graphic Style (for your style) from the Appearance panel menu.