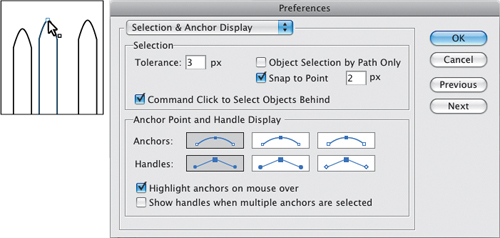
2. Selecting and Aligning
This lesson takes approximately an hour to complete. If needed, remove the previous lesson folder from your hard disk and copy the Lesson02 folder onto it.
![]()
Selecting content in Adobe® Illustrator® CS5 is one of the more important things you’ll do. In this lesson, you learn how to locate and select objects using the selection tools; protect other objects by grouping, hiding and locking them; and align objects to each other and the artboard.
Getting started
When changing colors or size and adding effects or attributes, you must first select the object to which you are applying the changes. In this lesson, you will learn the fundamentals of using the selection tools. More advanced selection techniques using layers are discussed in Lesson 8, “Working with Layers.”
1. To ensure that the tools and panels function as described in this lesson, delete or deactivate (by renaming) the Adobe Illustrator CS5 preferences file. See “Restoring default preferences” on page 3.
2. Start Adobe Illustrator CS5.
Note
If you have not already done so, copy the resource files for this lesson onto your hard disk, from the Lesson02 folder on the Adobe Illustrator CS5 Classroom in a Book CD. See “Copying the Classroom in a Book files” on page 2.
3. Choose File > Open, and open the L2start_1.ai file in the Lesson02 folder, located in the Lessons folder on your hard disk. Choose View > Fit Artboard In Window.
4. Choose Window > Workspace > Essentials.

Selecting objects
Whether you are starting artwork from scratch or editing existing artwork in Illustrator, you will need to become familiar with selecting objects. There are many methods for selecting objects in Illustrator. In this section, you will explore the main selection tools, including the Selection and Direct Selection tools.
Using the Selection tool
The Selection tool in the Tools panel lets you select entire objects.
1. Select the Selection tool (![]() ) in the Tools panel. Position the pointer over different shapes without clicking. The icon that appears as you pass over objects (
) in the Tools panel. Position the pointer over different shapes without clicking. The icon that appears as you pass over objects (![]() ) indicates that there is an object that can be selected under the pointer. When you hover over an object, it is outlined in blue.
) indicates that there is an object that can be selected under the pointer. When you hover over an object, it is outlined in blue.
2. Select the Zoom tool (![]() ) in the Tools panel and drag a marquee around the four colored shapes (the apples and hat) in the center of the page to zoom in.
) in the Tools panel and drag a marquee around the four colored shapes (the apples and hat) in the center of the page to zoom in.
3. Select the Selection tool, then hover the pointer over the edge of the red apple on the left. A word such as “path” or “anchor” may appear, because smart guides are turned on by default. Smart guides are snap-to guides that help you align, edit, and transform objects or artboards. Smart guides are discussed in more detail in Lesson 3, “Creating and Editing Shapes.”
4. Click the left red apple on its edge or anywhere in its center to select it. A bounding box with eight handles appears.

The bounding box is used when making changes to objects, such as resizing or rotating them. The bounding box also indicates that an item is selected and ready to be modified. The color of the bounding box indicates which layer the object is on. Layers are discussed more in Lesson 8, “Working with Layers.”
5. Using the Selection tool, click the red apple on the right. Notice that the left red apple is now deselected and only the right apple is selected.
Note
To select an item without a fill, you must click the stroke (border).
6. Add the left red apple to the selection by holding down the Shift key and clicking it. Both red apples are now selected.

Tip
To select all objects, choose Select > All. To select all objects in a single artboard, choose Select > All In Active Artboard. To learn more about artboards, see Lesson 3, “Creating and Editing Shapes.”
7. Reposition the apples anywhere in the document by clicking the center of either selected apple and dragging. Because both apples are selected, they move together.
Tip
Whenever you don’t want to use smart guides deselect them by choosing View > Smart Guides.
As you drag, you may notice the green lines that appear. These are called alignment guides and are visible because smart guides are turned on (View > Smart Guides). As you drag, the objects are aligned to other objects on the artboard. Also notice the gray box, or measurement label, that shows the object’s distance from its original position. Measurement labels also appear because smart guides are turned on.
8. Deselect the apples by clicking the artboard where there are no objects, or by choosing Select > Deselect.
9. Revert to the last saved version of the document by pressing the F12 key or choosing File > Revert. In the Revert dialog box, click Revert.
Using the Direct Selection tool
The Direct Selection tool selects points or path segments within an object, so that it can be reshaped. Next, you will select anchor points and path segments using the Direct Selection tool.
1. Choose View > Fit Artboard In Window.
2. Select the Direct Selection tool (![]() ) in the Tools panel. Without clicking, position the pointer over the top of one of the fence pickets you see above the red apples.
) in the Tools panel. Without clicking, position the pointer over the top of one of the fence pickets you see above the red apples.
When the Direct Selection tool is over an anchor point of a path or object, a label, such as the word “anchor” or “path,” appears. This label is showing because smart guides are selected.
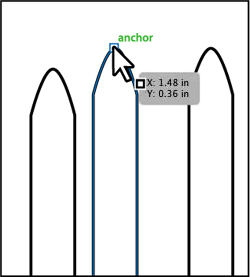
3. Click the top point of the same picket. Note that only the point you selected is solid, indicating that it is selected, while the other points in the picket are hollow and not selected.
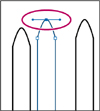
Notice the blue direction lines extending from the anchor point. At the end of the direction lines are direction points. The angle and length of the direction lines determine the shape and size of the curved segments. Moving the direction points reshapes the curves.
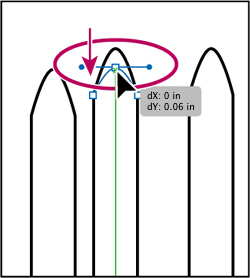
4. With the Direct Selection tool still selected, drag the individual point down, to edit the shape of the object. Try clicking another point, and notice that the previous point is deselected.
Note
The gray measurement label that appears as you drag the anchor point has the values dX and dY. dX indicates the distance the pointer has moved along the x axis (horizontal), and dY indicates the distance the pointer has moved along the y axis (vertical).
Tip
Using the Shift key, you can select multiple points to move them together.
5. Revert to the last saved version by choosing File > Revert. In the Revert dialog box, click Revert.
Creating selections with a marquee
Some selections may be easier to make by creating a marquee around the objects that you want to select.
1. Choose View > Fit Artboard In Window.
2. In the same file, switch to the Selection tool (![]() ). Instead of Shift-clicking to select multiple objects, position the pointer above and to the left of the upper left red apple and then drag downward and to the right to create a marquee that overlaps just the tops of the apples.
). Instead of Shift-clicking to select multiple objects, position the pointer above and to the left of the upper left red apple and then drag downward and to the right to create a marquee that overlaps just the tops of the apples.

Tip
When dragging with the Selection tool, you only need to encompass a small part of an object to include it in the selection.
3. Choose Select > Deselect or click where there are no objects.
Now you will use the Direct Selection tool (![]() ) to select multiple points in objects.
) to select multiple points in objects.
4. Click outside the top of one of the fence pickets above the red apples and drag across to select the tops of two pickets in the top row.

Dragging across the top points with the Direct Selection tool selects only those points.
Only the top points become selected. Click one of the selected anchor points and drag to see how the anchor points reposition together. Use this method when selecting points so that you don’t have to click exactly on the anchor point that you want to edit.
Note
Selecting points using this method might take some practice. You’ll need to drag across only the points you want selected, otherwise, more will be selected. You can always click away from the objects to deselect them, and then try again.
5. Choose Select > Deselect.
6. With the Direct Selection tool, try dragging across the tops of the red apples. Notice how multiple points in each apple are selected.
7. Choose Select > Deselect.
Creating selections with the Magic Wand tool
You can use the Magic Wand tool to select all objects in a document that have the same or similar color or pattern fill attributes.
1. Select the Magic Wand tool (![]() ) in the Tools panel. Click the orange apple and notice that the orange hat is selected as well. No bounding box (a box surrounding the two shapes) appears because the Magic Wand tool is still selected.
) in the Tools panel. Click the orange apple and notice that the orange hat is selected as well. No bounding box (a box surrounding the two shapes) appears because the Magic Wand tool is still selected.

When selecting with the Magic Wand tool, objects with the same color fill are selected as well.
Tip
You can customize the Magic Wand tool to select objects based on stroke weight, stroke color, opacity, or blending mode by double-clicking the Magic Wand tool in the Tools panel. You can also change the tolerances used to identify similar objects.
2. Click one of the red apples with the Magic Wand tool. Notice that both red apples are selected and that the orange apple and hat are deselected.
3. Holding down the Shift key, use the Magic Wand tool to click the orange hat. This adds the orange hat and orange apple to the selection, because they have the same fill color (orange). With the Magic Wand tool still selected, hold down the Alt (Windows) or Option (Mac OS) key, and then click the orange hat to deselect the orange objects. Release the key.
4. Choose Select > Deselect or click where there are no objects.
Selecting similar objects
You can also select objects based on fill color, stroke color, stroke weight, and more. The fill is a color applied to the interior area of an object, the stroke is its outline (border), and the stroke weight is the size of the stroke.
Next, you will select several objects with the same stroke applied.
1. With the Selection tool (![]() ), click to select one of the white fence picket objects at the top of the artboard.
), click to select one of the white fence picket objects at the top of the artboard.
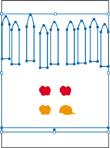
2. Click the arrow to the right of the Select Similar Objects button (![]() ) in the Control panel to show a menu. Choose Fill Color to select all objects on any artboard with the same fill color (white).
) in the Control panel to show a menu. Choose Fill Color to select all objects on any artboard with the same fill color (white).
Notice that all of the pickets at the top are selected, in addition to the white rectangle at the bottom of the artboard.
Note
The menu item Select > Same performs the same function as the Select Similar Objects button that appears in the Control panel.
3. Choose Select > Deselect.
4. Select one of the white picket shapes at the top of the artboard again, and then choose Select > Same > Stroke Weight.
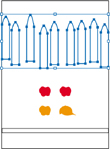
All of the fence picket shapes have a 1 pt stroke, so all strokes that are 1 pt are now selected.
5. With the previous selection still active, choose Select > Save Selection. Name the selection Fence, and click OK, so that you’ll be able to choose this selection at a later time.
6. Choose Select > Deselect to deselect the objects.
Tip
It is helpful to name selections according to use or function. In step 5, if you name the selection 1 pt stroke, for instance, the name may be misleading if you later change the stroke weight of the object.
Aligning objects
Multiple objects can be aligned or distributed relative to each other, the artboard, or a key object. In this section, you will explore the options for aligning objects and aligning points.
Align objects to each other
1. Choose Select > Fence to re-select the fence pickets.
Note
The Align options may not appear in the Control panel. If you don’t see the Align options, click the word Align in the Control panel to open the Align panel. The number of options displayed in the Control panel, depends on your screen resolution.
2. Choose Align to Selection from the Align To button (![]() ) in the Control panel. This ensures that the selected objects are aligned to each other.
) in the Control panel. This ensures that the selected objects are aligned to each other.
3. Click the Vertical Align Bottom button (![]() ) in the Control panel.
) in the Control panel.
Notice that the bottom edges of all the fence picket objects moves to align with the lowest picket.

Note
If Align options do not appear in the Control panel, it may be because only one object is selected. You can also open the Align panel by choosing Window > Align.
4. Choose Edit > Undo Align to return the objects to their original positions. Leave the objects selected for the next section.
Aligning to a key object
A key object is an object that you want other objects to align to. You specify a key object by selecting all the objects you want to align, including the key object, and then clicking the key object again. When selected, the key object has a thick blue outline, and the Align To Key Object icon (![]() ) appears in the Control panel and the Align panel.
) appears in the Control panel and the Align panel.
1. With the fence picket objects still selected, click the left-most picket with the Selection tool (![]() ).
).

The thick blue outline indicates that it is the key object, which other objects will align to.
Tip
In the Align panel, you can also choose Align To Key Object from the Align To option. The object that is in front becomes the key object.
2. In the Align options in the Control panel or the Align panel, click the Vertical Align Bottom button (![]() ). Notice that all of the pickets move to align to the bottom edge of the key object.
). Notice that all of the pickets move to align to the bottom edge of the key object.

3. Choose Select > Deselect.
Aligning points
Next, you’ll align two points to each other using the Align panel.
1. With the Direct Selection tool (![]() ), click the top-most point of the picket that is taller than the rest, and then Shift-click to select the top-most point of any other picket. In the figure, the picket to the right of the tallest picket is selected.
), click the top-most point of the picket that is taller than the rest, and then Shift-click to select the top-most point of any other picket. In the figure, the picket to the right of the tallest picket is selected.

You select the points in a specific order because the last selected anchor point is the key anchor. Other points align to this point.
2. Click the Vertical Align Top button (![]() ) in the Control panel. The first point selected aligns to the second point selected.
) in the Control panel. The first point selected aligns to the second point selected.
Note
If you don’t see the Align options, click the word Align in the Control panel to show the Align panel.
3. Choose Select > Deselect.
Distributing objects
Distributing objects using the Align panel enables you to select multiple objects and distribute the spacing between those objects equally. Next, you will make the spacing between the fence pickets even, using a distribution method.
1. Select the Selection tool (![]() ) in the Tools panel. Choose Select > Fence to reselect all of the fence pickets.
) in the Tools panel. Choose Select > Fence to reselect all of the fence pickets.
2. Click the Horizontal Distribute Center button (![]() ) in the Control panel.
) in the Control panel.
This moves all of the fence objects so that the spacing between the center of each of them is equal.

Note
Using the Horizontal or Vertical Distribute Center buttons distributes the spacing equally between the centers of the objects. If the selected objects are not the same size, unexpected results may occur.
3. Choose Select > Deselect.
4. With the Selection tool (![]() ) selected, hold down the Shift key and drag the right-most fence picket slightly to the right, to keep the picket vertically aligned with the other pickets.
) selected, hold down the Shift key and drag the right-most fence picket slightly to the right, to keep the picket vertically aligned with the other pickets.
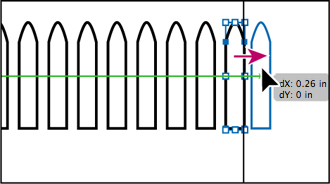
5. Choose Select > Fence to select all of the fence pickets again, and then click the Horizontal Distribute Center button (![]() ) again. Notice that, with the right-most picket repositioned, the objects move to redistribute the spacing between the centers of the objects.
) again. Notice that, with the right-most picket repositioned, the objects move to redistribute the spacing between the centers of the objects.
Note
When distributing objects horizontally using the Align panel, make sure that the left-most and right-most objects are where you want them, and then distribute the objects between them. For vertical distribution, position the top-most and bottom-most objects, and then distribute the objects between them.
6. Choose Select > Deselect.
Aligning to the artboard
You can also align content to the artboard rather than to other objects or a key object. With this method, each individual object is aligned separately to the artboard. Next you’ll align the leaves shape to the center of the artboard.
1. Click the Next artboard button (![]() ) in the lower-left corner of the Document window to navigate to the next artboard in the document, which contains the tree.
) in the lower-left corner of the Document window to navigate to the next artboard in the document, which contains the tree.
2. With the Selection tool selected, click to select the green tree leaves shape.
3. Click the Align To Selection button (![]() ) and choose Align To Artboard in the menu that appears. Setting this option ensures that all future alignments are aligned to the artboard. Click the Horizontal Align Center (
) and choose Align To Artboard in the menu that appears. Setting this option ensures that all future alignments are aligned to the artboard. Click the Horizontal Align Center (![]() ) button to align the group to the horizontal center of the artboard.
) button to align the group to the horizontal center of the artboard.

Note
The Align options may not appear in the Control panel, but are indicated by the word Align. The number of options displayed in the Control panel, depends on your screen resolution.
Note
When you want to align all objects to the center of the artboard for a poster, for example, grouping the objects is an important step. Grouping moves the objects together as one object relative to the artboard. If this isn’t done, centering everything horizontally moves all the objects to the center, independent of each other.
4. With the Selection tool, click to select the brown tree trunk shape.
5. Click the Horizontal Align Center (![]() ) button and then click the Vertical Align Bottom (
) button and then click the Vertical Align Bottom (![]() ) button to align the bottom of the tree trunk to the bottom of the artboard.
) button to align the bottom of the tree trunk to the bottom of the artboard.
Leave the tree trunk selected for the next step.

Working with groups
You can combine objects in a group so that the objects are treated as a single unit. This way, you can move or transform a number of objects without affecting their attributes or relative positions.
Group items
Next, you will select multiple objects and create a group from them.
1. With the Selection tool (![]() ), shift-click the green tree leaves to select them along with the tree trunk you had selected previously.
), shift-click the green tree leaves to select them along with the tree trunk you had selected previously.
2. Choose Object > Group, and then choose Select > Deselect.
3. With the Selection tool, click the brown tree trunk. Because the trunk is grouped with the leaves, both are now selected. Notice that the word Group appears on the left side of the Control panel.
Tip
To select the objects in a group separately, select the group, then choose Object > Ungroup. This ungroups them permanently.
4. Choose Select > Deselect.
Working in isolation mode
Isolation mode isolates groups or sublayers so that you can easily select and edit specific objects or parts of objects without having to ungroup the objects. When you use isolation mode, you don’t need to pay attention to what layer an object is on, nor do you need to manually lock or hide the objects you don’t want affected by your edits. All objects outside of the isolated group are locked so that they aren’t affected by the edits you make. An isolated object appears in full color, while the rest of the artwork appears dimmed, letting you know which objects you can edit.
1. With the Selection tool (![]() ), click either the green tree leaves or the brown tree trunk to select the group.
), click either the green tree leaves or the brown tree trunk to select the group.
Tip
To enter isolation mode, you can also select a group with the Selection tool and then click the Isolate Selected Object button (![]() ) in the Control panel.
) in the Control panel.
2. Double-click the tree trunk to enter isolation mode.
3. Choose View > Fit All In Window and notice that the rest of the content in the document appears dimmed (you can’t select it).


At the top of the Document window, a gray arrow appears with the words Layer 1 and <Group>. This indicates that you have isolated a group of objects that is on layer 1. You will learn more about layers in Lesson 8, “Working with Layers.”
4. Hold down the Shift key and drag the brown tree trunk slightly to the right. The Shift key constrains its movement to the horizontal.
When you enter isolation mode, groups are temporarily ungrouped. This enables you to edit objects in the group without having to ungroup.
5. Double-click outside of the objects to exit isolation mode.
6. Click to select the green leaves shape. Notice that it is once again grouped with the tree trunk and you can now select other objects.
7. Choose Select > Deselect and then choose View > Fit Artboard In Window.
Tip
To exit isolation mode, you can also click the gray arrow in the upper-left corner of the Document window until the document is no longer in isolation mode. Or, click the Exit Isolation Mode button (![]() ) in the Control panel.
) in the Control panel.
Adding to a group
Groups can also be nested—they can be grouped within other objects or grouped to form larger groups. In this section, you will explore how to add objects to an existing group.
1. Click the Previous Artboard button (![]() ) in the lower-left corner of the Document window to navigate to the previous artboard in the document, which contains the fence objects.
) in the lower-left corner of the Document window to navigate to the previous artboard in the document, which contains the fence objects.
2. With the Selection tool (![]() ), drag a marquee across the pickets at the top of the artboard to select them all.
), drag a marquee across the pickets at the top of the artboard to select them all.
3. Choose Object > Group.
4. With Align To Artboard chosen from the Align To Selection button (![]() ) menu, click the Horizontal Align Center (
) menu, click the Horizontal Align Center (![]() ) button to align the group to the horizontal center of the artboard. Choose Select > Deselect.
) button to align the group to the horizontal center of the artboard. Choose Select > Deselect.
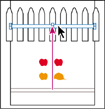
5. With the Selection tool, holding down the Shift key, drag the white rectangle at the bottom of the artboard on top of the group of pickets. You needn’t pay attention to the alignment.
6. With the Selection tool, Shift-click a picket object to select the grouped objects as well.
7. Choose Object > Group.
You have created a nested group—a group within a group. Nesting is a common technique used when designing artwork. It’s a great way to keep associated content together.
8. Choose Select > Deselect.
9. With the Selection tool, click one of the grouped objects. All objects in the group become selected.
10. Click a blank area on the artboard to deselect the objects.
11. Hold down on the Direct Selection tool (![]() ) in the Tools panel, and drag to the right to access the Group Selection tool (
) in the Tools panel, and drag to the right to access the Group Selection tool (![]() ). The Group Selection tool adds the object’s parent group(s) to the current selection.
). The Group Selection tool adds the object’s parent group(s) to the current selection.
12. Click the left-most fence picket once to select the object. Click again to select the object’s parent group (the group of pickets). The Group Selection tool adds each group to the selection in the order in which it was grouped.

Click once to select a picket.

Click twice to select the parent group.
Tip
If you were to click a third time, the white rectangle would also become selected.
13. Choose Select > Deselect.
14. With the Selection tool, click any object to select the group of objects. Choose Object > Ungroup to ungroup the objects. Choose Select > Deselect.
15. Click to select the fence pickets; notice they are still grouped.
16. Choose Select > Deselect.
Note
To ungroup all of the selected objects, even the fence pickets, choose Object > Ungroup twice.
Object arrangement
As you create objects, Illustrator stacks them in order on the artboards, beginning with the first object created. The order in which objects are stacked (called stack order) determines how they display when they overlap. You can change the stacking order of objects in your artwork at any time using either the Layers panel or Object > Arrange commands.
Arrange objects
Next, you will work with the Arrange commands to change how objects are stacked.
1. With the Selection tool (![]() ) selected, position the pointer over a red apple and click to select it.
) selected, position the pointer over a red apple and click to select it.
2. Choose View > Fit All In Window to see both artboards in the document.
3. Drag the selected red apple on top of the leaves in the tree. Release the mouse and notice that the red apple goes behind the tree, but it is still selected.
It is behind the tree because it was probably created before the tree, which means it is lower in the stack of shapes.
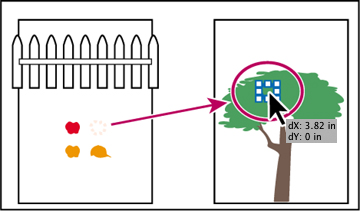
4. With the apple still selected, choose Object > Arrange > Bring to Front. This brings the apple to the front of the stack, making it the top-most object.
Selecting objects behind
When you stack objects on top of each other, sometimes it becomes difficult to select objects that are underneath. Next, you will learn how to select an object through a stack of objects.
1. With the Selection tool (![]() ), select the other red apple on the left artboard and drag it on to the green leaves shape on the right artboard, and then release the mouse.
), select the other red apple on the left artboard and drag it on to the green leaves shape on the right artboard, and then release the mouse.
Notice that the apple seems to disappear again. The apple went behind the leaves of the tree but is still selected. This time you will deselect the apple, then select it again by selecting through objects.
2. Click the red apple again. Notice that you have selected the object on top, which is the tree group, instead.

3. With the pointer still positioned over the location of the apple, behind the tree, hold down the Ctrl (Windows) or Cmd (Mac OS) key and click. Notice the angled bracket displayed with the pointer (![]() ). Click once more to select through the tree to the apple.
). Click once more to select through the tree to the apple.

Note
To select the hidden apple, make sure that you click where the apple and the tree overlap. Otherwise nothing will happen.
Note
You may also see a plus next to the pointer when selecting behind. That’s okay.
4. Choose Object > Arrange > Bring to Front to bring the apple on top of the tree.
5. Choose Select > Deselect.
Hiding objects
When working on complex artwork, selections may become more difficult to control. In this section, you’ll combine some of the techniques you’ve already learned with additional features that make selecting objects easier.
1. With the Selection tool (![]() ), drag a marquee across the fence pickets and the white rectangle on top to select them. Drag them to the bottom of the right artboard with the tree on it.
), drag a marquee across the fence pickets and the white rectangle on top to select them. Drag them to the bottom of the right artboard with the tree on it.
2. Choose Object > Arrange > Bring to Front.
3. Choose View > Fit Artboard In Window.
4. Click somewhere to deselect the objects, and then click to select the white rectangle on top of the group of pickets. Choose Object > Arrange > Send Backward one or more times until the white rectangle is behind the picket group. Choose Select > Deselect.
5. Using the Selection tool (![]() ), select the picket group and choose Object > Hide > Selection or press Ctrl+3 (Windows) or Command+3 (Mac OS). The picket group is hidden so that you can more easily select other objects.
), select the picket group and choose Object > Hide > Selection or press Ctrl+3 (Windows) or Command+3 (Mac OS). The picket group is hidden so that you can more easily select other objects.
6. Click to select the white rectangle and, holding down the Alt (Windows) or Option (Mac OS) key, drag the rectangle down to create a copy.
7. Choose Object > Show All to show the picket group again.
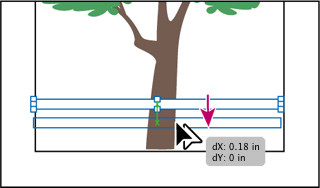

8. Choose File > Save to save the file and then choose File > Close.
Applying selection techniques
As stated earlier, selecting objects is an important part of working with Illustrator. In this part of the lesson, you will use most of the techniques discussed previously in this lesson to get more practice and learn a few new ones.
1. Choose File > Open, and open the L2start_2.ai file in the Lesson02 folder, located in the Lessons folder on your hard disk.
2. Choose View > Fit All In Window. Artboard #2 (the artboard on the right) shows the final artwork. Artboard #1 (the artboard on the left) shows the artwork in progress that you need to finish.
3. Choose View > Fit Artboard In Window to fit artboard #1 in the Document window. Choose View > Smart Guides to temporarily deselect the smart guides.
4. With the Selection tool (![]() ) selected, drag the black rounded rectangle in the upper-left corner of the artboard on top of front of the bus, as shown in the figure.
) selected, drag the black rounded rectangle in the upper-left corner of the artboard on top of front of the bus, as shown in the figure.

5. With the Selection tool, select the headlight shapes (the circles) in the lower-right corner of the artboard by dragging a marquee across them. Choose Object > Group.

6. Drag the center of the headlight group to slide it to its new location to the right of the newly-aligned rounded rectangle.
Note
You drag from the center to avoid grabbing a bounding box handle and accidently resizing the shapes.
7. Double-click the center of the headlight group to enter isolation mode. Click to select the white shape and drag it so that it’s visually centered on the other shapes. Choose Select > Deselect.

8. Press the Escape key to exit isolation mode.
9. With the Selection tool, press the Alt+Shift (Windows) or Option+Shift (Mac OS) keys and drag the headlight group to the left to duplicate it. Release the mouse button and then the modifier keys.

10. Shift-click the rounded rectangle and the headlight group to the right to select all three objects.
11. In the Control panel, choose Align to Selection from the Align To Selection button (![]() ) menu, and then click the Horizontal Distribute Center (
) menu, and then click the Horizontal Distribute Center (![]() ) button.
) button.

12. Choose Object > Group.
13. Shift-click the orange shape behind the selected group. Click the orange shape again to make it the key object. Click the Horizontal Align Center (![]() ) button, and then the Vertical Align Center (
) button, and then the Vertical Align Center (![]() ) button to align the rounded rectangle to the orange shape. Choose Select > Deselect.
) button to align the rounded rectangle to the orange shape. Choose Select > Deselect.

14. With the Selection tool, select the group of objects that contains the headlights. Choose Object > Lock > Selection to keep them in position. You cannot select the shapes until you choose Object > Unlock All. Leave them locked.
Tip
Locking objects is a great way to keep from selecting or editing content and can be used in conjunction with hiding objects.
15. Select the Zoom tool (![]() ) in the Tools panel and click three times on the dome at the top of the bus, above the text, SCHOOL BUS.
) in the Tools panel and click three times on the dome at the top of the bus, above the text, SCHOOL BUS.
16. Select the Direct Selection tool (![]() )and select the top anchor point in the dome, and then drag up to make the dome taller.
)and select the top anchor point in the dome, and then drag up to make the dome taller.

17. Double-click the Hand tool (![]() ) to fit the artboard in the Document window.
) to fit the artboard in the Document window.
18. Select the Zoom tool (![]() ) and click three times on the 4 lines in the lower left corner to zoom in.
) and click three times on the 4 lines in the lower left corner to zoom in.
19. With the Selection tool (![]() ), drag a marquee across the 4 lines to select them.
), drag a marquee across the 4 lines to select them.
20. In the Control panel, click the Horizontal Align Left (![]() ) button.
) button.
Note
If you don’t see the Align panel options in the Control panel, either click the word Align in the Control panel or choose Window > Align.
21. Choose View > Smart Guides to turn them back on.
22. With the Direct Selection tool (![]() ), click the right end of the top, shorter line to select the anchor point, and then drag to the right until the anchor point aligns with the other lines.
), click the right end of the top, shorter line to select the anchor point, and then drag to the right until the anchor point aligns with the other lines.
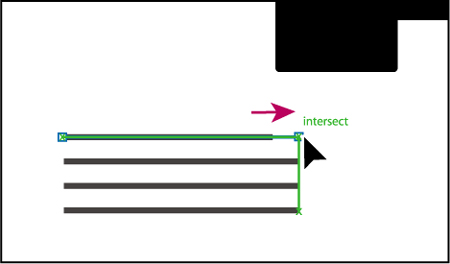
23. With the Selection tool, drag a marquee around the lines to select them. Choose Object > Group to group them.
24. Double-click the Hand tool (![]() ) to fit the artboard in the Document window.
) to fit the artboard in the Document window.
25. With the Selection tool, drag the line group to position it on the rounded rectangle between the headlights. Notice that you need to drag one of the lines, not between the lines, to move the group.
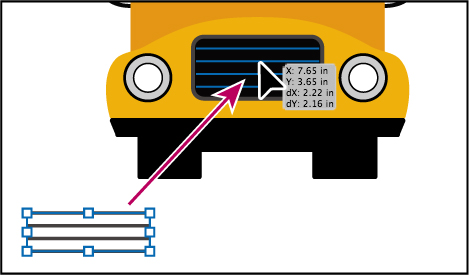
26. Choose Select > Deselect.
27. Choose File > Save and then File > Close.
Note
You may want to turn the smart guides off (View > Smart Guides) so that you can more easily drag the group of lines onto the bus. You can then align the group of lines with the other content if you want.
Exploring on your own
1. Choose File > Open, and open the L2start_3.ai file in the Lesson02 folder, located in the Lessons folder on your hard disk.
2. Experiment by cloning a star several times, using the Alt (Windows) or Option (Mac OS) key.
3. Apply different colors and strokes to the shapes and reselect them by choosing Select > Same or the Select Similar Objects button (![]() ) in the Control panel.
) in the Control panel.
4. Select three stars and arrange them, trying some of the distribute objects options in the Align panel options of the Control panel.
5. Select three stars and click one of them to set it as the key object. Align the other selected stars to the key object using the Align options in the Control panel.
6. With the stars still selected, choose Object > Group.
7. With the Selection tool, double-click one of the stars in the group to enter isolation mode. Resize several of the stars by dragging each star’s bounding box. Then press the Escape key to exit isolation mode.
8. Close the file without saving.
Review questions
1 How can you select an object that has no fill?
2 Name two ways you can select an item in a group without choosing Object > Ungroup.
3 How do you edit the shape of an object?
4 What should you do after creating a selection that you are going to use repeatedly?
5 If something is preventing you from selecting an object, name two ways to select the blocked object.
6 To align objects to the artboard, what do you need to first select in the Align panel or Control panel before you choose an alignment option?
Review answers
1. You can select items that have no fill by clicking the stroke or dragging a marquee across the object.
2. Using the Group Selection tool, you can click once to select an individual item within a group. Click again to add the next grouped items to the selection. Read Lesson 8, “Working with Layers,” to see how you can use layers to make complex selections. You can also double-click the group to enter isolation mode, edit the shapes as needed, and then exit isolation mode by pressing the Escape key or by double-clicking outside of the group.
3. Using the Direct Selection tool, you can select one or more individual anchor points and make changes to the shape of an object.
4. For any selection that you anticipate using again, choose Select > Save Selection. Name the selection so that you can reselect it at any time from the Select menu.
5. If something is blocking your access to an object, you can choose Object > Hide > Selection to hide the blocking object. The object is not deleted, just hidden in the same position until you choose Object > Show All. You can also use the Selection tool to select behind content by pressing the Ctrl (Windows) or Cmd (Mac OS) key, and then clicking on the overlapping objects.
6. To align objects to an artboard, first select the Align To Artboard option.

