
14. Working with Symbols
This lesson will take approximately an hour to complete. If needed, remove the previous lesson folder from your hard disk and copy the Lesson14 folder onto it.
![]()

The Symbols panel lets you apply multiple objects by painting them on the page. Symbols used in combination with the symbolism tools offer options that make creating repetitive shapes, such as grass, easy and fun. You can also use the Symbols panel as a database to store artwork and map symbols to 3D objects. Symbols can also be used in export to SWF and SVG.
Getting started
In this lesson, you’ll finish the artwork for a poster. Before you begin, restore the default preferences for Adobe® Illustrator®. Then open the file containing the finished artwork to see what you are going to create.
1. To ensure that the tools and panels function as described in this lesson, delete or deactivate (by renaming) the Adobe Illustrator CS5 preferences file. See “Restoring default preferences” on page 3.
2. Start Adobe Illustrator CS5.
Note
If you have not already done so, copy the resource files for this lesson onto your hard disk from the Lesson14 folder on the Adobe Illustrator CS5 Classroom in a Book CD. See “Copying the Classroom in a Book files” on page 2.
3. Choose File > Open, and open the L14end_1.ai file in the Lesson14 folder in the Lessons folder on your hard disk.
If you want to view the finished poster as you work, choose View > Zoom Out, and adjust the window size. Use the Hand tool (![]() ) to move the artwork where you want it in the window. If you don’t want to leave the image open, choose File > Close.
) to move the artwork where you want it in the window. If you don’t want to leave the image open, choose File > Close.

4. Choose File > Open to open the L14start_1.ai file in the Lesson14 folder, located in the Lessons folder on your hard disk.
5. Choose File > Save As. In the Save As dialog box, name the file poster.ai and navigate to the Lesson14 folder. Leave the Save As Type option set to Adobe Illustrator (*.AI) (Windows) or the Format option set to Adobe Illustrator (ai) (Mac OS), and click Save. In the Illustrator Options dialog box, leave the Illustrator options at their default settings, and then click OK.

6. Choose Window > Workspace > Essentials.
7. Double-click the Hand tool (![]() ) to fit the artboard in the window.
) to fit the artboard in the window.
Working with symbols
A symbol is a reusable art object that is stored in the Symbols panel (Window > Symbols). For example, if you create a symbol from an object in the shape of a blade of grass, you can then quickly add multiple instances of that grass symbol to your artwork, which saves you from having to draw each individual blade of grass. All instances of the grass symbol are linked to the associated symbol in the Symbols panel, so you can easily alter them using symbolism tools.
When you edit the original symbol, all instances of the grass that are linked to it are updated. You can turn that grass from brown to green instantly! Not only do symbols save time, but they greatly reduce file size. They can also be used in conjunction with Adobe Flash to create SWF files or artwork for Flash.
Illustrator comes with a series of symbol libraries, which range from tiki icons to hair and fur. You can access the symbol libraries in the Symbols panel or by choosing Window > Symbol Libraries.
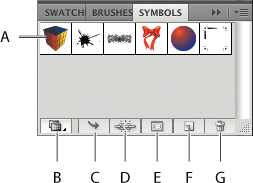
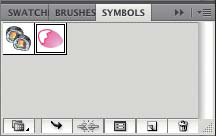
A. Symbols
B. Symbol Libraries menu
C. Place Symbol Instance
D. Break Link To Symbol
E. Symbol Options
F. New Symbol
G. Delete Symbol
Note
The Symbols panel at left is the default Symbols panel for a new Illustrator print document.
Using existing Illustrator symbol libraries
You will start by adding some sushi from an existing symbol library to the artwork.
1. Choose View > Smart Guides to deselect smart guides.
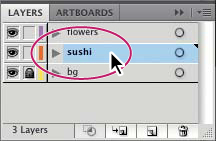
2. Click the Layers panel icon (![]() ) on the right side of the workspace to expand the Layers panel. Click the sushi layer to make sure it is selected. Make sure that all of the layers are collapsed by clicking the arrows to the left of the layer names as well.
) on the right side of the workspace to expand the Layers panel. Click the sushi layer to make sure it is selected. Make sure that all of the layers are collapsed by clicking the arrows to the left of the layer names as well.
When adding symbols to a document, whatever layer is selected when they are added is the layer they become a part of.
3. Choose Window > Symbols, or click the Symbols panel icon (![]() ) on the right side of the workspace to expand the panel.
) on the right side of the workspace to expand the panel.
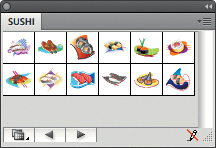
4. In the Symbols panel, click the Symbol Libraries Menu button (![]() ) at the bottom of the panel, and choose Sushi. The Sushi library opens as a free-floating panel.
) at the bottom of the panel, and choose Sushi. The Sushi library opens as a free-floating panel.
This library is external to the file that you are working on, but you can import any of the symbols into the document and use them in the artwork.
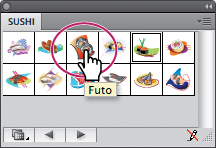
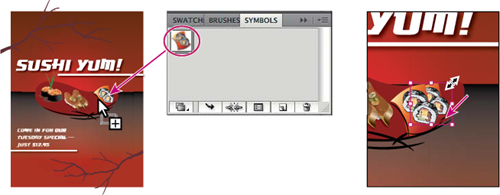
5. Position the pointer over the symbols in the Sushi panel to see their names as tooltips. Click the Futo symbol to add it to the Symbols panel for the document. Close the Sushi panel.
Every document has a default set of symbols in the Symbols panel. When you add symbols to the panel, they are saved with the active document only.
Tip
If you want to see the symbol names rather than the symbol pictures, choose Small List View or Large List View from the Symbols panel menu (![]() ).
).
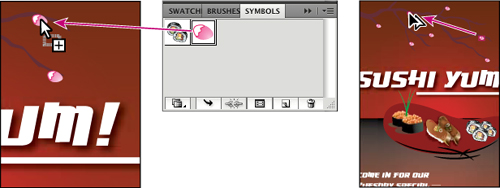
6. Using the Selection tool (![]() ), drag the Futo symbol from the Symbols panel onto the right side of the plate, on the artboard. Drag another onto the artboard to the left of the existing Futo symbol.
), drag the Futo symbol from the Symbols panel onto the right side of the plate, on the artboard. Drag another onto the artboard to the left of the existing Futo symbol.
The symbol you dragged onto the artboard creates instances of the Futo symbol. Next, you will resize one of the symbol instances on the page.
7. Using the Selection tool, click to select the rightmost Futo symbol instance. Holding down the Shift key, drag the upper-right corner of the instance down and to the left to make it smaller, while constraining its proportions. Release the mouse button and then the modifier key.
With the symbol instance selected on the artboard, notice that in the Control panel you see the word Symbol, and symbol related options.
Note
Although you can transform symbol instances in many ways, specific properties of instances cannot be edited. For example, the fill color is locked because it is controlled by the original symbol in the Symbols panel.
Next, you will edit the original sushi symbol so that both instances are affected. There are several ways to edit a symbol, and in this section we will focus on one.
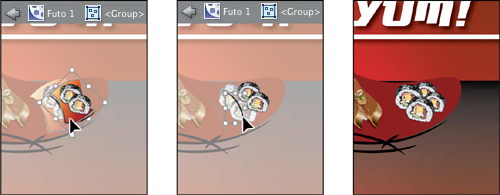
8. With the Selection tool (![]() ), double-click the smaller of the Futo symbol instances on the page.
), double-click the smaller of the Futo symbol instances on the page.
A warning dialog box appears, stating that you are about to edit the original symbol and that all instances will update. Click OK to continue. This takes you into isolation mode, so you can’t edit any other objects on the page.
Tip
Another way to edit a symbol is to select the symbol instance on the artboard, and then click the Edit Symbol button in the Control panel.
The Futo symbol instance you double-clicked appears to change in size. That’s because you are looking at the original symbol, not the resized symbol instance on the page. You can now edit the shapes that make up the symbol.
9. With the Selection tool, double-click the Futo instance to ungroup it.
Tip
You may want to zoom in on the Futo sushi symbol instances.
10. Click to select the reddish shape that looks like a plate beneath the sushi pieces. Press the Delete key to remove it. Do the same for the two curved black lines.
11. With the Selection tool, double-click off the sushi content or click the Exit Isolation Mode button (![]() ) in the upper-left corner of the artboard until you exit isolation mode, so that you can edit the rest of the content. Notice that both Futo instances now reflect the changes you just made.
) in the upper-left corner of the artboard until you exit isolation mode, so that you can edit the rest of the content. Notice that both Futo instances now reflect the changes you just made.
12. Choose File > Save, and leave the document open.
Creating symbols
Illustrator also lets you create your own symbols. You can make symbols from objects, including paths, compound paths, text, raster images, mesh objects, and groups of objects. Symbols can even include active objects, such as brush strokes, blends, effects, or other symbol instances.
Note
You can only use placed art that is embedded to create a symbol.
Now, you will create your own symbol from existing artwork.
1. Choose View > Draw_flower. This takes you to a zoomed in view off the right side of the artboard.
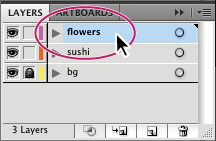
2. Click the Layers panel icon (![]() ) on the right side of the workspace to expand the Layers panel. Click the flowers layer to make sure it is selected. You will place the next series of symbol instances on this layer.
) on the right side of the workspace to expand the Layers panel. Click the flowers layer to make sure it is selected. You will place the next series of symbol instances on this layer.
3. With the Selection tool, drag a marquee across the two pink shapes off the right edge of the artboard to select them both.
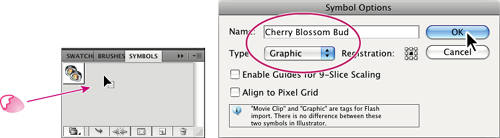
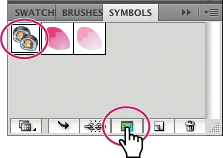
4. Click the Symbols panel icon (![]() ) to expand the panel. With the Selection tool, drag the selected shapes into a blank area of the Symbols panel.
) to expand the panel. With the Selection tool, drag the selected shapes into a blank area of the Symbols panel.
5. In the Symbol Options dialog box, change the name to Cherry Blossom Bud and select Graphic as the Type. Click OK to create the symbol.
Note
By default, the selected artwork becomes an instance of the new symbol. If you don’t want the artwork to become an instance of the symbol, press the Shift key as you create the new symbol.
After creating the Cherry Blossom Bud symbol, the original cherry blossom shapes off the right edge of the artboard are converted to a symbol instance. You can leave it there or delete it.
6. Choose View > Fit Artboard In Window.
7. Choose File > Save.
Editing a symbol
In this next section, you will add several instances of the Cherry Blossom Bud symbol to the artwork. Then you will edit the symbol in the Symbols panel, and all instances will be updated.
1. Select the Zoom tool (![]() ) in the Tools panel and click twice on the right end of the tree branch at the top of the artboard.
) in the Tools panel and click twice on the right end of the tree branch at the top of the artboard.
2. Using the Selection tool, drag an instance of the Cherry Blossom Bud symbol onto the right end of the branch at the top of the page.

3. Drag another instance of the symbol from the Symbols panel onto the limbs of the top tree branch. See the figure below for placement.
Next, you will learn how to add more instances of a symbol that’s already on the artboard, using a modifier key.
4. With the Selection tool (![]() ), press the Alt (Windows) or Option (Mac OS) key and drag one of the Cherry Blossom Bud instances already on the artboard to create a copy of the instance. When the new instance is in position, release the mouse button and then the modifier key. You should now have a total of three Cherry Blossom Bud instances.
), press the Alt (Windows) or Option (Mac OS) key and drag one of the Cherry Blossom Bud instances already on the artboard to create a copy of the instance. When the new instance is in position, release the mouse button and then the modifier key. You should now have a total of three Cherry Blossom Bud instances.
5. Use this same method to create a total of 7 instances on the top tree branch. See the figure for approximate positioning.
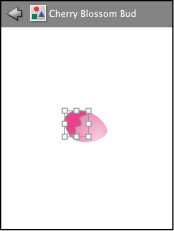
6. In the Symbols panel, double-click the Cherry Blossom Bud symbol to edit it. A temporary instance of the symbol appears in the center of the Document window.
Editing a symbol by double-clicking the symbol in the Symbols panel hides all artboard content except the symbol.
7. Press Ctrl++ (Windows) or Cmd++ (Mac OS) several times to zoom in.
8. With the Selection tool, click to select the smaller, white filled shape. Change the stroke to None and the Fill to Pink in the Control panel.
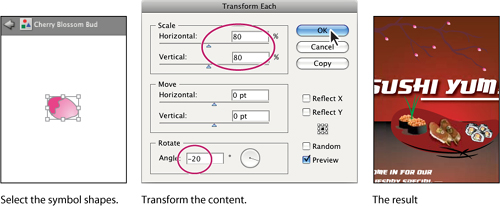
9. Choose Select > All, or drag across the shapes with the Selection tool.
10. Choose Object > Transform > Transform Each to open the Transform Each dialog box. In the Transform Each dialog box, change the Horizontal and Vertical Scale to 80. and the Angle to −20. Click OK.
This allows you to scale all of the symbol instances at once, rather than having to scale each individually. You could make other changes to the symbol artwork in a similar manner.
11. Double-click outside the symbol instance artwork on the artboard, or click the Exit Isolation Mode button (![]() ) in the upper-left corner of the artboard to see all the artwork. Press Ctrl+0 (Windows) or Cmd+0 (Mac OS) to fit the artboard in the window.
) in the upper-left corner of the artboard to see all the artwork. Press Ctrl+0 (Windows) or Cmd+0 (Mac OS) to fit the artboard in the window.
The symbol instances have now all been updated with the smaller bud.
12. Choose File > Save.
Breaking a link to a symbol
At times, you will need to edit specific instances on the artboard. Because the symbolism tools only let you make certain kinds of changes, you may sometimes need to break the link between a symbol and an instance. This creates a group of unlinked instances (if the object is composed of more than one object) on the artboard. You can then ungroup them and edit the individual objects.
Next, you will break the link to one of the Cherry Blossom Bud instances.
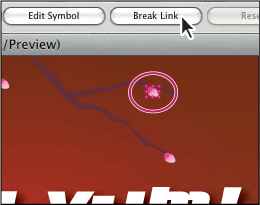
1. With the Selection tool (![]() ) selected, click to select one of the symbol instances of the bud on the page. In the Control panel, click the Break Link button.
) selected, click to select one of the symbol instances of the bud on the page. In the Control panel, click the Break Link button.
This object is now a series of paths, as indicated by the word Path on the left side of the Control panel. You should be able to see the anchor points of the shapes.
Note
It’s okay if the color of your selection is different from the color shown in the figure.
Tip
You can also break the link to a symbol instance by selecting the symbol instance on the artboard, and then clicking the Break Link To Symbol button (![]() ) at the bottom of the Symbols panel.
) at the bottom of the Symbols panel.
2. Select the Zoom tool (![]() ) and drag a marquee across the selected content to zoom in.
) and drag a marquee across the selected content to zoom in.
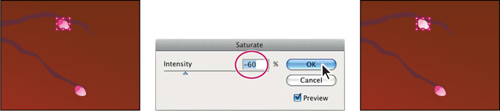
3. With the two shapes selected, choose Edit > Edit Colors > Saturate.
4. Change the Intensity to −60 and select Preview in the Saturate dialog box. Click OK.
5. Choose File > Save and keep the artwork selected.
Replacing symbols
Next, you will create a symbol from the modified bud shapes, and then replace a few of the Cherry Blossom Bud symbol instances with the new symbol.
1. Choose View > Fit Artboard In Window.
2. With the Selection tool (![]() ) drag the modified shapes into the Symbols panel. In the Symbol Options dialog box, change the name to Cherry Blossom Bud 2 and the Type to Graphic. Click OK.
) drag the modified shapes into the Symbols panel. In the Symbol Options dialog box, change the name to Cherry Blossom Bud 2 and the Type to Graphic. Click OK.
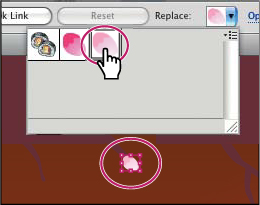
3. With the Selection tool, select a Cherry Blossom Bud instance on the artboard. In the Control panel, click the arrow to the right of the Replace Instance With Symbol field, to open the Symbols panel. Click the Cherry Blossom Bud 2 symbol.
4. Choose Select > Deselect.
5. Choose File > Save. Keep the file open.
Symbol layers
When you edit a symbol using any of the methods described, open the Layers panel and you will see that the symbol has its own layering.

Similar to working with groups in isolation mode, you see the layers associated with that symbol only, not the document’s layers. In the Layers panel, you can rename, add, delete, show/hide, and reorder content for a symbol.
Renaming symbols
Using the Symbols panel, you can easily rename a symbol, which updates all the symbol instances in the artwork as well. Next, you will rename the Futo symbol.
1. With the Selection tool (![]() ) click to select one of the Futo symbol instances on the artboard (the first sushi symbol you dragged onto the page).
) click to select one of the Futo symbol instances on the artboard (the first sushi symbol you dragged onto the page).
2. In the Symbols panel, make sure that the Futo symbol is selected. Click the Symbol Options button (![]() ) at the bottom of the Symbols panel.
) at the bottom of the Symbols panel.
3. In the Symbol Options dialog box, change the name to sushi and the Type to Graphic. Click OK.
Working with the symbolism tools
The Symbol Sprayer tool (![]() ) in the Tools panel allows you to spray symbols on the artboard, creating symbol sets. A symbol set is a group of symbol instances that you create with the Symbol Sprayer tool. You can create mixed sets of symbol instances by using the Symbol Sprayer tool with one symbol and then using it again with another symbol.
) in the Tools panel allows you to spray symbols on the artboard, creating symbol sets. A symbol set is a group of symbol instances that you create with the Symbol Sprayer tool. You can create mixed sets of symbol instances by using the Symbol Sprayer tool with one symbol and then using it again with another symbol.
Spraying symbol instances
Next, you will draw a flower, save it as a symbol, then use the Symbol Sprayer tool to apply flowers to your illustration.
1. Choose View > Draw_flower.
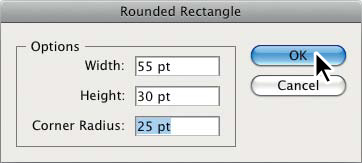
2. Select the Rounded Rectangle tool (![]() ) in the Tools panel. Click once, off the right edge of the artboard. In the Rounded Rectangle dialog box, change the Width to 55 pt, the Height to 30 pt, and the Corner Radius to 25 pt. Click OK.
) in the Tools panel. Click once, off the right edge of the artboard. In the Rounded Rectangle dialog box, change the Width to 55 pt, the Height to 30 pt, and the Corner Radius to 25 pt. Click OK.
3. With the rounded rectangle selected, press the letter D to apply the default fill of white and a 1pt black stroke.
4. Select the Zoom tool (![]() ) and click three times on the rounded rectangle.
) and click three times on the rounded rectangle.
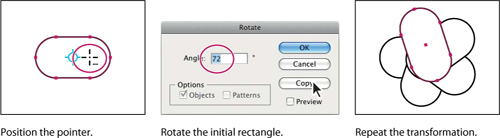
5. Select the Rotate tool (![]() ) in the Tools panel. Holding down the Alt (Windows) or Option (Mac OS) key, position the pointer just to the right of the center point of the rounded rectangle and click.
) in the Tools panel. Holding down the Alt (Windows) or Option (Mac OS) key, position the pointer just to the right of the center point of the rounded rectangle and click.
6. In the Rotate dialog box change the angle to 72. and click Copy.
7. Press Ctrl+D (Windows) or Cmd+D (Mac OS) three times to repeat the transformation and create a total of five rounded rectangles.
8. With the Selection tool, drag across the rounded rectangle shapes. Choose Window > Pathfinder to open the Pathfinder panel. Click the Unite button to merge all of the shapes into one. Close the Pathfinder panel group.
9. With the united shape selected, change the fill color to Flower (the pink gradient) and the stroke to None in the Control panel.
10. Click the Symbols panel icon (![]() ) on the right side of the workspace to open the Symbols panel. Drag the flower shape into the Symbols panel. In the Symbol Options dialog box, change the name to Flower and the Type to Graphic. Click OK. Delete the original flower shape off the right edge of the artboard.
) on the right side of the workspace to open the Symbols panel. Drag the flower shape into the Symbols panel. In the Symbol Options dialog box, change the name to Flower and the Type to Graphic. Click OK. Delete the original flower shape off the right edge of the artboard.
11. Choose View > Fit Artboard In Window.
12. Select the Symbol Sprayer tool (![]() ) in the Tools panel. Make sure the Flower symbol is selected in the Symbols panel.
) in the Tools panel. Make sure the Flower symbol is selected in the Symbols panel.
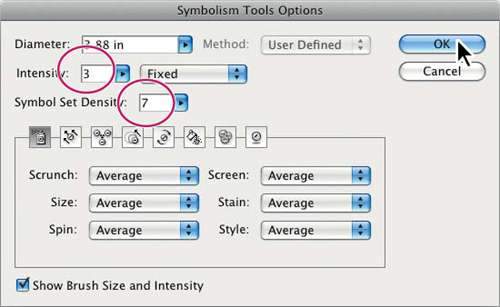
13. Double-click the Symbol Sprayer tool (![]() ) in the Tools panel. In the Symbolism Tools Options dialog box, change Intensity to 3. and Symbol Set Density to 7., if not already done. Click OK.
) in the Tools panel. In the Symbolism Tools Options dialog box, change Intensity to 3. and Symbol Set Density to 7., if not already done. Click OK.
Note
A higher intensity value increases the rate of change—the Symbol Sprayer tool sprays more, and faster. The higher the symbol set density value, the more tightly packed the symbols are as you spray them.
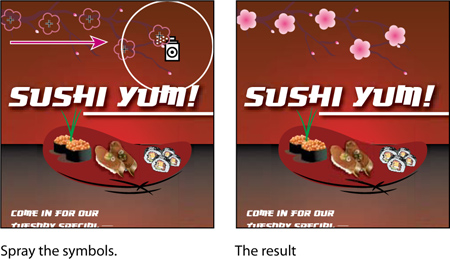
14. Starting on the left side of the artboard, over the tree, click and drag a little up and down, from left to right with the Symbol Sprayer, much like using an airbrush or can of spray paint, to create flowers on the tree branch. Release the mouse button when you see about 5 flowers on the artboard.
Notice the bounding box around the Flower symbol instances, identifying it as a symbol set. As you spray, the instances are grouped together as a single object. If a symbol set is selected when you begin to spray with the Symbol Sprayer tool, the symbol instances that you are spraying are added to the selected symbol set. You can easily delete an entire symbol set by selecting it and then pressing the Delete key.
15. Choose Select > Deselect.
16. With the Symbol Sprayer tool, drag across the top tree branch again, to add a few more flower instances.
Notice that after releasing the mouse button, you see a bounding box around only the new flower instances. To add symbol instances to an existing symbol set, you must first select the set.
17. Choose Edit > Undo Spraying to remove the last Flower symbol set.
18. With the Selection tool, click to select the Flower symbol set at the top of the artboard.
19. Select the Symbol Sprayer tool and add more flowers to the tree branch. Try clicking and releasing, instead of clicking and dragging, to add one flower at a time.
20. Choose File > Save and leave the symbol set selected.
In the next section, you will use the Symbolism tools to alter the look of individual symbol instances.

Tip
If you don’t like the placement of a flower, you can choose Edit > Undo Spraying to remove the instances you sprayed in the previous click.
Editing symbols with the Symbolism tools
In the next steps, you will edit the flowers in the flower symbol set using the Symbolism tools in the Tools panel.
Tip
If the Symbol Sizer tool is sizing too quickly, double-click the Symbol Sizer tool in the Tools panel and try lowering the Intensity and Density values in the Symbolism Tools Options dialog box.
1. With the flower symbol set and the Symbol Sprayer tool still selected, position the pointer over one of the flowers. Press the Alt (Windows) or Option (Mac OS) key and click to delete one of the instances in the set.
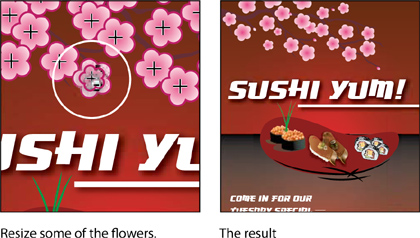
2. Select the Symbol Sizer tool (![]() ) from the Symbol Sprayer tool group in the Tools panel. Position the pointer over some of the flowers and click and hold the mouse button to increase the size of some of the flowers. In the same area of flowers, press the Alt (Windows) or Option (Mac OS) key while you are using the Symbol Sizer tool to reduce the size of the selected instances.
) from the Symbol Sprayer tool group in the Tools panel. Position the pointer over some of the flowers and click and hold the mouse button to increase the size of some of the flowers. In the same area of flowers, press the Alt (Windows) or Option (Mac OS) key while you are using the Symbol Sizer tool to reduce the size of the selected instances.
3. Make some of the flowers smaller than the rest, varying the sizes.
Tip
To affect fewer Flower symbol instances at a time, press the left bracket key ([) several times to make the brush diameter smaller.
Note
The Symbol Sizer works better when you click and release symbol instances, rather than holding down the mouse button.
Now, you will rotate some of the symbols.
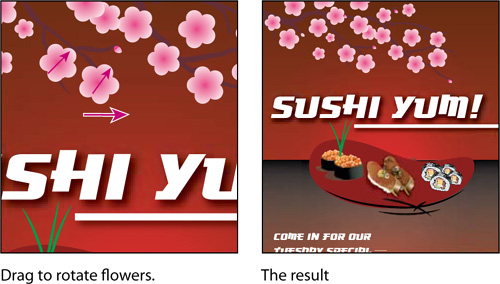
4. Select the Symbol Spinner tool (![]() ) from the Symbol Sizer tool group. Position the pointer over a flower in the symbol set, and then drag left or right to rotate.
) from the Symbol Sizer tool group. Position the pointer over a flower in the symbol set, and then drag left or right to rotate.
The more you move the pointer, the more rotation occurs.
Note
Arrows appear as you rotate, indicating the direction of rotation.
5. Select the Symbol Shifter tool (![]() ) in the Tools panel. With the symbol set still selected, press the right bracket key (]) several times to increase the size of the brush. Click the Flower symbol instances and drag to shift them.
) in the Tools panel. With the symbol set still selected, press the right bracket key (]) several times to increase the size of the brush. Click the Flower symbol instances and drag to shift them.
6. Choose Select > Deselect.
7. Choose File > Save.

Tip
There are lots of Symbolism tools for you to experiment with, including the Symbol Stainer tool (![]() ), which allows you to apply a stain to selected symbol instances in the symbol set.
), which allows you to apply a stain to selected symbol instances in the symbol set.
What do the symbolism tools do?
Symbol Shifter tool (![]() )—Moves symbol instances around. It can also change the relative stacking order of symbol instances in a set.
)—Moves symbol instances around. It can also change the relative stacking order of symbol instances in a set.
Symbol Scruncher tool (![]() )—Pulls symbol instances together or apart.
)—Pulls symbol instances together or apart.
Symbol Sizer tool (![]() )—Increases or decreases the size of symbol instances.
)—Increases or decreases the size of symbol instances.
Symbol Spinner tool (![]() )—Orients the symbol instances in a set. Symbol instances located near the pointer orient in the direction you move the pointer. As you drag the mouse, an arrow appears above the pointer to show the current orientation of the symbol instances.
)—Orients the symbol instances in a set. Symbol instances located near the pointer orient in the direction you move the pointer. As you drag the mouse, an arrow appears above the pointer to show the current orientation of the symbol instances.
Symbol Stainer tool (![]() )—Colorizes symbol instances. Colorizing a symbol instance changes the hue toward the tint color while preserving the original luminosity, so black or white objects don’t change at all.
)—Colorizes symbol instances. Colorizing a symbol instance changes the hue toward the tint color while preserving the original luminosity, so black or white objects don’t change at all.
Symbol Screener tool (![]() )—Increases or decreases the transparency of the symbol instances in a set.
)—Increases or decreases the transparency of the symbol instances in a set.
Symbol Styler tool (![]() )—Applies the selected style to the symbol instance. You can switch to the Symbol Styler tool when using any other symbolism tool by clicking a style in the Styles panel.
)—Applies the selected style to the symbol instance. You can switch to the Symbol Styler tool when using any other symbolism tool by clicking a style in the Styles panel.
Copy and edit symbol sets
A symbol set is treated as a single object. In order to edit the instances in it, you use the symbolism tools in the Tools panel. You can, however, duplicate symbol instances and use the symbolism tools to make the duplicates look different.
Next, you will duplicate the flower symbol set, and position it at the bottom of the artboard.
1. Click the Layers panel icon (![]() ) to expand the Layers panel. Make sure that the bg layer is locked, as indicated by a lock icon (
) to expand the Layers panel. Make sure that the bg layer is locked, as indicated by a lock icon (![]() ) to the right of the eye icon (
) to the right of the eye icon (![]() ). Click the Layers panel icon to collapse the panel.
). Click the Layers panel icon to collapse the panel.
2. Select the Selection tool (![]() ) and drag a marquee across all of the symbols content at the top of the artboard, including the Flower symbol set and the flower buds.
) and drag a marquee across all of the symbols content at the top of the artboard, including the Flower symbol set and the flower buds.
Tip
If you want to select all instances of the same symbol in the artwork and they are not part of a symbol set, select a single instance of the symbol and, then choose Select > Same > Symbol Instance.
3. Choose Object > Group.
4. Press the Alt (Windows) or Option (Mac OS) key and drag a copy of the instances to the bottom, right of the artboard. When it is in position, release the mouse button and then the modifier key.
5. Choose Object > Transform > Transform Each. In the Transform Each dialog box, select Reflect X and Reflect Y. Click OK.
6. With the copied symbol set at the bottom still selected, double-click the Rotate tool (![]() ) in the Tools panel. In the Rotate dialog box, change the Angle to 23. and then click OK.
) in the Tools panel. In the Rotate dialog box, change the Angle to 23. and then click OK.
Note
There are many transformations that you can make to a symbol set. You can also drag a point in the bounding box of a symbol set with the Selection tool to resize it.
7. With the Selection tool, drag the symbol instance group into position on top of the bottom tree limb.

8. Choose Select > Deselect, then File > Save.
Storing and retrieving artwork in the Symbols panel
Saving frequently used logos or other artwork as symbols lets you access them quickly. In this next part of the lesson, you will take symbols that you’ve created and save them as a new symbol library that you can share with other documents or users.
Note
Symbol libraries are saved as Adobe Illustrator (.ai) files.
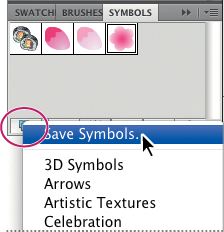
1. In the Symbols panel, click the Symbol Libraries Menu button (![]() ), and then choose Save Symbols.
), and then choose Save Symbols.
Note
When saving symbols as a separate library, the document that contains the symbols should be open and active in the Document window.
2. In the Save Symbols As Library dialog box, choose a location such as your Desktop to place the symbol library file. Name the library file sushi_poster.ai. Click Save.
Note
When you first open the Save Symbols As Library dialog box, Illustrator takes you to the default Symbols folder, where you can store the libraries that you create. Illustrator recognizes any libraries stored here and lets you choose them from the Symbol Libraries menu later.
Tip
If you save the library in the default folder, you can make subfolders and create a folder structure that suits you. You can then easily access them using the Symbol Libraries Menu button or by choosing Window > Symbol Libraries.
3. Without closing the poster.ai file, create a new document by choosing File > New. Leave the default settings, and then click OK.
4. In the Symbols panel, click the Symbol Libraries Menu button (![]() ) and choose Other Library at the bottom of the menu. Navigate to the folder where you saved the sushi_poster.ai library, select it, and then click Open.
) and choose Other Library at the bottom of the menu. Navigate to the folder where you saved the sushi_poster.ai library, select it, and then click Open.
The sushi_poster library appears as a free-floating panel in the workspace. You can dock it or leave it where it is. It stays open as long as Illustrator is open. When you close Illustrator, and then relaunch it, this panel does not reopen.
5. Drag any of the Symbols from the sushi_poster library panel onto the page.
6. Choose File > Close and do not save the new file. Keep the poster.ai file open if you plan on continuing to the Exploring On Your Own section.
Mapping a symbol to 3D artwork
You can apply any 2D artwork stored as a symbol in the Symbols panel to selected surfaces on a 3D object. To learn about mapping symbols to 3D artwork, see Lesson 12, “Applying Effects.”
Symbols and Flash integration
Illustrator also provides excellent support for SWF and SVG file type export. When you export to Flash, you can set the symbol type to Movie Clip. In Adobe Flash, you can choose another type if necessary. You can also specify 9-slice scaling in Illustrator so that the movie clips scale appropriately when used for user interface components.
You can move Illustrator artwork into the Flash editing environment or directly into the Flash Player. You can copy and paste artwork, save files as SWF, or export artwork directly to Flash. In addition, Illustrator provides support for Flash dynamic text and movie clip symbols.
A generic symbol workflow in Illustrator is similar to a symbol workflow in Flash:
• Step 1: Symbol creation
When you create a symbol in Illustrator, the Symbol Options dialog box lets you name the symbol and set options specific to Flash: movie clip symbol type (which is the default for Flash symbols), Flash registration grid location, and 9-slice scaling guides. In addition, you can use many of the same symbol keyboard shortcuts in Illustrator and Flash, such as F8 to create a symbol.
• Step 2: Isolation mode for symbol editing
• Step 3: Symbol properties and links
• Step 4: Static, dynamic, and input text objects
Next, you will create a button, save it as a symbol, and then edit the symbol options.
1. Choose Window > Workspace > Essentials.
2. Choose File > New.
3. In the New Document dialog box, choose Web from the New Document Profile menu. Keep the rest of the options at their default settings, and then click OK.
4. Choose File > Save As. In the Save As dialog box, name the file buttons.ai and navigate to the Lesson14 folder. Leave the Save As Type option set to Adobe Illustrator (*.AI) (Windows) or the Format option set to Adobe Illustrator (ai) (Mac OS), and then click Save. In the Illustrator Options dialog box, leave the Illustrator options at their default settings, and then click OK.
5. Click the Symbols panel icon (![]() ) to expand the panel.
) to expand the panel.
6. Drag the blue Bullet - Forward symbol from the Symbols panel onto the artboard.
Tip
As mentioned previously in this lesson, many more symbols come with Illustrator. You can find them by clicking the Symbol Libraries Menu button at the bottom of the Symbols panel.
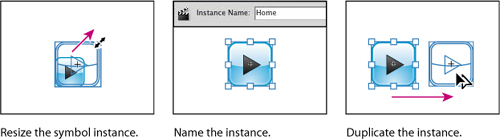
7. With the Selection tool (![]() ), Shift-click the upper-right corner of the button and drag to make it larger, releasing the mouse button and then the key.
), Shift-click the upper-right corner of the button and drag to make it larger, releasing the mouse button and then the key.
8. With the button still selected, change the Instance Name in the Control panel to Home and press Enter or Return.
The Instance Name is optional when working in Illustrator and is used to identify one symbol instance from another. Entering an instance name for each button is useful if you choose to import the Illustrator content to the stage in Flash (File > Import > Import To Stage).
9. With the button selected, drag it to the right, and then press Shift+Alt (Windows) or Shift+Option (Mac OS) to create a copy. Release the mouse button first, and then the modifier keys. In the Control panel, type Info in the Instance Name field and press Enter or Return.
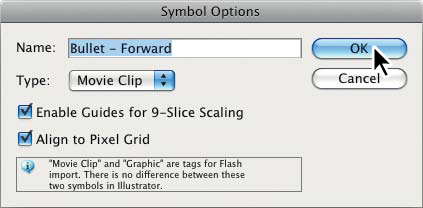
10. With one of the buttons still selected, click the Symbol Options button (![]() ) in the Symbols panel. Make sure that Movie Clip, Enable Guides For 9-Slice Scaling, and Align To Pixel Grid are selected. Click OK.
) in the Symbols panel. Make sure that Movie Clip, Enable Guides For 9-Slice Scaling, and Align To Pixel Grid are selected. Click OK.

Next, you’ll adjust the 9-slice scaling guides.
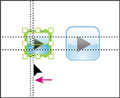
11. With the Selection tool, double-click the leftmost button to enter isolation mode. When the warning dialog box appears, click OK.
12. Select the Zoom tool (![]() ) in the Tools panel and click three times on the leftmost button to zoom in. Choose Select > All.
) in the Tools panel and click three times on the leftmost button to zoom in. Choose Select > All.
Choosing Select > All allows you to see the anchor points in the shapes. When you adjust the 9-slice scaling guides, you want to try to position them to indicate the scalable part of the object (usually not the corners).
13. With the Selection tool, drag the rightmost guide to the left, just past the left edge of the black arrow, as shown in the figure.
You can use 9-slice scaling (scale-9) to specify component-style scaling for graphic style and movie clip symbols.
14. With the Selection tool, double-click away from the buttons to exit isolation mode.
15. Choose View > Fit Artboard In Window, then File > Save.
Understanding Flash Symbol Options
Movie Clip: Use movie clip symbols to create reusable pieces of animation (in Flash). Movie clips have their own multiframe Timeline that is independent from the main Timeline—think of them as nested inside a main Timeline that can contain interactive controls, sounds, and even other movie clip instances. You can also place movie clip instances inside the Timeline of a button symbol to create animated buttons. In addition, movie clips are scriptable with ActionScript®.
Align to Pixel Grid: To create a pixel-aligned symbol, select the Align to Pixel Grid option from the Symbol Options dialog box. Symbols aligned to pixel grid remain aligned to the pixel grid at all locations of the artboard, in their actual size.
9-slice scaling: You can use 9-slice scaling (scale-9) to specify component-style scaling for graphic style and movie clip symbols. This type of scaling lets you create movie clip symbols that scale appropriately for use as user interface components, as opposed to the type of scaling typically applied to graphics and design elements.
The symbol is conceptually divided into nine sections with a grid-like overlay, and each of the nine areas is scaled independently. To maintain the visual integrity of the symbol, corners are not scaled, while the remaining areas of the image are scaled (as opposed to being stretched) larger or smaller, as needed.
—From Illustrator Help
For the next section, you need to have Adobe Flash CS5 installed on your machine.
1. Open Adobe Flash CS5.
2. Choose File > New. In the New Document dialog box, make sure that the General tab is selected and that ActionScript 3.0 is also selected in the list. Click OK.
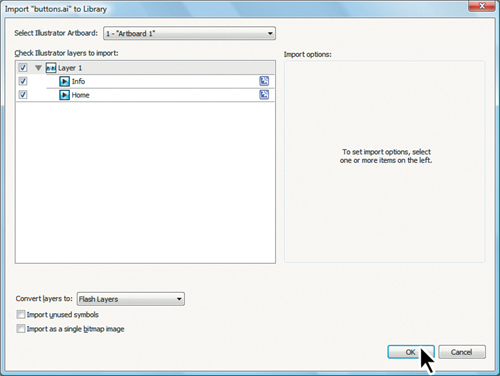
3. Choose File > Import > Import To Library in Adobe Flash. Navigate to the buttons.ai file you just saved in Illustrator and click the Import To Library button. The Import “buttons.ai” To Library dialog box appears.
This dialog box lets you select which artboard to import, which layers to import, how to import the content, and more. The Import Unused Symbols option at the bottom of the dialog box brings all the symbols in the Illustrator Symbols panel into the Flash Library panel. This can be very useful if, for instance, you are developing a series of buttons for a site.
4. Click OK.
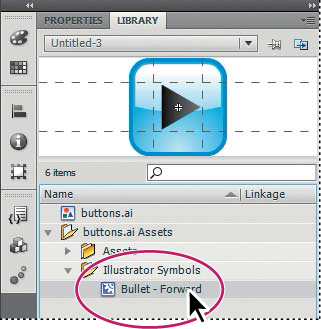
5. Open the Library panel by clicking the Library panel tab on the right side of the workspace. Click the arrow to the left of the folder names to reveal the assets as well as the Bullet - Forward symbol in the Illustrator Symbols folder.
6. Drag the Bullet - Forward symbol onto the stage.
Note
There are several ways to get Illustrator CS5 content into Flash CS5. You can also copy and paste from Illustrator to Flash (using the default Paste preferences) or choose File > Import > Import To Stage. Import to stage places the two buttons on the stage, and each instance name appears in the Property panel when the buttons are independently selected. The content is also added to the Library panel.
7. Choose File > Close to close the Flash file, and don’t save changes. Close Flash, and return to Illustrator.
Pasting Illustrator artwork into Flash
Another option for getting content from Illustrator CS5 to Flash CS5 is to copy and paste content into Flash from Illustrator. When you paste into Flash CS5, the Paste dialog box appears. You can paste a simple bitmap or paste using the AI File Importer preferences. The latter option works like the File > Import > Import To Stage command, although the Import “buttons.ai” To Stage dialog box does not appear.
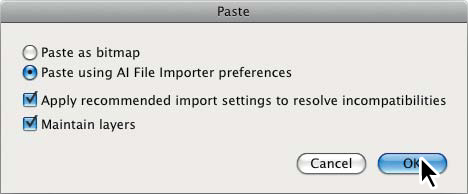
When you paste Illustrator artwork into Flash, the following attributes are preserved:
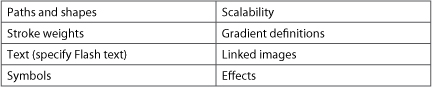
—From Illustrator Help
Exploring on your own
Try to integrate symbols into illustrations with repeated artwork from a map that contains everything from repeated icons and road signs to creative and customized bullets for text. Symbols make it easy to update logos in business cards or name tags, or any artwork created with multiple placements of the same art.
To place multiple symbol instances, do the following:
1. Select the artwork that you want to use as a symbol.
2. Using the Selection tool, drag the art into the Symbols panel. Delete the original art when it is in the Symbols panel.
3. To add an instance to the artboard, drag the symbol from the Symbols panel to the artboard.
4. Drag as many instances of the symbol as you like, or press the Alt (Windows) or Option (Mac OS) key and drag the original instance to clone it to other locations.
The symbols are now linked to the original symbol in the Symbols panel. If a symbol is updated, all placed instances are updated.
Review questions
1 What are three benefits of using a symbol?
2 Name the symbolism tool that is used for rotating symbol instances in a symbol set.
3 If you are using a symbolism tool on an area that has two different symbols applied, which one is affected?
4 How do you update an existing symbol?
5 What is something that cannot be used as a symbol?
6 How do you access symbols from other documents?
7 Name two ways to bring symbols from Illustrator to Flash.
Review answers
1. Three benefits of using symbols are:
• You can easily apply multiple shapes.
• You can edit one symbol, and all instances are updated.
• You can map artwork to 3D objects (covered in depth in Lesson 12, “Applying Effects”).
2. The Symbol Spinner tool changes the rotation of a symbol instance in a symbol set.
3. If you are using a symbolism tool over an area that has two different symbol instances, the symbol active in the Symbols panel is the only instance affected.
4. To update an existing symbol, double-click the symbol icon in the Symbols panel or double-click an instance of the symbol on the artboard. Then you can make edits in isolation mode.
5. Unembedded images cannot be used as symbols.
6. You can access symbols from saved documents either by clicking the Symbol Libraries Menu button (![]() ) at the bottom of the Symbols panel and choosing Other Library from the menu that appears; by choosing Other Library from the Symbols panel menu; or by choosing Window > Symbol Libraries > Other Library.
) at the bottom of the Symbols panel and choosing Other Library from the menu that appears; by choosing Other Library from the Symbols panel menu; or by choosing Window > Symbol Libraries > Other Library.
7. Copy and paste the symbol(s) from Illustrator to Flash, choose File > Import > Import To Stage, or choose File > Import > Import To Library.