
As you start working on more complex projects, it's a good idea to have a high-level understanding of what we are trying to achieve with what we are making and, subsequently, break it down into sizable modules that you can work on.
This would start with the Problem Statement or Problem Definition that outlines the problem that we are going to solve.
This would be followed with the Solution, which gives a brief outline of the functionality required to solve the problem.
Let's have a look at these concepts with respect to our project.
Problem statement: Unauthorized people are messing with your things.
Solution: Build a safe, which can be opened with a key. In case the safe is opened without a key, an alarm goes off, which will alert you of the intruder!
Simple enough, isn't it?
Let's break this solution of ours into blocks so that we can visualize this project more clearly:
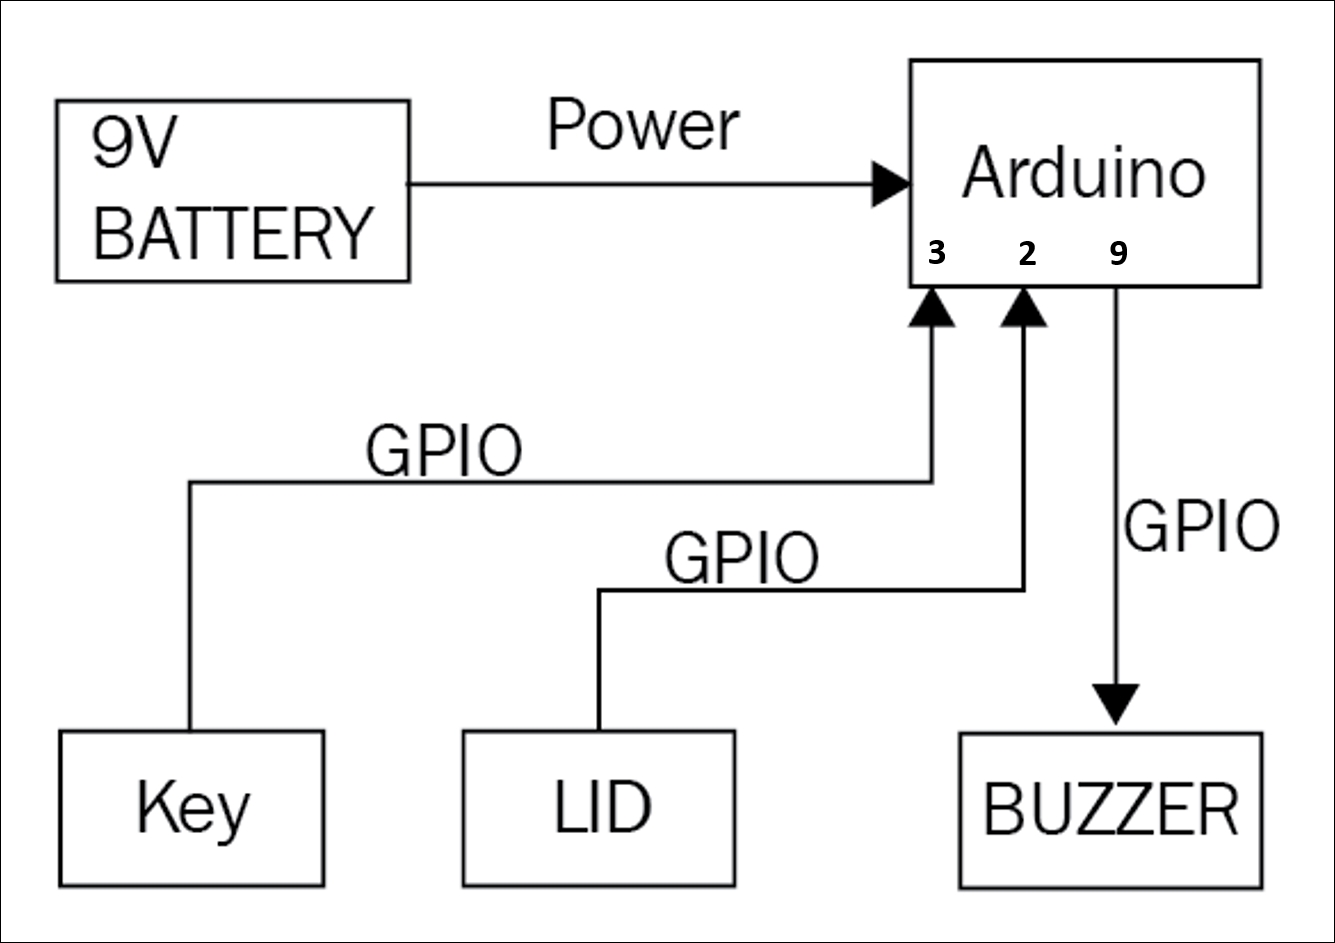
In the preceding diagram, you can see all the different parts of the project that work together to solve the problem statement.
Let's also define how these different blocks are going to work together.
The way in which our safe will work is as follows:
- If someone opens the safe without a key being inserted into the keyhole in the box, an alarm will go off
- If someone places a key in the keyhole and then opens the box, the alarm doesn't go off
Let's put this into a diagram that will define the flow in which actions would take place:
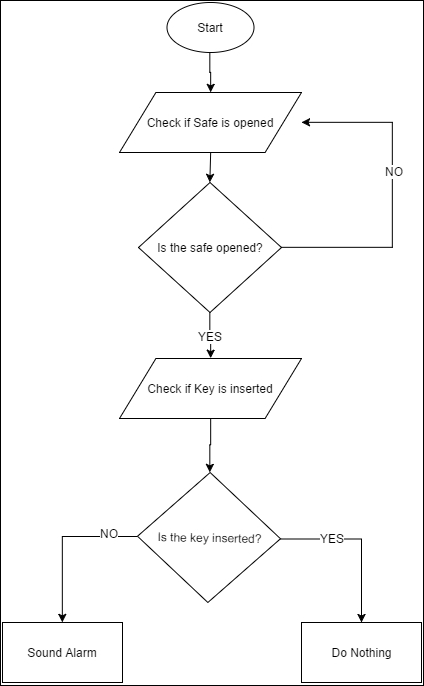
You can imagine the preceding diagram as if this is what the Arduino is thinking.
This diagram is also referred to as a Flow Chart since it describes the flow in which your project and, in turn, the code that you will put into the Arduino will work.
The Start defines where to start from. After this, there is a series and some tasks that are performed and decisions taken. We shall look at these one by one.
After Start, the Arduino checks whether the box is open or not. If the box is not open, the Arduino checks it again and continues checking until the box is opened. This is why there is an arrow pointing to the previous step. Doing this kind of task is also called a Loop. Hence, we say that we are checking whether the box in opened in a loop.
Only if the box is open does Arduino move on and get out of this loop and check whether there a key present in the keyhole.
If a key is present, the Arduino doesn't do anything and, thus, knows that an authorized person with a key has opened the box. But if the key isn't inserted when the box is opened, an alarm will be sounded.
Now, before we go on and start building things, there are a few more things left to understand. Bear with me, my friend, we are almost there.