10. Using Title Deko
It’s easy to overlook the significance good titles can bring to your video productions, but like most elements of video editing, a title works best as an enhancement rather than as a glaring object on the screen. Therefore, before you can move on to being creative, you need to understand at least the basic fundamentals of title creation.
In Liquid 7, you can make titles using any image creation program, but generally speaking, most are created using Title Deko, which has been supplied with a number of different NLE packages in a variety of formats over the years. It’s a relatively easy program to use, and although it’s beginning to look a little dated, it still packs a significant punch.
In this chapter, you learn how to create a basic title, adjust it using the templates available, and finally, add movement and backgrounds to enhance the title’s visual appeal.
Introducing Title Deko
Title Deko is essentially a text editor that creates bitmaps of your text so that you can manipulate them on the Liquid Timeline. If this all sounds a little complicated, don’t worry; the majority of this happens in the background. All you need to do is type the text and decide which design to use. Once you’ve completed this, Title Deko creates the bitmap for you and Liquid automatically imports it.
Title Deko is a separate application, but it’s integrated in such a way that you never really see the join or feel removed from your actual video project. For most editors, using Title Deko is a quick and resourceful way to create titles without having to break the creative flow.
Opening Title Deko
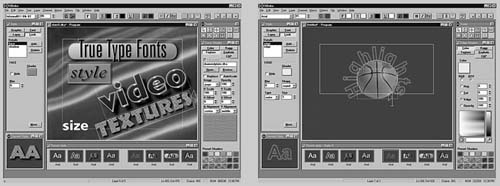
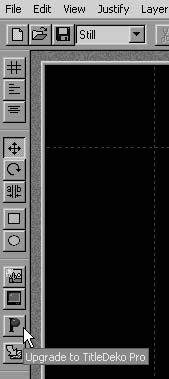
Opening Title Deko (or Pro if it is installed) is a simple matter of clicking the Toolbar button or using the keyboard shortcut. Once you open Title Deko, it takes over your monitor with a full-sized interface (Figure 10.1). Figure 10.2 shows the Toolbar and buttons cut away from the interface in order to see them more clearly.
Figure 10.1. The TitleDeko RT interface.

Figure 10.2. The control buttons and menus for the Title Deko RT interface.

Do one of the following:
• Press F2 on the keyboard.
• Click the Character Generator button ![]() on the Liquid Toolbar.
on the Liquid Toolbar.
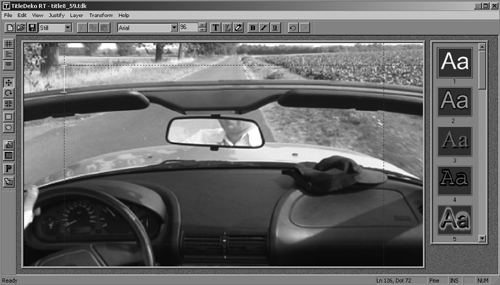
• By default, the background of the Title Deko Editor displays whatever is underneath the Timeline cursor. If this happens to be a blank space in the Timeline, the background is black; if not, video from the Timeline is displayed as a single frame (Figure 10.3). It is not possible to change this image by scrubbing the Timeline.
Figure 10.3. When video is present on the Timeline, you see a single frame in Title Deko.
Creating a Basic Title
Once Title Deko opens on your screen, the text cursor is ready. To create a title, just type and the text appears on your screen (Figure 10.4). If you make a mistake, navigate using the left and right arrow keys to delete or retype the word.
Figure 10.4. Basic text entry using the default font and point size.

When you get to the end of a line, the text wraps around to the next line; if you press Enter, you create a carriage return. If you drop below the window, you’ll need to scroll up using the standard Windows scroll bar.
• You can also use a wheel mouse to scroll through the text window.
• Undo/Redo via the Ctrl+Z shortcut is supported, as are the Search and Replace functions found in most text editors. You can access most of these edit features from the Edit menu (Figure 10.5).
Figure 10.5. The Edit menu.
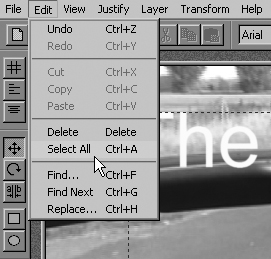
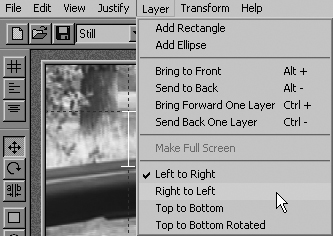
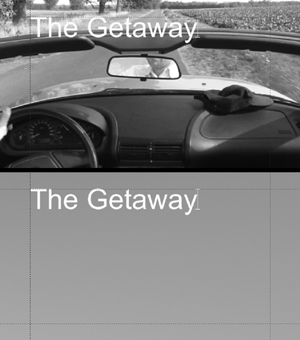
Figure 10.7. A title showing the clip below using its alpha channel (top). The same title with a colored background loses its alpha channel (bottom).
Altering the Text Properties of a Title
Once you have created a basic title, you’ll want to customize it. In this section, you’ll learn how to alter the font and point size, and also how to enhance the title using shadows, colored backgrounds, and background images.
Changing the font and point size
The text defaults to Arial 96 points whenever you open the application. This is a rather large point size, and it’s easy for your titles to start looking messy once you’ve entered only a little bit of text. At this stage, you’ll want to adjust the point size of the text and think about altering the font you are using.
To change the font
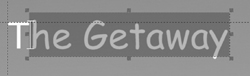
1. Highlight your text by dragging a lasso around it with the mouse (Figure 10.8).
Figure 10.8. Dragging the lasso around the text selects it. You must do this to apply any changes to text or objects in Title Deko.

2. Select the font you want by doing one of the following:
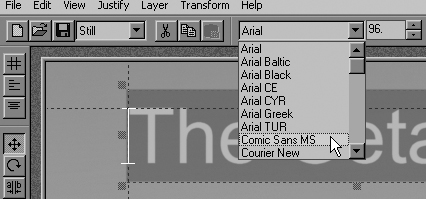
• Click the Font drop-down menu and choose from the list (Figure 10.9).
Figure 10.9. The Font menu.
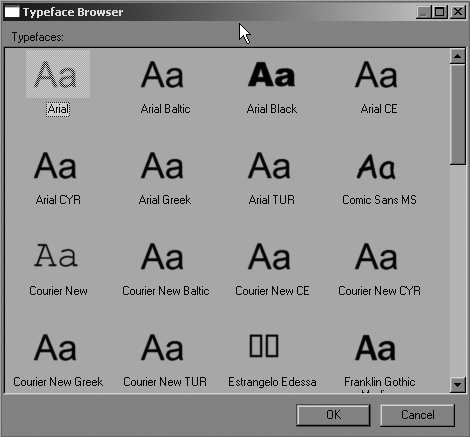
• Click the Browse Typefaces button, or press Ctrl+T and make your selection by double-clicking any of the available fonts (Figure 10.10).
Figure 10.10. The Typeface browser allows you a better look at the fonts that are available.
• Text that isn’t highlighted doesn’t change. Make sure you highlight all of your text; otherwise missing letters will remain in the old font style (Figure 10.11).
Figure 10.11. Bits of your text not highlighted retain their previous font.
1. Highlight your text by dragging a lasso around it with the mouse (see Figure 10.8).
2. Then do one of the following:
• Click the up and down arrows next to the point size (Figure 10.12).
Figure 10.12. Adjusting the point size using the up and down arrows...
![]()
• Double-click inside the point size box and directly enter the size you want (Figure 10.13).
Figure 10.13. ...or directly entering the numerical value...
![]()
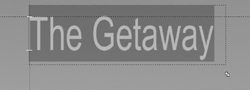
• Click one of the adjustment handles around your text and drag it to the size required (Figure 10.14).
Figure 10.14. ...or dynamically dragging the text to a new size using the selection box.

Aligning text
Once you have the right point size and font style, you can move the text by surrounding either all of it or just one word (or even one letter) and dragging it to wherever you want to place it.
However, to align the text with a bit more accuracy, you should use the alignment tools. You can find these arranged down the left side of the Title Deko RT interface.
To align the text
1. Highlight your text by dragging a lasso around it with the mouse (see Figure 10.8).
2. Click one of the three alignment buttons (Justify, Justify Horizontal, or Justify Vertical) and make your choice.
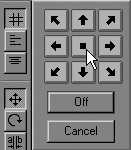
Here I have selected the top Justify button, which allows me to justify the text in any of the eight directions by clicking one of the arrows, or to center the text by clicking on the middle square button (Figure 10.16).
Figure 10.16. Aligning text via the tool buttons.
The two buttons below this button are Horizontal Justify and Vertical Justify, which allow for text justification only on the horizontal or vertical axis.
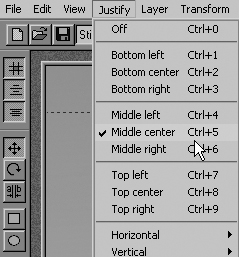
• You can also access these options by selecting Justify in the menu bar and the keyboard shortcuts listed in it (Figure 10.17).
Figure 10.17. Adjusting alignments via the Justify menu.
Enhancing the Text
Once the point size is under control and you have decided which font to use, you can refine things a little further by enhancing the text in various ways. Although you really need the Pro version of Title Deko to create some truly startling changes, the standard version can still add shadows, create colored backgrounds, and even insert a picture into the frame.
To add a shadow
1. Highlight your text by dragging a lasso around it with the mouse (see Figure 10.8).
2. Click the Edit Current Look button, or press Ctrl+P and select the Shadow tab in the Look edit dialog (Figure 10.18).
Figure 10.18. The Shadow tab in the Look edit dialog.
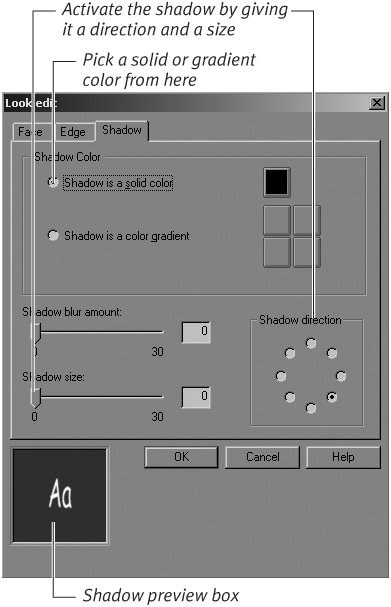
3. Choose a solid or gradient color for your shadow, and then click the colored tiles to pick the actual color.
4. To activate the shadow, give it a direction and a size.
You can find the controls for both of these at the bottom of this interface along with the shadow blur slider. As you adjust these three controls, a real-time preview of your shadow is created.
• If your shadow has a size of zero, no shadow displays. Occasionally Title Deko picks up the last shadow setting in a new title. If you don’t need it, just return to the Edit look dialog and reduce the shadow to zero.
• If your shadow is black, you can’t see it against the standard black background Title Deko uses to represent the alpha channel.
• When you use it constructively with bright colors, the Shadow Blur can produce a very nice-looking title (Figure 10.19).
Figure 10.19. A title with shadow and blur added.

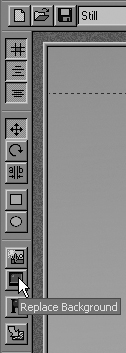
1. Click the Replace Background button once (Figure 10.20).
Figure 10.20. The Replace Background button.
2. From the Set Background dialog, select whether the color will be a solid or gradient, and then choose the actual color or colors by clicking the colored tile(s) (Figure 10.21).
Figure 10.21. Choosing a color for the background.
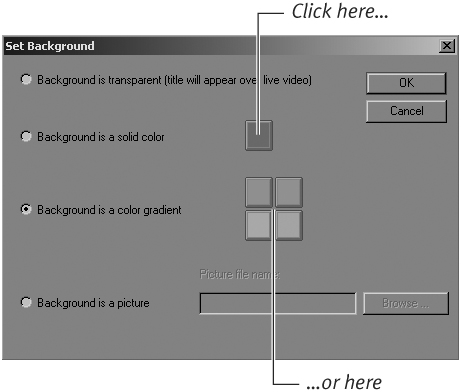
3. Click OK to close this dialog; the background color is created as a result.
• You can add a colored background before or after you add text to the title image.
• To return to the alpha channel so that you can see through the title again, select the Background is transparent option.
Figure 10.22. A title generated after adjusting a setting in each of the three tabs.

1. Click the Insert Picture button once (Figure 10.23).
Figure 10.23. The Insert Picture button...
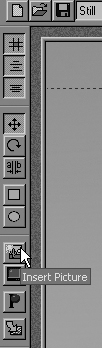
2. From the Open dialog, browse to the image you want, and click once to select that picture (Figure 10.24).
Figure 10.24. ...allows you to select a file.

3. Click the Open button and the picture is inserted into the title.
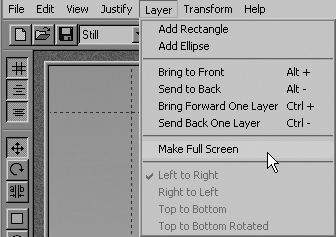
4. To expand the picture to full-screen size, select Make Full Screen in the Layer menu (Figure 10.25).
Figure 10.25. The Make Full Screen option in the Layer menu.
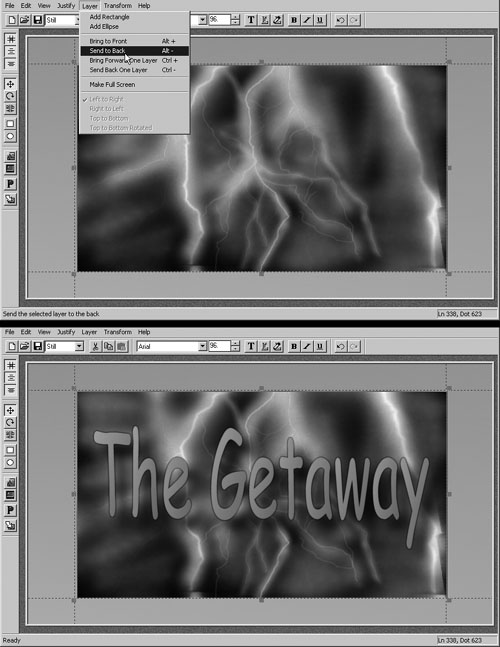
• If the picture obscures the text (Figure 10.26, top), select Layer from the menu bar and select Send to Back from the choices available, or press Alt+hyphen on the keyboard to send it behind the text (Figure 10.26, bottom).
Figure 10.26. Before and after sending an image to the back so that you can see the text.
Making a Title Move
Title Deko can also animate a title in one of two directions: the title can roll up the screen, or crawl across it. These features can be a bit limiting, and you might find that a well-placed Realtime filter is more practical (see Chapter 9, “Working with Filters” for more on filters). But if you want to quickly add movement to a title, the Title Deko RT interface offers a quick and tidy method of doing so.
To add movement to a title
1. Highlight your text by dragging a lasso around it with the mouse (see Figure 10.8).
2. Select Roll or Crawl from the Movement drop-down menu (Figure 10.27).
Figure 10.27. Adding a basic animation to the title via the Movement menu.

• You can’t see movement in the Title Deko RT interface. You must exit the editor and add the title to the Timeline before you can see it move.
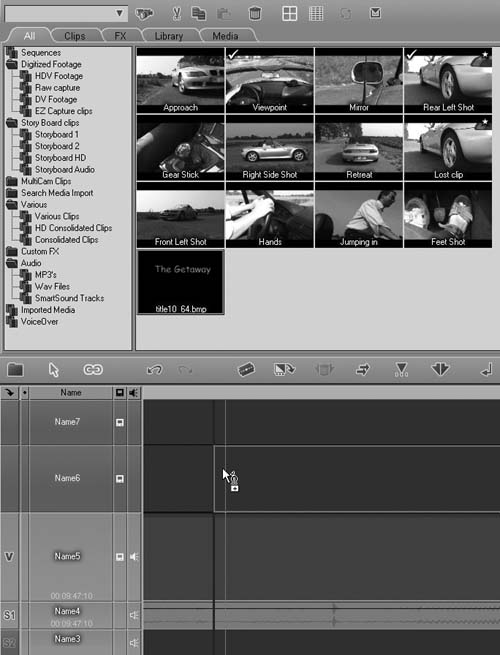
• In the Project Browser, titles with movements appear as either Picons with a white star in the corner or, in detail view, with a small arrow Picon next to the text.
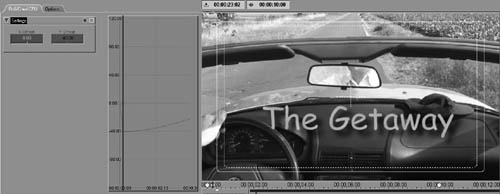
Using Filters to Animate Titles
Figure 10.28. Better results can be obtained by using the Roll and Crawl Realtime filter.
Saving a Title and Adding It to the Timeline
Once you’ve created a title, you can save it in a couple of ways—either by creating a stand-alone title that you might want to import into future projects, or by saving the title and importing it directly into the Project Browser.
The default way to save your title is to send it to the Project Browser where it can be stored for future use. Once in the Project Browser, you can also use it in other sequences, not just the one on which you’re working.
Once you’ve created your title and saved it to the Project Browser, you can add it to the Timeline. This process is exactly the same as placing a video, music, or image file into your project.
To save a title
Do one of the following:
• Press F12, press Ctrl+E, or select File < Save as new to Liquid to automatically add this title to the Project Browser, but to keep the Title Deko RT interface open.
• Press F11 to automatically add this title to the Project Browser and to close the Title Deko RT interface.
• To return to the Liquid interface without saving the title you’ve created, select Exit from the File menu.
To place a title on the Timeline
Do one of the following:
• Drag and drop the title to where you want it to be (Figure 10.30).
Figure 10.30. Drag and drop your titles from the Project Browser to the Timeline...
• Send the title to the Source Viewer; then use the insert arrow to send it to the current location of the Timeline cursor.
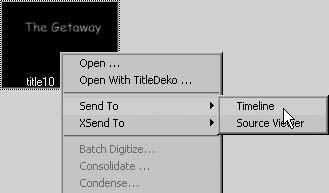
• Right-click the Title and select Send To > Timeline from the contextual menu to send the title to the current location of the Timeline cursor (Figure 10.31).
Figure 10.31. ...or right-click and select Send To < Timeline.
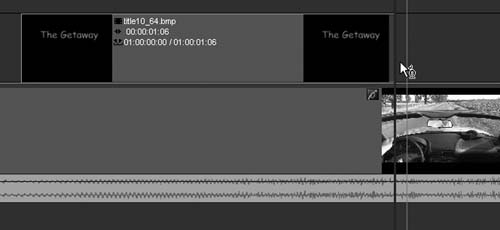
• You can change the duration of a title on the Timeline by clicking the mark-in or mark-out point to reveal a red or yellow handle—depending upon which edit style you are using. Grab this with the mouse to adjust the size (Figure 10.32).
Figure 10.32. Dynamically change the duration of the title on the Timeline.
Editing the Title Again
Once a title is in the Project Browser or on the Timeline, you can re-edit it quite simply using Title Deko. However, be careful—editing the title in the Project Browser doesn’t affect any instance of the title that already exists on the Timeline. Similarly, editing a title on the Timeline doesn’t affect its parent in the Project Browser.
To edit a title
• Right-click the title either on the Timeline or in the Project Browser, and select Open With TitleDeko from the contextual menu (Figure 10.33).
Figure 10.33. You can use the contextual menu to re-edit a title in the Project Browser or on the Timeline.

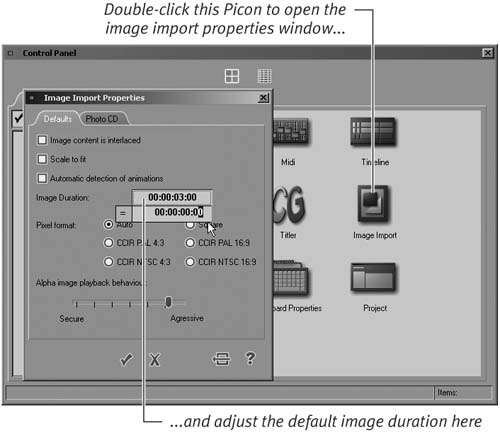
The Default Duration of a Title
Figure 10.34. Altering the default image duration of all titles via the Control Panel and the Image Import button.
Advanced Title Deko Techniques
Once you have mastered the basics of creating and saving your own customized titles, you can move on to add some greater enhancements to your text. You can achieve this by adding objects to the image; doing so isn’t complicated and can create impressive results.
Two different objects can be added to a title: Rectangle and Ellipse. They can be any color, and you can resize and overlap them to create a whole range of different shapes.
To add an object
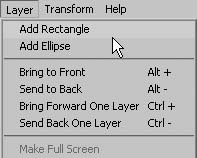
• Within the Title Deko RT interface, select Layer from the menu bar and choose Add Rectangle or Add Ellipse (Figure 10.35).
Figure 10.35. Adding an object using the Layer menu.
• To move an object, simply select it and move it with the mouse.
• To resize an object, drag any of the handles out in the direction you want to expand it.
• To delete an object, press the Delete key with the object selected.
To change the object color
• Click the Edit Current Look button or press Ctrl+ P. You must make sure the object is highlighted for the changes to affect it. Once the object is highlighted, you can adjust the color using the Look edit dialog.