13. Exporting the Timeline
DVD may be the first export choice for many home and semiprofessional users, but you’ll find plenty of other ways to get your project out of Liquid and into the real world. In fact, Liquid is capable of exporting your project to a number of different formats, including Internet-based distributions such as Windows Media Player, or to a file that can be incorporated into an application that can create Flash presentations. With Liquid, you really can “create once and publish many times.”
In this chapter, you’ll learn how to use all of these methods to output your project to the tape and file destination media of your choice, which allows you to incorporate your projects into Web sites.
Using the Output Wizard
The Output Wizard is often used to simplify the export, especially for first-time users. There aren’t that many steps to using the wizard, but it does demonstrate how the workflow should work. This in itself can be illuminating. If you are new to NLE or Liquid, it is best if you start by exploring the export functions of this program by using the wizards first.
To use the Output Wizard
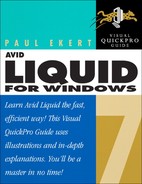
• From the menu bar, select File > Output Wizard (Figure 13.1).
Figure 13.1. Accessing the Output Wizard.
Click any of the icons to launch the appropriate application (Figure 13.2). Each of these choices is clearly explained in the text beside each of the icons in the wizard.
Figure 13.2. The Output Wizard window.

• Fuse Sequence is not an option in the Output Wizard; you must access it directly from the File menu. See the “Fusing a Sequence” section later in this chapter for details.
• For complete details on the Burn to Disc option, see Chapter 12, “DVD Authoring.”
Recording to Tape
You can export your sequences to tape if you need to create an archive of your finished project or supply your client or audience with a VHS copy of the finished movie. However, unless you’re using BetacamSP or an RS422 interface between the analog (VHS) deck and computer, you have no control over the deck and will need to export simply by playing back the Timeline with the analog outputs selected.
When exporting to DV, you have full control over the recording deck.
• Consider exporting the Timeline to a DV device and then playing the DV device into the VHS recorder to avoid sound synchronization problems that can beset analog output.
To record to an analog tape
1. Make sure the Timeline has finished rendering by clicking the Render icon ![]() and ensuring that the include yellow slices check box is checked (Figure 13.3).
and ensuring that the include yellow slices check box is checked (Figure 13.3).
Figure 13.3. Make sure the include yellow slices check box is checked and that rendering has finished.

2. Click the Monitor icon in the Liquid Timeline and select your analog output (Figure 13.4).
Figure 13.4. The analog outputs options available when you’re using the Pro BOB.

Note: Analog outputs are only displayed if you have a recognized analog output device connected, such as the Pro Breakout Box (BOB) or the MovieBox Deluxe.
3. Click the Record button on your analog deck, and then click Play on the Liquid Timeline.
• During analog output, make sure background devices aren’t operating and avoid using the computer for any other activities until the export is complete.
1. Make sure the Timeline has finished rendering by clicking the Render icon and verifying that the include yellow slices check box has been checked.
2. Connect your DV device to the FireWire cable Liquid uses, then make sure it’s in Player mode and that you’ve inserted a non–copy-protected tape.
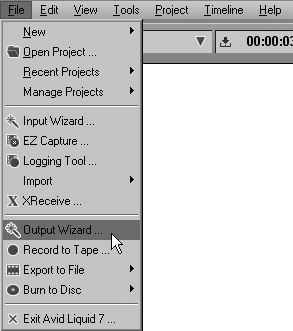
3. Click the Monitor icon in the Liquid Timeline and select Liquid: IEEE1394 to activate the FireWire output (Figure 13.5).
Figure 13.5. Selecting the FireWire output. This should occur automatically once your DV device is connected, but always check before you attempt a DV export.
4. To open the Record To Tape interface, do one of the following:
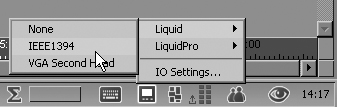
• From the menu bar, select File > Record to Tape (Figure 13.6, top left).
Figure 13.6. Three ways of accessing the Record to Tape interface.
• From the new Quick Access menu, select Output, then click Record to Tape (Figure 13.6, top right).
• From the menu bar, select the Output Wizard, and then click the Record to Tape icon (Figure 13.6, bottom).
5. With the Record to Tape window displayed (Figure 13.7), select the Record tab and select Entire Sequence or Mark In to Mark Out from the top drop-down menu.
Figure 13.7. The Record to Tape interface.
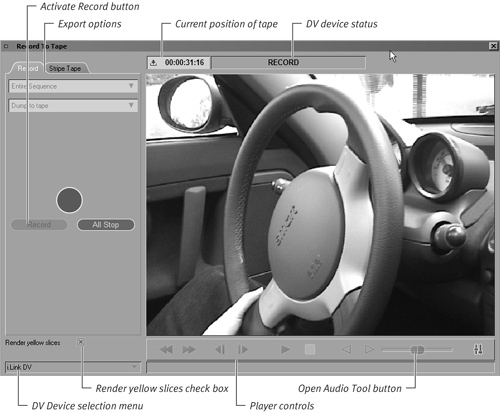
6. Review the tape you’re planning to use by using the player controls, and then find the place you want your recording to begin.
7. Click the Record button to send the Timeline to the DV tape. Click Stop to end this at any time.
• Although the Record To Tape interface has a Render yellow slices option, it’s always best to render the Timeline first to avoid potential output problems.
• You can also monitor and alter the output volume by clicking the Open Audio Tool button in the bottom-right corner of the Record To Tape interface, and adjusting the volume with the slider controls.
• By default, the Shuttle control is absent from the Record To Tape interface, but you can add it by customizing the interface. See Chapter 1, “Getting Started” for details.
Fusing a Sequence
The Fuse function is used to literally fuse together all the clips on the Timeline to create a single AVI file on your hard drive. It’s also used if you want to alter a clip in some way—for example using color correction—then create a completed media file that will not need rendering again to see the change.
Fuse is one of the most used functions in the Liquid world. I use it constantly to create a clip from a Sequence I may want to use again—for example, a FirstPlay “Produced by...” message to include on all my DVDs.
• A fused clip can be automatically imported back into the Project Browser after fusing has finished.
To fuse a Sequence
1. From the menu bar, select File > Export to File > Fuse to open the Export interface.
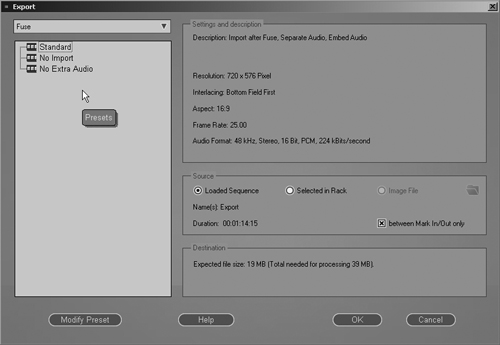
2. Select which option you want to use. The default standard will fuse and import the file back into the Project browser. Click the OK button to proceed (Figure 13.8).
Figure 13.8. The Fuse Sequence interface.
3. Liquid will now ask you to specify where it should save this file. Make sure you pick a fast drive in your system and one with enough space (Figure 13.9).
Figure 13.9. Naming and Saving a Fused Sequence.
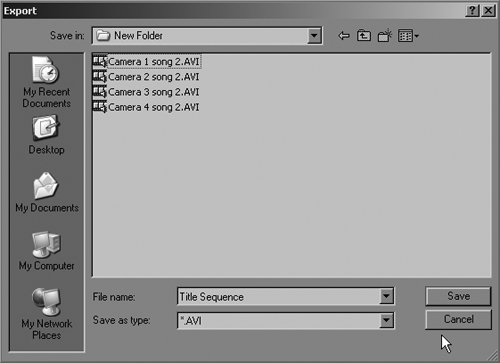
Once you name the clip and click the Save button, the Timeline will be rendered and saved to that location. Once it is finished rendering, it imports this into the currently selected Rack.
• If you’re exporting a particularly large Timeline, make sure that the destination drive has plenty of room. Allow 4 GB for every 10 to 15 minutes of Timeline footage.
• Due to a file size restriction placed on the AVI format by Microsoft, an AVI can’t be longer than 4 GB. The Fuse method gets around this limitation by using an Open DML format that is immune to this restriction and can create an AVI of any length on an NTFS partition.
• The Fuse method is also useful when you compile a standard introduction sequence that you want to use at the start of each of your videos. Rather than dumping this to a DV tape or DVD and then capturing or importing it, you can quickly create a single clip that you can store in the Rack of your choice.
Exporting a Sequence to a Specific File Format
The Internet is the perfect place to distribute your video productions, or at least to expose them to a wider audience. In this case, distribution is simply a matter of deciding which format you want to use and what sort of quality levels you require.
Remember, large-scale formats such as AVI create large files that aren’t always suitable for downloading. The QuickTime format can create a more compact version of the same Timeline, but users must have this application installed on their computer.
Trial and error reveals which format is best for which production, and which one offers the best download time versus the optimal quality setting.
To export a Sequence to a specific file format
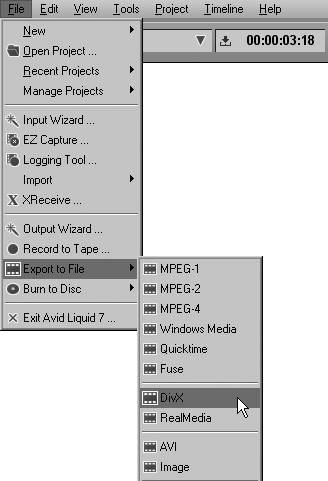
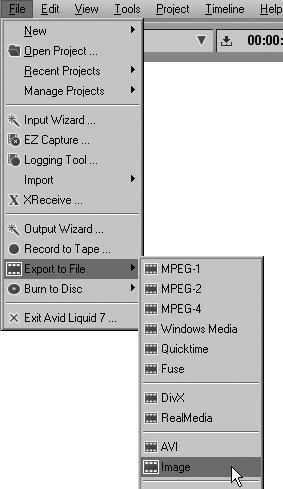
1. From the menu bar, select File > Export to File and then select from the choices available (Figure 13.10).
Figure 13.10. Exporting as a DivX clip.
2. The Export interface will appear and, depending upon which format you selected, will display a range of options (Figure 13.11).
Figure 13.11. The DivX Export interface.
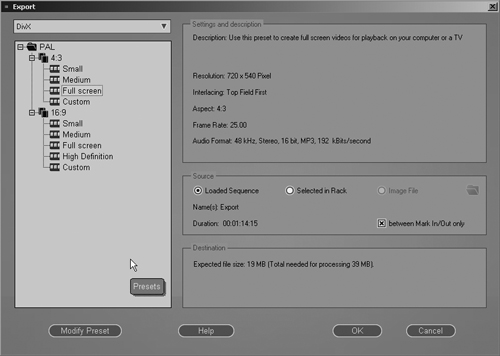
Many of these options are explained in greater detail in Chapter 12.
3. Once you have made your choices, click the OK button.
Liquid will then ask you where you would like the file to be saved.
4. Once you name the file and click the Save button, the export process will begin.
• You may need to install some codecs on your computer before they show up on the list in the Options dialog.
Exporting a Single Frame
The real beauty of film is that it captures a whole range of events in motion; this is something only an experienced cameraperson can do with a normal photograph. However, with video, you have the option of isolating one specific frame from a whole range and using that to create a photograph, either to include in your video project, or to place on the cover of the DVD case.
To export a single frame
1. Scrub through the Timeline until you find the frame you want to export.
2. Press the I key and then the O key, without moving the Timeline cursor, to place the mark-in and mark-out points one frame apart (Figure 13.12).
Figure 13.12. Defining a mark-in and mark-out point one frame apart.

3. From the menu bar, select File > Export to File > Image to display the Image Export window (Figure 13.13).
Figure 13.13. Opening the Image Export interface.
A easy and convenient way to export a single frame bitmap is to use the Snapshot button ![]() . This simply creates a bitmap out of whatever frame is currently in the Master Viewer and then places it in the current Rack.
. This simply creates a bitmap out of whatever frame is currently in the Master Viewer and then places it in the current Rack.
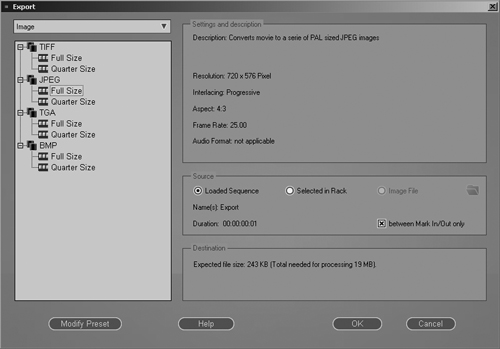
4. Select from the image formats displayed, and then select the frame size (Figure 13.14).
Figure 13.14. The image format options available in Liquid 7.
5. Click the OK button and browse to the folder to which you want to export the file.
Once you name the file and click the Save button, a single frame suitable for use inside applications like Paint Shop Pro will be exported to your chosen folder.
Using XSend
One of Liquid’s most powerful features is its ability to export a clip from the Timeline or Project Browser to another application outside of Liquid.
The reason you’d want to do this is if the clip needs to be edited in a compositing program such as Commotion, After Effects, or, in the case of audio, any number of audio programs.
You accomplish this using the XSend command, which literally sends your clip to X, where X is the application of your choice.
To use XSend
• Right-click any clip on the Timeline or in the Project Browser, and select XSend To and any application from the available list (Figure 13.15).
Figure 13.15. Right-click a clip, access the XSend To option, and select the target program.

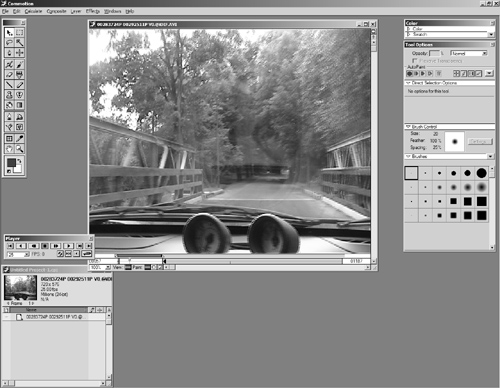
Liquid then exports the clip and loads it into the application you selected (Figure 13.16).
Figure 13.16. The selected clip open in Commotion ready for some serious compositing work.
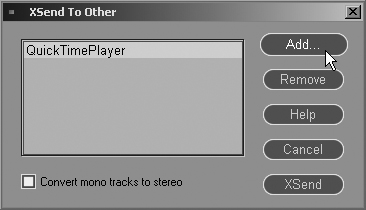
• If the application you want to use isn’t listed, click Other. Then add the application by clicking the Add button and browsing to the .exe file of the application you have in mind (Figure 13.17).
Figure 13.17. You can add any suitable application to the XSend list.
• To XSend the whole Sequence, you’ll need to fuse the clip and then XSend it to the application from the Project Browser. See the “Fusing a Sequence” section earlier in this chapter.
• As an alternative to fusing the entire Timeline, you can build a container and XSend that. For details on containers, see Chapter 14, “Advanced Techniques.”