
3. Importing Media Clips
The alternative to using the Logging Tool is to directly import media into your computer. It is the most direct way you have of bringing media clips such as pictures, music, animations, and other media types into your project.
Liquid 7 can work with an extensive list of file formats, with most common types of media supported. However, the types of imports you are most likely to make will fall under one of these categories:
• Windows Video standard (AVI) files; this includes DivX and WMP9 movies—which in version 7 now import without having to break apart the embedded data in some encoded video files (known as demuxing), and play without requiring rendering.
• Video object (VOB) files from a DVD; these also no longer need demuxing on import in version 7.
• DV as AVI files, and HDV as M2V files.
• Music formats such as WAV, MP3 files, and CD tracks ripped using Windows Media Player.
• Picture formats including JPEG, TIFF, BMP, and others.
• Apple’s Movie standard (MOV files) and MPEG files such as the VCD and SVCD MPEG formats.
Any number of clips can be imported at any one time, and there is no physical size restriction either, although extra-large files will make your Timeline very slow to update.
Touring the Import Media Window
Importing a media file is essentially the same process no matter what type it is—the exceptions being S/VCD and VOB files, which have an extra preview feature. For all other media files, Liquid uses the same interface—the Import Media window—to suck them into your projects.
• Liquid refers to any type of media—image, video, or sound—as a media clip, regardless of its format or its content.
To Open the Import Media window
1. Do one of the following:
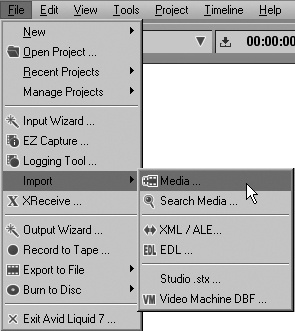
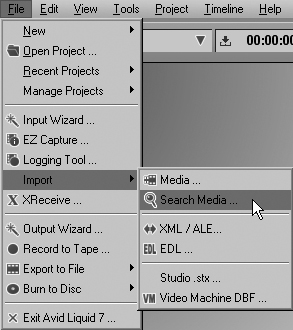
• From the menu bar, select File > Import > Media (Figure 3.1).
Figure 3.1. Opening the Import Media window using the Menu Bar interface.
• Right-click on the menu bar’s Rack Window button ![]() at the top right of the Project Browser.
at the top right of the Project Browser.
• This Import Media window is fairly uncomplicated with only limited options to choose from (Figure 3.2).
Figure 3.2. The Import Media window viewed here as thumbnails.

2. To exit the Import Media window without importing anything, click Cancel.
Elements of the Import Media window
The following list describes the various feature of the Import Media window.
• File location selection area: All Windows commands are supported here including Create New Folder and browsing directories. The last icon on the list can select Thumbnails, Titles, Icons, Details, or List View just as you would do when using Windows Explorer.
• File selection area: As a rule, if it appears in this window, then you can probably import it into the Project Browser.
• Filename: Once the file is selected, the filename appears here.
• Files of type: If you want to filter the files, you can subdivide the media clips into their different categories (Figure 3.3).
Figure 3.3. The three choices available from the Media File Action menu appears on the left of the Import Media window. The Files of type filter is in the middle of the window.
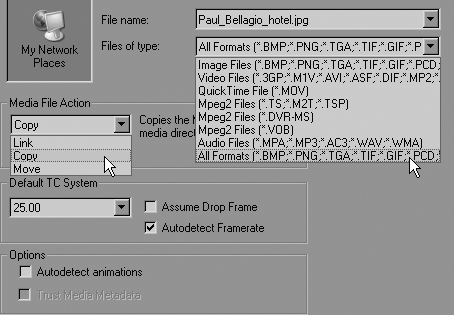
• Media File Action: Here you decide what method of import to use for each media clip. There are three choices (see Figure 3.3).
• Link: This creates a simple link between the original media clip and Liquid; a new file is not created. This type of import is quick because no new media is created. If a media clip is in a place where it is unlikely to be moved (for example, on your local media drive), then you could safely use Link and enjoy the speed benefits this offers.
• Copy: This copies the original media clip to whichever location you have specified. This is the best option to use if you are importing MP3 or WAV files from a CD, or video files from SVCD or DVD sources.
• Move: This physically moves the original media clip to the media drive.
Both Copy and Move require some kind of file transfer, which will create a slower import than the Link method. If, however, the media clip exists on a network or removable drive, then you will want to copy or move it so that you can guarantee access to it in the future.
Copy is the safest option since Move will physically remove the media clip from wherever it was originally stored.
• Default TC system: This is only used when importing a video clip and with a frame rate that is not standardized. See Chapter 6 of the Avid Liquid Reference Manual for complete details.
• Options: Here you have two check boxes:
• Autodetect animation: This is used to import animation files so that only one file, a reference file, appears in the Project Browser. See the “Importing Animated Sequences” sidebar for details.
• Trust Media Metadata: This is used by another version of Liquid called Liquid Chrome.
Using the Input Wizard
To help users gain a quick understanding of the Liquid workflow, users can access a wizard to assist with the import process. If you have never imported a media clip, it’s well worth running the wizard at least once just to see the workflow in action.
To import a media clip using the wizard
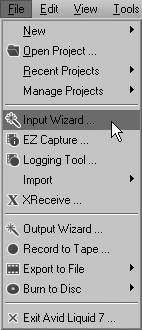
1. From the menu bar, select File > Input Wizard (Figure 3.4).
Figure 3.4. Selecting the Input wizard.
This opens the Input wizard (Figure 3.5).
Figure 3.5. The various choices available in the Input wizard.
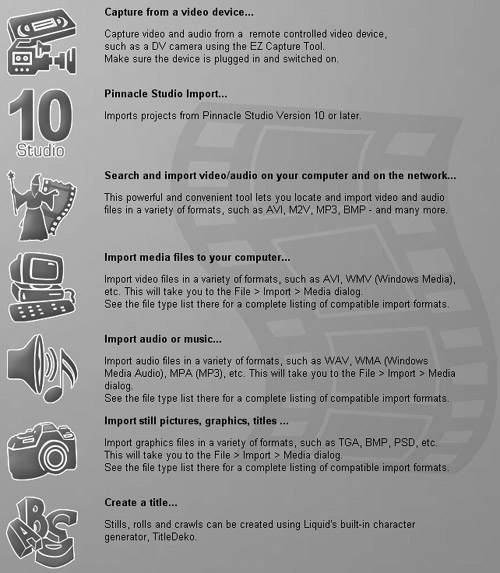
2. Choose which media type you want by clicking the appropriate icon.
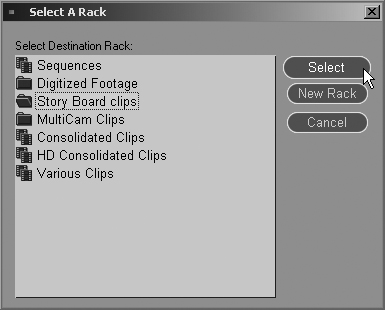
3. You are asked to select the Rack to which you want to import the media file (Figure 3.6). Remember, the Racks on your monitor may look different from the screen shot unless you have copied the layout.
Figure 3.6. Select a Rack or create a new one from here.
See Chapter 1, “Getting Started,” for more details on creating Racks and Folders.
Choose which Rack you want to use, and then click Select. This will bring up the Import Media window shown in Figure 3.2.
4. Browse to the file using the normal Windows functions.
5. When you have located your chosen file, click once to select it, and then click Open or press Alt+O.
The clip takes a moment to import and appears in the Rack you selected in step 3.
Once imported into Liquid, you can alter the media clip any way you like without altering the original. Remember, Liquid is a nondestructive editor.
• Just as you can in Windows, you can select more than one file at a time for import. Multiple clips are selected by holding down the Shift key to select a consecutive range of clips or by holding down the Ctrl key to select individual clips.
• Click once inside the file selection area and then press Shift+A to select all of the clips in the folder. Unsupported clips (operating system files) are not seen by Liquid and will not be selected.
Figure 3.7. The Search and Import Media icon in the Input Wizard.

Figure 3.8. The Search Media window after it has searched the C drive for images.
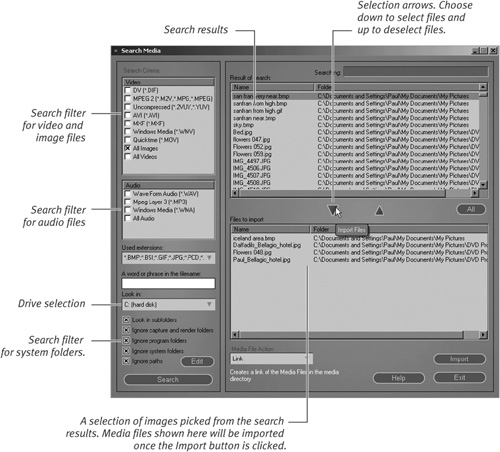
Figure 3.9. The new Search Media Import folder containing the imported files.
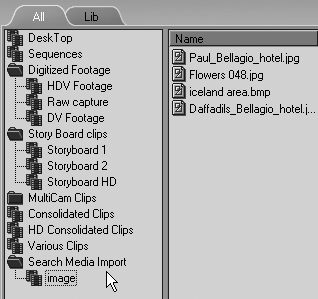
Figure 3.10. Accessing the Search Media option from the menu bar.
Manually Importing a Media Clip
Importing a media clip without the wizard is an identical process, but without the handholding. This means that you must choose which Rack you want your import to be stored in before you begin. It’s not a big step, and once you understand the import process, you will probably want to stop using the wizard completely.
To import a media clip
1. Check to make sure you have selected the correct Rack in the Project Browser. (By default, media clips will always be imported into the last selected Rack.)
You select a Rack by simply clicking it in the left window of the Project Browser.
2. To bring up the Import Media dialog (Figure 3.14) do one of the following:
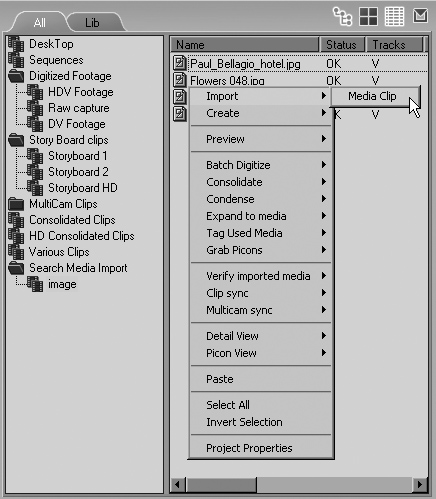
• Click the right window of the Project Browser and select Import (Figure 3.11).
Figure 3.11. Open the Import Media window by right-clicking in the Project Browser...
• Select File > Import > Media (Figure 3.12).
Figure 3.12. ...or use the Menu Bar...

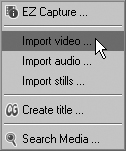
• From the Quick Access Menu in the upper right of the Liquid interface, select Input > Import video, Import audio, or Import stills (Figure 3.13).
Figure 3.13. ...or use the new Quick Access menu.
3. Use the Windows browser to locate the file you want to import.
4. Highlight the media clip you want.
5. Select whether you want to Link, Copy, or Move the media clip (see “Elements of the Import Media window” earlier in this chapter).
6. Once all choices have been made, click Open or press Enter.
The media clip will now import into the Rack you have selected in Step 1.
• Just as you can in Windows, you can select more than one media clip to be imported at a time. Select multiple media clips by holding down the Shift key to select consecutive clips or by holding down the Ctrl key to select individual clips.
• By clicking once inside the file selection area and then pressing Shift+A, you can select all of the clips in this folder. Unsupported clips (operating system files) are not seen by Liquid and will not be selected.
• Liquid also allows you to drag and drop clips from Windows Explorer into the Project Browser.
• Liquid 7 introduced the new Quick Access menu for simplifying the core functions of the Timeline. See Chapters 1 and 6 for more details on the Quick Access menu.
Figure 3.14. The Import Media window; For full details, see Figure 3.2 and the accompanying text description in the “Elements of the Import Media window” section earlier in this chapter.
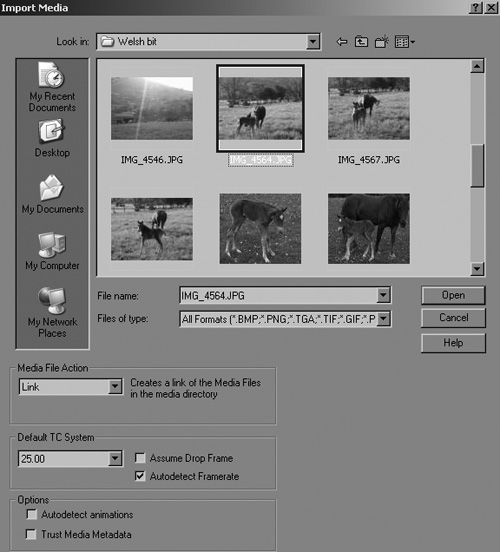
Figure 3.15. The first frame of a TGA animation is highlighted.
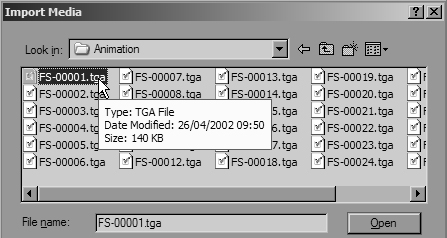
Figure 3.16. The animated clip in the Project Browser and also on the Timeline.
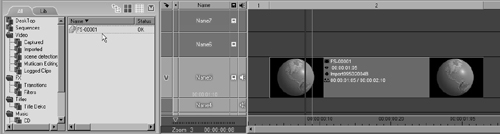
Figure 3.17. If you choose to import an S/VCD or VOB file using this screen, you will be able to preview the file before you finish importing it.
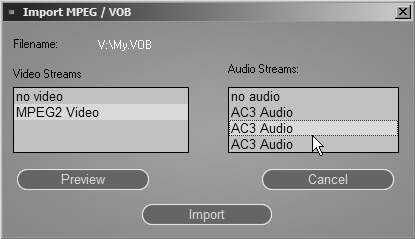
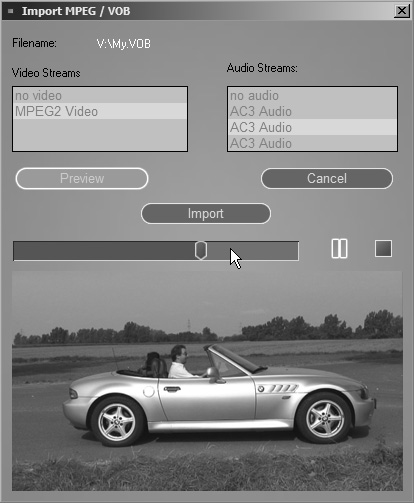
Figure 3.18. The Preview window opens under the selection screen once the Preview button is clicked.
Dealing with Image Import Problems
Although Liquid can import pretty much anything, some imports may throw up unexpected results. Images from digital cameras and scanners are particularly prone to problems.
Most imported images will have been taken by digital cameras and will have frame and image sizes that vary to the moon and back. This is not a problem for Liquid to import, but it can be a problem if you want them to display correctly on the Timeline.
Figure 3.19 shows an image taken with a 2 MB digital camera. When imported into Adobe Photoshop, this image has a size of 1600 pixels by 1200 pixels. This is a large image, but not uncommonly large in the digital camera world. When the image is displayed in the Source Viewer, only a zoomed-in section of the image is shown; on the Timeline, the effect would be the same (Figure 3.20).
Figure 3.19. The original digital image, reduced in size to fit in this book.

Figure 3.20. The same digital image placed on an SD DV Timeline.
Why does this happen?
Video editing systems have a resolution that is linked to the TV standard used in each country. For example,
• In the United States, the National Television System Committee (NTSC) standard uses a screen resolution of 720 pixels by 486 pixels.
• In Europe, the Phase Alternating Line (PAL) standard uses a screen resolution of 720 pixels by 576 pixels.
To display an image correctly, you must scale it to fit one or the other of these sizes or convert it from an oversized image to one that is the correct size.
Converting your images to the size you want requires time and an image manipulation program. This means that every photo you want to import into Liquid needs to be altered in this way. This is a laborious process if you have a lot of images to convert.
The solution is to let Liquid scale each image to fit the resolution being used on the Timeline. For details, refer to the “Resizing Images” section on the next page.
• HDV users can look pretty smug at this point. Most hi-res images will fit comfortably inside a HD inlay. In fact, as shown in Figure 3.21, they are sometimes not large enough. In this case, “Scale to Fit” will enlarge the image.
Figure 3.21. The same digital image placed on an HDV Timeline.
Resizing Images
Converting images can be achieved at three different times:
• During Import
• While it is in the Project Browser
• When it has been placed on the Timeline
To resize during Import
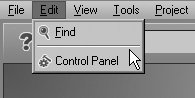
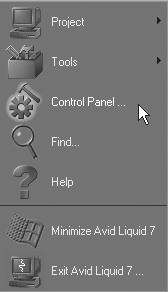
1. Select Edit > Control Panel (Figure 3.22).
Figure 3.22. Selecting the Control Panel.
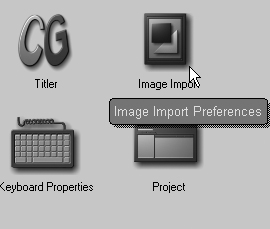
2. Click Image Import (Figure 3.23).
Figure 3.23. The Image Import icon on the Control Panel.
This brings up the Image Import Properties box (Figure 3.24).
Figure 3.24. The Image Import Properties window.
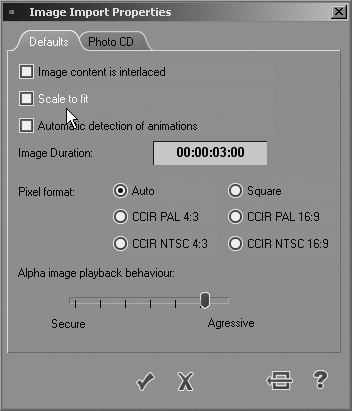
Most of the settings here are for various specialized image-related problems and configurations. Details on this can be found in Chapter 6 of the Avid Liquid Reference Manual.
The two areas of greater interest are
• Scale to fit: When selected, this will import images to the current TV standard.
• Image Duration: This defaults to 3 seconds, but most editors prefer a minimum duration of at least 10 seconds. You can set this here and dynamically resize it on the Timeline at a later point.
3. Click the Scale to fit check box.
4. Close the Image Properties box and import your image.
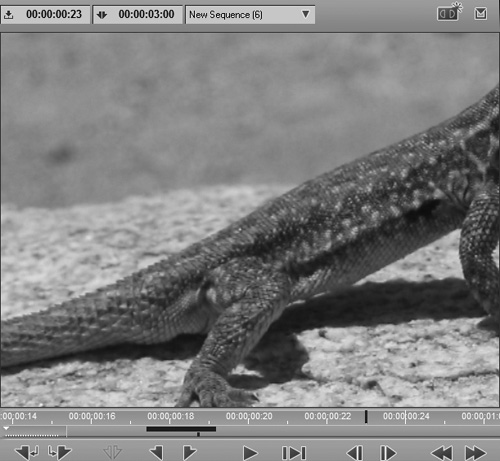
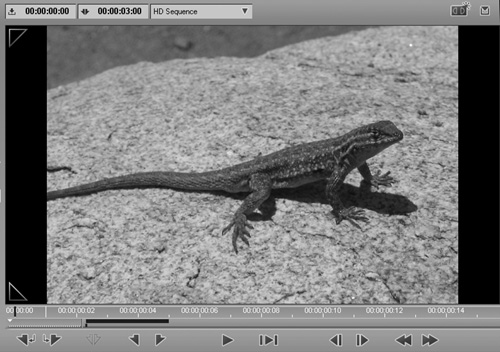
Figure 3.25 shows the original image imported with this setting. Don’t worry too much about the black border running around the outside of the screen; remember, not all of the Inlay will be shown on most TV screens. Trial and error is required here to see what works for you and what doesn’t.
Figure 3.25. The original image reimported using the new settings.
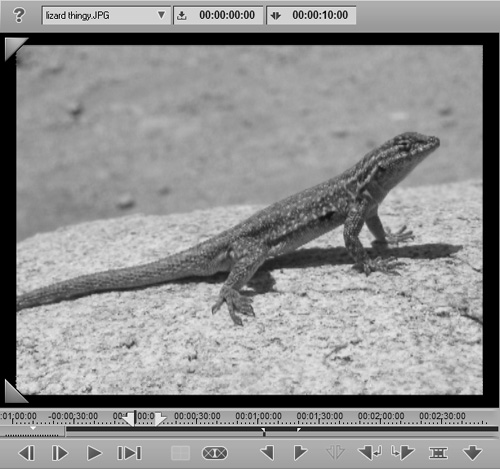
• The Lizard JPEG is one of the sample files that can be downloaded from www.peachpit.com/liquid7vqp.
To resize in the Project Browser or on the Timeline
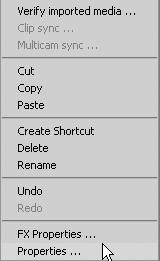
1. If you have already imported your images and you now want to resize them, right-click the image in the Project Browser (or on the Timeline) and select Properties from the menu (Figure 3.27) to display the Properties of that image.
Figure 3.27. Accessing the media clip’s properties.
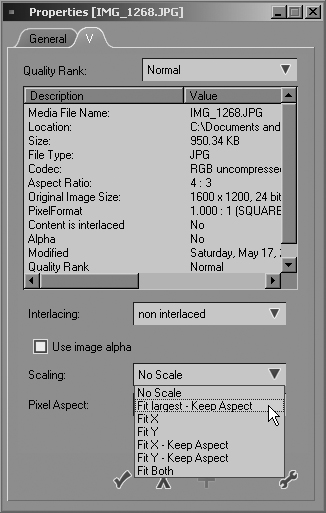
2. Select the V tab to display the visual settings and select Fit largest - Keep Aspect from the Scaling Menu Bar (Figure 3.28).
Figure 3.28. Selecting Fit largest - Keep Aspect from the Menu Bar.
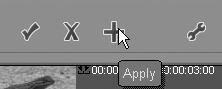
3. Click the plus button to apply this, and then click the check mark button to exit the Properties box (Figure 3.29).
Figure 3.29. Click on the Apply button to apply the change.
Files that won’t import or display correctly
• The clip needs to render before it can play back. Check this by clicking the Render icon ![]() to see if the clip is rendering and how long it will take.
to see if the clip is rendering and how long it will take.
• The clip uses a codec that is not installed on your computer. Check this by trying to play the clip in Windows Media Player. Media Player will give an error message if it doesn’t recognize the codec. If you are very lucky, Media Player will download the correct codec automatically. But only if you are lucky—in the real world this rarely works.
• Google is the place to search for the codec you are looking for, but be aware of what you are downloading! Viruses and Adware programs proliferate the codec market.
Figure 3.30. The six different options for adjusting an image after it has been imported.
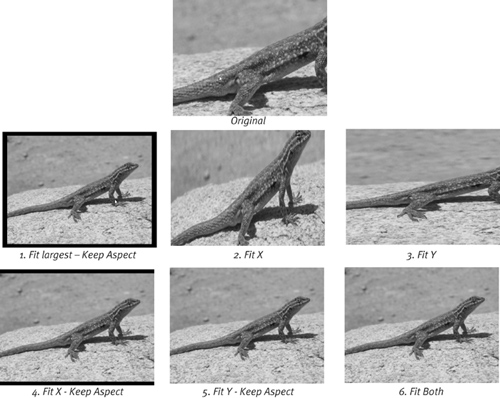
• Fit largest - Keep Aspect: Stretches each side equally
• Fit X: Stretches only the vertical and ignores the horizontal aspect ratio
• Fit Y: Stretches only the horizontal aspect and ignores the vertical aspect ratio
• Fit X - Keep Aspect: Stretches the vertical to fill the screen but keeps the horizontal aspect ratio correct
• Fit Y - Keep Aspect: Stretches the horizontal to fill the screen but keeps the vertical aspect ratio correct
• Fit Both: Stretches all sides, ignoring both aspect ratios
Creating Media Files
Although it is true that media files need to either be imported or digitized to be used in Liquid, the exceptions are certain types of media you can create inside Liquid.
These fall into five categories:
• Creating a color clip
• Creating a signal clip
• Creating a DVD menu
• Creating a title
• Creating a SmartSound clip
You’ll learn how to create a DVD menu in Chapter 12, a title in Chapter 10, and a SmartSound clip in Chapter 7. This next section explains how to create color and signal clips.
Creating a color clip
You’ll often create a color clip to function as the background in an effect or to be used for the lead-in to start a video or the lead-out to end it.
To create a color clip
1. Do one of the following:
• Select the Rack inside which you want to create the clip, and right-click in the right window of the Project Browser.
• Right-click on the Rack Window button ![]() at the top right of the Project Browser.
at the top right of the Project Browser.
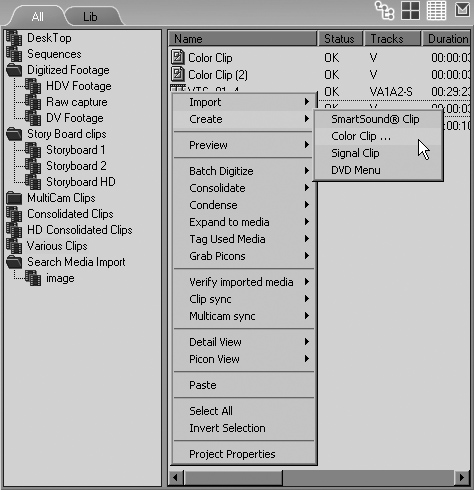
2. From the contextual menu, select Create > Color Clip (Figure 3.31).
Figure 3.31. Accessing Create > Color Clip.
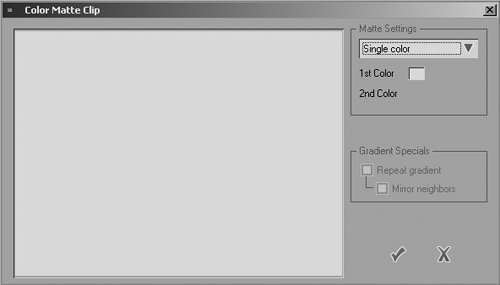
This brings up the Color Matte Clip box.
3. On the right side of the box, choose from three settings:
Single color: A standard color clip made from the color of your choice (Figure 3.32).
Figure 3.32. Choosing a single color.
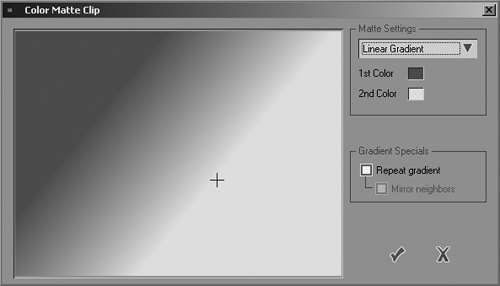
Linear Gradient: Uses two colors and creates a gradual fade from one color to the next on a user-defined path. A path is created by clicking the mouse inside the color window and dragging the cursor around to create the desired effect (Figure 3.33).
Figure 3.33. A linear gradient color clip.
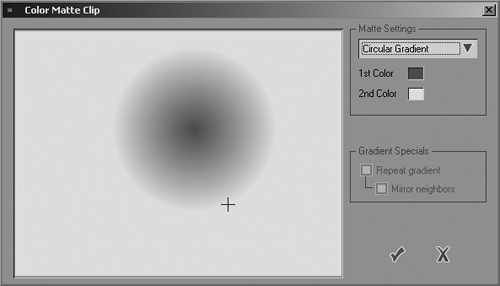
Circular Gradient: Uses two colors and creates a gradual fade from one color to the next in a circular pattern from a user-defined radius. To create a user-defined radius, click anywhere inside the colored area and drag the point of the circle outward or inward (Figure 3.34).
Figure 3.34. A circular gradient color clip.
4. Choose which color you want by clicking the small colored rectangle to bring up the color picker (Figure 3.35).
Figure 3.35. The color picker tool.
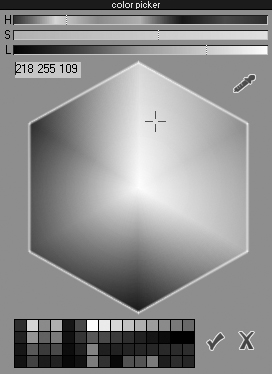
5. Once you have decided on a color, click the check mark to exit the color picker.
6. Click the check mark to exit the Color Matte Clip window.
A color clip is created in the Rack you have selected.
You can insert this new media clip into the Timeline or the Source Viewer and use it just like any other media clip.
Creating a signal clip
The use of a signal clip is somewhat esoteric; all you actually create is a WAV file with a single beep inside it. Some editors use this to give the end of scenes an audio mark or to create an audio queue that they can use as a guide while editing. The rest of us will find its functionality less remarkable.
To create a signal clip
1. Do one of the following:
• Right-click inside the right window of the Project Browser.
• Right click on the Rack Window button ![]() at the top right of the Project Browser.
at the top right of the Project Browser.
2. From the contextual menu, select Create > Signal Clip.
The signal clip is created inside the Rack you have selected.