
In Chapter 7 you saw how Xamarin.Forms allows you to quickly build cross-platform apps that run on Android and iOS (and actually Windows 10) by sharing the user interface and a common set of APIs based on portable class libraries, shared libraries, and .NET Standard libraries.
Now the problem is that most apps need to access native iOS and Android features whose APIs are not mapped by Xamarin.Forms, and I’m talking about common tasks such as showing the camera, detecting network connection availability, and reading and writing files. If Xamarin.Forms did not offer a solution to this problem, then it would neither be as useful nor as successful as it is. In fact, it allows you to access native features in several ways, such as leveraging platform-specific APIs with a bridge to Xamarin.Android and Xamarin.iOS libraries and integrating native visual elements that you can use to enrich the user experience. In this chapter, I will walk you through the most common ways you have to add native features to a Xamarin.Forms solution.
Note
Remember that, in Xamarin.Forms, everything that is available on iOS and Android is also available on Windows 10 through the Universal Windows Platform when you use Visual Studio 2017 on Windows, even though this will not be mentioned in this book.
Using the Dependency Service
More often than not, mobile apps need to access device and operating system features, such as sensors, the camera, files on disk, and network information. iOS and Android have platform-specific APIs that allow you to work with all these features because both the hardware and the operating systems are different from one another. As a consequence, shared code in Xamarin.Forms cannot directly access these APIs.
However, there is a simple feature that allows shared code to access platform-specific APIs based on inversion of control (IoC). In the PCL project (or another shared project type), you create a C# interface that defines the required functionalities; then in the iOS and Android projects, you create classes that implement the interface and that provide a platform-specific implementation of the functionalities. In the PCL project, you then use the DependencyService class and its Get method, which finds the correct implementation of the interface for the platform your app is running on. This enables apps written with Xamarin.Forms to do anything a native app can do. The DependencyService class is a dependency resolver and is able to resolve classes that have been registered as implementations of a given interface. For a clear understanding of how the dependency service works, I will provide an example that extends the News Reader sample app started in the previous chapter. More specifically, I will show how to add local data access support based on SQLite, which not only is a common requirement in most mobile apps but which also requires you to specify a path name for the database. Android and iOS have different APIs to deal with path names and to represent user folders on the device, so constructing the full path for the SQLite database is something that requires the dependency service. The sample app will basically create a table based on the Item class and will store a list of news in the database.
Adding the SQLite NuGet Packages
The first thing you need to do is to add NuGet packages that allow you to work with SQLite databases. SQLite is already bundled in iOS and Android, so it is a convenient choice for local data access. By following the lessons learned in Chapter 2, add the NuGet package called SQLite.Net PCL to all the three projects in the solution. Figure 8-1 shows the appropriate NuGet package in the Add Packages dialog.

Figure 8-1. Adding the SQLite.Net PCL package
Once you have added the package to the three projects and before you start implementing data access, some minor changes are required to the Item class. In fact, the SQLite library exposes data annotation attributes that you can use to decorate class names and properties to define the table name, column names, identity, required columns, and some basic validation rules such as maximum string length. In Visual Studio, open the Item.cs file and add a using SQLite.Net.Attributes directive first. The next step is to decorate the class name with the Table attribute to specify a table name and define a property called Id that can be used as the identity column. This is the code you need to edit the Item class (the remaining code will be left unchanged):
[Table("Items")]public class Item : INotifyPropertyChanged{private int id;[PrimaryKey, AutoIncrement]public int Id{get{return id;}set{id = value;OnPropertyChanged();}}// The rest of the code is unchanged...}
Decorating the class name with Table is optional. If not specified, the table will have the same name as the class. In this case, a table called Item would be generated, but a plural name is more consistent, so the Table attribute allows you to specify Items as the table name. The Id property is decorated with the PrimaryKey and AutoIncrement attributes, which set the column as the primary key and as the table identity with auto-increment, respectively. By default, column names reflect property names. You can use the Column attribute to define column names different from property names. Other common attributes are NotNull (marks a property as required), MaxLength (sets the maximum length for a string property), and Ignore (does not include the property as a column in the table).
Implementing the Dependency Service
To access the SQLite database from shared code, you need an instance of an object of type SQLiteConnection that exposes, among the others, the database path name and that allows for creating, querying, and deleting tables. This path name must be constructed in the iOS and Android projects, and both must return a SQLiteConnection object. To accomplish this, in the PCL project add a new interface called IDataAccess.cs. You can follow the same steps you saw to add a class, but in the New File dialog you will find an item called Empty Interface (see Figure 8-2).
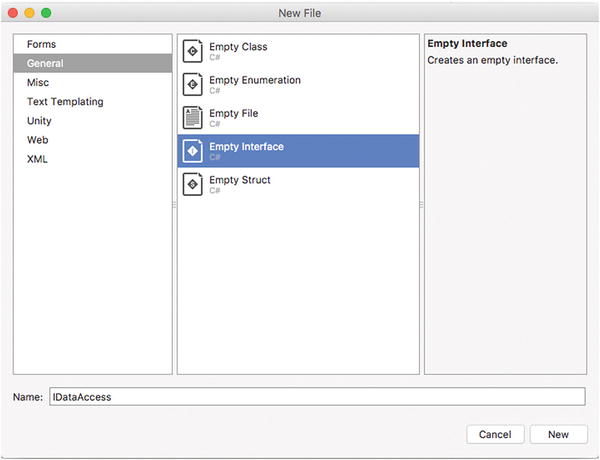
Figure 8-2. Adding an interface
The code for the interface is simple and looks like the following:
using SQLite.Net;namespace NewsReader{public interface IDataAccess{SQLiteConnection DbConnection();}}
The interface defines a method called DbConnection that returns an object of type SQLiteConnection. Platform-specific classes will need to expose their own implementation of the method. To accomplish this, add two files called DataAccess.cs, one in the Android project and one in the iOS project. The Android implementation looks like the following:
using System;using System.IO;using Xamarin.Forms;using NewsReader.Droid;using SQLite.Net;using SQLite.Net.Platform.XamarinAndroid;[assembly: Dependency(typeof(DataAccess))]namespace NewsReader.Droid{public class DataAccess : IDataAccess{public SQLiteConnection DbConnection(){string dbName = "newsreader.db3";string dbPath =Path.Combine(Environment.GetFolderPath(Environment.SpecialFolder.Personal),dbName);returnnew SQLiteConnection(new SQLitePlatformAndroid(),dbPath);}}}
Platform-specific implementations of an interface that is used with the dependency service must be decorated with the Dependency attribute, which is actually applied at the namespace level with the assembly: enforcement to ensure that only one implementation will be used (and in the case of multiple implementations, the first one is used). As you can see, the class properly implements the interface by exposing the DbConnection method, whose body first retrieves the user’s personal folder path on Android and concatenates it (Path.Combine) with the database name, which I have called newsreader.db3 but that you can replace with a name of your choice. Finally, an instance of the SQLiteConnection object is returned, passing the target platform (SQLite.Net.Platform.XamarinAndroid.SQLitePlatformAndroid) and the database path name.
Note
When concatenating strings that represent folder and file names, do not use the C# string concatenation operator (+) or methods such as String.Concat. Use Path.Combine instead, which ensures that the full path is generated properly and that it does not contain any extra special characters.
Similarly, you need an implementation on the iOS side, which looks as follows:
using System;using System.IO;using NewsReader;using NewsReader.iOS;using SQLite.Net;using Xamarin.Forms;[assembly: Dependency(typeof(DataAccess))]namespace NewsReader.iOS{public class DataAccess: IDataAccess{public SQLiteConnection DbConnection(){string dbName = "newreader.db3";string personalFolder =Environment.GetFolderPath(Environment.SpecialFolder.Personal);string libraryFolder = Path.Combine(personalFolder, "..", "Library");string dbPath = Path.Combine(libraryFolder, dbName);returnnew SQLiteConnection(new SQLite.Net.Platform.XamarinIOS.SQLitePlatformIOS(),dbPath);}}}
As you can see, there is a difference in how folders are handled in iOS. Here you have to construct the path of the local library, and then you concatenate it with the database name. The target platform is represented by the SQLitePlatformIOS type. Now you have two platform-specific implementations of a class that generate the path name of the database and that return an instance of SQLiteConnection. The next step is to add some logic to use a database for storing news. The very first time the app starts, it will download the news feed content from the Internet and will store the list of items in the database. This way, the next time the app starts, contents will be retrieved from the local database instead of downloading them again from the Internet, which improves perceived performance and offers offline contents. However, the user must be able to refresh the news list, for example, with the pull-to-refresh gesture. Having that said, open the ItemService.cs file and edit the QueryRssAsync method as follows (explanations will come shortly):
public static async Task<IEnumerable<Item>> QueryRssAsync(bool forceReload){SQLiteConnection database = DependencyService.Get<IDataAccess>().DbConnection();database.CreateTable<Item>();// if force reload or the table contains no item...if (forceReload == true || !database.Table<Item>().Any()){var client = new HttpClient();var data = await client.GetStringAsync(FeedUri);var doc = XDocument.Parse(data);var dcNS = XNamespace.Get("http://purl.org/dc/elements/1.1/");var query = (from video in doc.Descendants("item")select new Item{Title = video.Element("title").Value,Author = video.Element(dcNS + "creator").Value,Link = video.Element("link").Value,Thumbnail = GetThumbnail(video),PublicationDate =DateTime.Parse(video.Element("pubDate").Value,System.Globalization.CultureInfo.InvariantCulture)});client.Dispose();database.DropTable<Item>();database.CreateTable<Item>();database.InsertAll(query);return query;}else{return database.Table<Item>().AsEnumerable();}}
The updated version of the method takes an argument of type bool, called forceUpload . If true, the method will reload contents from the Internet and save them into the database; if false, the method returns the list of Item objects stored in the database. Notice the first line of the method body: it declares a variable of type SQLiteConnection that receives the result of the invocation to the platform-specific implementation of the DbConnection method you saw before. To accomplish this, the code invokes the static DependencyService.Get method , which is a generic method and whose type parameter is the interface that you defined in the PCL project. With this approach based on IoC, you do not need to care about the platform your app is running on. The DependencyService class calls the appropriate platform-specific implementation of the interface and, in this case, of the DbConnection method. The DependencyService class crosses any barriers between Xamarin.Forms and native APIs, and therefore it allows you to do anything you could do with Xamarin.Android and Xamarin.iOS in terms of full API availability. The condition that forces the code to load data from the Internet is either forceUpload = true or that the database contains no items, regardless of the value of forceUpload. The Table generic method from the SQLiteConnection class allows you to interact with the table whose type is represented in the generic type parameter. In this case, Table<Item> allows you to interact with the table of Item objects. This method returns an object of type TableQuery<T>, which implements the IEnumerable<T> interface and therefore supports the LINQ extension method, such as Any, that is used to detect whether the table contains at least one object. So, if either forceUpload is true or Any returns false (which means no items), the code downloads the RSS feed content from the Internet. The code for this is unchanged. When the download completes, the code invokes other methods from the SQLiteConnection instance, such as DropTable (which deletes a table), CreateTable (which creates a table), and InsertAll (that inserts all the items in an IEnumerable collection into the database). Notice that DropTable and CreateTable are generic and require the type parameter that represents the table, the Item class in this case. InsertAll is not generic, and the SQLite library is intelligent enough to automatically resolve the type for the items in the collection, storing them in the proper table. The SQLiteConnection class exposes a large number of methods to work with both individual records and multiple records, such as Insert, InsertAll, Update, UpdateAll, Delete, and DeleteAll, and it also exposes methods to send SQL commands, such as CreateCommand, and methods to work with transactions, such as BeginTransaction and Commit. IntelliSense provides helpful tooltips when calling these methods. If instead forceUpdate is false and there is at least one record in the table, the code returns the collection of Item objects exposed by the Table method, converted into IEnumerable<Item> with AsEnumerable so that callers do not rely on a specialized type such as TableQuery. The next, simple code edit you need to do is in the ItemViewModel.cs class file, more specifically in the InitializeAsync method. The edit you need to do is to simply accept a parameter of type Boolean that is passed to the invocation of QueryRssAsync and that looks like this:
public async Task InitializeAsync(bool forceReload){if (IsBusy)return;IsBusy = true;try{var result = await ItemService.QueryRssAsync(forceReload);if (result != null){this.Items = null;this.Items = new ObservableCollection<Item>(result);}}catch (Exception){this.Items = null;}finally{IsBusy = false;}}
Finally, you need to make a couple of edits in the NewsReaderPage.xaml.cs file. In fact, you need to add the same Boolean parameter to the LoadDataAsync method and pass true or false depending on whether the app is starting up or whether pull-to-refresh has been invoked by the user. The following code contains the few edits:
private async Task LoadDataAsync(bool forceReload){this.NewsActivity.IsVisible = true;this.NewsActivity.IsRunning = true;await this.viewModel.InitializeAsync(forceReload);this.RssView.ItemsSource = this.viewModel.Items;this.NewsActivity.IsVisible = false;this.NewsActivity.IsRunning = false;}protected override async void OnAppearing(){base.OnAppearing();await LoadDataAsync(false);}private async void Handle_Refreshing(object sender, System.EventArgs e){await LoadDataAsync(true);}
You have completed the implementation of the required code to store and load data against a SQLite database so that the contents are downloaded from the Internet only when the app is launched for the first time and only if the user pulls to refresh the ListView control. You can simply run the sample application and see how it benefits from the steps described in this section.
Using Plug-ins
When you create apps with Xamarin.Forms and you need to access native APIs, most of the time you use features that exist across platforms, with different APIs. Think of the camera. iOS and Android devices have cameras, and their APIs are certainly different from one another, but at least a few of the features are similar, such as launching the camera, taking a picture, and saving a picture on disk.
As another example, think of the GPS sensor. Android and iOS devices mount different hardware for that and expose APIs that are totally different from one another, but in both platforms the GPS sensor can return the current position and can detect whether the position changes. For capabilities that exist cross-platform and that expose common ways of interaction, instead of writing platform-specific code and implementing the dependency service, you can take advantage of plug-ins. These consist of an abstract cross-platform implementation for those features that can be shared across platforms and that can be easily consumed in Xamarin.Forms solutions. Plug-ins are available as NuGet packages that you can easily add to your projects, and they are open source. Most of them have been created by Microsoft employees, but developers can create plug-ins that can be shared with other developers as well. A list of plug-ins is maintained on GitHub at http://github.com/xamarin/XamarinComponents , and I will shortly teach you how to find plug-ins on NuGet. The sample application described so far lacks an important feature: detecting whether a network connection is available before attempting to download the RSS feed content from the Internet. Detecting the availability of a network connection requires platform-specific code, so you would normally use the dependency service and the iOS and Android libraries. Fortunately, this can be dramatically simplified using the so-called Connectivity Plugin. To understand how it works, in the Solution pad right-click the PCL project name and then select Add ➤ Add NuGet Packages. When the Add Packages dialog appears, search for the Connectivity Plugin for Xamarin and Windows, as shown in Figure 8-3. The identifier of most plug-in packages starts with Xam.Plugin, so if you type this search key in the search box, the list of packages will be quickly filtered to show the list of available plug-ins (and remember to only add packages from trustworthy sources).
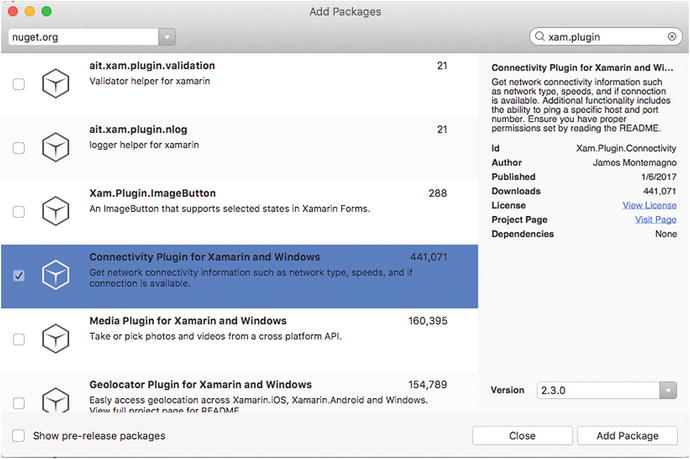
Figure 8-3. Downloading plug-ins for Xamarin from NuGet
Click Add Package and repeat the same steps for the iOS and Android projects. Going into depth on the details of a plug-in’s infrastructure is beyond the scope of this chapter, so you can refer to the documentation about this topic ( http://developer.xamarin.com/guides/xamarin-forms/platform-features/plugins/ ). By the way, generally speaking, plug-ins provide a singleton class that exposes members, and their purpose is to offer a cross-platform solution to working with platform-specific features. In the case of the Connectivity Plugin, this exposes a singleton class called CrossConnectivity with a Boolean property called IsConnected that returns true or false depending on whether a network connection is available. Using this class is extremely easy. For example, a good idea is to check whether a network connection is available inside the QueryRssAsync method of the ItemService class, before downloading content from the Internet, to prevent app crashes. Open the ItemService.cs file and add a using Plugin.Connectivity directive. This is the namespace that defines the CrossConnectivity class. Next, just before the declaration of the client variable of type HttpClient, add the following line:
if (!CrossConnectivity.Current.IsConnected) throw new InvalidOperationException();The Current property represents the actual singleton instance of the class. In this code, if IsConnected returns false, which means no connection, an InvalidOperationException is thrown and will be handled shortly by the caller. Of course, you could decide to implement different logic. With this plug-in and a single line of code, you have called a platform-specific feature without writing all the necessary code yourself. Actually, CrossConnectivity has much more to offer. With the IsReachable and IsRemoteReachable methods, you can ping a host and a remote host, respectively, and with the BandWidths property, you can retrieve a collection of available active network connections. Notice that BandWidths is not supported on iOS and will always return an empty list. On Android, you must make sure that ACCESS_NETWORK_STATE and ACCESS_WIFI_STATE are selected in the application manifest.
Note
When you use plug-ins, I recommend you visit each plug-in’s home page for more documentation and to discover potential limitations. Normally, you can find the URL for the plug-in home page on GitHub or when you select a plug-in NuGet package in the App Package dialog.
The next step is to implement error handling in the NewsReaderPage.xaml.cs file . Not only is this a best practice, but in this particular case it is required because an InvalidOperationException is thrown if no connection is available. Let’s change the LoadDataAsync method as follows:
private async Task LoadDataAsync(bool forceReload){Try{this.NewsActivity.IsVisible = true;this.NewsActivity.IsRunning = true;await this.viewModel.InitializeAsync(forceReload);this.RssView.ItemsSource = this.viewModel.Items;this.NewsActivity.IsVisible = false;this.NewsActivity.IsRunning = false;}catch (InvalidOperationException){await DisplayAlert("Error", "Check your Internet connection", "OK");return;}catch (Exception ex){await DisplayAlert("Error", ex.Message, "OK");return;}}
The code implements specialized error handling for InvalidOperationException and shows a specific error message, and it provides general error handling by catching Exception and showing the exception message. The DisplayAlert method shows a pop-up in the user interface, and the last argument represents the text you want to display in the button that closes the pop-up. There is another method overload that allows you to specify text for both the OK and Cancel buttons and that returns true or false depending on the user choice. If you now try to run the application and attempt to download contents without an Internet connection, you will see an error message, and the app will not crash. By using a plug-in, you have been able to quickly implement a feature that would otherwise require more extensive work on platform-specific projects.
Using Native Visual Elements
In the previous sections, you saw how to call platform-specific APIs in your shared code. Xamarin.Forms offers powerful ways to fully leverage Android and iOS libraries, but sometimes you might have different needs. As you learned in the previous chapter, Xamarin.Forms maps native controls into cross-platform objects that encapsulate everything that is in common between platforms.
However, in some situations you might want to use the native views directly. Reasons for this might be deeper UI customizations or using views for which Xamarin.Forms does not provide a mapping. There are several ways to accomplish this, and this section walks you through all the possible alternatives.
Adding Native Views to XAML
Xamarin.Forms allows developers to add native views directly into the XAML markup . This feature has been available only since a few versions, and it makes it really easy to use native visual elements. To demonstrate this feature, create a new blank Xamarin.Forms project called NativeViews .
In the XAML of the root page, you first need to add the following platform XML namespaces:
xmlns:ios="clr-namespace:UIKit;assembly=Xamarin.iOS;targetPlatform=iOS"xmlns:androidWidget="clr-namespace:Android.Widget;assembly=Mono.Android;targetPlatform=Android"xmlns:formsandroid="clr-namespace:Xamarin.Forms;assembly=Xamarin.Forms.Platform.Android;targetPlatform=Android"
Remember that you can choose a different name for the namespace identifier. As you can see, the first two namespaces point to the corresponding C# namespace that exposes native controls. The third namespace points to Xamarin.Forms and is required with Android widgets. Using native views is then really straightforward since you just need to declare the specific view for each platform you want to target, as follows:
<StackLayout><ios:UILabel Text="Native Text" View.HorizontalOptions="Start"/><androidWidget:TextView Text="Native Text"x:Arguments="{x:Static formsandroid:Forms.Context}" /></StackLayout>
In the previous example, the XAML markup is using a UILabel native label on iOS and a TextView native label on Android. Notice how you can assign properties the way you would with any other view. With Android widgets, you must supply the current Xamarin.Forms UI context, which is done with a special form of data binding that binds the static (x:Static) Forms.Context property to the view. You can interact with views in C# code as you would normally do, such as with event handlers.
Introducing Custom Renderers
Xamarin.Forms renders visual elements by leveraging native views and layouts on each platform, but it is limited to those properties that exist cross-platform. If you need further customizations, you are allowed to use native visual elements directly so that you can make all the customizations you need. Customizations at this level are not limited to layout, but they might also involve changing a view’s behavior.
To accomplish this, you use the so-called custom renderers . A custom renderer is a class that inherits from the class that maps the native view (the renderer) in Xamarin.Forms and that must be implemented in each platform project. Here you can edit the layout, override members (where possible), and change the behavior of the native view, which you will then be able to use in XAML. For a better understanding, let’s consider the following example, which requires you to create a new blank Xamarin.Forms project called CustomRenderers. Suppose you have an Entry view in Xamarin.Forms and you want the content of such an Entry to be automatically selected when the user taps the text box. Because the Xamarin.Forms Entry does not support this, you can create a custom renderer that works at the platform level. In the PCL project, add a new class called SelectableEntry, which inherits from Entry as follows:
using Xamarin.Forms;namespace CustomRenderers{public class SelectableEntry: Entry{}}
Technically speaking, creating a class that inherits from the original view is not mandatory. However, any customizations you provide would affect all the views of the same type (Entry in this case), which is probably not the desired behavior. By creating a derived class, you can customize only this one and decide when to use the customized view or the original view. The next step is creating a class that extends the built-in renderer (called EntryRenderer in this case), and this must be done in both the iOS and Android projects. For example, the following code must be added to a class file in the iOS project (called SelectableEntryRenderer.cs) and demonstrates how to extend the EntryRenderer class by handling the EditingDidBegin event on the UITextField view and calling the PerformSelector method, passing an ObjCRuntime.Selector object that performs the selectAll selection over the text box:
using System;using Xamarin.Forms;using Xamarin.Forms.Platform.iOS;using CustomRenderers;using CustomRenderers.iOS;[assembly: ExportRenderer(typeof(SelectableEntry), typeof(SelectableEntryRenderer))]namespace CustomRenderers.iOS{public class SelectableEntryRenderer : EntryRenderer{protected override void OnElementChanged(ElementChangedEventArgs<Entry> e){base.OnElementChanged(e);var nativeTextField = Control;nativeTextField.EditingDidBegin += (object sender, EventArgs eIos) =>{nativeTextField.PerformSelector(new ObjCRuntime.Selector("selectAll"),null, 0.0f);};}}}
Notice the ExportRenderer attribute : it says that objects of type SelectableEntry will be rendered through objects of type SelectableEntryRenderer. In Android, the logic is pretty similar, so you have to add a SelectableEntryRenderer.cs file to the Android project and write the following code:
using System;using Xamarin.Forms;using Xamarin.Forms.Platform.Android;using CustomRenderers;using CustomRenderers.Droid;[assembly: ExportRenderer(typeof(SelectableEntry), typeof(SelectableEntryRenderer))]namespace CustomRenderers.Droid{public class SelectableEntryRenderer: EntryRenderer{protected override void OnElementChanged(ElementChangedEventArgs<Entry> e){base.OnElementChanged(e);if (e.OldElement == null){var nativeEditText = (global::Android.Widget.EditText)Control;nativeEditText.SetSelectAllOnFocus(true);}}}}
In the case of Android, the view is an object of type EditText, and the customization is done by invoking its SetSelectAllOnFocus method . At this point, you can simply add a SelectableEntry view to your XAML as follows:
<?xml version="1.0" encoding="utf-8"?><ContentPage xmlns="http://xamarin.com/schemas/2014/forms"xmlns:x="http://schemas.microsoft.com/winfx/2009/xaml"xmlns:local="clr-namespace:CustomRenderers"x:Class="CustomRenderers.CustomRenderersPage"><StackLayout Orientation="Vertical" Padding="20"><Label Text="Enter some text:"/><local:SelectableEntry x:Name="MyEntry"HorizontalOptions="FillAndExpand"/></StackLayout></ContentPage>
The local XML namespace is automatically available in the page declaration. You will see that IntelliSense will help you select the view from the list of objects exposed by the local namespace, and the XAML editor’s behavior is the same as with other views. If you now run the application, you will see how the text in the SelectableEntry view will be automatically selected with a tap (see Figure 8-4).

Figure 8-4. The custom renderer in action
In summary, with custom renderers you can modify the layout and behavior of a view, and you can then use the view in XAML like any other Xamarin.Forms control.
Introducing Effects
Sometimes you just need to customize some layout properties of a view, without the need to change its behavior. To accomplish this, Xamarin.Forms has the concept of an effect. At a higher level, an effect can be thought of as a simplified custom render that is limited to customizing layout properties. An effect is a class that inherits from PlatformEffect and that must be implemented in all the platform projects. For the next example, I will be extending the CustomRenderers project created previously.
Suppose you want to change the background color for some native views. In the iOS project, add a file called BackgroundEffect.cs and the following code:
using System;using CustomRenderers.iOS;using UIKit;using Xamarin.Forms;using Xamarin.Forms.Platform.iOS;[assembly: ResolutionGroupName("MyEffects")][assembly: ExportEffect(typeof(BackgroundEffect), "BackgroundEffect")]namespace CustomRenderers.iOS{public class BackgroundEffect: PlatformEffect{private UIColor originalColor;protected override void OnAttached(){try{originalColor = Control.BackgroundColor;Control.BackgroundColor = UIColor.FromRGB(204, 153, 255);}catch{// Cannot set property on attached control}}protected override void OnDetached(){try{Control.BackgroundColor = originalColor;}catch{}}}}
An effect definition first requires you to specify a resolution group name. This can be considered as the collection of effects your new class belongs to. Then, with the ExportEffect attribute , you specify the type you are exporting and a name that will be used in shared code for resolving the effect. You then need to override both the OnAttached and OnDetached methods. The first one is called when the effect is assigned to a view, and the second one is called when the effect is removed from the view. In the case of iOS, the background color of a view is an object of type UIColor. For Android, the logic is similar, so you still need a code file called BackgroundEffect.cs in the Android project, with the following code:
using System;using Android.Graphics.Drawables;using Xamarin.Forms;using Xamarin.Forms.Platform.Android;using CustomRenderers.Droid;[assembly: ResolutionGroupName("MyEffects")][assembly: ExportEffect(typeof(BackgroundEffect), "BackgroundEffect")]namespace CustomRenderers.Droid{public class BackgroundEffect : PlatformEffect{private Android.Graphics.Color originalColor;protected override void OnAttached(){try{originalColor = (Control.Background as ColorDrawable).Color;Control.SetBackgroundColor(Android.Graphics.Color.LightGreen);}catch{// Cannot set property on attached control}}protected override void OnDetached(){Control.SetBackgroundColor(originalColor);}}}
In Android, the background color of a control is an object of type Drawable. At a deeper level of inheritance, it is actually of type ColorDrawable, so a cast is required to access its Color property, whose value is stored for reverting to the original color when OnDetached is called. Then a simple invocation to SetBackgroundColor allows for changing the background color. The next, easy step is to add a class to the PCL project that acts as a bridge between the user interface and the platform-specific effect definitions. Add a class file called BackgroundEffect.cs with the following code:
using System;using Xamarin.Forms;namespace CustomRenderers{public class BackgroundEffect: RoutingEffect{public BackgroundEffect(): base("MyEffects.BackgroundEffect"){}}}
This class inherits from RoutingEffect, which provides the infrastructure to expose effects to the user interface. Notice how the constructor of the base class is invoked, passing a string that contains the resource group name and the effect name. The final step is consuming the effect in XAML. For example, you can apply the effect to the SelectableEntry view defined previously, as follows:
<local:SelectableEntry x:Name="MyEntry"HorizontalOptions="FillAndExpand"><local:SelectableEntry.Effects><local:BackgroundEffect/></local:SelectableEntry.Effects></local:SelectableEntry>
Obviously, you can apply effects to any supported view. Effects must be added to the Effects collection as in the code shown earlier. As you add the effect, the previewer in Visual Studio will automatically render the layout change. You are not limited to using effects in XAML because they also can be added in C# code. In this case, the code you write would look like this:
MyEntry.Effects.Add (Effect.Resolve ("MyEffects.BackgroundEffect"));Effects is a .NET collection, and therefore you can invoke the Add method to add an effect. Notice that an effect is not referred to as an object, so you must resolve the effect by calling Effect.Resolve and passing a string that is made of the resource group name and the effect name. With a limited effort, you have been able to change the layout of visual elements without the need to implement a custom renderer, which is instead preferred when you need to change also the behavior of controls.
Note
In Xamarin.Forms, you can also create custom views. You have two ways to do this. One way to do this is a class that inherits from a view, such as the SelectableEntry shown before, which inherits from Entry. There you can override members and expose other properties. The other way is to create XAML contents of type ContentView. A ContentView appears similar to a ContentPage, with the difference that a ContentView represents an individual, reusable view that consists of the aggregation of multiple visual elements, with its C# code-behind file.
Summary
Being the powerful platform it is, Xamarin.Forms allows you to fully leverage native APIs through several options. The first option is using the dependency service, which requires defining a C# interface; it allows you to implement platform-specific code in the iOS and Android projects for full API access. Then, with an approach based on inversion of control, it automatically resolves the correct implementation through the DependencyService.Get method.
The second way relies on plug-ins, which are shared implementations of code that exist on all platforms. Plug-ins are open source and are offered as NuGet packages, and they expose singleton classes that implement cross-platform APIs that you can call to invoke iOS and Android APIs, including those that allow you to work with hardware capabilities.
Another way is to use native visual elements such as views and layouts. Xamarin.Forms allows you to include native controls directly in XAML markup, but it also allows for further customizations with custom renderers and effects.
This chapter closes the long overview of the Xamarin development platform with Visual Studio for Mac. Starting in the next chapter, you will begin a new journey through one of the most important pieces in the Microsoft vision for cross-platform development: .NET Core.